Kids grow up, and grow out of not only their clothes, furniture, and toys, but also the boats you build for them. Who knew? The first boat I built was a cedar-strip double-paddle canoe which could carry one of my kids and me comfortably. However, I had four kids at home. I built a second boat, a small skin-on-frame kayak, from plans for one of my daughters when she was a teenager. My two youngest daughters were the most interested in paddling, so the kayak worked well for several years until they outgrew it.
I wanted each of them to have their own boat to help them develop their paddling skills and independence. I could have built them each a cedar-strip, but I knew from experience that skin-on-frame would cost less, be ready sooner, and most importantly be something they could each easily carry on their own.
When I ran across a YouTube video of Brian Schulz of Cape Falcon Kayak using his 66 Canoe system to build three skin-on-frame canoes that nested together, I was immediately sold. I’d be able to transport three boats without having to purchase a larger vehicle or a trailer.
The 66 Canoe design is not simply a set of plans for a handful of different static models of various sizes, but rather a video class to guide the builder through a series of decisions about length, beam, depth, rocker, sheer and cross-section to create a custom-built canoe to meet the builder’s needs, all without the need for making and modifying molds. Brian gave the system its name after he found the double-paddle pack canoe that the pack canoe that inspired it involved 66 percent of the time, cost, and weight of one of his skin-on-frame kayaks.
 Photographs by and courtesy of the author
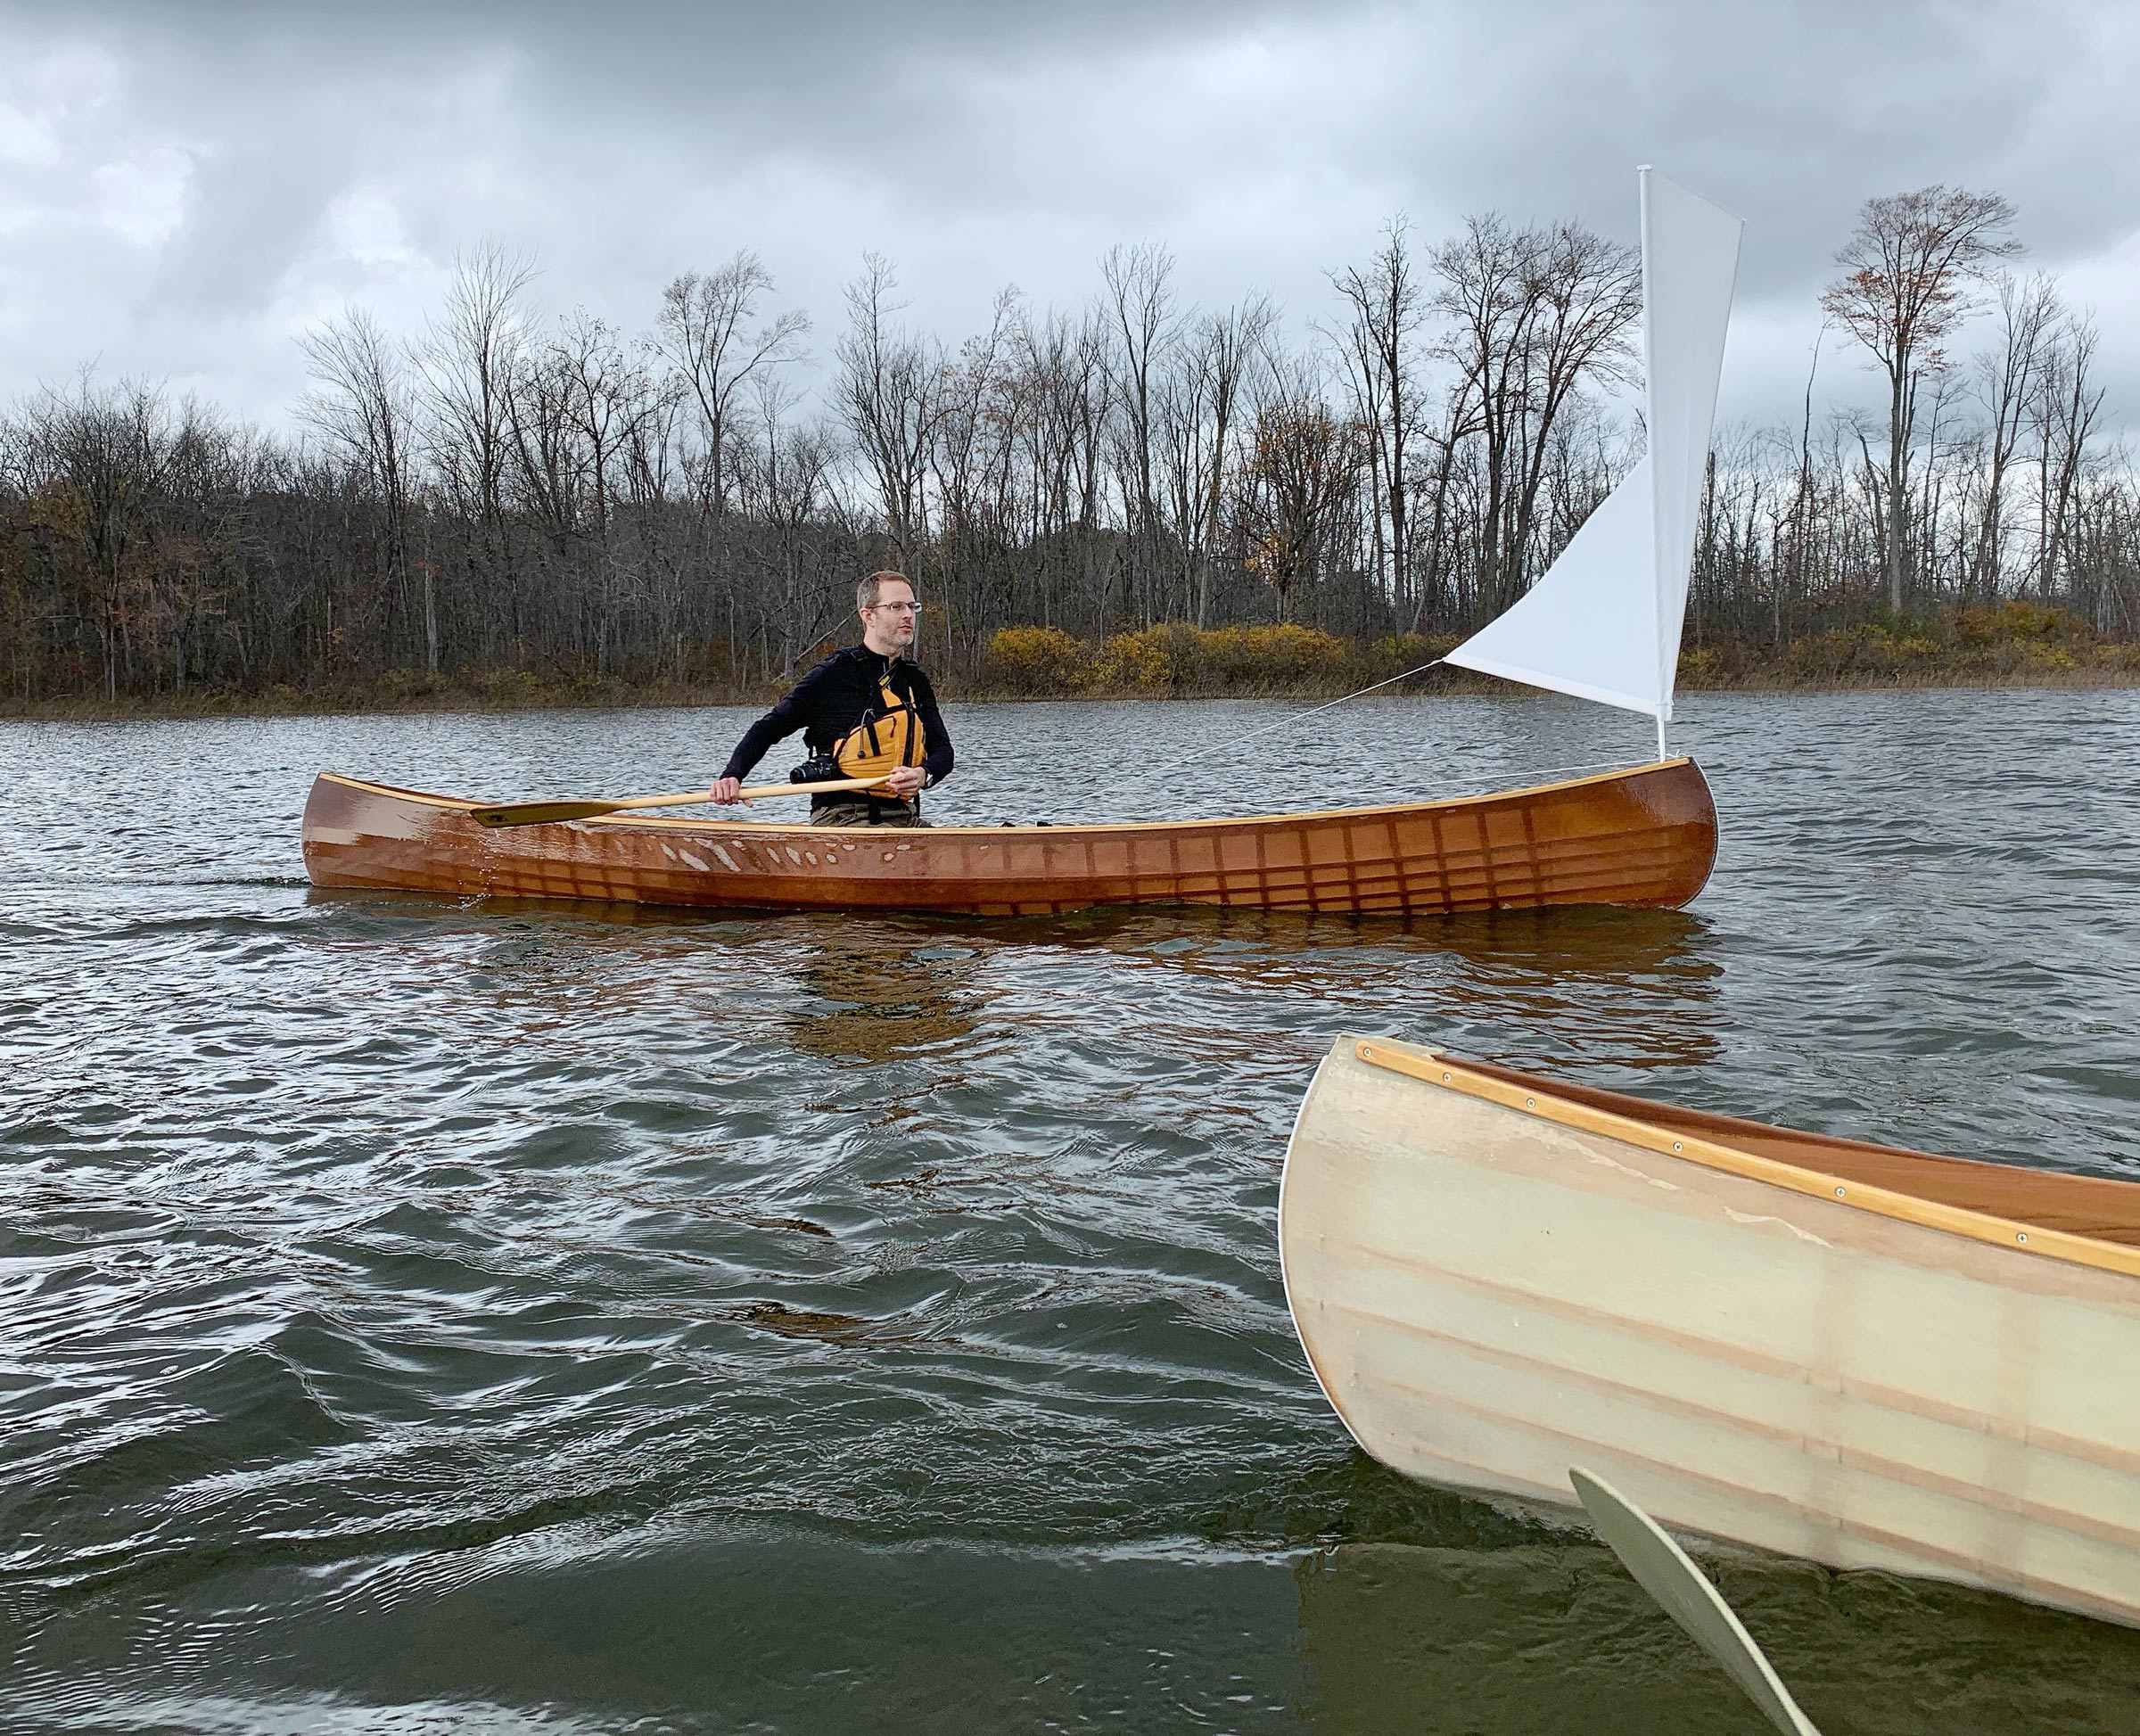
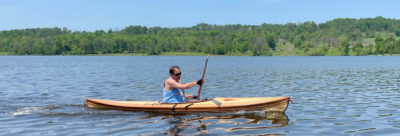
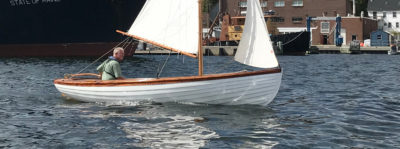
Sitting in the canoe may seem more comfortable at first, but the kneeling position seen here provides more stability by keeping weight low and affords more control of the canoe.
His detailed plan sets and video courses are an interesting and very effective way to build compared to building from plans or even during an in-person workshop. I chose to build three solo canoes, and used the medium, large, and extra-large sizes recommend by Brian for nesting. I did’t have any hull-design expertise, so I just used his dimensions for my canoes, though. I reduced the beam of each by just 1″ built all three concurrently, which saved some tool-setup time, and allowed me to practice a task on my boat, before completing the same step on my daughters’ smaller boats.
I used western red cedar for the longitudinal members and stems, ash for the outwales, and white oak for the ribs. For steam-bending, Brian highly recommends white oak that has not been kiln dried. He notes a couple of sources that will mill and ship suitable-quality bending oak. I located a mill in my area of southern Michigan where I could pick out white-oak boards that were sawn just a day or two earlier.

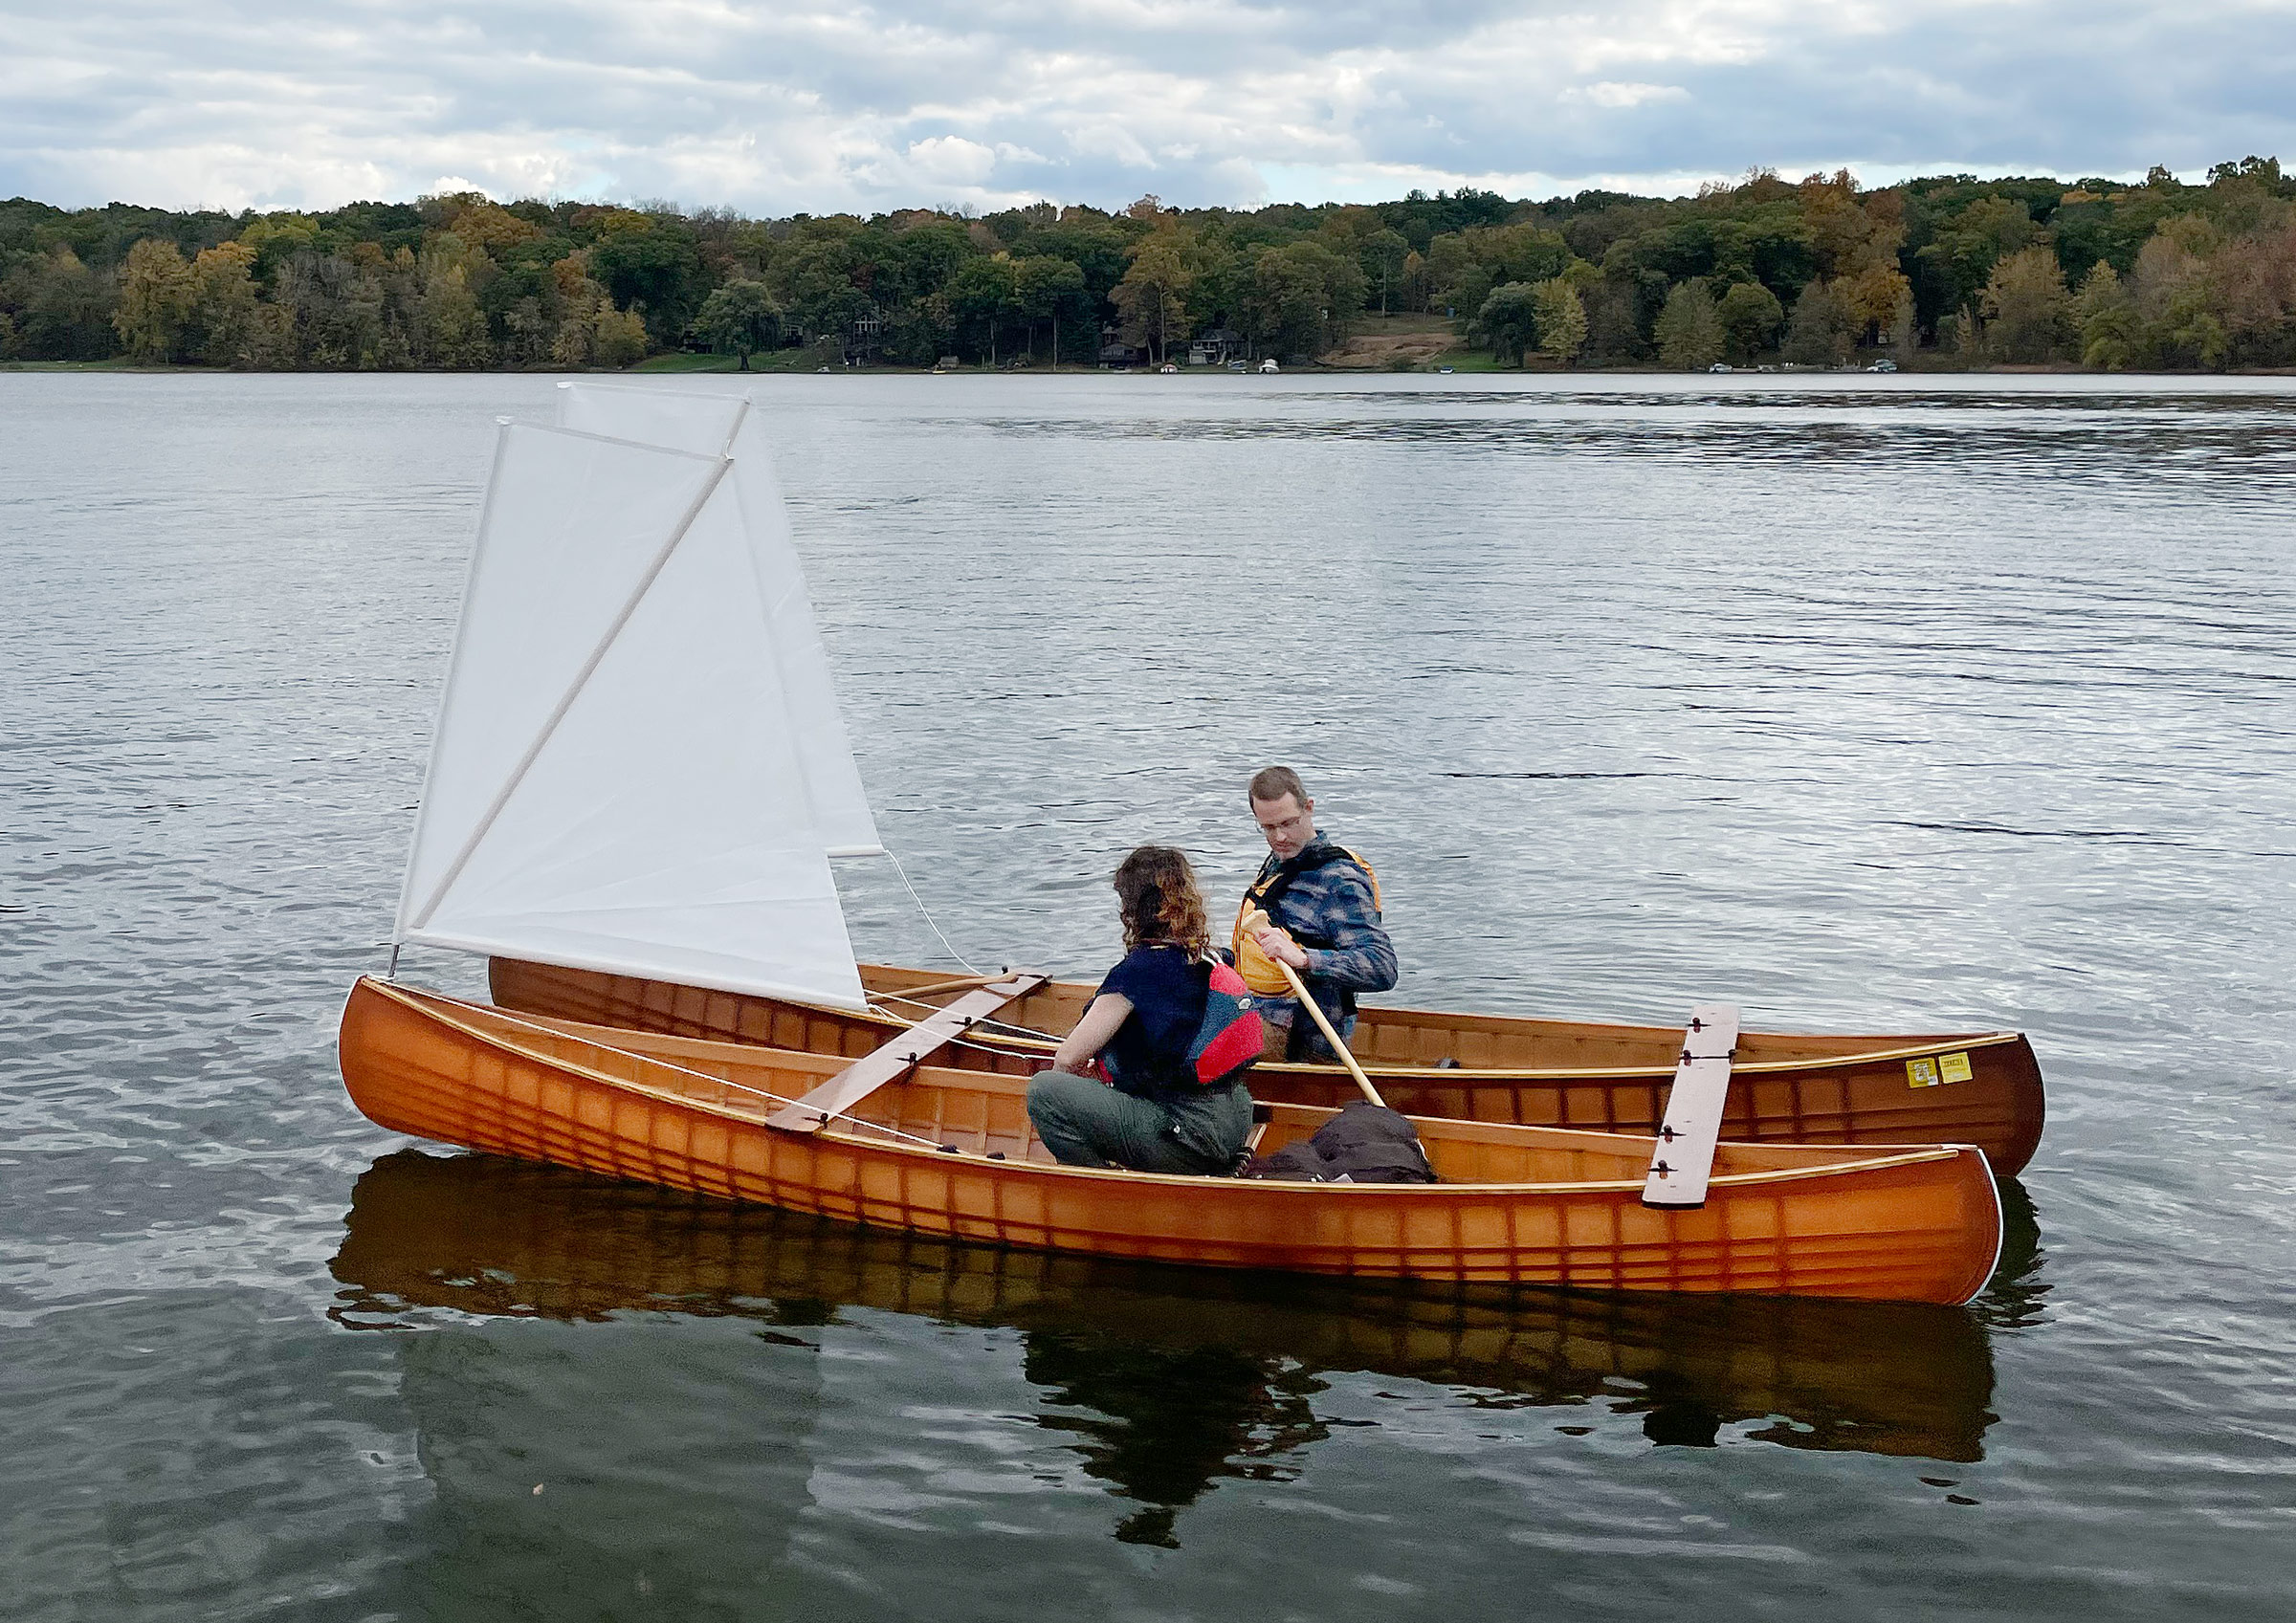
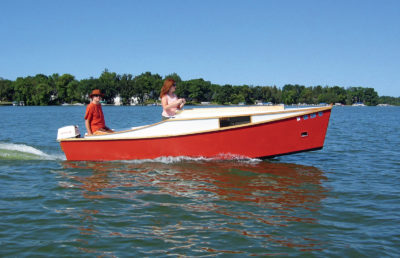
The extra-large canoe can easily carry two paddlers.
Brian is continually innovating and shares his new developments almost immediately on his Instagram account, and once developed, works it into the plans and videos. After I finished my boats, he announced a method to incorporate some mild tumblehome into the design, and shared the results and methods.
The basic skills and operations for the 66 Canoe build are relatively simple, and while I have built both a cedar-strip and a skin-on-frame boat before, neither of those builds had the level of detailed instruction as in the Cape Falcon Kayak instructional videos.
The construction process begins with laminating three boards together to shape the stock for the gunwales in the vertical profile curve of the sheer. The two gunwales are then rip-sawn from this lamination; the rib locations are marked out on them and cut with a plunge router. Spreaders shape the gunwales in plan view, either symmetrical (maximum beam amidships) or asymmetrical (maximum beam forward or aft of center).
Stems and keel are lashed on and the amount of rocker is set. Then, based on the measured beam, sheer, and rocker at each rib location, Brian has a formula for calculating the lengths of the rib stock. A story stick records each measurement for easy transfer to the rib stock. The videos eliminate any confusion, as every step of the process is shown plainly. The rib-length formula can be tweaked slightly to create different hull shapes, which are explained in the plans. Since I was building three canoes, I stuck with the default formula on my extra-large canoe and then tweaked it slightly for my daughters’ canoes to give them a slightly fuller and flatter shape for extra stability.
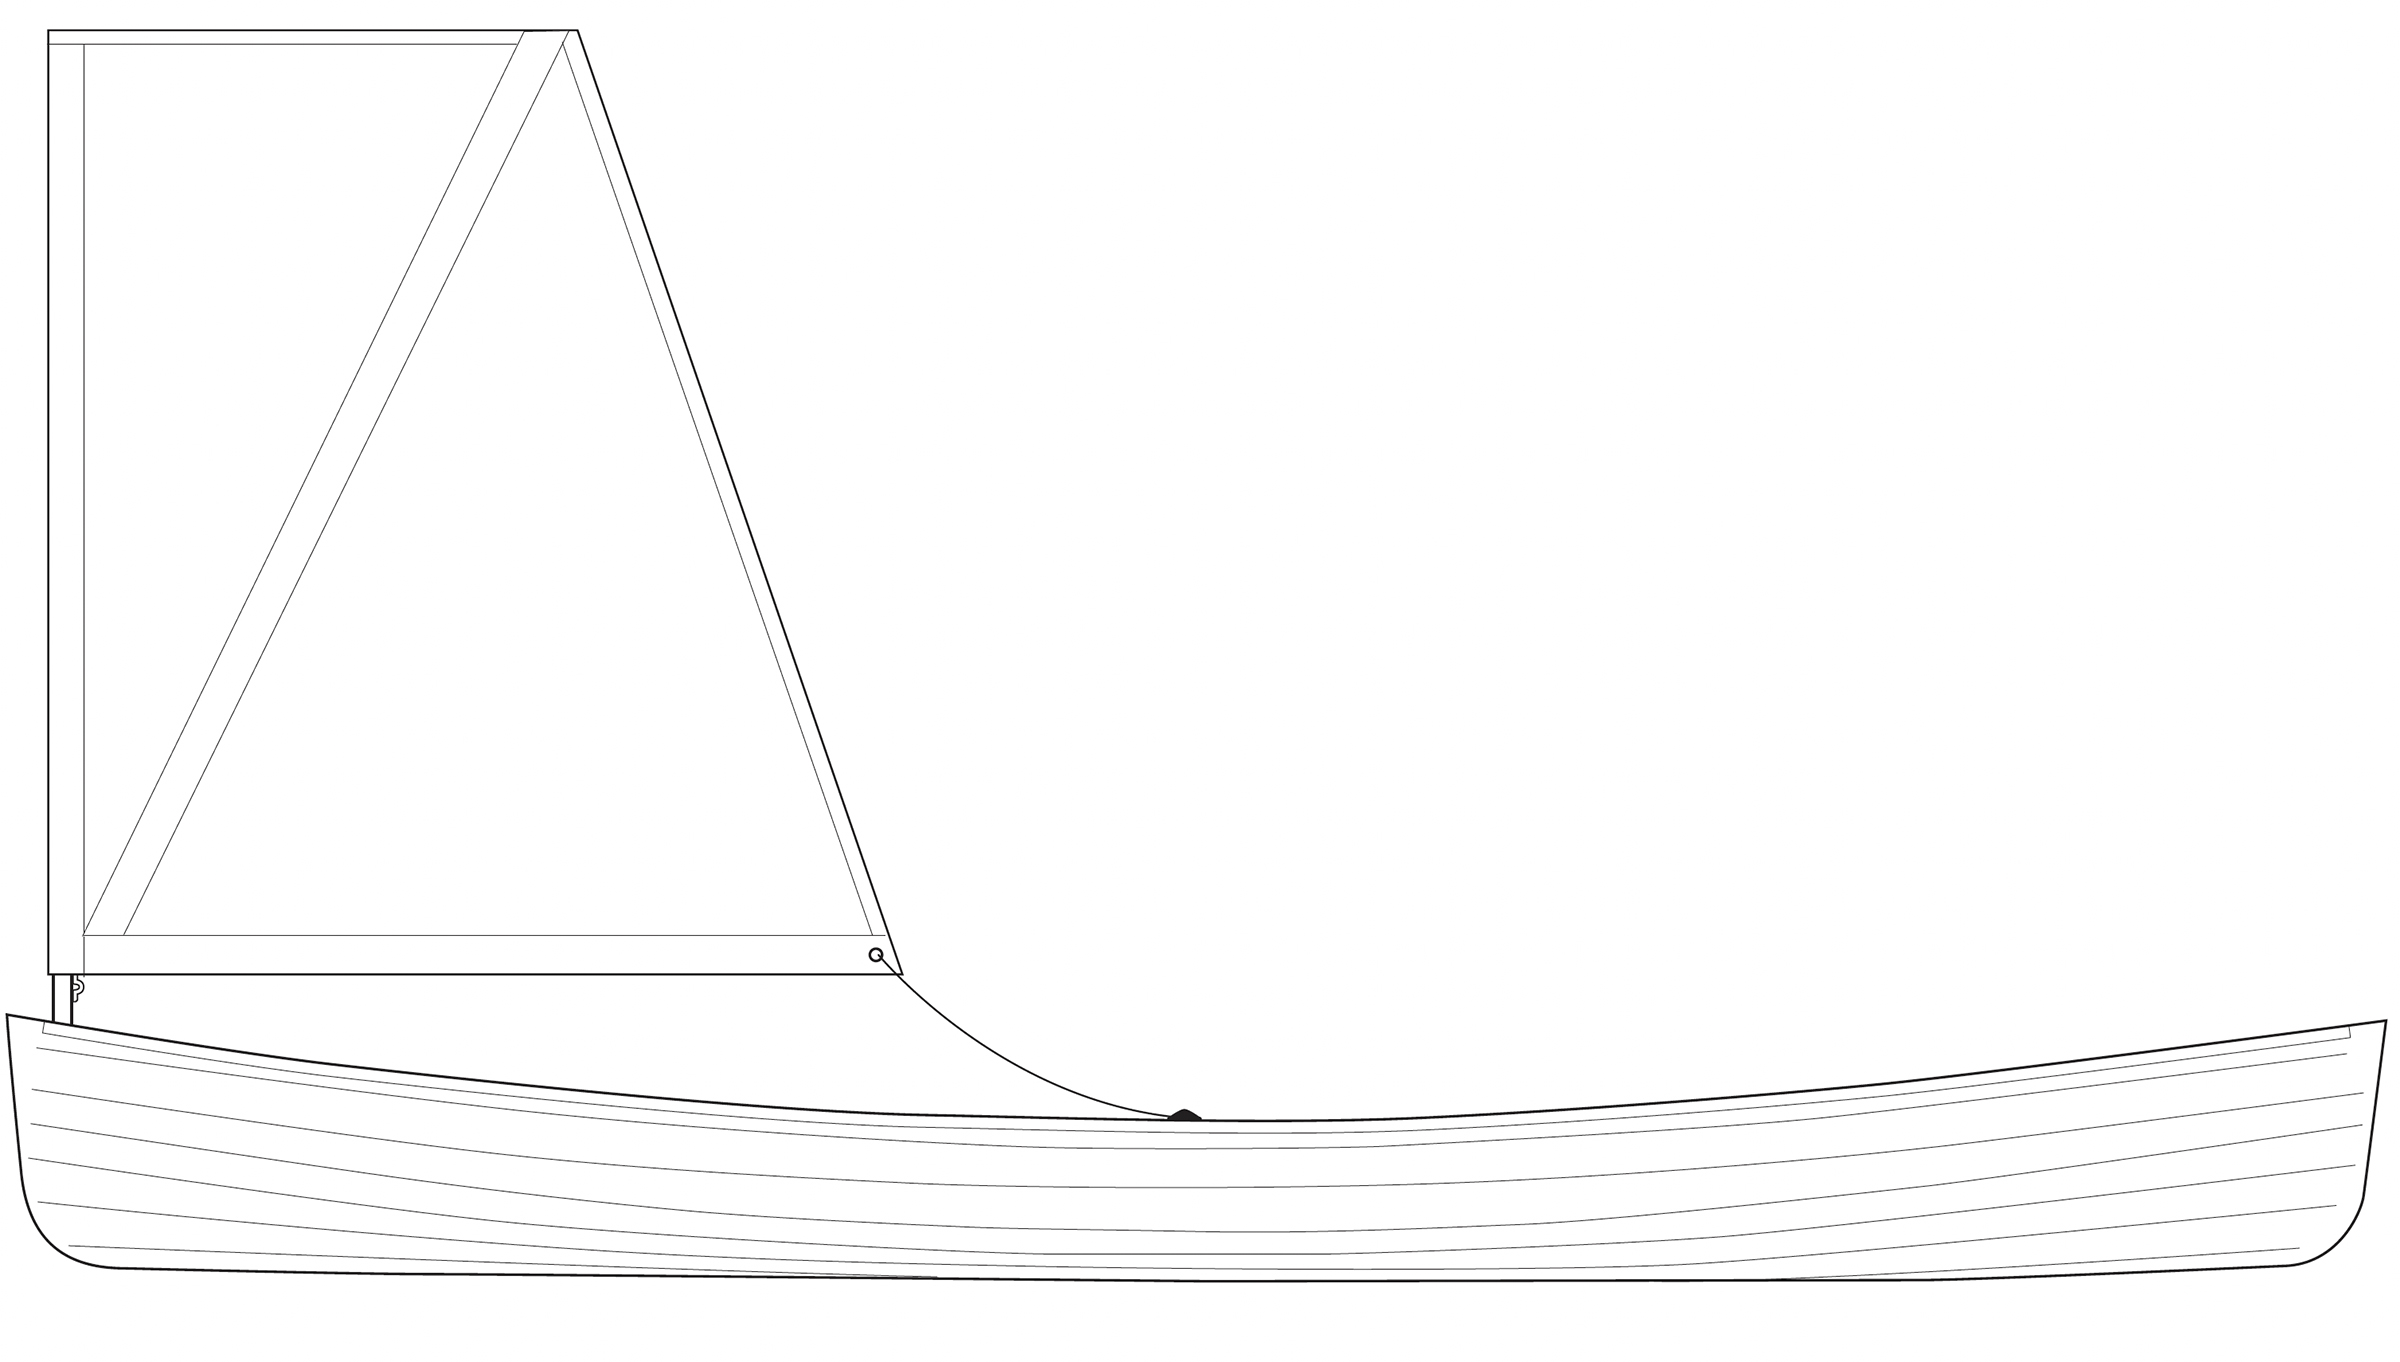
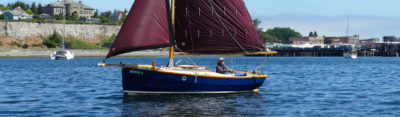
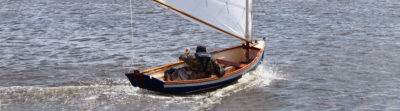
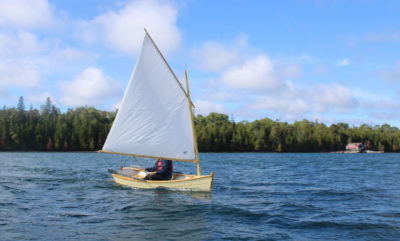
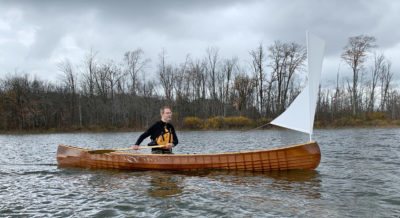
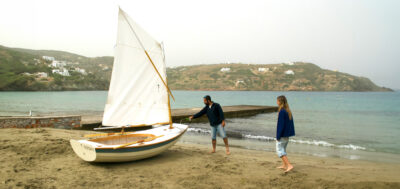
The sailing rig’s mast is designed to be easily and quickly raised and lowered. While under sail, the canoe can be propelled as well as steered by the paddler.
With the videos providing guidance, steam-bending was simple. Brian explains how long to steam your particular bending wood and demonstrates how to bend the ribs without using forms to achieve the necessary shape in each area of the canoe. It’s easy to detect and correct asymmetry by eye. Any remaining small deviations are faired by lashing the stringers on immediately after steam-bending the ribs.
The amount of rocker can be adjusted slightly while lashing on the keel and finishing the stems. After the seat-mounting blocks are added, the frame is sealed with oil and allowed to dry. I used Corey’s Pine-Tar Boat Sauce; Brian strongly recommends a skin of 9-oz 840 X-TRA Tuff Ballistic Nylon and the two-part urethane coating also offered at The Skin Boat Store. The skin can be colored for a traditional appearance and the coating is very tough.
Stem bands of brass or plastic are added to protect the canoes’ most vulnerable parts of the skin from abrasion. I had used acetal-copolymer but later switched to a moisture-resistant HDPE on the middle-sized canoe to improve its tracking due to that material’s taller profile.
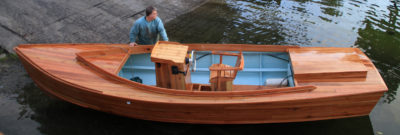
Seats can be installed right against the bottom of the gunwales, or a bit lower using spacer blocks. I use 1.25″ spacers in the extra-large canoe, and 7/8″ in the large. Dropping the seat in the medium canoe, the smallest of the three, makes it difficult to fit my size-11 feet underneath while in the kneeling position, and could create a safety issue.
To protect the lashings from abrasion, I use a closed-cell foam pad in the bottom of the canoe as recommended. Flotation is provided by securing 4″-diameter foam noodles along the insides of the canoe with ball-bungees, which can be easily removed to nest the canoes.

When boards are attached to the gunwales to create a catamaran configuration, the space between the canoes can allow for paddling between them.
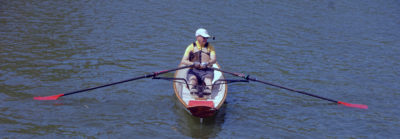
Other optional items include a small pop-up sail, boards to catamaran canoes together, and a rowing outrigger and oars. I’ve made and used the sails and catamaran boards but have yet to make the rowing setup. I logged about 180 hours of construction time for three canoes, catamaran boards, and sails.
The ability to nest the three canoes and transport them on top of my compact hatchback is wonderful. The nested canoes made it possible to take all three plus my cedar strip on a trip from Michigan to Grand Teton and Yellowstone parks.
While it’s easiest to load the canoes with two people, I am able to do it alone because my vehicle has a low roof and the canoes are so light. At the boat launch people watch amazed as we pull off canoe after canoe from the roof. It takes 8 to10 minutes to install the seats and flotation in the two larger canoes.
I’ve paddled all three boats in the fully upright seated position, but mostly now only do this when the boats are connected as a catamaran. I just enjoy the kneeling position more.
The performance of my three nesting canoes is just graduations of stability and speed. Which one is just right probably depends on your size and weight. Brian had the three medium/large/extra-large variants listed as having ideal paddler weights of 125/175/225 lbs with maximum capacities about double each of those weights.
I’m 6′2″ tall and about 180 lbs, and I knew that the largest canoe was probably a bit too large for me, but I didn’t want to make the smallest canoe much narrower than 27″ for my youngest daughter. This is one of the trade-offs for the ability to nest the canoes. There is a 2″ minimum difference in width in order for the full-sized canoes to nest inside each other (1.5″ minimum for pack canoes). Similar minimum differences apply for length.
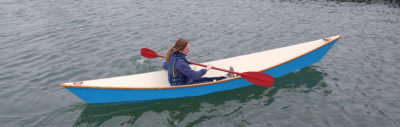
To my surprise, when paddling by myself, I found that in most conditions I enjoy paddling the smallest of the canoes. I thought it would be too unstable, but in the kneeling position the canoe is stable enough for me to feel confident and is very quick with a nice glide. It tracks well, as would be expected with my weight in this smaller boat.
The middle-sized canoe is a bit more stable and slightly slower, and the largest canoe marginally more so on both counts. And because it’s so lightly loaded with just paddler and no gear, the largest canoe can be more difficult to handle if the wind picks up. The largest canoe will likely be perfect for canoe-camping, something that my older daughter and I are eager to try out, and it will be the one that I build the rowing outrigger for first. Its stability and size make it ideal for this option.
The middle-sized canoe has more rocker than the largest canoe, a result of my experimenting with a bit too much progressive rocker at the ends. I immediately detected its loose tracking, but that was easier to correct than too little rocker. I improved its tracking with slightly thicker stem bands.
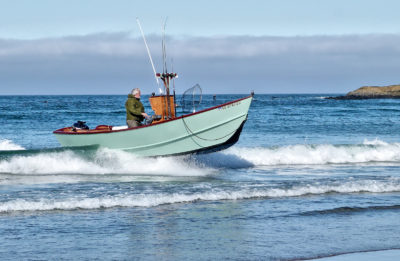
While I have only paddled the canoes for one season, I have not pampered them. I routinely run them up onto sandy or gravel beaches and treat them as I would any piece of outdoor gear: with respect to my investment of time and money, but not agonizing over every scratch or bump. They have shown no significant signs of wear yet. The lashed construction and tough, flexible skin absorb and spring back from impact rather than cracking as a more rigid hull might.
I built catamaran boards for the canoes, which allow me to connect two or even all three together. The speed seems marginally slower, but steering is easy. The minimum 18″ space between the connected canoes allows for paddling between them. This is an amazingly fun way to paddle together. The canoes essentially become a high-performance raft with excellent stability. You can see and chat with your companions face-to-face, rather than looking at their backs as in a tandem canoe.
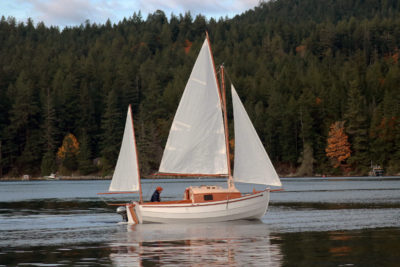
The catamaran arrangement is very well suited to using the optional sailing rig.
I made sails for all three canoes of about 1.2, 1.6, and 1.7 square meters, following Brian’s video instructions and plans. I have no experience in sailing, but in my few sea trials the sails are a fun way to catch a downwind breeze and, when a nice, sustained gust comes along, it certainly pushes us at least as fast as workout-level paddling. I haven’t had much sailing on a reach likely due to my inexperience. In the catamaran configuration, and with over 3 square meters of combined sail area, a nice downwind run is pretty darn fun. My next project for the canoes will be making the oars and outriggers that are covered in another one of Brian’s courses.
The 66 Canoe plans and the video-course method of instruction are far more thorough than a book or plans only, and would be an excellent approach for a first-time builder. Brian’s system allows you to stick with a basic, general-purpose canoe, experiment with a sleek racing design, or a wide and stable fishing canoe. Access to his extensive experience is icing on the cake.
They are among the lightest canoes available and more durable than people assume. They nest together for easy storage and transport, and garner compliments wherever we go. They allow two of my daughters and me to paddle together or independently, and to explore sailing, and canoe-camping. It will be quite a while before we outgrow these canoes. ![]()
Adam Eckhardt of Flatrock, Michigan, has been a maker of things all his life. Prior to these three 66 canoes he built a Guillemot Kayaks MicroBootlegger and a Yostwerks Sea Pup kayak.
66 Canoe Particulars for M, L, XL
[table]
Length/ 13′ 9.5″, 14′ 9″, 15′ 9″
Beam/ 27″, 29″, 31″
Depth at center/11.25″, 12.13″, 12.75″
Weight/ 28.6 lbs, 32.0 lbs, 34.6 lbs
[/table]
The Skin-on-Frame Canoe Building Course from Cape Falcon Kayak is a 12-hour online video course. It includes a downloadable 30-page PDF plan and licensing for the purchaser to build unlimited canoes for personal use.
Is there a boat you’d like to know more about? Have you built one that you think other Small Boats Magazine readers would enjoy? Please email us!


Neat boats, thanks for writing them up! As a fellow South Michigander who’s currently in the market for both, I’m very curious to learn where you sourced decent cedar and the fresh-cut bending oak.
Wow! Incredible technique! Such a fantastic read, really interesting reading and seeing the process and even seeing them out on the water. Hope to see you writing more articles!