My son-in-law, Jess, is a professional river guide in Jackson, Wyoming. At the start of the 2019 season, one of his colleagues arrived in town with a handcrafted, double-ended, fully decked river dory he had built in the off season. It’s a beautiful boat based on plans in Roger Fletcher’s book: Drift Boats & River Dories. Jess was smitten and asked me, an avid woodworker, if I’d like to make a boat for him. Without a thought, I said I’d build it with him, not for him, and thus began our two-plus-year journey building Fletcher’s 17′6″ wooden Colorado River Dory.
Neither Jess nor I was familiar with Fletcher’s book, so we each obtained a copy. It’s a bit of a history book that also includes a variety of dory and drift-boat lines drawings and tables of offsets. In addition to the backstories of the 10 boats he describes, Fletcher provides detailed plans for each and general assembly methods for all. The Colorado River Dory is presented in nine pages in Chapter 21, and the construction method occupies the 73 pages of Chapter 11. For those who’d like to take a trial run at the construction, the book also includes a chapter on building a 1″ scale model of any of the 10 boats.
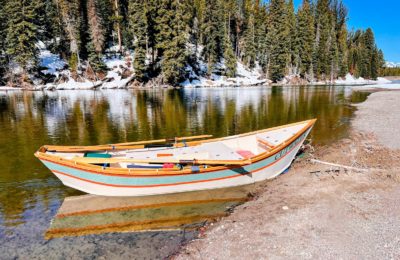
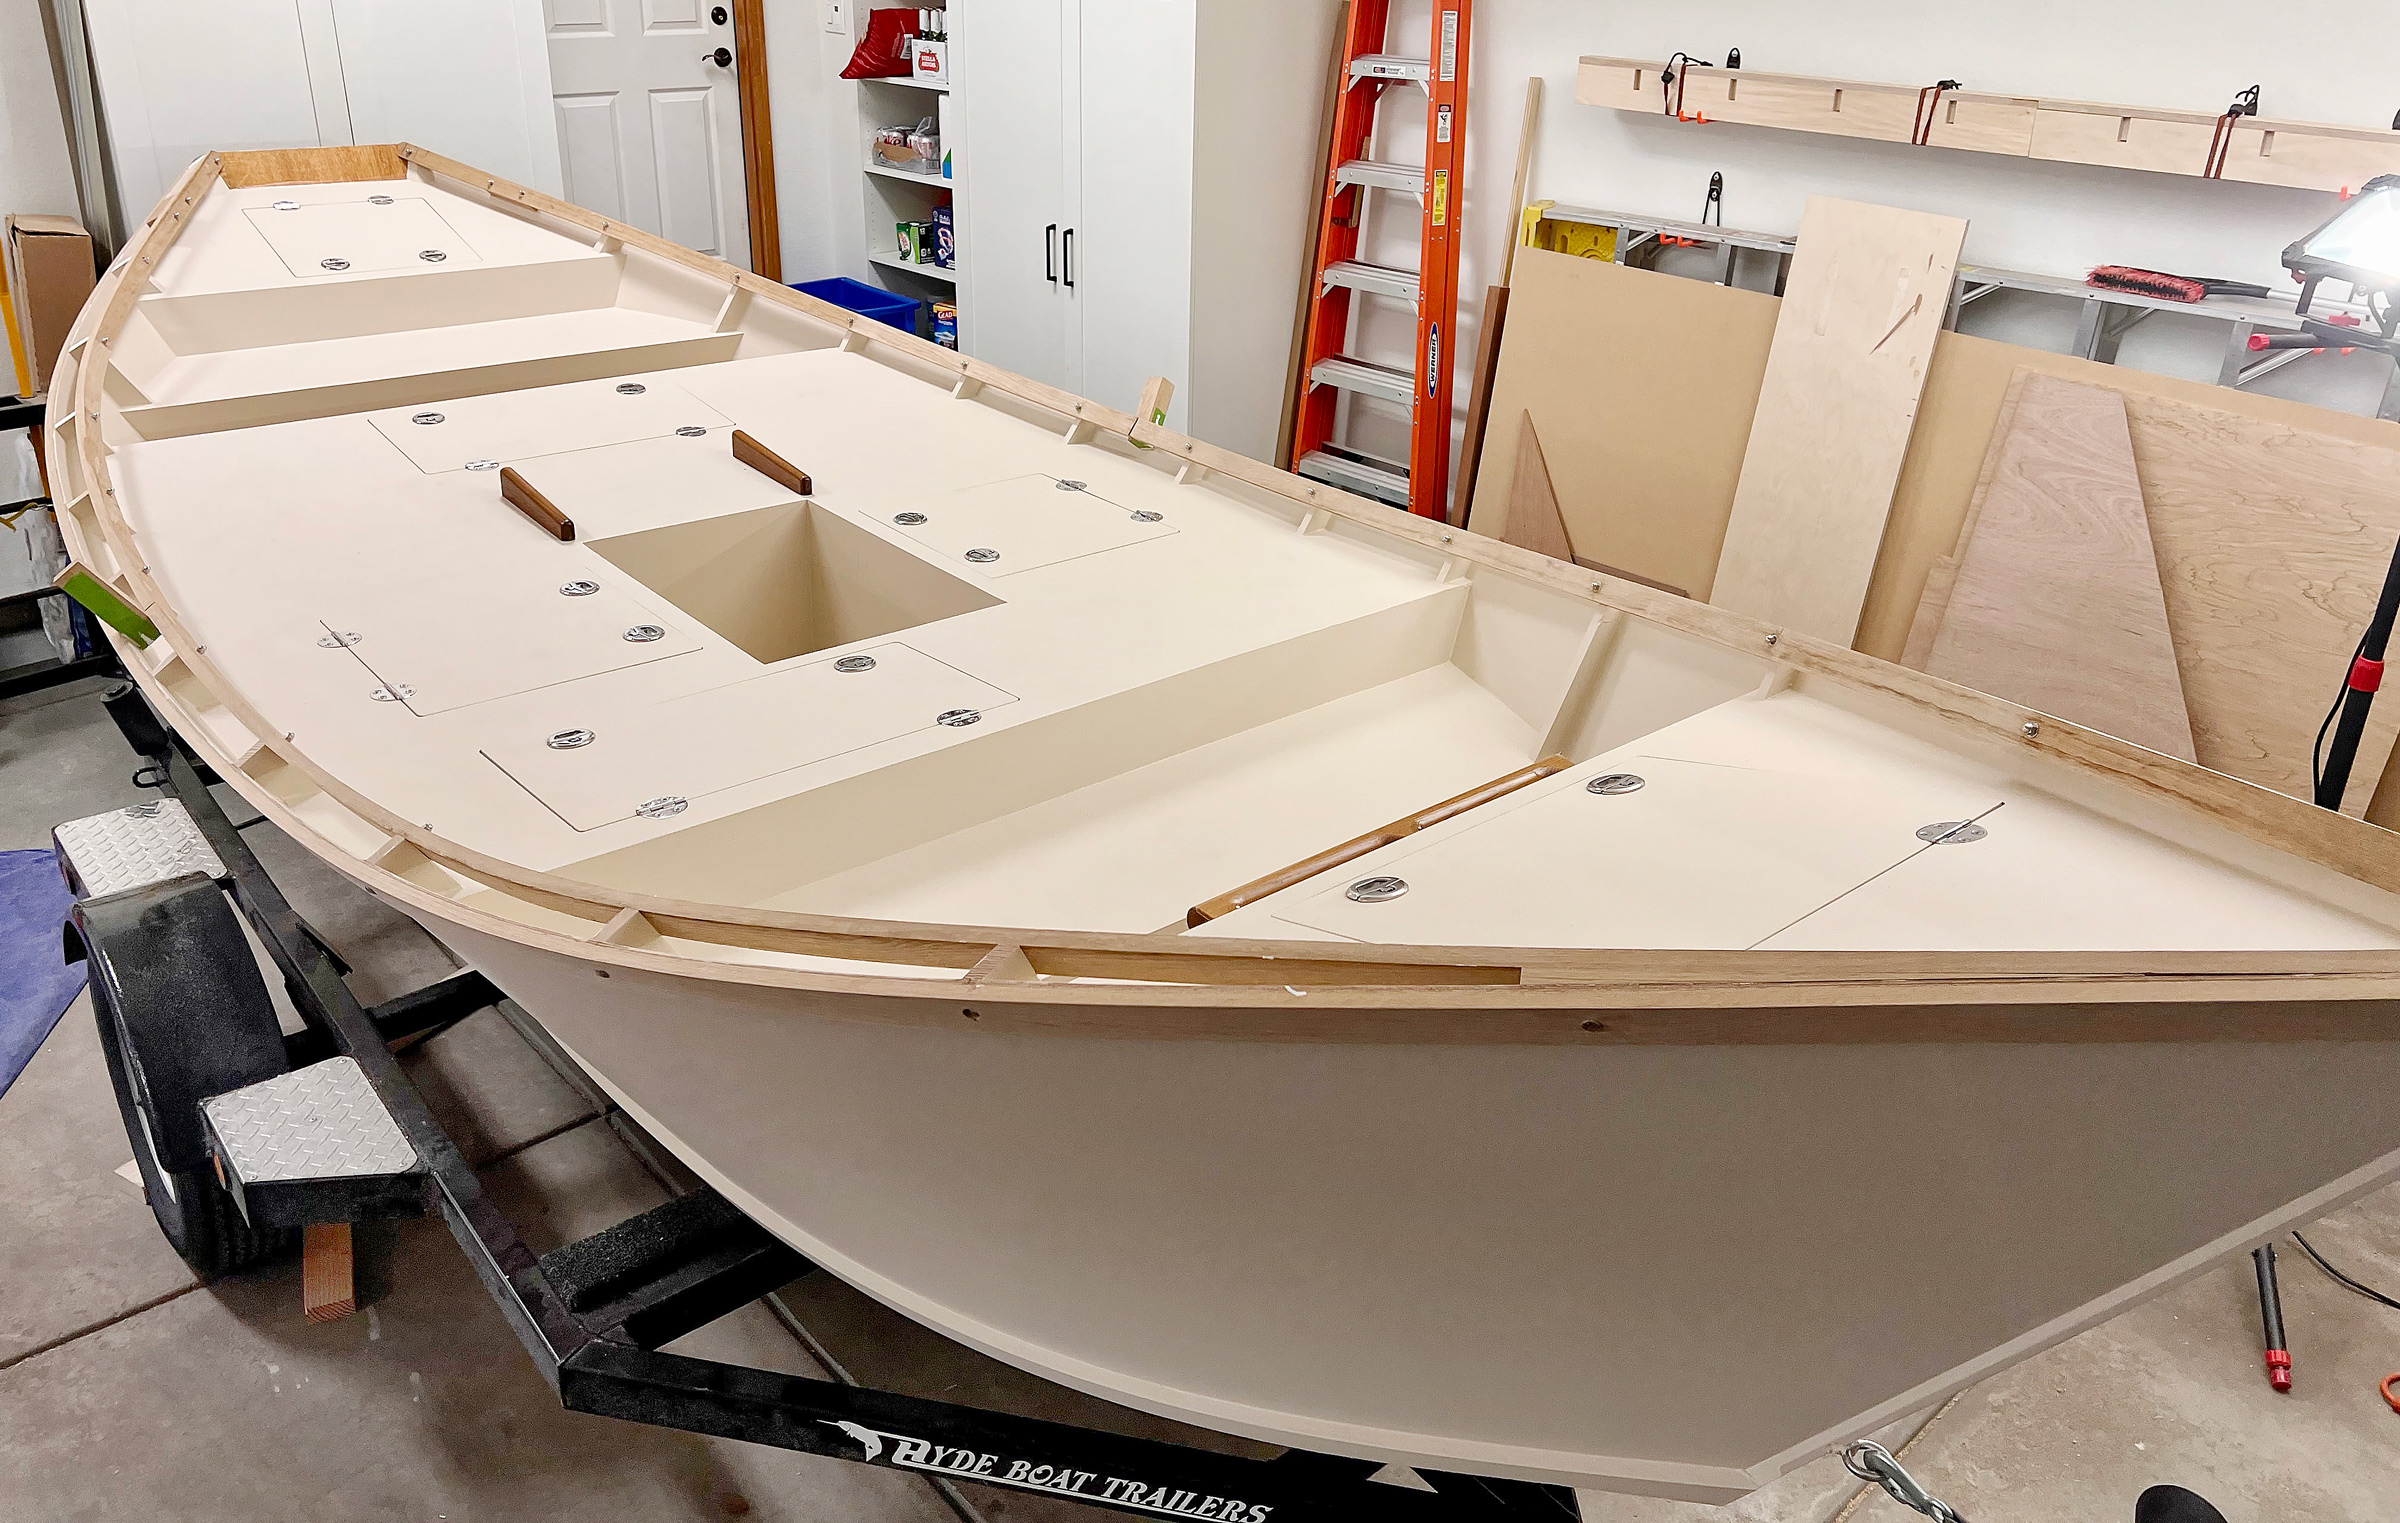 Jeff Battin
The Colorado River Dory is designed with six watertight hatches and offers plenty of storage space and flotation. The second hatch from the bow is offset to starboard to ease loading larger items like coolers. The aft seat, as designed, would have had passengers facing the stern. Here, that seat has been moved toward the back so passengers can look forward. The cleats aft of the center footwell keep the rower and a seat pad centered while navigating rough water.
Jess and I built the boat in Castle Rock, Colorado. The structure for the hull is composed of 10 frames that are each beveled on their floor timbers and side frames to fit the plywood bottom and side panels. We made ours of straight, vertical-grain Douglas-fir to optimize the strength-to-weight ratio. Notches cut in the floors will accommodate a hard chine made of white oak. The hull sides are specified to be made of 1⁄4″ plywood—we used 6mm Hydrotek. The panels are 19′ long and required two 1:12 scarf joints, which we cut with a shop-built router sled. The plans call for the bottom of the boat to be made of 1⁄2″ or 5⁄8″ plywood, with the option of a sacrificial layer of 1⁄4″ plywood. We used 18mm Hydrotek plywood, two sheets scarfed together to length.
River boats can be built on a strongback, but it seems most are built free-form and bottom up. We began by fastening the two side panels to a beefy white-oak inner stem using Sikaflex and silicon-bronze screws. Next, we fastened the frames to the hull from amidships working our way fore and aft. The transom is a glued-up piece of 1 1⁄4″-thick white oak and was installed last.
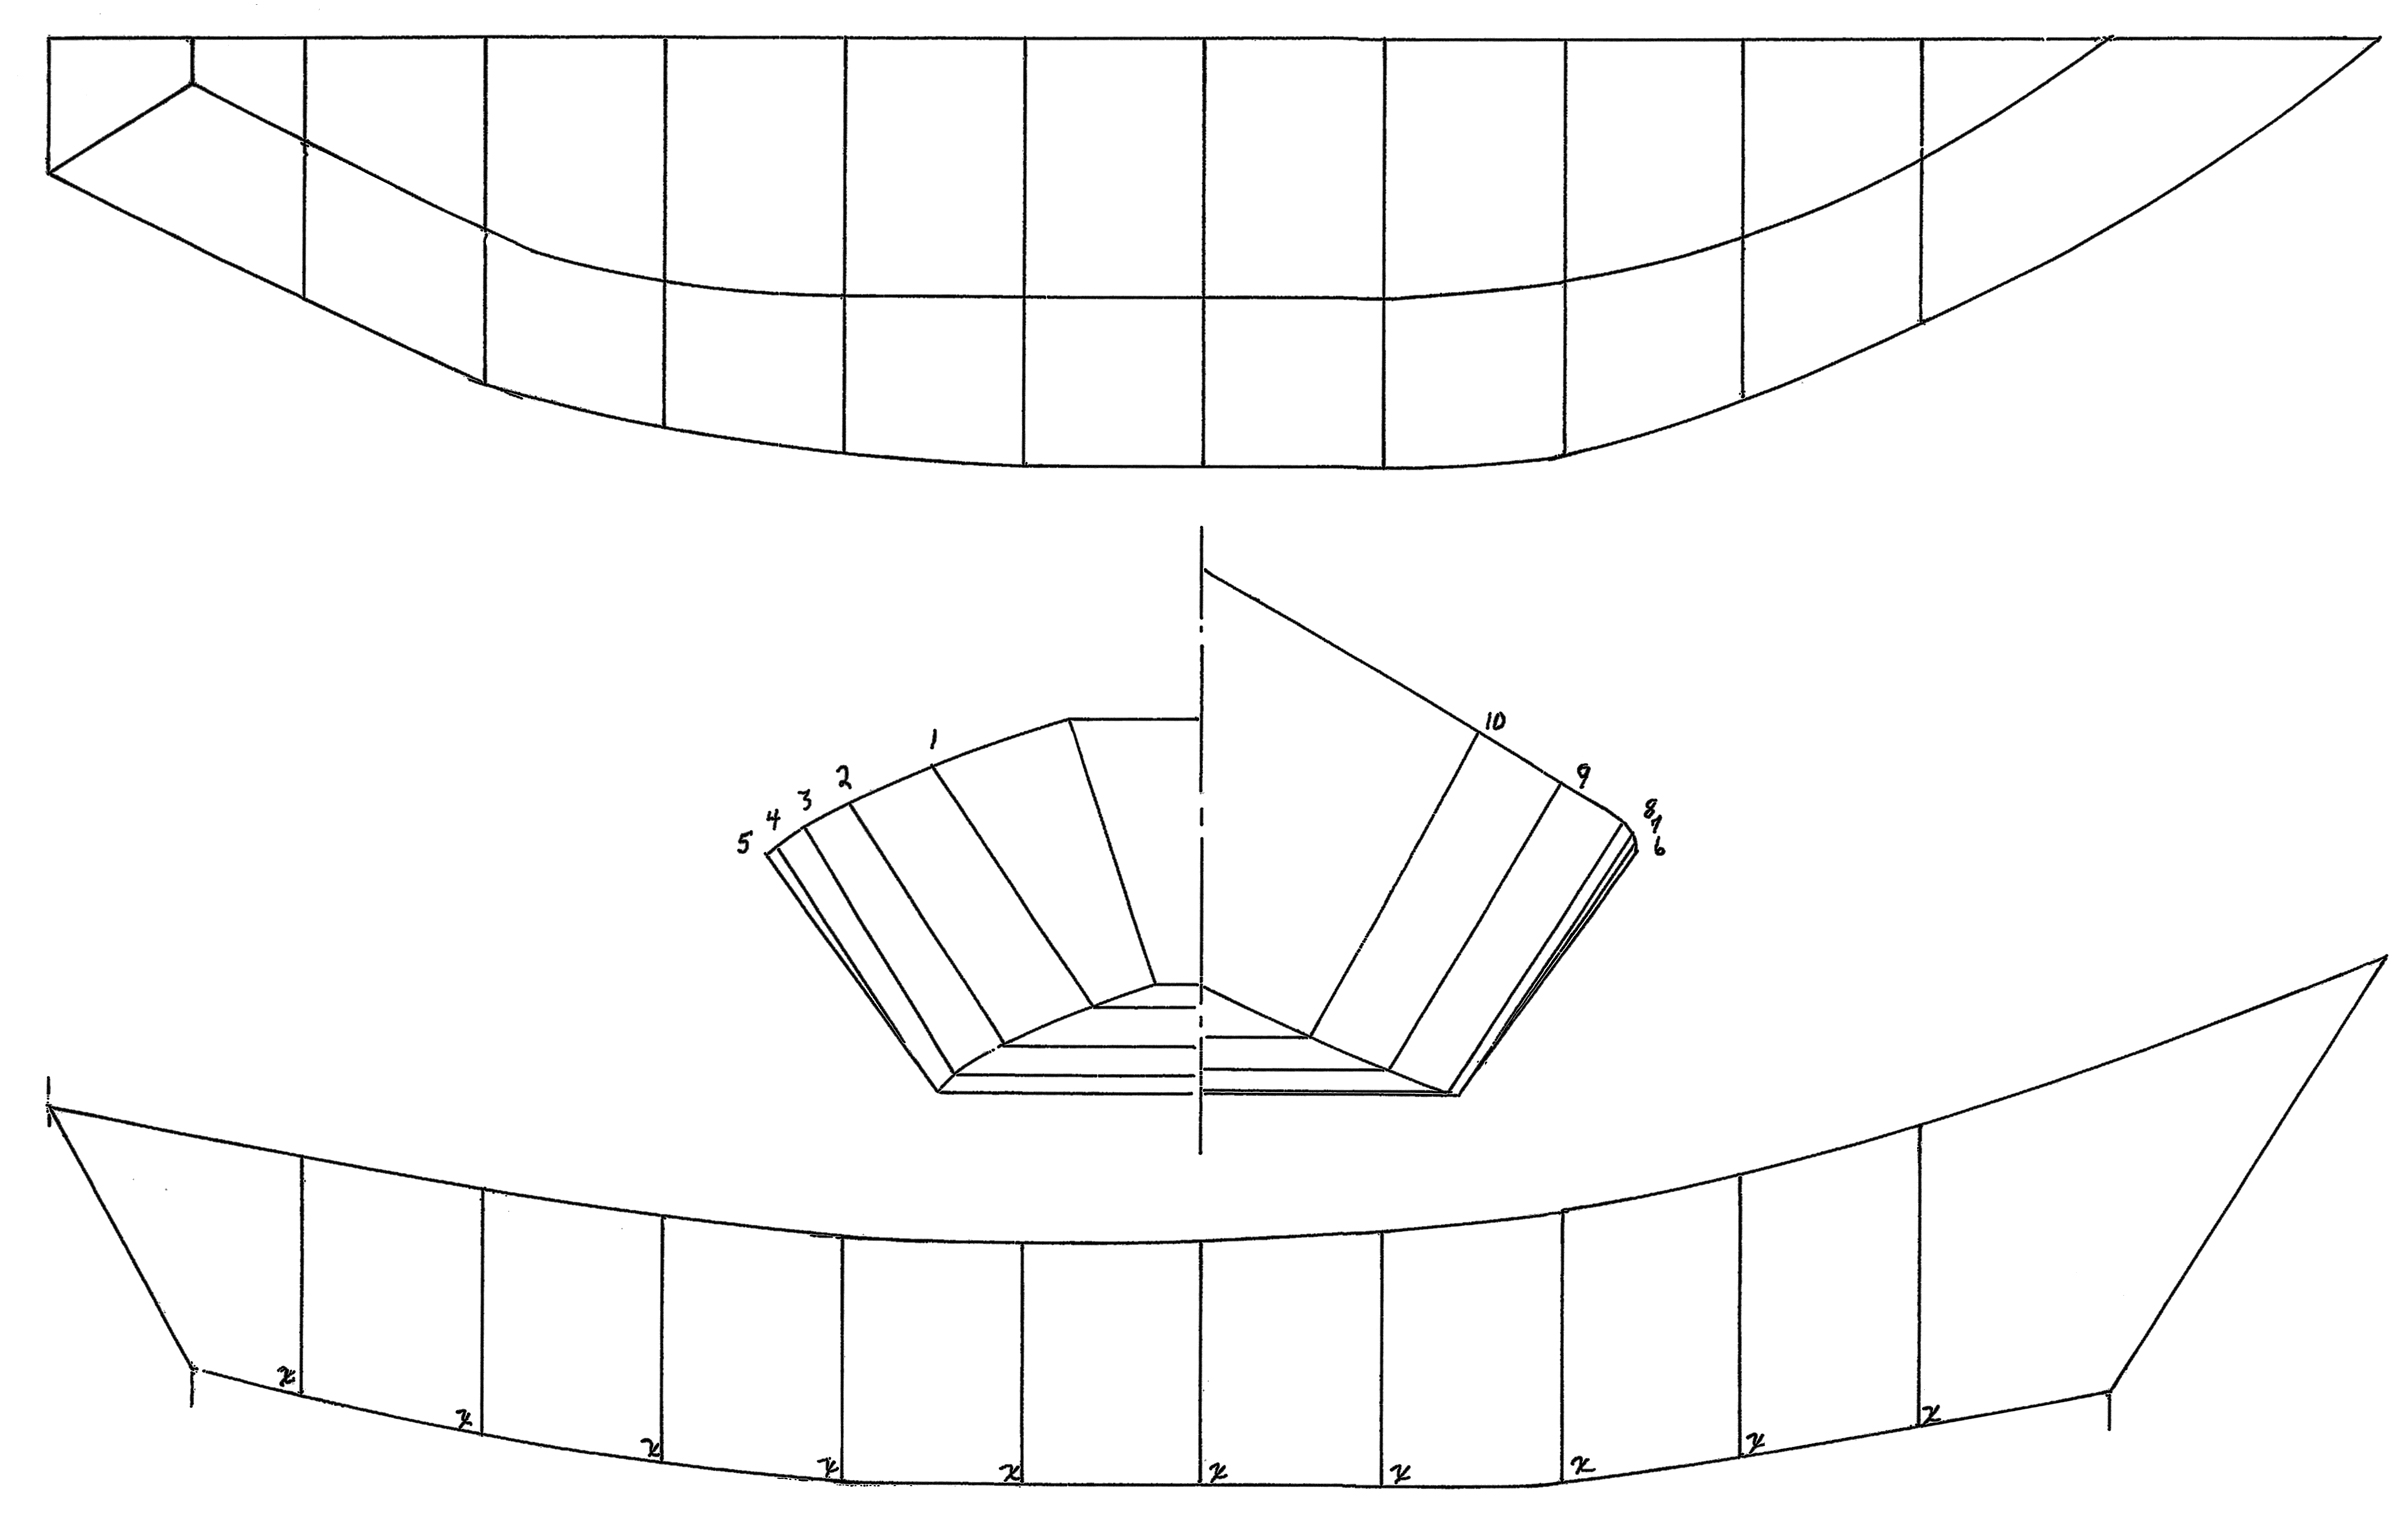
When we had all the frames in place between the side panels, we noticed that the sides were pinched, rather than straight, between stations 4 and 7, and that the bottom was hogged, not flat as it is designed to be. We rechecked our work, but we had built to plan. It became clear that the plan’s baseline offsets for the frame pattern at stations 5 and 6 were off by roughly 1⁄2″. We solved the problem by pushing the two frames deeper into the hull so that the chines ran, as intended, straight between 4 and 7. While full lofting could reveal the error in the offsets, particleboard molds cut to the given offsets for stations 5 and 6 could be put in place and adjusted to fair the hull and then be used to create patterns for the frames. Fortunately, both stations have no bevels.
The installation of the chine log was a challenge. Fletcher’s book suggests that it can be made from one piece of oak, steamed, and slipped into the frame notches. The chine log needs to be angled fore and aft to accommodate the angles of the stem and stern. This makes the top side of the chine log longer than the opening set by the stem, transom, and the bottom edge of the sides. The instructions call for inserting the ends of the chine before sliding the rest of it in; short blocks of wood clamped to the side frames serve as guides to hold the curve of the chine and guide it into the notches. Jess and I found steam-bending and edge-setting the white-oak chines stressful and ended up installing them in two pieces with scarfs that would be joined amidships after the pieces had been installed. In a recent conversation, Fletcher mentioned: “That chine log is a spooky placement. Before steaming was commonplace, the Rogue River boys cut two 1⁄2″ chines and installed each separately to give them a 1″ chine. Kind of crude, but it worked for them.”
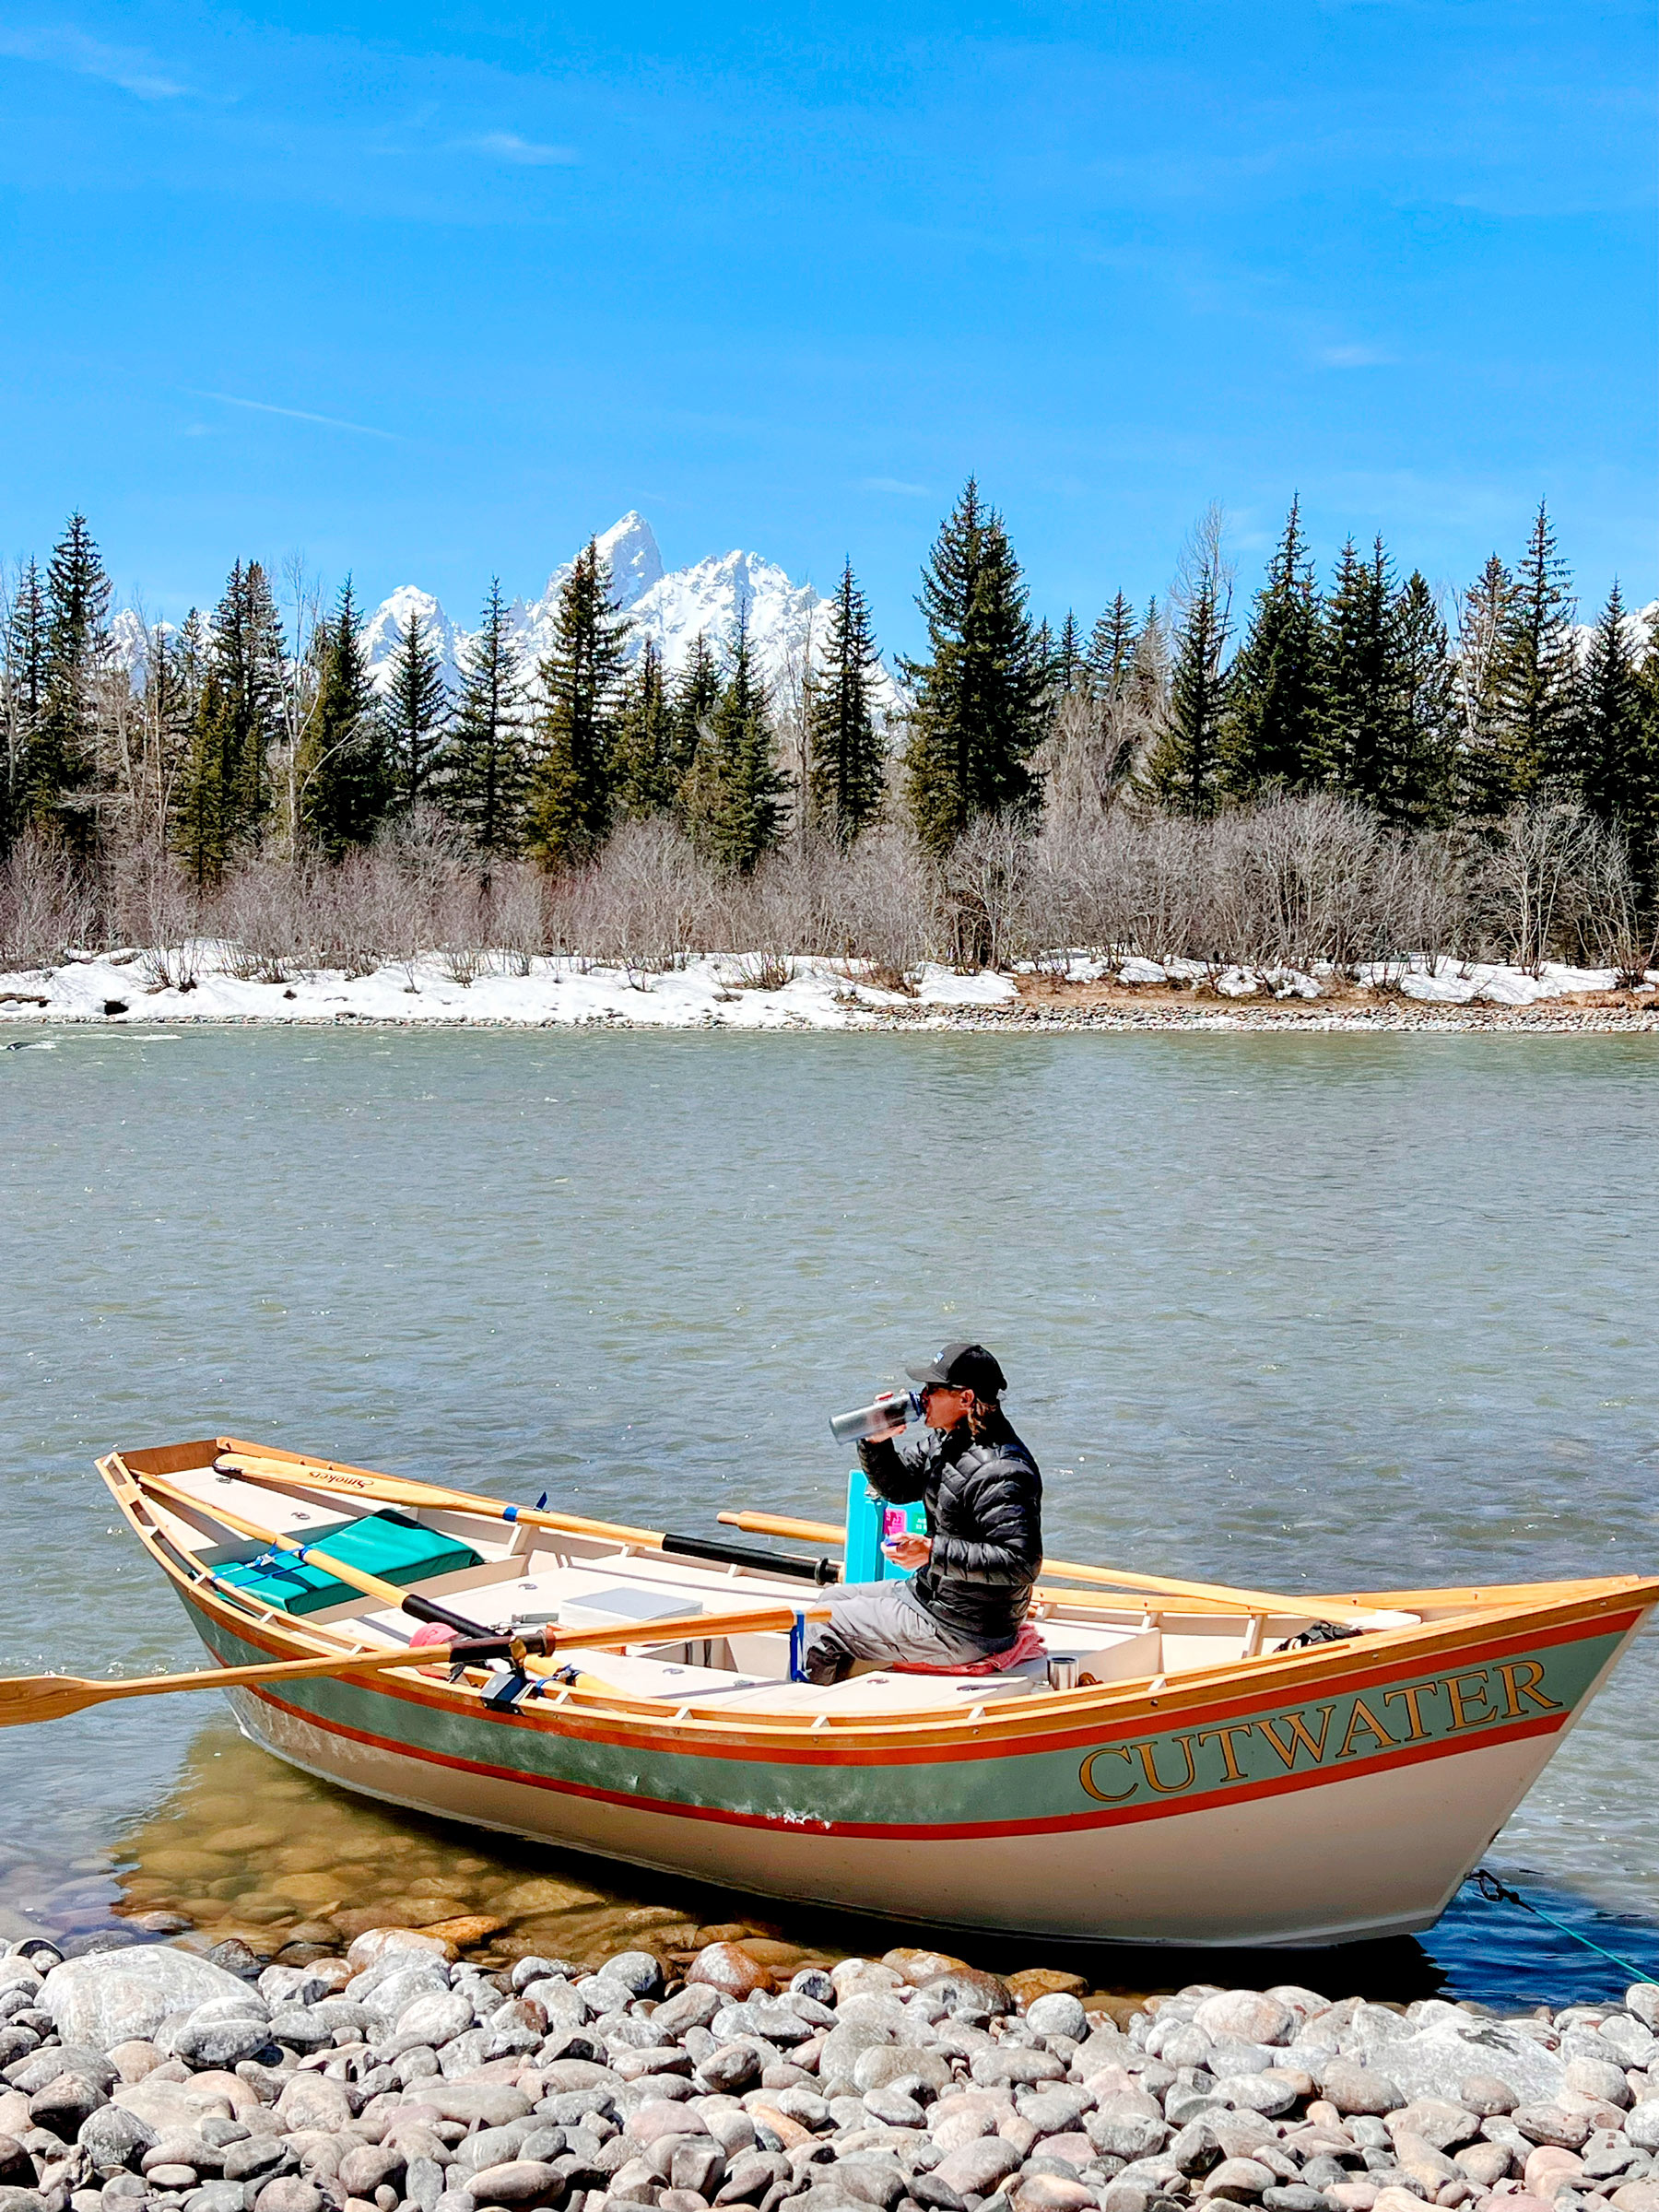
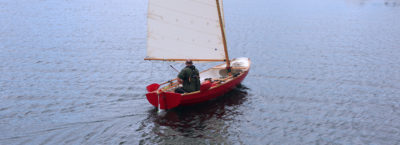
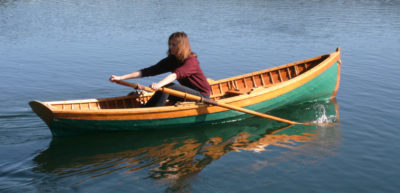
 Jeff Battin
In this side view, the straight and flat section of the side and bottom are made evident by the straight run of the outside chine. Jess is experimenting here with spare oar placement. Here on the Snake River boaters are required to carry one spare oar, but two spare oars will be required in the Grand Canyon.
Fairing the chine and the frame floor timbers was done with hand planes and an ingenious sanding board described in Fletcher’s book. We installed the bottom with Sikaflex and silicon-bronze screws and then planed its beveled edge fair with the hull sides. We had to steam-bend and affix white-oak outside chines. The outside chines have the same bends and edge-sets as the chine logs, but with the bottom in place there was no way to use clamps to hold them to the boat. We resorted to fender washers, construction screws, and polysulfide to set them in place. Installing the false stem was much easier.
The last step, before we could flip the boat over, was to fiberglass the bottom. While we are wooden-boat purists, the bottom of a river boat gets hard use. The old-timers would have installed sacrificial sheets of plywood to protect it, but we opted for the contemporary method noted in the book: 20-oz triaxial fiberglass cloth and multiple coats of epoxy, with graphite added to the last two coats to reduce friction when dragging the boat across sandy beaches. We laid the ’glass and applied all seven coats of epoxy in one go. It made for a long day but eliminated the need to sand between coats.
The boat had been upside down in my garage for nine months, and we were dying to see it right-side up. We had to build a wheeled cradle and needed an extra pair of hands to turn it safely, but it was a joy to see it looking like a boat.
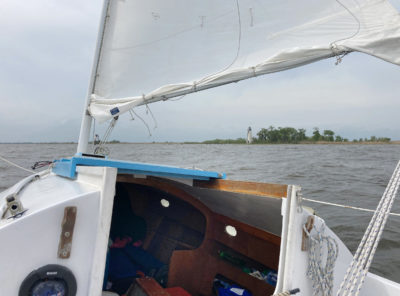
 Jeff Battin
Here, the rower is sitting facing the stern, normal for rowing saltwater dories but not for river dories. The Colorado River Dory can be rowed from either position; rapids are run facing the bow with the oarsman doing the steering and maneuvering and the current covering the distance. The rocky shore here at Deadman’s Bar is typical and demonstrates the need for a dory bottom armored with epoxy and fiberglass.
Jerry Briggs, whose 1971 Grand Canyon dory inspired the Colorado River Dory, said, “building the hull is the easy part; it’s all the carpentry work that takes the time.” I would certainly agree that crafting the bulkheads, seats, decks, and hatches took a lot of time. Fletcher’s book gives general details and measurements for how Briggs “tricked out” his boat but makes it clear that it can be configured however you like. We generally followed Briggs’s design, although we did eliminate the drain tube that is set in the elevated sole in the rower’s footwell and opted to have a continuous deck surrounding the footwell so Jess could sleep comfortably onboard. In the book, the four adjoining decks in the center of the boat were staggered and sloped to shed water into the footwell. We also reoriented the stern seat to face forward.
We used Douglas-fir for the carlins and beams. The fussy part of the build was fitting the 9mm-Hydrotek plywood decks around the frames and accommodating the rolling bevel of the hull. We used joggle sticks and templates and it came together nicely. We added epoxy fillets to all the seams but didn’t reinforce them with fiberglass. We may regret this decision, but fiberglass can always be added later.
The last step before painting was to cut and fit the six deck hatches and the inwales. We used stainless-steel circular hinges, circular compression latches, and spring hatch holders to make the lids watertight. The inwales are made from steam-bent white oak and are fastened to the frame heads with stainless-steel carriage bolts.
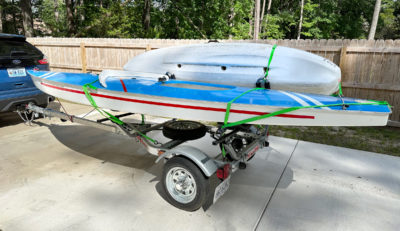
We used bilge paint below decks and topside paint on the hull and decks. The brightwork has multiple coats of spar varnish. We added rubber grit to the deck paint to improve traction. Jess bought a drift-boat trailer that fit our dory perfectly, and we towed it to Jackson in April 2022. Jess and his friends welded custom oarlocks, which we installed in July.
There seem to be countless equations for calculating oar length that all yield different results. Jess was convinced he needed 11′ oars, but Levi Jamison of Songbird Oars said that the dory would do best with 10-footers. He was right, and Jess couldn’t be happier with his handmade ash-and-walnut sticks.
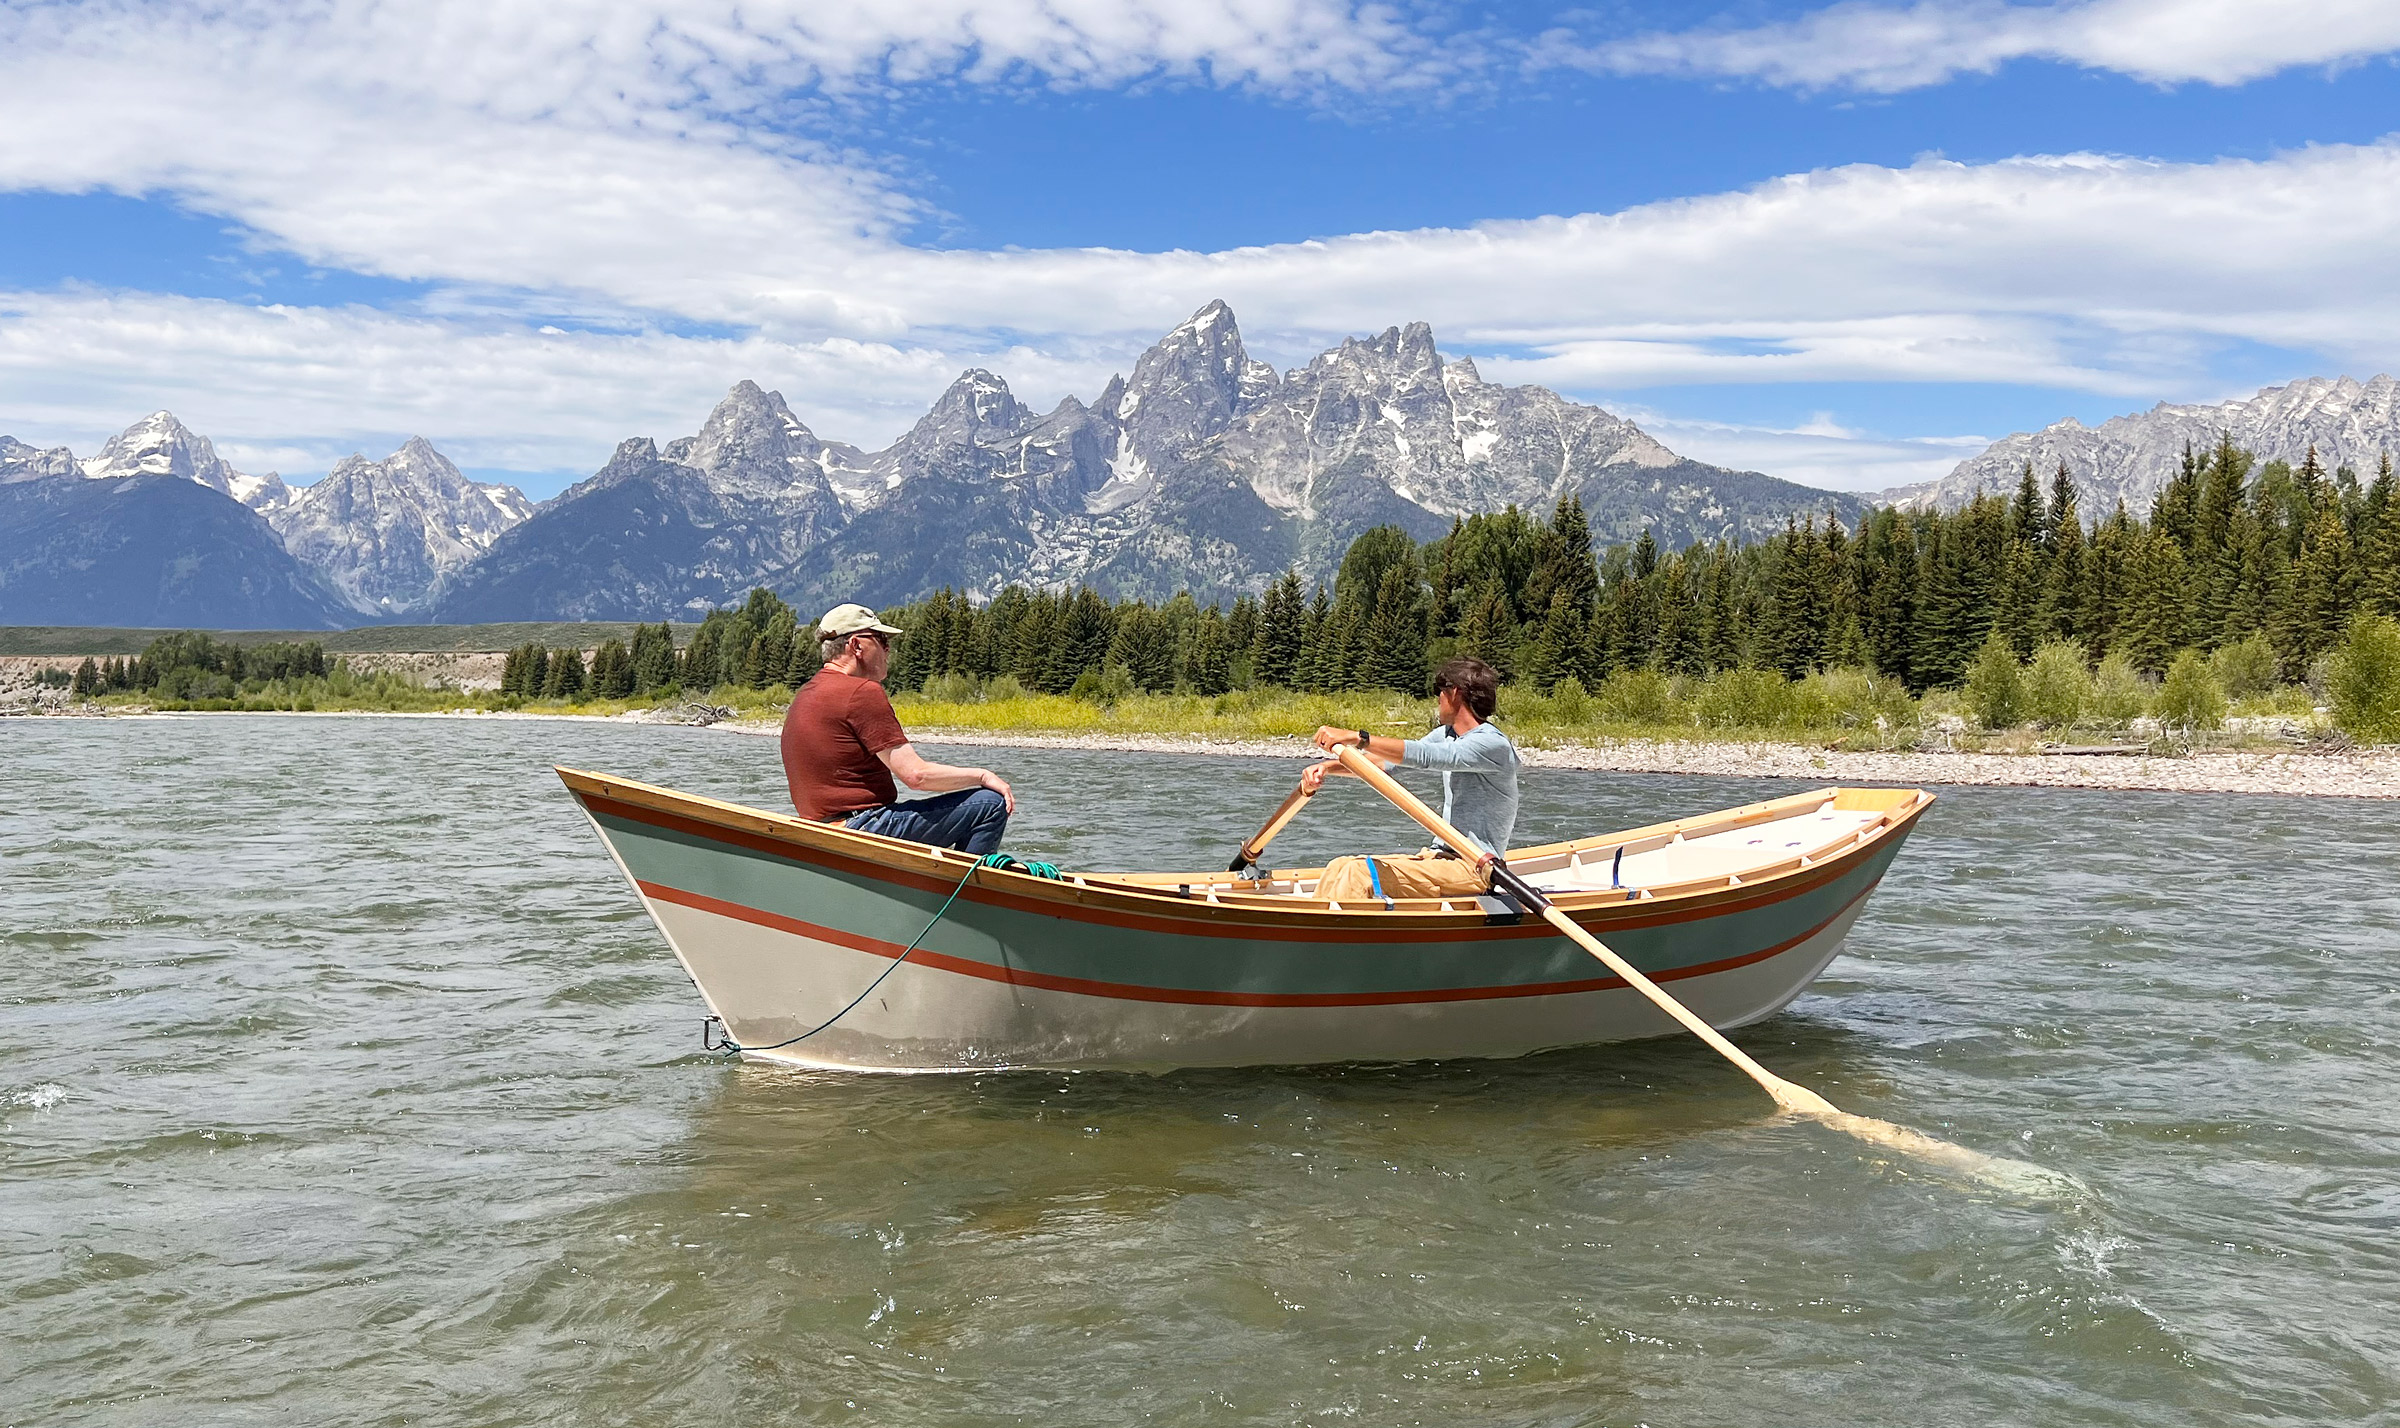 Taylor Lambert
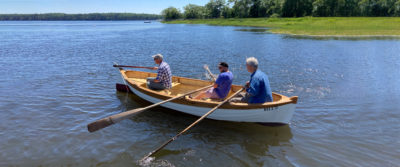
Jess (right) and the author ran the Snake River at the foot of the Grand Tetons. The full bow can support the weight of a passenger sitting well forward and maintain trim without needing another passenger aft to balance the load.
For our Colorado River Dory’s maiden voyage, Jess and I ran the Snake River in Wyoming’s Grand Teton National Park in mid-July 2022. During the 10-mile trip Jess noted that the dory rows like a dream. Its long, flat bottom allows it to track well through the water and glide over shallow, rocky sections without fear of damage. The boat rows great whether bow or stern first, which is helpful when a downstream ferry is best.
Typical of all river dories, balance is important whether carrying people, cargo, or both. If the load is the least bit off-center, it becomes difficult to maintain a straight course; the boat tends to spin to the weighted side.
Jess and I built our dory in about 75 days, working on and off over two years. It was a wonderfully rewarding experience. A decked river dory like the Colorado River Dory is a complicated thing to construct and best suited to someone with considerable woodworking experience. For the neophyte, the open river dories described in Fletcher’s book would be the better place to start.
Jess has a permit to run the dory, christened CUTWATER, down the Colorado River and through the Grand Canyon this October. He’ll be accompanied by two friends, each in a wooden dory inspired by Fletcher’s book. We’re confident CUTWATER is ready to provide Jess a safe passage.![]()
Colorado River Dory Particulars
[table]
Length/17′ 2-3⁄8″
Beam/6′ 4-3⁄4″
Depth amidships/19-3⁄8″
[/table]
Plans for the Colorado River Dory ($64)and Roger Fletcher’s book Drift Boats & River Dories ($35) are available on his website, Rivers Touch. The book is also available from The WoodenBoat Store ($34.95).
Is there a boat you’d like to know more about? Have you built one that you think other Small Boats Magazine readers would enjoy? Please email us!
It’s a beautiful boat. I was part of Brad Dimmock’ s ( now instructing at the Wooden Boat School) workshop at his place in Flagstaff. In 2018 I am the owner of that Briggs GC dory now and have floated this same section. They are amazing river boats with a wonderful history in the west. I really enjoyed your narrative of the build. Just down the road in Colorado Springs, btw.
Thank you!
I have always enjoyed Dory Designs. As a designer myself, I do not think my brain would stretch far enough to elaborate my topside the way this dory has been designed, but hats off to this designer. I have not read the article but see no reason even on the Colorado River to doubt this sweetheart dory could or would be swamped by water remaining on board. She is perfect! I want one! In the week to come as I read and consume this article I will invest in her plans and plan out a journey from the Snake River to the Columbia River to the Pacific Ocean. Wish me well. I have personal experience in design and construction of wooden boats. This one is a favorite. Thank you.
There is a boat I would like to know more about.
I have what I believe to be “Waterbug” made by R. Hamann & Son in Carmel, NY.
Found an ad in a 1961 copy of Boating magazine.
I am hoping to resurrect her this winter for my 5-year-old nephew but do not know about the sail (41 sq ft) or how it was rigged.
Any info is appreciated.
Thanks for your help.
When building from free plans you get what you paid for. The pinch and hog between frame five and seven is typical of free plans. I have built many models from free plans. I have found almost all free plans to have dimensions altered from the original design. The results are always a difficult build to plan and poor design performance. I have seen multiple builds by free plan drawings. All were costly mistakes. Before the investment of time and expense of building a boat. THE “LEAST” expense is the cost of the original designer prints. False hull lines are a common practice to protect a designers original work. Always build a scale model from suspect prints to reveal design flaws. My practiced eye can see the fault in the hull lines from the drawings in this article. An easy check for prints is to see if a strip of wood will easily bend and naturally form along the print lines. If the task is difficult, the print lines are suspect of an altered print!
I like her a lot!
One observation: you have the nuts (quite a few) on the inside of the inwales. With potentially a lot of tossing around, shouldn’t you put these rather on the outside?
Thanks! We used acorn cap nuts on the carriage bolts inboard so there are no sharp edges or potential snags.