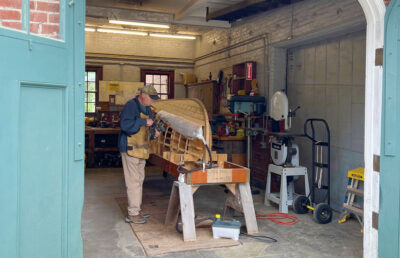
There are few techniques as efficacious and expeditious as using steam to plasticize wood—especially when bending planks. The technology is simple: you need a steambox, a high-capacity steam generator, plenty of fast-action deep-throated clamps, a gaggle of small wooden clamping pads, and hopefully, some reliable helpers to assist with bending the plank to the vessel. Once planks are removed from a steambox, they immediately begin to lose their pliability, and every second counts. For two or more people working in concert, this can lead to a bit of a scramble—even with extensive preparation and experience. For a lone builder, it can be a nightmare.
As luck would have it, there’s an alternative—the trusted, boil-in-the-bag technique where you bring the steambox to the boat, not the plank to the steambox.
For most small craft, the critical twist in a plank is at one end, typically the bow (or in both ends if the boat is a double-ender). In the middle, the run is relatively flat and straight. Thus, when it comes to steaming, you don’t need to work on the whole length of the plank but only on the hood ends (where the plank fits into the stem or sternpost rabbets).
To steam your plank ends singlehanded, you will need a contractor trash bag, or any long closable plastic “sock”; some string or masking tape; heat-resistant gloves, such as welding gloves; a 5-gallon bucket; and a steam generator such as an electric wallpaper steamer or purpose-built wood steamer with a long hose.
 Photographs Isaac Robbins
The new plank is clamped in place, its hood end sticking out at a tangent. To bring it into the stem rabbet requires considerable bending, which if done cold will undoubtedly split the wood.
Step 1.
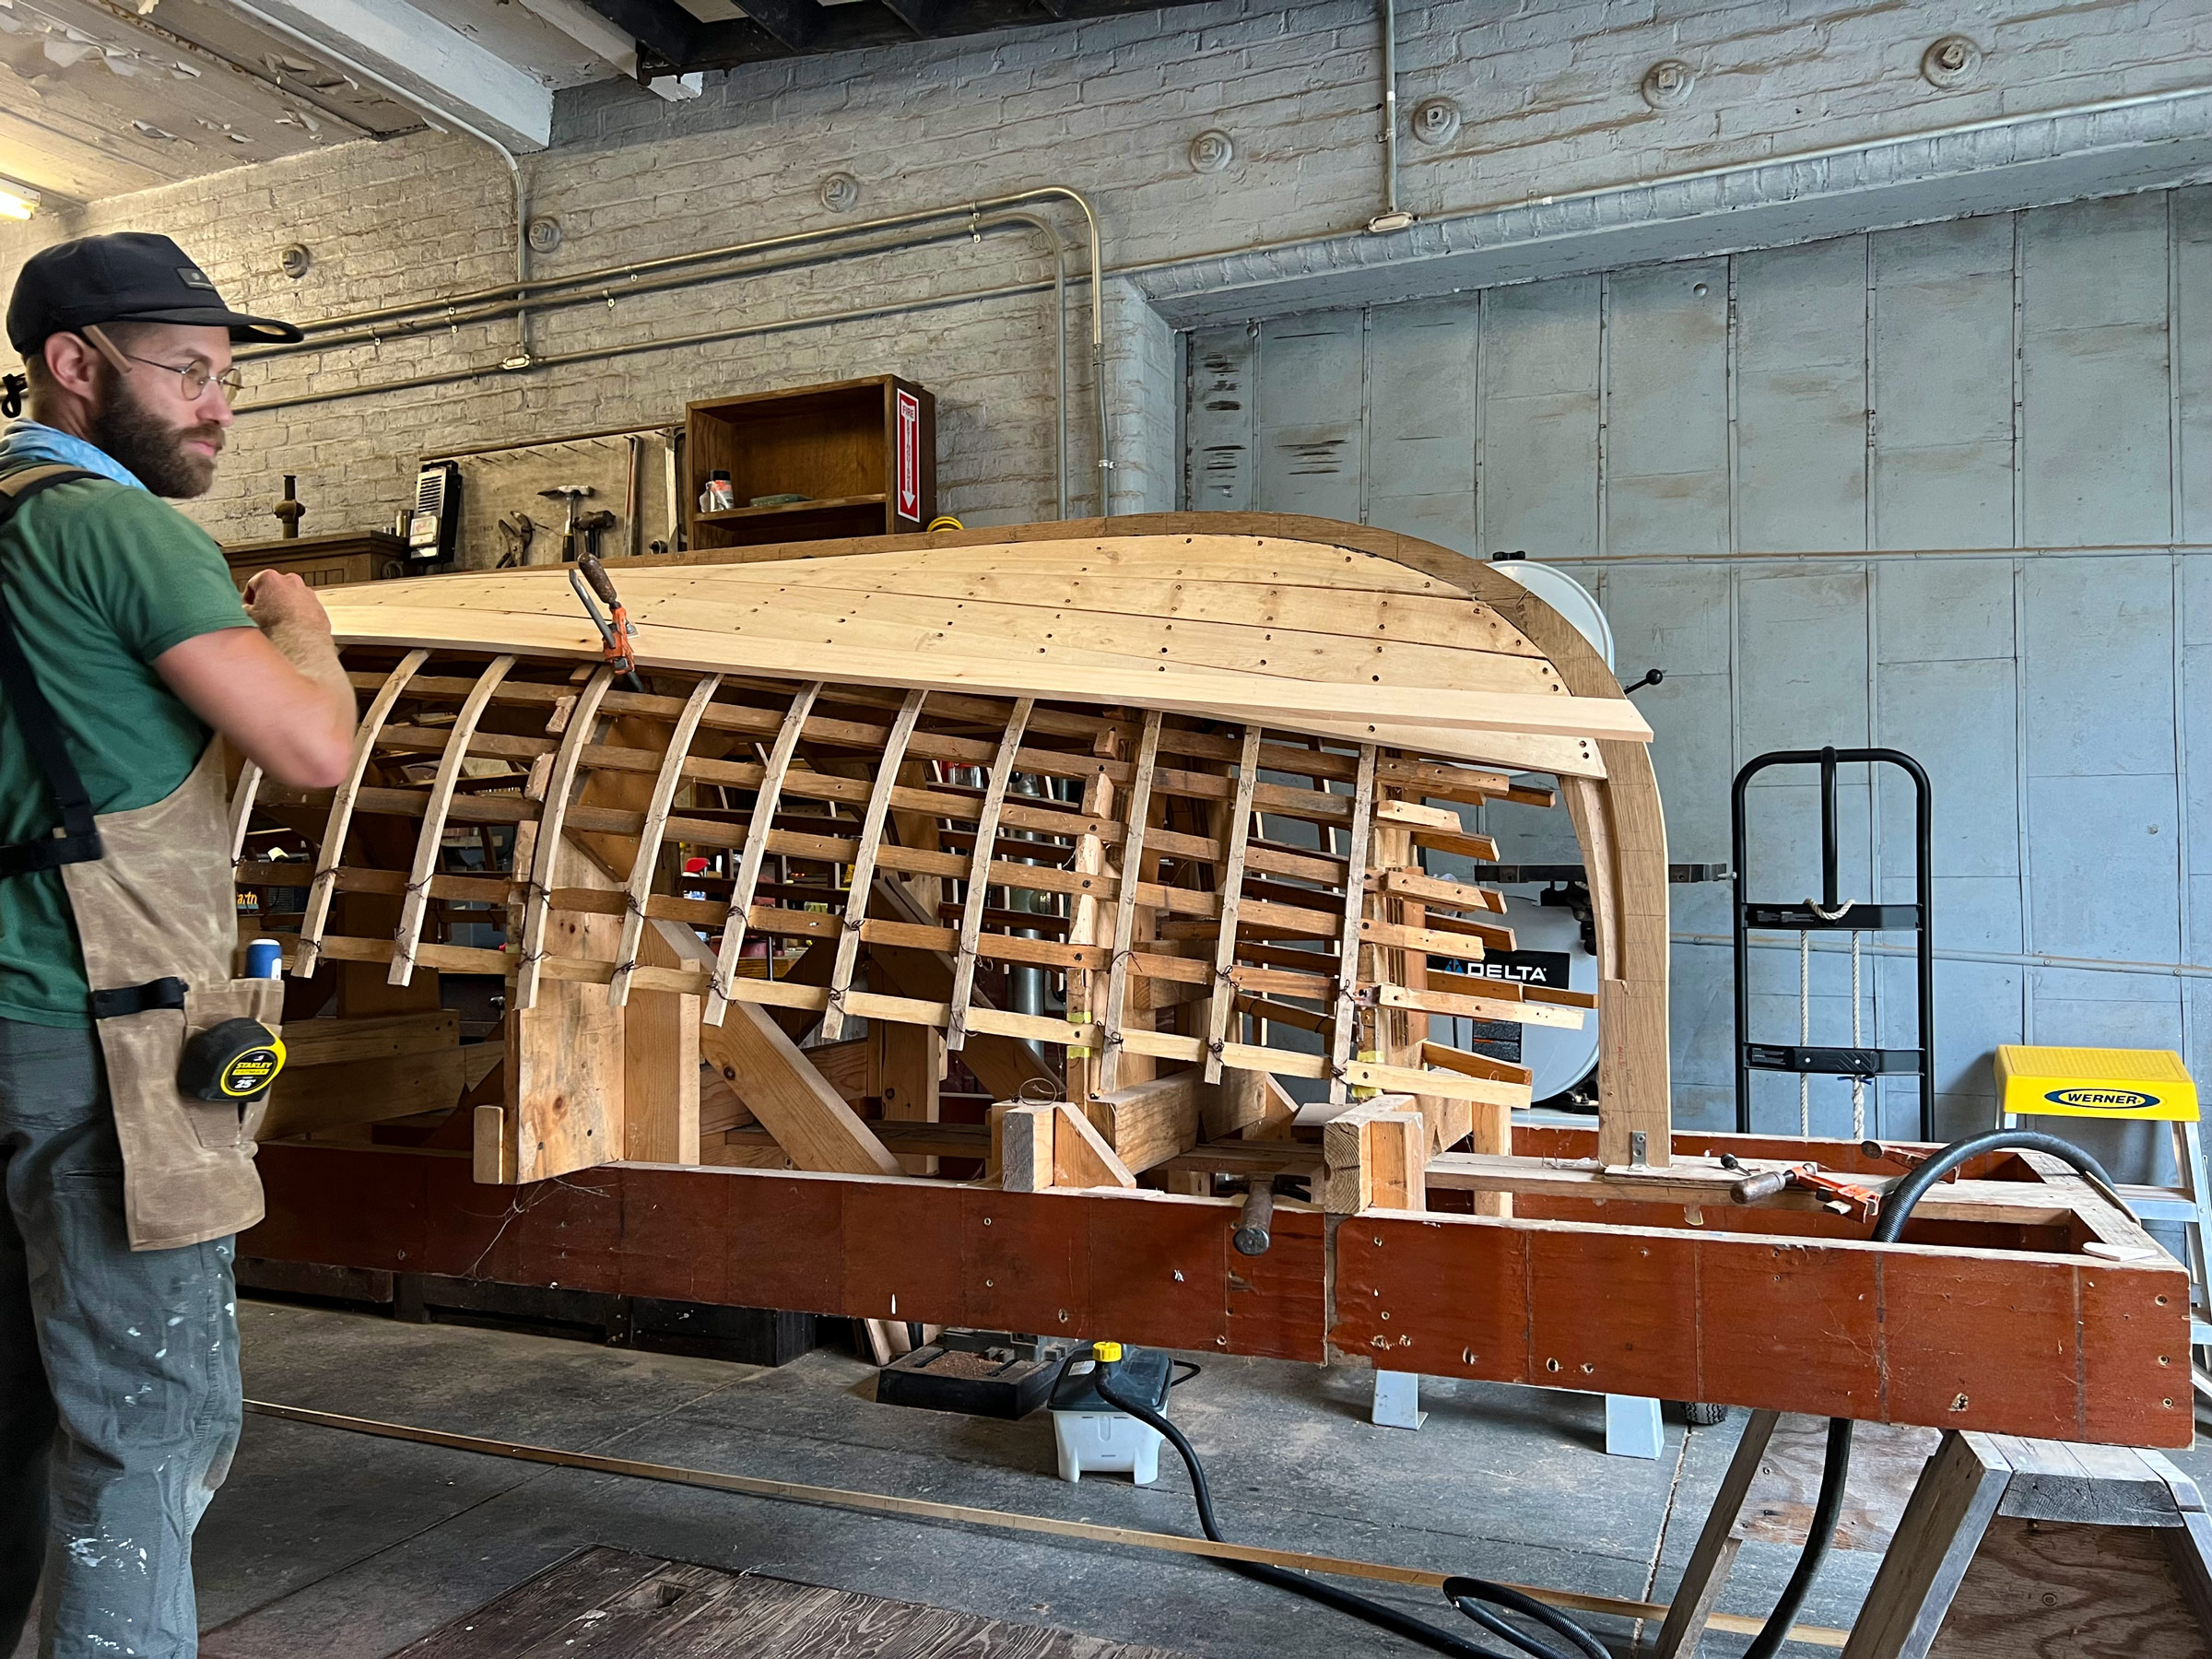
Clamp the pre-fashioned plank in its proper location on the hull. To align the plank, it helps to make an index line on it to indicate a station mold or frame.
Step 2.
Assemble the necessary clamps and pads that will be used to hold the plank once it is bent into place.
Step 3.
Slide the bag over the hood end of the plank, which is likely sticking out from your setup at a bit of a tangent. Slide the end of the steam hose into the bag along with the plank, then close the bag around the hose and the plank with string or masking tape. Make a couple of holes in the top and bottom of the bag. The top ones will allow the cooled vapor to escape the bag; the lower ones will allow the condensed steam to drip out. Place the bucket beneath the bag to catch the drips.
Step 4.
Plug in the steamer and set your timer for the requisite time—typically 1⁄2 hour for a 1⁄2″ plank, 3⁄8 hour for 3⁄8″, and so on. This timeframe is consistent for both hard- and softwood, although most small boats will be planked in softwood. As the steam fills the bag it will inflate like a hot-air balloon. Adjust the position of the bucket to catch the drips. Sit back, have a cup of coffee, and wait for the magic to unfold.
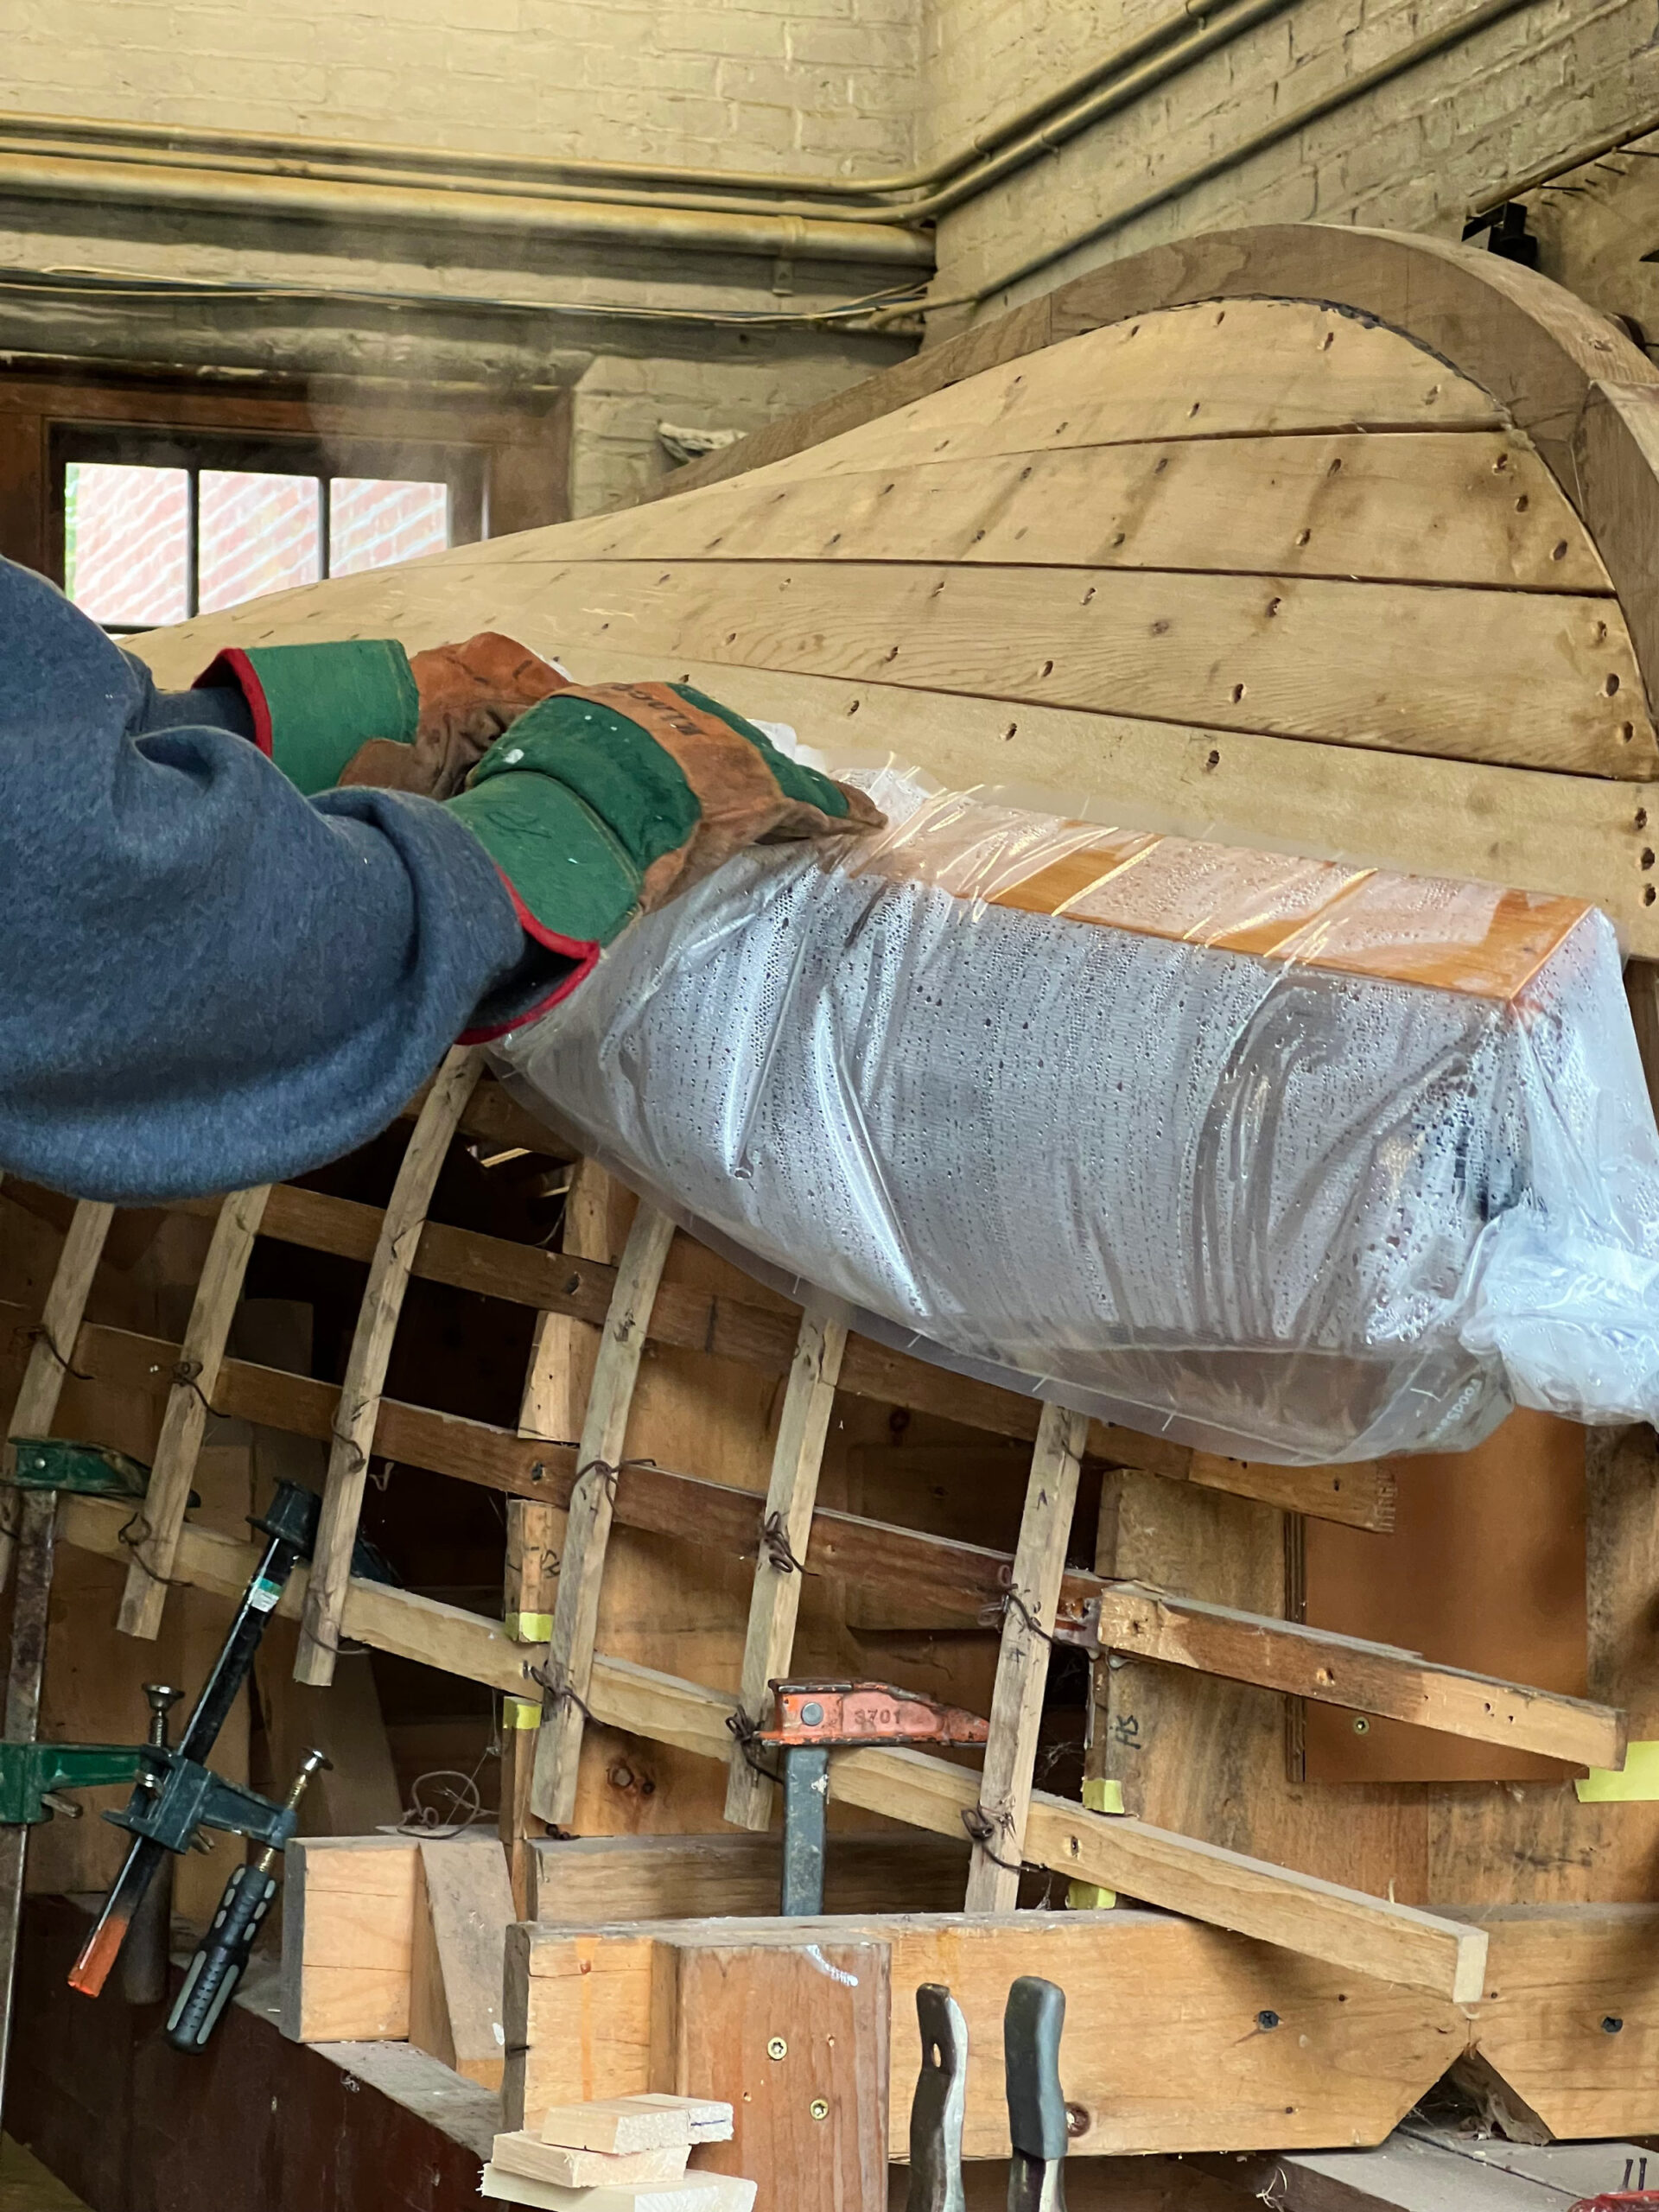
The plank is wrapped in plastic, the steamer’s hose fed into one end. Steam has been filling the bag and, as it cools, it has condensed and pooled inside. If holes had been made in the bottom of the bag, the condensation would have dripped away. Now, however, the builder must be careful not to spill the pooled condensation while removing the steamer and bag from the plank.
Step 5.
Once the time is up, don your heat-resistant gloves (the bag and its contents will be plenty hot), release the closure, and slide the hot, waterlogged bag into the bucket. Twist and press the now-limber plank into place and clamp it down. Let it cool into shape.
Step 6.
Make any final clamping adjustments to snug the plank into its correct location, add bedding between the stem and plank, and fasten.

After steaming, the pliable plank can be twisted and clamped into place. It is then allowed to cool before being permanently bedded and fastened into the stem.
For small boats where a false stem is added later in construction (for example, dories, semi-dories, skiffs), the plank can be run past the stem to be trimmed off later.
For carvel planking, pay special attention to the placement and clamping of the plank: the end of the hood can run long, landing on the face of the stem beyond the rabbet instead of in it. To avoid this, when you clamp the plank into place, set it roughly 1⁄4″ aft of its index location (see Step 1), then steam and bend in the plank. Once it is cool, slightly back off the clamps and, with a wooden mallet, lightly tap the aft end of the plank to advance it to its final resting place in the rabbet. Retighten the clamps, snug up the plank, and fasten it into place.
This simple steaming technique can prevent disaster in many boatbuilding operations: when a partially fastened but reluctant outwale is threatening to snap, or cranky chines just won’t make the final bend, or the “other” end of a peapod’s plank won’t fall into place, the mobile steamer and bag will save the day. All it takes is thinking out of the (steam) box.![]()
Greg Rössel is a builder of small boats and a long-time instructor at WoodenBoat School. He is the author of Building Small Boats, Boat Builder’s Apprentice, Half Hull Modeling, and a regular contributor to WoodenBoat magazine. He is also a member of WoodenBoat’s Mastering Skills video crew, and the presenter of World of Music on WERU-FM.
You can share your tips and tricks of the trade with other Small Boats readers by sending us an email.


Whew,,, what a job. Now I know why I like stich and glue!
I have had some success bending with dry heat. Sometimes I use a heat gun, but for larger areas, such as a panel of plywood, I have a propane powered heater intended for paint or wallpaper removal. It has a reflector about 4.5″ or 5″ in diameter. You have to keep this kind of heat source moving to avoid scorching the wood. The dry heart method works very well when you have just a few frames to bend (bending batches is more efficient with a steam box).
One advantage of dry heat is that you don’t have to wait for the wood to dry out before gluing or finishing. I have pre-bent thin (1/8″) plywood pieces and then laminated them to make knee braces for a kayak. Once glued, the resulting lamination becomes very stiff and strong. I also backed out a strip of oak with a router before bending it to become edge banding for plywood bulkheads with S-shaped profiles.
When bending strips, I like to clamp one end in a bench vise together with a steel bending strap, then C-clamp the other end before applying heat. When the wood is hot (only takes a couple of minutes), the strap forces the inside fibers to crumple; making the outer fibers take the bend is likely to splinter the wood. The steel binding strap used to bundle lumber works well. I check out the dumpsters at the lumber yard for scrap strapping when I need a piece. It comes in various widths.
It may seem counter-intuitive, but I seldom bother to check grain orientation before bending, except that it should be straight (flat grain, vertical grain–seems to make no difference).
I have used this technique and it works great. I build Adirondack Guideboats and use it mainly for the gunnels on each end on some designs where the bend comes around and up drastically. For what I do i use plastic sterilization tubing it comes in 2″ through 6″ wide, 100 foot lengths. See link below for details:
https://www.safcodental.com/catalog/infection-control/sterilization-tubing/plasdent-sterilization-tubing?hsa_acc=3454209772&hsa_cam=18137883502&hsa_grp=&hsa_ad=&hsa_src=x&hsa_tgt=&hsa_kw=&hsa_mt=&hsa_net=adwords&hsa_ver=3&utm_source=google&utm_medium=cpc&utm_campaign=PMax_Shopping_50_GP&utm_content=NEWACCT15&utm_term=&gad_source=1&gclid=CjwKCAjw9p24BhB_EiwA8ID5Bin5457YMsuVdZ6n9VrlcfD2Wdv_WdFhXmvUA3WvhflAGvc0LYKG_hoCN0cQAvD_BwE
I have used a variation of this technique on my last three boats, which were glued-lap plywood. Max thickness of the ply was 3/8” (mm).
Lacking a steamer, I wrap the plank ends in old towelling before enclosing them in heavy (4 mil) plastic. The plastic is arranged to drain excess water just as described in the article. I have an old kitchen kettle which I fill and set to boil. Once the kettle has boiled, I lift the plastic and pour the boiling water over the towels before putting the plastic back over. I refill the kettle and repeat the process. The towelling holds the heat sufficiently between applications of each kettleful. I find that three boilings of the kettle is usually enough, and with my kettle that takes about half an hour. I pull the plank ends in with clamps while the hot towelling is still in place. Once it has cooled sufficiently, I remove the towelling and re-clamp the plank until it has dried.
One issue I encountered was heat placement: Heat rises so make sure the heat source is below the bag and parts you are steaming.
We used a similar method on two lapstrake hulls but the plastic was a problem. We bought some aluminum dryer vent hose, so the heat didn’t destroy it. We rented a wallpaper steamer and it worked great.
As a matter of fact I think Louis Sauzedde of Rhode Island invented this about 5 years ago.
I wound up using this technique with an improvised change; I tied the steam tube to the hoodends of the broadstrakes and wrapped it all round with cling-wrap. It’s crude, but works very well. I added blocking to help with drainage. I also wrapped a thick towel around the plank to insulate it before clamping into place.
I was at the Woodenboat school when they took these photos; tons of fun to see them in ‘print’.