During the first two decades of the 20th century, yachting was a particularly popular sport among men of standing and means. Each yachtsman wanted a tender worthy of his yacht. It needed to row and tow well and travel with efficiency and stability while carrying considerable weight in a range of sea states. It also had to have pleasing lines and be built to the highest standards of craftmanship. For this clientele, cost was not a consideration.
Charlie Lawton of Marblehead, Massachusetts, built some of the finest tenders meeting these requirements. John Gardner was a coworker and friend of Lawton’s, and when Lawton retired sometime in the 1940s at age 90 he gave Gardner the lines, table of offsets, and some patterns for the Lawton Tender. Gardner eventually put this information together as a detailed set of plans and instructions for building the boat and published them in the January 1978 issue of National Fisherman. They were also included in Building Classic Small Craft: Complete Plans and Instructions for 47 Boats, published in 2004.
Lawton built his tenders with carvel planking over delicate bent-oak frames. Newfound Woodworks worked from Gardner’s offsets, lines, and descriptions of Lawton’s building techniques to produce plans for a Lawton Tender built with cedar strips and covered with fiberglass cloth and epoxy resin. There is a sense in which these modern materials respect the original aesthetics of Lawton Tenders. Newfound Woodworks says that a Lawton Tender built with their kit materials weighs about 70 lbs, which is indeed light. The strip-built boat does not require frames, knees, or breasthooks, although they can be added if you want your tender to look more like Lawton’s.
 Stephen Bowen
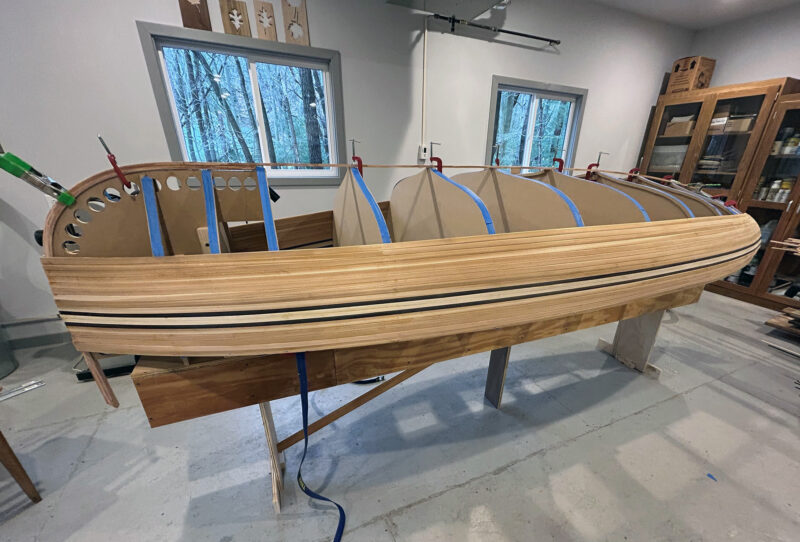
Applying the strips from the bottom up is straightforward for the first two-thirds of the hull, but eventually, the ends are butted against the inner keel and at that stage there is a tight bend for each strip. An alternative method is to plank down for about 20 percent and then plank up to close the gap. The author milled his own red-cedar strips.
I built a Lawton Tender from Newfound Woodworks’ plans with no intentional modifications. As fits its purpose, the tender is a short, stout craft with an overall length of 10′, an overall beam of 45″, and a capacity of 575 lbs. I bought the “standard set of plans,” which includes full-sized half-drawings of the form station outlines with several stations’ outlines superimposed on each plan sheet. Using carbon paper, the outline for one side of a station is traced onto 1⁄2″ MDF, then the sheet is turned over and the mirror image is traced to outline the full station form. Conveniently, the tallest stations are just under 24″ so at least four station forms can be made from a 4′ × 8′ sheet of MDF cut into four 24″ × 48″ pieces. Full-sized station outlines that do not require you to turn over the sheet and justify it to the centerline are available at an additional cost.
Included with the plans is a booklet consisting of 12 pages of step-by-step instructions, a bill of materials for the kits that Newfound Woodworks can provide, and some 32 pages of general information on strip-building techniques. These instructions are meant to be sufficient for experienced builders, but those with limited experience are urged to first get the Pre-Kit consisting of the book Woodstrip Rowing Craft by Susan Van Leuven and two instructional videos, Cedar Strip Boat Building and Applying Fiberglass and Epoxy, in DVD format, with additional strip-building notes (the company hopes to offer the videos in streaming format, too). I had built a cedar-strip canoe so didn’t get the Pre-Kit and already had the book, which I found invaluable in answering questions, but I haven’t seen the videos.
 Matt Bowen
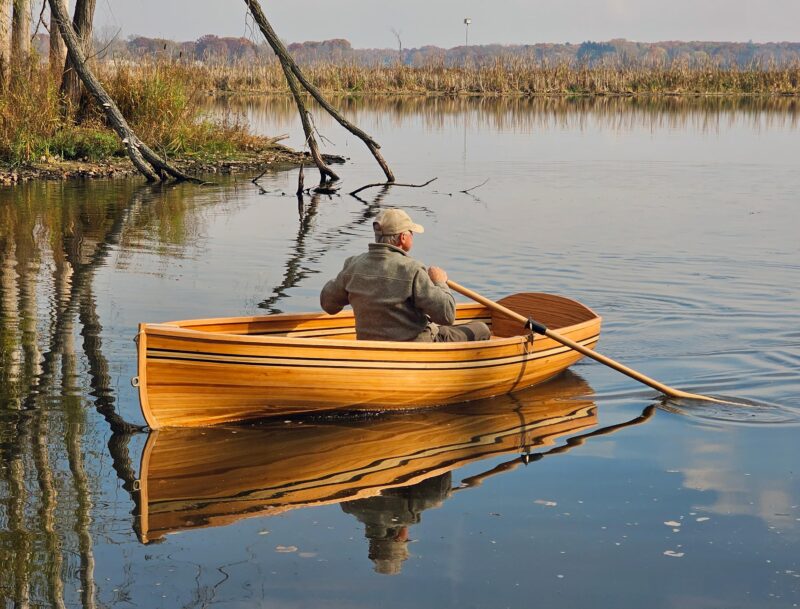
Whereas the Newfound Woodworks kits for the Lawton Tender use white cedar, the author chose to use his own red cedar with a contrasting accent stripe. The fine entry and aft skeg help the boat to track well despite its light weight and shallow draft.
Newfound Woodworks can provide a kit that includes nearly all the materials needed to build the boat: station forms, wood, fiberglass cloth, and epoxy. The woods they provide are specifically chosen for this boat. Most of the strips are white cedar, which is more flexible than red cedar and quite helpful when stripping the hollow forefoot and the most-curved section of the stern. Many of the pieces are pre-cut to the final dimensions. The kit is the practical option for builders who do not have access to a joiner, planer, router table, and table saw. I chose to use wood I already had or could obtain locally. I made strips from red cedar, and for the rest of the boat I used the wood of a Kentucky coffeetree that blew down in my yard a decade ago. This ring-porous wood has the same density as white ash. I’m sure there are woods that would have been easier to work with, but I liked the coffeetree’s golden-blond color.
The boat is built upside down on 10 molds, a stem form, and a transom support set on a box-beam strongback. The first step is to laminate the inner stem and assemble the transom, which is made up of 1⁄4″ plywood sandwiched by 3⁄8″ hardwood. Once they are attached to the form, stripping begins at the sheer and works up toward the keel.
 Stephen Bowen
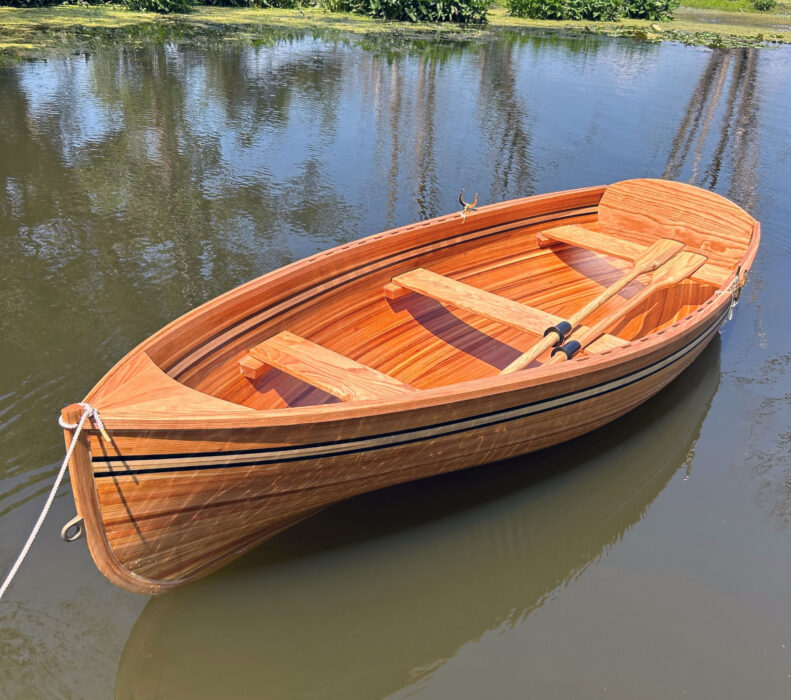
The strip-plank construction lends itself to a clean interior without frames, knees, or breasthooks, although these can be added for a more traditional aesthetic.
There are two ways to attach the strips to the stations: with staples or with clamps. I chose the latter to avoid all those staple holes, and applied a 1⁄2″-wide band of MDF beside the exterior edge of each station to hold the clamps, as recommended by Van Leuven. Simple spring clamps worked for most strips and didn’t mar the cedar. Given the degree of bend and twist required, it was essential to use straps between stations to hold the strips in place while the glue dried. The twist involved in attaching strips at the hollow forefoot and the transom is particularly challenging, and Newfound Woodworks offers some clever suggestions that helped me. A possible benefit of using staples is that they stay in place until all the strips have been applied, whereas clamps are removed after each strip. In applying strips to the forward half of the boat from the center to the keel, I found that the straps pulled the completed section away from the station forms and it did not fully return after the straps were released. Had I recognized this earlier, I would have used some small screws at a few points to secure the completed section to the station forms. Newfound Woodworks assured me that this relatively small departure from the intended shape would not affect performance.
As the first two-thirds of the strips are attached, they overlap the stem and transom and are easily trimmed once the glue has cured. Farther up the form, the ends of the strips have to be fitted as they butt against the inner keel. Fitting is difficult because these strips must be bent quite a bit. An alternative recommended in the building notes is to build about 20 percent of the hull by starting at the inner keel and working down. This section is not initially glued to the keel so that it can be lifted off the form. Then strips are added from the bottom up progressing to the point where they overlap the area covered by the top-down panel. The panel is put in place, scribed from underneath against the completed section of the hull, and cut to fit. The building notes provide more detailed instructions for this approach.
 Matt Bowen
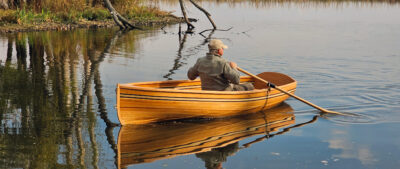
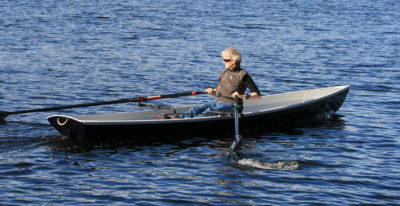
With its high freeboard the Lawton Tender has excellent load capacity, but can be adversely affected by a strong crosswind.
When the hull is completely stripped, it is faired and sanded, sealed with epoxy, ’glassed, and varnished. The outer stem, skeg, and outer keel are added and sheathed with more ’glass. The boat is then removed from the form and supported right-side up as the inside of the hull is faired, sanded, and ’glassed. The inwales and outwales are installed and a small deck is put in place. Finally, the seats and oarlocks are installed. My finished boat weighs 89.5 lbs.
Ibought a Trailex aluminum trailer that is a perfect fit for the 10′ Lawton Tender. The boat and the trailer are light and very easy to handle. For those with the strength, the 70-lb boat could be cartopped but with a center depth of nearly 20″ don’t forget it’s up there when you are pulling into the garage.
 Stephen Bowen collection
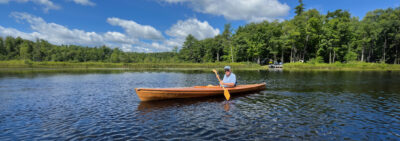
The Lawton Tender has proved ideal for lake fishing with 125 lbs of grandchildren on board.
I chose the Lawton Tender as a small, easily handled boat for getting out on nearby lakes and rivers; sometimes fishing and sometimes taking out the grandkids. I’m pleased with its stability and balance. Because it is so light, I tend to treat it like a canoe and not stand too far away from the centerline, but I’ve never felt like it was in danger of flipping. I was surprised at how fast I can row it with about 125 lbs of grandchildren occupying the forward and aft seats; we covered 1 mile in 22 minutes. It tracks well, but with its ample freeboard is affected by wind.
I’m happy I chose this project. Building the boat was more challenging than building the canoe, and I learned a lot in the process. Newfound Woodworks was very responsive to questions either by email or by phone. Their Lawton Tender has lived up to my expectations and is getting quite a bit of use. I would recommend it to anyone who wants a small rowboat.![]()
Stephen Bowen is a retired aquatic scientist, professor, and dean. For his research career, he had a series of nearly indestructible Boston Whalers. In retirement, he shares a 34′ sloop with his son for sailing Lake Michigan and he now has a small, easily transported boat for West Michigan’s inland lakes and rivers.
Lawton Tender Particulars
Length: 10′ 1⁄4″
Waterline length: 9′
Beam: 45″
Waterline Beam: 43″
Weight: 70 lbs
Displacement (capacity): 575 lbs
Draft: 4 3⁄4″
Center depth: 19 3⁄4″
Depth at bow: 23 1⁄4″
Plans ($110 and $160) and kits ($3,405) for the Lawton Tender are available from Newfound Woodworks. The Pre-Kit Rowing/Fishing Boat Package is $98.
Is there a boat you’d like to know more about? Have you built one that you think other Small Boats readers would enjoy? Please email us!




Steve,
Your tender looks great. I like seeing it afloat and I think is more striking looking in the water than when I saw it in your shop.
Jerry DePersia
Can the plan be stretched to make it longer and if so, has anyone built a longer version.?
How would the longer one perform as compared to the standard 10 version?
Regards
Jdr
10% is the rule of thumb, that’d put you at 11′. It’d be a hair faster and carry a hair more weight. But unless you carried that weight it’d ride higher too which seems to be the main drawback of this design.
Looks aren’t the drawback, dam that thing is gorgeous.
Iain Oughtred’s Acorns look similar and come slightly larger I believe, certainly his Guillemot is 11′ 5″ and can be done strip planked. Reviews for all of these are in back issues of this magazine.
If you want it bigger yet, look at Whitehalls. Basically this boat is a short Whitehall.
I made this boat. I am very pleased. Beautiful and light. I can send photos to anyone interested.