Initially designed for millionaires, the Passagemaker skiff is also ideally suited to thousand-aires like me. In addition to being a manageable “investment” at $1,349, the Passagemaker proved to be less onerous to build than I originally imagined. On completion, this skiff lived up to its touted versatility and its ability to carry loads and loads of all kinds of boating stuff.
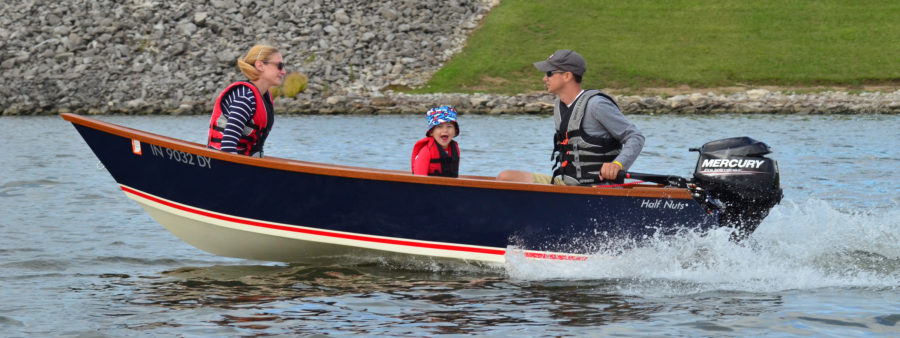
The Passagemaker was created by John Harris, chief designer and president of the Annapolis, Maryland, based Chesapeake Light Craft (CLC) at the behest of PassageMaker, a magazine catering to anyone interested in big, expensive, power cruisers. “The editor was very specific in what he wanted the boat to do,” Harris recalls. The design had to be small and light enough to be easily hoisted, probably in davits, onto the stern of a trawler-style cruiser. Its length was to be 11′7″ and include the option of breaking the down into two parts, each with its own watertight integrity, and easily reassembled. It had to be robust enough to carry three people and all their gear comfortably and safely in protected waters where the mother vessel was likely to be anchored, moored, or docked. It had to be propelled easily with an outboard motor, oars, or a sailing rig, and, finally, it had to be good-looking.
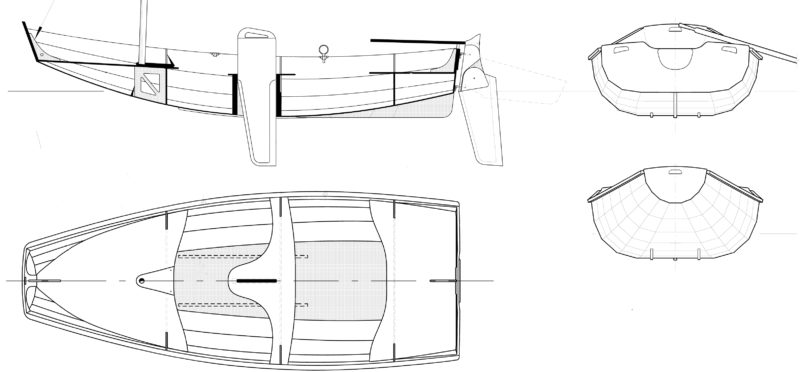
Undaunted by such a tall order, Harris self-imposed a 100-lb limit to the skiff’s dry weight, a goal he more than met by bringing the Passagemaker in at just under 90 lbs. This was achieved by drawing on the handsome form of traditional Norwegian prams and using modern materials and boatbuilding methods. The lapstrake design of the original prams lends itself to CLC’s LapStitch method for stitch-and-glue plywood. The overlapping joints are self-aligning and offer plenty of gluing surface area and an attractive appearance. Using mostly 1/4″ (6 mm) stock for the four strakes, bottom, and other pieces helped keep the weight down, while fiberglass cloth and epoxy added stiffness and durability. By the time the design was ready for the CNC cutter, Harris was well on his way not just to meeting all of the PassageMaker magazine specifications but also to creating a boat that would have a broad appeal. He introduced his Passagemaker in 2005, and since then CLC has sold more 500 of the kits.
 all photographs by Joe Devenney Photography, photos.joedevenney.com
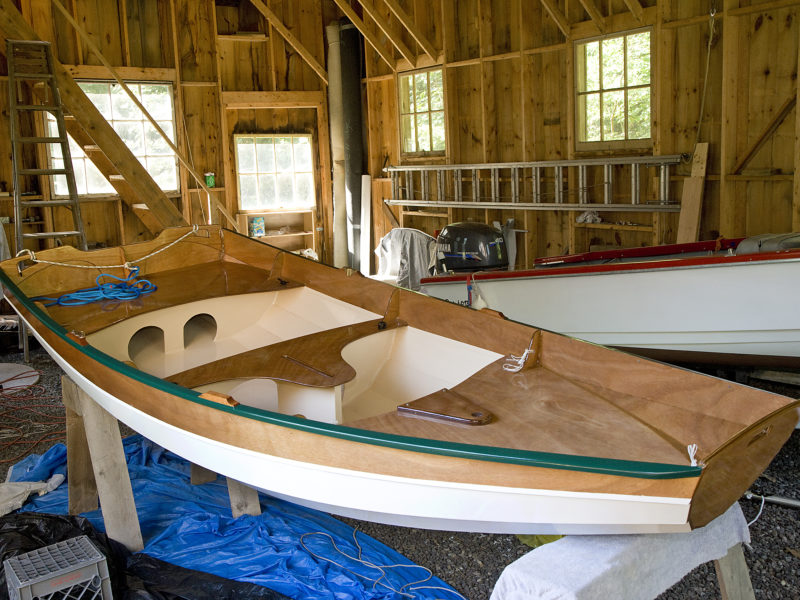
All of the CNC-cut pieces are shipped boxed and ready for assembly. Longer pieces are in the unopened box standing against the wall.
When my Passagemaker kit arrived via UPS, I anticipated few problems. The space needed to put the Passagemaker together turned out to be considerable, but I had the luxury of working in a big, open barn; a single bay in the standard two-car garage would be a pretty tight fit, making some construction processes more onerous than they might otherwise be. The MAS epoxy CLC recommends and sells exceeded my expectations. With several decades of experience working with other brands, I was impressed with how well MAS epoxy flowed and laid flat and even. It had essentially no odor and stayed perfectly clear on the surfaces I coated with it for protection. MAS epoxy is non-blushing and does not create a waxy film on its surface as it cures. That eliminates problems blush can pose when applying subsequent coats of epoxy, varnish, or paint.
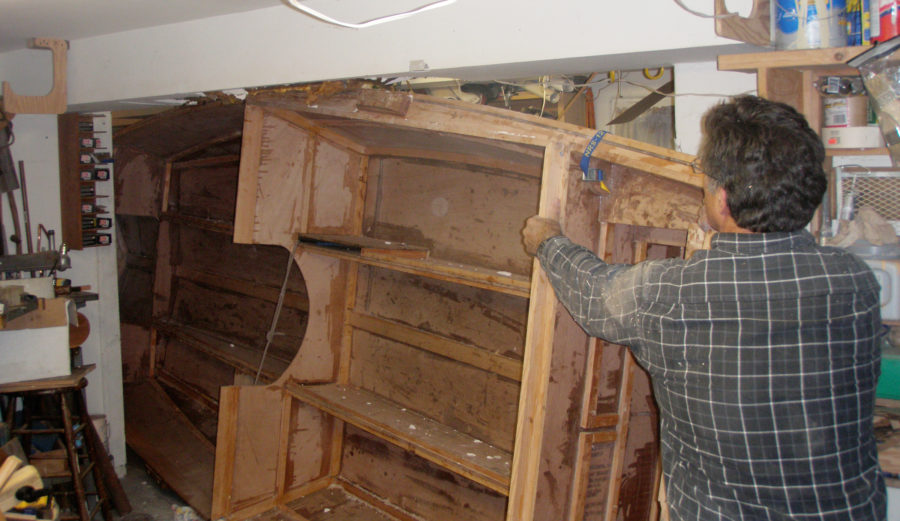
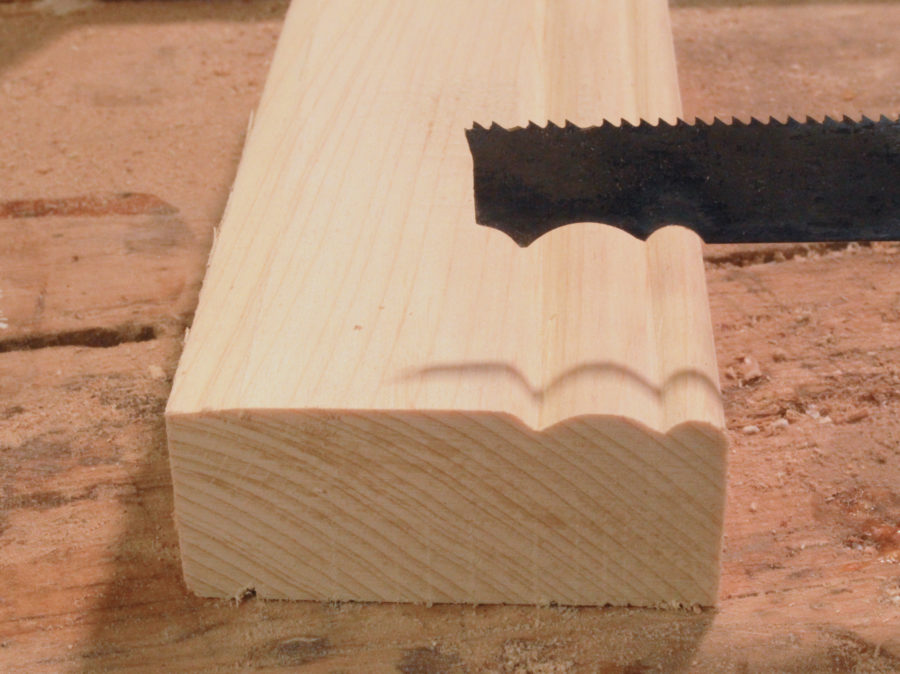
All of the planks for the Passagemaker arrive in two parts and have to be made full-length before they can be assembled into bottom and sides. My Passagemaker kit was an early version, and plank pieces had to be scarfed together. Slathered with epoxy and clamped, the slanted surfaces slid against one another when pressure was applied by weights or clamps. CLC solved this problem by changing the scarf joints to puzzle joints that assure much greater precision, and eliminate the messy task of trying to keep scarf joints from moving about.
Pre-drilled holes for the CLC’s plywood panels are also a big improvement over earlier iterations of the Passagemaker kit. The locations of the holes are determined by computer and each pair is matched up directly across the lap, so wire ties ensure greater precision. I had drilled the holes myself on an earlier project, and ran the risk of having the assembled strakes ending up out of whack with each other at the ends. Pre-drilled holes also save a tremendous amount of time.
The construction of the Passagemaker is pretty straightforward, even if you’re a beginning do-it-yourselfer. The free customer support via telephone was excellent. I called only once with a question about an obscure aspect of the construction process. The CLC representative didn’t have the answer when I called, but he called me back in about 20 minutes with the information I needed. Two other CLC kit builders I know reported excellent customer support on many aspects of the construction process.
CLC has a list of tools and supplies you’ll need for the project. None of the tools needed to complete the Passagemaker are particularly expensive, and they’re all worthy additions to the shop of a beginner do-it-yourselfer. You can’t have too many clamps. A half-dozen C-clamps are particularly useful, and spring clamps, bar clamps, and deep-throat clamps come handy, especially if you are working alone. Having a wide variety of clamps can keep the work moving along if an extra pair of hands is unavailable. I clamp pieces together for a dry run before I mix epoxy. I know from experience that when parts don’t go together quite as expected after epoxy is applied, things can get very messy. The puzzle joints are virtually foolproof, but it’s always wise to work any bugs out before the epoxy gets stirred.
Chesapeake Light Craft estimates the Passagemaker will take 100 hours to build. The daggerboard trunk is standard outfitting, even for the basic rowing hull, making it easy to upgrade to sailing.
CLC’s website offers weeklong classes in which many of their boats can be built in a week and taken home for outfitting and applying a finish. Without the benefit of CLC’s shop, tools, and expertise, even an accomplished do-it-yourselfer cannot assemble a Passagemaker in one week and enjoy the process. It took me 125 hours to complete a Passagemaker, and that included painting, varnish, and setting up the sloop rig. With the new puzzle joints and the pre-drilled holes for the copper-wire stitching, the time commitment could be under 100 hours.
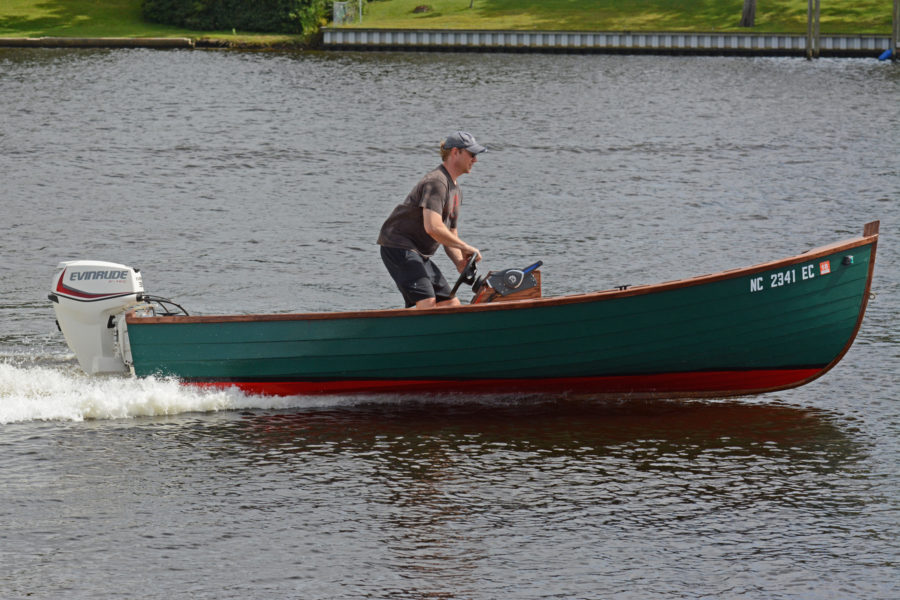
The bottom has enough rocker to keep the transom from dragging in the water, even with a much heavier load aboard.
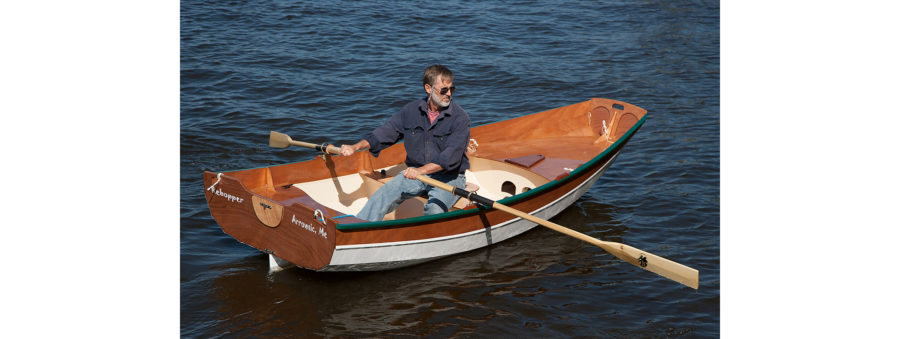
On my first few rowing and sailing outings with the Passagemaker, I was alone and without any load aboard. The high volume of the hull makes the boat sit high in the water, and the generous rocker sets the ends high; the skeg is only partially immersed, and the overhanging bow can catch the wind. In a 12-knot breeze, having some sand-filled bags in the bilge settled the boat deeper in the water, and I was better off both rowing and sailing. Leeward drift in my sloop-rigged Passagemaker was significantly reduced by putting some weight in the bottom. To be fair, the boat was designed to be filled with up to 650 lbs of cargo—passengers, groceries, dogs, or whatever—and the more you fill it up, the better it performs.
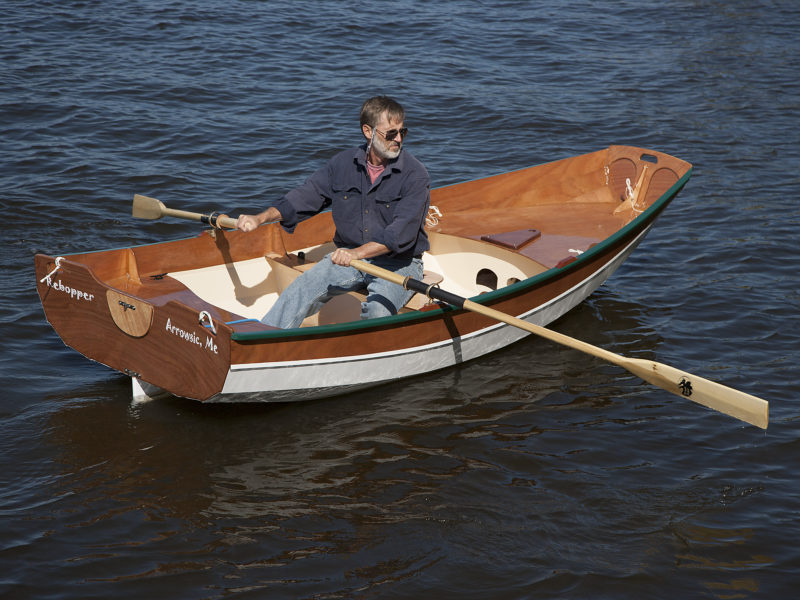
With a solo helmsman sitting in the stern sheets, the Passaagemaker will settle down by the stern. Sitting on the bottom farther forward or carrying ballast in the bow will restore proper trim.
The boat worked best with lighter people and goods well forward or aft, and the larger, heavier portion of cargo amidships. Keeping the ends light makes the boat quicker to respond to waves and lift over them. At first, when I sailed alone, I sat well aft, handy to the tiller and rudder, but this set the bow higher than it needed to be. Sitting amidships put the Passagemaker in better trim and might have led me to make a tiller extension and new leads for the jibsheets. Before making any modifications, I tried loading my sand bags at the base of the forward seat. I found I could sit comfortably aft, and the boat performed very well. And only 100 lbs of sand was needed for good sailing results on my solo outings.
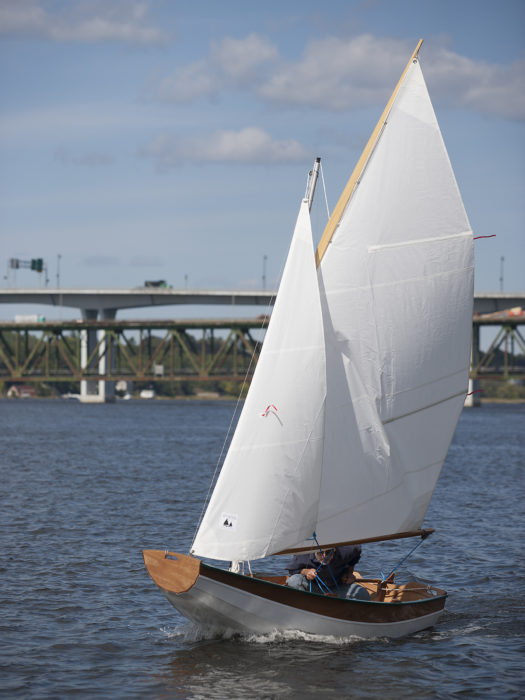
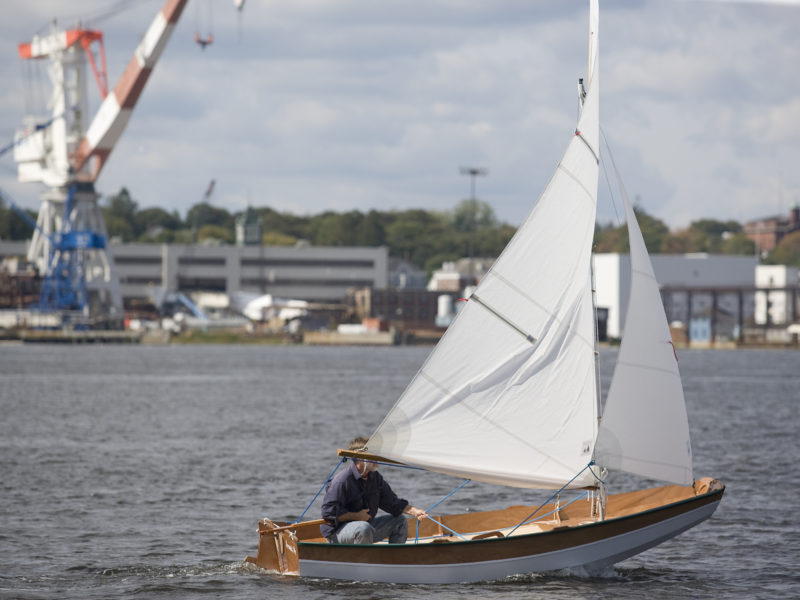
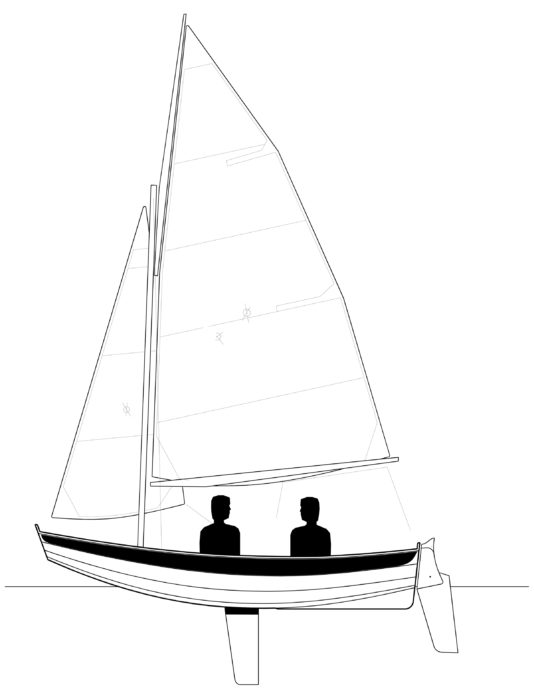
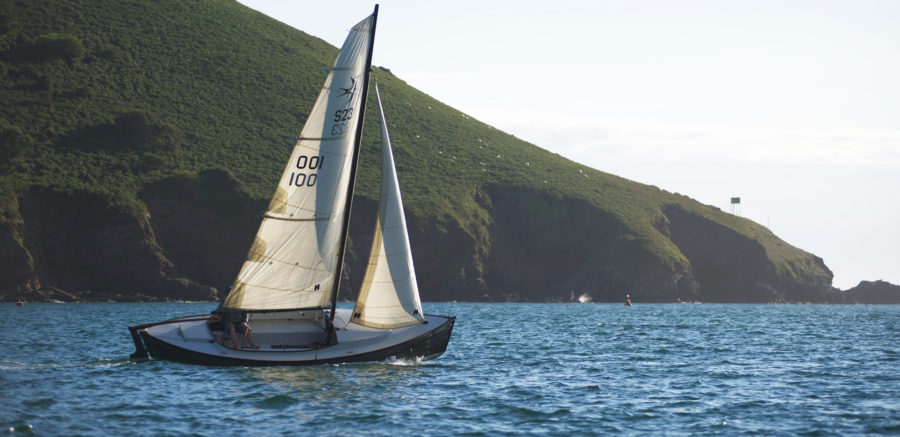
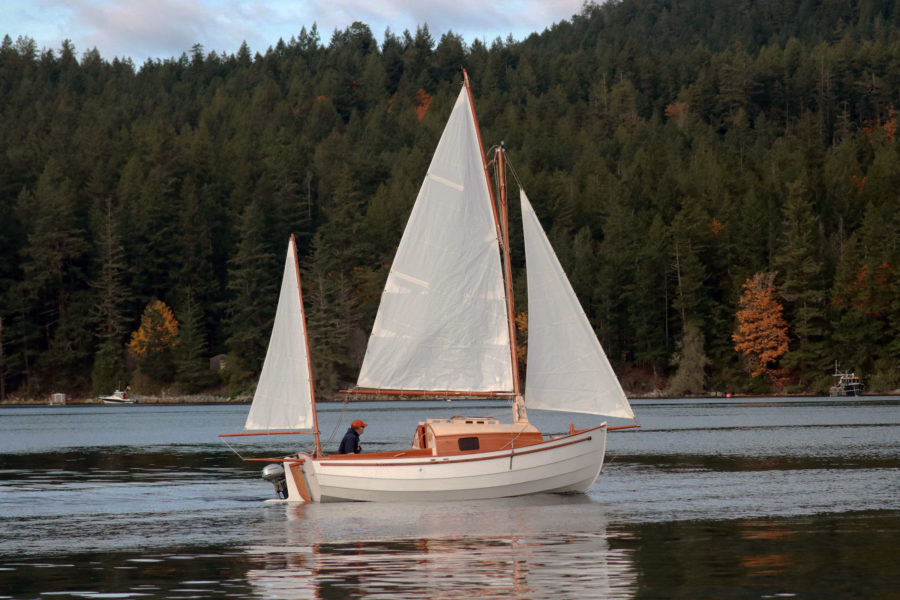
This Passagemaker carries the gunter sloop rig. The mast, gunter, and boom all fit within the hull for easy transport.
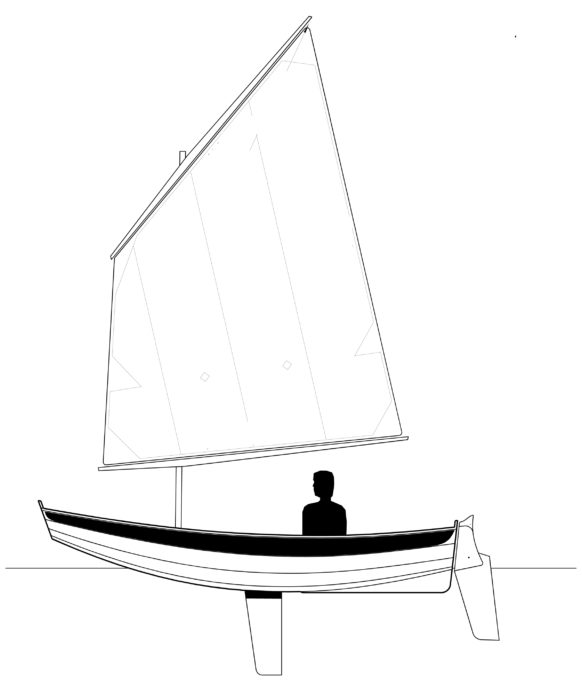
Designer Harris reports the single-sail lug rig is more popular than the two-sail sloop rig I built. I’d agree that the lug rig would make sailing simpler, but either sailing rig is well worth the investment: Sailing is the best way to enjoy the Passagemaker. The Passagemaker can carry an outboard from 2 to 4 hp. With my 3-hp motor I found it performed best when loaded, with the weight properly distributed fore and aft.
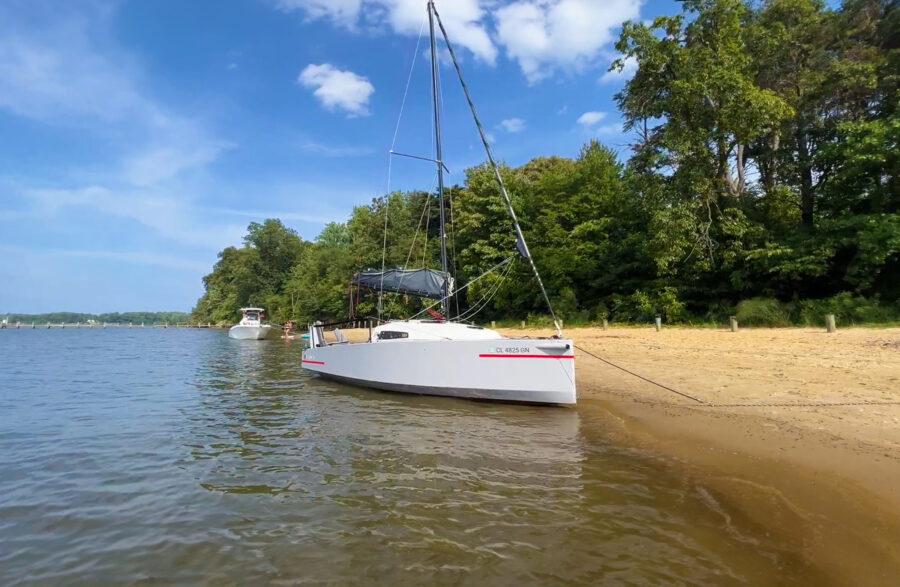
The latest version of Passagemaker is a take-apart model, one that breaks into two sections, and after the stern seat is removed and placed in the bow, the forward section nests in the stern section for very compact storage and transport.
Harris notes most Passagemakers are built for their own sake, not as a tender for a big trawler. “It’s an enormously versatile boat, and most people seem to build them for the self-esteem that a project like this brings,” he reports. I’d agree that the Passagemaker has much more to offer than mere utilitarian service as a tender.![]()
Ken Textor has been writing about, working on, restoring, building, and living on boats since 1977. He lives in Arrowsic, Maine.
Particulars
[table]
Length/11′7″
Beam/56″
Weight/90 lbs
Maximum payload/650 lbs
Draft/6″
Draft with daggerboard/30″
Sail area/78 sq ft
[/table]
Chesapeake Light Craft’s library of videos includes Passagemaker construction, rowing, and sailing. Plans, an instruction manual, and a variety of kit options, including a gunter sloop or a lug rig, are available from Chesapeake Light Craft.
Is there a boat you’d like to know more about? Have you built one that you think other Small Boats Monthly readers would enjoy? Please email us!


Join The Conversation
We welcome your comments about this article. If you’d like to include a photo or a video with your comment, please email the file or link.