The plans for Yankee Tender first appeared in 1979 in WoodenBoat Nos. 30–32 as part of a how-to-build series. When you get the six generously detailed sheets of plans from The WoodenBoat Store for this 12′4″ flat-bottomed rowing skiff, you also get reprints of those magazine articles with their numbered photos and written instructions. What a deal! If you have some heavy paper and a clean-swept floor you can get right to work on laying out the molds, as no lofting is necessary. Study the plans carefully, and you’ll learn a great deal about building a flat-bottomed lapstrake boat with wood in the traditional manner. I sure did.
 Johanna DeVries
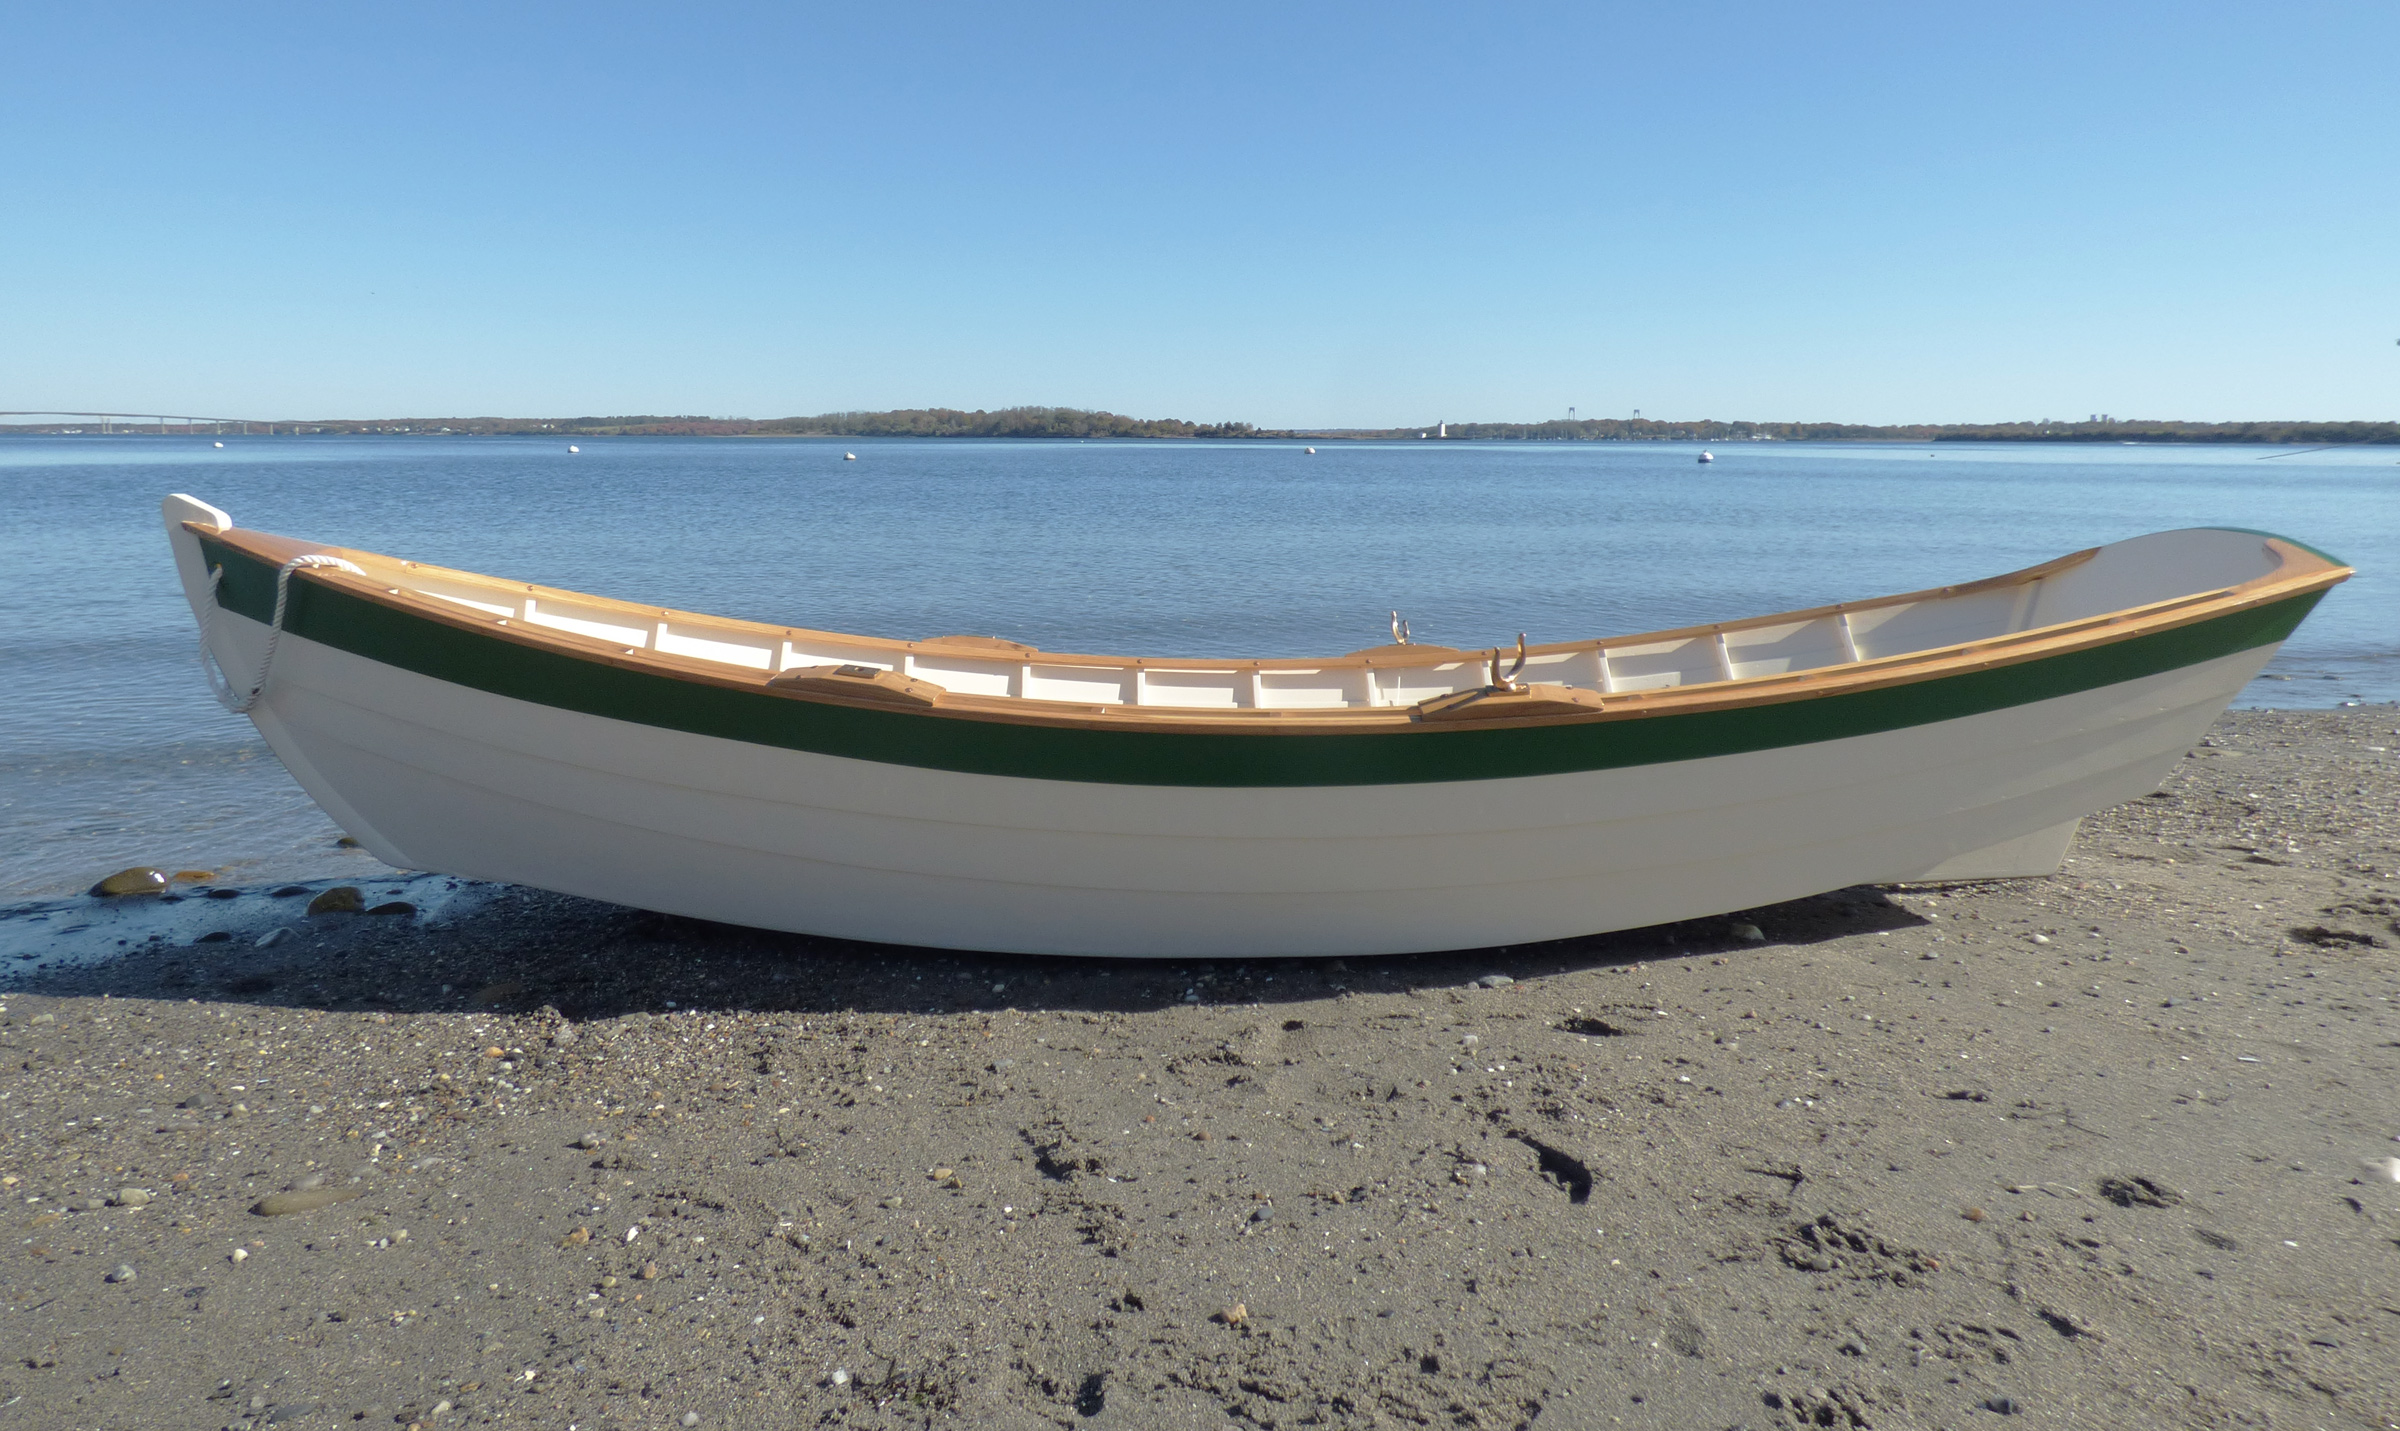
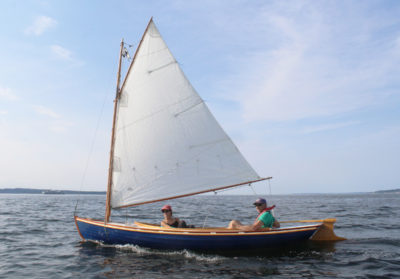
The Yankee Tender’s profile shows the strong curves of the sheer and rocker.
The tender is an elaboration on a boat designed and built by Asa Thompson in New Bedford, Massachusetts, more than 90 years ago. He started a one-man boatshop specializing in canoes during the late 1800s, and over the ensuing years adapted his methods to changes in boaters’ tastes. In 1927, he built a flat-bottomed yacht tender with canoe-like scantlings. This tender-skiff is in the Mystic Seaport Museum collection and is occasionally on public display—I got to see it two years ago at The WoodenBoat Show. For some time, I’d been contemplating building a lightweight, trailerable, traditional, flat-bottomed rowing boat with a saltwater pedigree. Three things that make this boat a standout: its lightness, both in weight and looks; its double-planked bottom; and its fish-well center seat. Seeing Asa Thompson’s skiff led me to The WoodenBoat Store’s plans.
The plans call for either white pine or northern white cedar for the transom, planking, and bottom—I built with cedar—and the remainder of the structure is white oak. The 3/8″-thick side planks are beveled at both sides of the lap to reveal a delicate edge. The sawn-oak frames are sided 5/8” and given a graceful curve; the inwale and guardrail are as fine as a canoe’s, helping bring the boat’s weight down. My boat weighs 130 lbs.
The bottom is cross-planked with two overlapping layers of 3/8″ cedar with a sheet of canvas slathered in bedding compound sandwiched in between. This construction prevents the gaps and subsequent leaks that occur when boats with single-plank bottoms dry out.
 Johanna DeVries
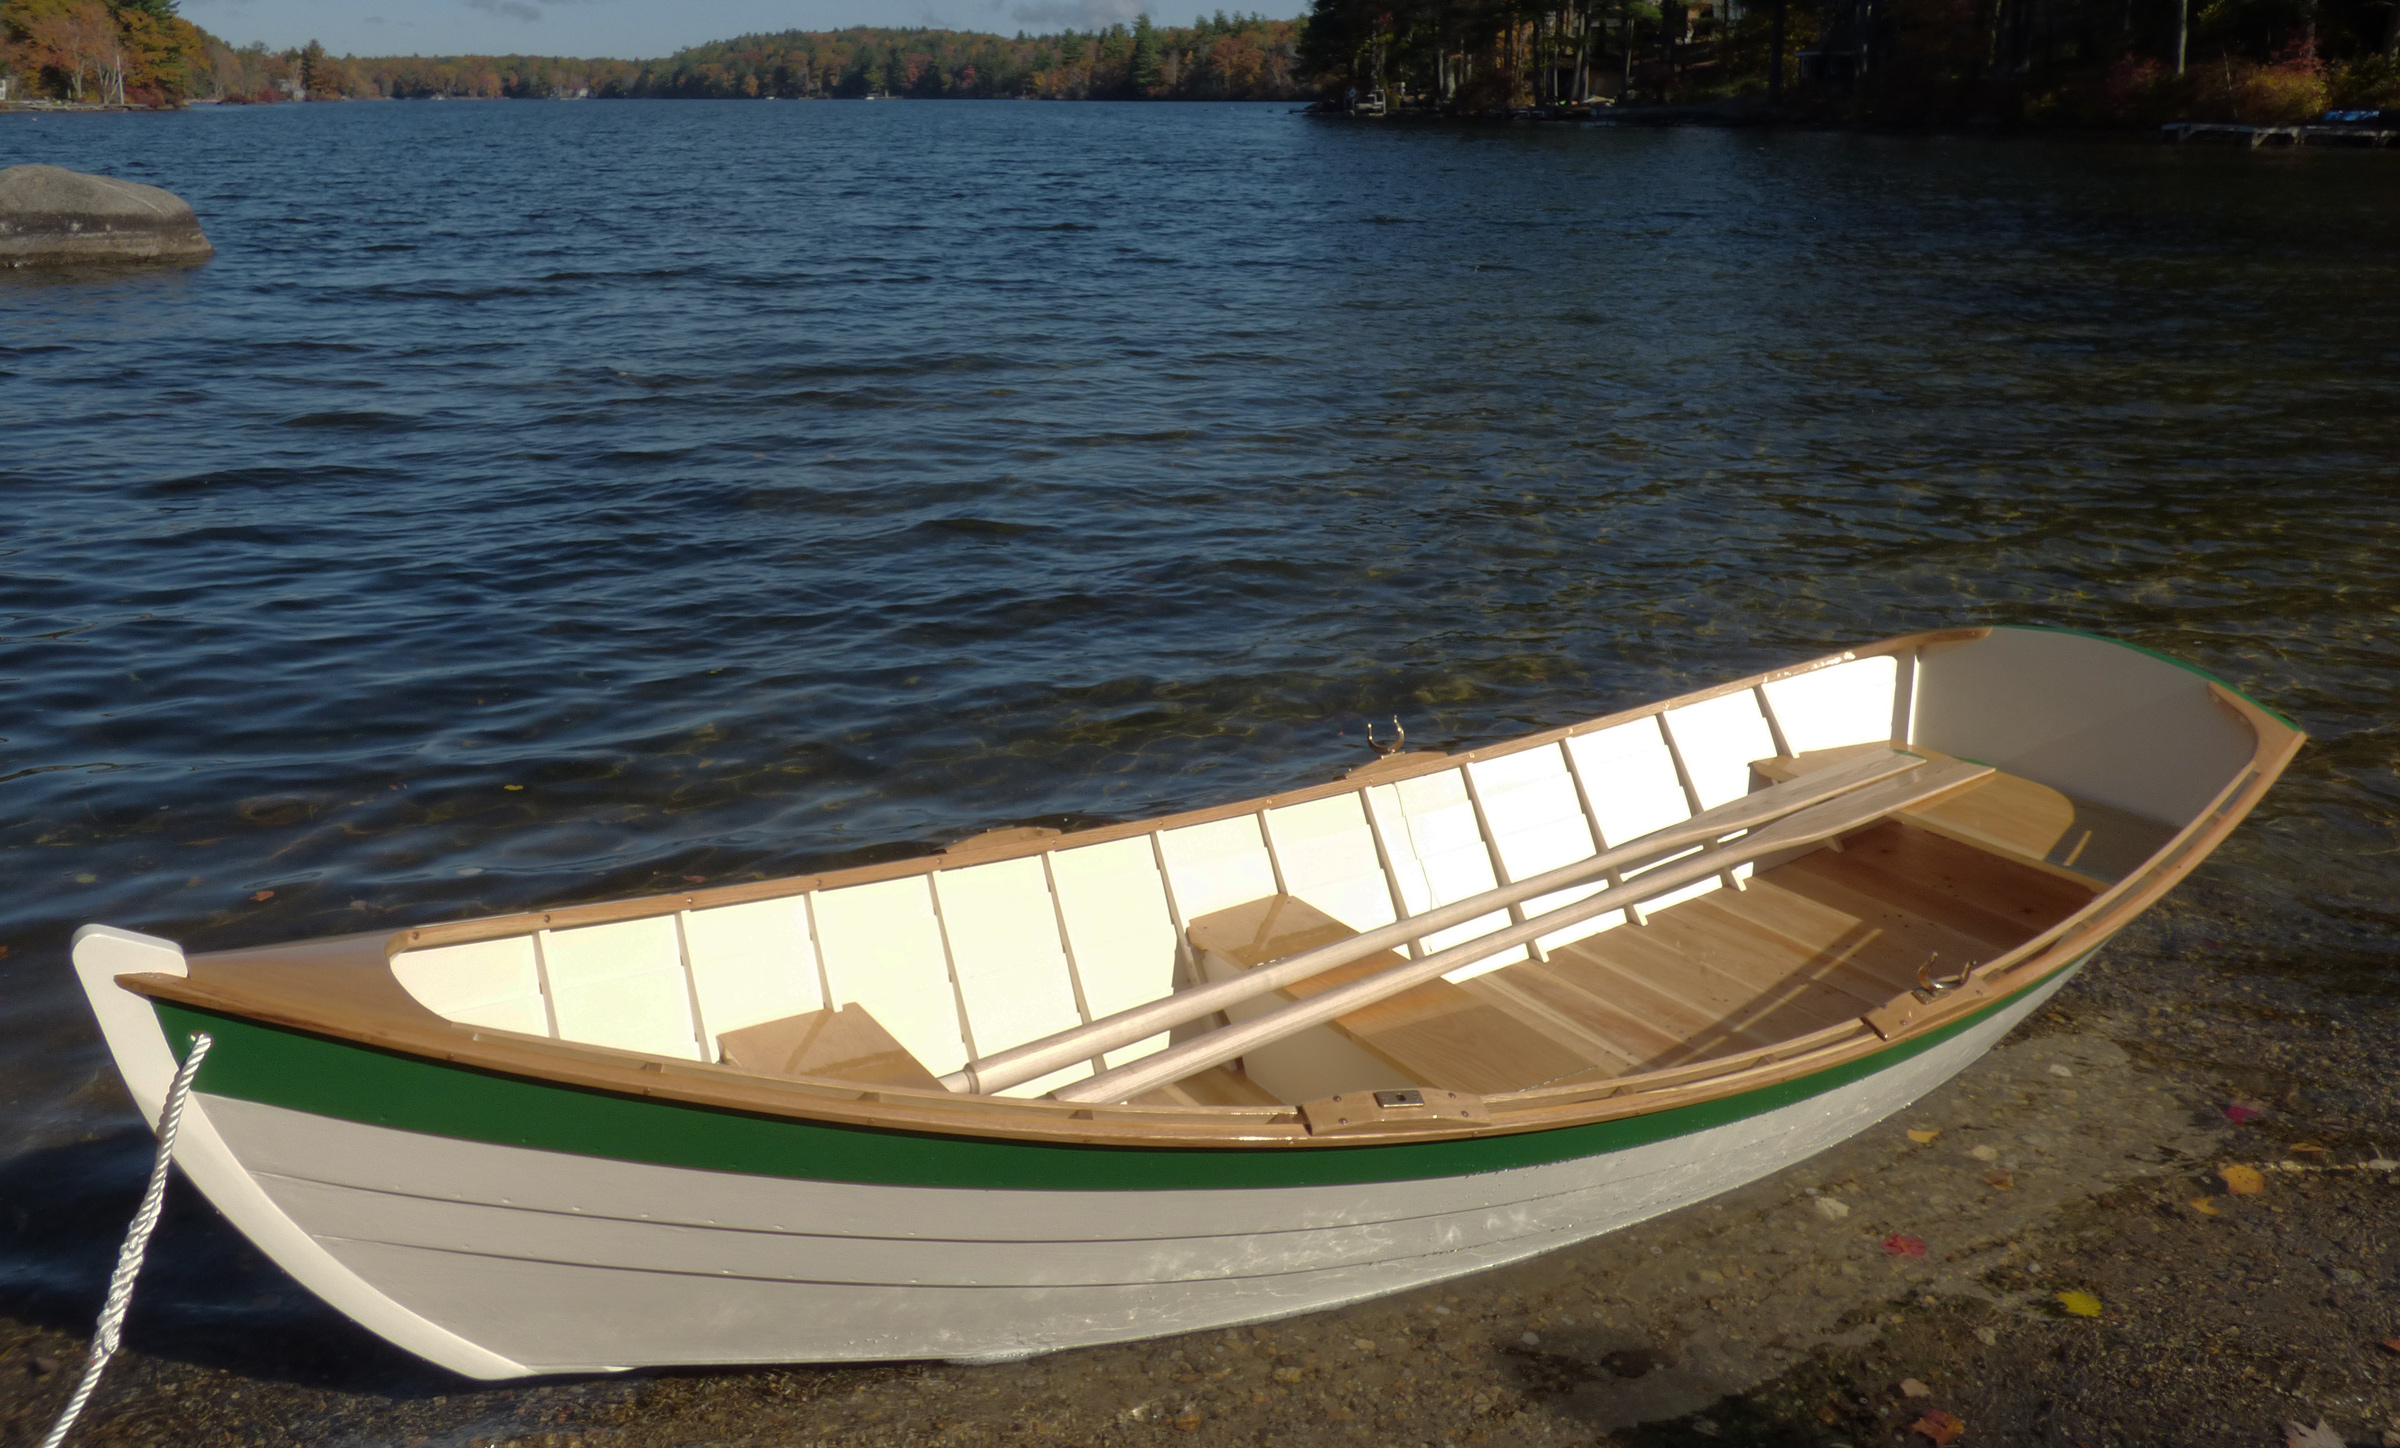
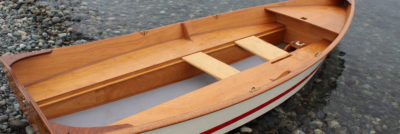
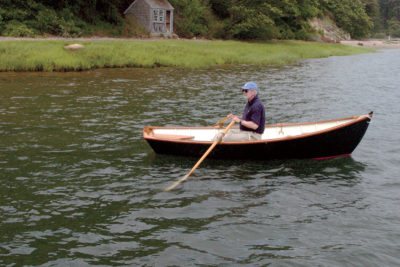
The cross-planked bottom doesn’t require framing, so it provides a clean, unobstructed surface.
The cross-planking requires no framing on the bottom and provides an uncluttered interior. The fish-well structure of the center seat makes it sturdy and stiffens up the light hull, and gives great dry storage (or live bait) options.
The Yankee Tender is much more than an excellent introduction to traditional boatbuilding. The materials and fastenings lists are detailed and complete. There are even drawings for help in setting up the simply designed strongback. You’ll learn how to bevel the laps, cut gains, scribe frames, and get a sweet, fair sweep of the sheer. And when you’re done, you’ll have an elegant skiff.
I didn’t make the A-framed building platform as shown in the plans, but set the molds up on a ladder frame I’d made for a previous boat. The transom is of 7/8″ cedar, edge-glued with splines. The inner stem is sawn from 8/4 white oak. The transom and stem bevels are shown on the plans and can be gotten out on a tablesaw. With the molds squared and plumbed and the stem and transom in place, a temporary 1×4 backbone batten is secured to stem and transom and to notches in the centers of the molds to complete the setup.
I ripped the chines’ bevels on the tablesaw. It’s recommended that the chine logs be steamed to ease twisting and bending into place. My steambox is only 6′ long, so I steamed the aft ends and clamped them into place until cool. Later in the day I steamed the forward ends and clamped them overnight before fastening.
The cedar I had for the planking was 1″ thick and live-edged. I picked through the boards looking for knotty and narrow planks that would work better for the bottom planking, saving cleaner material for the sides. After sawing straight, parallel edges and resawing to a thickness of 3/8″, I laid out the random-width boards to dry-fit the planks for the inner bottom, hand-planing edges for a good fit. As per the plans, I laid a strand of cotton wicking along the chine as each bottom board was nailed home tight.
The garboards have a width of 10-1/2″ at the stem. My bandsaw can only resaw planks up to 8-1/2″ wide, so I needed to narrow the stock before resawing it, and then edge-glue two pieces with epoxy to achieve the required width. Next, I trimmed the ends of the inner bottom boards to match the chine bevel. The plans call for a strand of cotton as caulking between garboard and stem, chines, and transom cleats, but here I applied a healthy bead of polysulfide before fastening the plank.
After trimming the garboard flush with the bottom and sanding the inner bottom planking, I dry-fit the outer bottom planks, overlapping the garboard edges and covering the seams of the inner bottom planks, noting where nails lay, then pre-drilled and temporarily screwed-in the planks. With an oscillating tool and a flush-cutting blade, I trimmed the bottom planks flush with the outer surface of the garboards. I numbered the planks, removed the screws, and stacked the planks in order.
Then came the fun part! I had purchased No. 10 cotton duck and laid it out on the smooth inner bottom, cutting it to overhang a few inches. Before starting the bedding process, I lavishly brushed the bottom planks with boiled linseed oil, allowing them to soak it in overnight. Then I thinned Interlux Boatyard Bedding Compound to a peanut-butter consistency with boiled linseed oil, spread it evenly across the inner bottom, then laid out and rolled the canvas, squeezing the bedding compound into the fabric. Next, I trowled more of the goo onto the canvas. I then replaced the pre-drilled outer bottom planks, the setting and driving the screws home. I drew the double bottom tight along the plank seams with 7/8” copper clout nails, hammered in and clenched every 5″ to 6″. All told, I used 2-1/2 quarts of bedding compound and 1 quart of linseed oil.
After the remaining three planks were hung, I flipped the hull and fitted and attached the outer stem, breasthook, quarter knees, frames, and rails. I then flipped hull back upside-down to fit and fasten the skeg and keel. Finally, right-side up again, the fish well and thwarts were installed and oarlock pads were riveted to the rails.
 Tom DeVries
The generously rockered bottom keeps the transom well clear of the water when the boat has a solo rower aboard.
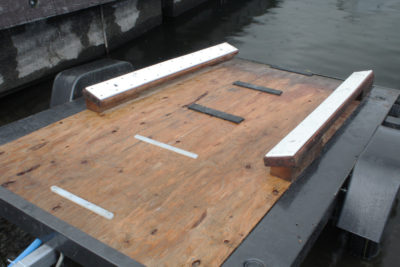
Two hours from where we live are places like Mystic, Connecticut; Bristol, Rhode Island; and Cape Ann, Massachusetts. Cape Cod isn’t too much farther. The Yankee Tender is easy to transport on a lightweight trailer. Its skeg, keel, and stem settle readily onto my trailer’s rollers and, by modifying the bunk boards just a bit, the hull rests its flat bottom for secure strapping. Two spry people can lift the light hull. For cartopping, roof racks that span 5′ are necessary to accommodate the boat’s 52” beam.
My first go at rowing Yankee Tender was on a quiet lake. It took some getting used to the angle of the 8-½′ oars I had made. The center seat height of 9-3/4″ is very comfortable, but my hand position seemed to be higher toward my chest than I’m accustomed to. The boats I’m more familiar with have a lower freeboard. It felt a bit like driving a Ford after years in a Toyota—the controls weren’t all in the same place. The Yankee Tender’s plans offer no recommendation for oar length, but the plan for Asa Thompson’s original 11′3″ skiff suggests 6′6″ oars. I felt these were too stubby. With practice, I found a quicker cadence, 8′ oars, and a shorter stroke worked well, especially with any headwind.
The boat is as zippy as a sports car in its maneuverability. With one occupant, it rides high on the water, with no drag at the transom. The skeg keeps you on course, yet the wicked rocker allows quick spins. The tender’s width and flared topsides allow you to scooch over on the center seat to a rail so you can open one of the hinged fish-well covers without making the hull unsteady. The boat moves along with ease; it’s not a flier but it offers a safe, dry, seaworthy ride.
 Tom DeVries
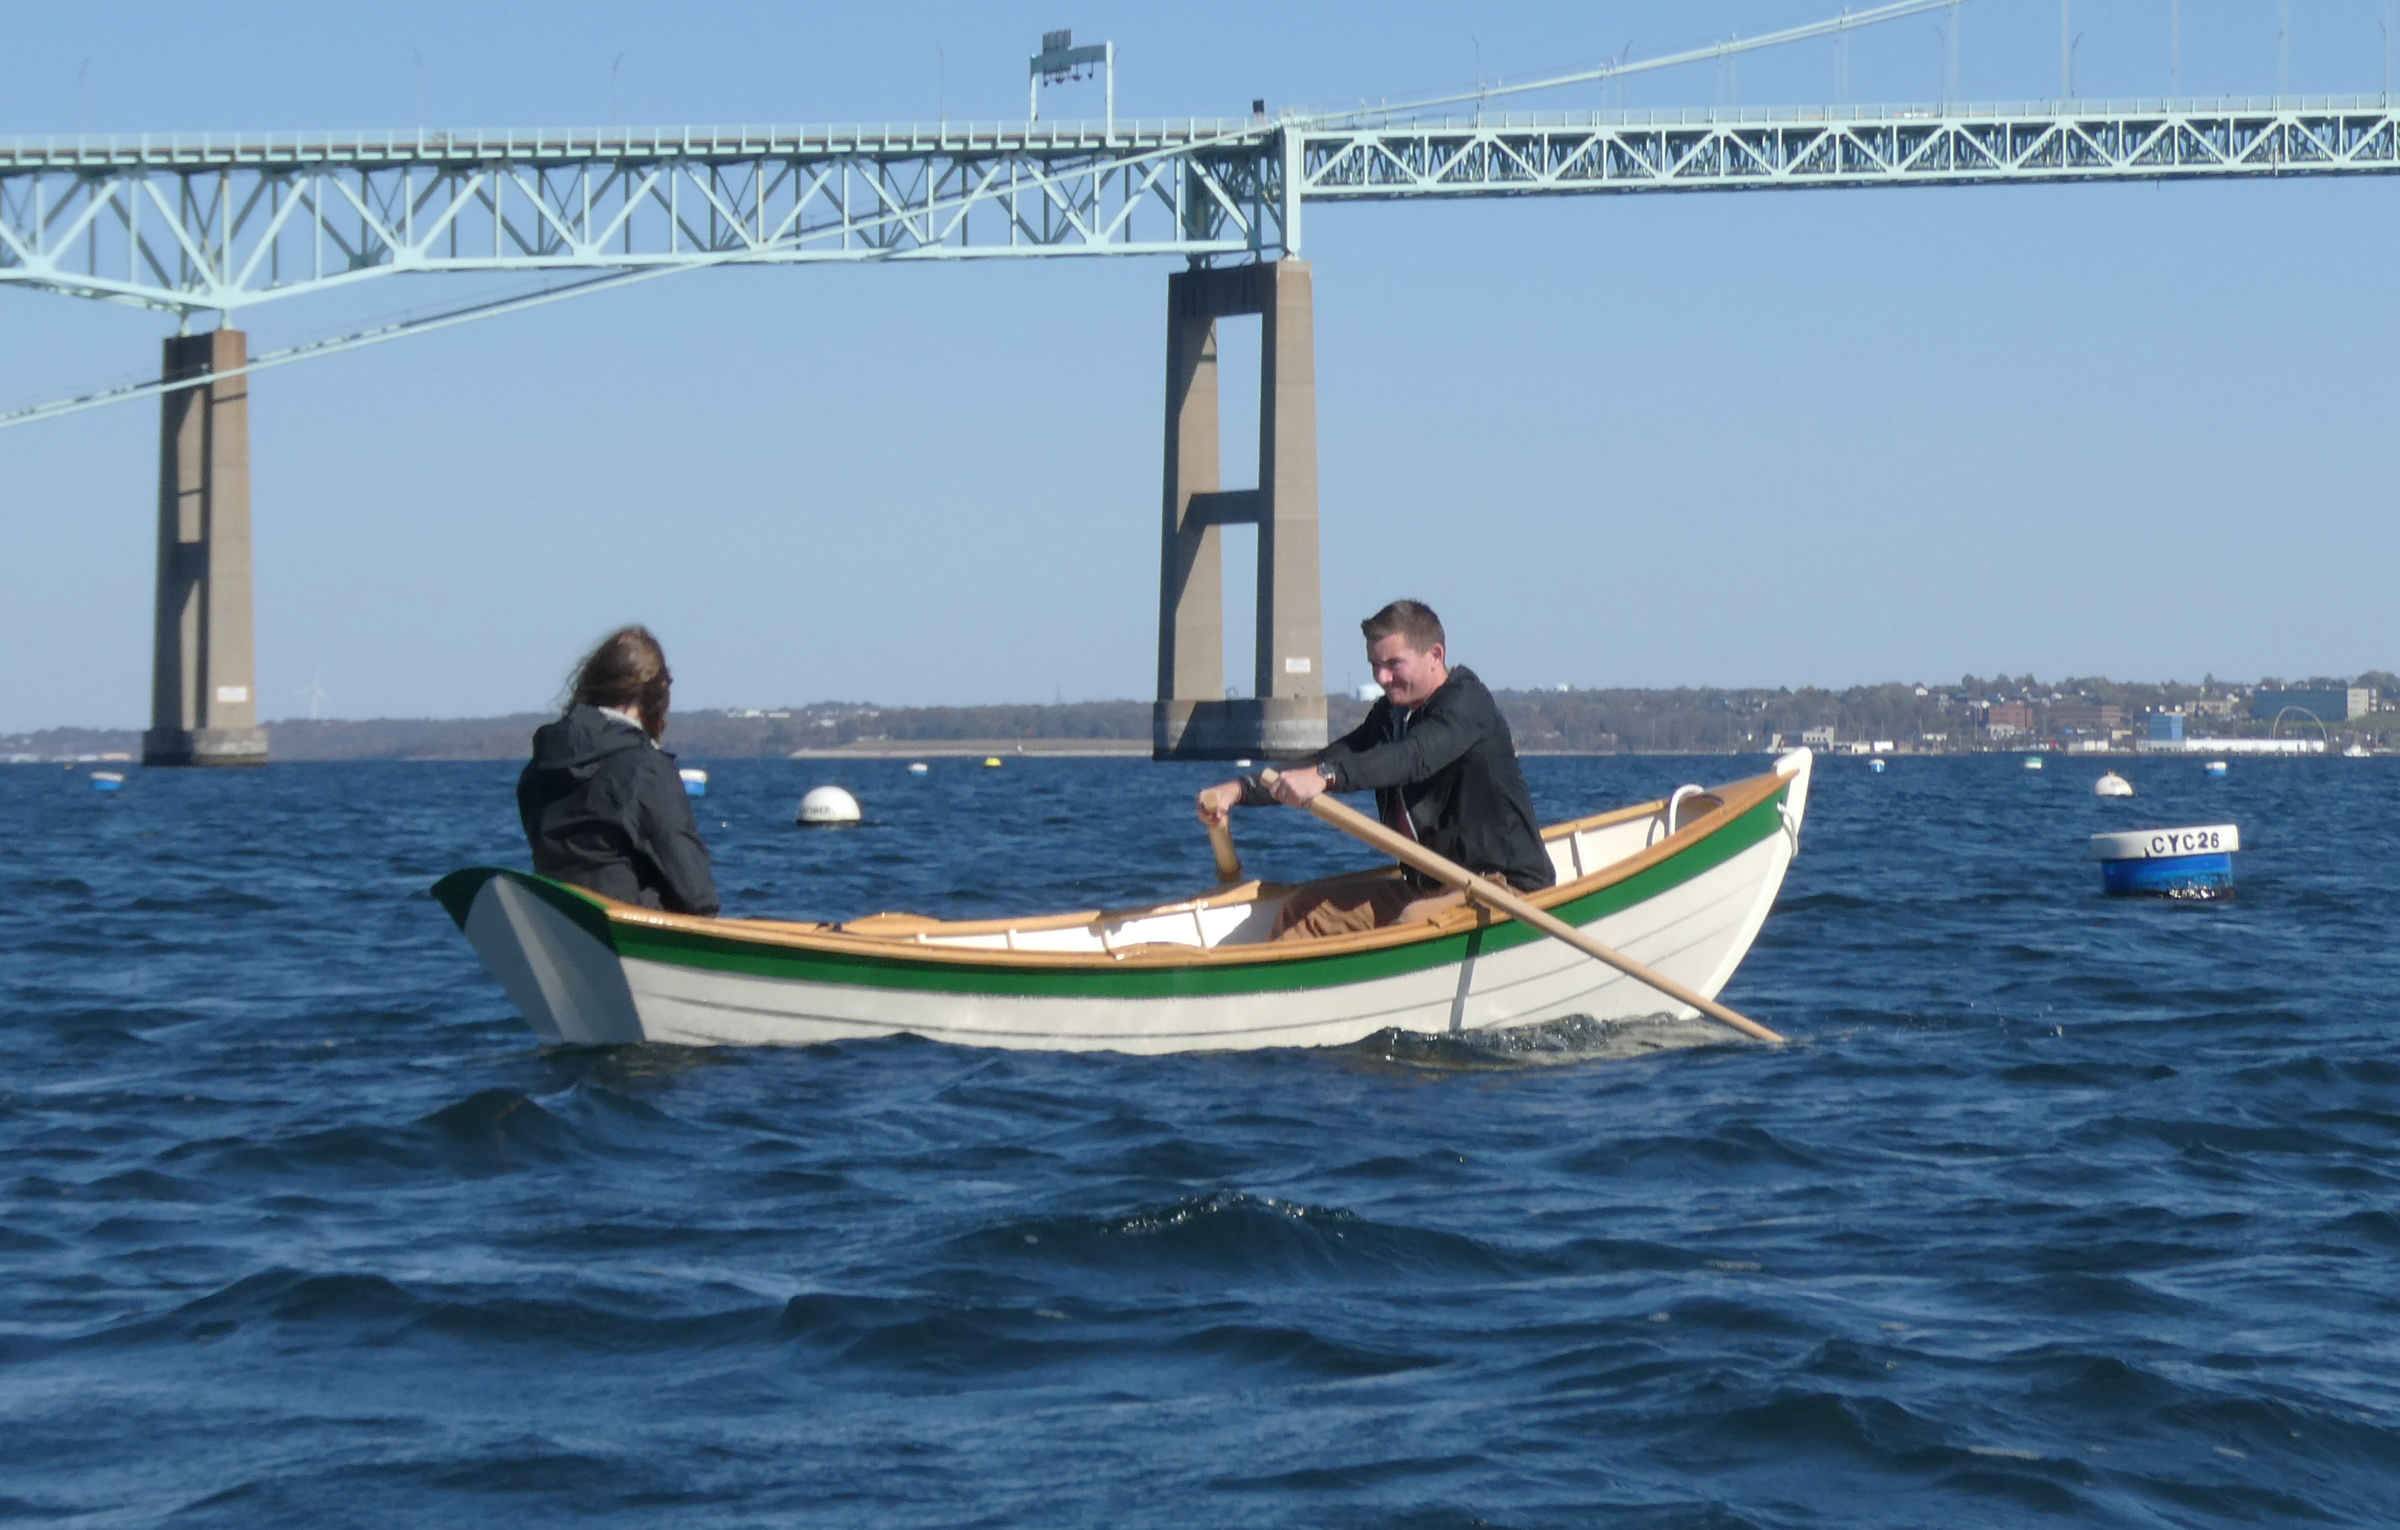
The tender has two rowing stations, but it is not intended for tandem rowing. The forward station is used for rowing with a passenger.
With two adults on board, the rower occupies the forward thwart and the passenger sits in the stern with the angled transom as a comfortable backrest. Proper weight distribution is important to keep an even keel. The tender carries its load well with its fullness forward and ample beam. Settled into the water with the weight of two aboard, the boat has added stability, and is still lively and quick on a turn. The tucked-up transom makes it easy to back into shore and disembark dry-footed.
I had two goals in mind when building the Yankee Tender. First, I wanted to gain some more knowledge of traditional wooden boat building. If you’re like me and relish the smells of sawn oak and cedar accompanied by a heady waft of linseed oil or the fishy smell of bedding compound in your shop, building this 40-year-old design might be for you. Second, I wanted to have a light boat for safe seaside exploration. This is not a bull of a skiff, but a jaunty craft that will serve well in our saltwater adventures. Asa Thompson’s original tender has been around for more than 90 years, and there should be many more generations enjoying this salty skiff.![]()
Tom DeVries studied fine woodworking with James Krenov in the early 1990s. He and wife Tina live in central Massachusetts surrounded by white-pine and red-oak trees. Tom drives north for his white cedar planking stock and wishes his lumberyard still carried spruce 2x6s.
Yankee Tender Particulars
[table]
Length/12′4″
Beam/4′4″
Depth amidships/15.25″
[/table]
Plans for the Yankee Tender are available from The Wooden Boat Store, printed or downloaded PDF (digital), for $50.
Is there a boat you’d like to know more about? Have you built one that you think other Small Boats Magazine readers would enjoy? Please email us!


I’m now building a Yankee Tender myself. I like the lines and traditional look as Tom does. It is quite straightforward in terms of woodworking skill level. I did deviate from the traditional design by using a sheet of 3/8” marine plywood for the outer bottom instead of crossplanking. Otherwise I stuck with the plan described in WoodenBoat.
Though the double-layer bottom is no doubt more time-consuming and probably costlier than plywood, I enjoy the pace and scale of the “old-fashioned” way. I also like the look of the oil finished cedar in the bottom of my boat.
Another option I considered for the Yankee Tender bottom was the method Harry Bryant uses on his dory skiff Daisy. He uses 3/8″ cedar cross-planked for the inner bottom and epoxies an outer layer fore and aft—in effect a 2-ply cedar plywood. The glue-up would work best with two people and I’m generally alone in my shop.
I’m curious how you treated the end grain of the plywood at the stern, as the bottom overhangs the transom?
I’ve liked this boat from the first time I saw it decades ago. It’s simple without being plain. Being more into shapes than woodworking, if I were building a similar craft, I would probably substitute plywood for all the solid wood planking. Then I’d cover the hull with epoxy-saturated fiberglass. I would definitely try to preserve most of its curves, especially in profile. The builder did a fine job of it but, if it were mine, I’d be a little too afraid to treat it like a simple flat-bottomed skiff. It’s nice to to see this design again.
I beg pardon of Harry Bryan for my erroneous “t”. I suspect there’s a watery association with Wooden Boat’s Associate Editor Anne Bryant in my mind as my thoughts drift Down East. Mr. Bryan’s double planking method is described in WoodenBoat 126.
Hi. I built an original Asa Thompson skiff for a client many years ago; it was one of the best short, flat-bottom skiffs I have rowed. I used marine ply for the bottom, 3/8″ I think, and 1/4″ for the garboards. Sheathed this unit with epoxy and cloth, then used cedar for the top 2 lapstrake planks. Cherry transom, oak framing and rails—looked pretty good. The second owner brought it to the Wellfleet Rowing Rendezvous a couple of years ago, still rowed and looked great.
My plan to seal end grain anywhere it occurs involves liberal application of unthickened epoxy.
This design is truly eye candy at its best. We are considering building one at the shop to replace our Nutshell on the pond behind our buildings. Ours will be an ultralight version for ease of manhandling at the dock. As always, a very good article from Small Boats Magazine.
Late to this conversation. I built a Yankee tender about 30 years ago now using white oak with red cedar planking. My only deviation from the original plans was that I didn’t like the seating plan and went with a stern seat, rowing bench, and bow seat. She has served us well to get out to our mooring and just pleasant rowing. She rows and tracks very well but is a bit “tender.”
Having done the double cross planking with light canvas in between using lots of polysulfide. I would not do that bottom again. It was dry for at least ten years but when it started leaking there is no fixing that complicated stepped joint. At that point I had to pull the whole bottom off including the keel structure. I replaced this with 1/2″ plywood, first routing a small groove into which I set up essentially a polysulfide gasket and then bedded the entire thing in polysulfide using silicone-bronze screws (hate removing those ring nails!). This fix remains tight after nearly 20 years. This year, my son had to prep and launch her (I’ve been waiting for this day). It looks like the keel may need replacing next year. There is also some softening of the bottom at bow and stern. I attribute this to the fact that the boat sits on a dock with those ends exposed due to the extreme rocker of the bottom. She has served us well.
I’m currently building a Yankee Tender and am planning on using the technique described in the article for the bottom. How much bedding compound and linseed oil should I expect to need?
I am interested in building this boat. Some practical questions: roughy how much does it cost to build and equip? I have a small wood working shop that has a double door exit and wonder how much the opening needs to be to remove it?
I purchased these plans because I liked the lines and clean woodwork. I build model boats and am wanting to get away from store-bought kits and build directly from plans. This boat is a perfect fit for me to do that. Im thinking a 1:12 scale model in my future.
Like you, I prefer to make my models from actual boat plans rather than from kits. I usually work to a simple scale, such as 1″ equals 1′. My most challenging one was the 9′ lapstrake pram dinghy from Chapelle’s Boatbuilding. Also modeled a Ted Brewer 22′ plywood ketch, a 16′ round-sided dory from John Gardner, a Bolger “Diablo” outboard utility boat, an Atkin “Precious”–7′ skiff that is still on the building form–and LF Herreshoff’s “H-28,“ which I whittled out of solid wood, at my desk, instead of studying during a semester when my grades suffered. Reportedly, that ketch was a favorite of GIs returning home from WWII.
Models like this save a lot of time (days instead of months or years) and material cost, while giving one a feeling of how the actual boat might be built. Also makes toying with various modifications or furniture arrangements easy.
Bending the tiny white-ash frames for the round-bilged pram taught me something interesting about bending wood. The tiny frames cooled almost instantly after being pulled out of the tea kettle. So I tried bending them around the hot stove pipe I was standing next to, and stumbled upon the concept of dry-heat bending (which I eventually wrote an article about for Woodenboat magazine–well over 30 years ago now).