One of the first things that my father-in-law taught me was how to make the end of a line shipshape by applying a whipping. The method that he taught me is known as the “common whipping,” multiple turns of whipping twine with its ends pulled underneath the turns. The common whipping is quick and easy but prone to slipping off the end of the line and will come completely apart if any part of it is cut or chafed. Two other options—the Admiralty whipping and the West Country whipping—are more secure, nearly as easy to execute, and don’t require a needle.
 SBM
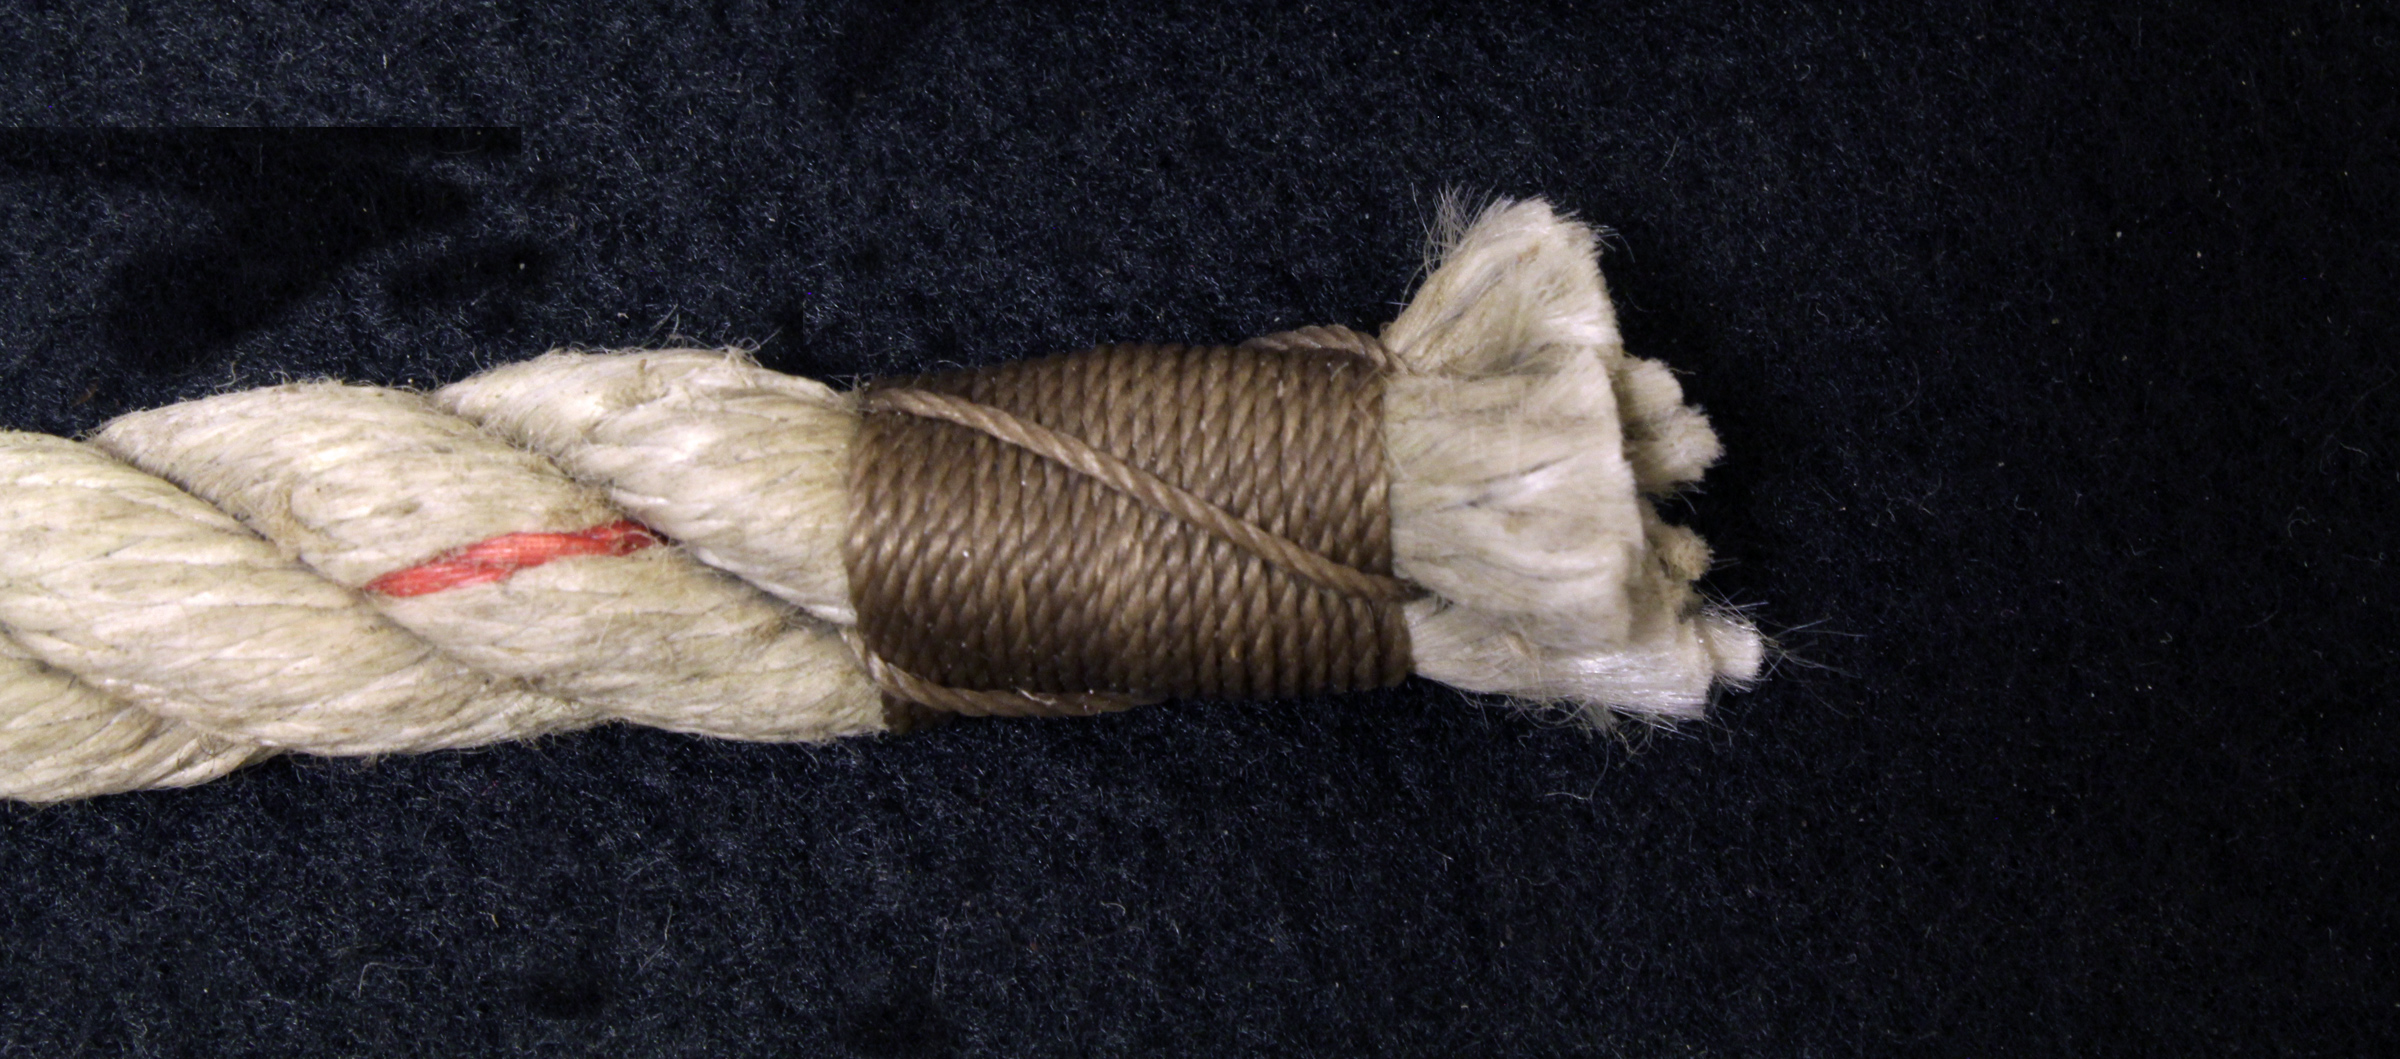
SBMThe Admiralty whipping looks like a sailmaker’s whipping, but it is applied without a needle.
The Admiralty whipping is described in The Ashley Book of Knots and the British Admiralty Manual of Seamanship as a good way to finish three-strand line and looks very much like the sailmaker’s whipping, also known as the palm-and-needle whipping, but it doesn’t require the palm or needle. Start the Admiralty whipping by tying the end of the line with a short length of whipping twine to keep the strand ends from untwisting and fraying while you work. Waxed polyester twine holds knots and stays in place best.
Normally a whipping covers a length of line that’s one-and-a-half times the line’s diameter. A 3′ length of twine is enough to whip a line up to a 1/2″ diameter. Spread the strands apart about 1-1/2” back from the line end by inserting a marlinespike or twisting the line against the lay; pull 6″ of whipping twine under a strand to become the standing end. The working end of the twine is taken over and back under the next strand up from the first strand, forming a small loop on either side of the first strand. This twine loop must be about 2” in length, which is long enough to slide over the end of the strand it crosses. At this point the working end is wrapped tightly around all three rope strands, starting at the base of the loop and working toward the end of the line. Once the turns are complete, the short length of twine holding the ends of the strands can be untied and discarded. The loop of twine, made at the start of the whipping, is pulled across the turns and put over the end of the strand that it straddles, then the standing end of the twine is pulled to tighten the loop around its strand. The standing end of the twine is then run alongside its strand, across the turns, and it is tied off to the working end of the twine with a square knot. The square knot is buried between the strands at the end of the line, and the end can be trimmed neatly with a knife.
 SBM
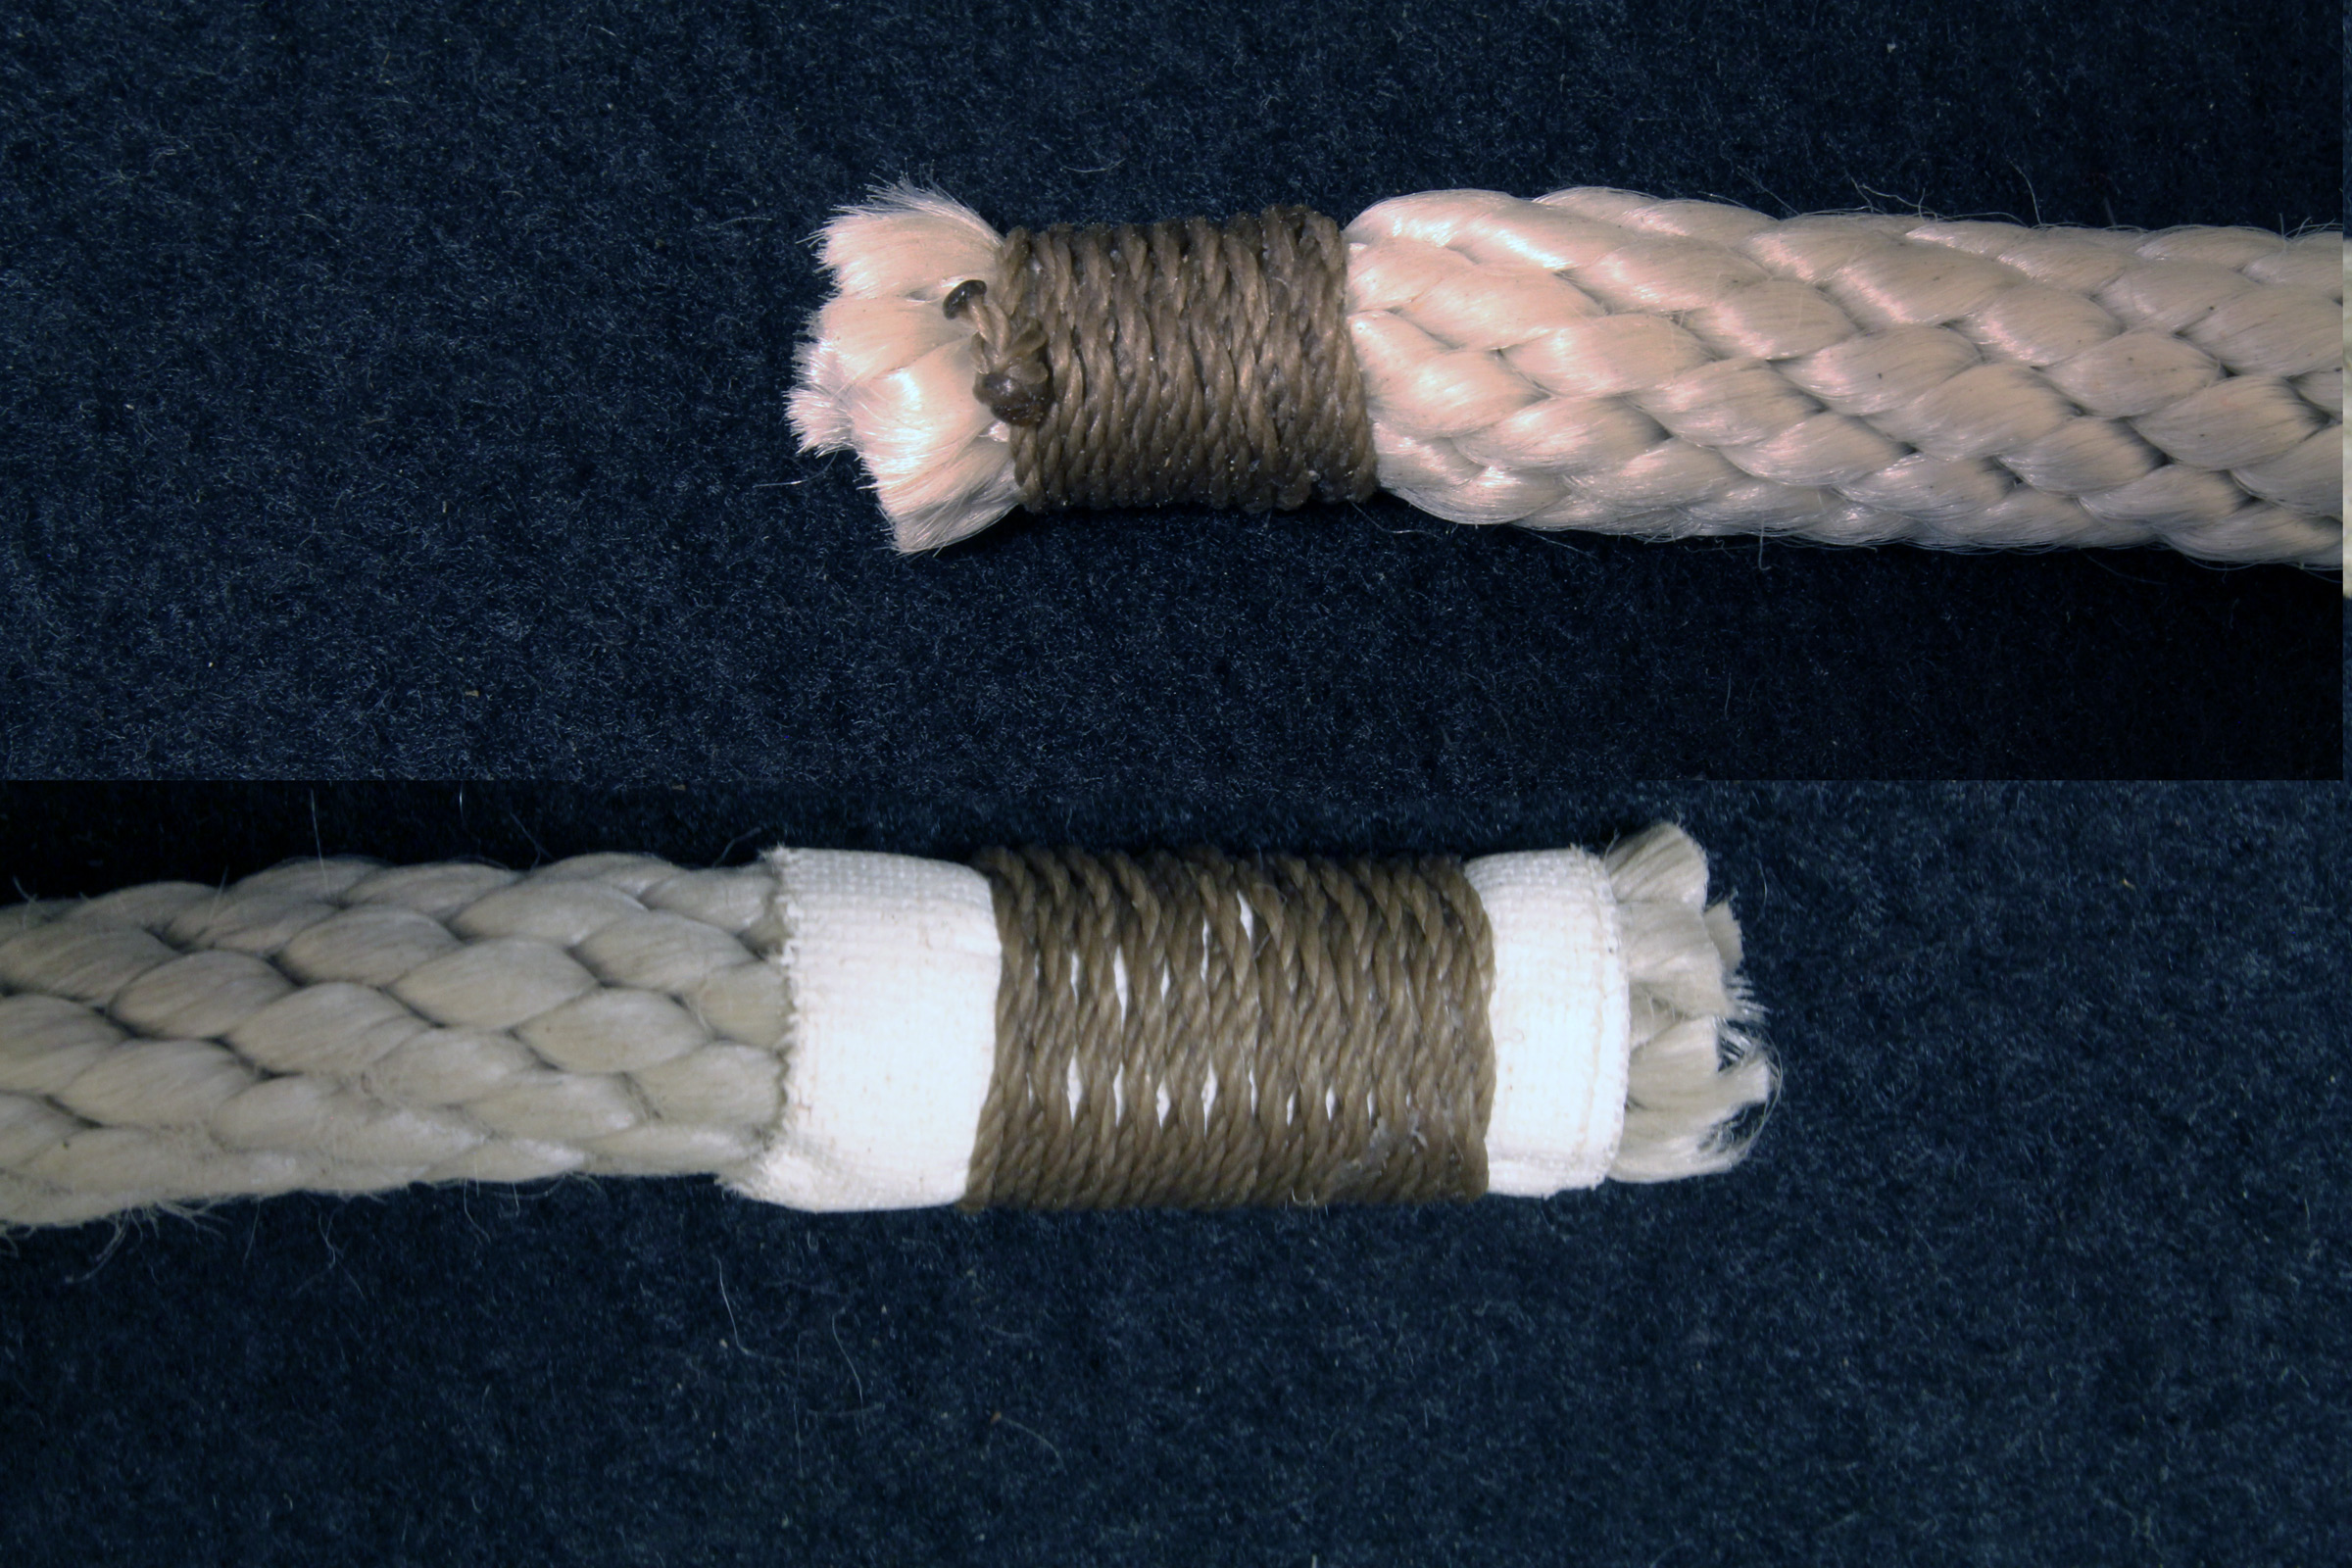
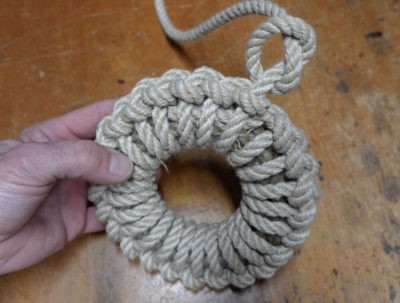
SBMThe West Country whipping can be applied on laid or braided line. The gaff tape wrap underneath it is optional.
The West Country whipping is easy to tie and is both functional and decorative. It can be tied without a needle and palm, and its multiple knots prevent a quick unraveling. The knots can be retied if they come loose. The West Country can also be tied with cord to wrap tillers and handholds to provide a secure grip.
When we tie the West Country whipping, we tape the last inch of the line with two wraps of cloth gaff tape. The Ashley Book of Knots, incidentally, identifies this taping on the end of a line as a “linesman’s whipping” and notes that it starts with the end of the tape getting tucked in between strands of a laid rope. For whipping a 3/8″ line, I measure out about 3′ of waxed twine. The whipping can be started at the end of the line or worked out to the end from about an inch back. For laid line we work from the end. We draw the middle of the twine around the line and start tying half knots, the beginning of a square knot, first on one side, then on the opposite side, going back and forth for about 3/4″ of the line. The whipping is finished with a square knot; excess line is trimmed and the knot can be buried in the strands.
When we put whippings on synthetic line, we’ll often pass the freshly cut end by a flame to fuse the strands’ fibers. We do this with a light touch to avoid melting the material. A liquefied blob of synthetic material hardens with a sharp edge at its perimeter, which can cut skin if it slips through your hands.
Nicely whipped lines make our boats shipshape, and we find doing the whippings is very relaxing. Pull up a chair and try your hand at it.![]()
Kent and Audrey have whipped lines for over 50 small boats, their restoration blog can be found at www.smallboatrestoration.blogspot.com.
You can share your tips and tricks of the trade with other Small Boats Magazine readers by sending us an email.


Both methods seem verrrry slow. I can’t imagine spending that much time fiddling with knots when you can run a needle through it. As for the length of the whip- I see no reason to go past a line diameter. It looks better when it’s shorter. When it comes time to trim the bitter end, I’d never saw through it with scissors. Simply place the line on a wooden block, poise a knife with a strong spine over the line, and give a swift whack with a mallet. It leaves a perfect cut with a single blow.
While they might take longer, I do like the security and the artistry of these two alternatives to the common whip I have been using for 45 years. I’m looking forward to spending some quality time with my line ends.