My decision to build a cedar-strip canoe came about when a close friend loaned me Gil Gilpatrick’s Building a Strip Canoe. He thought it would be a nice wintertime project for me since I had recently retired. After a few reads of the book, my wife and I decided on the 16′ Laker design. It’s been many years since we have done any serious canoeing and now, with grandchildren, we thought having a nice stable all-around canoe would be best.
We purchased the strips, gunwales, decks, etc. from Newfound Woodworks, a Bristol, New Hampshire, company that specializes in strip-building products. We came home with all the material needed for our design—a blend of western red cedar, eastern white cedar, and some accent strips in Alaska pine. The strips were all bead-and-coved and uniform in width and thickness, something we could not have accomplished if we had tried to rip and mill the strips. We also chose to purchase pre-caned seats and a pre-shaped yoke.
I deviated from the Gilpatrick design by selecting ash inner and outer stems instead of gluing the cedar strips together and shaping them at the stems. This decision was made primarily because I preferred the aesthetics of the stem guards. In his book, Gilpatrick states that, based on his experience, the stem guards do not provide any additional protection and they add weight, merely ounces, but something he is keenly aware of.
Before starting our build, we took the templates provided in the book to a print shop to mirror the half template and scale them to full size. Since we went with stem guards, we had to trim 3⁄4″ off the stem forms to keep to the design length.
 Photographs courtesy of Tim Cormier
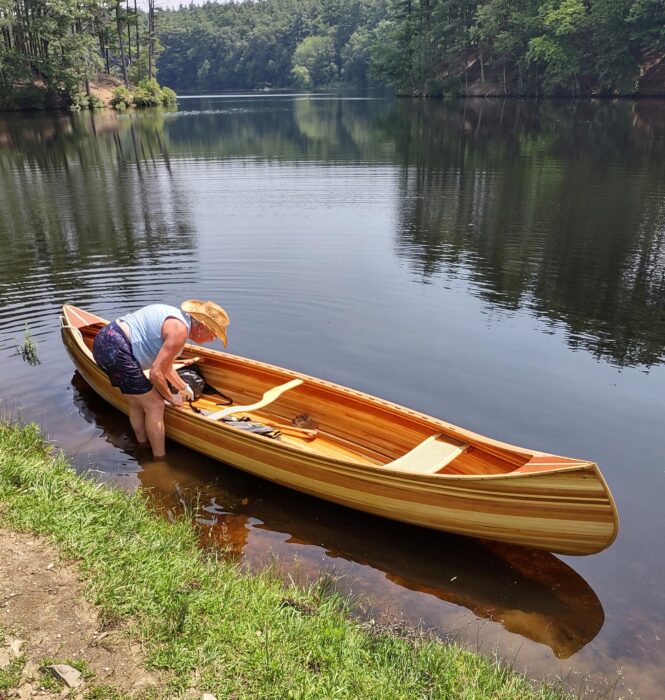
Thanks to the canoe’s flat bottom loading and boarding in shallow waters is straightforward.
Stripping the canoe and seeing it take shape proved to be an enjoyable process. My wife participated quite a bit and having that extra set of hands greatly helped. I tried using an adjustable air-powered stapler, but it was a mistake. I could not get the settings correct to keep the staple head raised above the strips. The T50 hand stapler suggested by Gilpatrick worked best.
Fairing the outer hull took more time than expected. The more you look and feel, the more sanding and fairing you want to do. I purchased a spokeshave and once I got the settings adjusted it was a fun tool to use. Keeping the blade well-honed was essential.
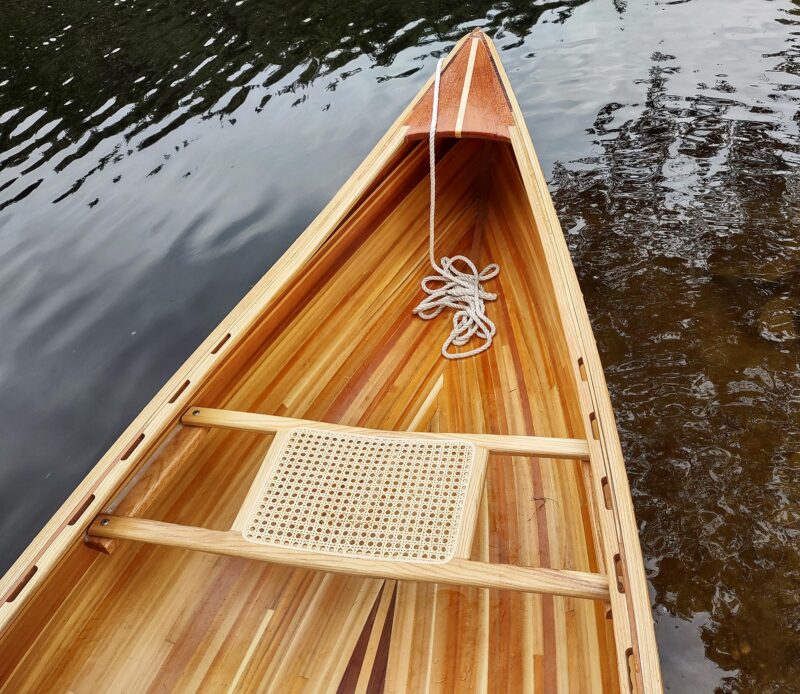
Purchasing pre-made caned seats from Newfound Woodworks saved a lot of time. All the Cormiers had to do was trim and install.
Fiberglassing was a new experience for us. The outer hull was easier to ’glass than the inner, and both sides required some patience toward the stems. After we decided where to make cuts for the cloth to fit together, the edges never seemed to lay wet the same way. I’ve read online forums where other canoe builders have ’glassed the inner hull in sections with better success.
The installation of the gunwales was also a challenge. The double curves toward the stems needed a lot of coaxing. After giving it some thought, I built a steamer out of a 4′ piece of galvanized dryer vent and a bending form to shape the gunwale. Once the shape was set, the gunwale was much easier to install. The Gilpatrick book showed solid wood gunwales with 3⁄4″ × 3⁄4″ outwales and 3⁄8″ × 3⁄4″ inwales. The inwales we purchased were milled with router-cut openings to replicate a spacered gunwale, allowing for quick and easy drainage of water from the canoe when ashore by turning it on its side.
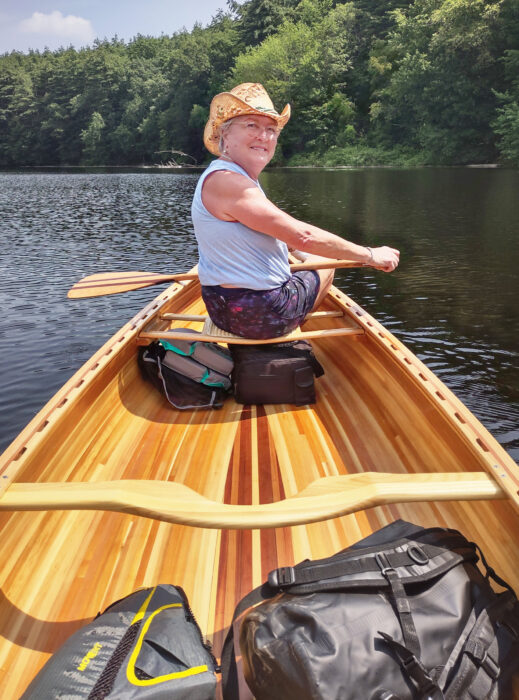
Like the cane seats, the yolk was pre-made. The inwales have routered-out spaces along their entire length, which lends a traditional look, reduces weight, and allows for quick and easy water drainage when the canoe is tipped on its side on shore.
All that was required for the pre-made seats and yoke was to trim and fit them into the canoe. The book provides detailed instructions for making the seat frames and devotes 12 pages to caning them. I did not feel confident enough to drill all the holes in the frame with a handheld drill to cane the seats, but if I get a drill press, as Gilbert recommends for the process, I may attempt it on a new set of seats.
The build required about 270 hours over six months to complete. The canoe came in at 72 lbs, a little above the 65-lb estimate in the book.
I built a support rack for the back of my pickup truck and cushioned the black pipe crosspiece with a section of pool noodle. Sliding the canoe onto the rack and back off is easily accomplished singlehanded. Two short lengths of pool noodle, split to wrap around the gunwale, cushion the forward end of the canoe on the truck-cab’s roof.
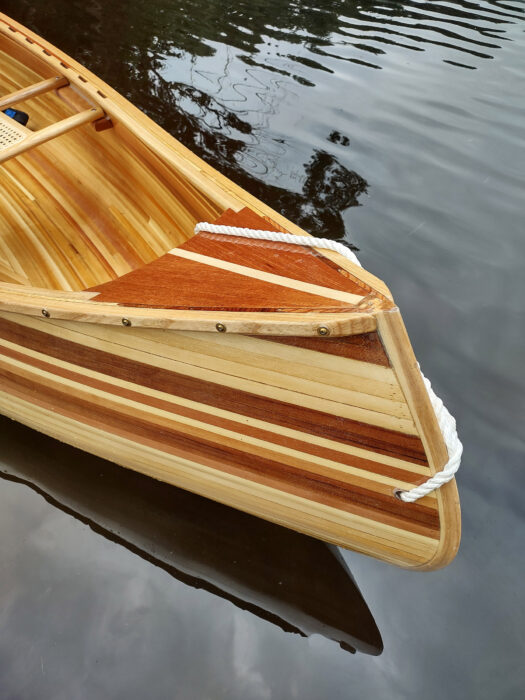
In the stems, Tim added ash inner and outer stem guards. To maintain the canoe’s designed length, he trimmed ¾″ off the stem forms. While Gilpatrick advises against the stem guards because of the extra weight they bring to the canoe, Tim liked their appearance.
We held off putting the canoe in the water because we wanted paddles appropriate for it. We purchased Canoe Paddles: A Complete Guide to Making Your Own, by Graham Warren and David Gidmark, and chose the Sugar Island design. Making paddles turned out to be easier than we’d anticipated. They came out a bit on the heavy side, as I’d been too conservative when thinning out the blades. I later used some 1 × 6 pine to make some shorter, lighter versions of the paddles for our grandchildren to get them excited to join us.
After we slipped the canoe into the water for the first time, it floated in good trim. I stood up several times and found it to be very stable. Once we got seated and started paddling, it tracked well. Later in the day the afternoon wind picked up and the canoe sideslipped, but as long as we were actively paddling and used some small J-strokes, it wasn’t much of an issue and the canoe held its course well.
With smooth, easy strokes the canoe slipped along quietly; with more aggressive paddling the bow gurgled as it cut through the water. The canoe maneuvered handily as we paddled around lily pads and downed trees.
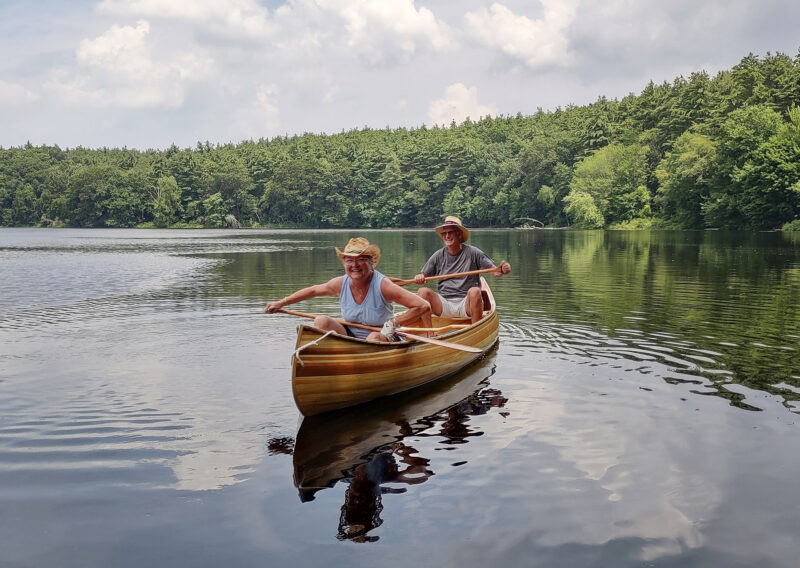
The canoe carries its beam well into the ends and the sheer rises sweetly to the stems. For the bow paddler, this results in a generous beam at the seat, narrowing forward for a comfortable stroke. Looking for a more stable canoe that would suit both themselves and the grandchildren, the Cormiers appreciate the Laker’s stability and generous freeboard.
I’ve done some solo paddling in shorter canoes, and the Laker, at 16′, is right on the dividing line between solo and tandem canoe. It seems a bit long for me to attempt significant solo trips, but this may be my inexperience showing.
As we built our canoe there was always a feeling of excitement as we progressed through each building phase, and this feeling never wavered.
When we’ve taken the Laker on the road, thumbs-up and beeps are common, and we’ve had numerous people walk over at rest areas and gas stations to admire and talk about the boat. This never gets old. We are very happy with the canoe and hope to get many hours on the water with the grandchildren aboard. I enthusiastically recommend the Laker as a wonderful general-purpose family canoe.![]()
Tim Cormier and his wife, Renee, live in Merrimac, Massachusetts, where they raised three sons, and have five grandchildren. Tim is retired after a 35-year career as a software engineer. An active outdoor person, he enjoys playing soccer, golf, hiking, skiing, and snowmobiling—anything outdoors. He has always enjoyed some woodworking, and this canoe is the biggest project he has taken on. For 45 years, he and Renee have boated out of Pemaquid Harbor, Bristol, Maine, enjoying weekend cruises, fishing, or just sitting on anchor in one of Midcoast Maine’s many hidden coves.
Laker Particulars
Length: 16′
Beam: 36″
Depth: 13″
Height of stems: 22 1⁄2″
Weight: approx 65 lbs
Building a Strip Canoe, by Gil Gilpatrick, is available from The WoodenBoat Store for $24.95. The 112-page book includes plan sheets, folded and tucked into the back of the book.
Is there a boat you’d like to know more about? Have you built one that you think other Small Boats readers would enjoy? Please email us!
Congrats, what a beautiful boat you made!! I also recently finished building Gil Gilpatrick’s Laker model. It took me almost TWO YEARS! but I was working on it fairly infrequently. I was so glad to be finished that I had a party to celebrate. Glad to see that you used stem guards; I didn’t and made a terrible mess of the stems. I ended up painting them to hide my shoddy work. Like you, I purchased most of strips from Newfound; they were a great resource and so friendly.
I found that foam pipe insulation is cheaper than pool noodles and comes in several diameters. I use the 1″ insulation for the racks on my truck to haul my kayaks.
Well done, Tim and Renee. Wishing you many happy days entertaining the grandkids.
Well done! Gil first published that book in 1979!!! I built a canoe with my dad when I was in middle school, then built the my own, with the help of Gil’s book, in the 1990s. I’m sure you’ll have years of enjoyment on the water with that boat, with plenty of, “Wow! That’s gorgeous!” comments along the way.