Small boats often require a variety of sails, covers, ditty bags, straps, and other fabric accessories that have grommets—metal rings that protect holes in the material and whatever cordage runs through them. Plain metal grommets were introduced around 1830 to replace sewn eyelets, and in 1883 William Wilcox developed a new type, the spur grommet, which quickly became the standard for maritime use.
Spur grommets can be put under loads that would tear out plain grommets and can be set in sailcloth, canvas, leather, webbing, and many other materials. They have two parts: the grommet itself, which has the barrel that is inserted through the material, and the washer. Spur grommets are made of thicker metal than plain ones, and the barrel is longer to accommodate thicker material. The washers have small triangular teeth that puncture the material when the grommets are installed, and the grommet perimeter has a rolled rim that captures the washer spur tips as they are bent outward.
 Photographs by the authors
Spur grommets are made of thicker metal than plain grommets and have rolled rims. The spurs of the washer, right, curl into the hollow of the rime of the grommet, left.
Plain grommets and spur grommets both come in numbered sizes, but for any given size, they have different shapes and dimensions so each type requires a dedicated die set. While plain grommets are designed for light-duty use on thin fabrics, spur grommets require a minimum thickness of material to take a tight set. The Sailrite website lists both the minimum and maximum capacities, expressed in decimal inches as well as layers of Sunbrella fabric required. In applications such as reefpoints, where there aren’t multiple layers of sailcloth, reinforcing panels should be added, both to strengthen the area and provide the three layers the grommet needs for a tight fit. Common spur-grommet sizes are #0 (1/4″), #1 (5/16″), #2 (3/8″), #3 (7/16″), and #4 (1/2″). The dimensions given in fractions of an inch are the inside diameters of the grommets before installation. That diameter is slightly larger after installation. For our small boats we use #0 for sail lacing rings on our Sunfish, #1 for reefpoints, and #4 for sail head, tack, and clew grommets as well as tie-down points for boat covers.
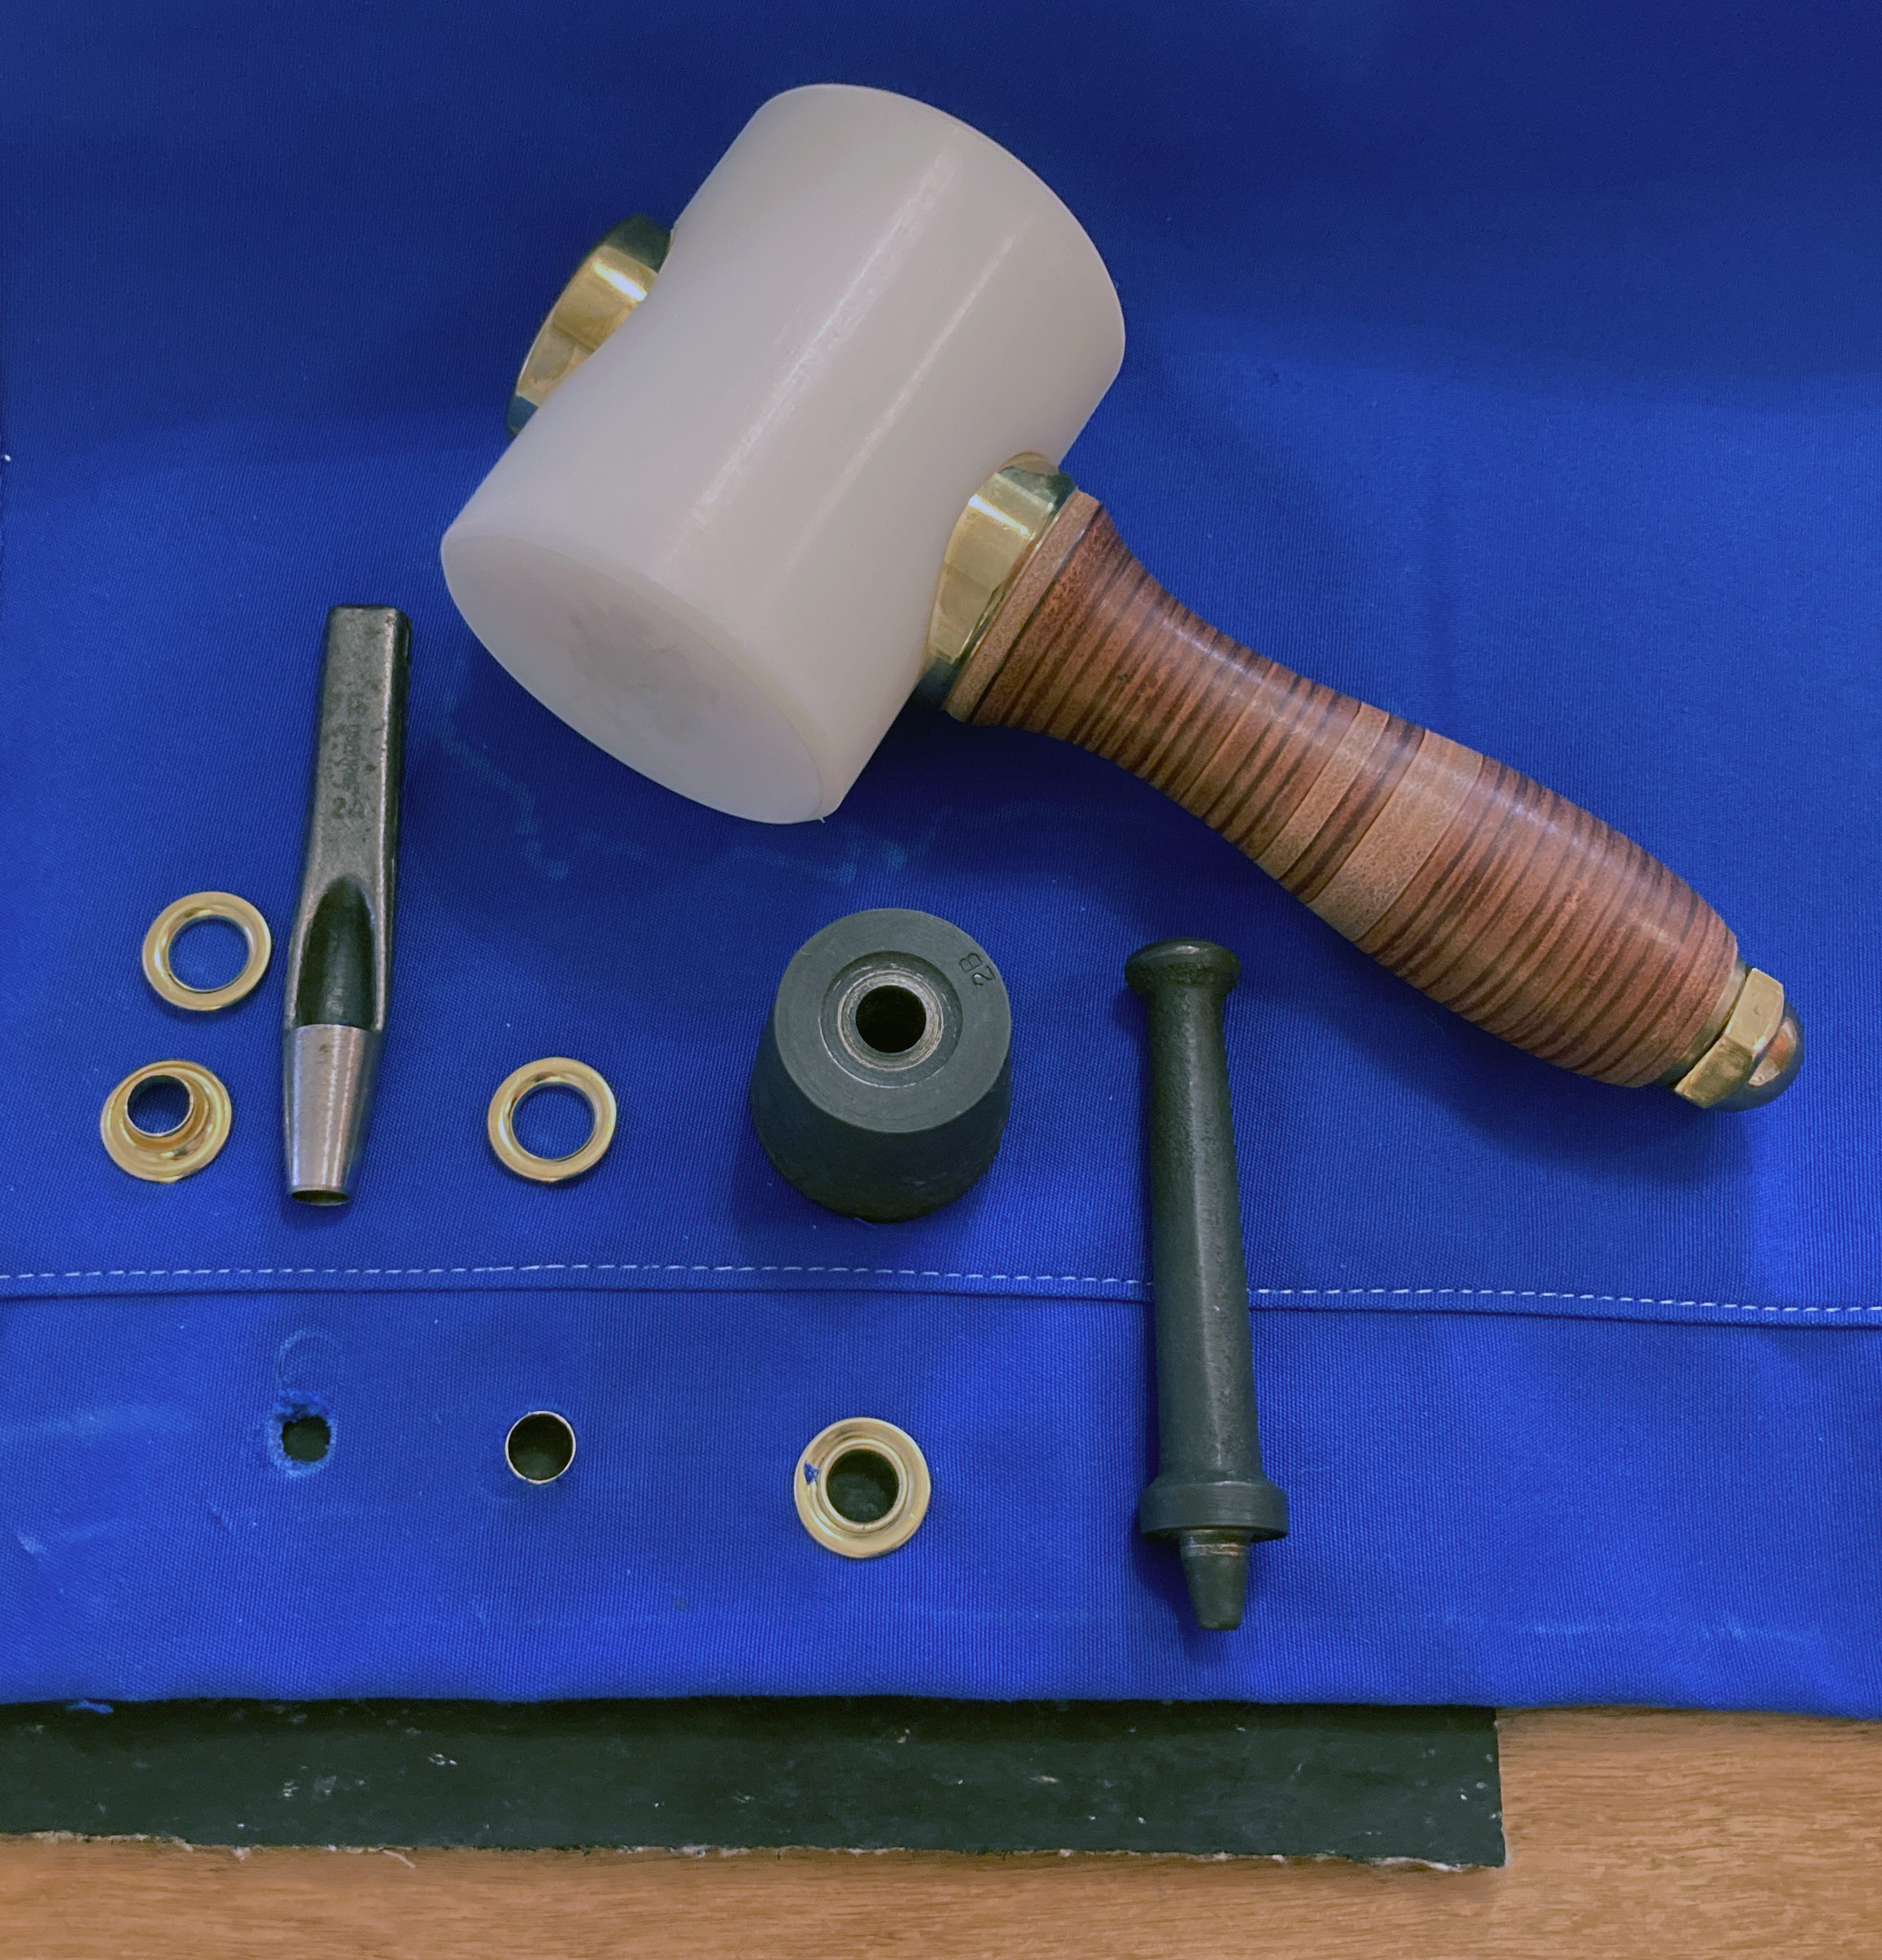
The tools for installing spur grommets are a hole punch, mallet or hammer, and a setting tool and its anvil.
We punch holes for our spur grommets with a hole cutter, set on a rubber cutting mat. We use our 3-lb Barry King nylon mallet to drive the setting tool of the die set and have, with practice, developed a feel for the force and number of strikes to set the grommet tight without overdoing it and making the outer ring cut the fabric. If you foresee a lot of grommet setting in your future, you might consider splurging for the W-1 C. S. Osborne hand press.
There are many applications for grommets in the gear used for boating, from sails to covers and gear bags. Spur grommets—and the dies to set them— cost more than plain grommets but are far more secure than plain grommets and just as easy to install.![]()
Audrey and Kent Lewis mess about with their small boats in the shoal waters of Northwest Florida. Their boating adventures are logged at Small Boat Restoration.
Spur grommets and the tools needed to install them are available from Sailrite, C. S. Osborne, Stimson, and other suppliers
Is there a product that might be useful for boatbuilding, cruising, or shore-side camping that you’d like us to review? Please email your suggestions.


Join The Conversation
We welcome your comments about this article. To include a photo with your remarks, click Choose File below the Comment box.