My first experience of boatbuilding was with my father, constructing a strip-planked canoe and a stitch-and-glue kayak while I was at school. Later, while doing research in a fairly theoretical field, I felt a strong urge to do something practical. I had long been fascinated by traditional boatbuilding methods, particularly those I’d seen when visiting the Viking Ship Museum in Roskilde, Denmark, and wanted to see if I could learn some of those skills.
The engineering department where I was doing my research has a large workshop, equipped with many tools from lathes to 3D printers. The space is mostly for professional use but is also available for personal projects. I had known and worked with the workshop supervisor for several years, and he kindly allowed me to build a boat there, with the condition that it had to be small enough to carry down the (fairly wide) stairway.
I had read about the Nottage Dinghy in How to Build a Boat by Jonathan Gornall. It is a 3m (9′ 10″) lug-sailed lapstrake dinghy designed by Fabian Bush. When I bought the plans direct from Fabian, he invited me to visit the Nottage Maritime Institute in Wivenhoe, Essex, England, where students can enroll in a class to build dinghies for themselves. On a dark and cold Saturday, I went to the workshop where they gave me tea and biscuits, and in a happy daze I wandered around boats being built, and chatted with the students. By the time I went home late in the evening I was committed.
 Alastair Gregory
The Nottage Dinghy can be built upside down or rightside up. I chose to build upside down and made four molds. After constructing the backbone with iroko and sapele, I used some strip planking—left over from another project—to line out the 10 strakes.
The Build
The Nottage Dinghy is heavily built for its size, with spruce planking over steamed oak frames on an iroko-and-sapele centerline structure. It has internal floors supporting floorboards. Fabian helped me source the timber and was always happy to answer my questions throughout.
I had chosen the Nottage Dinghy specifically to learn traditional boatbuilding skills, and it is excellent for that. Gone were the days of playing with large quantities of epoxy, accidentally leaving it in a pot until it starts to smoke; in were the days of steaming inch-thick timbers into shape, only to find they had split the next day. (I did this with the gunwales…twice.)
The build begins with constructing the backbone, for which I used iroko and sapele. The drawings specify the dimensions, with several full-scale patterns included. The hog is a fairly heavy piece of wood and needs to be steamed into shape at the stern—which gave me my first experience of steaming. I used a wallpaper stripper to generate the steam and bagged up the parts.
The rabbet position is marked in the drawings, but you need to work out the bevels yourself. This can be done by lofting the boat, but I did it by constructing the backbone, setting the molds, and cutting the rabbet in place using battens and some educated guesswork. The boat can be built upright or inverted; I planked it upside down and later turned it over to work on the interior.
The plans include patterns for seven molds. I made four—three evenly spaced between the stem and transom, and a fourth at the bow to help get the right twist at the forefoot. This worked well with the 10mm—as specified in the plans—spruce planking, which was able to self-fair over the four molds. If using thinner stock, additional molds might be needed.
 Alastair Gregory
I planked the boat in the recommended 10mm spruce and finished with a sapele sheerstrake, which I would leave bright finished.
I lined out the 10 strakes using leftover strip planking as battens, marking plank lands on the transom, molds, and stem, and got down to planking. My lining-out looked nice to me, though a more experienced boatbuilder might have been able to achieve fairer planks. I found plank spiling particularly rewarding. It always seemed a bit like magic to take the strange sinuous shape I had cut out and have it wrap onto the hull and assume the shape I needed. At least, it was magical when it worked.
For all but the garboard and a couple of nearly straight strakes around the bilge, I scarfed together stock to ensure that the wood grain was running as straight as possible along the planks. This is important around the forefoot where the planks have significant twist and grain runout could cause a split.
The garboards had the most extreme twist and needed steaming and careful clamping along their full length and especially at the bow. Indeed, most of the planks needed steaming at the bow, and some required steaming at the stern also. If the hull were planked in hardwood, the stock could likely be thinner—perhaps around 8mm—which could considerably reduce the amount of steaming required.
For the 12mm × 20mm oak frames I bought the wood early and for a couple of months submerged it in a tank filled with tapwater to which I added a bit of salt to minimize rot—a method used at the Nottage Institute. I checked periodically for signs of rot, but encountered no issues. My steambox for the frames was a 10’ length of schedule 40 PVC pipe, which handled the heat well (most plastic pipes melt like a Dali painting…ask me how I know). With friends helping, we bent the frames quickly, breaking only about three. The much longer process of hammering in all the copper rivets and roves took several weeks.
 Alastair Gregory
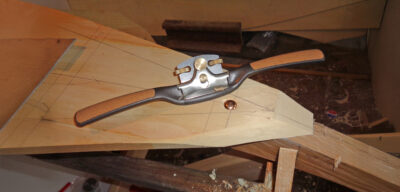
I originally planned to fit a sapele gunwale, but it split when I tried to bend it into the stem. In the end, I followed the suggestions in the plans and steamed and laminated two pieces of oak—the lighter wood contrasted nicely with the darker sapele of the sheerstrake and the seats.
The interior fitout was mostly sapele and iroko left over from the backbone build. The only false start was my attempt to use leftover sapele plank stock for the gunwales instead of the oak, iroko, or teak indicated in the plans. The sapele split when I tried to steam it to shape. In the end, I steamed two laminated pieces of oak for the gunwales, and this worked fine. I made the sheerstrake with sapele rather than the spruce I used for the other planks. It made the thwart-knee connections feel sturdier and allowed me to varnish the sheerstrake as a nice accent. One of the longest jobs, second only to riveting, was shaping and fitting the floor timbers. Each had to be patterned, cut, and beveled. It was time-consuming, but I particularly enjoyed it, as it felt like the purest form of “traditional” boatbuilding I got to try.
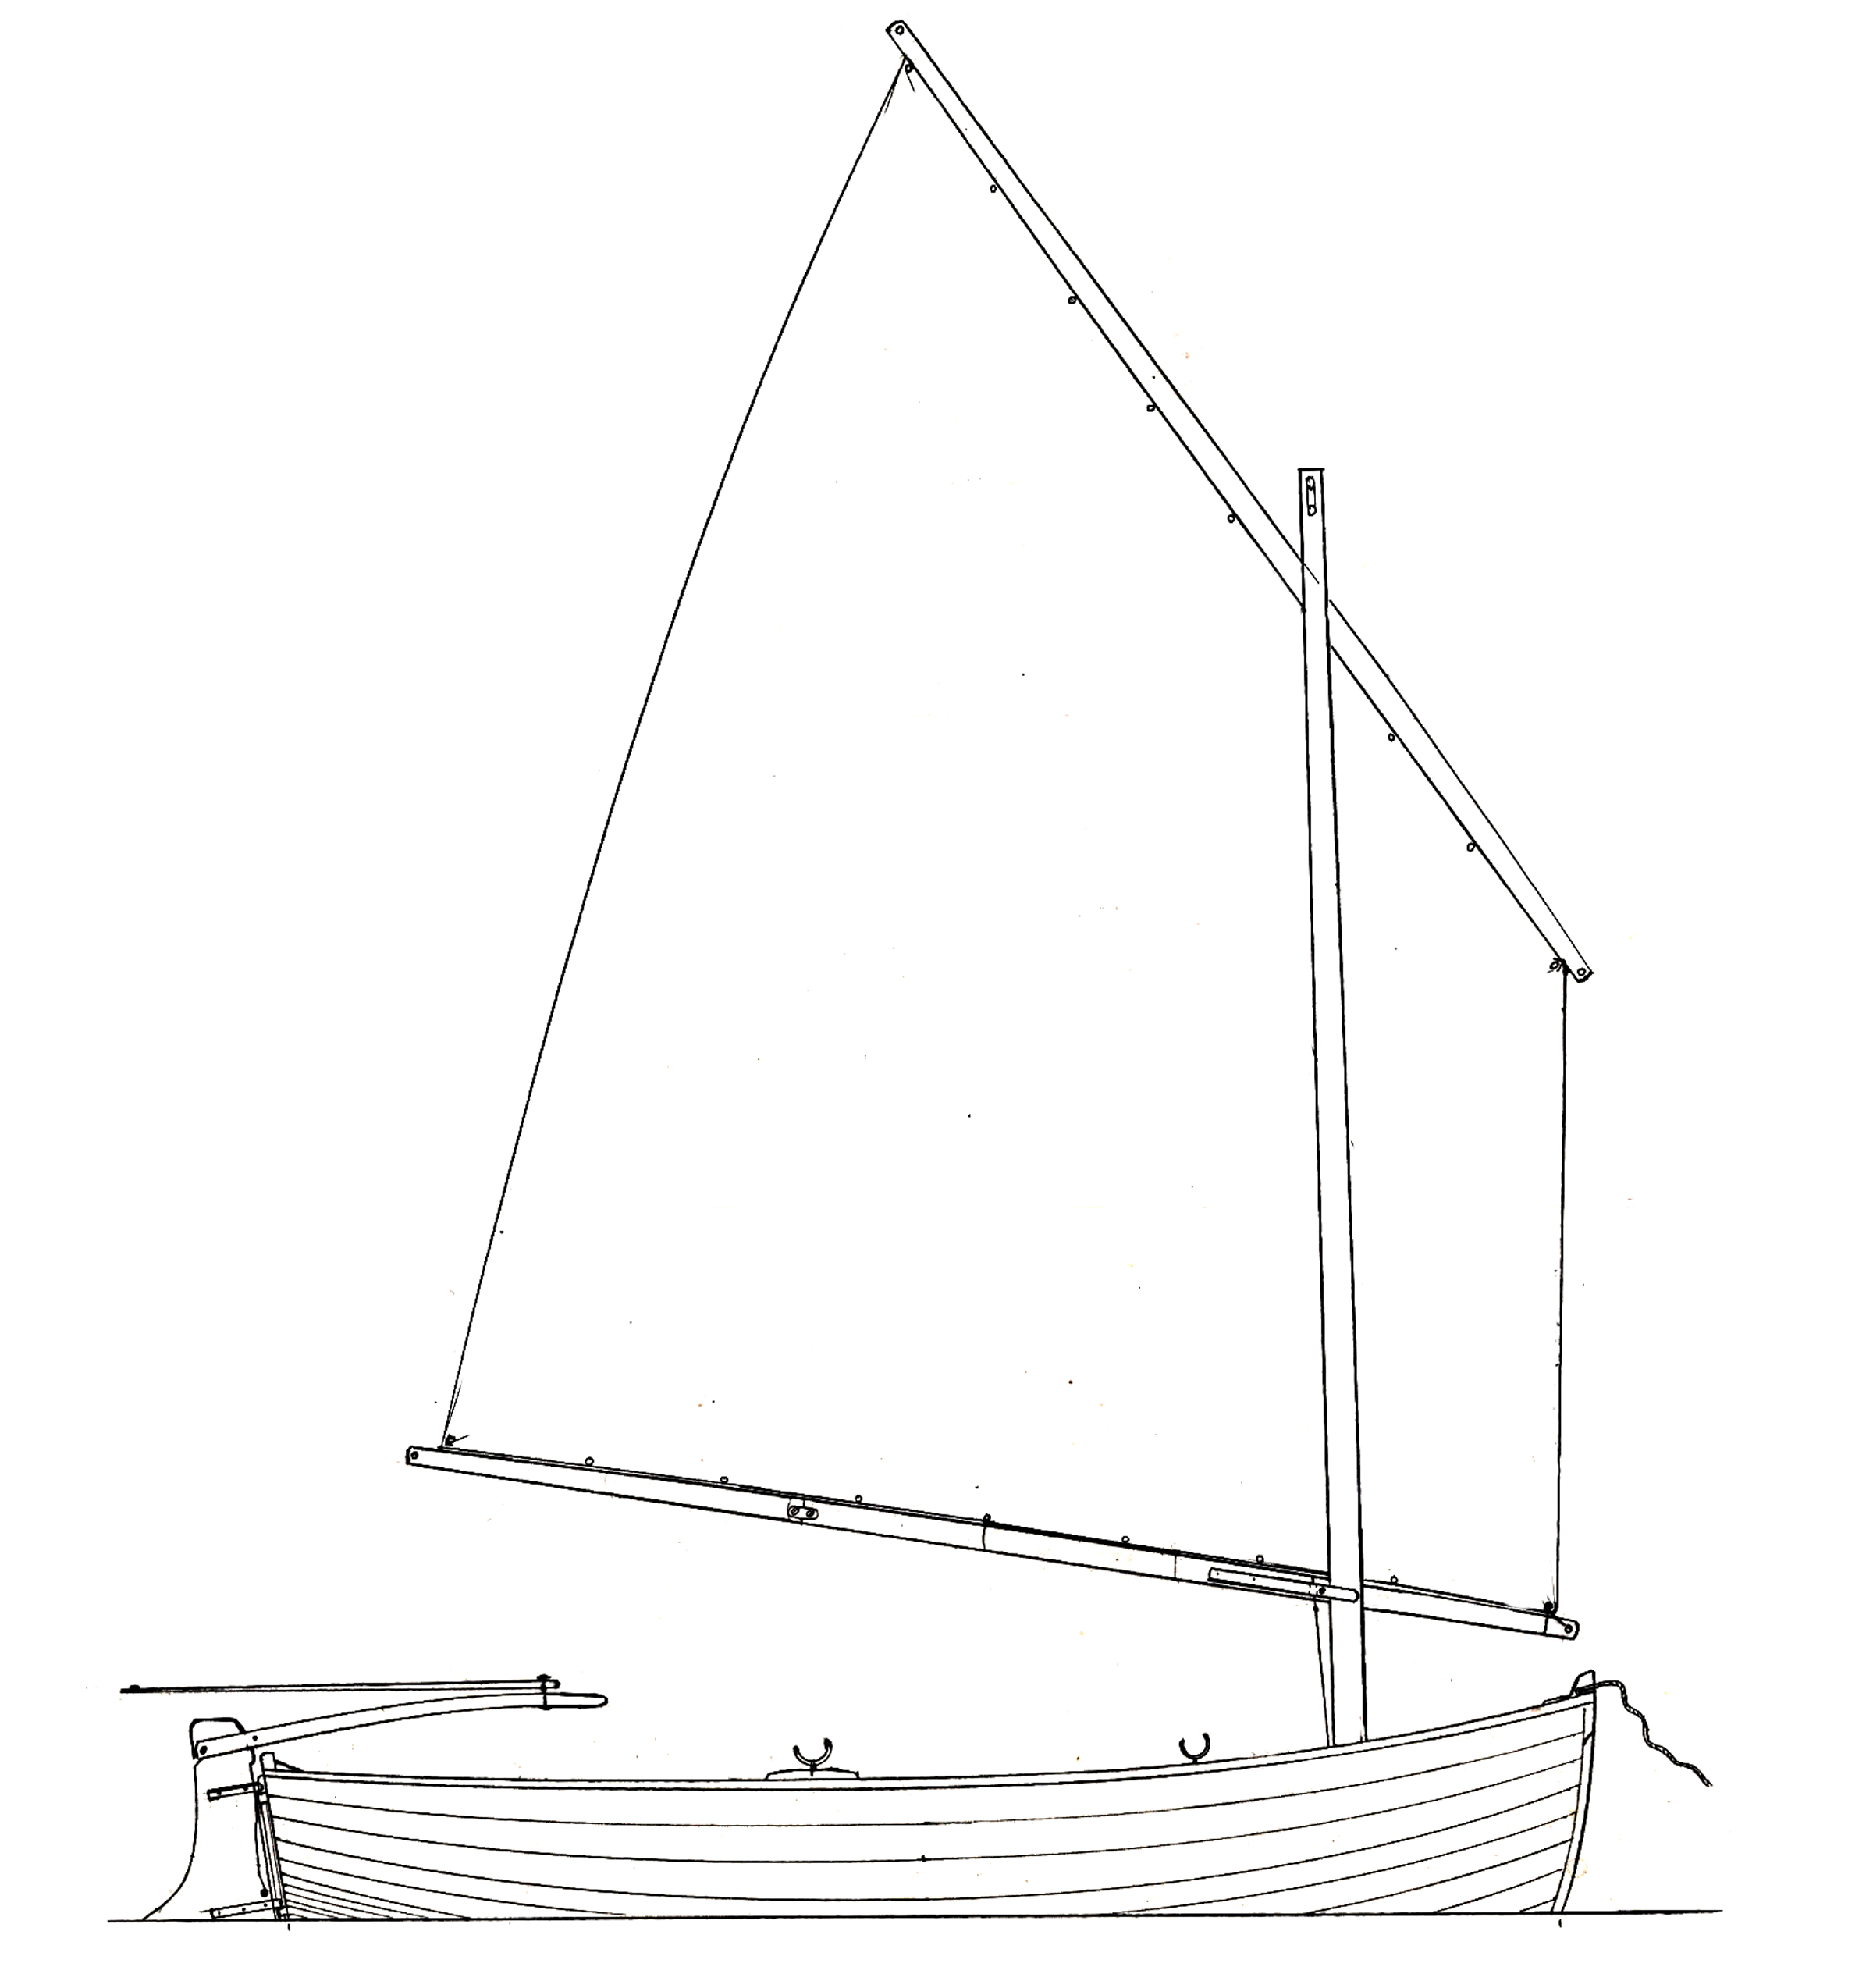
I made the sail from a Sailrite kit—Sailrite cuts the panels (they worked from Fabian’s sail plan) and the customer sews them together.
Sailing the Nottage Dinghy
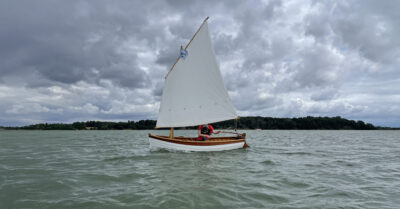
I launched the dinghy in January 2023. Over the course of four years, I had probably spent about 1,000 hours on the build. Since completion, I have kept it at a local sailing club on a non-tidal river and have trailed it to various estuaries on England’s East Coast; this year, I plan to take it to the Norfolk Broads.
 Joanna Wolstenholme
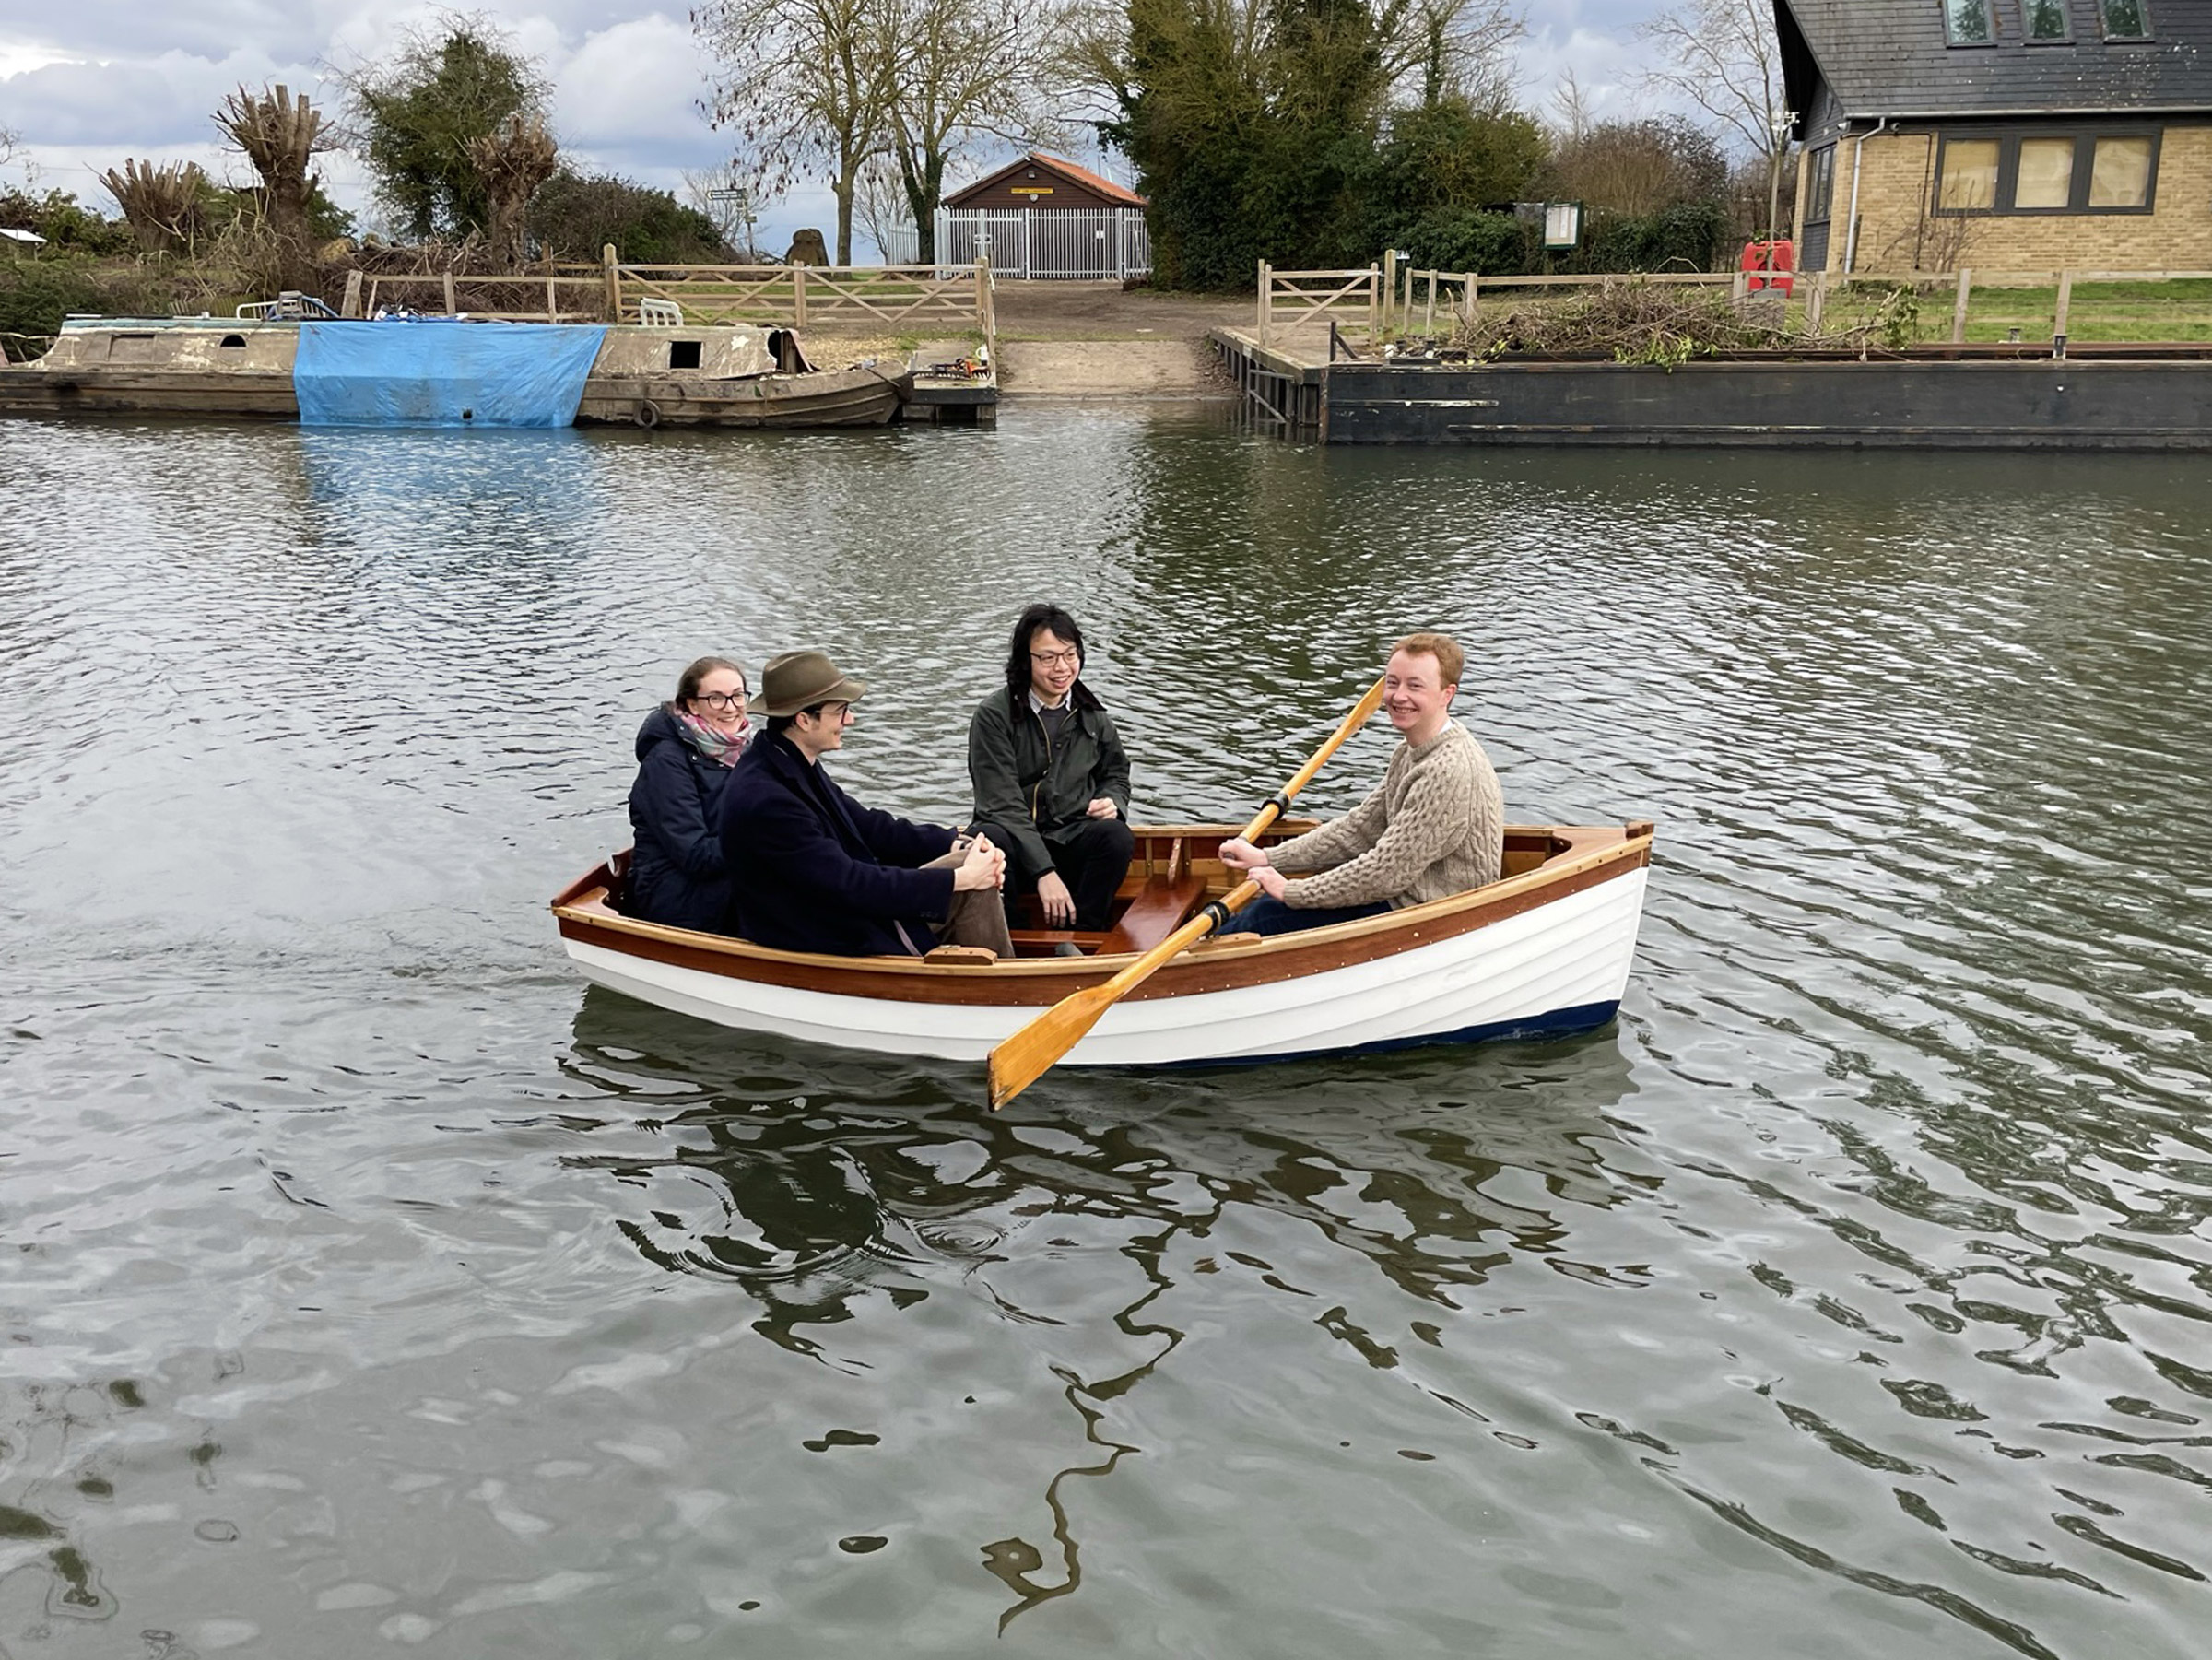
Thanks to the second rowing station forward, there’s room for four adults. Despite being less than 10′ long, the Nottage Dinghy carries the weight well, maintaining decent trim and plenty of freeboard.
Rigging the Nottage Dinghy is straightforward, and I can go from trailering to sailing in about 45 minutes. The dinghy is small but feels sturdy. Its weight makes it seem larger, and stability is good, even when moving about in the boat. In light airs I sit on the center thwart, moving aft as the wind picks up. When sitting on the seats, my head is quite close to the boom while closehauled and coming about or jibing, and it can feel a bit cramped. I am considering removing a section of the side benches so that I can more easily sit on the floorboards, which I think would make light-airs sailing more comfortable and would aid visibility. In stronger winds, moving aft on the side bench improves both trim and visibility. In a short chop some spray comes over the bow, but when I’m sitting aft of the center thwart it doesn’t reach me.
Maneuvering the boat is straightforward, and it’s pretty responsive. In light airs it slips along fine as long as you are careful to keep it well-balanced, the sail filled, and not to stall when going through a tack, but it is definitely not a racing boat. In stronger winds it comes alive with the crinkling sound of the bow wave on the plank laps. I’ve sailed in winds up to about 18 knots, and with the sail reefed I think it would handle more, so long as the sea state allows. It’s a comfortable boat, feels very safe, and while it does respond to gusts the motion is neither violent nor unwieldy and is accompanied by the characteristic creaking of a traditional wooden boat.
 Joanna Wolstenholme
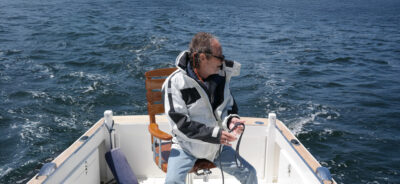
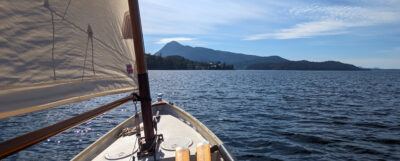
As the dinghy picks up speed, the chuckle of the bow wave against its narrow lapstrake planks is a comforting sound. In stronger winds it’s best to move aft to maintain good trim. In a short chop, if spray does come over the bow, it doesn’t reach farther aft than the center thwart.
The yard and boom fit comfortably in the length of the boat (the mast is too long, but for trailering can be strapped in place with its heel in the sculling notch), and I can row with the rig lying alongside me on one of the side benches. The center and forward thwarts are both rowing stations and I’ve rowed with four adults aboard without difficulty. When estuary sailing, I often launch and row into clear water before raising sail. The boat lies comfortably beam-on to the wind when hoisting the sail; I have also made use of this trait when putting in a reef.
Overall, the Nottage Dinghy has been a fantastic choice for learning traditional boatbuilding, and while I’m still getting to know it as a sailing boat, it’s the ideal messing-about Swallows-and-Amazons-type dinghy that I look forward to making the most of.![]()
Alastair Gregory is an engineer working in medical device development near Cambridge in the U.K. When he started building his Nottage Dinghy MABEL he was a researcher at the University there. He’s a keen sailor and amateur boatbuilder, and has a particular ambition to build a Folkboat one day. He says that throughout MABEL’s build, he learned from YouTube channels such as Tips From a Shipwright by Louis Sauzedde, and also from many books, including Clinker Boat Building by Martin Seymour, Clinker Boatbuilding by John Leather, Boatbuilding by Howard Chapelle, Planking and Fastening by Peter Spectre, and From Tree to Sea by Ted Frost. All are available from multiple outlets both online and on the high street.
The Nottage Dinghy Particulars
LOA: 3m (9′ 10″)
Beam: 1.6m (5′ 3″)
Draft centerboard up: 0.2m (8″); centerboard down: 1m (3′ 3 1⁄2″)
Sail area: 5 sq m (54 sq ft)
Plans for the Nottage Dinghy are available for £55 (plus shipping) from Fabian Bush, The Old Yacht Store, 49 High Street, Rowhedge, CO5 7ET, U.K.; tel: +44 (0)1206 728577.
Is there a boat you’d like to know more about? Have you built one that you think other Small Boats readers would enjoy? Please email us your suggestions.


Great to see small boatbiulding in the uk
A boat build brings people together in so many ways.
All sort of people on different levels buy into it, and contribute
in all sorts of way, knowledge, time, bronze hardware etc
Sailing clubs should encourage boatbuilders