The Laughing Gull is a 15′ 9″ gunter-rigged sharpie sloop designed by Arch Davis. Early sharpies were used by oystermen in Long Island Sound in the latter part of the 1800s for sailing shallow waters, including skimming over sandbar shoals to get their hauls quickly to market. They had flat bottoms, single hard chines, and very shallow draft. Ralph Munroe, yacht designer and jack-of-all-trades in Coconut Grove, Florida, further refined the design in the late 19th and early 20th century. His most notable design was a 28-footer, EGRET.
I began building my Laughing Gull in the summer after my junior year in college. I had admired Arch Davis’s designs since middle school, and called him about building a boat. He sized up my interests and skill level—only birdhouses and bookshelves at that point—and recommended the Laughing Gull. He had designed the boat with young people like me in mind. It would be simple to build, thrilling for a youthful crew hiked out on the rail as the skiff leapt up on a plane downwind, and forgiving when capsized.
I soon had the 110-page building manual and plans in hand. Shortly thereafter, my shipment of marine plywood arrived. Mr. Davis generously made himself available for free phone consultation, but his written instructions were so thorough, I hardly needed to call. Only basic carpentry tools were required. I did not own a tablesaw, so I borrowed one from friends. The only things I did not make myself on the boat were the sails and hardware.
 Photographs by Ashley and Casey McMann
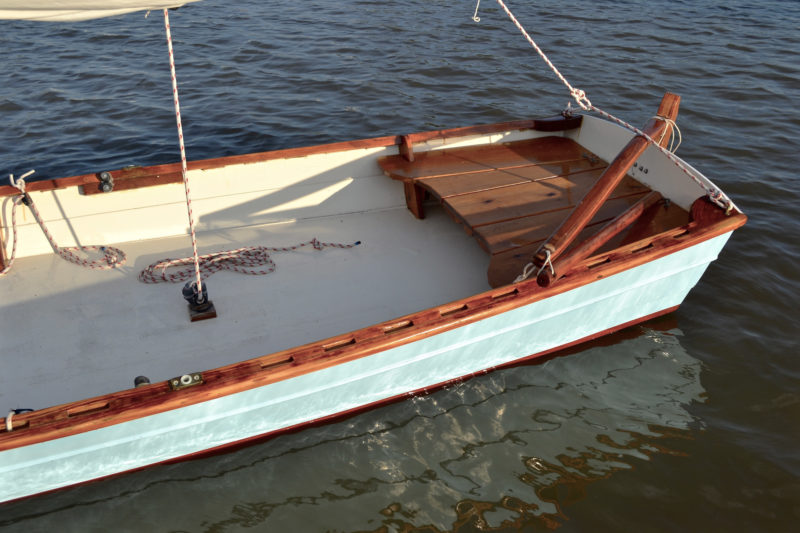
The cockpit sole is elevated to create a self-bailing cockpit and a voluminous flotation chamber spanning the entire bottom of the hull. Its perimeter lands just below the middle of the sides.
Construction begins, interestingly, with the cockpit sole. It forms a watertight compartment with the hull bottom and drains unwelcome water through above-the-waterline scuppers. The sole is cut from 1/4″ plywood, and frames are fitted along the sides. Longitudinal stringers with horizontal supports and the stem are then glued and screwed in place to the sole; the bottom is then similarly attached to the stringers. I used red cedar for the stringers, frames, and stem to save weight, but in retrospect Douglas-fir, which was also a recommended option, would have provided better strength.
The 1/2″ plywood transom is attached to the angled ends of the stringers, sole, and hull bottom. The lapstrake sides, cut from 1/4″ plywood, are glued and clamped along their length, and screwed to the frames, transom, and stem. The gunwale is stiffened with a rubrail and sheer clamps, for which I used heart pine. I used Douglas-fir for the spars and pine for the rudder. The daggerboard was initially a composite of pine and cedar, but it fractured after hitting an underwater obstruction. It is now made of an African hardwood. The interior is fitted out with seats and rigging. All surfaces have two coats of epoxy.
In the cockpit, the mainsheet runs to a block in the center, mounted on a small pad of oak. The jibsheets run to cam cleats on the inboard side of the gunnels. There are seats fore and aft with storage beneath.
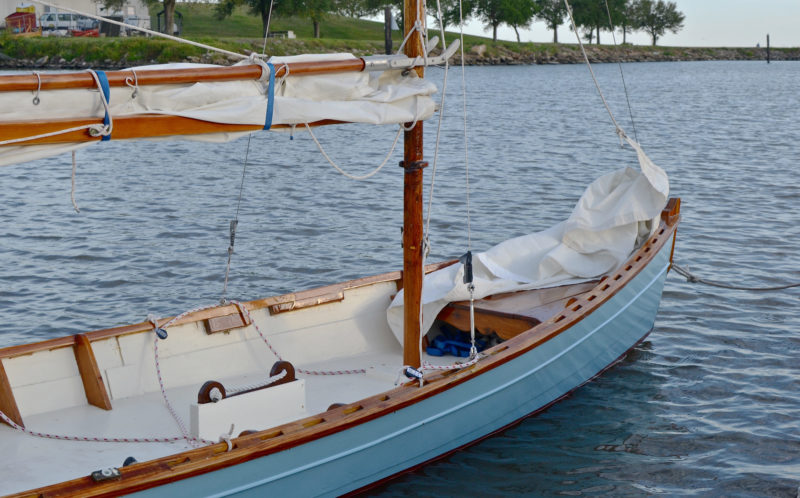
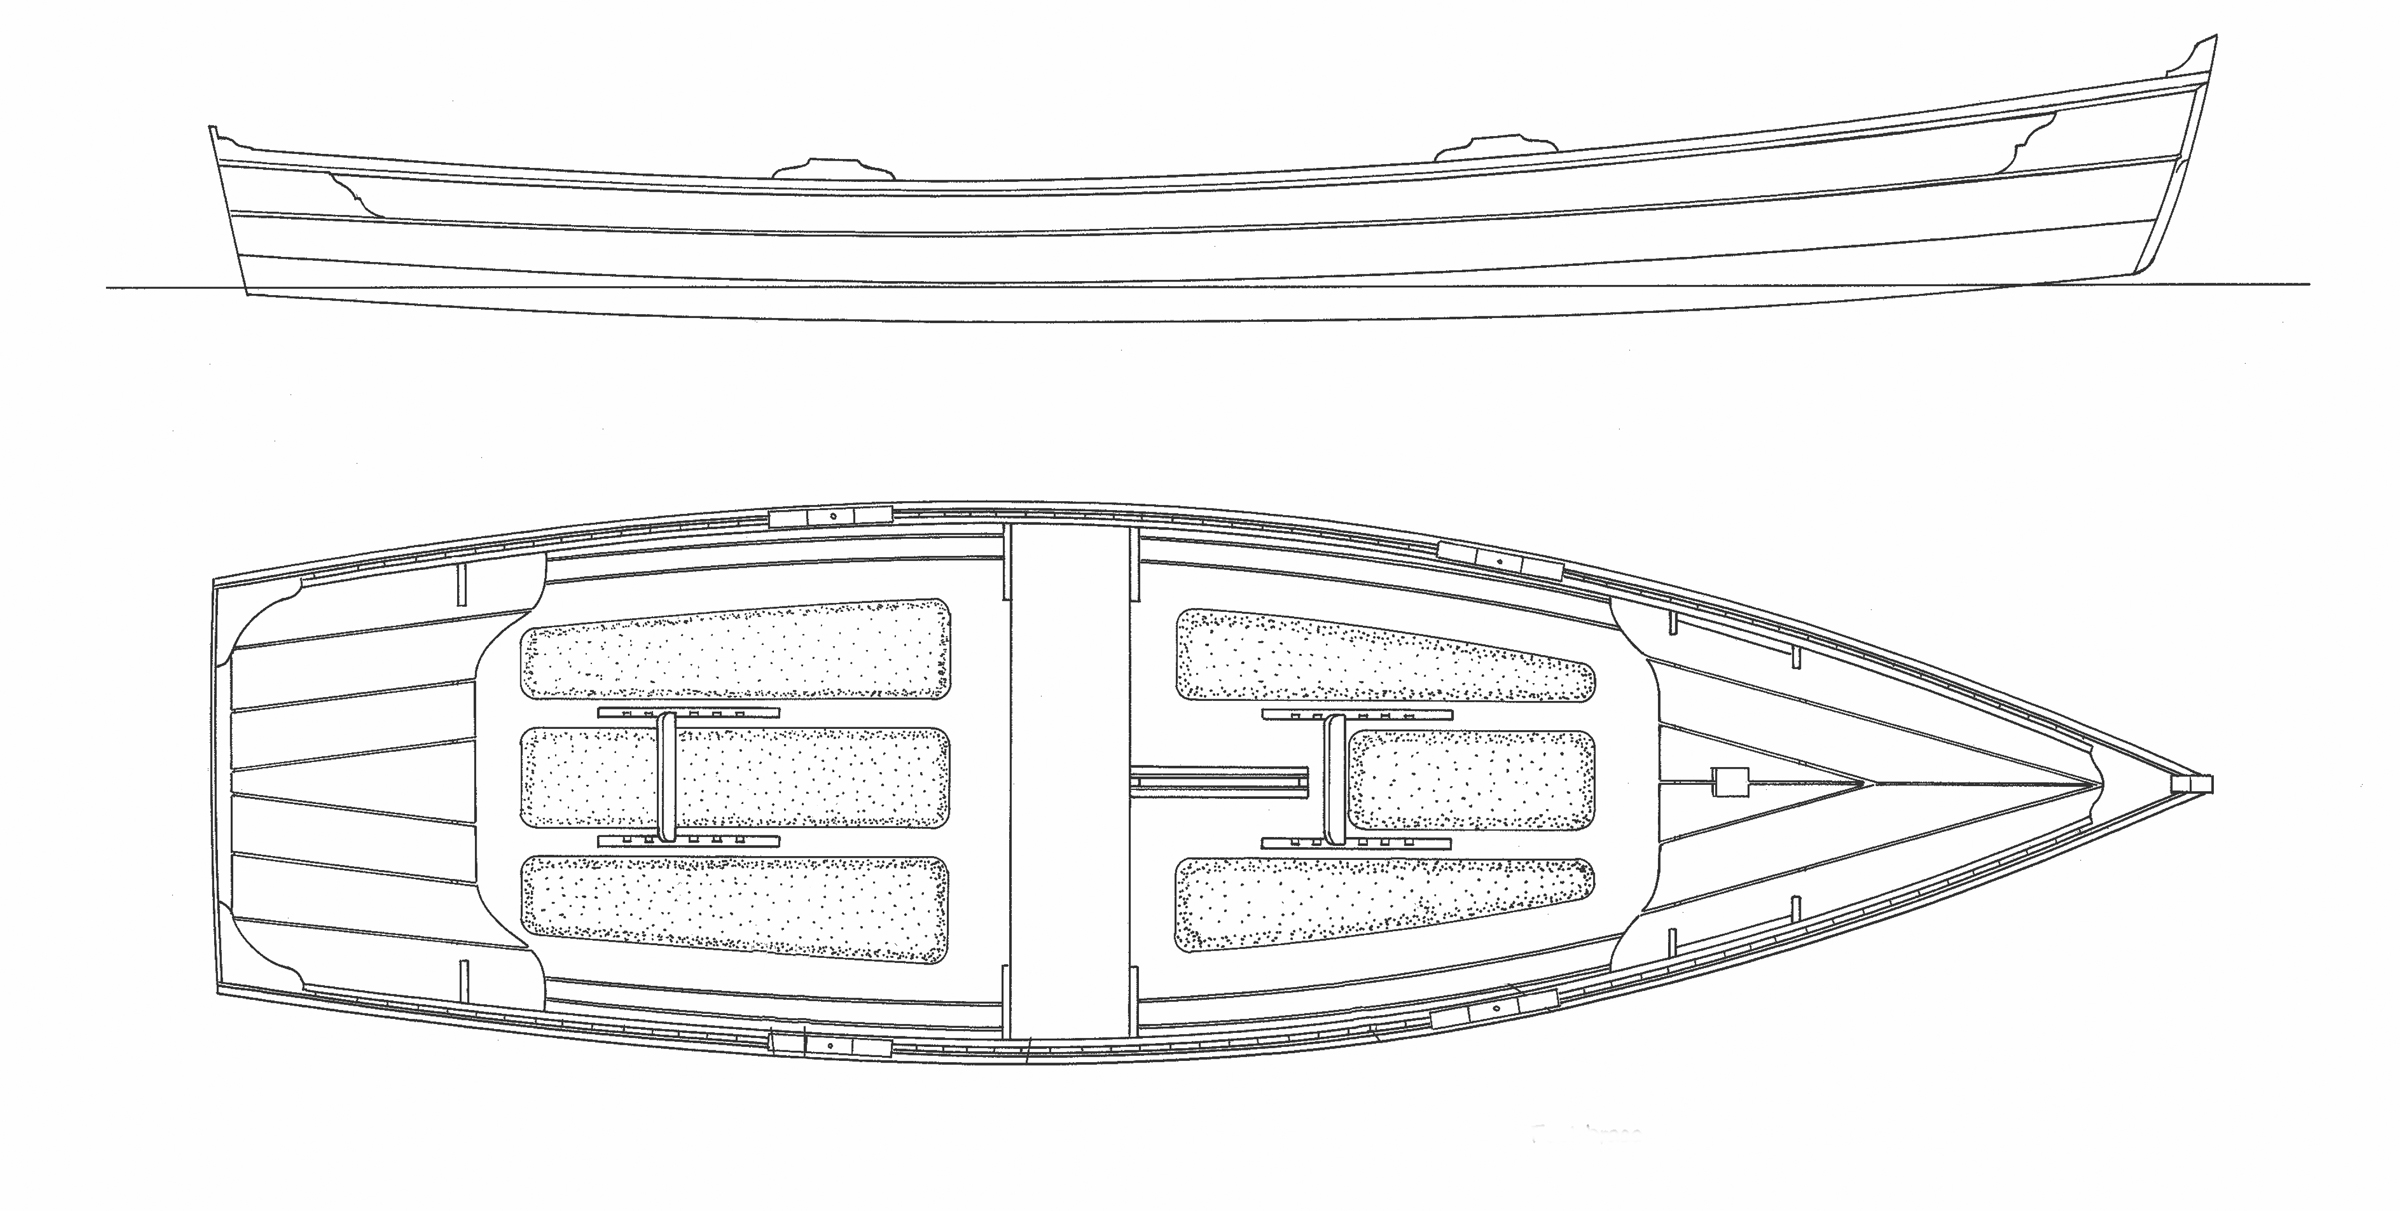
The center thwart has been left out of this Laughing Gull. Its place would be just aft of the daggerboard trunk supported by the two closely spaced frames.
I did deviate slightly from the plans during construction. Intending to use the boat almost exclusively for sailing, I did not make the oarlock risers because I thought these might make sitting on the rail uncomfortable. I omitted the center bench and rowing footrests to keep the cockpit clear. I added hiking straps for the skipper and one crew. I added hinges to the seats for better access to storage space beneath.
The plans specify a hollow mast but, regrettably, I was too eager to launch to take the time to carve out the insides. My mast is solid and therefore heavier than it would be otherwise.
I christened the boat CAROLINA ROSEO after my great-grandmother who emigrated from Italy to New York by herself when she was just 15. The boat has beautiful lines and gets compliments everywhere I go. This is most amusing in Miami, where this little sailing skiff often steals the show from the superyachts.
Quite soon after launching, a friend and I took it on an eight-day camping trip along the north Florida Gulf Coast. When I moved to Coconut Grove, I sailed almost weekly for four years and went on several overnight sailing-camping trips throughout Biscayne Bay, Florida Bay, and the Keys. I now sail out of New Orleans, and my Laughing Gull is more than 10 years old.
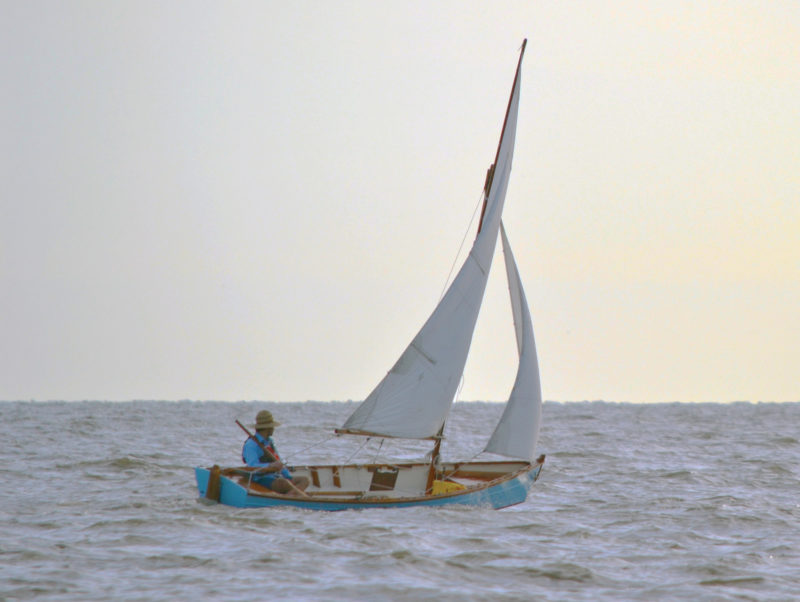
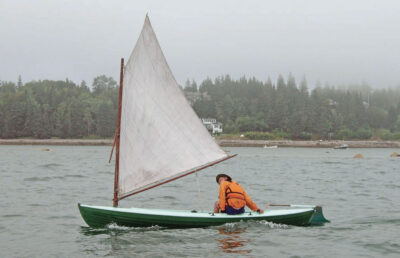
The author reports he has “comfortably sailed the Laughing Gull in up to 25 knots off the wind.”
I have sailed the hell out of this boat and send updates to Mr. Davis, often to his chagrin. He frequently reminds me that I sail in conditions the boat is not designed for. That said, I can tell you that my Laughing Gull positively screams downwind in 35 knots of breeze (caught in a squall, somewhat on purpose). It easily makes 12 knots surfing down the Atlantic swell off Miami on a broad reach with 20 knots of wind. I once sailed the 15 miles from Ragged Keys back to Coconut Grove on a broad reach, and averaged 9 knots. The boat is also content ghosting along in inches of water in Florida Bay with her board and rudder up, steering by sails alone.
The Laughing Gull’s light weight (225 lbs) and ample sail area make it sensitive to every variation in the wind. The most remarkable thing about the skiff is how readily it planes on anything between a close reach and a broad reach. At the first sight of whitecaps, it will leap on top of the water and soar.
As speed increases when sailing a beam or broad reach in high winds, a phenomenon curious for a monohull occurs: the windward telltales on the jib gyrate and the main luff flutters. You trim the sails and it happens again. Soon, you find yourself in the paradox of sailing a broad reach with sails trimmed as if on a close reach! Recognizing variations in apparent wind is an important factor in sailing this boat well.
In Miami, I sailed out of the U.S. Sailing Center and so was surrounded by world-class sailors (which I absolutely do not count myself among!) in racing dinghies. On many occasions while returning to the harbor, the Laughing Gull would keep pace with Stars and 420s.
Another testament to its speed: The Barnacle Society of Coconut Grove, Florida, holds an annual classic boat regatta at The Barnacle Historic State Park that was once the home of Ralph Munroe. I entered CAROLINA ROSEO in the race for four years, and won my division in three of them—much more a credit to the design than to my racing skills. The boat is fast!
The Laughing Gull’s gunter rig points quite well but, given its large sail area, adequate weight on board to keep the boat balanced is critical. It is stable on a run with a slight windward heel, cutting a handsome figure wing-on-wing.
A reef is prudent when sailing alone in 15 knots or in 20 knots with crew. I’ve comfortably sailed in up to 25 knots off the wind, but after that things get unwieldy, and I risk ending up in the drink.
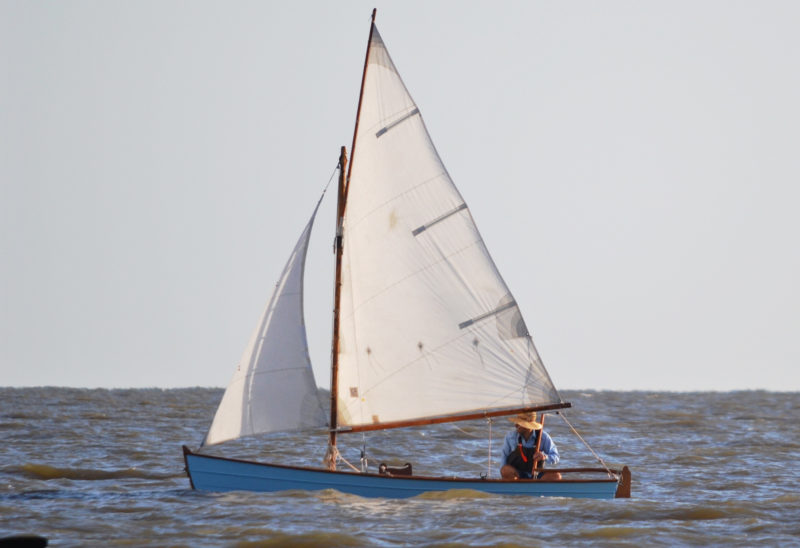
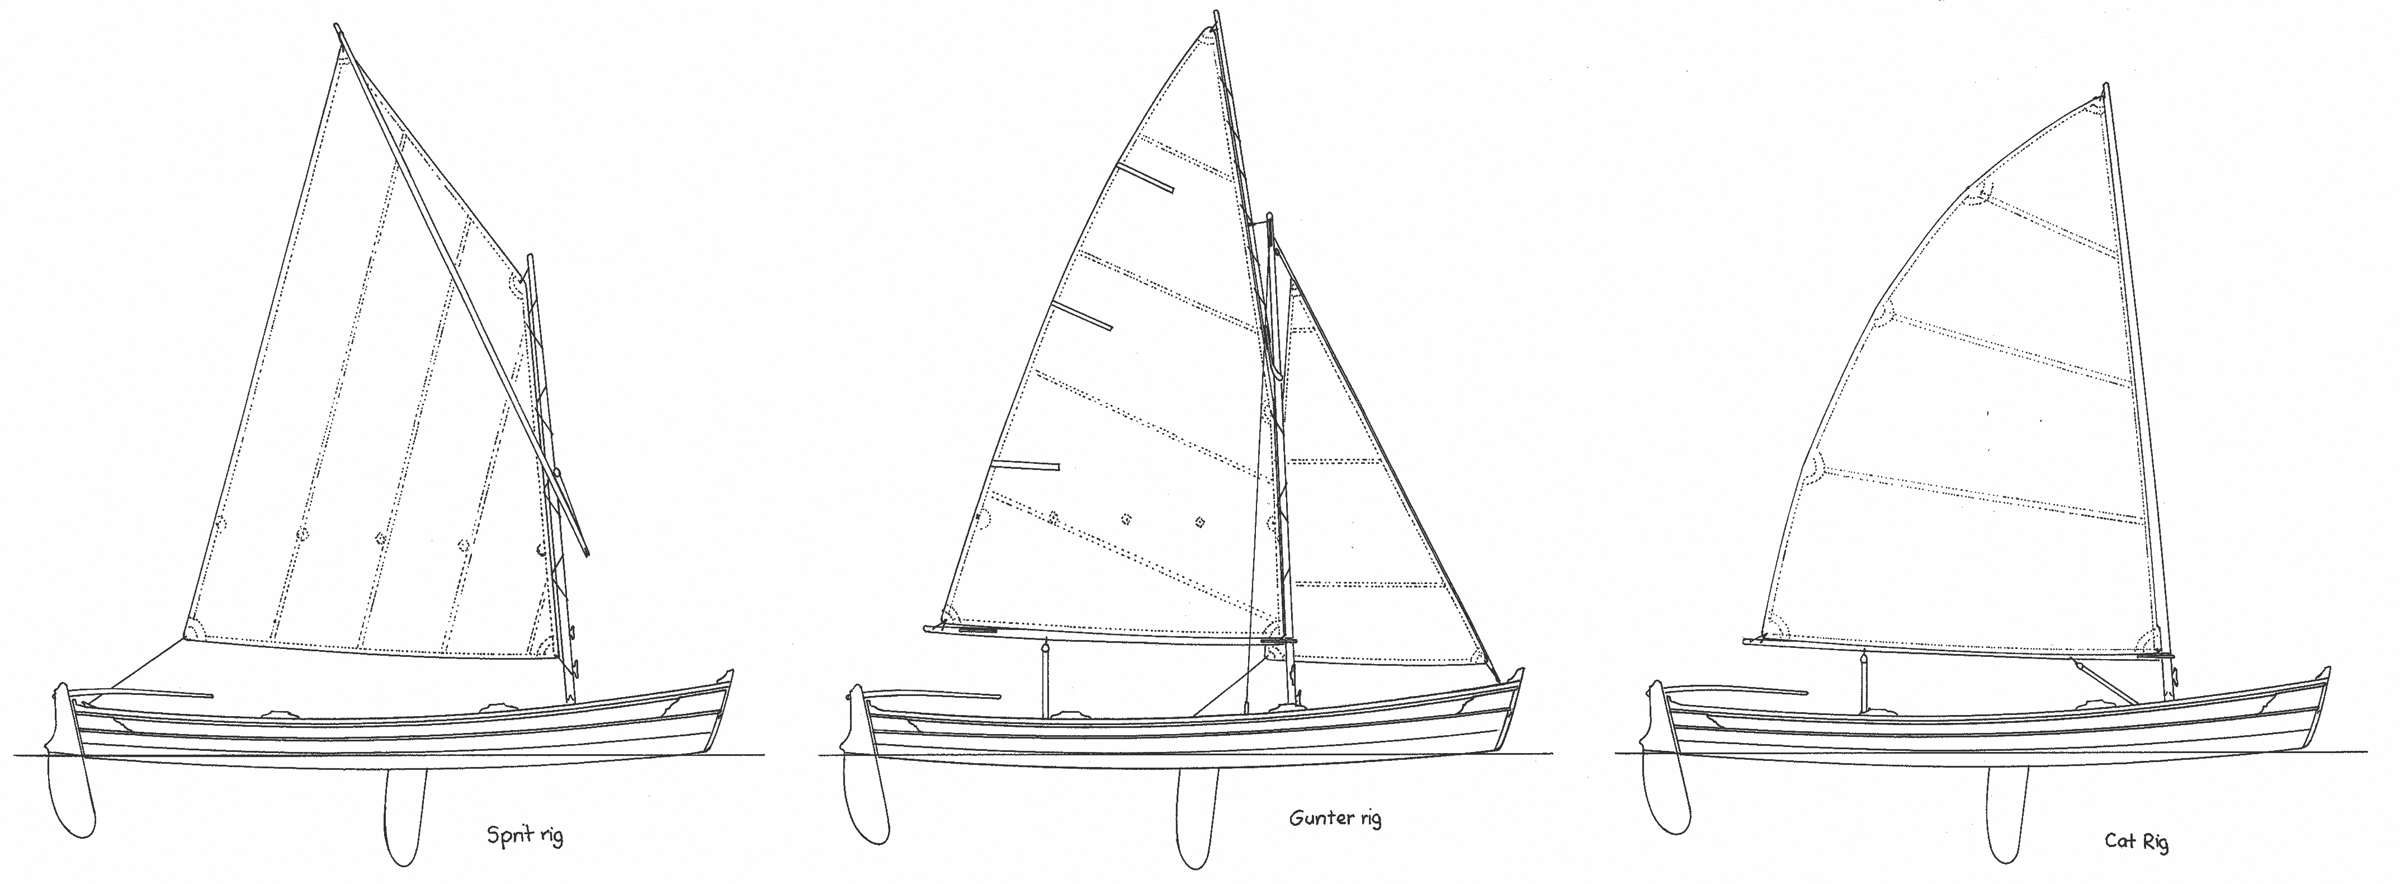
There are 70 sq ft of sail in the gunter main and 25 sq ft in the jib. The plans offer a sprit rig with and 82 sq ft main and a cat rig with 83 sq ft.
Recovering following capsize is easy. Best is to hop over the gunwale and recover the boat dry, which I have done successfully on several occasions. When that opportunity has passed, the skiff still comes back up without too much effort. The raised deck makes the boat somewhat tender when swamped, so waiting for the scuppers, which are above the waterline, to do a bit of their work before getting back on board, is wise.
The boat does tend to be a wet ride; quite a bit of spray is kicked up primarily when hitting waves while on a plane. The scuppers also let in some water when heeling.
The Gull is nimble, and easily makes a 180-degree turn in a boat length. With the flat bottom, the boat is a bit tender initially at the dock, but is stable once under sail.
Though tight, the cockpit allows for storage of bare essentials for warm-weather onshore camping for two. On a four-day solo trip from Miami to Big Pine Key (just shy of Key West), I slept on board, tucked away in shallow mangrove coves. I could stand outside the boat to work on things and get situated. It was like sleeping on a canoe. However, as Mr. Davis would point out, the boat is not designed for this kind of use.
I have made several modifications to strengthen the boat for sailing in high winds. The rudder has been a bit of a problem for me over the years. I first broke the gudgeon launching from the beach for the north Gulf Coast trip mentioned above. The rudder caught in the sand and the gudgeon pulled out. The gudgeon was attached with screws, per the plans. I made the repair with through-bolts, and would recommend this approach for maximum strength. I also recommend securing the pintles to the rudderstock with bolts rather than screws.
Sometimes the gaff jaw doesn’t rotate well in a tack, leaving the gaff at an awkward orientation. Wrapping that section of the mast with copper sheathing and using a metal bail to secure the gaff around the mast has been an improvement. A related issue is an occasional crease in the sail, which appears when the peak halyard is not right against the mast, or the gaff is twisted. I think that a slightly greater angle between the gaff and mast would address both the crease and the restricted gaff jaw rotation. Designer Arch Davis notes: “I am aware of the issue of the gaff jaws not rotating easily. I also have copper sheathing where the gaff jaws bear on the mast. Rubbing paraffin wax on the sheathing and jaws helps the jaws rotate more easily. Some time ago I changed the shape of the sail a little, so that the gaff is not so nearly vertical. This has been helpful and the sail should be stretched tightly along the gaff. In any case, it’s certainly good practice to experiment with the attachment point of the peak halyard, and the tension of both halyards. Obviously, they need to be eased or tightened, depending on wind strength.”
To strengthen the gaff and boom jaws for high-wind sailing, I found a metalworker who made two custom aluminum jaws, which have stood up to every condition I’ve thrown at them.
The above issues are the result of heavy use in tough conditions. I mention them here for folks interested in experiencing the thrill of sailing this boat in high winds.
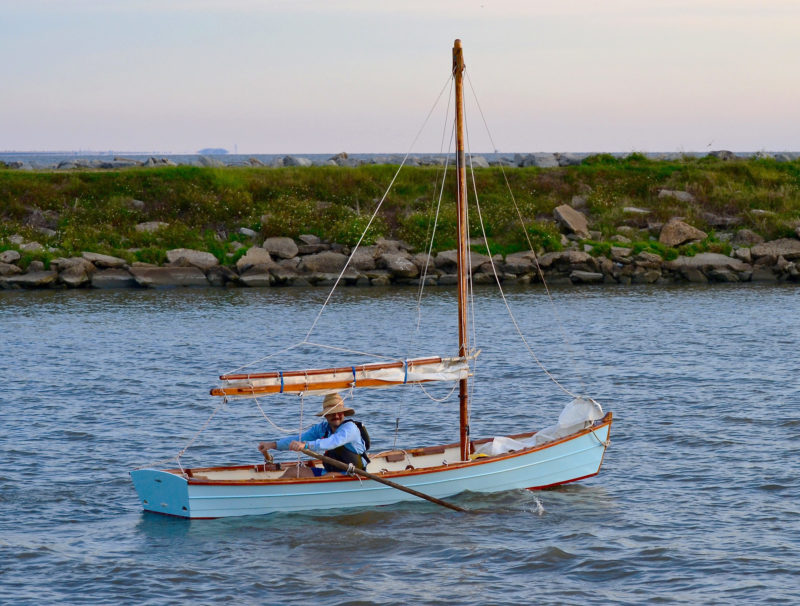
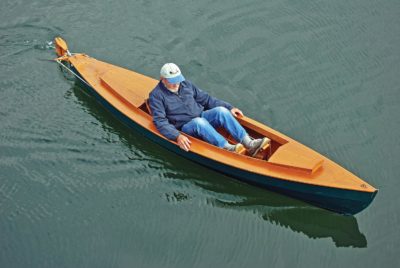
The boat is designed with two rowing stations. The author preferred to keep the cockpit unobstructed by a rowing thwart and rows while seated on the cockpit sole. It works, but is not as effective as having the thwart and foot brace. Note that the transom has two scuppers, which make it self-bailing.
I do have one pair of oarlock sockets which are set directly into the gunwale rather than as blocks added on top. However, since I usually launch where the distance from ramp to open water is not far, a short canoe paddle is more than adequate for auxiliary power to get to the wind. On overnight trips, I do bring a set of oars to get into unfamiliar marinas or tidal creeks. Without the oarlock risers, center bench, and footrests that are specified in the plan, but not installed on my boat, rowing in open water is unsurprisingly unwieldy. For best performance under oars, stick with the design. In spite of my omissions to the rowing arrangements, the skiff is quite speedy when propelled by oars and can easily outpace a kayak.
The Laughing Gull is easily hauled on a johnboat trailer with flat bunks, and its light weight makes it easy to handle at the ramp. It takes me about 45 minutes to rig and launch.
I adore this boat. It is elegant and super fast. The Laughing Gull is perfect for someone young with a taste for adventure or anyone with an appreciation for a beautiful craft. It was a joy to build. Mr. Davis has been a great support, and continues to provide helpful advice. Building the Laughing Gull and sailing it hard remains my proudest accomplishment.![]()
Peter Sawyer is a general surgery resident in New Orleans, Louisiana. He learned to sail when he was 11 years old at Camp Sea Gull, a seafaring summer camp on the North Carolina coast. He has been at it ever since. He thanks Art Ballard, the Miami-based metalworker who made the aluminum jaws.
Laughing Gull Particulars
[table]
Length/15′ 9″
Beam/4′ 5″
Draft, board up/5″
Draft, board down/2′ 9″
Weight/225 lbs
[/table]
Plans for the Laughing Gull include ten 24″ x 36″ sheets of drawings, full size patterns, and an illustrated building manual. are available for $200 from Arch Davis Designs. Pre-cut kits cost $1,450 and include: stem, transom, frames, bottom and deck panels, topsides planking, plan, and DVD.
Is there a boat you’d like to know more about? Have you built one that you think other Small Boats Magazine readers would enjoy? Please email us!
Comments:
We welcome your comments about this article. If you’d like to include a photo or a video with your comment, please email the file or link.
Credit Notes:
A colleague, Ashley McMann, kindly took some photos for me, which I have uploaded to the Dropbox folder. They are under the Sawyer Sailing folder. Her husband, Casey McMann took the photos in the Casey McMann photos folder. I tried to make named photos for Ashley’s work but it won’t let me do it.

Hi. I am Peter’s mother. This is a great article and I can attest to the fact that the CAROLINA ROSEO has been a joy in Peter’s life. I have to say that I feel vindicated by Mr. Davis’ comments regarding how the boat should be used and in what conditions. Hearing of Peter’s adventures has been stressful at times!
Peter has had only the best things to say about Mr. Davis and his continuing guidance.
Beautiful boat, Peter. Great article.
Thanks, Bill! much appreciated.
A detailed and engaging article on the joys of building a skiff and then sailing the hell out of it. I should just say, you don’t have to be young to get a kick out of sailing hard and fast. I have just finished building a Goat Island Skiff and am looking forward to scaring myself silly in the coming weeks. I am 74.
That is great to hear, Harvey. Did not mean to exclude at all!
Hope we can see your story on these pages soon.
Thank you for your kind comments.
Over here in the UK, I run a small sailmakers ( R.& J. Sails) where we specialise in sails for small boats. Consequently we make a number of gunter mainsails, and I would agree with a customer who commented that the gunter main is quite a difficult sail to make. Although, looking at your sail, I would comment that your sail has been correctly made. The problem with a gunter mainsail is judging how much the gaff will “drop back” from the mast, especially as there are a number of different methods and knots used for attaching the halyard. As a generaliZation, I would say that it is better to allow for too much drop-back than not enough, as if it is too little, it will develop a crease radiating from the throat down to the clew, and you comment on this in your article. It is something dinghy sailors would refer to as a “luff starvation crease.”
Regarding the problem encountered with the gaff jaws, this is a common problem and here are some notes that I hope you and your readers will find helpful.
1. The position of the gaff halyard is critical, the ideal position is 50% of the length of the gaff, however many rigs function satisfactorily with a 40% distance between the throat and the head positions. Looking at the photos, I would calculate that yours is only about 33% If the headroom under the boom can be reduced, try moving the halyard attachment up as far as possible towards the 50% mark. If this is not possible the only solution would be to make a longer gaff and have the sail modified to the new length.
2. You comment that “you should stretch the sail tightly along the gaff” In my experience this will not achieve anything other than permanently stretching the sailcloth along the head of the sail, however there is a proviso in that it depends if the luff rope has been put in tight or even shrunk, which means undue force will have to be applied to this side of the sail. Again the photo appears to show that you have judged it correctly, but if it has been put in tight or shrunk it is easily corrected by your sailmaker.
3. However, we have found that the tape and rope along the luff should be put in tight, sufficiently so that a 2:1 or 3:1 downhaul should be used to pull it out to its correct length. Looking at the “yoke gooseneck,” you could rig a handy billy between the bottom of the boom and the foot of the mast. Increasing the tension along the luff helps to keep the gaff jaws in alignment. This is modification to the luff rope can be easily completed by your sailmaker.
4. Looking at the gaff jaws, rather than tying the halyard to the gaff jaws, where it could pull to one side, I would recommend that the halyard is fastened centrally. Either to a ring bolt or even a hole though the jaws so that the halyard can be tied off with a stopper knot.
I hope that the above is helpful, and best wishes from the UK for your excellent magazine,
Dick Hannaford