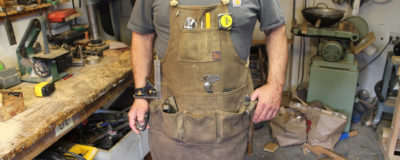
Like many of you, I’ve been spending a lot more time at home during the pandemic. I count myself very lucky to have a job that I enjoy and do from home, so for me, life hasn’t been upended as it has been for so many. I also have a basement with the space and tools to keep myself occupied during the recent spate of additional time at home. In the last few months, I’ve been taking on some projects that I’ve been too busy to make time for and some that I’ve just been curious about. The five presented below fit nicely in Webster’s definition of puttering around: “doing small jobs and other things that are not very important.” I don’t really need any of the things that I’ve built lately—what I need is a haircut—so my aim has been to fill the time I’d ordinarily be with my family, friends, and community with projects that provide some relief from the sad and disturbing news that has inundated us all.
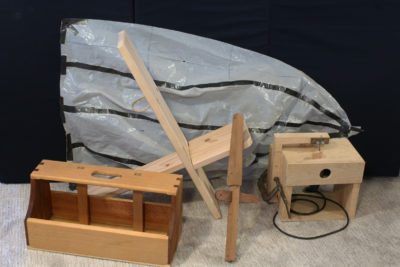
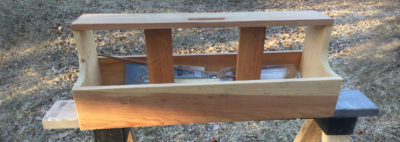
Tool Tote
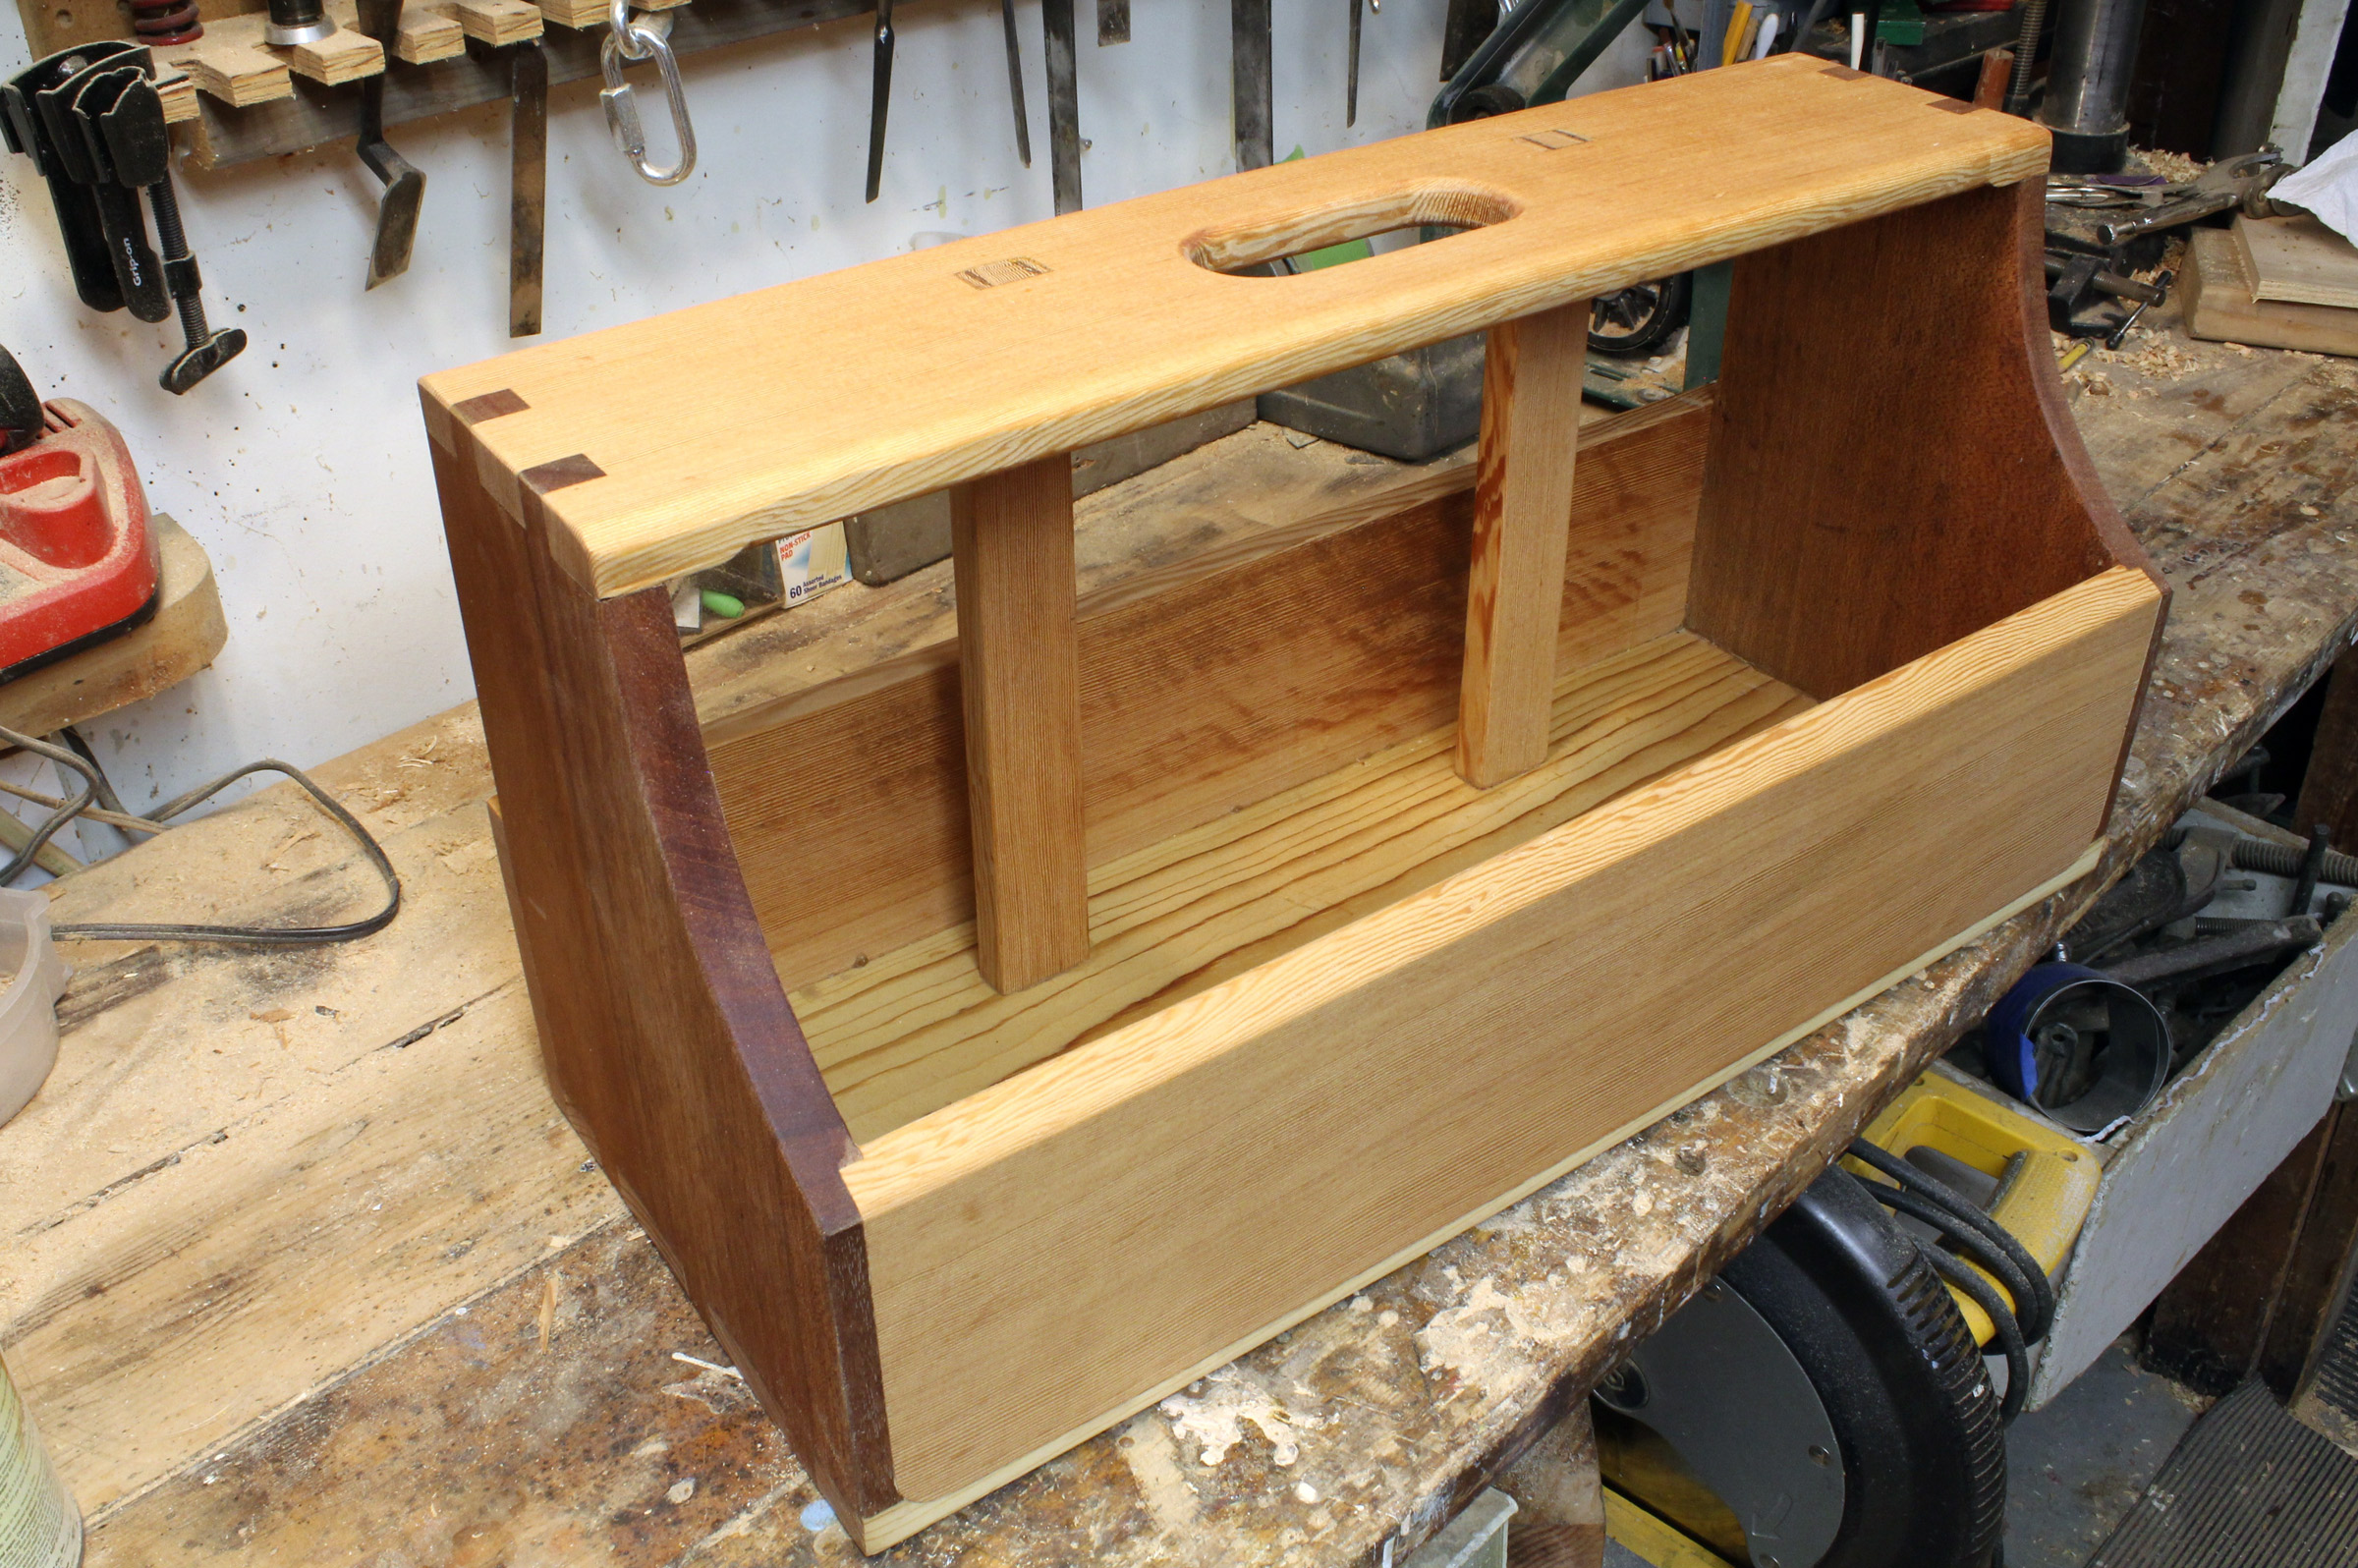
Making a fancier version of Joe’s tool tote didn’t improve upon its usefulness, but the more complex joinery let me spend more time in my shop.
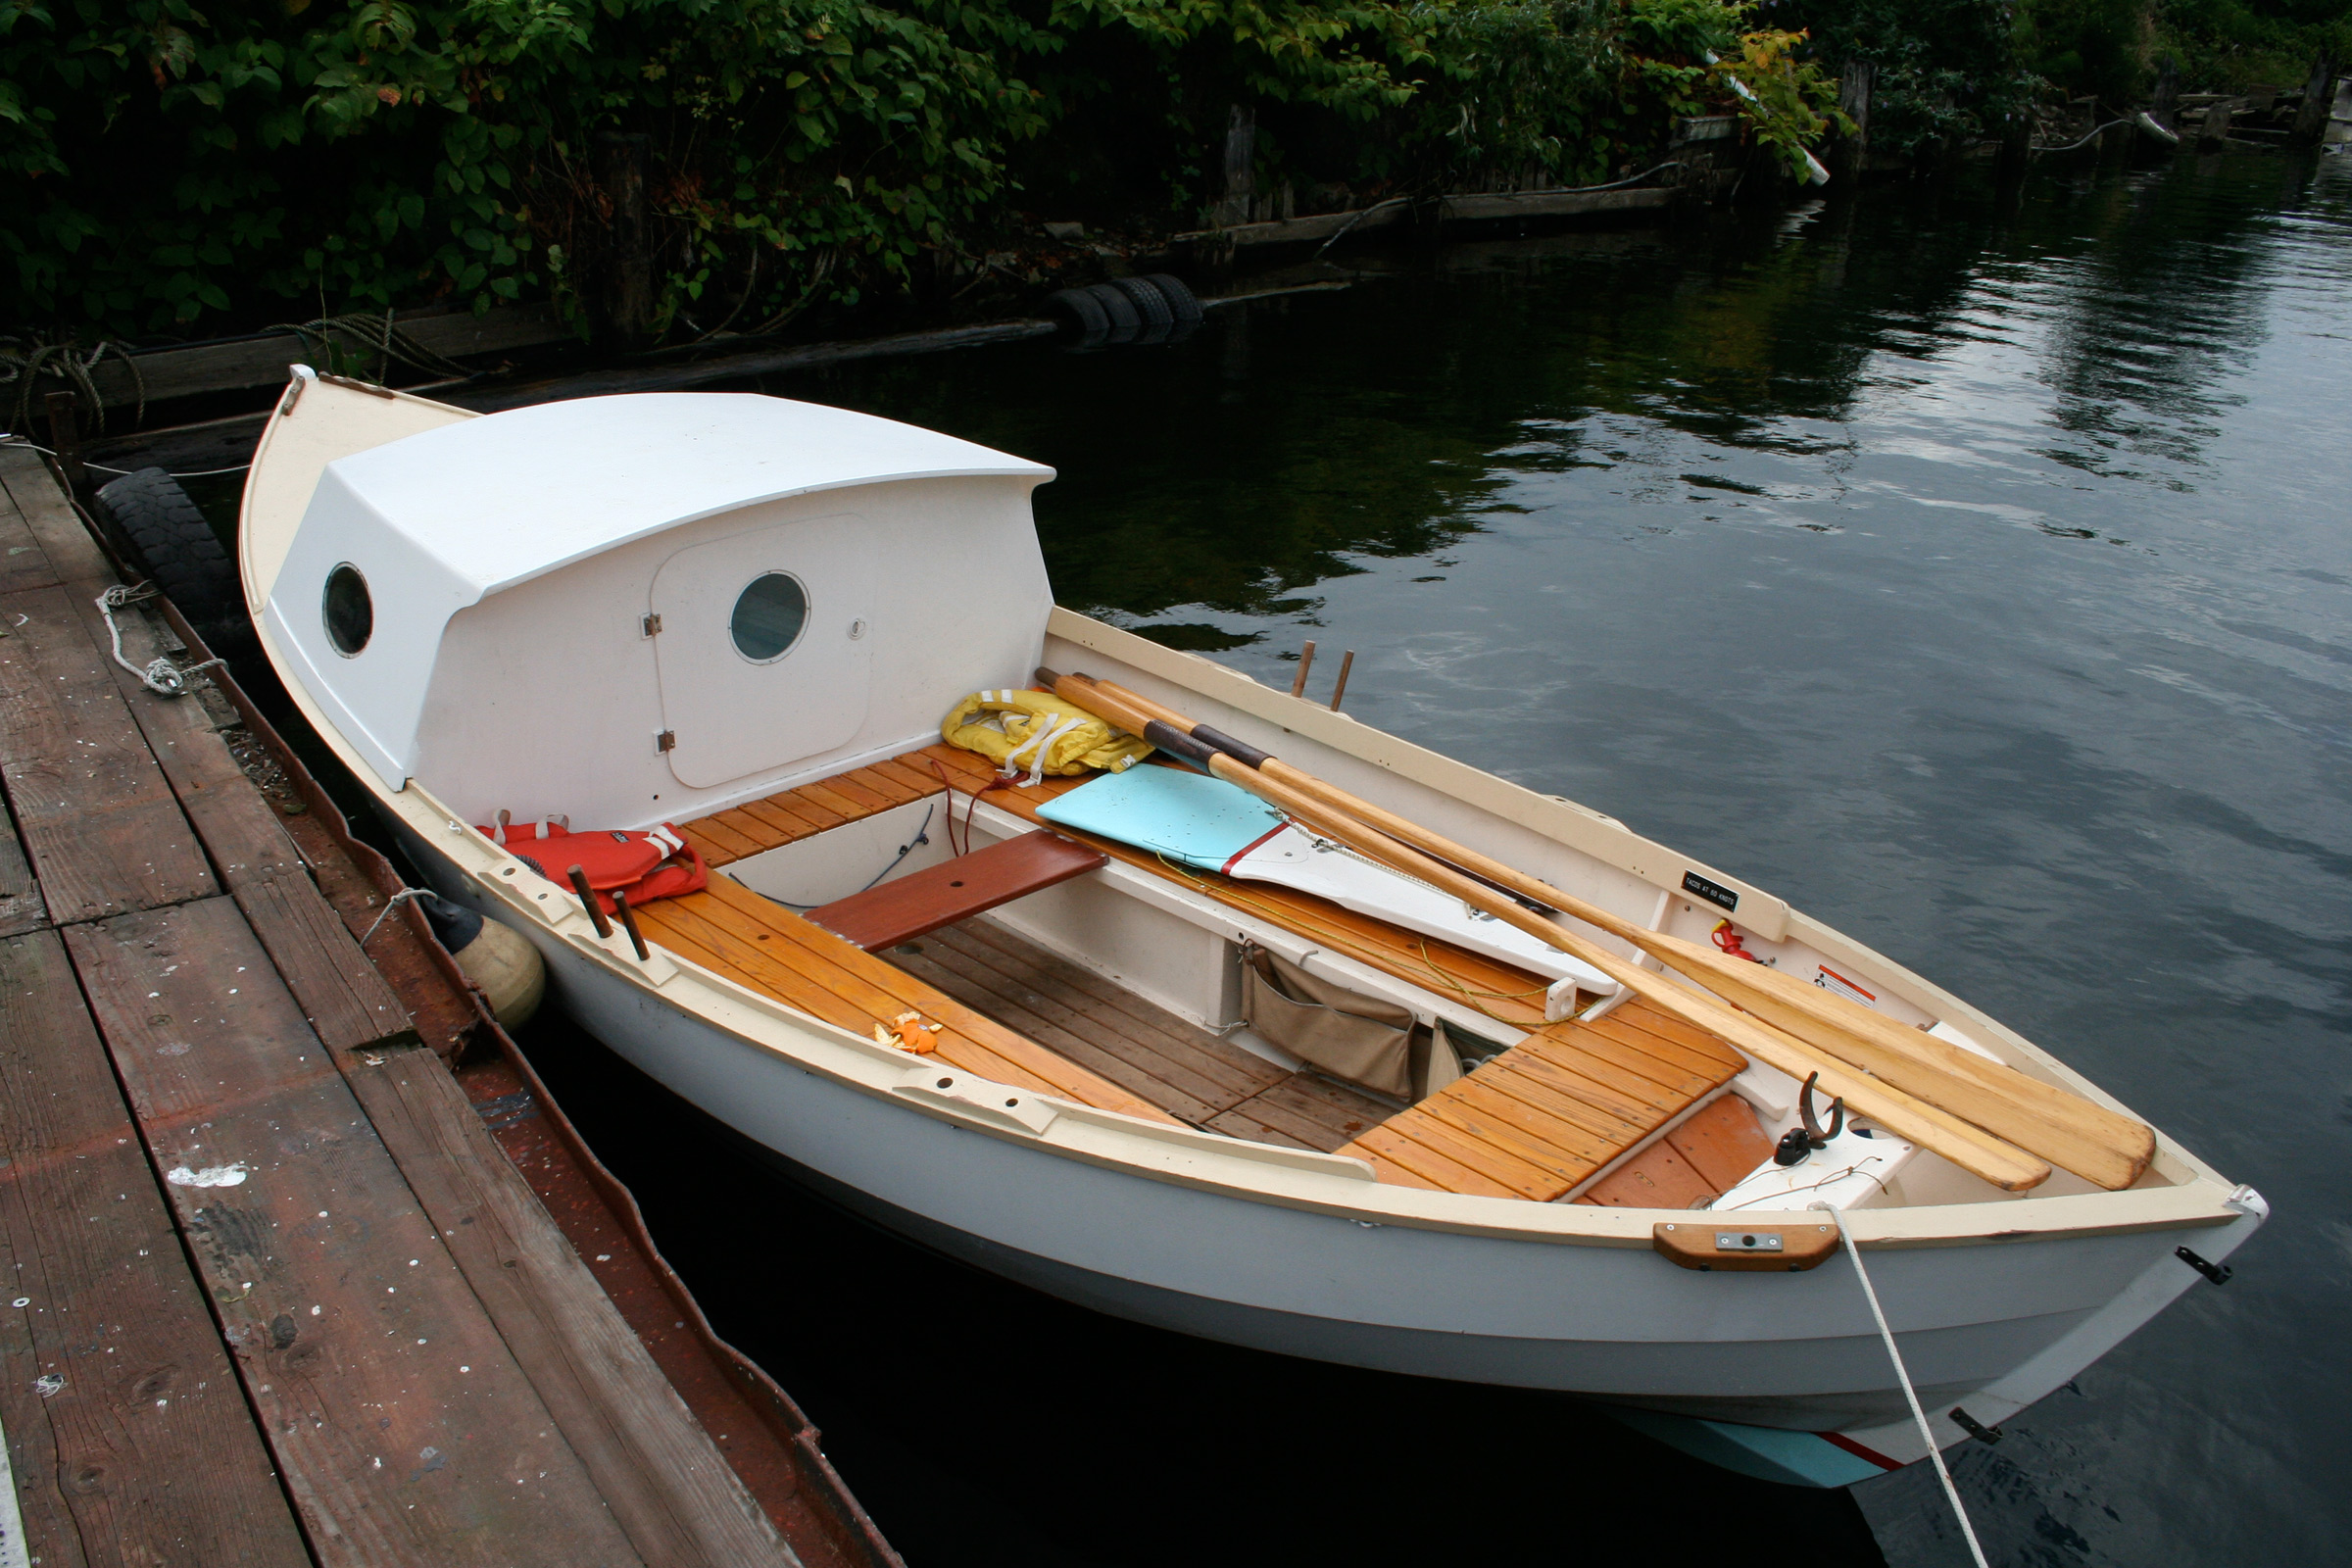
I was intrigued by the tool tote Ben Fuller presents in this issue. I have something similar in my shop that serves the same purpose. I sent a photo of it to Ben and he thought that it was a caulker’s bench.
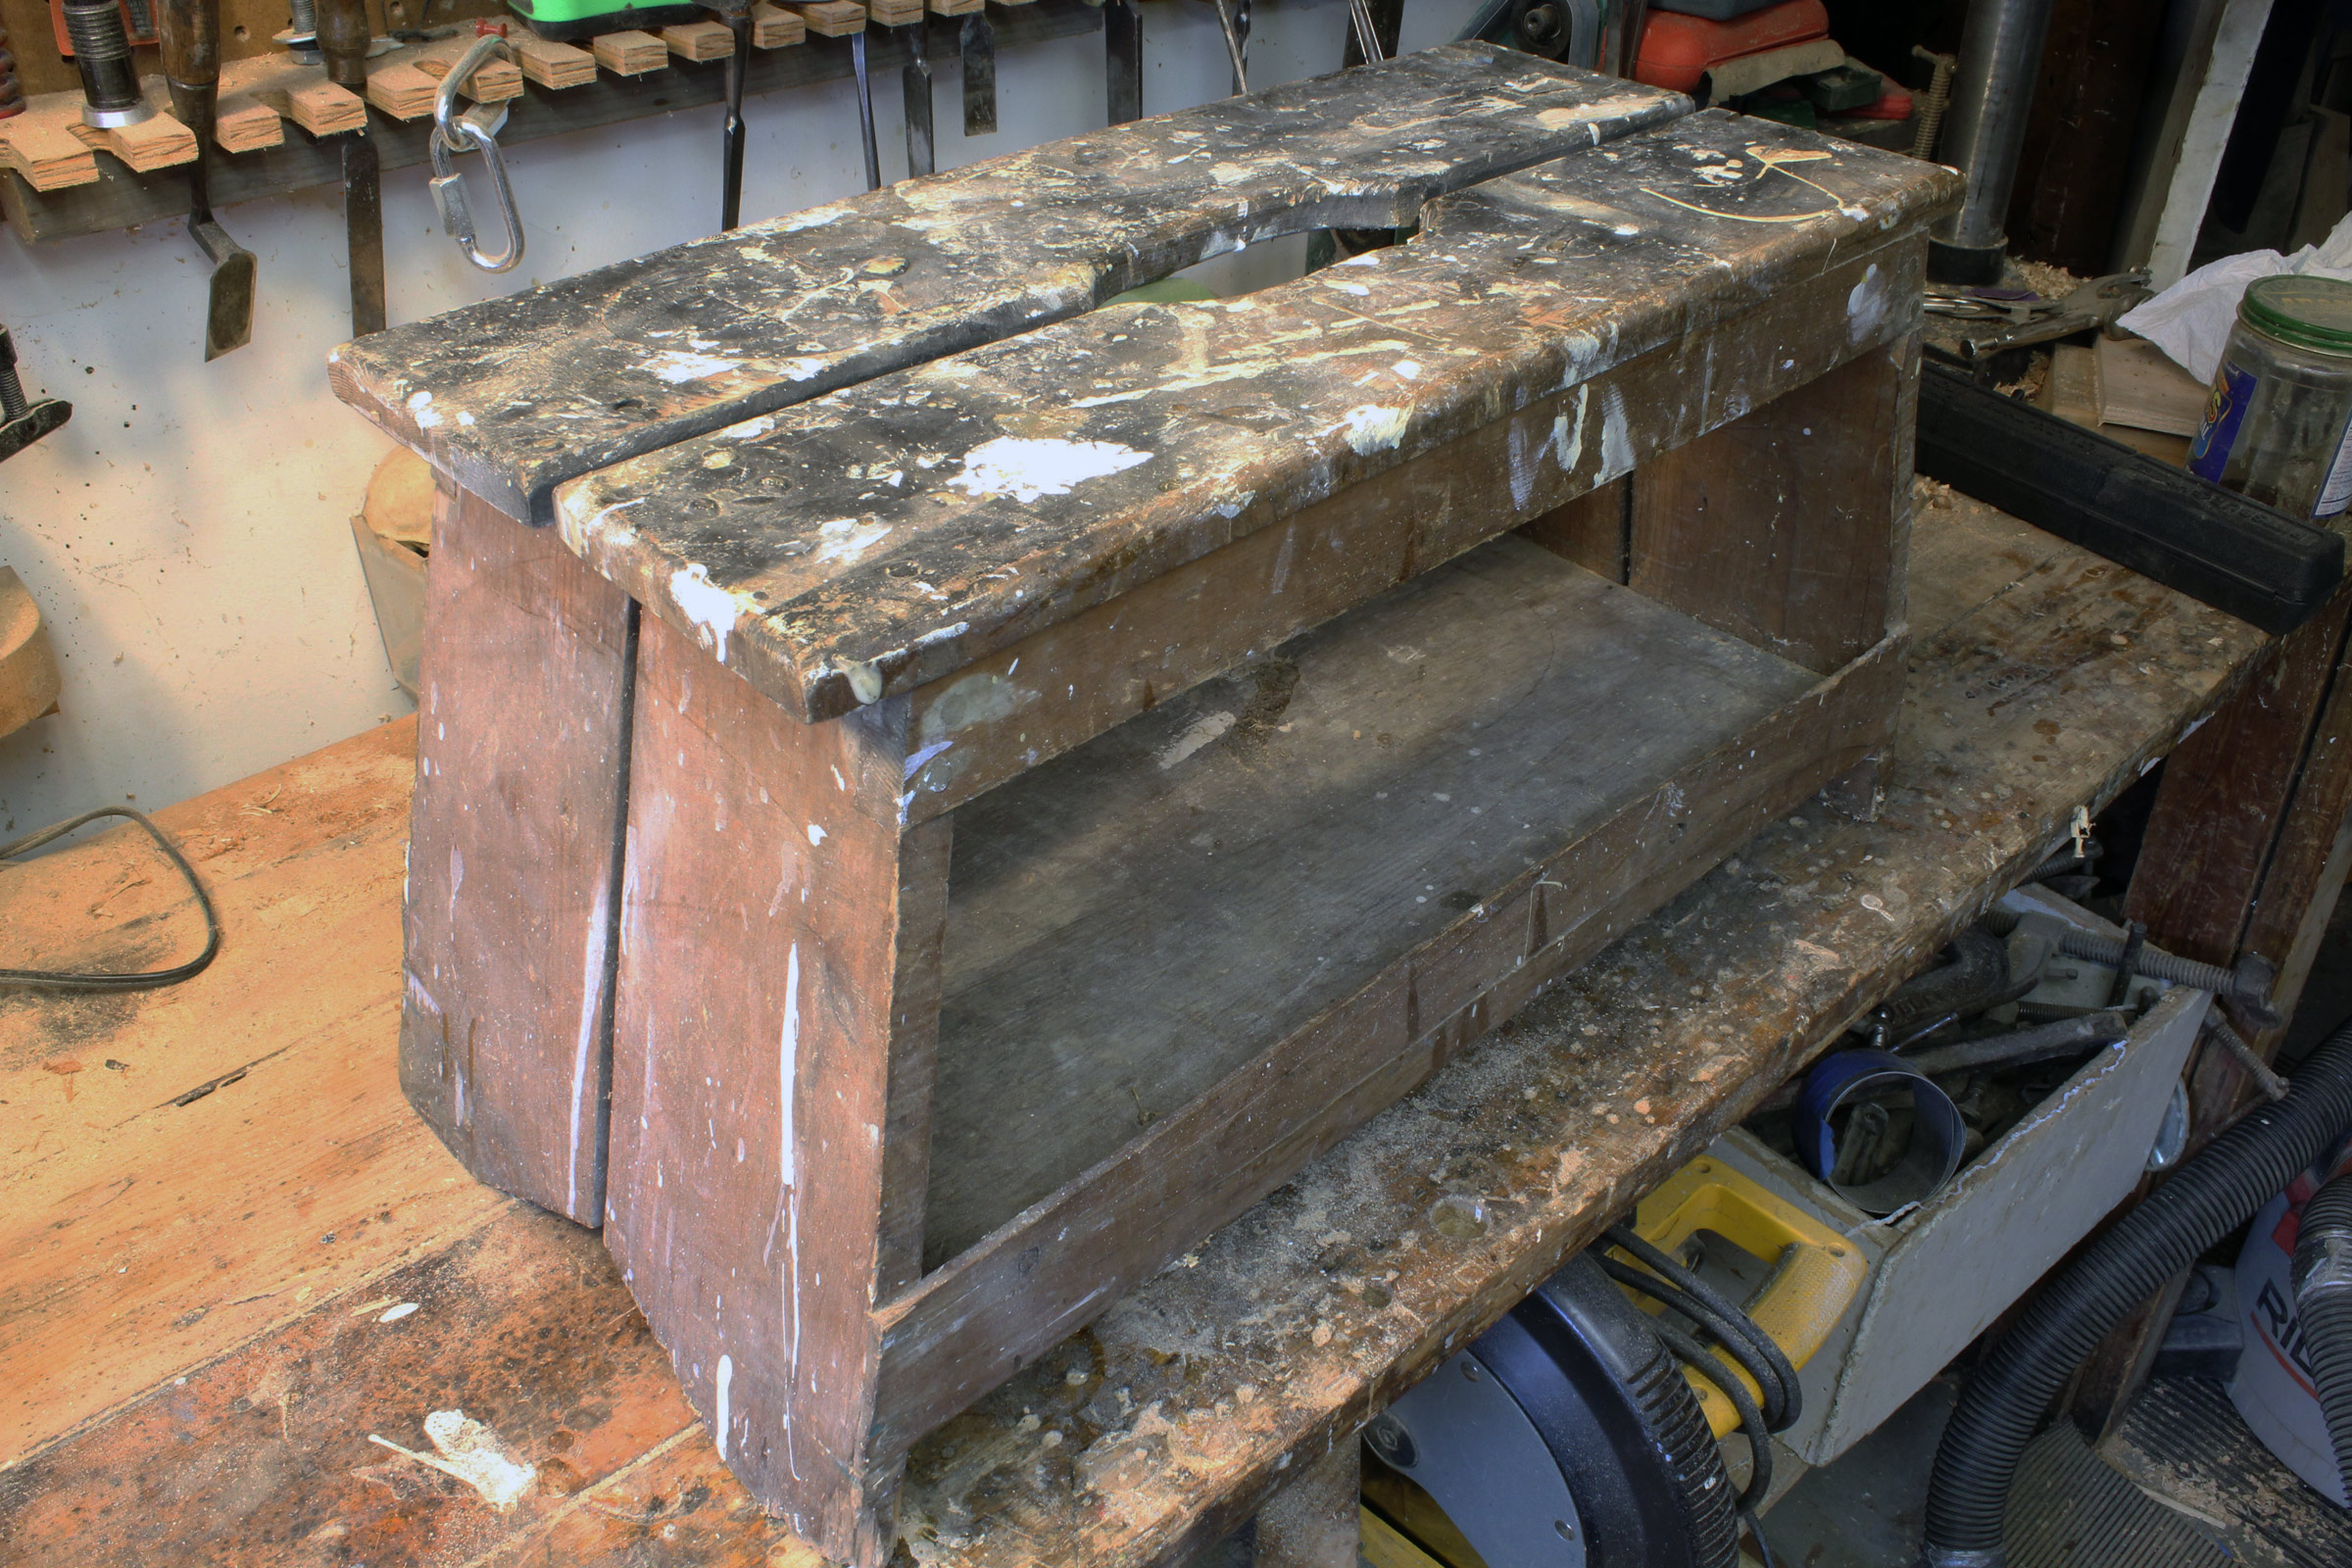
My old step stool/tool tote has seen decades of action with boatbuilding and home improvements. Like Ben Fuller’s version, it has simple joinery and is just held together with screws, and should last another generation, but I wasn’t going to let the absence of need get in the way of an engaging project.
So, while I didn’t need another tote, Ben’s mention that Joe Liener would have built a fancier version of the tote with rabbeted joints was all I needed to decide to build one. To comply with the Stay Home order from the Washington State governor, I avoided going shopping for lumber by looking around the house for wood I could use.

I cut the finger joints on my tables saw using a sled to hold the workpieces upright. I considered dovetails, but they are a bit too fussy for me and I wanted to keep the project in my comfort zone.
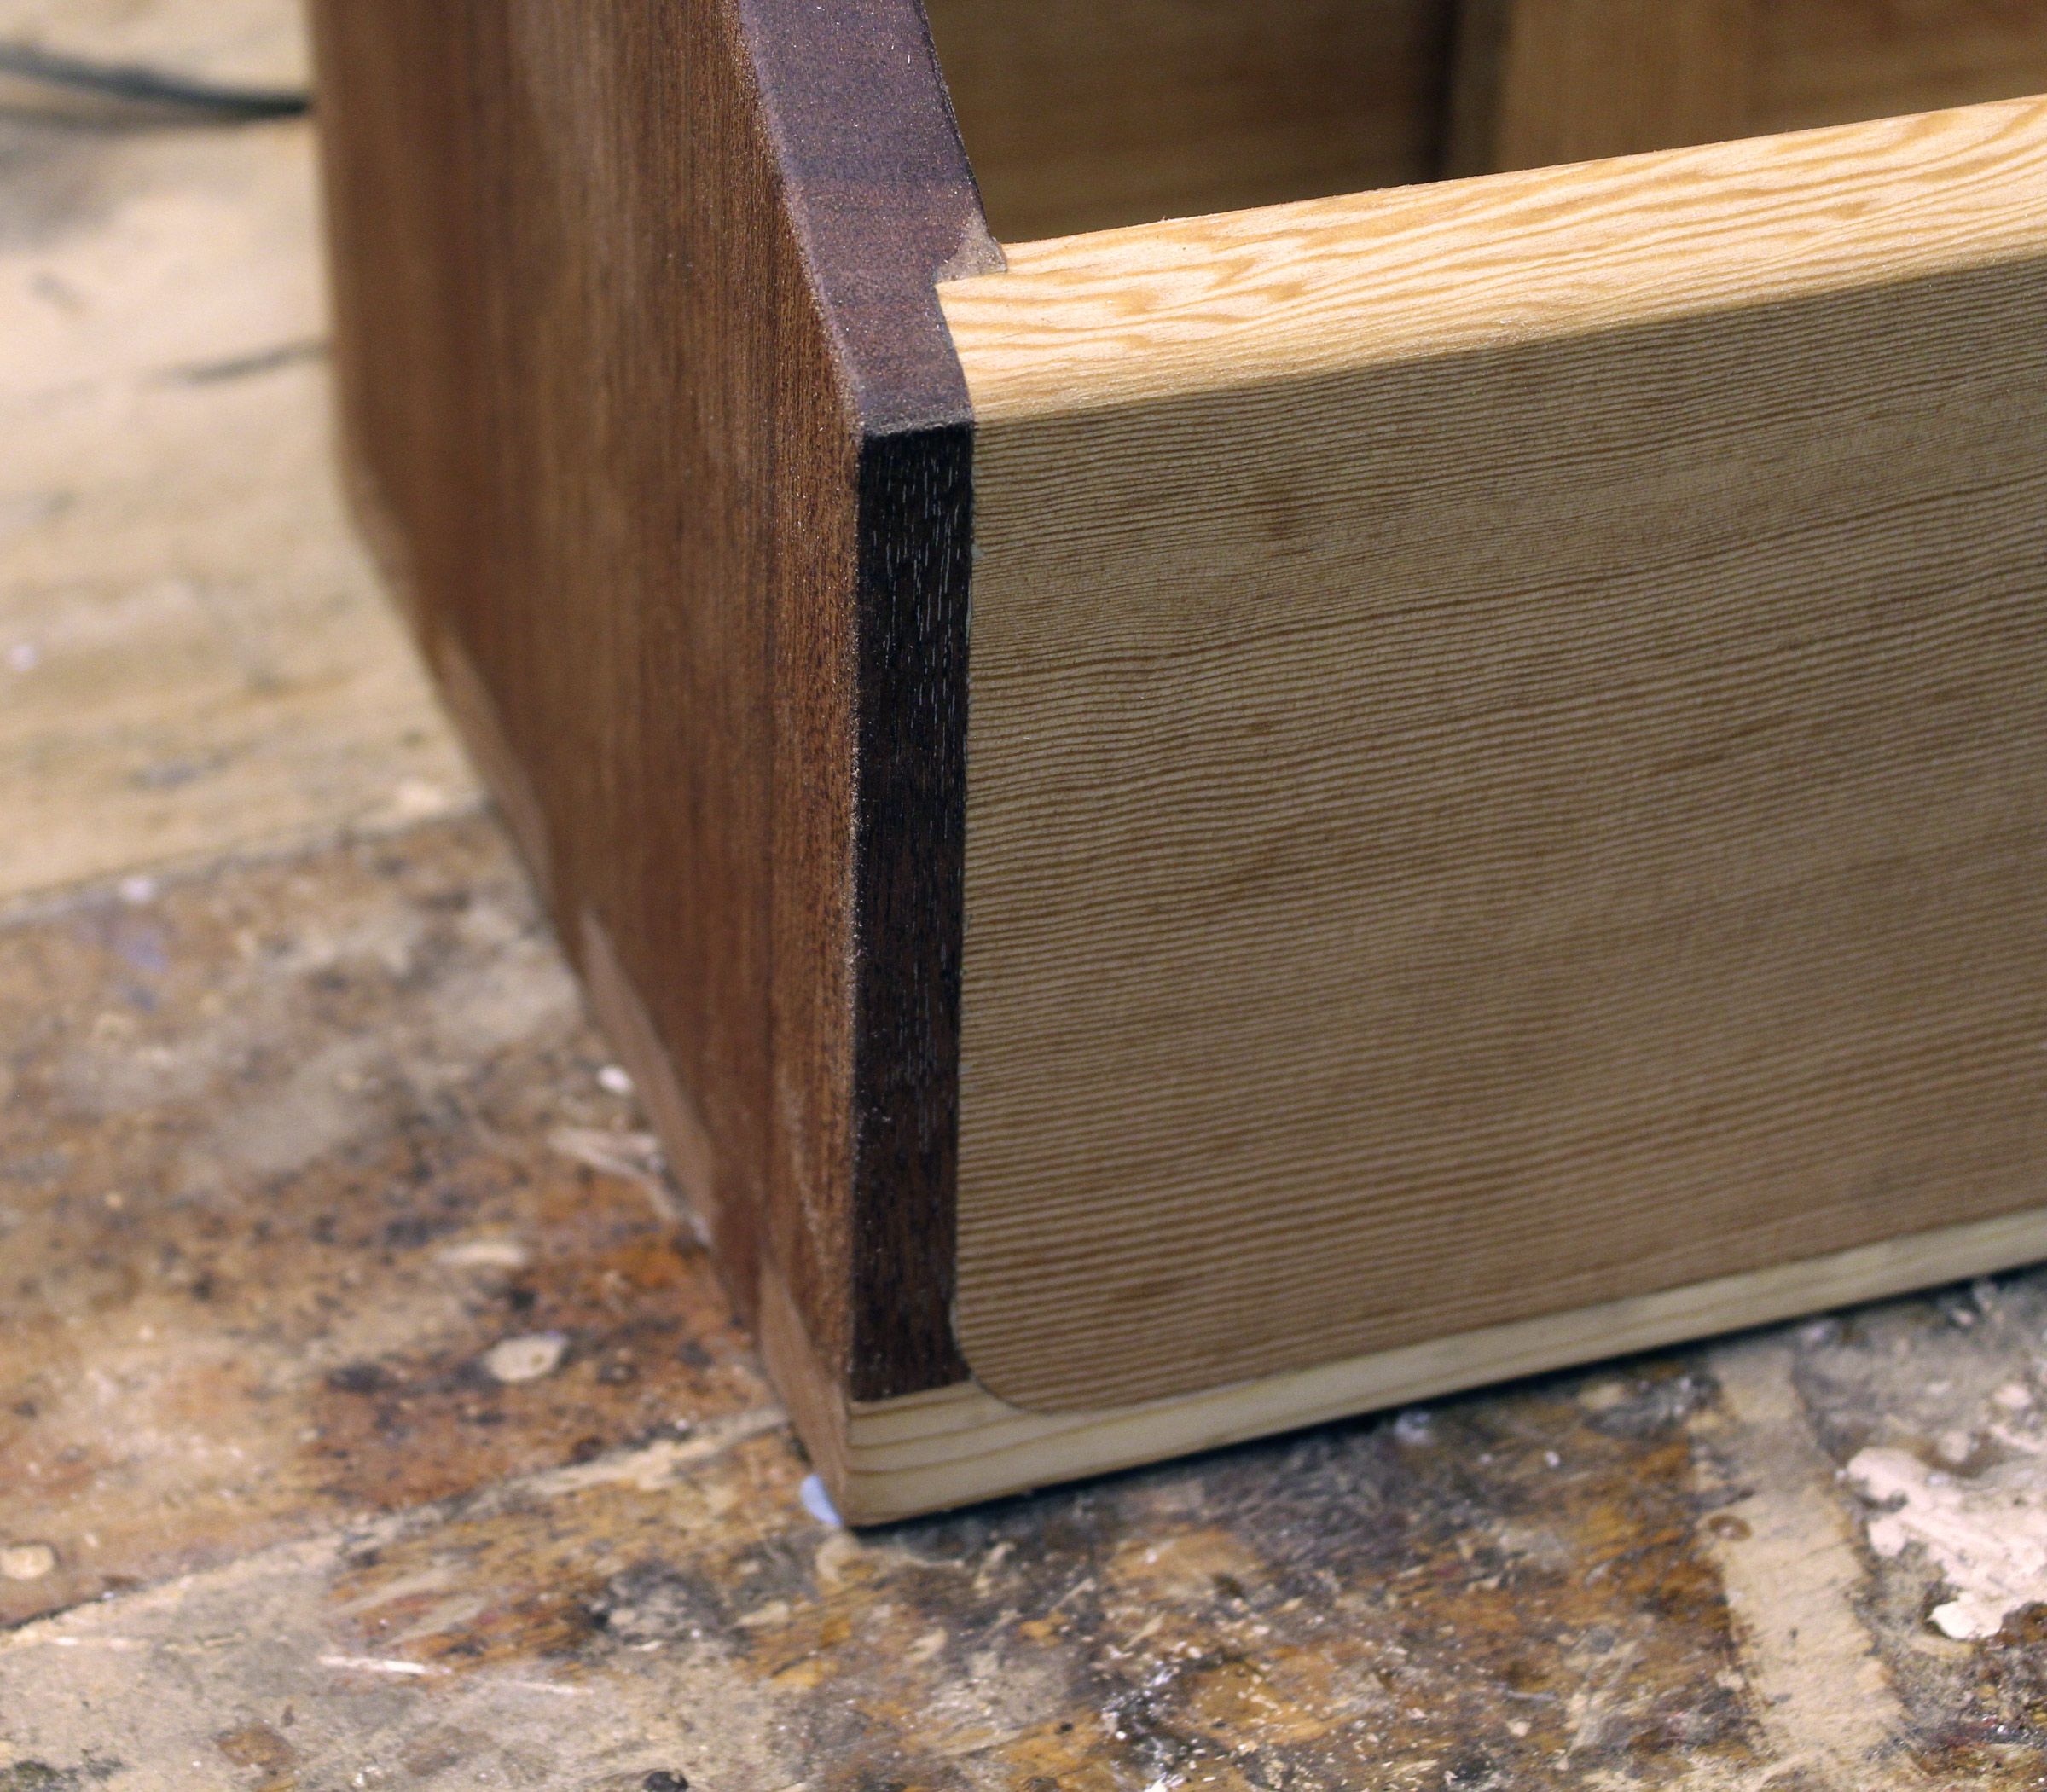
I cut the rabbets in the ends and sides with a router and opted to keep the radiused corner rather than chisel it square.
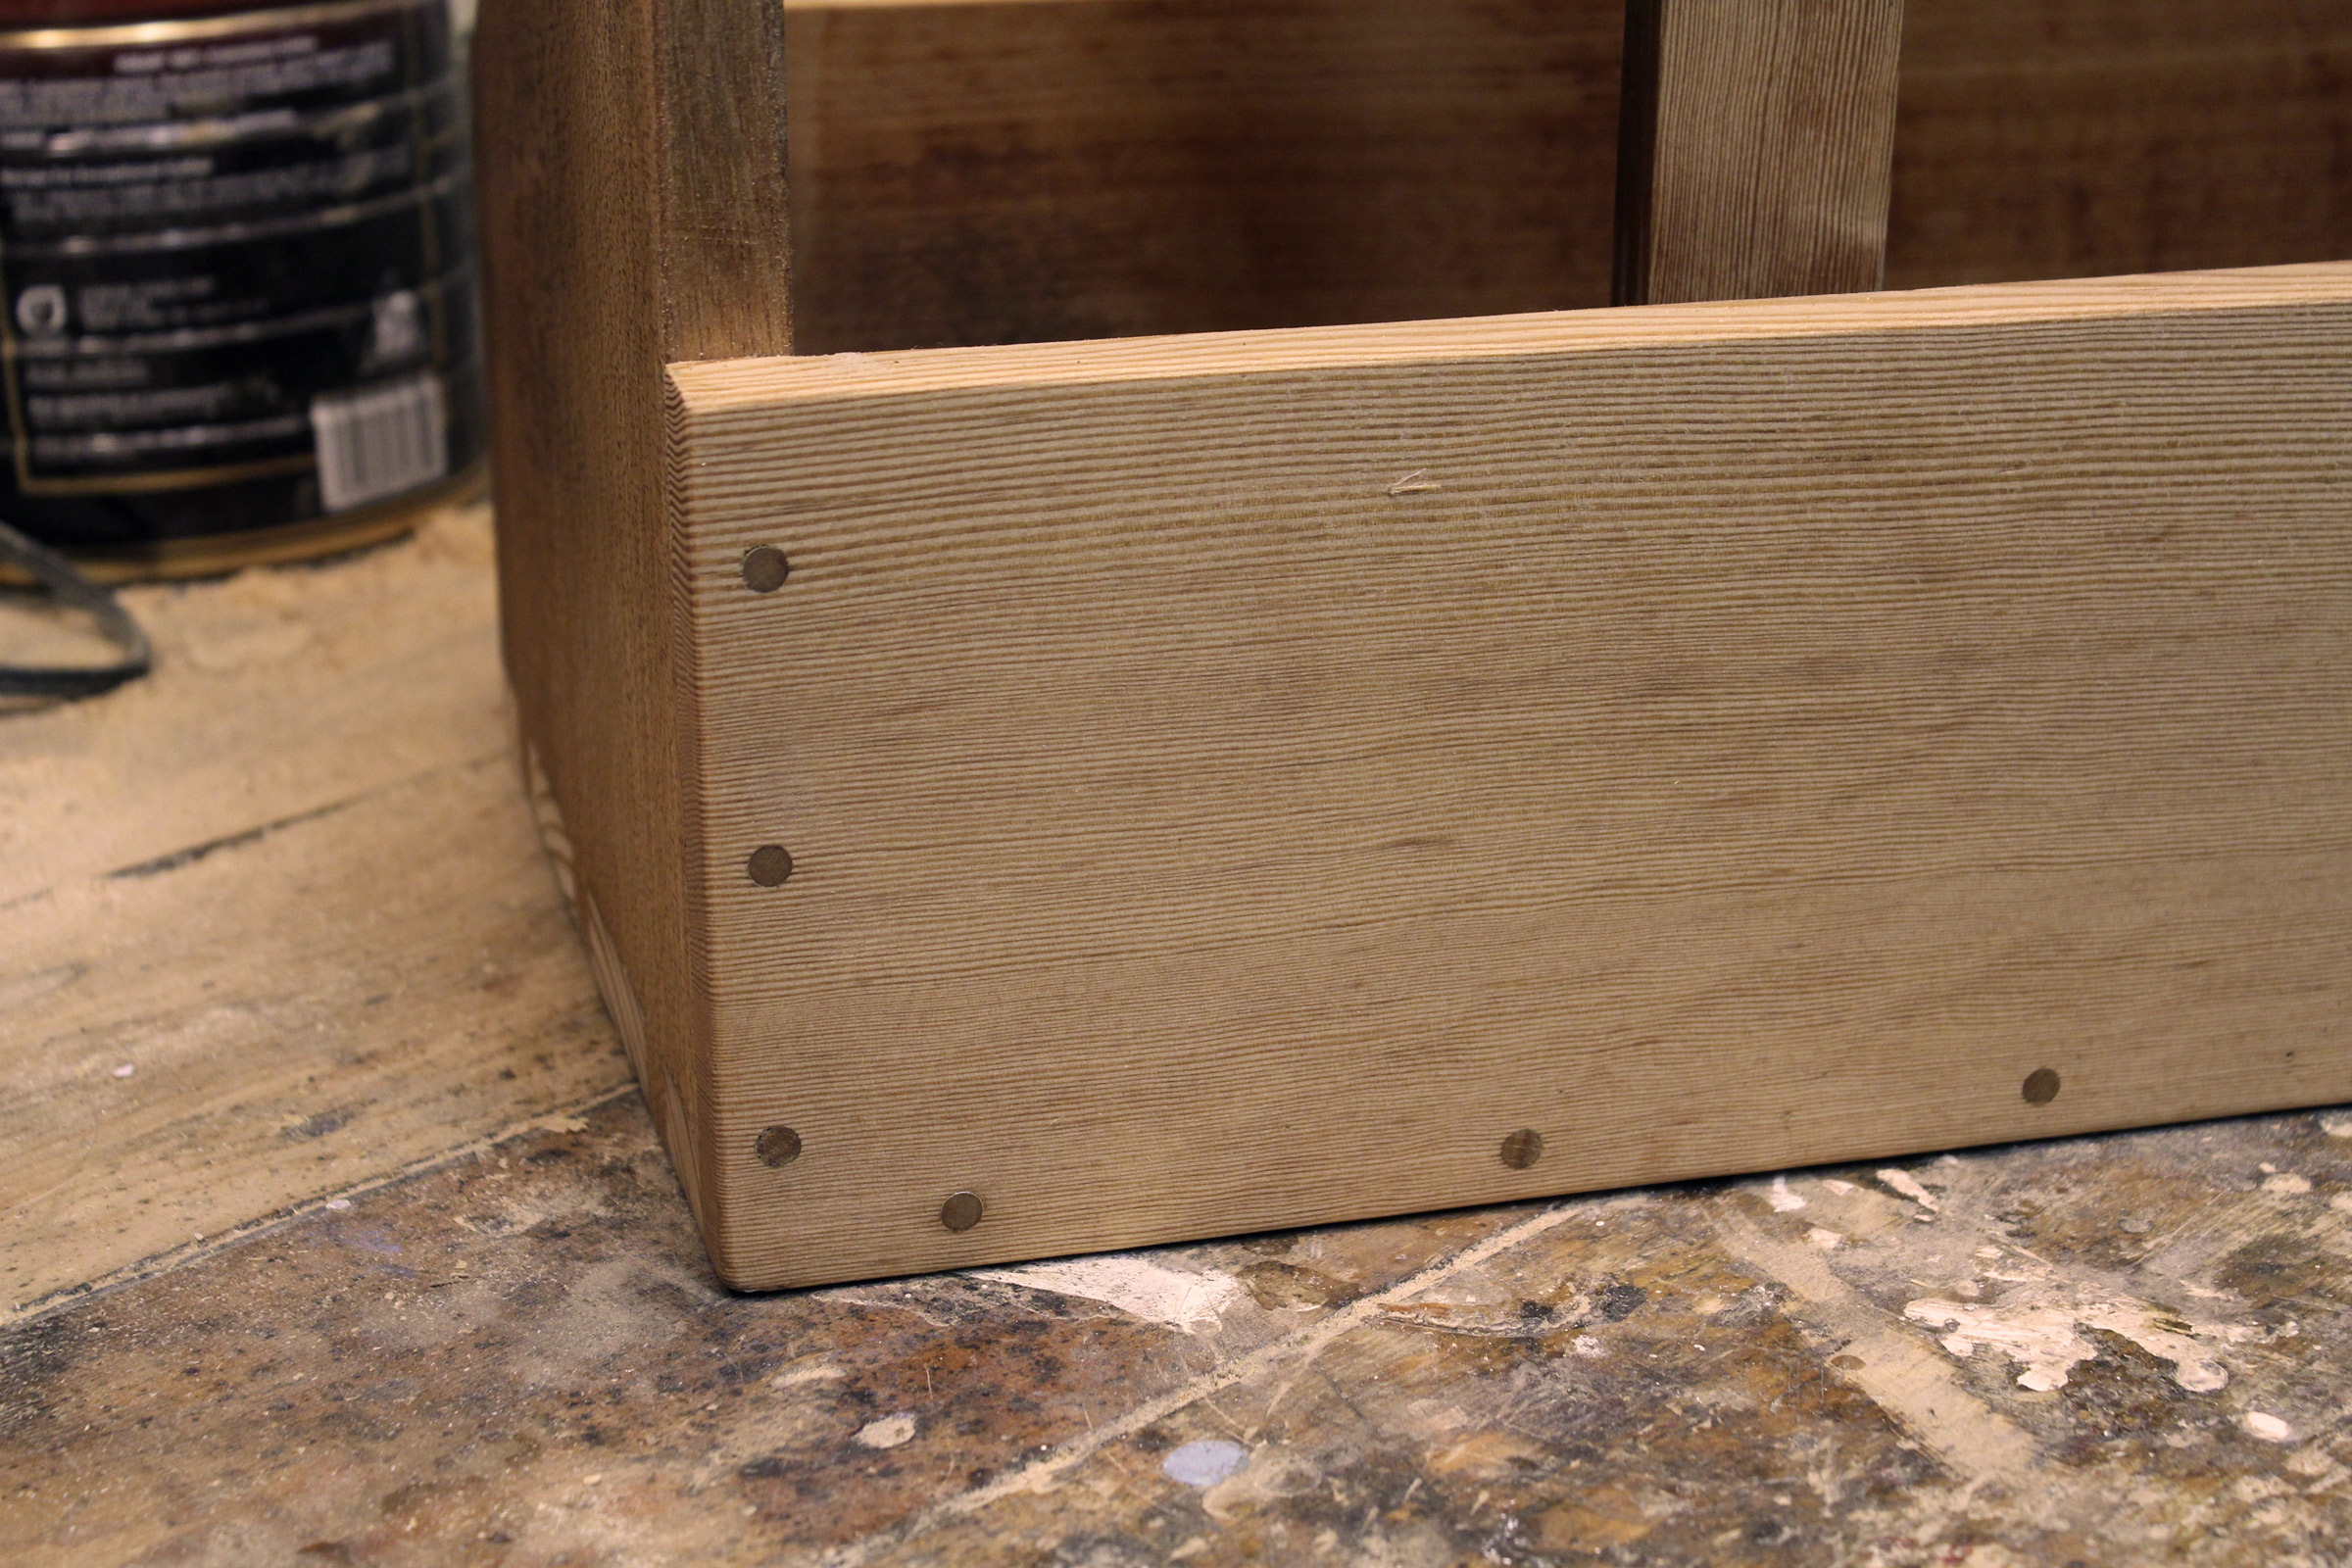
I didn’t rabbet the back into the sides, but secured it with pegs and glue.
For a tighter fit in the mortises, I kerfed and wedged the tenons—a bit of lily gilding, perhaps. Glue would suffice.
The widest board I found was a 24″ 1×12 pine shelf I had in my shop’s storage room. I cleared everything off of it and repurposed it for the tote’s bottom. I had mahogany scraps for the ends, and a Douglas-fir plank, once a bookshelf in the house I grew up in, for the sides and top. Making a fancier version of the tote suited me just fine. The more time and thought it required, the more time it would fill during the Stay Home order.
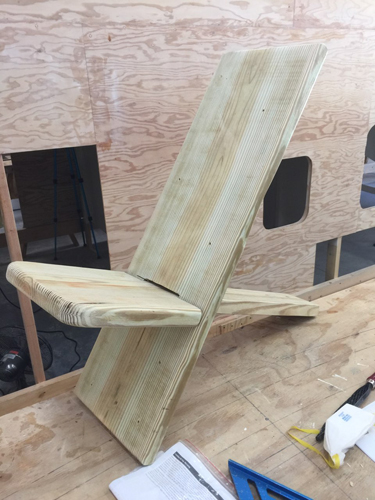
Viking Chair
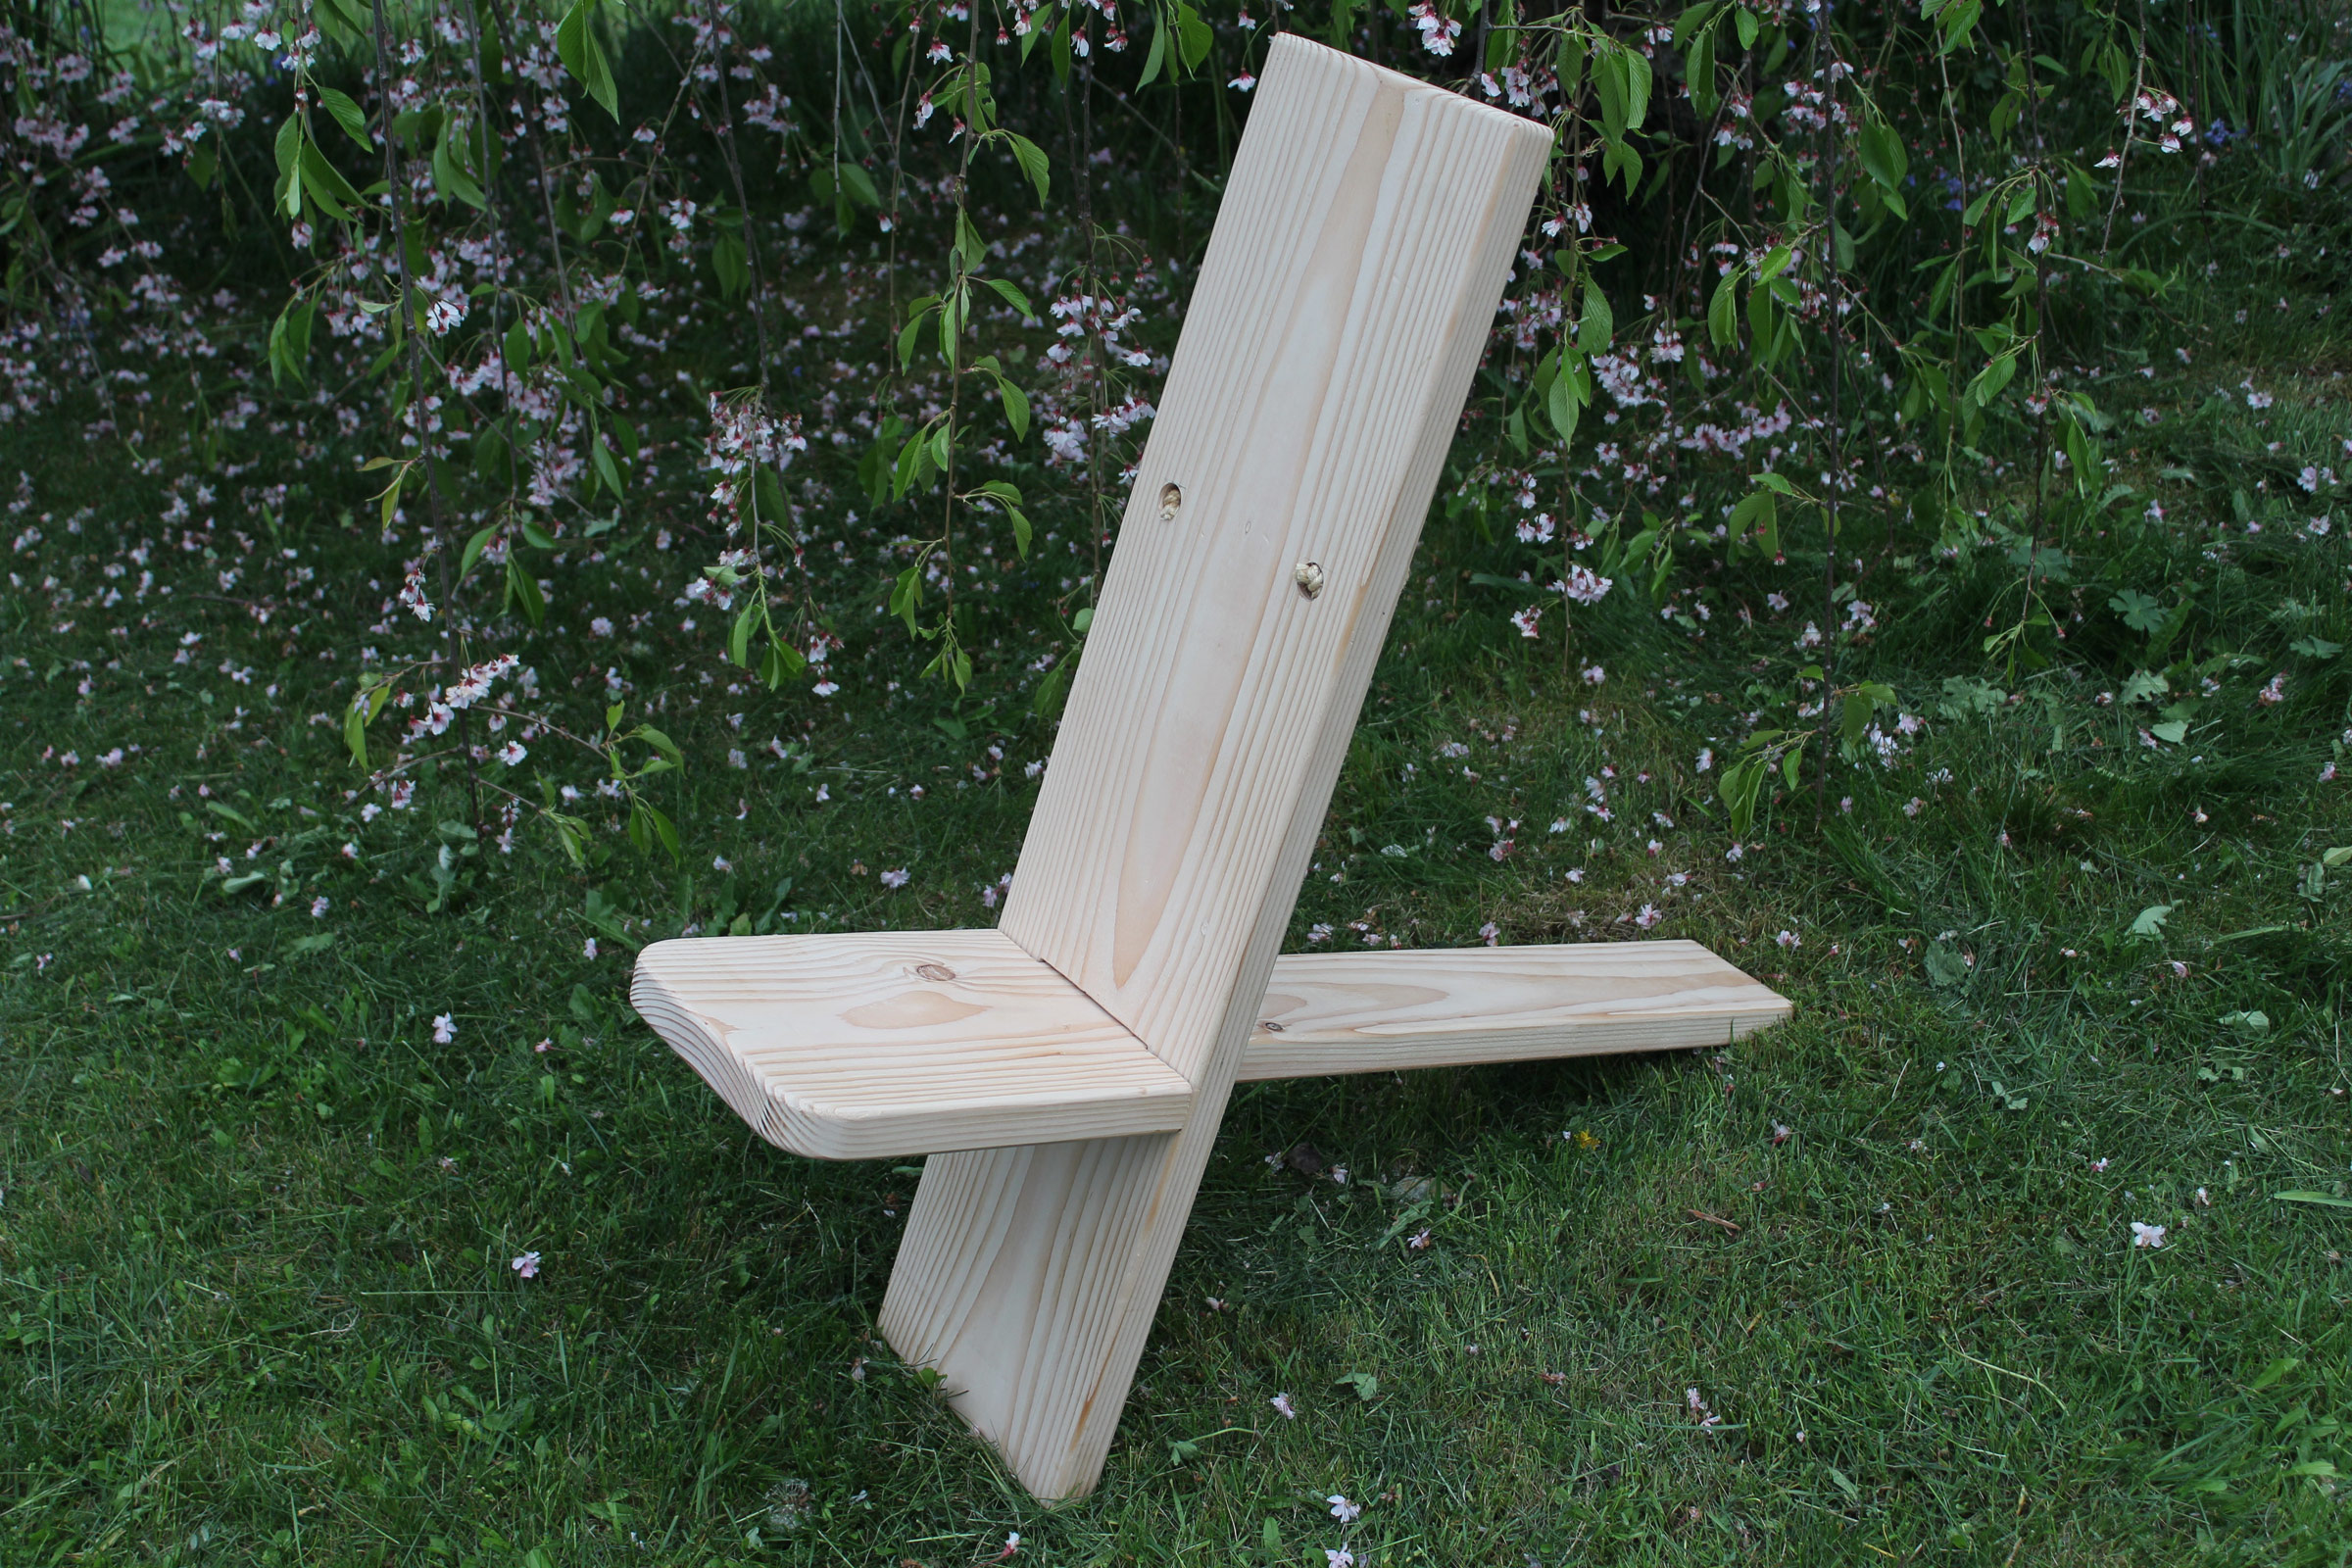
This take-apart chair is surprisingly comfortable. A pad on the seat would help for long periods of sitting, but the back feels great. If you’re tending a camp fire or stove and need to reach it, you can lean forward, bringing the chair with you until the back is vertical. The seat takes the weight and your feet keep you stable. The two holes in the back are deep countersinks for the rope handle’s knots.
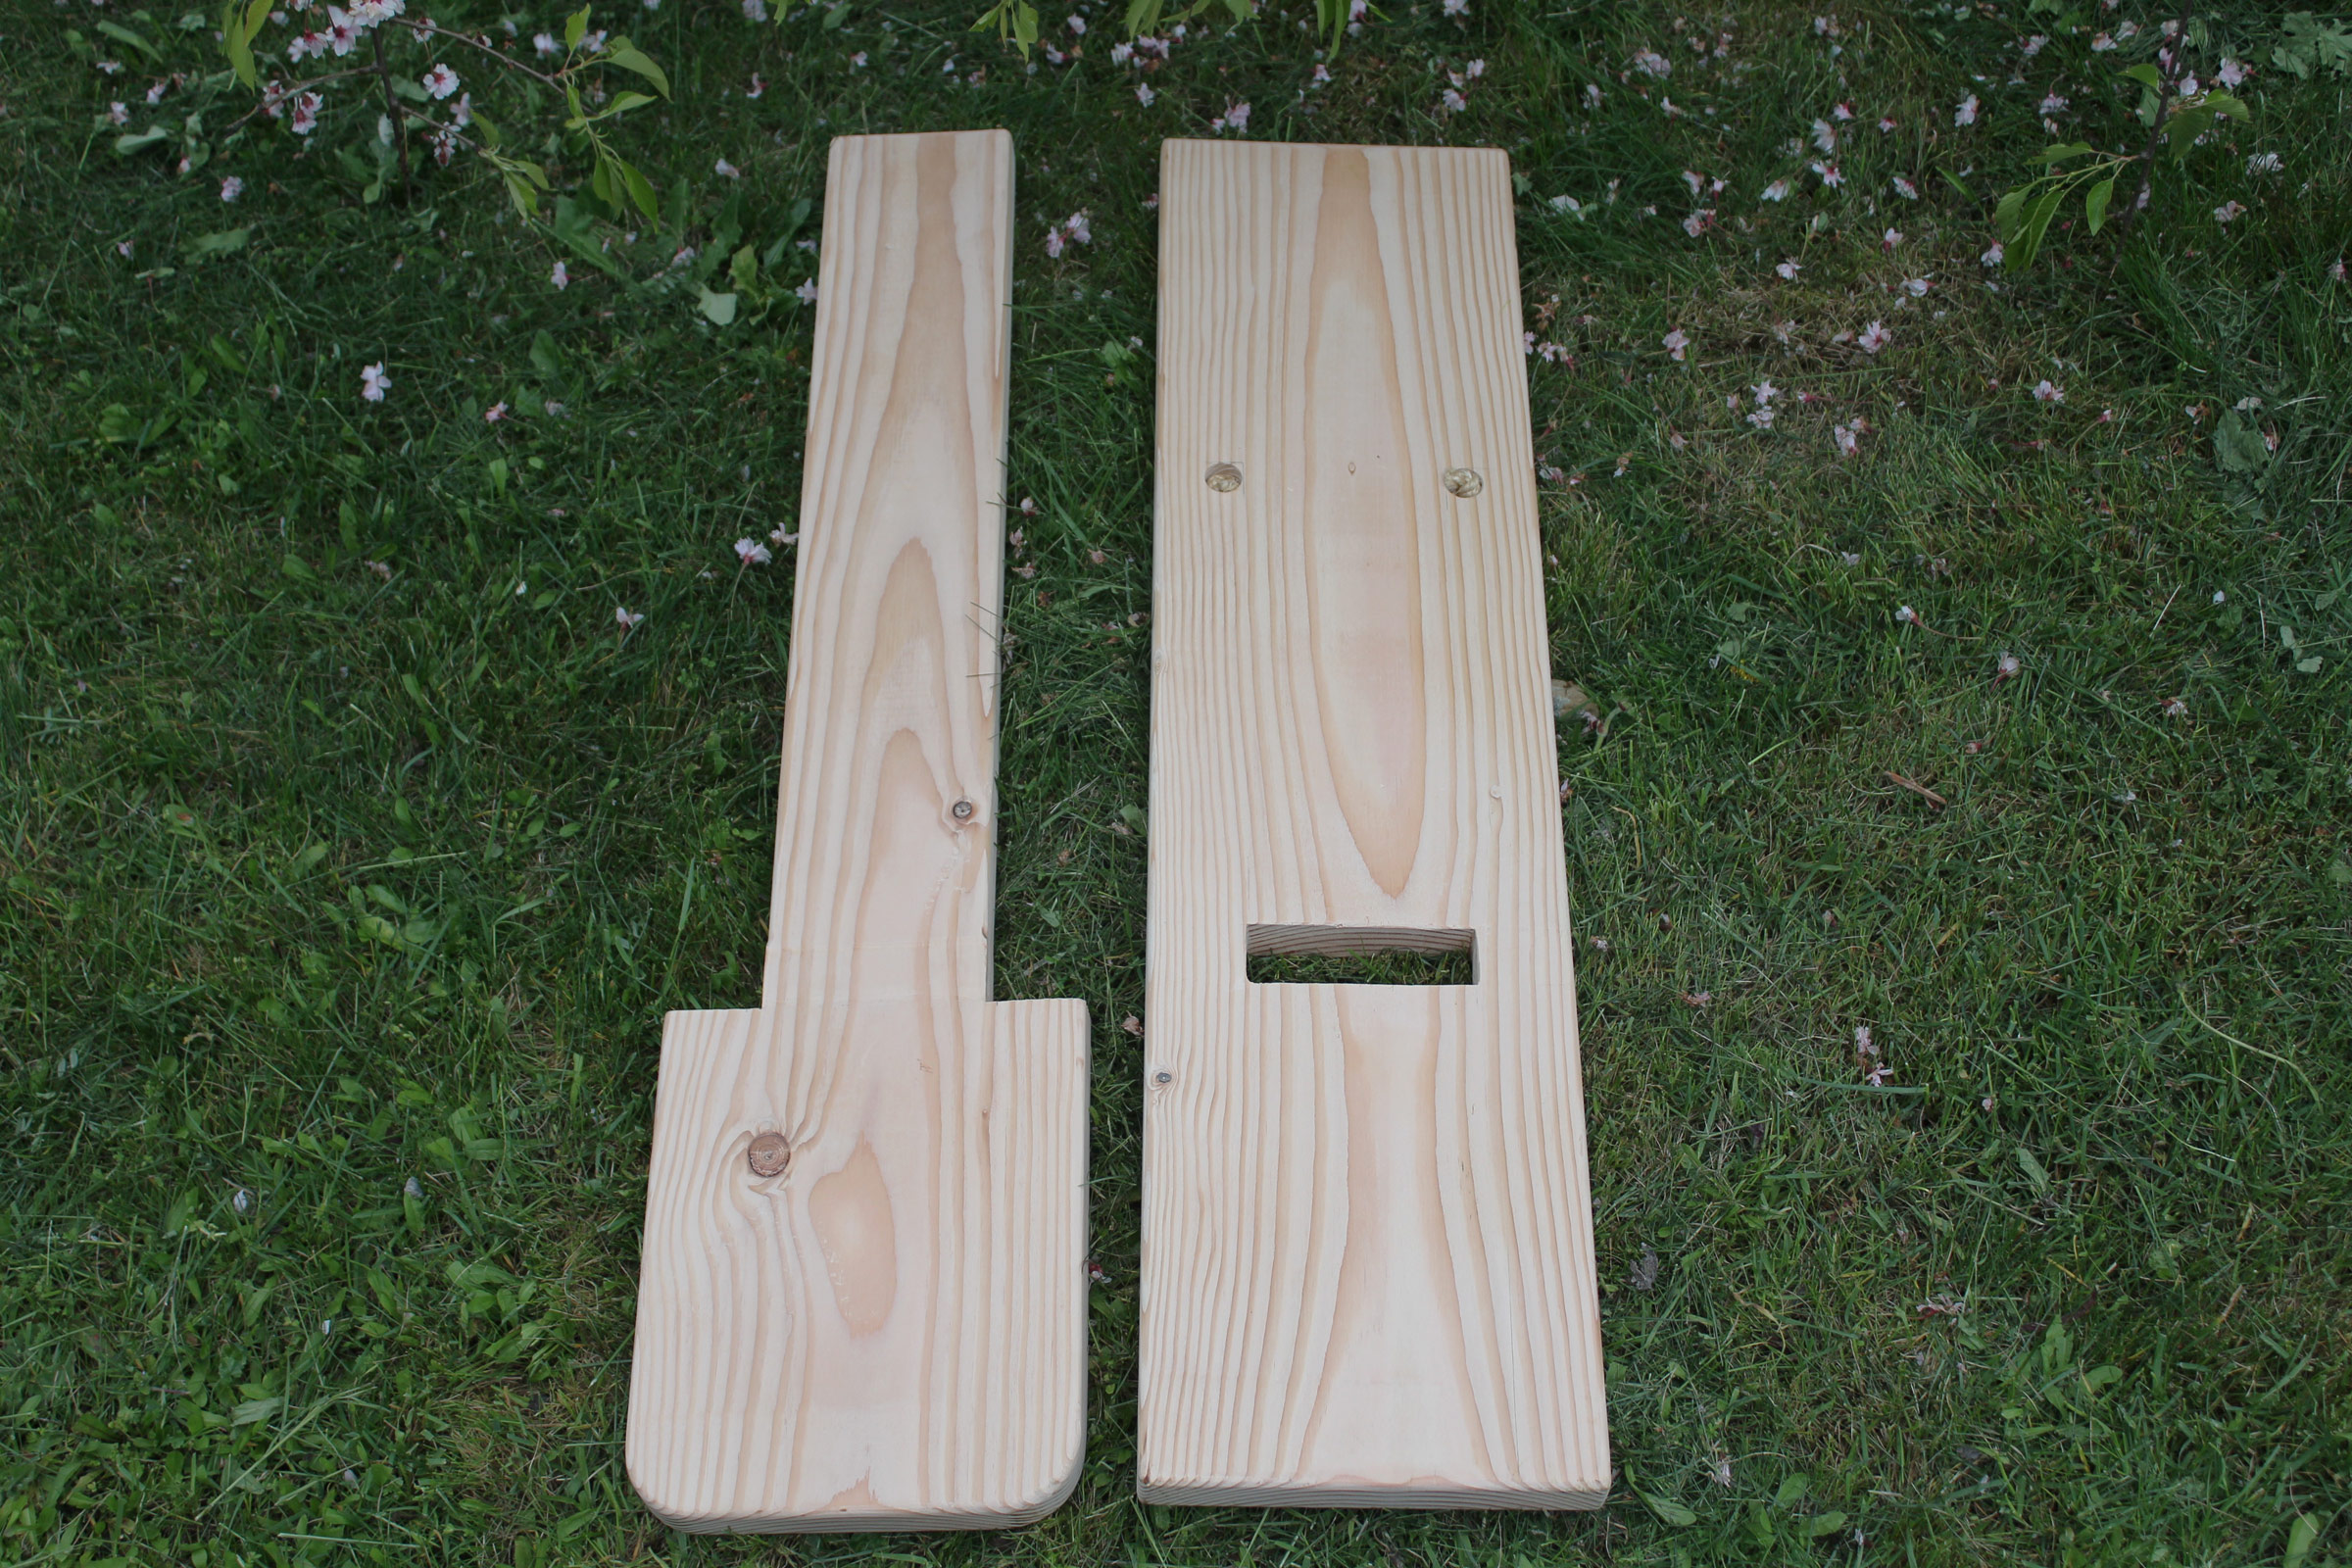
While scanning the web for other DIY projects I found a lot of sites about a Viking take-apart chair. (The design may actually be of African origin.) This version is made of two 3′ lengths of 2×10 and as simple as a woodworking project can be. One of the planks gets a mortise 11″ from one end and the other gets a 4-3/4″-wide tenon for all but 11″ of its length. I had some left over 8′ 2x10s in the garage and used the one with the fewest knots. It was cupped, so I ran it through the thickness planer to get both faces flat and then sized the mortise to match the reduced thickness.
The chair is so simple that the finished pieces are blank canvases for decorative touches.

A rope handle makes it easy to carry the chair and provides a way to hang it up out of the way.
The mortise should have a slightly loose fit to make assembly and disassembly easy. After I finished the chair, I found the two planks awkward to carry so I added a rope handle to the seat back. The tenon slips into the loop and rests its shoulders on it. There’s enough slack in the rope to get a comfortable grip on it. The Viking chair worked out well and we’ll be using it aboard our canal boat.
Jigsaw Table
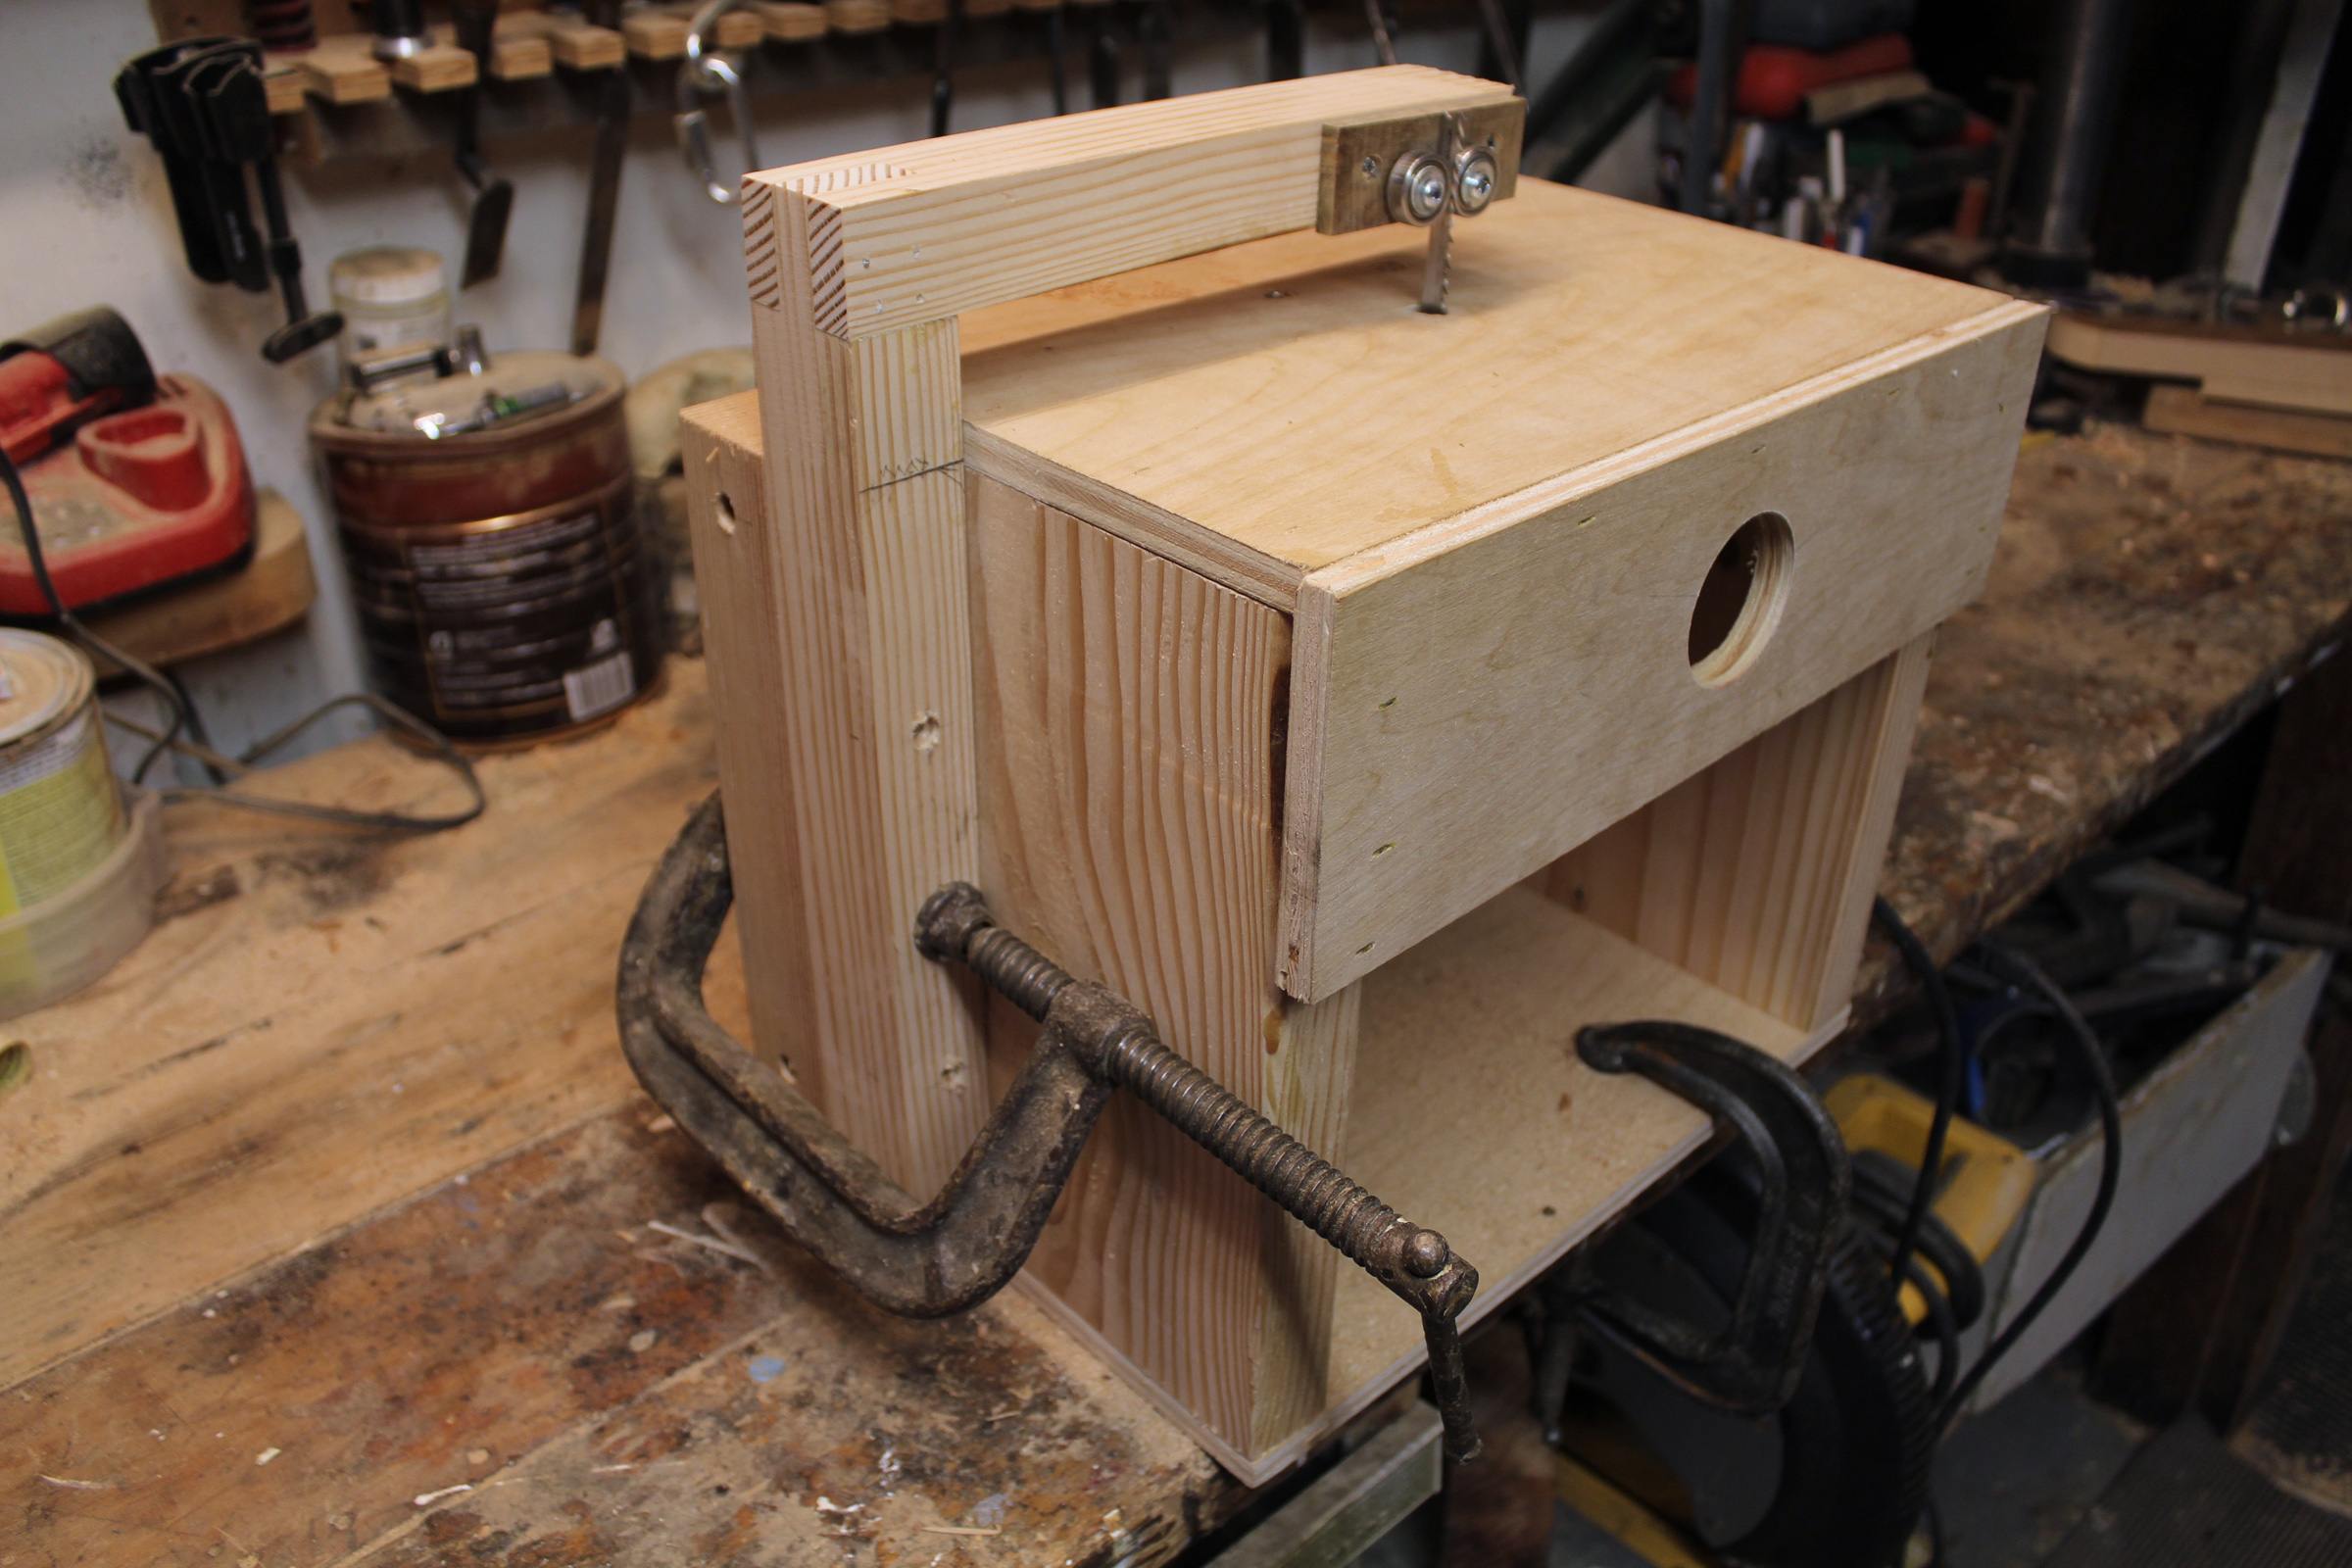
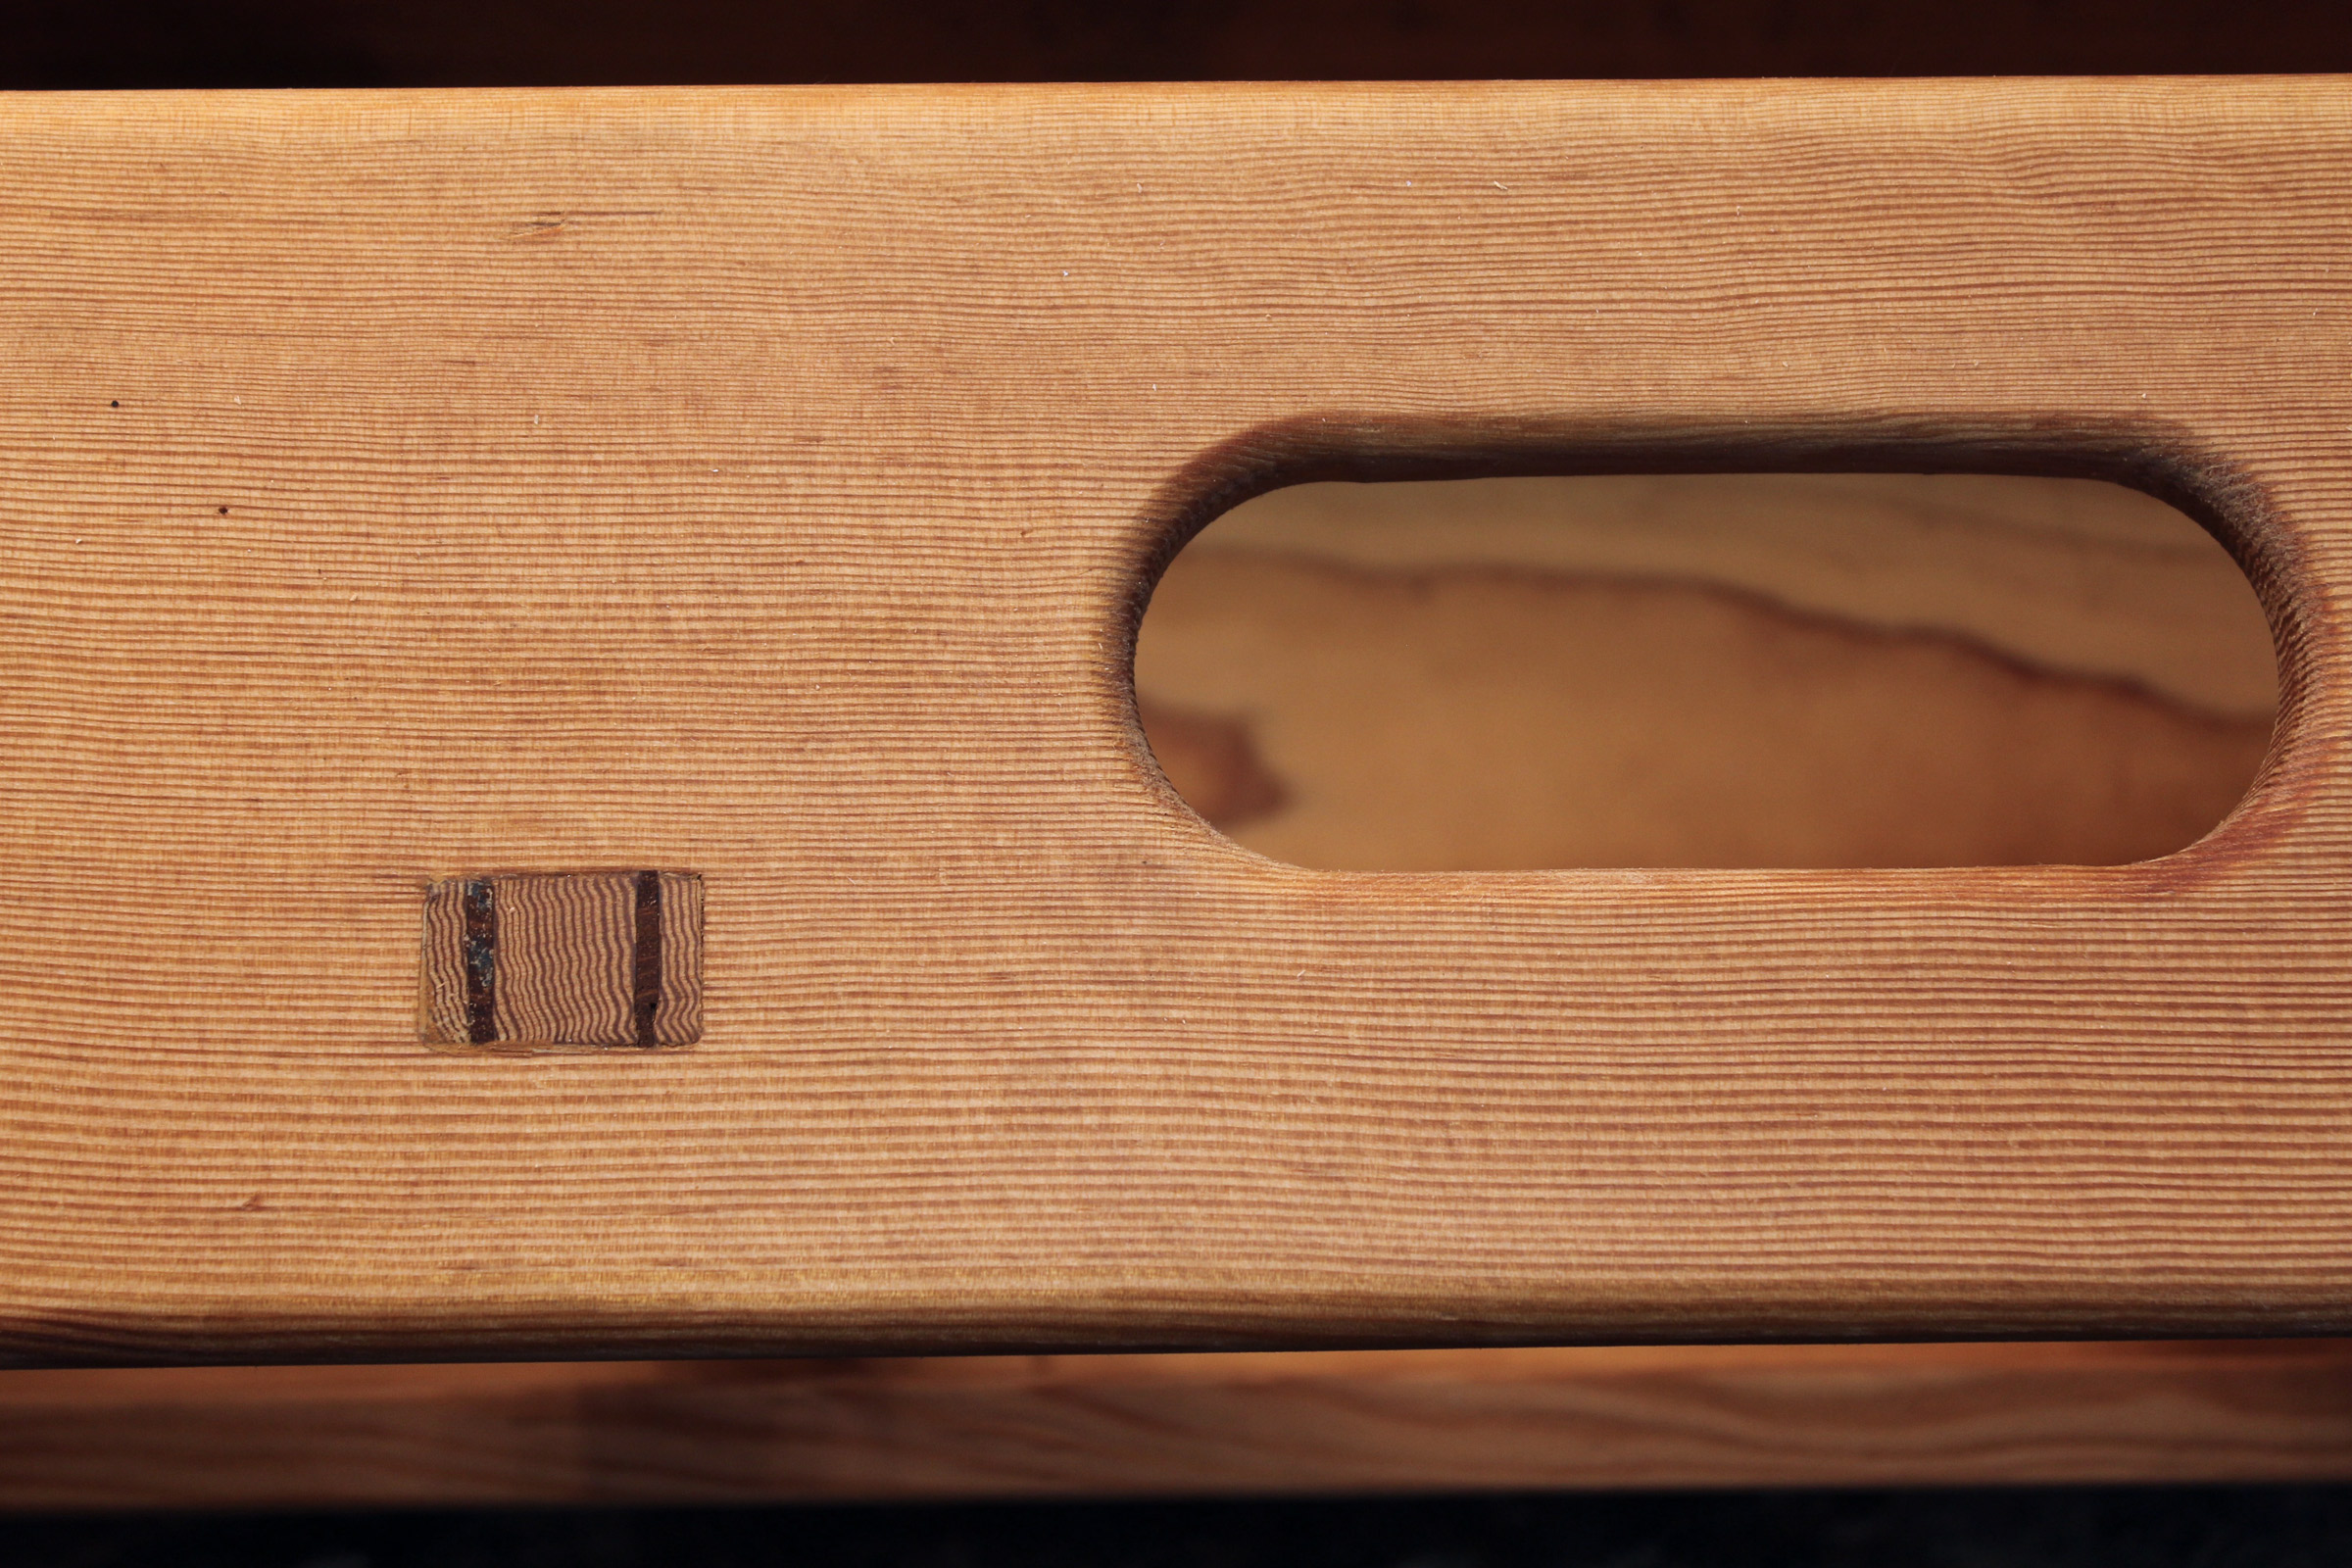
Jig-saw blades rarely stay square to the workpiece, so a guide to keep it from drifting is essential for accurate work. I had initially had the overhead arm fixed in place and intended to make an adjustable hold-down close to the blade, but the simplest arrangement turned out to be making the arm itself adjustable, held by a clamp, to serve as the hold-down. I can reach the saw’s trigger through the opening in the front. The circular hole in the front panel provides a view for changing blades.
One of the projects I’ve been meaning to do for a few years was a jigsaw table with a blade guide. I’d made a jigsaw table once before, little more than a piece of plywood with two holes to screw the jigsaw base to it and another hole for the blade. I liked being able to work small parts with the table, something that a jigsaw can’t do without a table, but I didn’t like the way the blade tended to lean to one side or the other through curved cuts and how the work piece could jump suddenly with the blade’s upstroke. One of the variations I saw on the web had an overhead arm with ball-bearing blade guides. I’m always eager to put ball bearings to use—I have a bunch of them left over from years of roller-blading—so the project interested me.
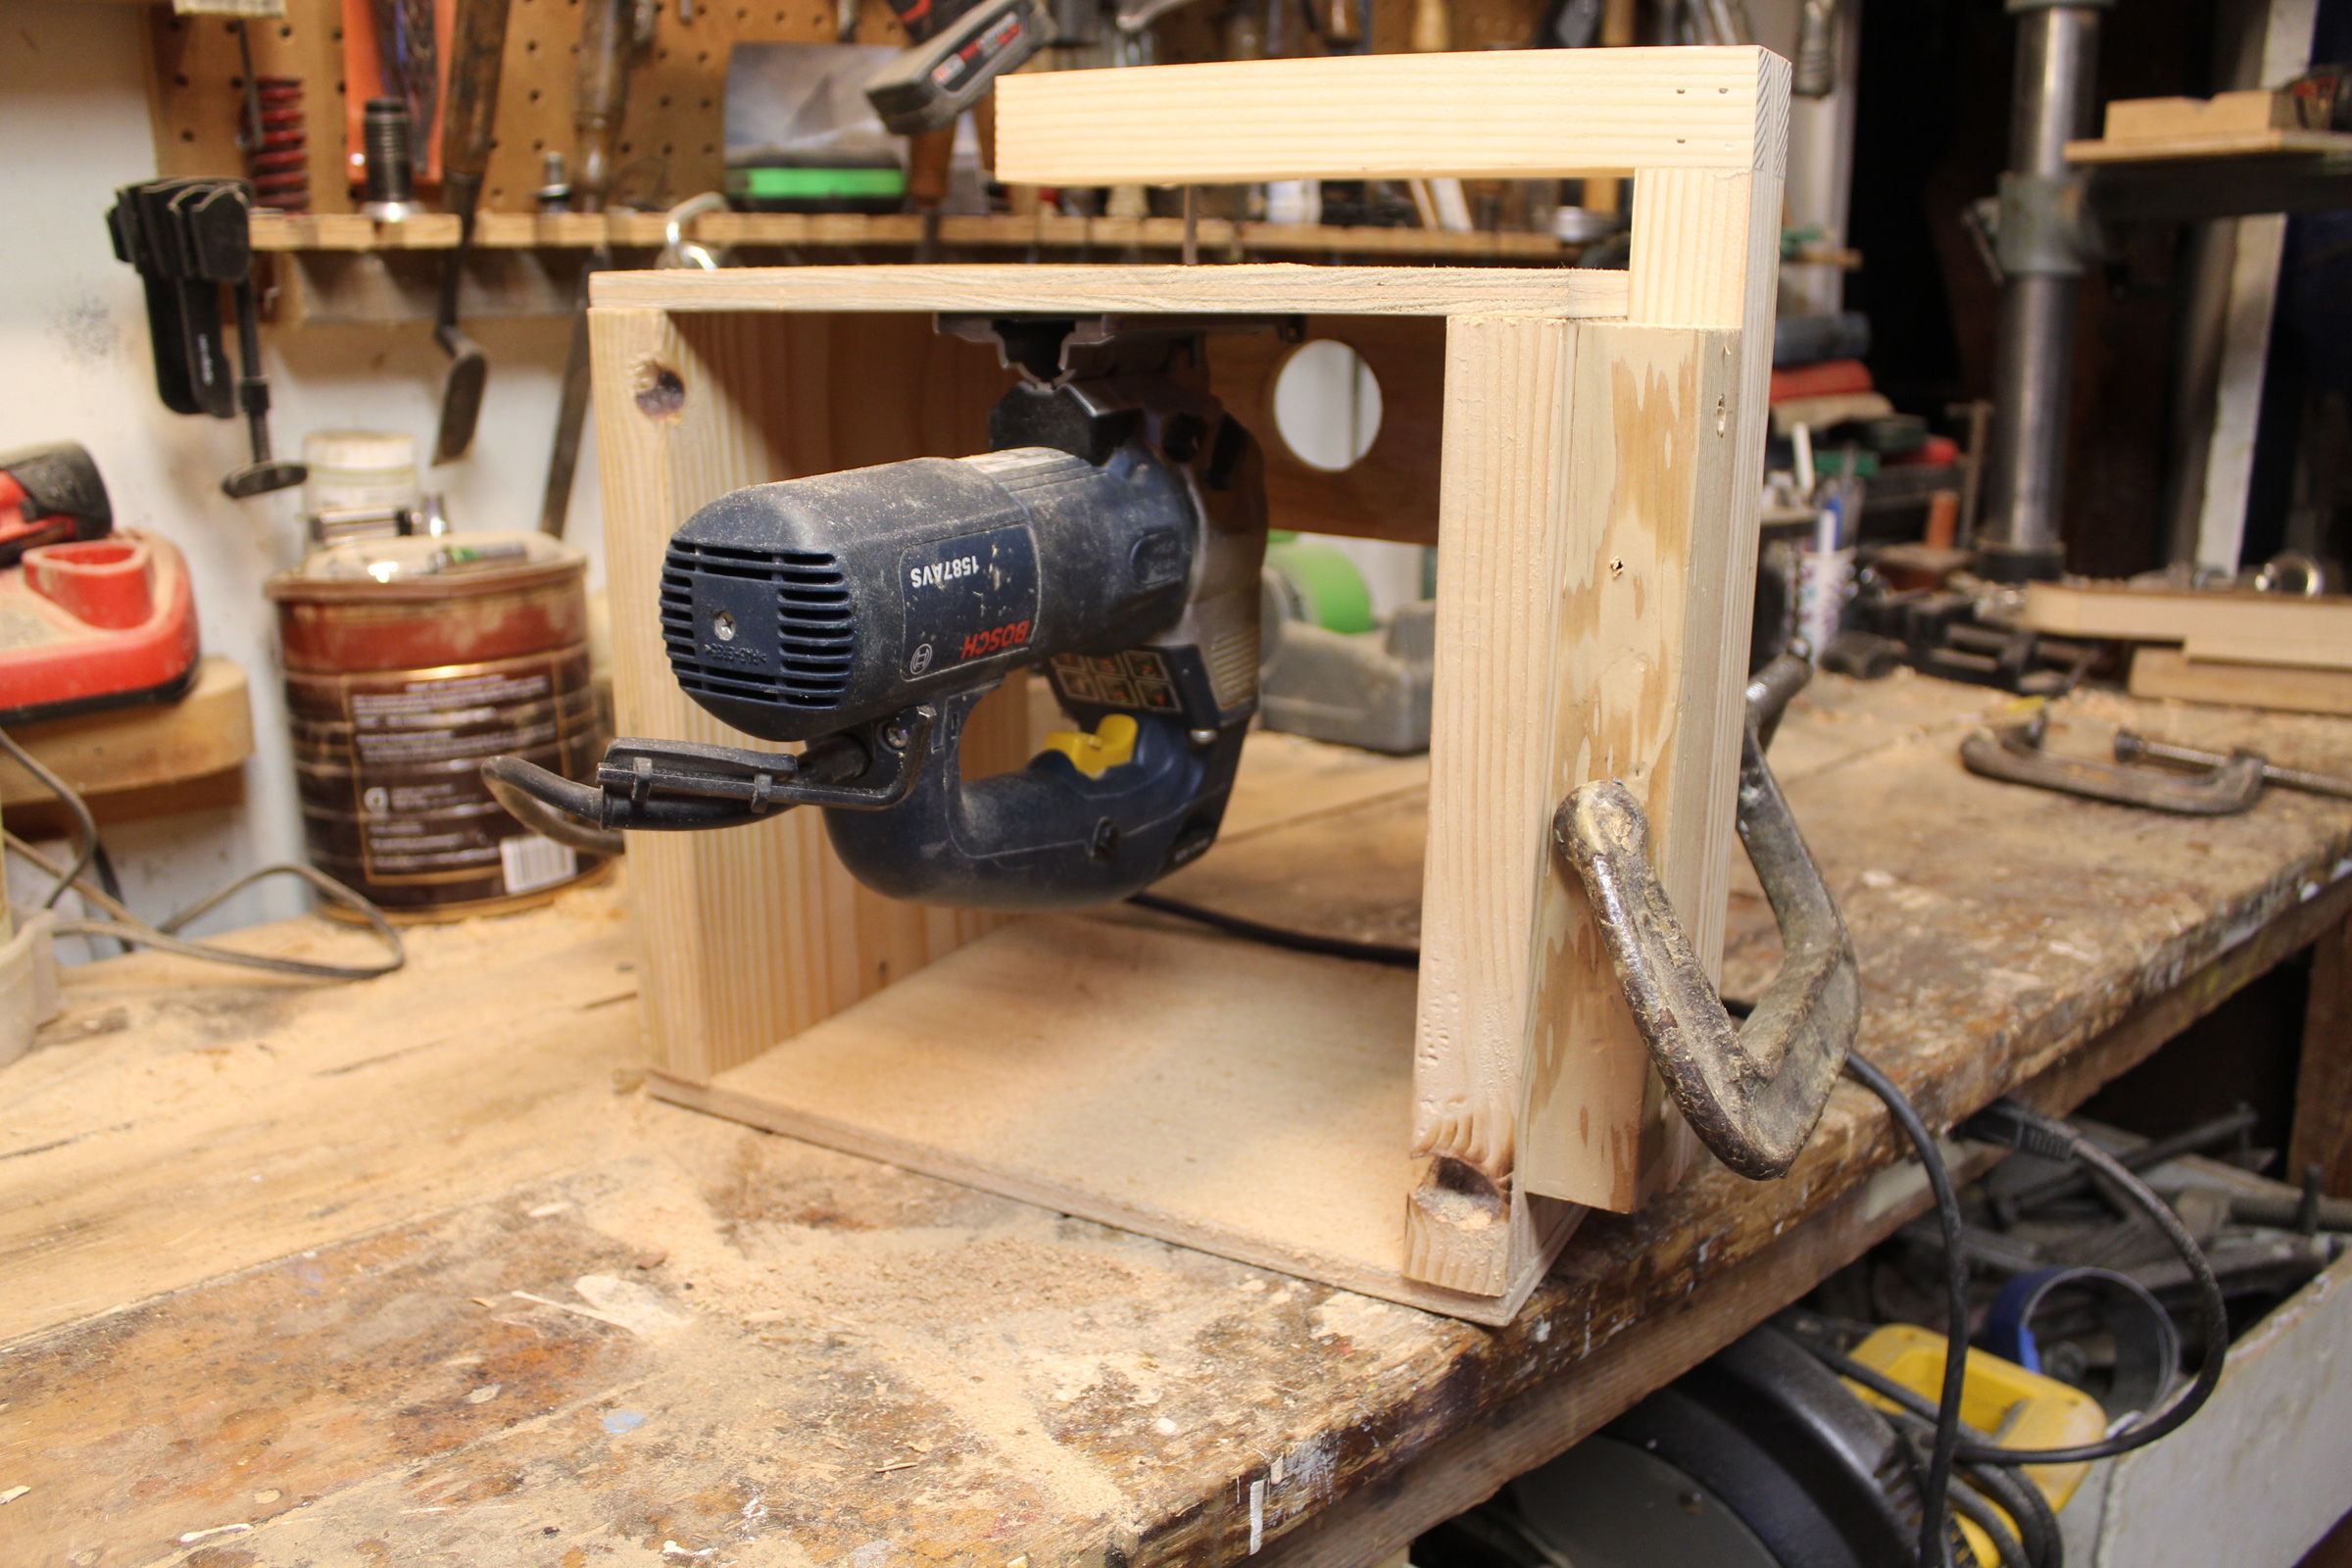
Two countersunk machine screws hold the jig saw under the table. The the vertical 2×2 supporting the foot of the clamp is screwed to the table side and serves as a guide for the overhead arm.
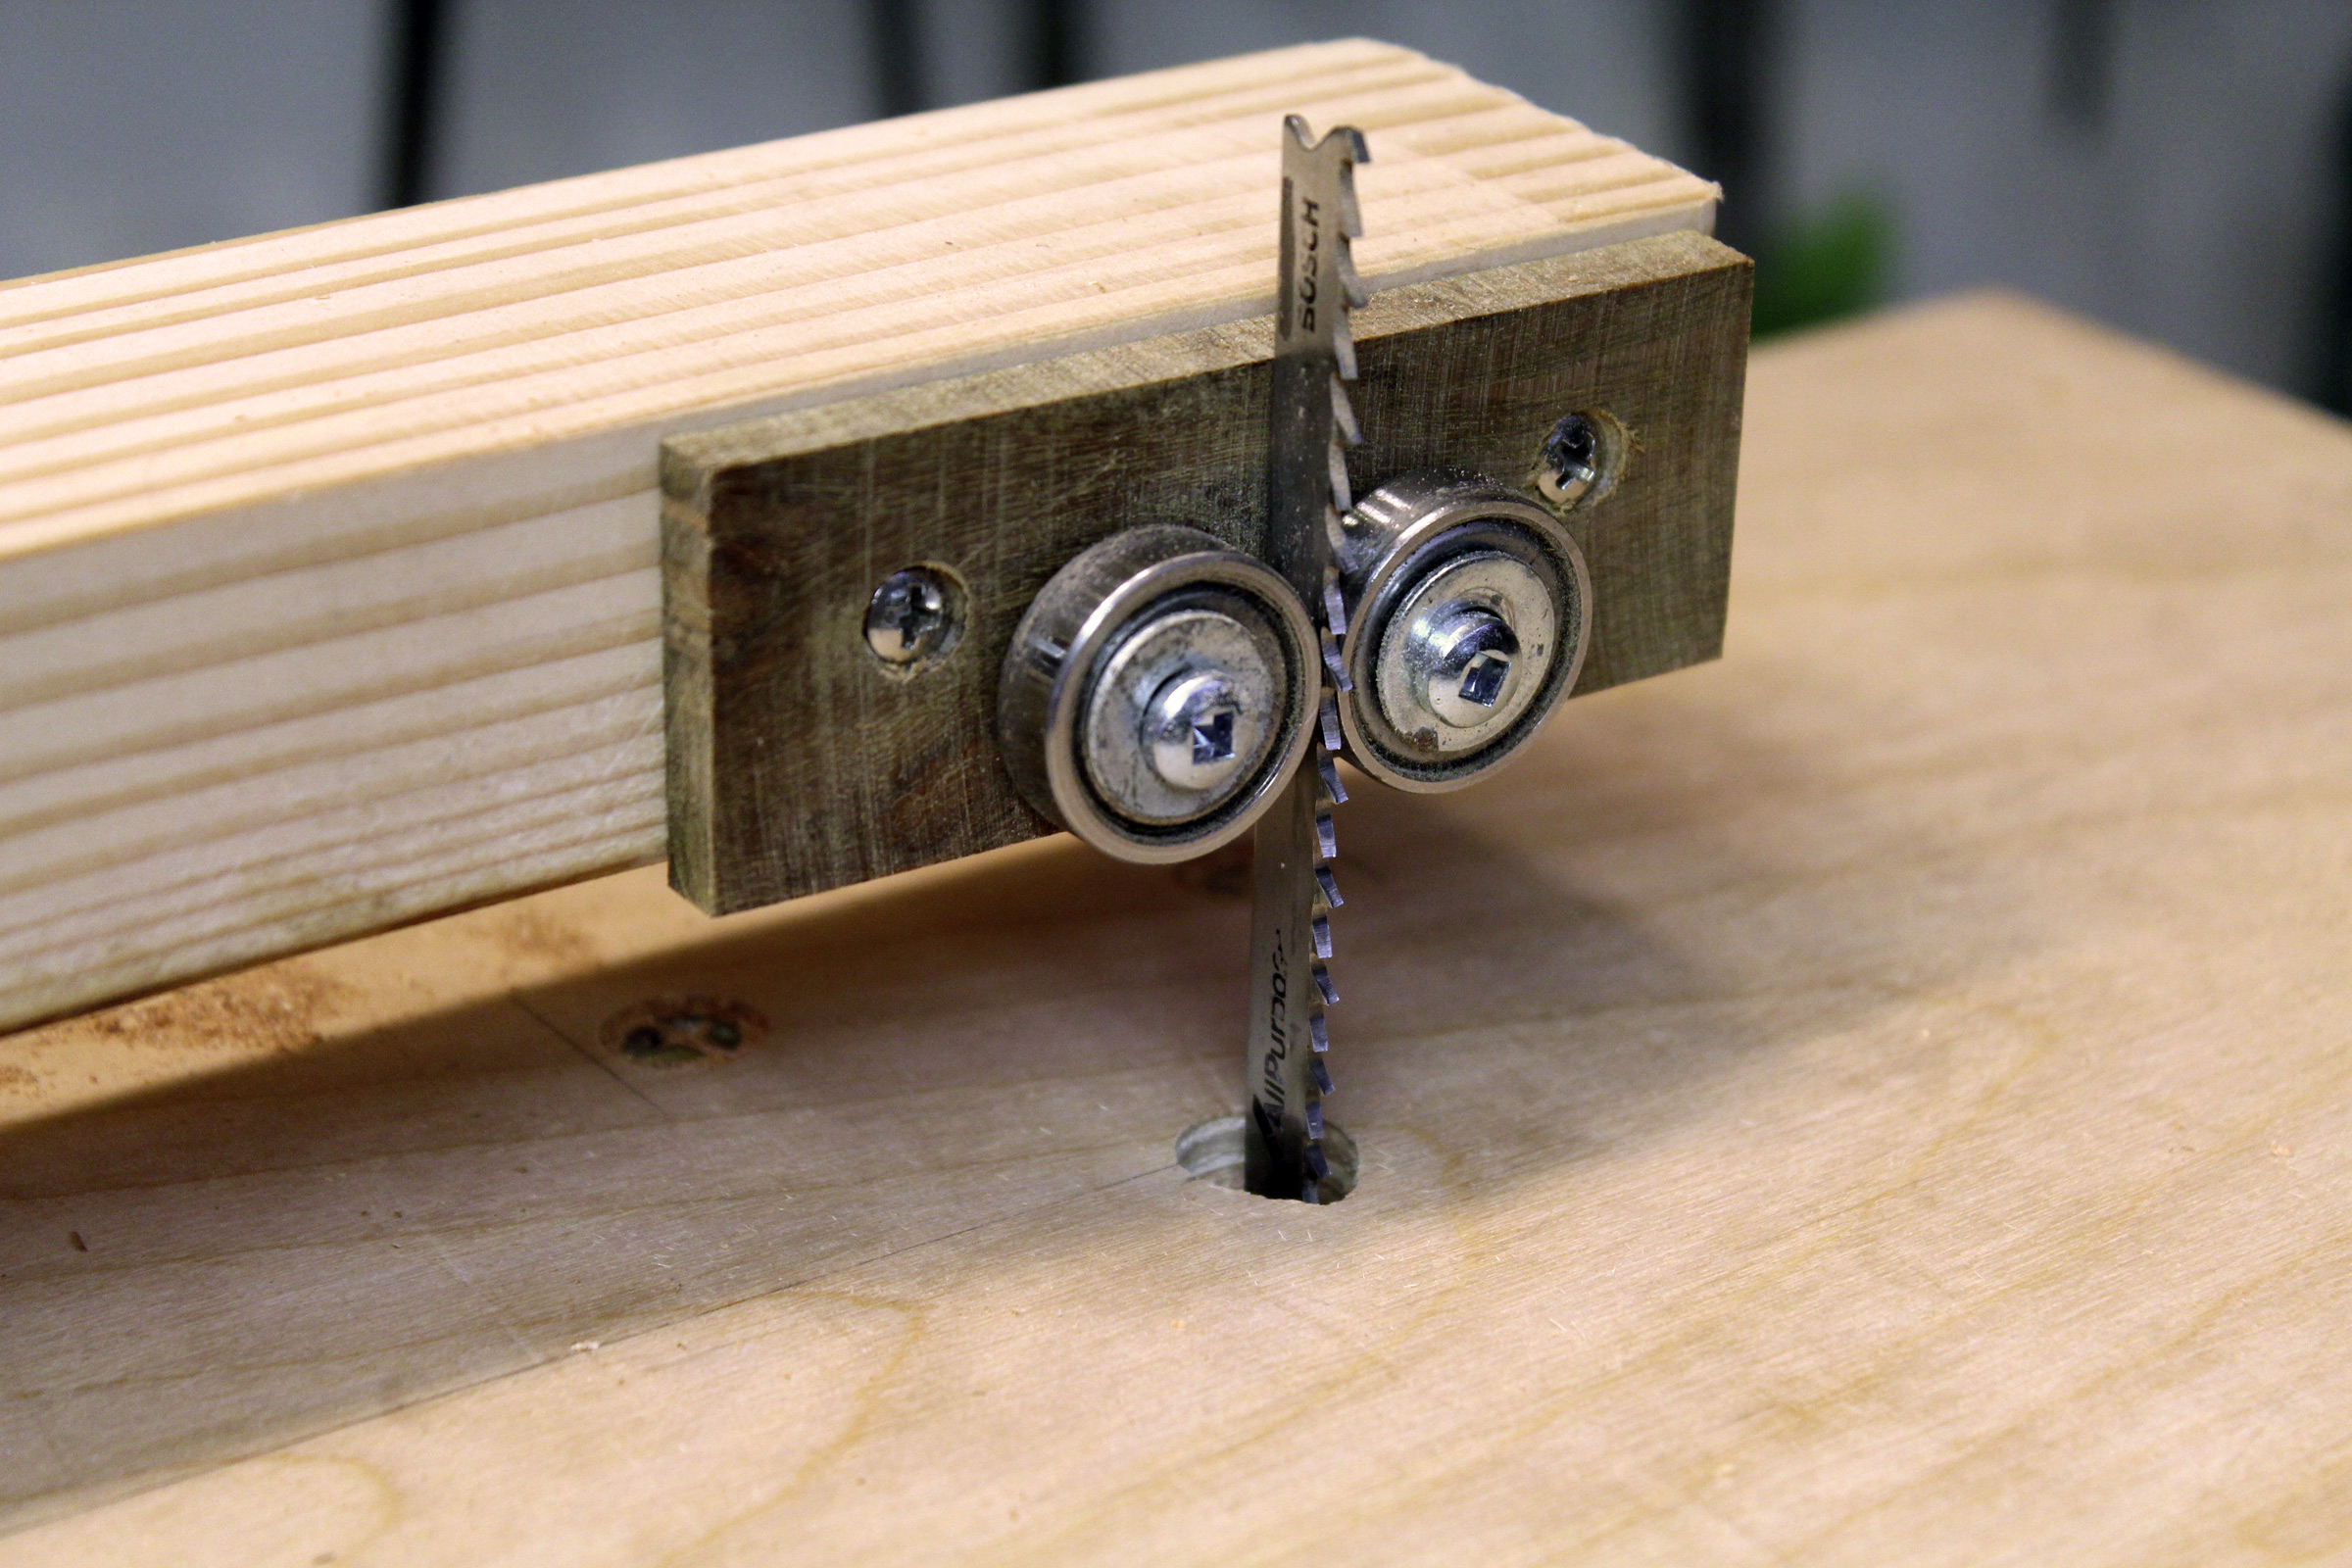
The hardwood block is ipe, cut from a scrap of porch decking. It is very dense and resists heat. The screws are undersized for the holes in the bearings, allowing them to be shifted to contact the blade and hold it square to the table.
The overhead arm has a finger joint, glued and pinned with an air nailer. The two bearings keep the blade vertical, and a piece of ipe, a very dense and durable hardwood, backs it up. The arm is clamped to the table so its height can be adjusted. Set lightly on the workpiece, it serves as a hold-down.
The 4″ jigsaw blades I usually use are too short for the table and guides, but 5-1/4″ blades work and will cut wood up to 1-1/2″ thick. I have three bandsaws and keep a small blade on one of them for small jobs. I didn’t have a pressing need for this jigsaw table, so it fit right in with puttering’s unimportant jobs. I just wanted to see how it worked and I’ve been happy with it so far.
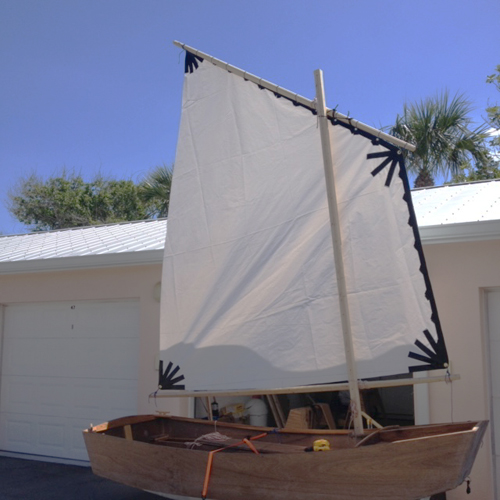
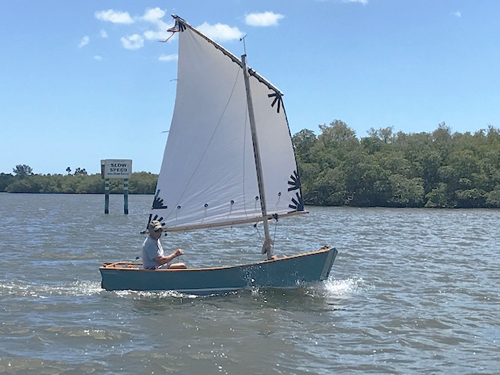
Spinnaker
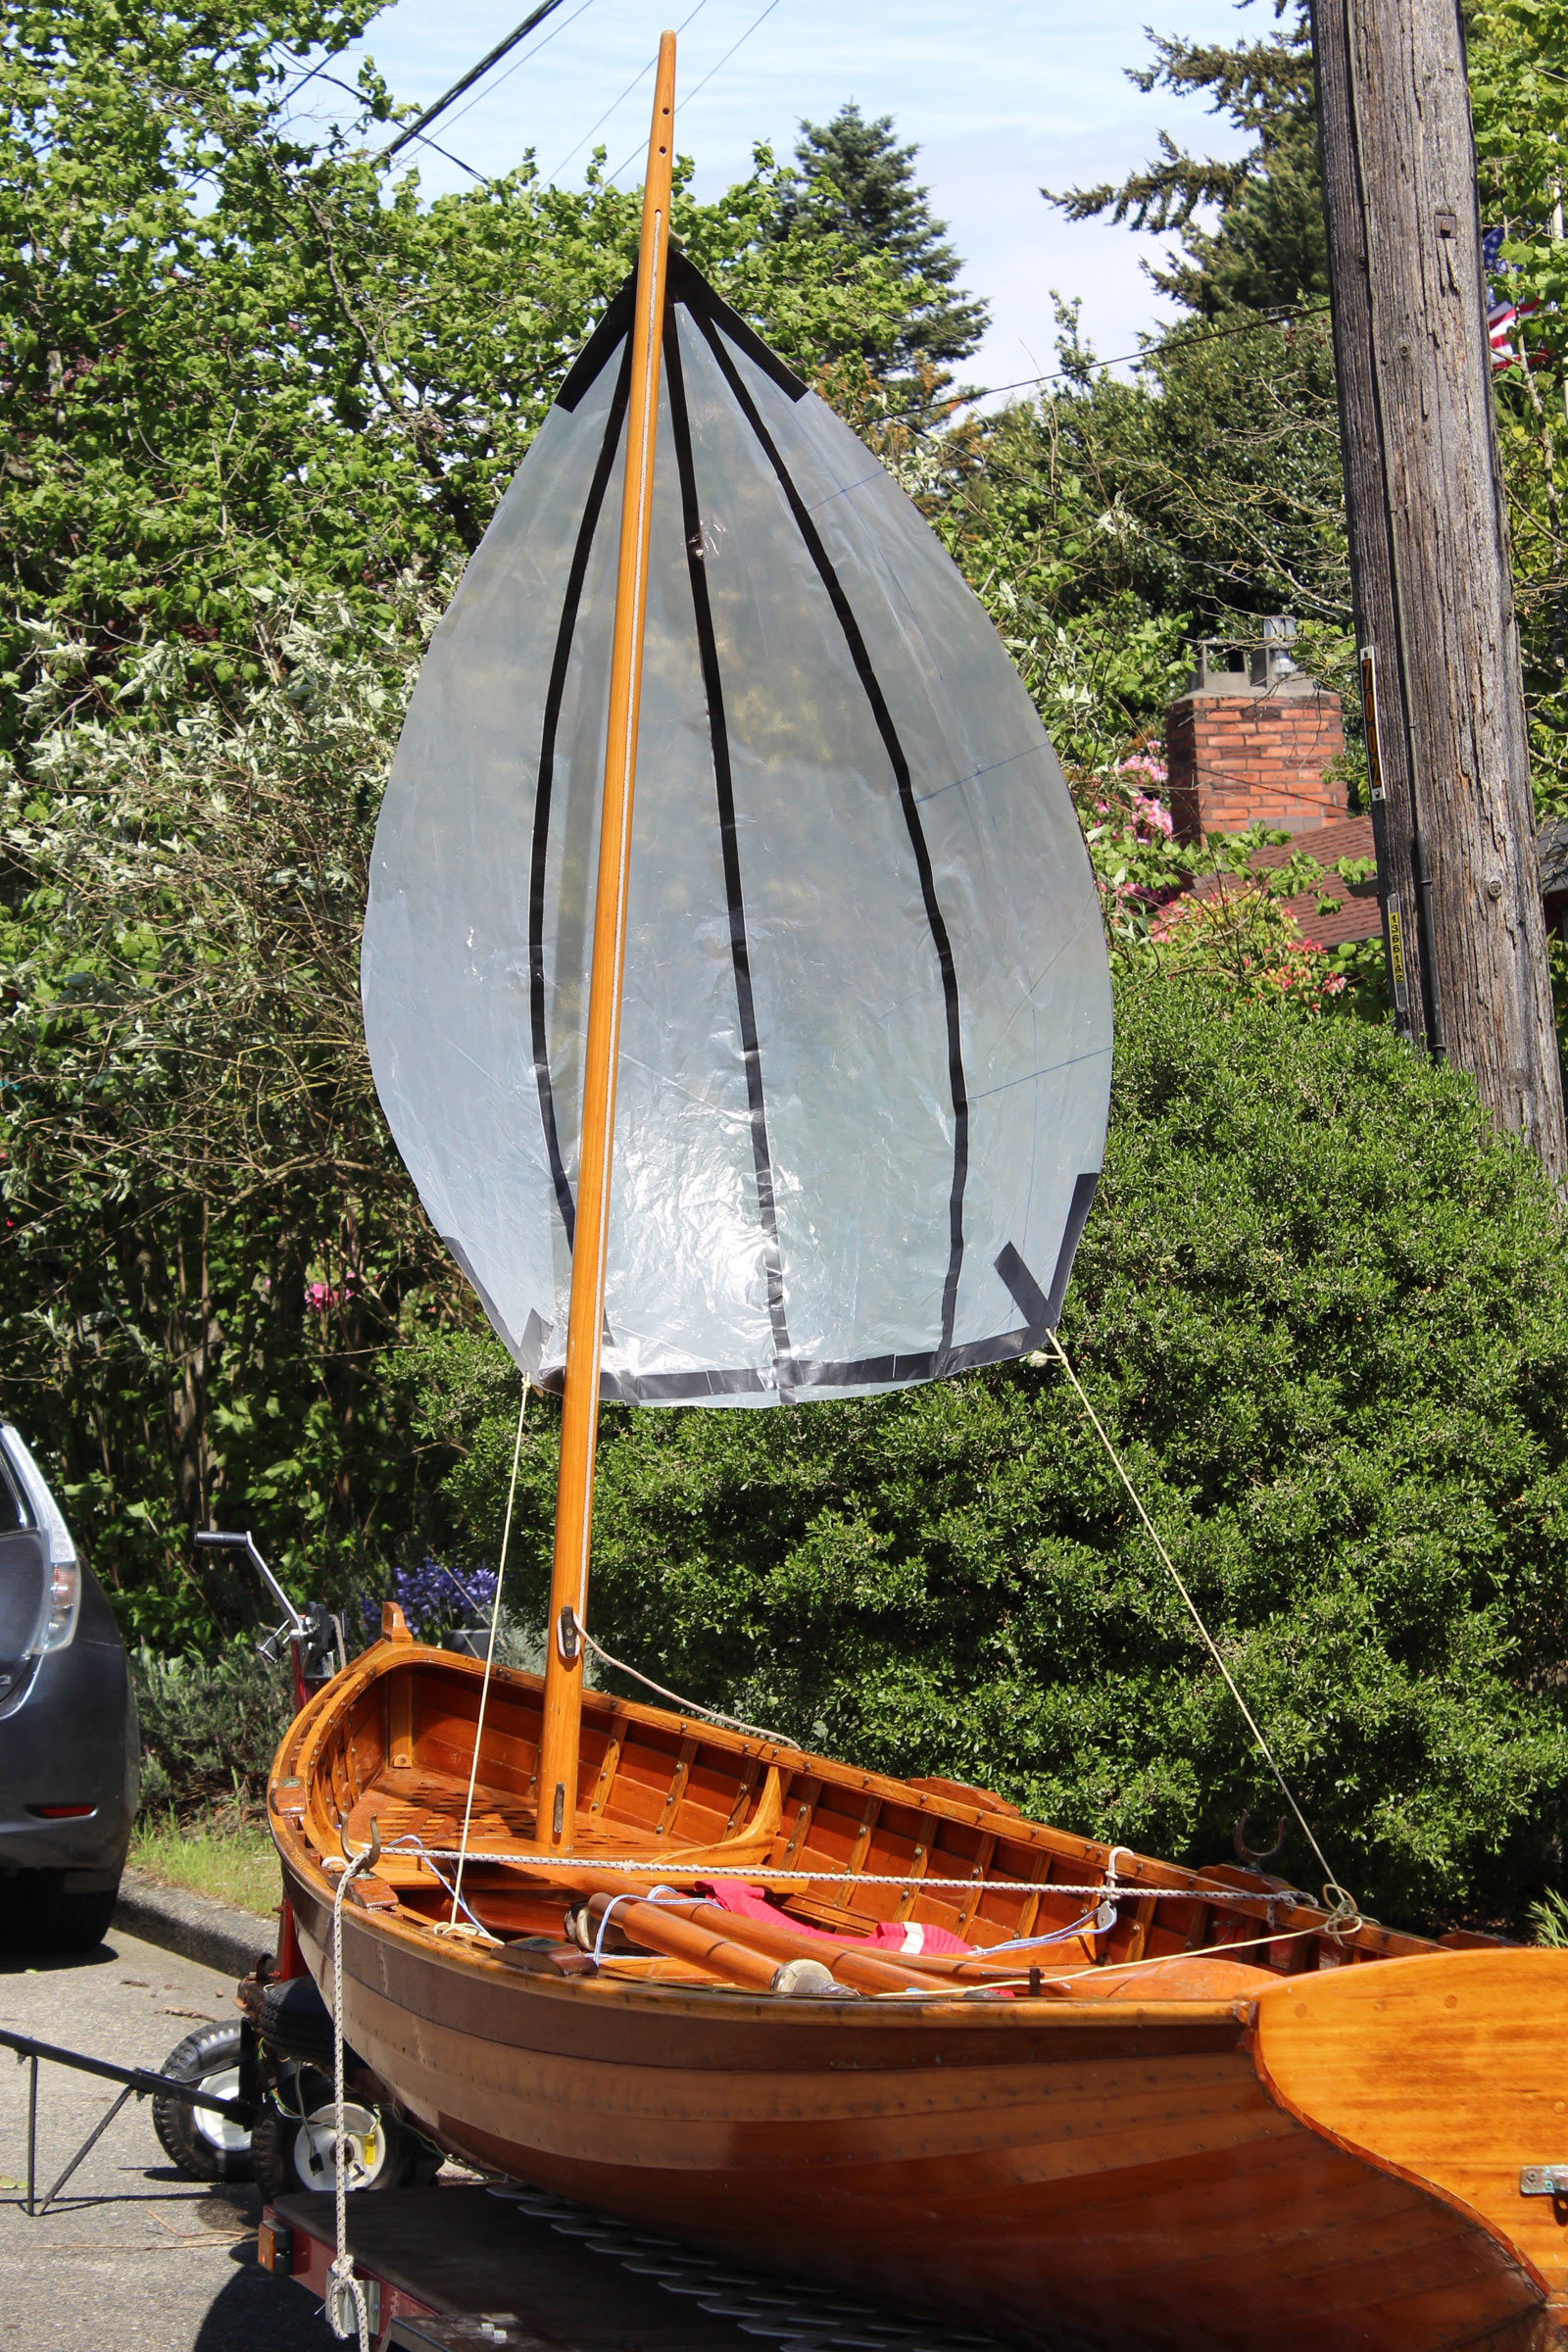
The larger of the two plastic-sheet prototypes I made is still rather small as spinnakers go, but I didn’t make it for catching light winds when I’d be better off rowing. The idea was to sail moderate breezes where I could sail at least at fast as I could row.
When I took my Whitehall out for a row in March, I was musing about having a small sail for the downwind leg of that outing. I’ve never had a proper spinnaker for any of my boats—I occasionally used a nylon tarp with its top end gathered as one—and thought I’d try my hand at making one. I did a search online for a spinnaker pattern suitable for a small boat and found just one that seemed workable. It was part of a page reproduced from an article on spinnakers originally published in Model Yachting Monthly in June 1945. It was about 4′ tall and could be made with three or four vertical panels for a width of 33″ or 44″. I cut four 6mm plastic sheet panels to that pattern and used Gorilla tape to assemble them. It turned out to be much too small for the Whitehall, although it might be the right size for a kayak. It should have occurred to me that a 14′ boat isn’t a size any model sailboat sailor would consider. I scaled the pattern up 150 percent, cut another four plastic panels and taped them together. That seemed to be about the right size for the Whitehall and worked well in a short trial on the Seattle ship canal. I have some spinnaker cloth and in the weeks ahead I’ll sew up the real thing.
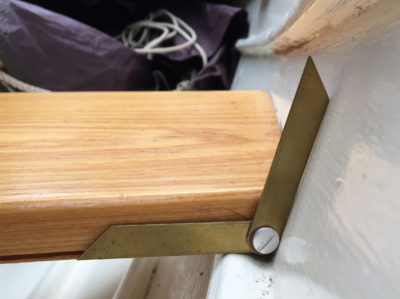
Rudder Yoke
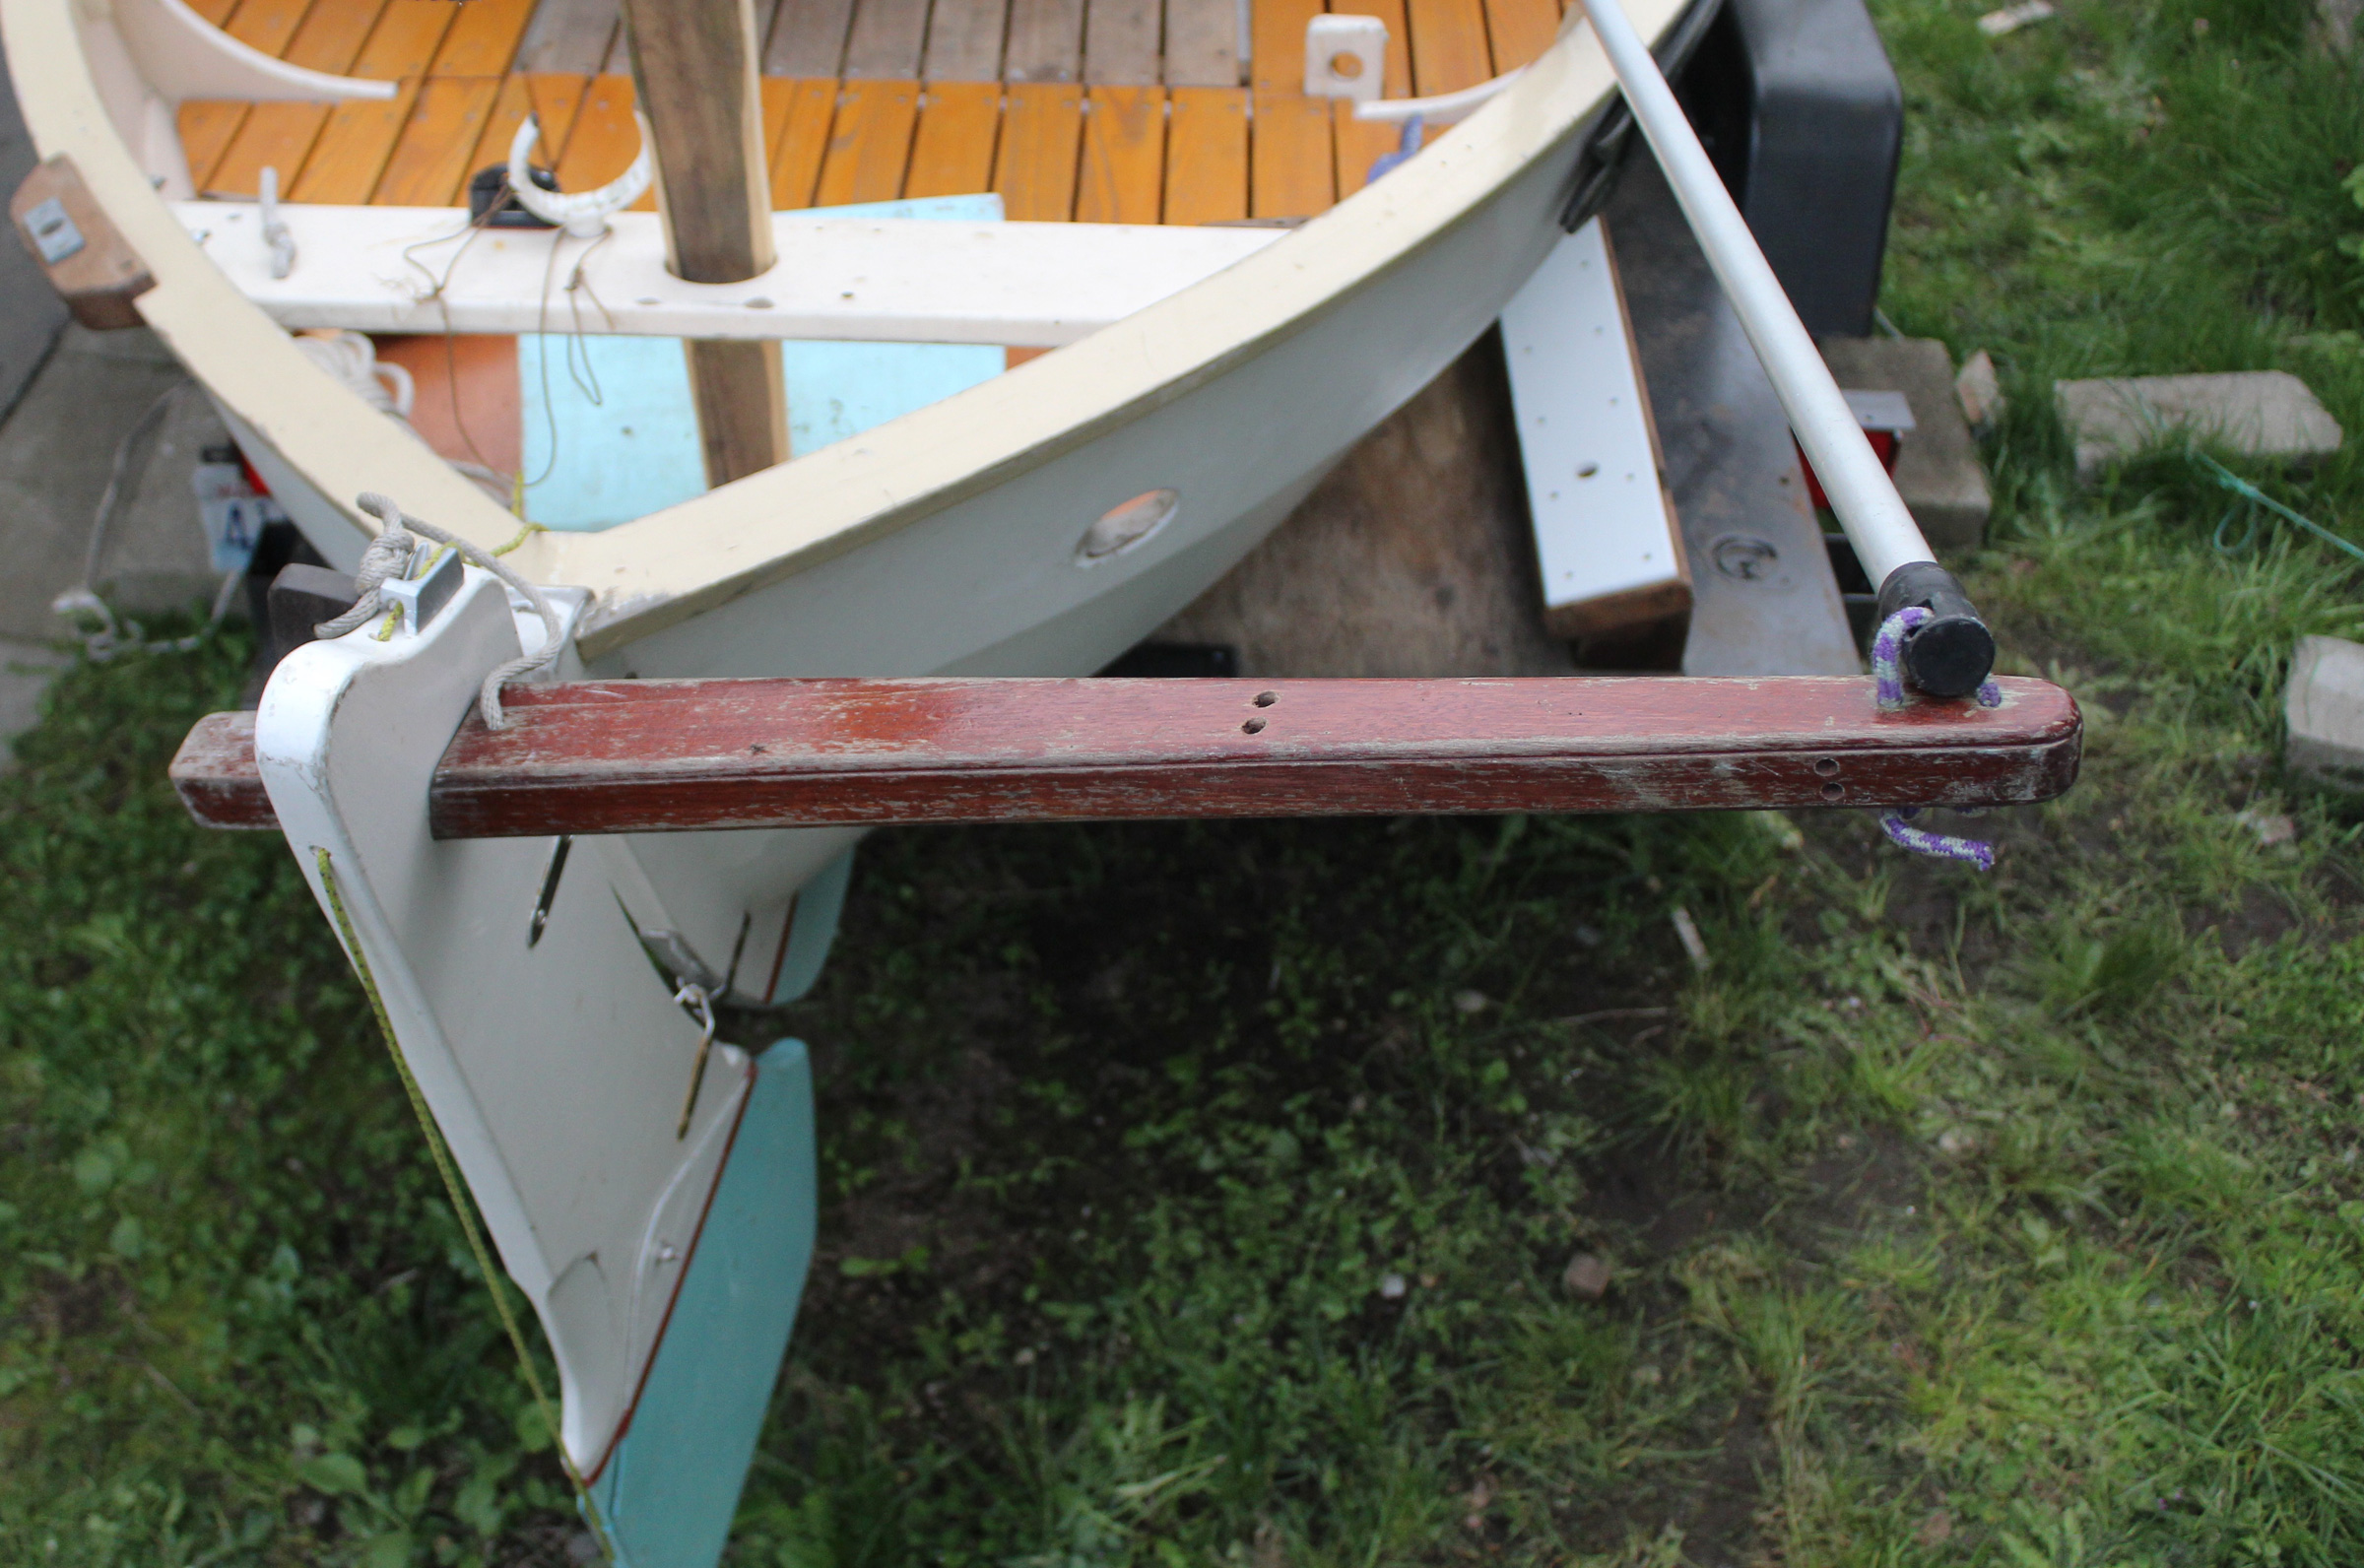
The Norwegian tiller works great for sailing when I have to be in the aft half of the cockpit to tend to the sheets.
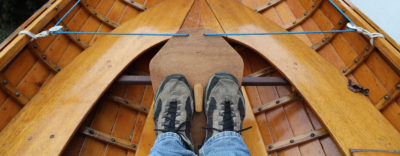
My Caledonia yawl has the Norwegian tiller it was designed with, and the adjustable painter’s pole that serves as its extension allows me to sit almost anywhere I need to be while sailing. But when I’m using the boat under power, I occasionally like to steer from the forward end of the cockpit or from the removable cabin when I have it in place. I had devised a rope-steering system that worked with the Norwegian tiller, but its extension made it awkward and required having the boomkin in place.
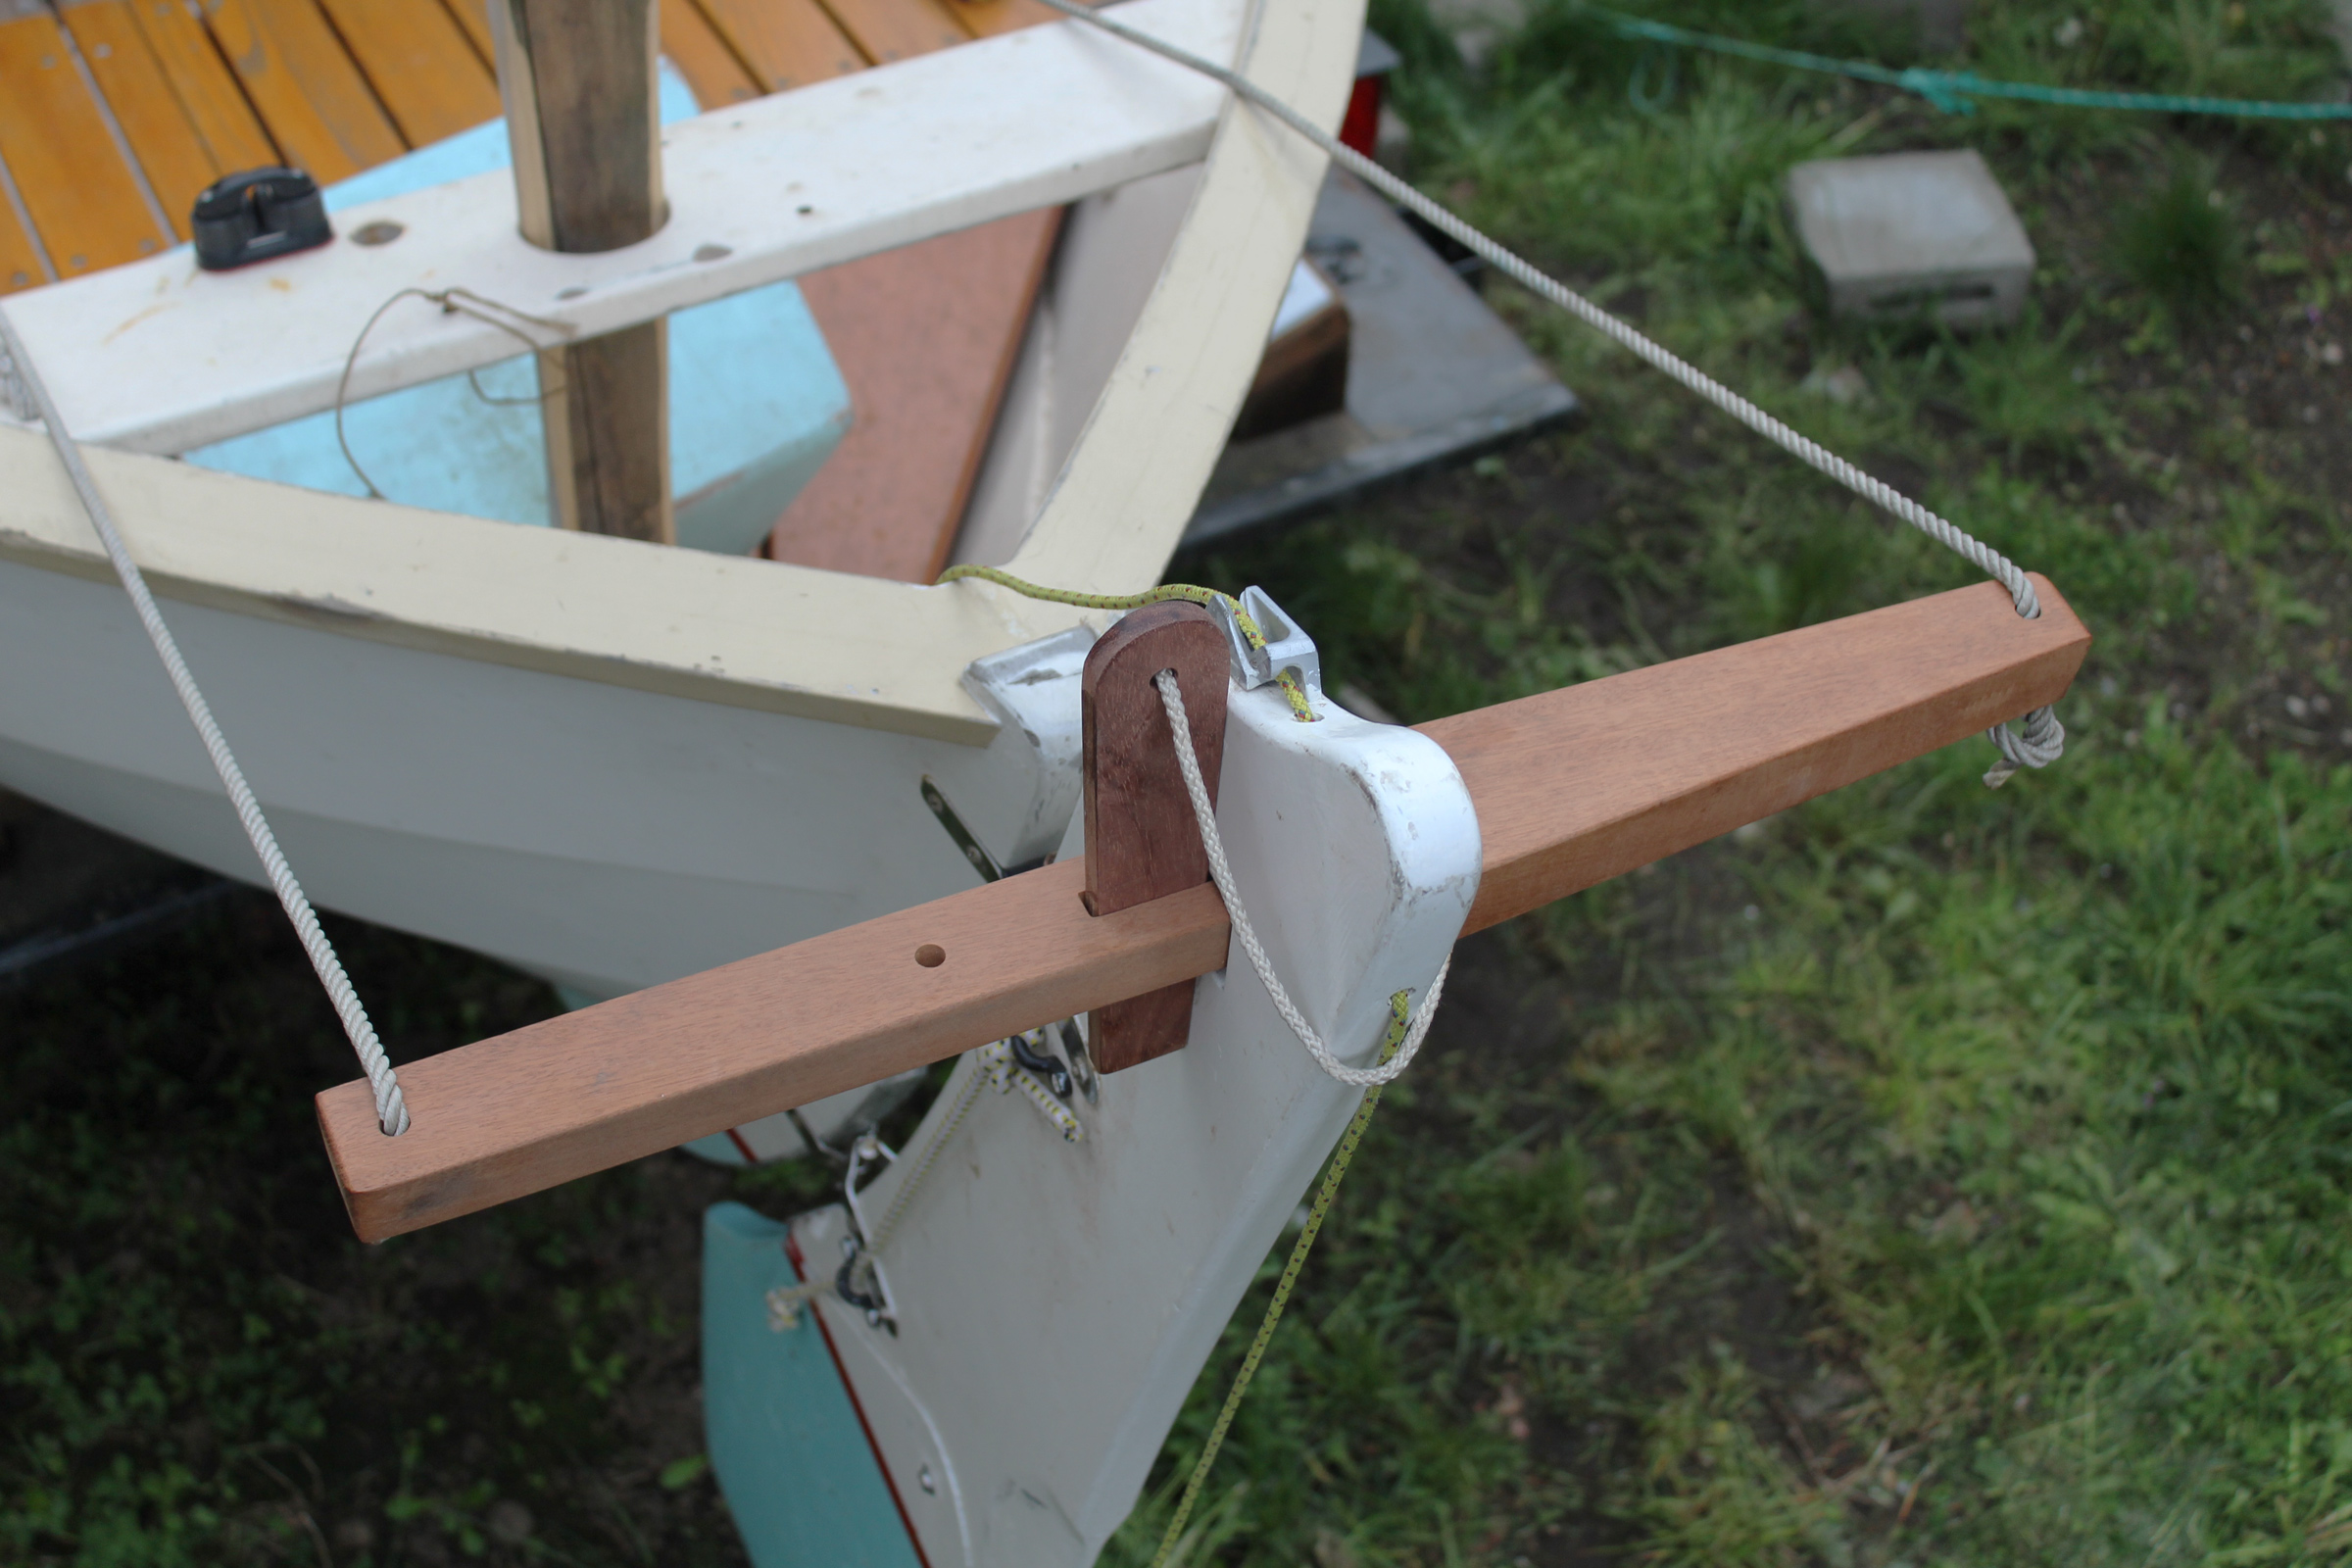
The yoke that I made to fit the rudder-head mortise will give me the option to steer from wherever I like. I’ll use it while motoring and take an extension of the deadman’s switch forward with the tiller lines.
A yoke would make for a tidier system that’s easier to set up, so I made a replacement for the tiller arm with a similar tusk tenon and wedge to lock it in place, but extend the tenon as far to port as the tiller-side arm would extend to starboard. The woodworking on that project is done. I just need to varnish the two pieces.
I will keep working with these projects until they are all finished and, along the way, start thinking about new ones. As long as the pandemic has me on a short leash, I’ll stay home as much as possible to keep myself and those around me healthy and look to puttering about to pass the time pleasantly and productively.![]()


I like the jig-saw table. Might be just the thing for those of us that only have portable power tools. Next up would be turning your router into a spindle shaper….
One of the things that puzzles me on the Norwegian tillers in modern designs is that they don’t go to the hole drilled in the tiller head and the round tenon to fit it. That way you don’t have to have some kind of fancy universal joint between tiller and yoke. Of course you could go the way I do on RAN TAN with an L-shaped tiller to get around the mizzen and a conventional extension on its end.
For designing and making patterns for sails is very good program named sailcut (www.sailcut.org). It is opensource and I have found it very handy to design small sails. Some time ago I also pushed their code change for better designing small spinnakers (the software is mainly for regular sails and did not allowed to design symmetric sails like spinnaker), now it is able with some fiddling with numbers to got pretty neat cuts for spinnaker. There is also guide how to measure and cut sails under its webpage.
I have designed ~8m2 spinnaker for my 420 class dinghy that way. Still did not get the time to order material, cut and sew that.
Your idea of using plastic sheet and Gorilla tape is similar to my 75-sq-ft balanced-lug rig sail to power JAKE, an 11’ pram of my own design and somewhat fashioned after Doug Hyland’s Oonagh. I used shrink wrap cutoffs from covering my cruising sailboat.
The head and luff are reinforced with Gorilla tape as well as the cringles on the four corners and single reef points and associated nettles. As a flat sail it trims unusually well and powers the boat surprisingly efficiently.
The shrink wrap is quite strong and has stood up to Florida sun for the better part of three fall-to-spring seasons. The only porosity has been a couple of mangrove holes poked into it while trying to sail through our narrow mangrove-lined channel in shifting winds. I now row it to and fro from my slip to a temporary mooring outside of our little marina saving the sail from user abuse.
I agree, a great idea. Looks perfect for those bigger jobs that a scroll saw has trouble handling.
I like your jigsaw table as a cheap addition to a poor man’s workshop however I propose a slight addition in the name of safety. A cap or shield on the arm over the top end of the blade would eliminate the possibility of a seriously nasty poking injury in a moment of distraction or loss of balance.
I had seen a Viking chair many years ago and thought what a great idea for any family that enjoyed the outdoors. After time, I had forgotten about it. I can see it fitting in nicely in the bow of my boat.
I also thank all who shared the idea of using the gorilla tape as a reinforcement for the plastic. Such a simple idea. The photos of the tape patterns are very useful.
I liked “Puttering Around” a lot. It reminded me of some of the more rudimentary benches and boxes my dad made for his work as a drapery installer: a couple of step benches and two long wooden boxes for stacking drapes in. I really never paid much attention to them, but every once in a while he’d talk about them with a sense of pride. They were simple but nicely built, functional and durable—the lasted forever. I’ve never been tool or mechanically oriented—my crown jewels were a book stand and a knife holder I built in wood shop in junior high—so the things you build have a sense of magic to me. Reading the articles left me feeling that I’d just paid a visit to your shop.
Hey Chris,
Had to share this since I got the Chair idea from your recent article in Small Boats. I made mine with 2×12 stock I had laying around. I have a 4-year-old granddaughter who will claim this for her own when she sees it.
Thanks,
Charlie
Yes, I could see myself falling asleep in one of those chairs!
Removable cabin? Would love to see a picture.
You can see more photos and a video in “Gimme Shelter,” an article I did about motor cruising in my Caledonia Yawl.