 Dale McKinnon
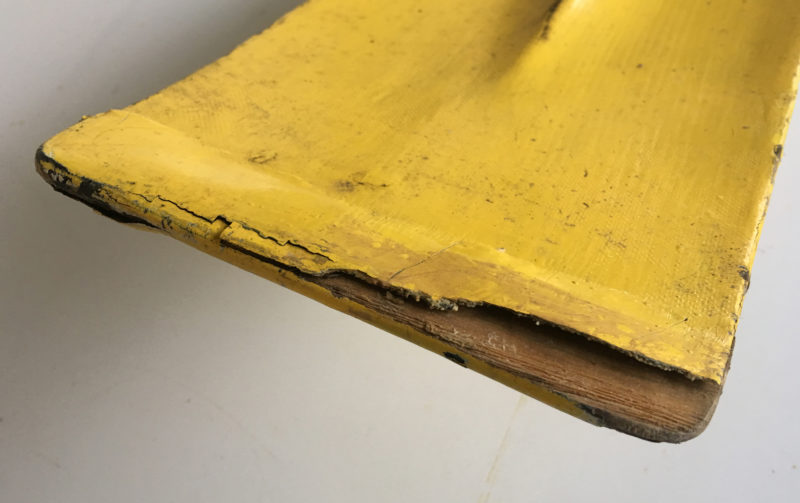
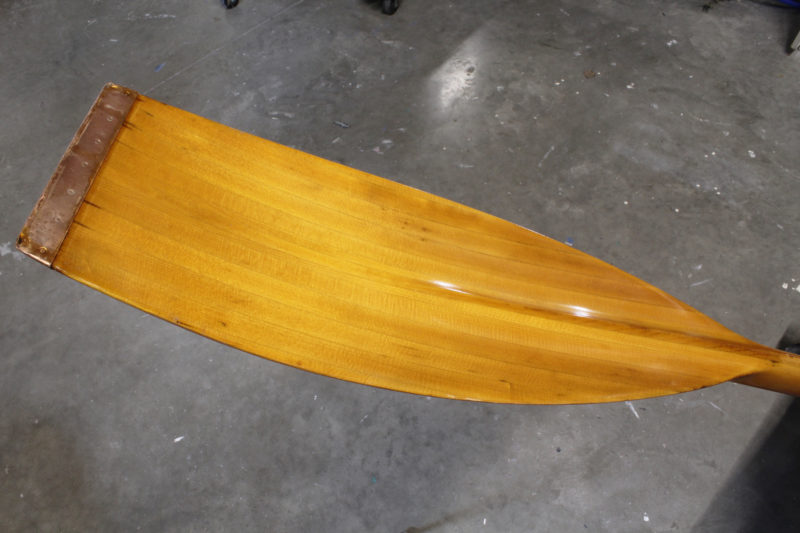
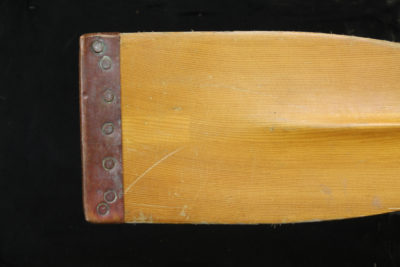
Although this blade was protected by a strip of hardwood that was glued in place and covered with fiberglass, the wear and tear of cruising still took its toll.
Oars do their work in water, and if that were all they came in contact with, they’d get by with a few coats of varnish. But they get beat up when pushing off docks, clipping pilings, and scraping across rocky shallows. The tips of the blades get the worst of it, and you can reinforce them with hardwood, epoxy, fiberglass, or a combination of the three, but those materials will eventually show the wear and tear they’re subjected to.
 Photographs by the author
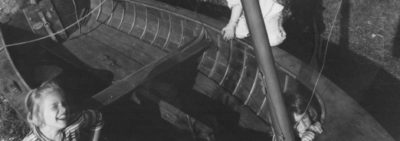
This is one of a pair of oars that I built and equipped with copper tips in 1985. That winter, they survived my 2,400-mile, 2-1/2 month sneakbox row from Pittsburgh to Cedar Key, Florida. They’ve been in use on and off since then.
The traditional approach has been to cover the blade tips with sheet copper. The copper guards look good, take wear well, and make a good do-it-yourself project. I always put copper guards on my spoon-bladed oars. The tips are thin and have cross grain that makes them more fragile than straight-bladed oars; fortunately, the tips are straight across and easy to wrap with copper.
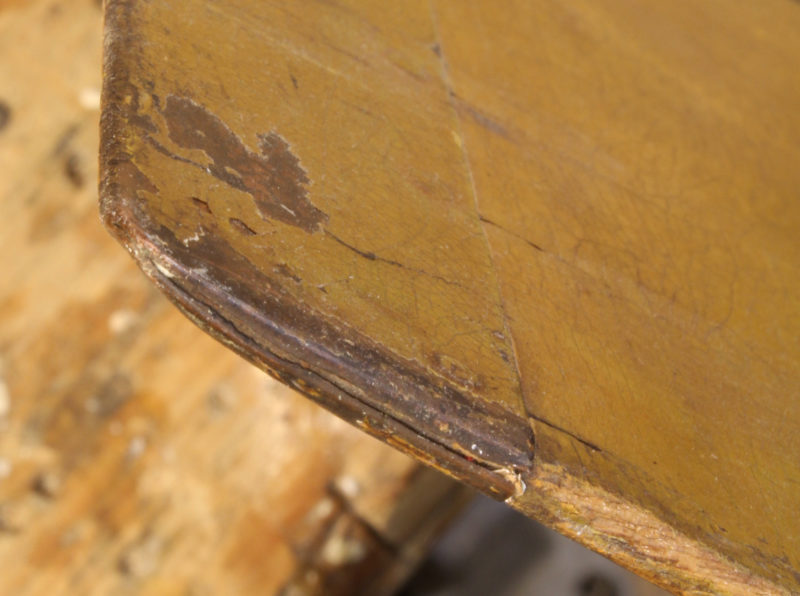
While the oar once used by my great grand uncle for class races at Harvard developed some spits where the nails are, the copper tip made it possible to make the blade very thin and light. The splits may have developed long after the oar was in use.
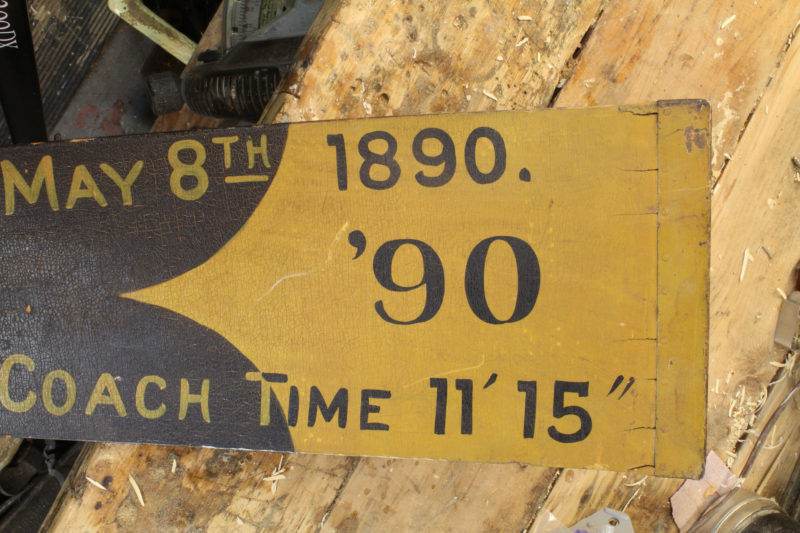
There are two styles of copper guards that I know of. The simplest covers the blade faces, and the edges, trimmed short, come close to butting together at the sides. That’s how the coppers were applied to the racing oars handed down to me from my great grand-uncle, Charles L. Crehore, who rowed with the class of 1890 crew at Harvard. Those oars were used only on racing shells and treated well, so the guards offered enough protection.
The edges of the Harvard oar’s coppers had been carefully trimmed and tapped around the edges of the blades. The hammering work-hardens the copper, which helps it hold its shape.
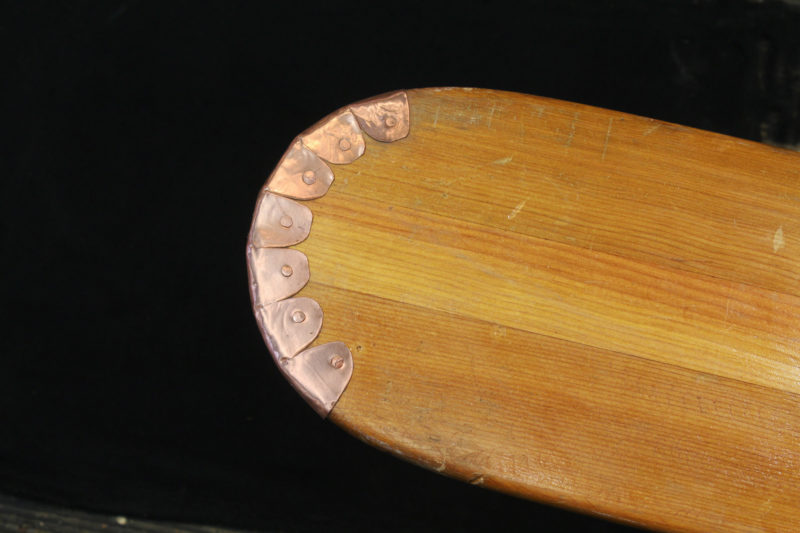
For the rigors of cruising, I prefer guards with tabs that wrap around the blade edges to better protect them. It’s the style that was used on the oars made by the racing shell company founded by George Pocock in 1911.
Pocock’s wooden oars and sculls were all fitted with copper tips.
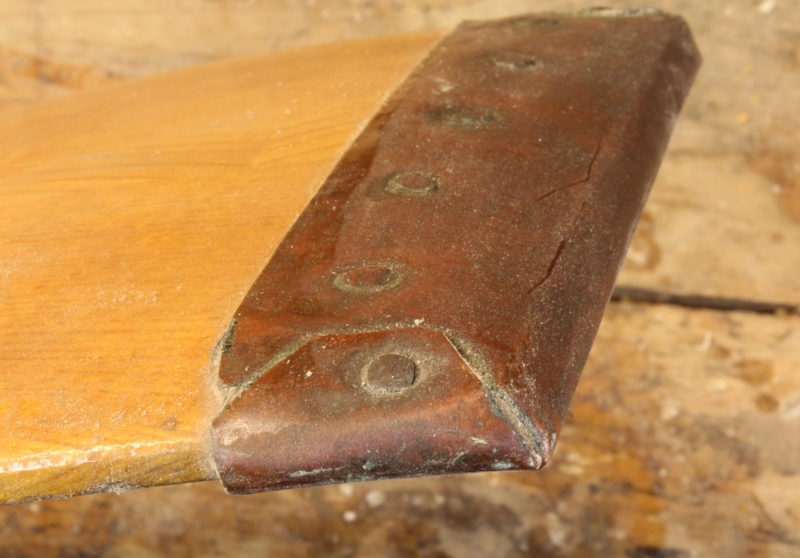
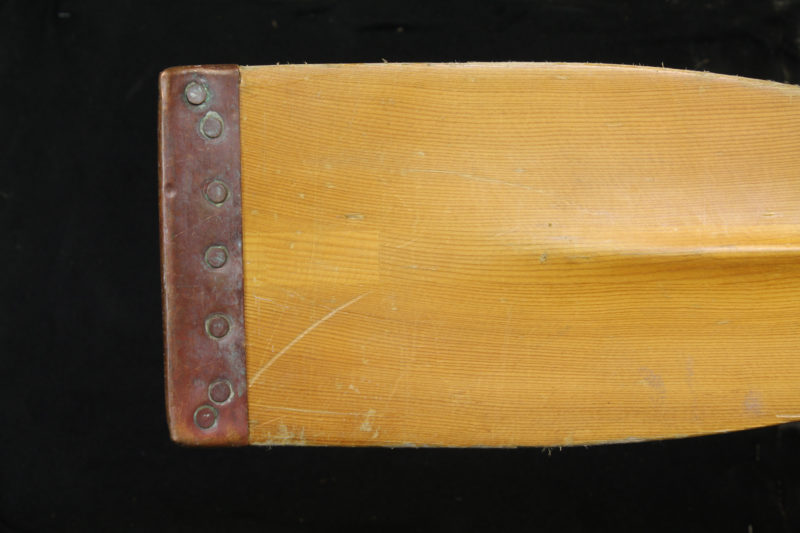
I used a version of the Pocock style for my sneakbox oars. The wrap-around edges make a very durable guard. The nails were inserted from the opposite side; the peened ends are seen here.
I’ve used sheet copper of varying thicknesses for guards. I measured the Pocock guards at about 0.016″ thick (0.477mm). That’s 27-gauge or 12-ounce copper, a good thickness for durability and ease of applying. I make templates from the stiff paper hanging file folders are made of. Copper nails hold the guards in place. Depending on the length of nail that I need, I use either copper tacks or clench nails. If those aren’t readily available, you can use copper wire, the kind that’s used to wire your house. Home improvement stores sell it by the foot, and a foot is more than enough for many pairs of oars.
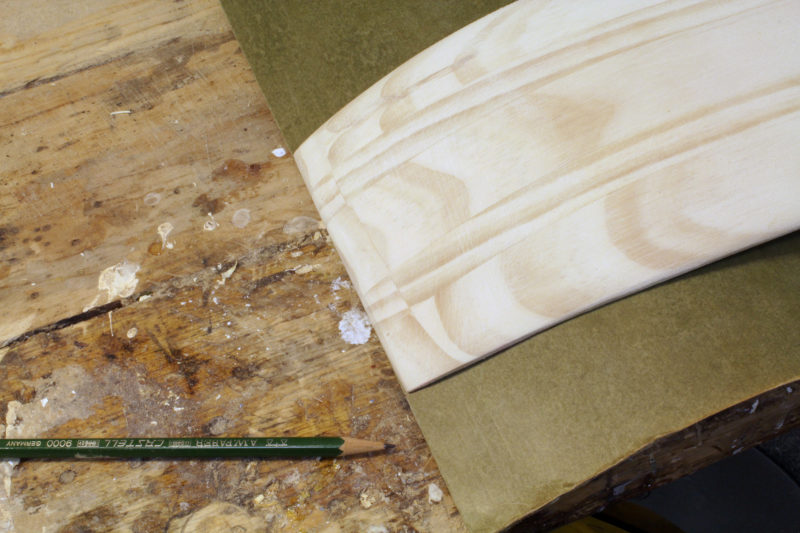
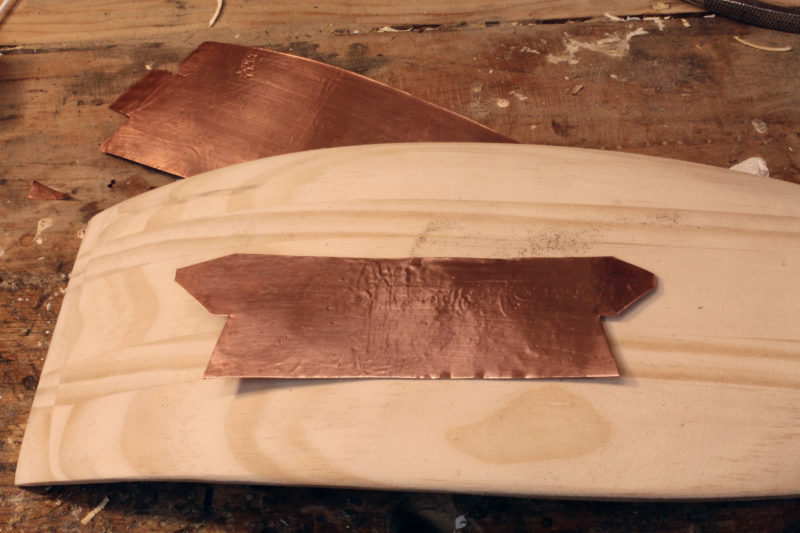
The outline of the blade is traced onto stiff paper—here a hanging file folder—with fold set along the blade’s tip.
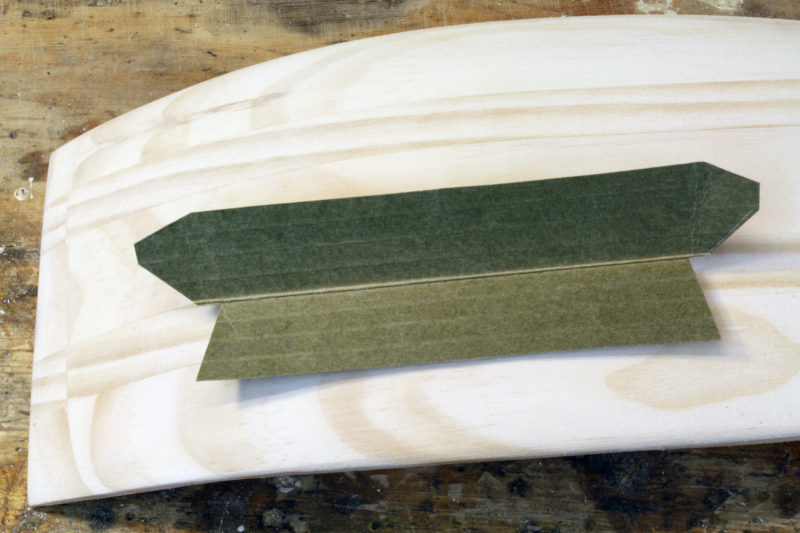
The bottom of the pattern here is cut along the traced lines. The upper half has tabs that project straight out for about 1/4″, long enough to wrap around the edges of the blade. Each tab is tapered to a truncated point that will be held in place by a copper nail.
The copper needs to get a straight bend before being fitted to the oar blade.
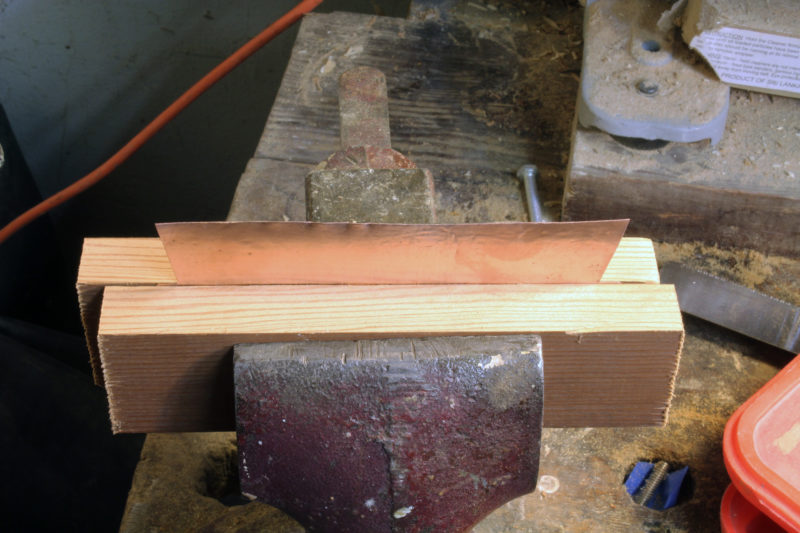
Two blocks of wood clamped by a vise around the copper serves as a sheet-metal brake to make a straight fold.
The block at the back pushed the copper over and kept it flat.
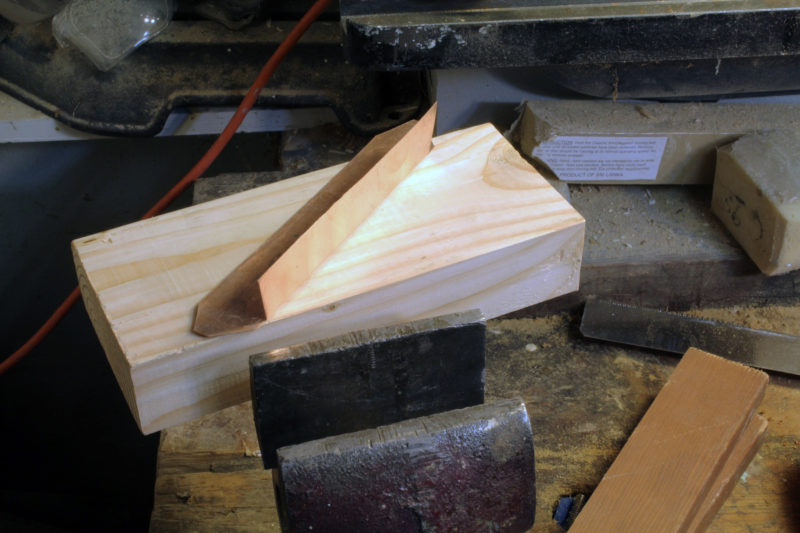
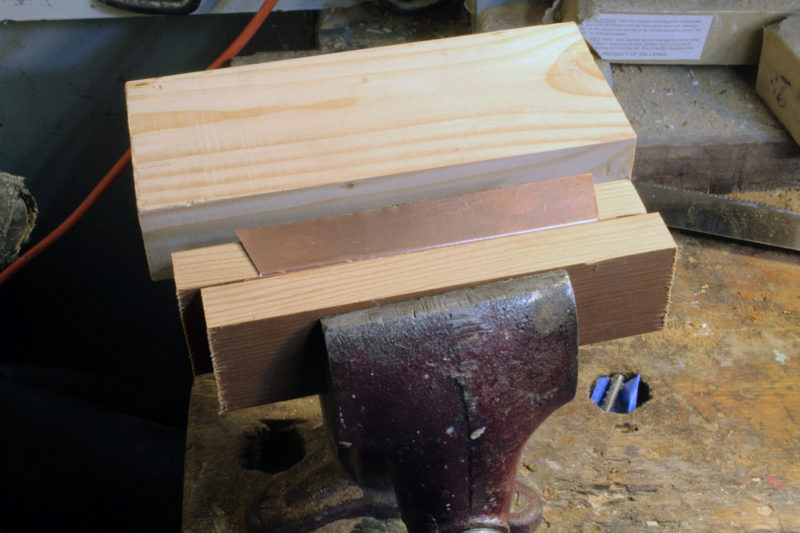
The copper comes out of the makeshift brake with a right-angle bend.
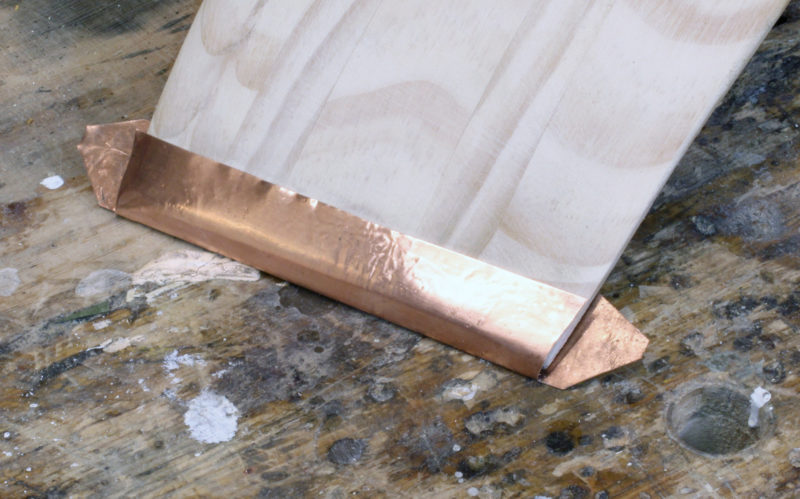
The copper, with the table on the concave side of the blade, is formed around the tip.
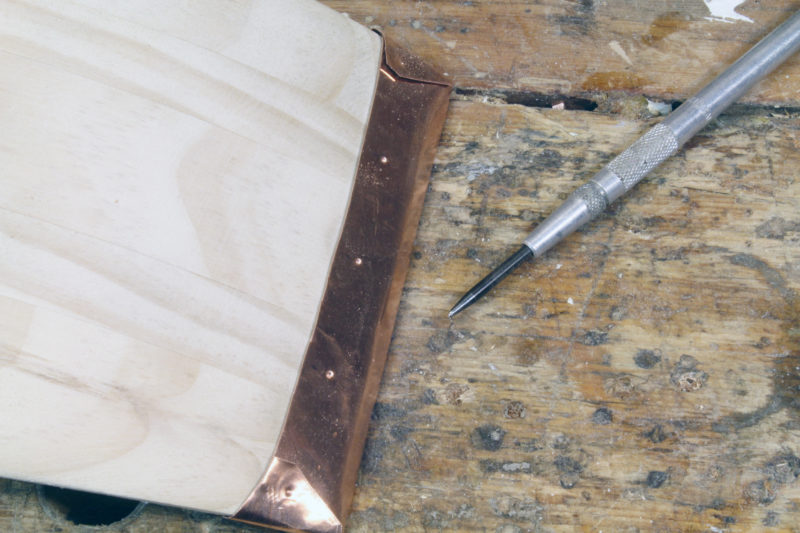
The edges of the tabs should be cut to flow into the long, straight edge. With a spring-loaded automatic center punch you can hold the copper tight with one hand, and punch the dimples with the other.
I put the guards on after I varnish the oars. Then, after I’ve shaped the guards around the blade tips, I apply Dolphinite bedding compound to both the oar and the inside of the copper, enough to make sure that I’ll get some squeezing out as the guard goes on. It’s easiest to drill the holes for the nails after the guard is pushed on over the Dolphinite. If I predrill the holes and then remove the guard for the Dolpinite, it’s hard to get the holes realigned for the nails.
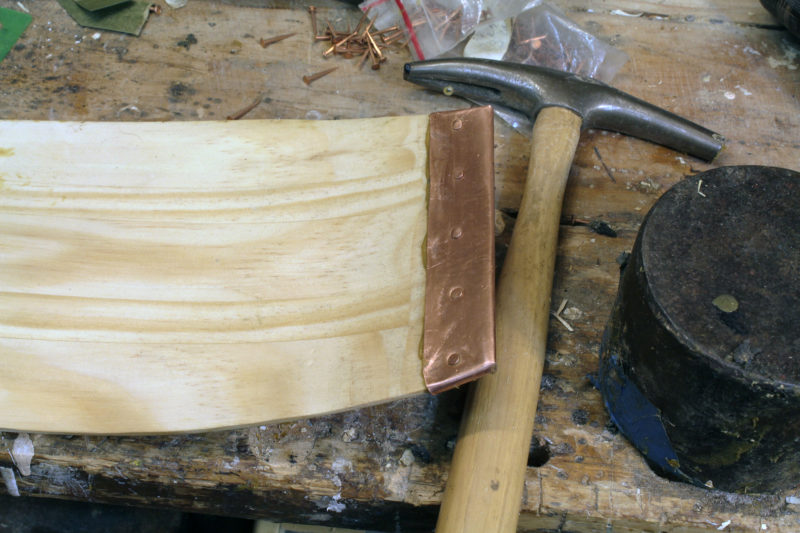
The copper nails are pressed or tapped into the predrilled holes from the concave side of the blade.
The protruding points of the nails are clipped short and tapped to flare at the ends. Note the bedding compound squeezed out as the nails tightened the fit of the guard.
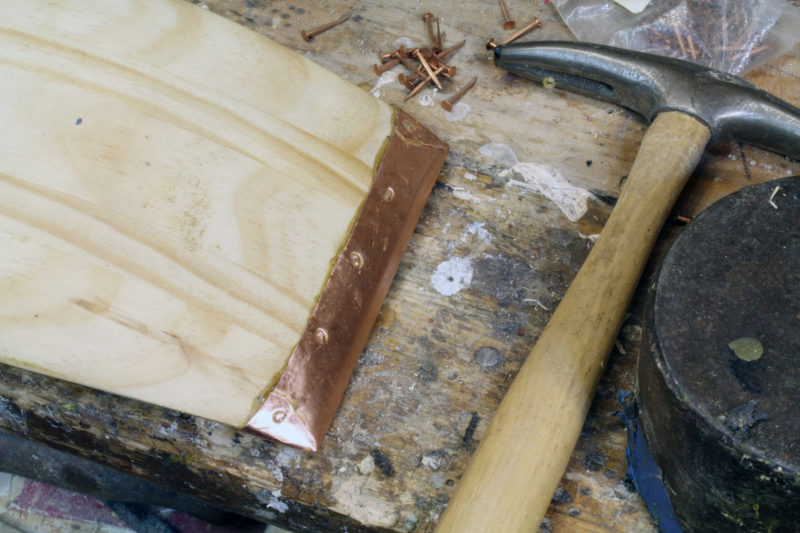
The nails are inserted into the holes on the concave side of the blade; after trimming the excess length on the back side, I use a small hammer and tap lightly, to flare the cut ends. Whether I can peen the ends nicely or not depends on the copper in the nail. Some nails will mushroom; others will fold over no matter how carefully I tap. Both results will do the job.
After the guard has been fastened, I’ll tap it home with small rubber mallet until the bedding compound stops coming out from under the copper. The corners of the guard may have a sharp edge which is easily rounded with a few tap with a small hammer.
Oars and paddles with rounded blade tips call for other treatments. I put a copper tip on a paddle that I use for maneuvering my boats in tight quarters.
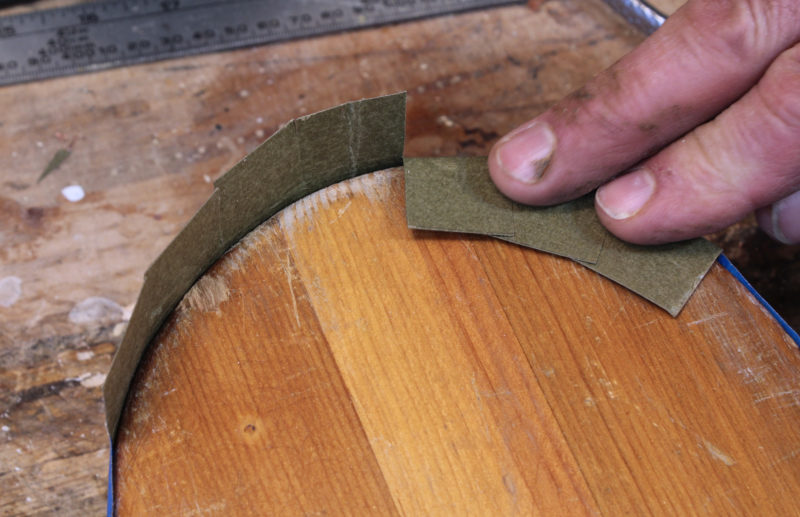
The flaps will overlap and the apex of the obtuse angle where the inside edges intersect gets marked. Then, I cut the sides of the tabs from those marks to the base of the tab. The taper of each flap will eliminate the overlap.
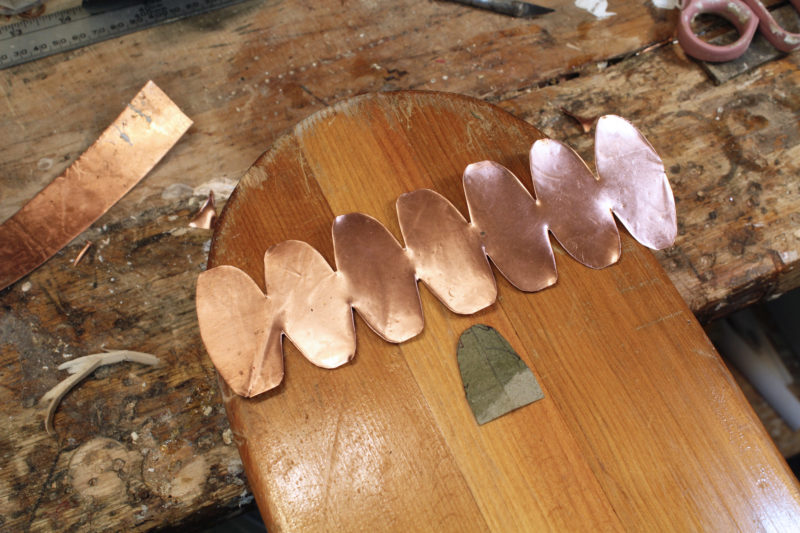
A single tab cut from the pattern and rounded serves as the template for all of the tabs on the copper.
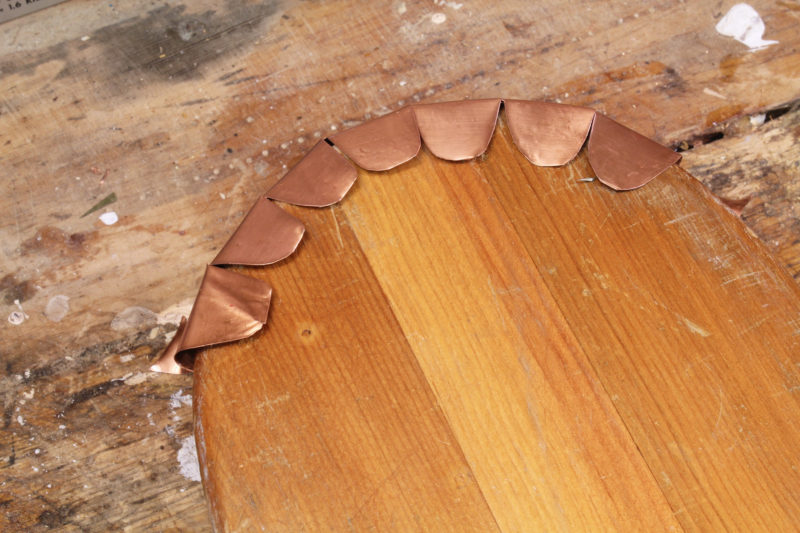
Folding the tabs around the blade begins to put the copper into shape.
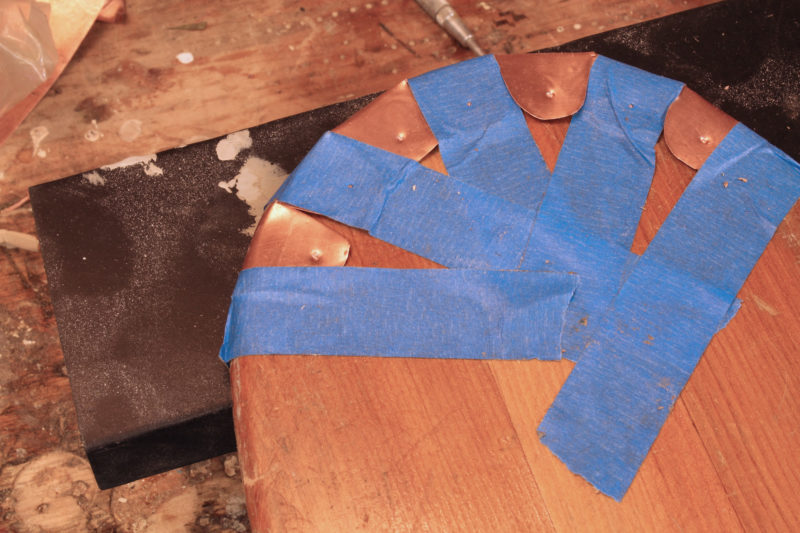
With tape holding the copper bent around the blade tip, the holes for the nails are marked with a center punch and drilled through the blade and the tabs on both sides. I have a block of rubber here backing up the copper on the back side of the blade. A block of softwood will do as well.
After the guard has been attached with nails, a gentle tapping with a small hammer will bring the copper in close contact with the blade.
A simple flat band around a straight-bladed oar is a tradition method for preventing a blade from splitting. It doesn’t protect the tip from wear.
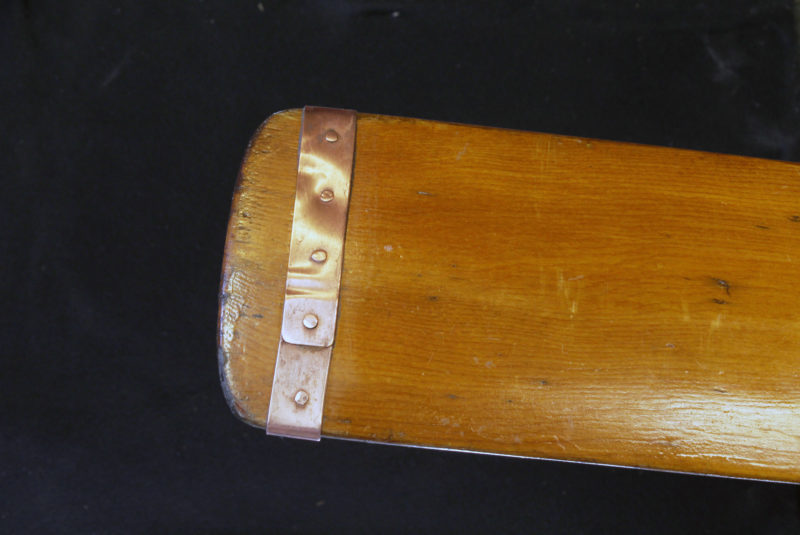
A band of copper is easy to apply to a blade with a rounded tip. The blade may be scarred by use and abuse, but the band should prevent more serious damage that would render the oar useless.
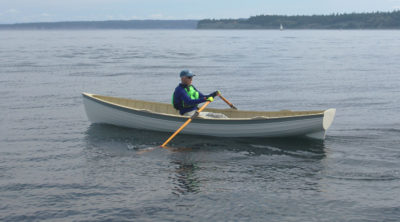
The copper guards I put on my sneakbox oars 43 years ago have held up well. They survived a 2,400-mile cruise, mostly rowing, from Pittsburgh, Pennsylvania, to Cedar Key, Florida, and many years of use after that. The oars could use a little sanding and some varnish, but they’ve never needed repair.![]()
Christopher Cunningham is the editor of Small Boats Monthly.
You can share your tricks of the trade with other Small Boats Monthly readers by sending us an email.


Very effective technique–as well as simple and elegant. Thanks for sharing this.
Great article. Very well illustrated and easy to follow. Thanks for sharing this effective tip on protecting oars.
I like the solution adapted for oars with the rounded blade with copper cover.
When I build the oars to be used in shallow water, I sometimes add a piece of black locust-type hardwood to the blade tip.
The timing of the article couldn’t be better. I have been drying two planks of ash in my workshop to make canoe paddles and was just starting to think about how to fasten copper sheet to the rounded the bottoms. I had not seen your copper design and think it will be perfect!
I have built my own kayak paddles for a number of years, gradually evolving my design and methods, starting from a David Zimmerly article on Aleut and Inuit paddles in a Sea Kayaker magazine of long ago. He called this one a Mackenzie River model. The design has willow-leaf shaped blades. I use Sitka spruce for the shaft, and build up blades from red cedar. The shafts are hollow, with a wall thickness of about 3/16″. The blades are moderately spooned and have a slight ridge lengthwise down the face of the blade, on the theory that it helps prevent fluttering (which does seem to work). The backs are convexly curved. In a sculling stroke, the blades exhibit remarkable laminar flow and provide strong support.
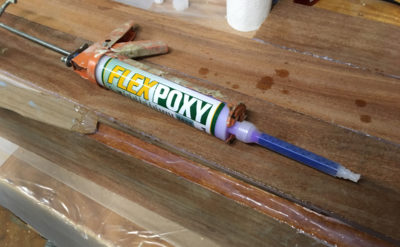
Originally I fiberglassed the blade tips, but this quickly wore off with use. On the last one I built (which I am still using) I tried a different method. I mixed up a pot of epoxy using a slow-cure resin, and stood the paddle upright with about 3 to 4 inches of the blade immersed. After the epoxy cured, I ground and sanded the excess epoxy off to restore the desired blade shape and thickness (thickness at the tips being about 1/4″).
So far, this paddle has held up very well to all the usually abuse—fending off docks, rocks, and the bottom. I don’t baby the paddle at all. Being a wobbly old guy, I depend on the paddle as a support pole as I clamber out of the boat and stagger my way up the beach.
I believe that a well-suited epoxy for this application would be “Git Rot,” which is formulated to penetrate the wood, giving it the “toughness of a screw driver handle” (to paraphrase the manufacturer’s claims).
(Fun Story: I was paddling with George Gronseth years ago with one of my earlier home-built paddles. George was using a custom-built paddle with unfeathered, rather wide flat blades. He suggested we swap paddles for comparison. I complained-by way of a preemptive apology-that my paddle had an annoying flutter. He said “What’s wrong with a little flutter?” And it turned out that his paddle also had an annoying flutter.)
P. S I should have mentioned that George Gronseth is proprietor of Seattle Kayak Academy, in Issaquah, WA.