When my partner, Marti Wolfe, got a Drake 17, a 17′ 4″ double-ended rowing boat, she bought an aluminum SUT Trailex trailer, which is popular among small-boat owners. Trailex is one of the few companies that makes trailers specifically for light boats, including those for rowing and paddling.
Most small-boat trailers, built for the ubiquitous outboard skiffs, have Y-shaped frames to accommodate the breadth of the transom, and stiffer suspensions to support the weight of the motor. Even the lighter of such trailers may have a 1,000-lb capacity. But Trailex’s SUT line of small-boat trailers are sprung for much lighter loads and thus give lightweight boats a softer ride. The SUT-220-SA, which Marti bought, is for boats up to 17′ and 220 lbs, and the larger SUT-350-S is for narrow boats up to 22′ and 350 lbs. These SUT trailers have a single central beam that extends between and beyond the wheels. While the small roller on its back end supports the stern of the boat, it makes a small target for the bow of a returning boat. And the beam itself is no place to stand for either launching or retrieving.
 Photographs by the author
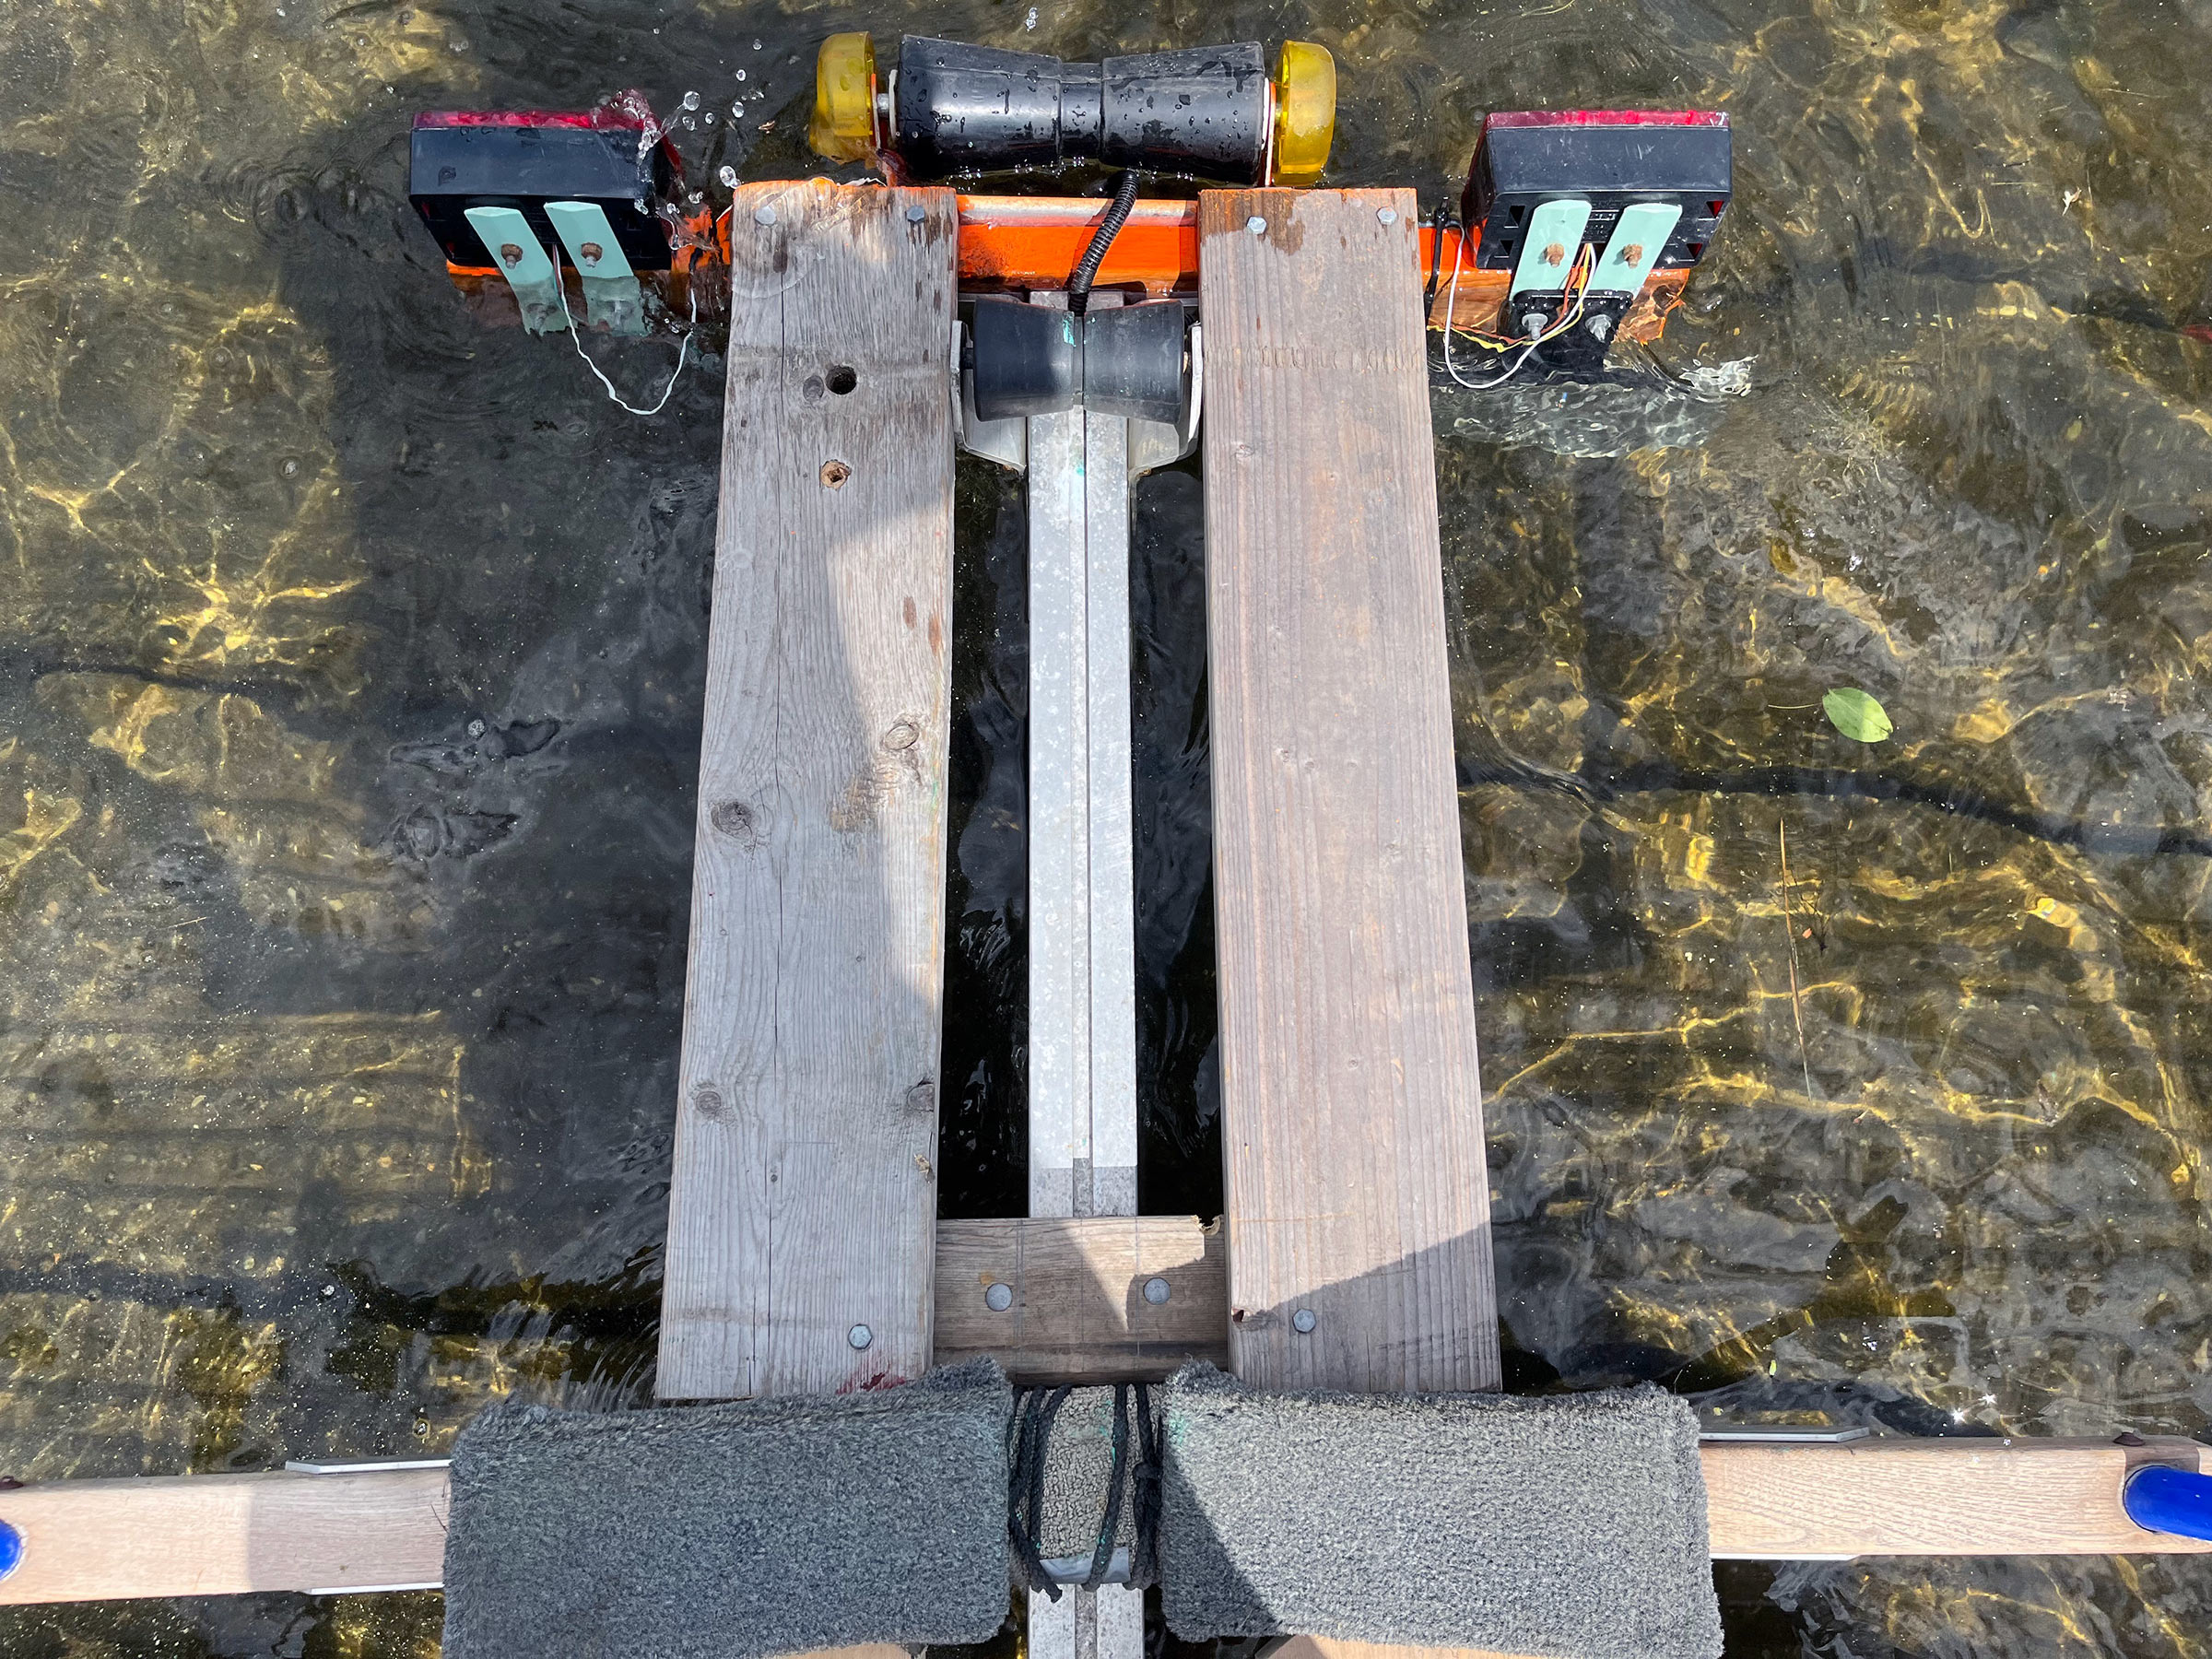
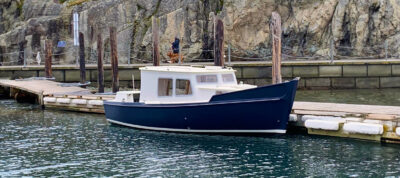
The tail end of the trailer was little more than the slender aluminum beam, seen here in the center. Two 2×4s secured to it support the two 2×6s that provide a walkway to the end of the trailer. The roller, with end caps, offers a wide target for retrieving the bow without damaging it.
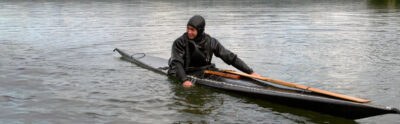
Marti launches her Drake 17, LJ, in salt water daily, and to protect the trailer bearings, she keeps them out of the water. This leaves the boat perched above the water and since standing or walking on the trailer’s slender center beam is out of the question, she has to wear boots and wade to handle the boat at the ramp.
After we set-up the trailer with rollers, bunks and guide poles, I wanted to add a walkway so Marti could walk safely to the back of the trailer to launch and recover the boat. Over the wheels, the rectangular frame of crossbars and siderails could support a plank to make a walkway, but we needed to add crosspieces to support an extension of the walkway over the tail end of the center beam. At Marti’s suggestion, we removed the taillights and bolted a 32″-long 2×4 to the pair of now-empty L-brackets. The spacing of the bolt holes in the L-brackets just happened to make it possible to use the bolts to anchor the frame of a 10″ roller. I used an extra-long axle for the roller so I could add end caps, which would prevent damage to a bow that misses the target.
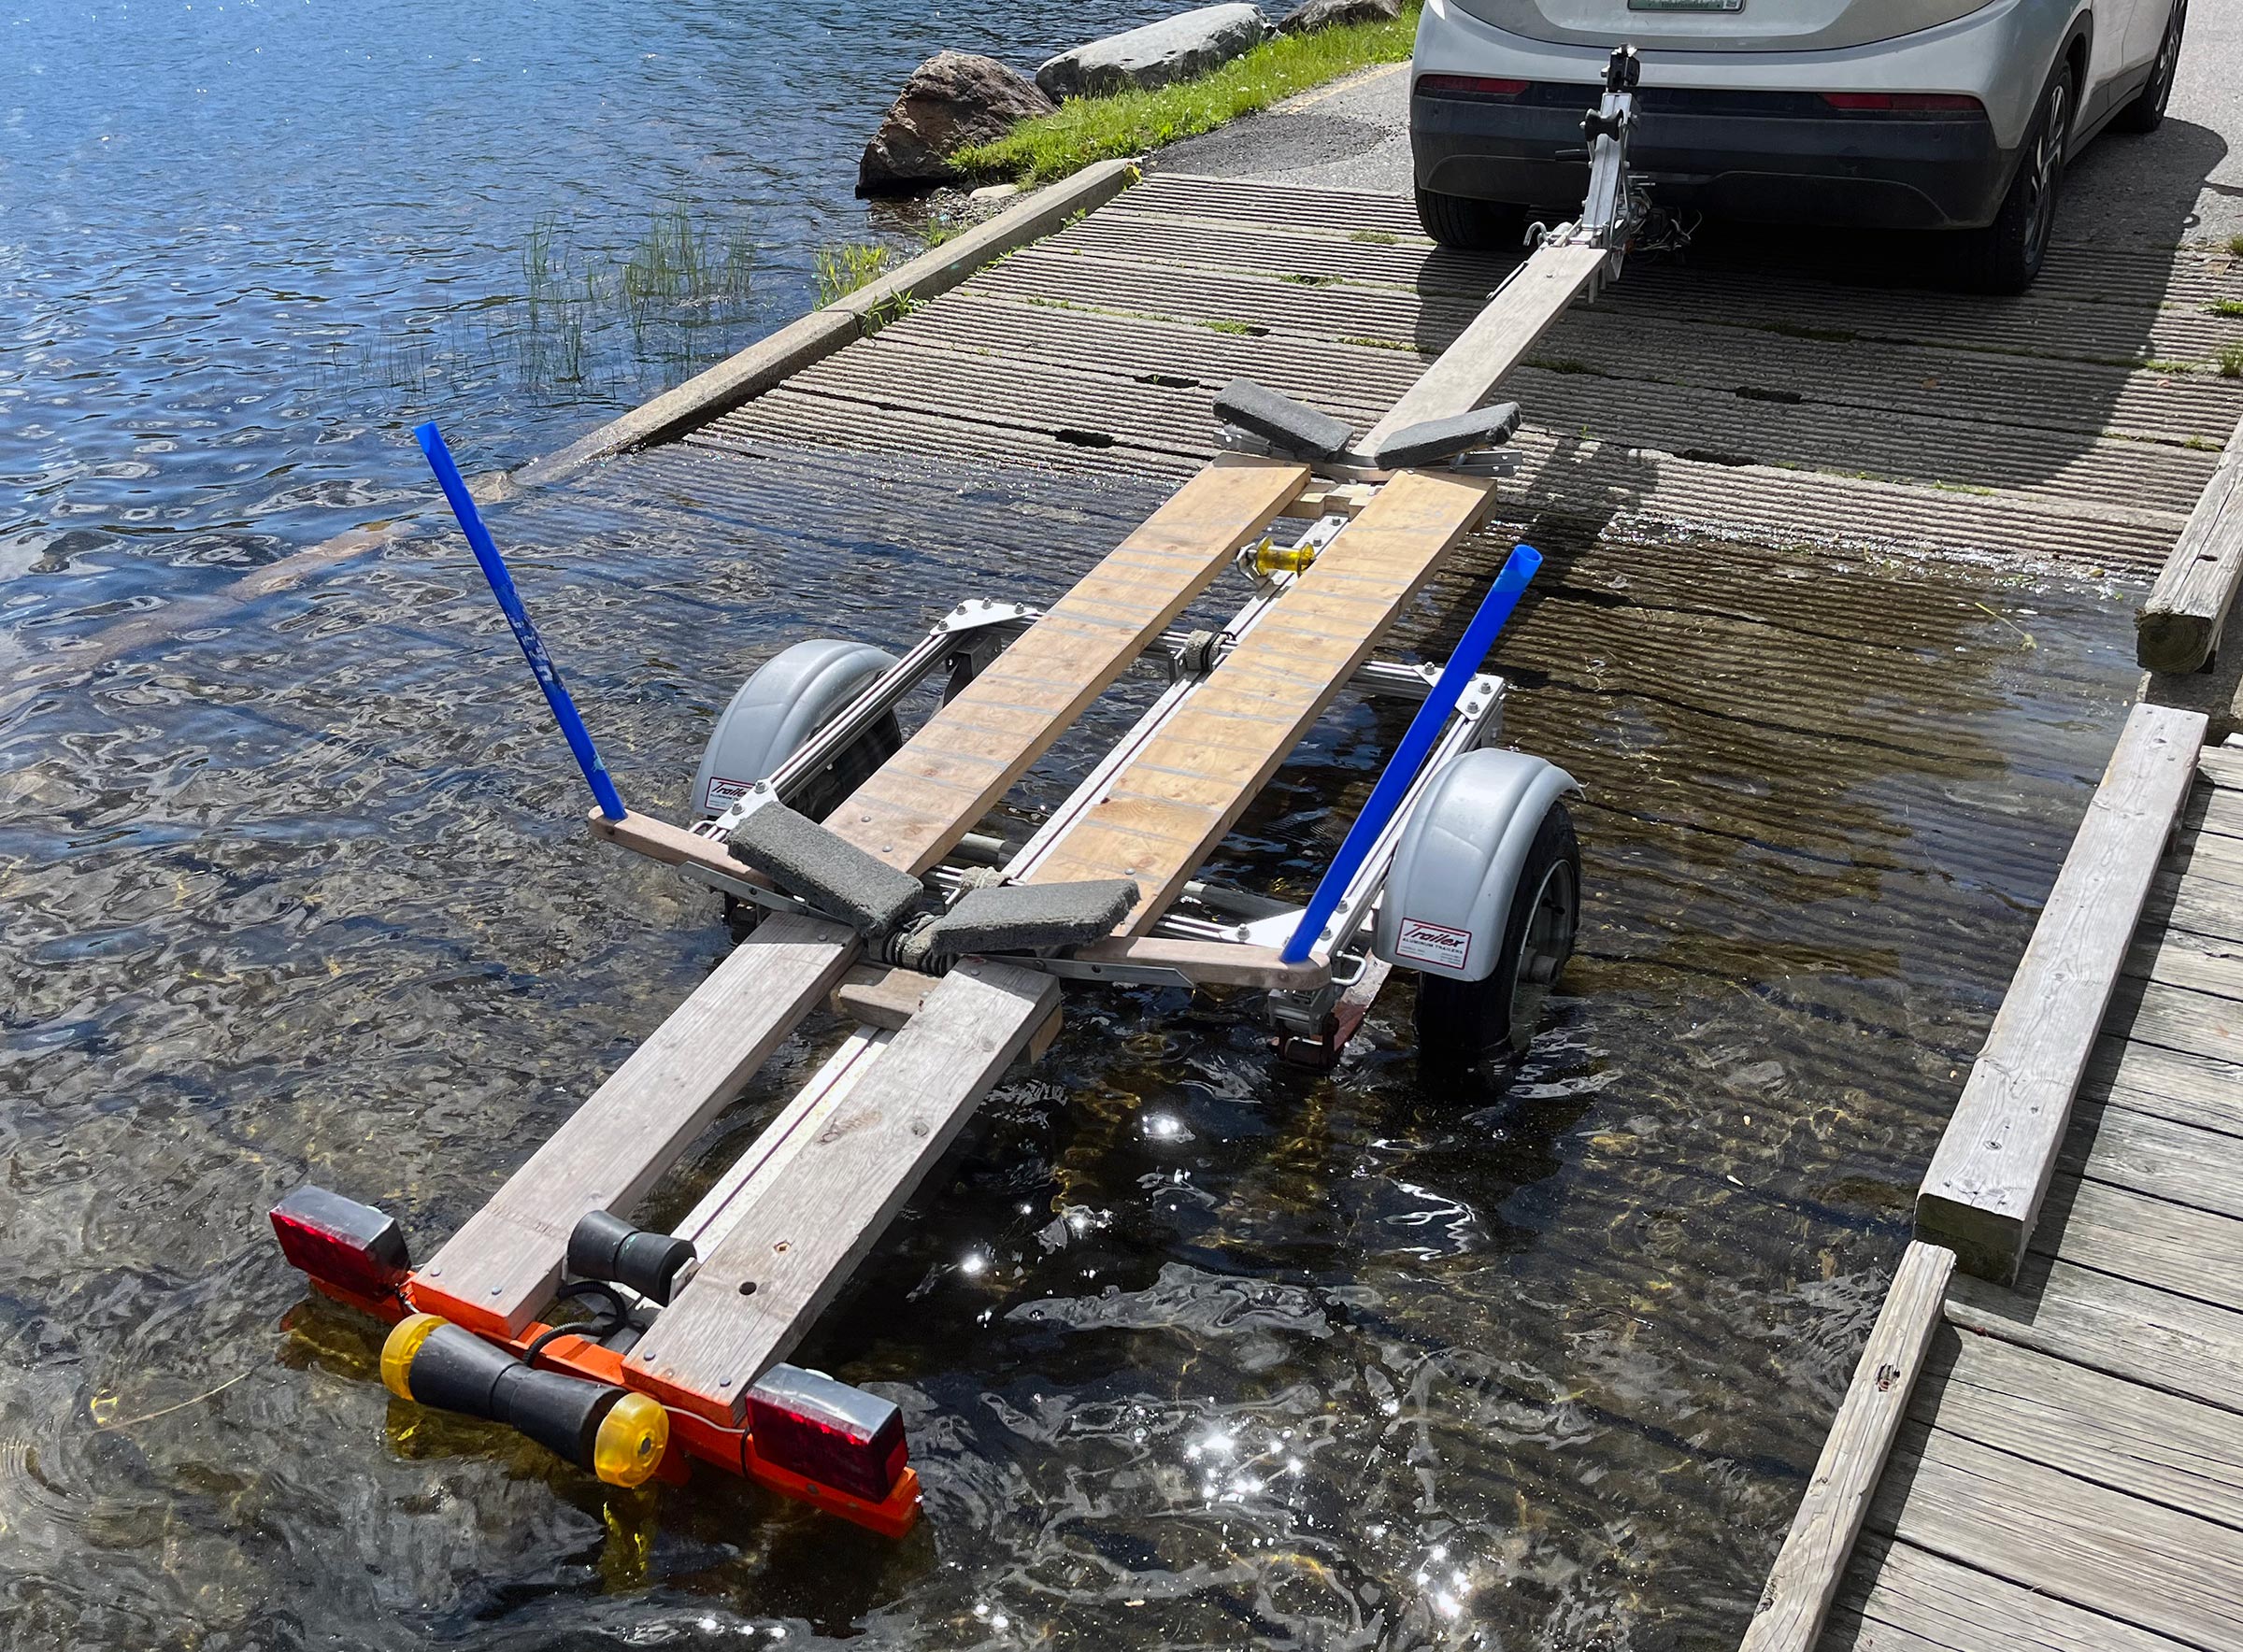
The trailer’s crossbars support the back ends of the 2×6s that serve as the middle section of the walkway. Their forward ends are lag-bolted to a 2×4 secured to the trailer tongue.
The 2×4 crosspiece worked brilliantly. We painted it dayglo orange to make it more visible when the trailer has no boat on it. I attached another 2×4 crosspiece to support the forward ends of two 2×6s. This 2×4 is about 17″ long and spans both the 2×6 walkway pieces and the 6″ gap between them, which is required by the small roller fixed to the trailer’s center beam. The 2×4 lies flat on the beam and is secured with carriage bolts on either side of the beam. The ends of the bolts are slipped through holes in a 1″-thick hardwood cleat that spans the bottom of the beam. Nuts and washers finish the connection. The 2×6s are set on top of the two crosspieces and are secured with lag bolts, finishing the aft part of the walkway.
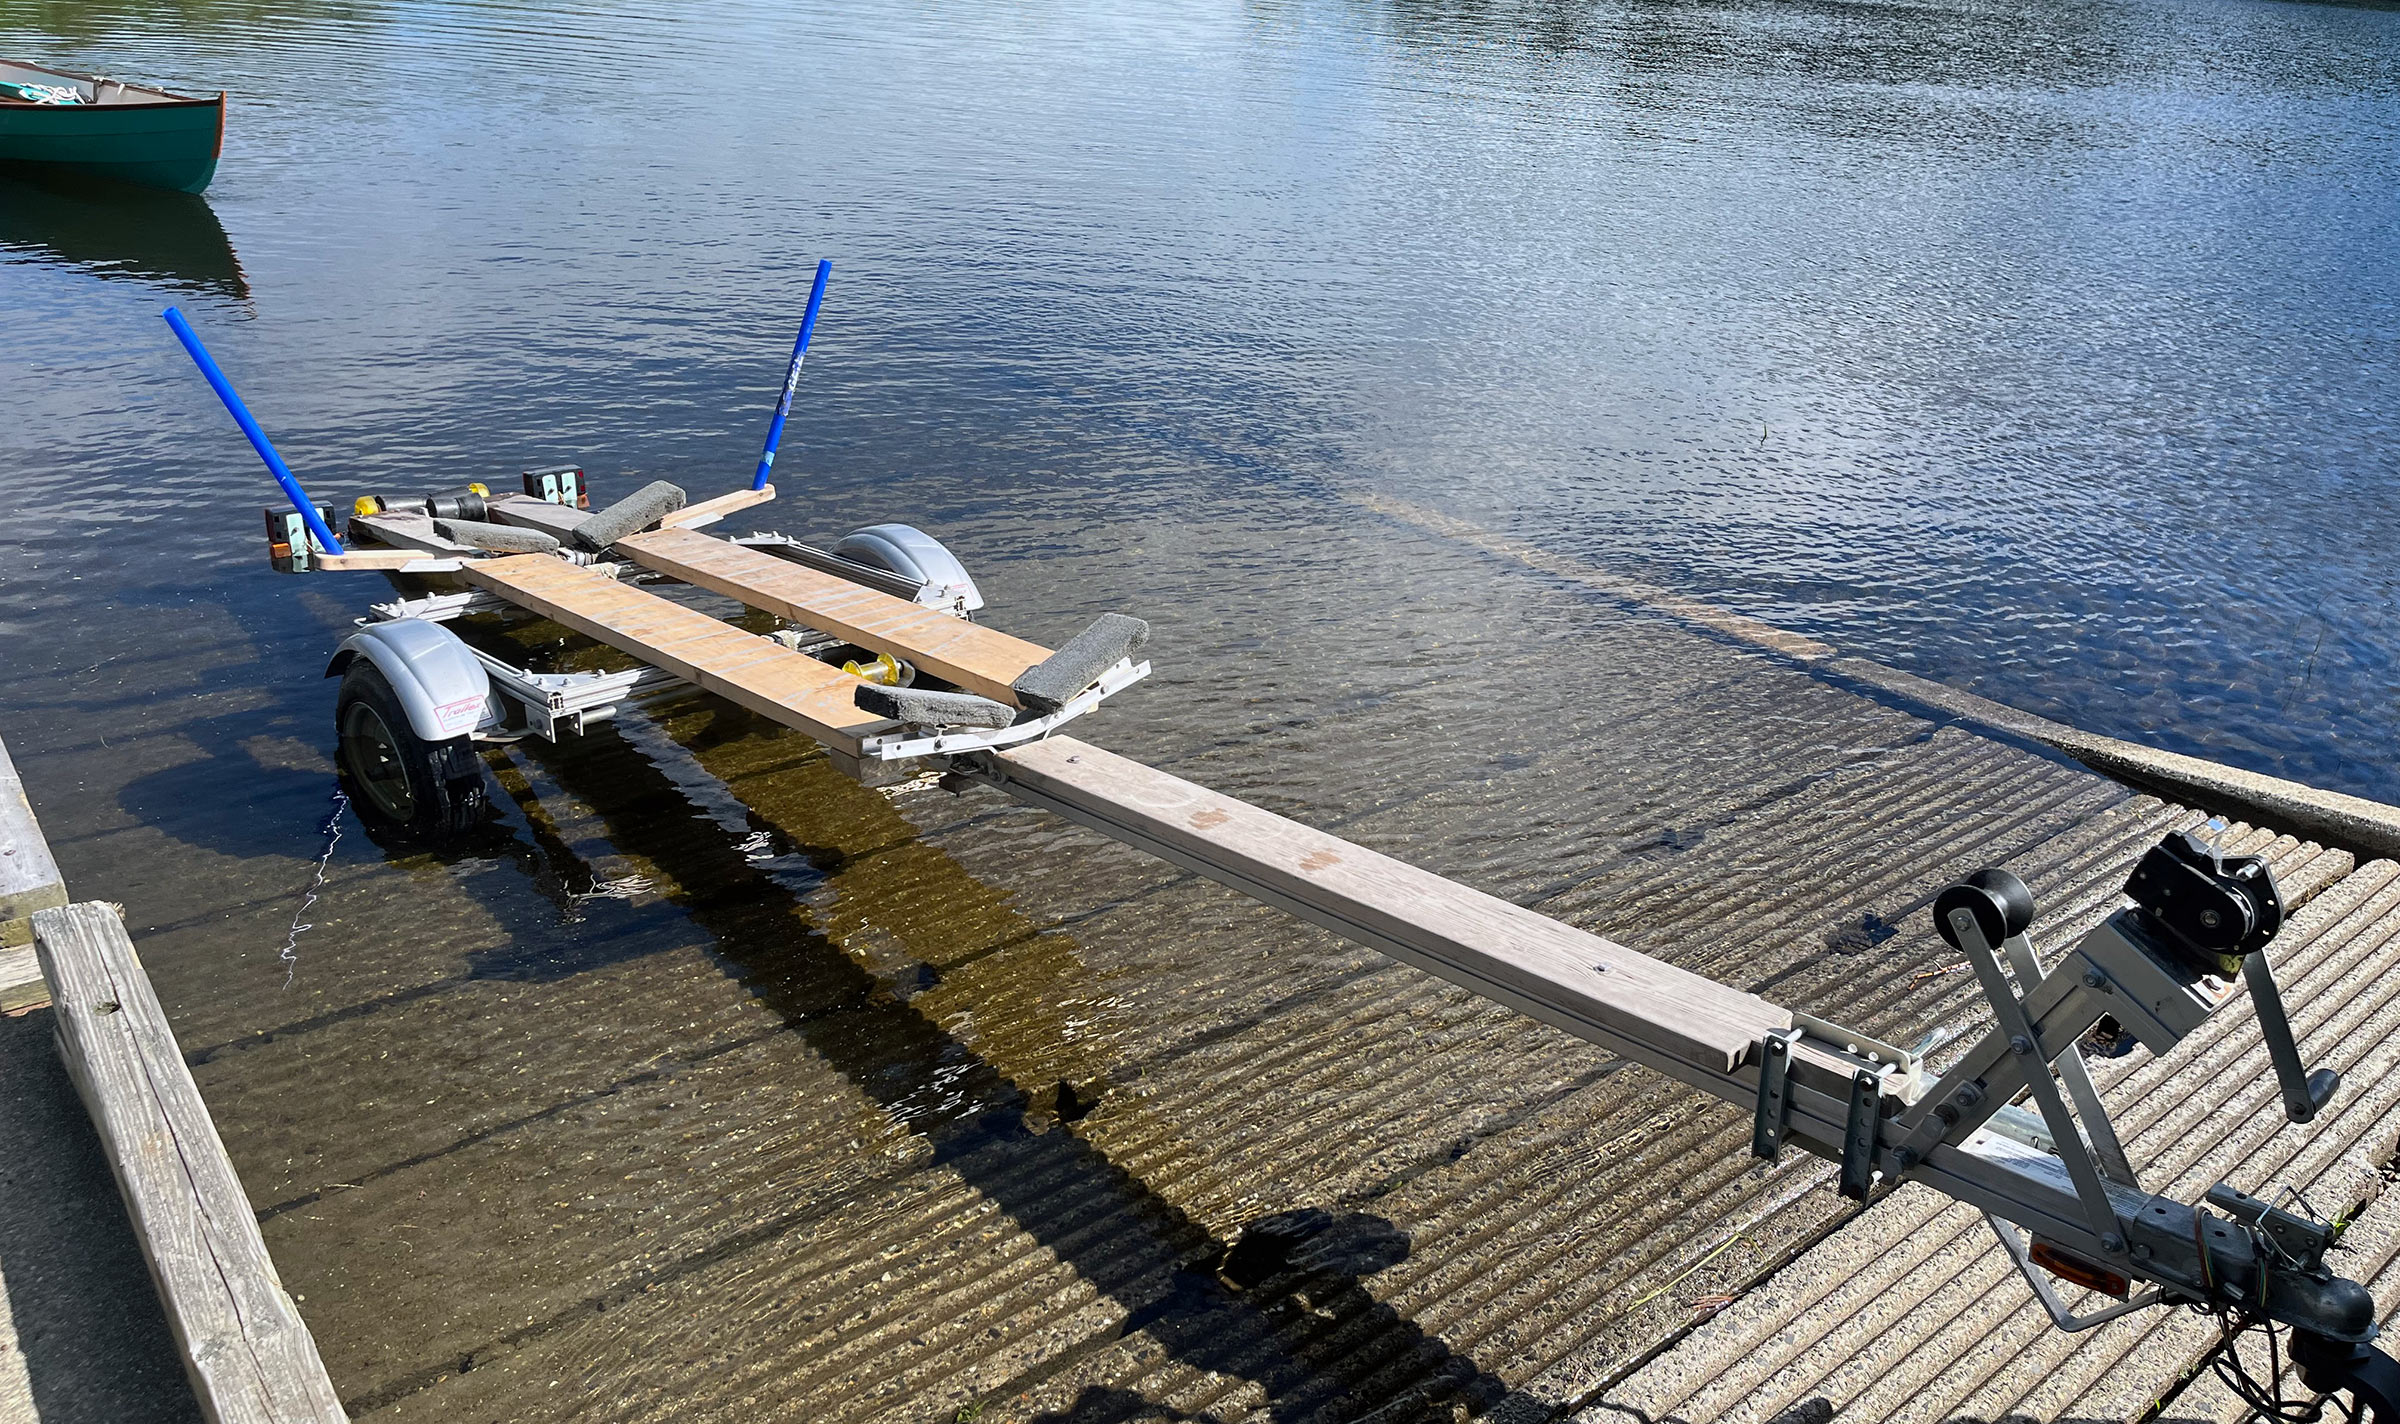
A single plank secured to the tongue serves as the forward end of the walkway. If something wider is preferred, 2×4 crosspieces, like those used on the other sections of the walkway, can support a pair of planks.
For the center section, I cut 2×8s to fit the length of the square frame formed by the trailer’s aluminum crossbars and siderails and secured the planks with carriage bolts and hardwood cleats. For the forward walkway, I bolted a single 2×8 to the trailer tongue with nuts captured in the channel molded into the extrusion. It was a rather fussy chore, and I would recommend, instead, using the paired bolts with a wooden cleat as described above.
With the walkway complete, I mounted the taillights on top of the 2×4 at the back rather than on its face to minimize the chance of the boat’s stem hitting them. Instead of going to the hardware store and buying mending plates, I used short lengths of a salvaged fiberglass sail batten to connect the lights to the 2×4. The wires for the trailer’s lights led through the central extrusion and had enough extra length to reach the lights in their new positions, farther from the centerline. I had to drill a hole in the wooden cross bar through which I could run the wires. I ran ground wires from the lights (which are no longer in contact with the metal trailer) to bolts connected to the trailer beam. Mounting the trailer lights high has the added benefit of keeping them out of the water. I haven’t yet fixed the 2×4 to allow the left taillight to illuminate the license plate. A little auxiliary light or taking a couple of cuts off the corner of the 2×4 will do the job.
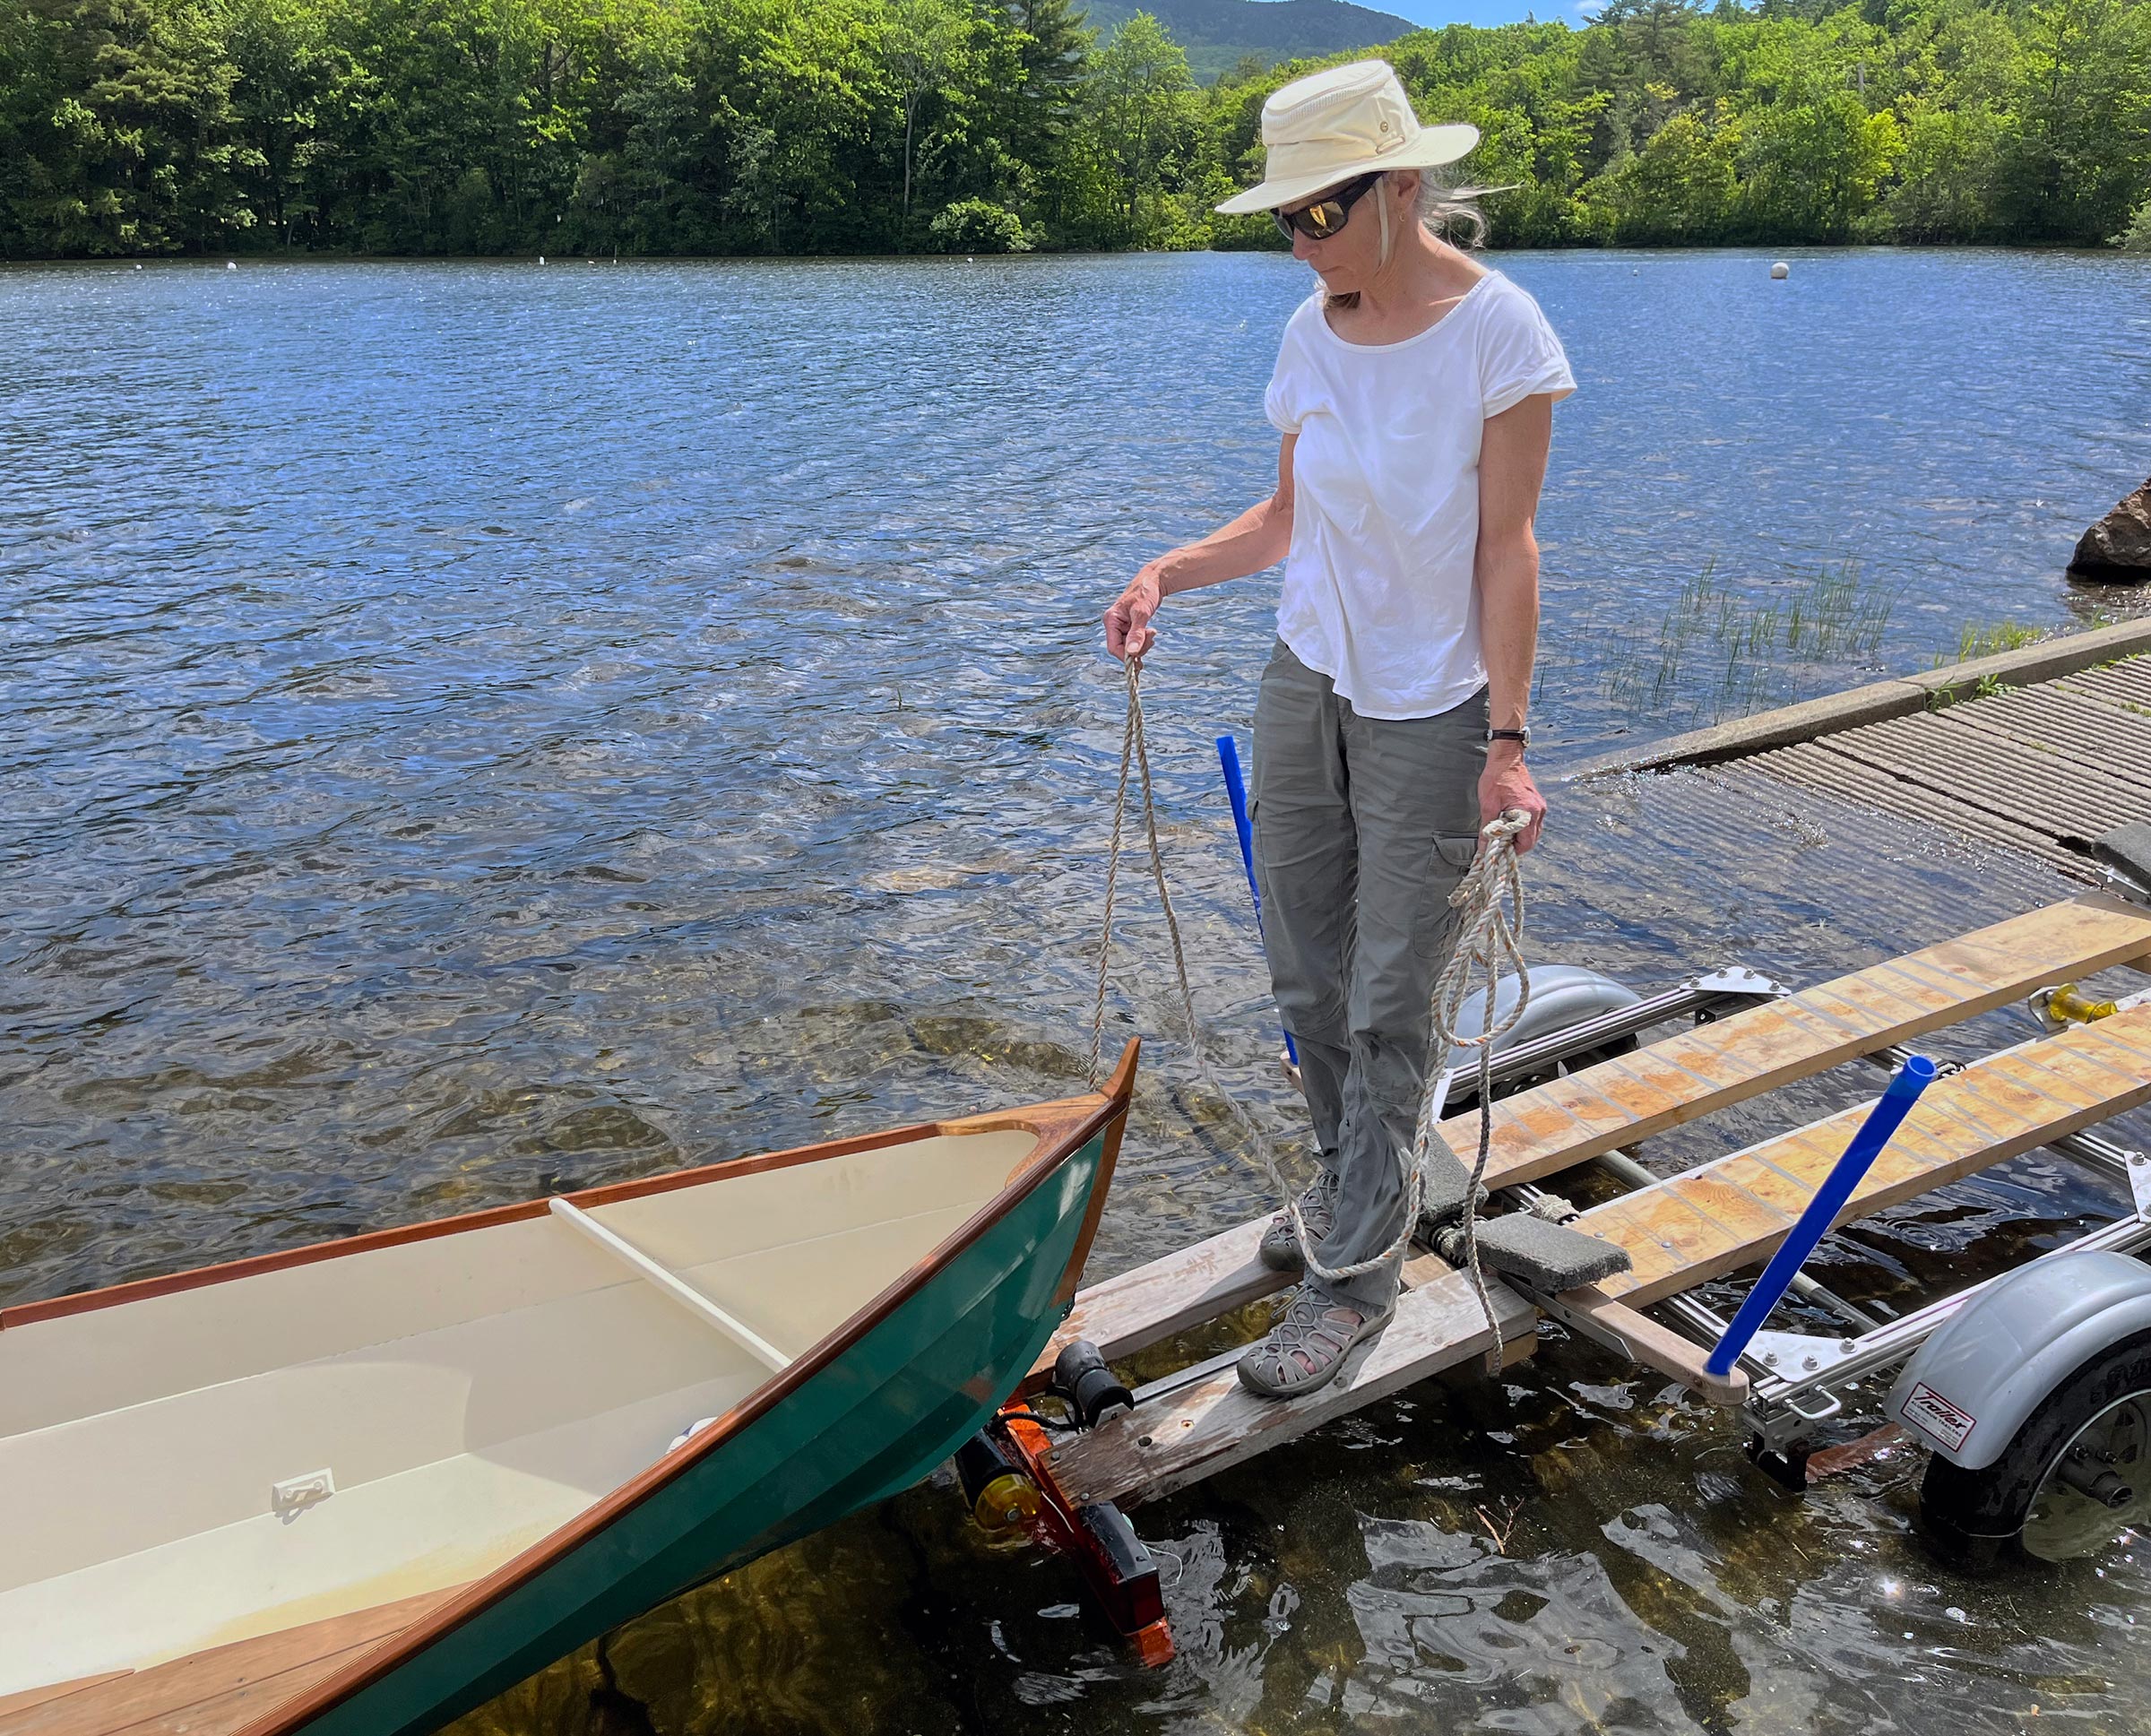
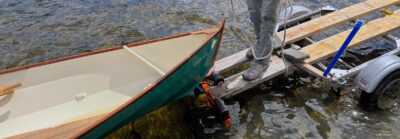
There’s enough slope on this boat ramp to keep the trailer bearings out of the saltwater and yet bring the back end very close to the water, making it an easy lift to bring the boat up onto the end roller. The walkway provides a secure platform from which to handle the boat
Improving a trailer to make handling small rowing and sailing boats easier will depend on the trailer. Some kind of walkway is well worth fitting to any small-boat trailer. The Y-shaped frame of most trailers makes it an easily applied addition as the parallel extremities of the Y provide convenient support for added cross bars. But with just a few pieces of common lumber and a free weekend, you can add a walkway to even a light Trailex single-beam frame. Now Marti can walk LJ out to the end of her trailer to launch and recover her boat.![]()
Ben Fuller, curator emeritus of the Penobscot Marine Museum in Searsport, Maine, and former curator of Mystic Seaport and Chesapeake Bay Maritime Museum, has been messing about in small boats for a very long time. He is owned by a dozen or more boats ranging from an International Canoe to a faering.
You can share your tips and tricks of the trade with other Small Boats Magazine readers by sending us an email.


Thanks, Ben!
I have a Drake 17 on a Trailex trailer too, and I like your walkway design. I have added walk-boards to other, heavier trailers, but hadn’t thought of adding them to the Trailex. Brilliant!
Rob Hazard
Great upgrade! We have added walkways to a few other trailers, and covered them with outdoor carpet to provide a little extra grip for shoes and boat protection.
Thanks for sharing the details!
Having worked with this for a bit now, I’d increase the width of the aftermost cross piece and use a bigger roller which would mean some holes drilled into the roller bracket. A bigger target for the bow.
For loading in a crosswind a bigger target helps for sure. On my similar SUT500-S I added a 3-roller bar made from a piece of aluminum square tube (the angled outer rollers push the hull onto center while loading). Trailex sells the T-bolts that fit the slots, useful for attaching modifications. I also added a step plate of aluminum with non skid, from there I can just walk on the bunks.
Photo while loading: https://flic.kr/p/PdMA6T
Brilliant! I was having issues with the bow of my CLC Northeaster Dory being gouged by the sharp edges of the rear factory-roller brackets: there was simply no way to keep the bow from bumping into them as I loaded the boat onto the trailer. The always-helpful folks at Trailex, seemingly aware of the problem, suggested coating the sharp edges (which I had already rounded with a file) with “Plastic Dip.” This has helped, but you seem to have, perhaps inadvertently, a much better solution: your rear 2×4 is snug up against and shields the boat from the brackets while the entire system radically reduces the chance of the bow colliding with the brackets. Looks like I have a new project!
I also have a Trailex trailer. What a great idea! It looks like I’ll have a new project added the my list! Thanks.