We are building a Joel White 7′ 7″ Nutshell Pram and will rig it with a 37-sq-ft lug main. We ordered the Nutshell lugsail kit from Sailrite, pressed Skipper’s sewing skills into service for the construction, and are very pleased with the result.
The kit comes with nine pages of instructions, five precut sail panels and six sets of corner and reef reinforcements pre-cut from 4-oz Dacron. Also included in the kit are telltales, a Sailrite logo sticker, spur grommets, a roll of 1/4″ Seamstick double-sided adhesive basting tape, V-69 UV-resistant polyester thread, and 3″ non-adhesive Dacron tape. All the materials were well packaged, and shipping was prompt. When we had questions along the way, Sailrite’s crew and sailmaker were very responsive to our phone calls and emails.
The sail panels are computer plotted with seam lines, hem lines, and reefpoint placement. The sides of each panel are curved to different degrees, so when they are sewn to the 1/2″ marked on the cloth, this broadseaming, as it’s called, helps give the sail its “belly,” and together with the curves in the sail’s perimeter of the sail, create a wonderful three-dimensional aerodynamic shape for driving power.
 Photographs by the authors
The main panels in the sail are cut with a curve along one edge so that the seams will give the sails a three-dimensional curve. While the seams joining the panels are uniform in width, the technique is called broadseaming, a holdover from the times when panels had straight edges and the curves were produced by making the seams broader as they approached the sail edges.
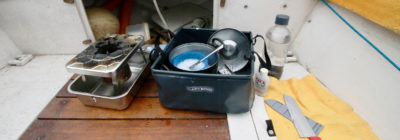
Armed with a basic home sewing machine, scissors, and a #2 spur-grommet die set, Skipper was able to assemble the sail in just a few hours (even with my “help”). We used Skipper’s home-sewing Janome machine instead of her Sailrite LSZ-1 walking-foot machine, to validate Sailrite’s assertion that the kit can be assembled with a home sewing machine. A zigzag stitch 3/16″ wide and long is used throughout. The seams between panels get two rows of stitching, each 1/8″ from the nearer edge. If your sewing machine cannot stitch zigzag, the Sailrite instructions say those panel seams get three rows of straight stitching.
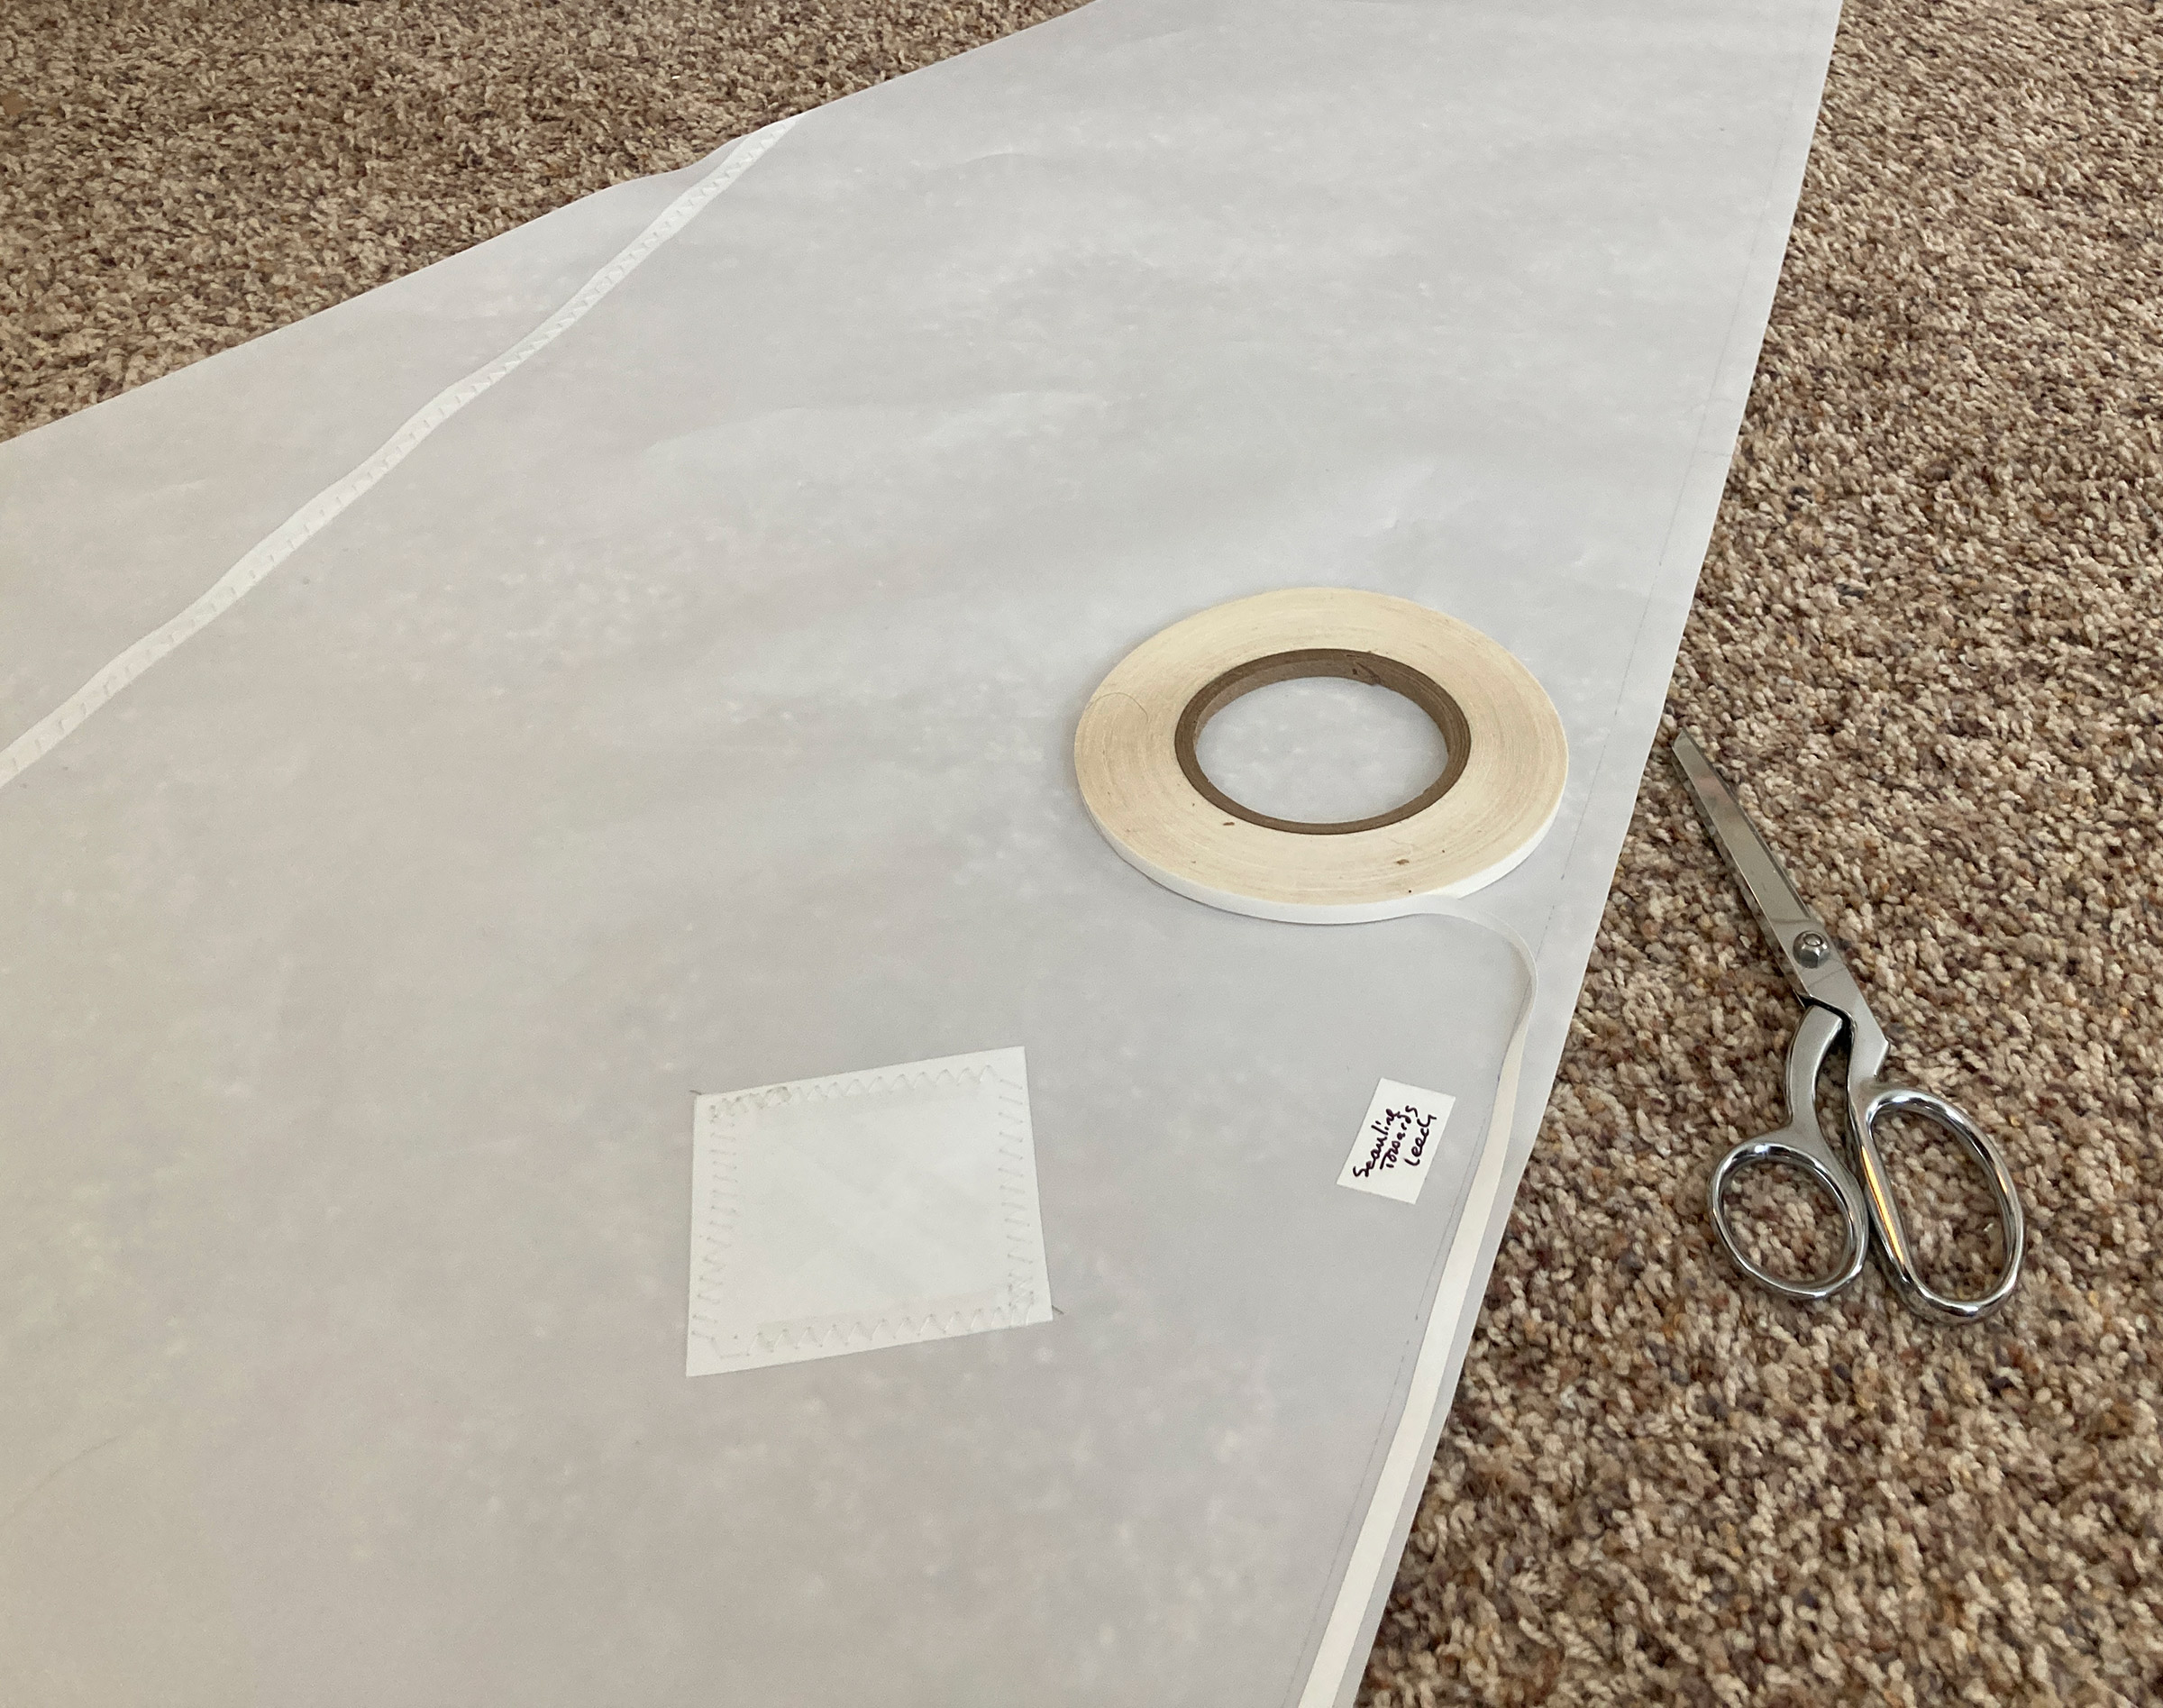
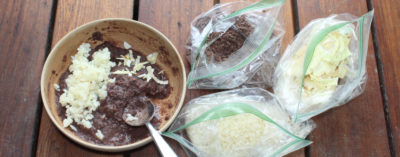
Double-sided basting tape holds separate sailcloth pieces together and secures folded edges for sewing. Tearing the tape instead of cutting it with scissors makes it easier to separate the tape from its backing. With a bit of practice you can snap the backing and stretch the tape to make a small tab you can pull.
The corner patches are three layers thick and, when the double hems for the leech and luff are folded and sewn, the corners have a total of six layers to sew through. A light-duty machine will work its way through the layers—a little help with the hand wheel may be required—and extra care must be taken to advance the sailcloth under the presser foot to get an evenly spaced stitch. If you have a heavier-duty machine with a walking presser foot, like Sailrite’s LSZ-1, it controls the slippery sailcloth for you.
The 2″ squares for the optional reefpoint patches must be cut by hand using sharp scissors. The Dacron sailcloth is treated with resins that minimize if not eliminate fraying, and edges don’t need to be cut with a hot knife. The precut pieces from Sailrite are cut with a sharp rotary cutter on a computer-controlled plotter.
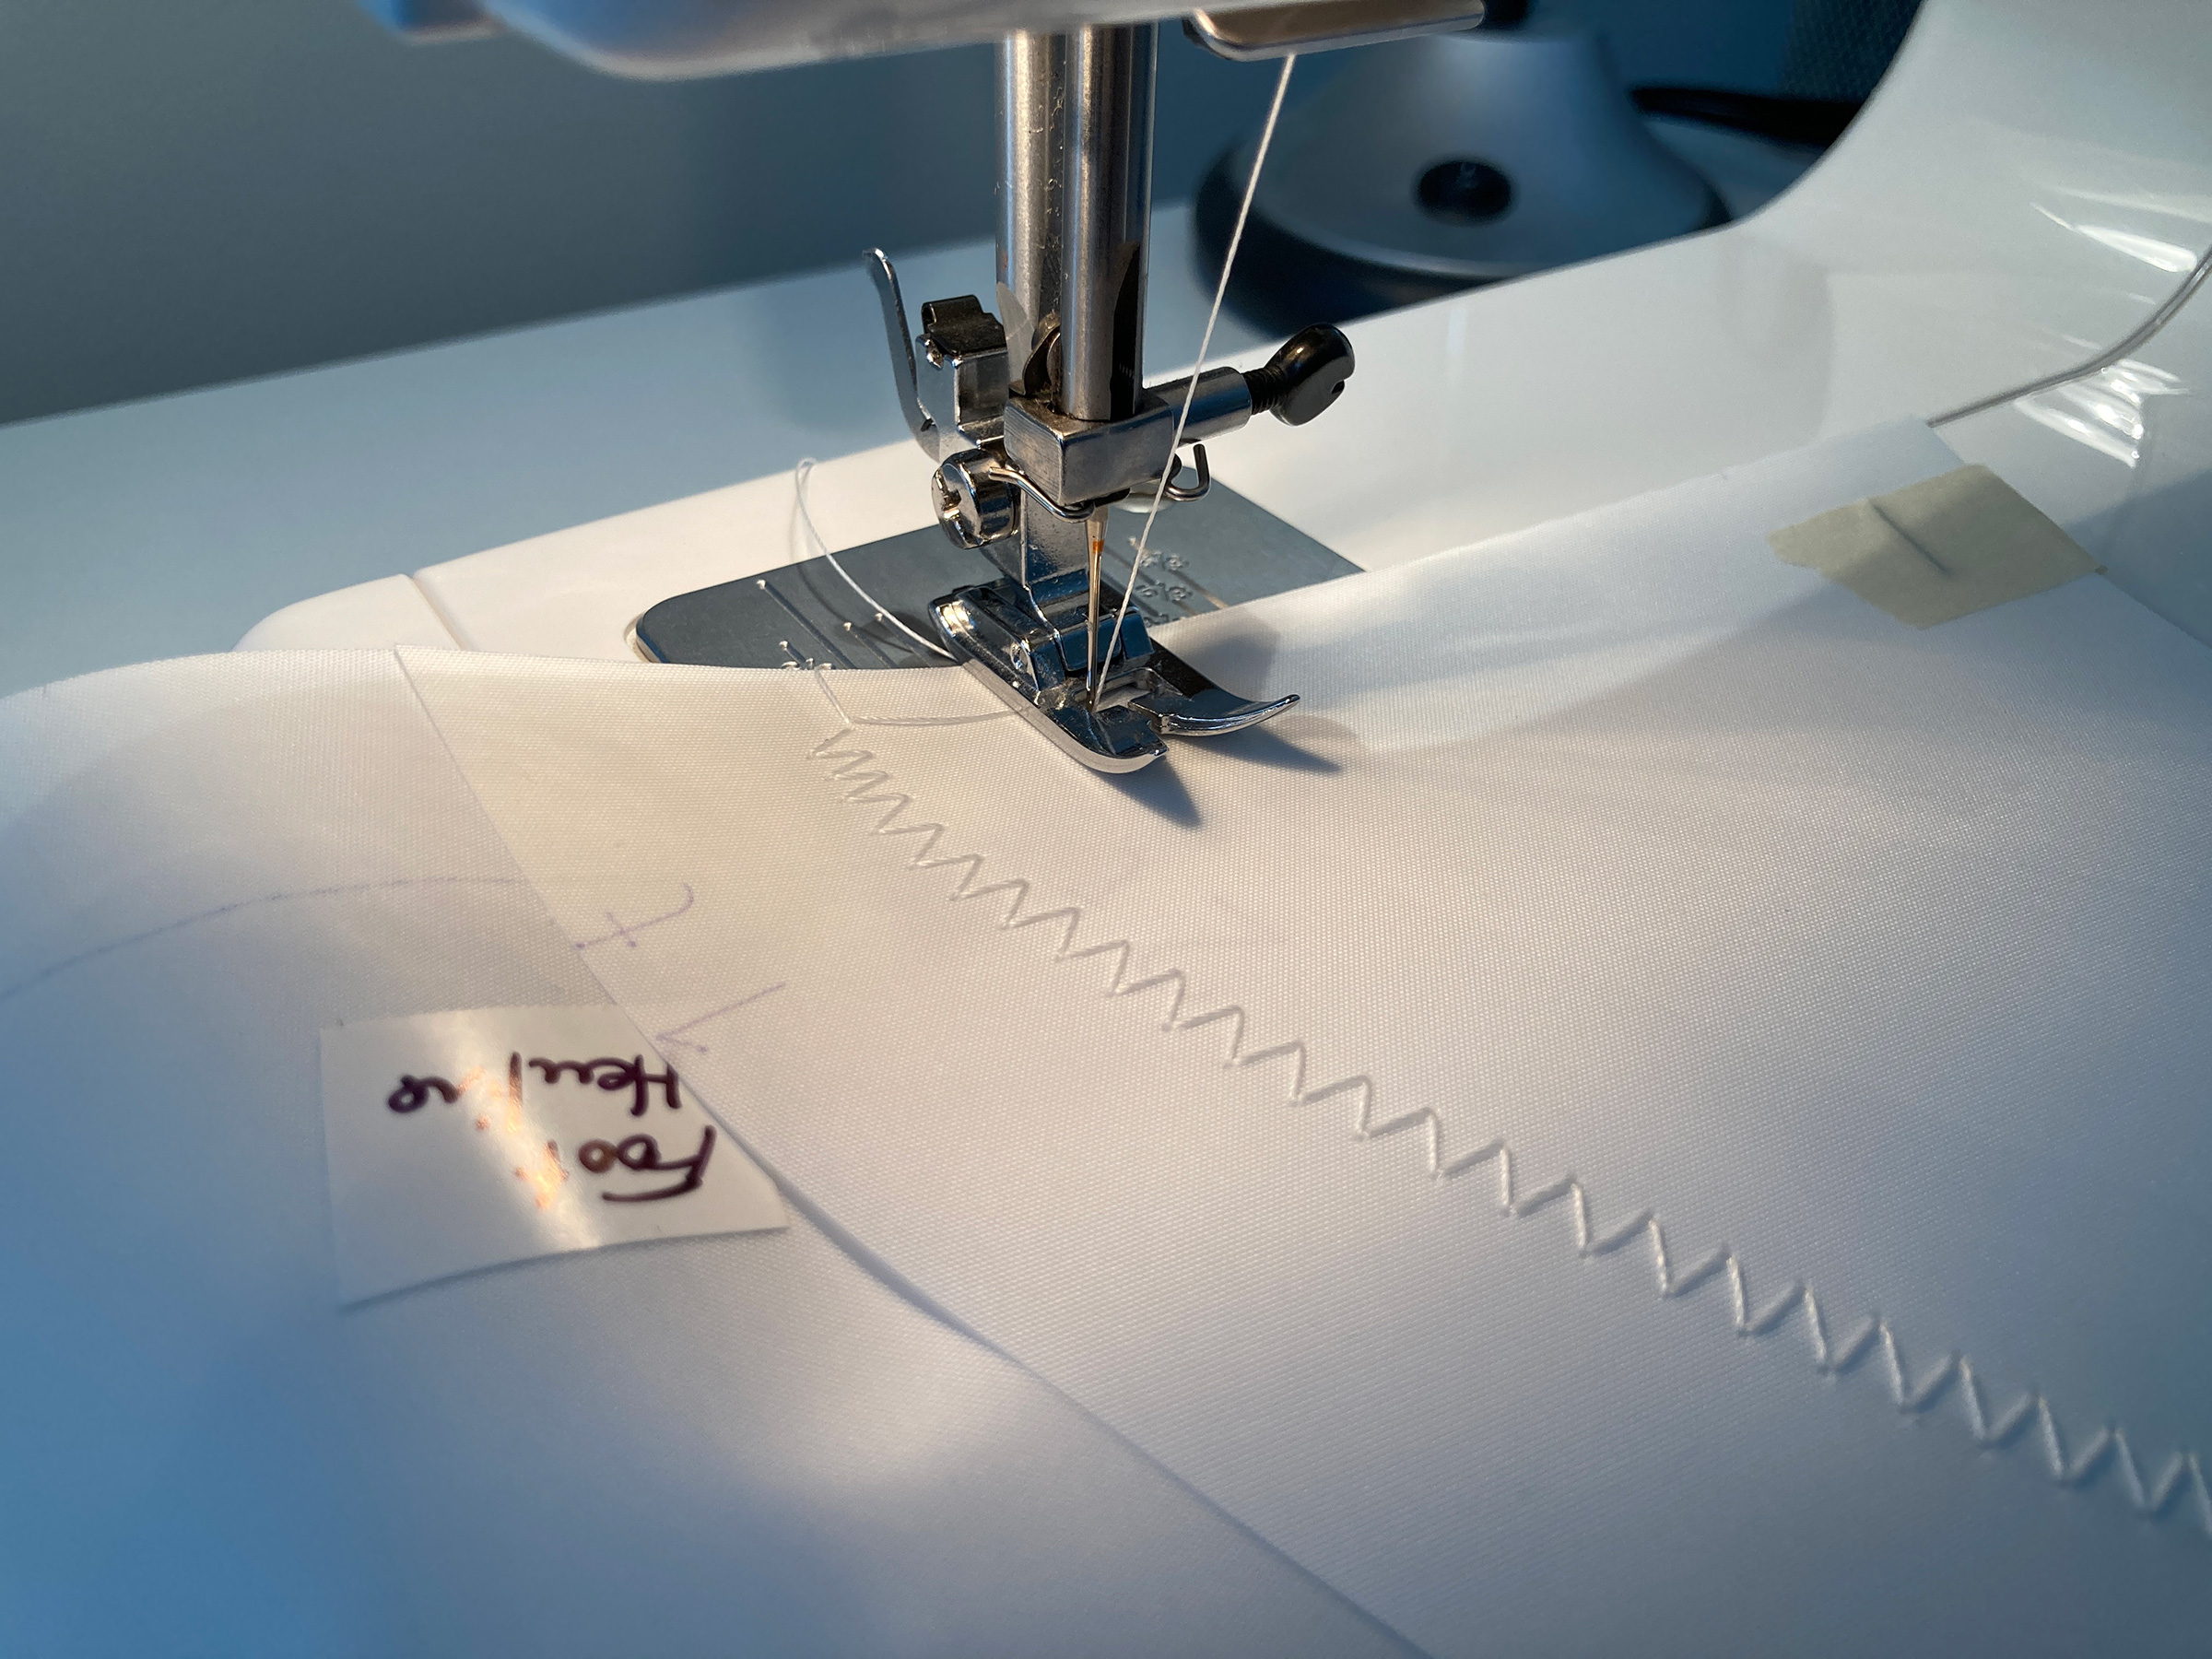
Zigzag is the traditional machine stitch for sails. Most home sewing machines have straight and zigzag settings as the most basic selections, but if your machine does only straight stitches, modern Dacron sailcloth in Sailrite kits is well stabilized with resins so that whatever stretch might occur in a small sail is not likely to break the stitching.
The instructions explain the markings on the sail and the sequence of construction. Sailrite has done a good job with the assembly sequence of the five panels and the reefpoint, peak, clew, tack, and throat patches to minimize the number of times that large amounts of sailcloth must be rolled up to run through the sewing machine’s throat, which can be a challenge on a small machine. After the five panels and all of patches are sewn together, the leech and foot are folded twice and sewn with a double hem to reinforce the perimeter and to cover and protect the cut edges of the cloth and lock the ends of the seam stitching. The head and luff are not hemmed but have the Dacron tape folded and sewn over the edges to cover them and serve as a reinforcement for grommets. The brass spur grommets included with the kit provide extra grip on the sailcloth.
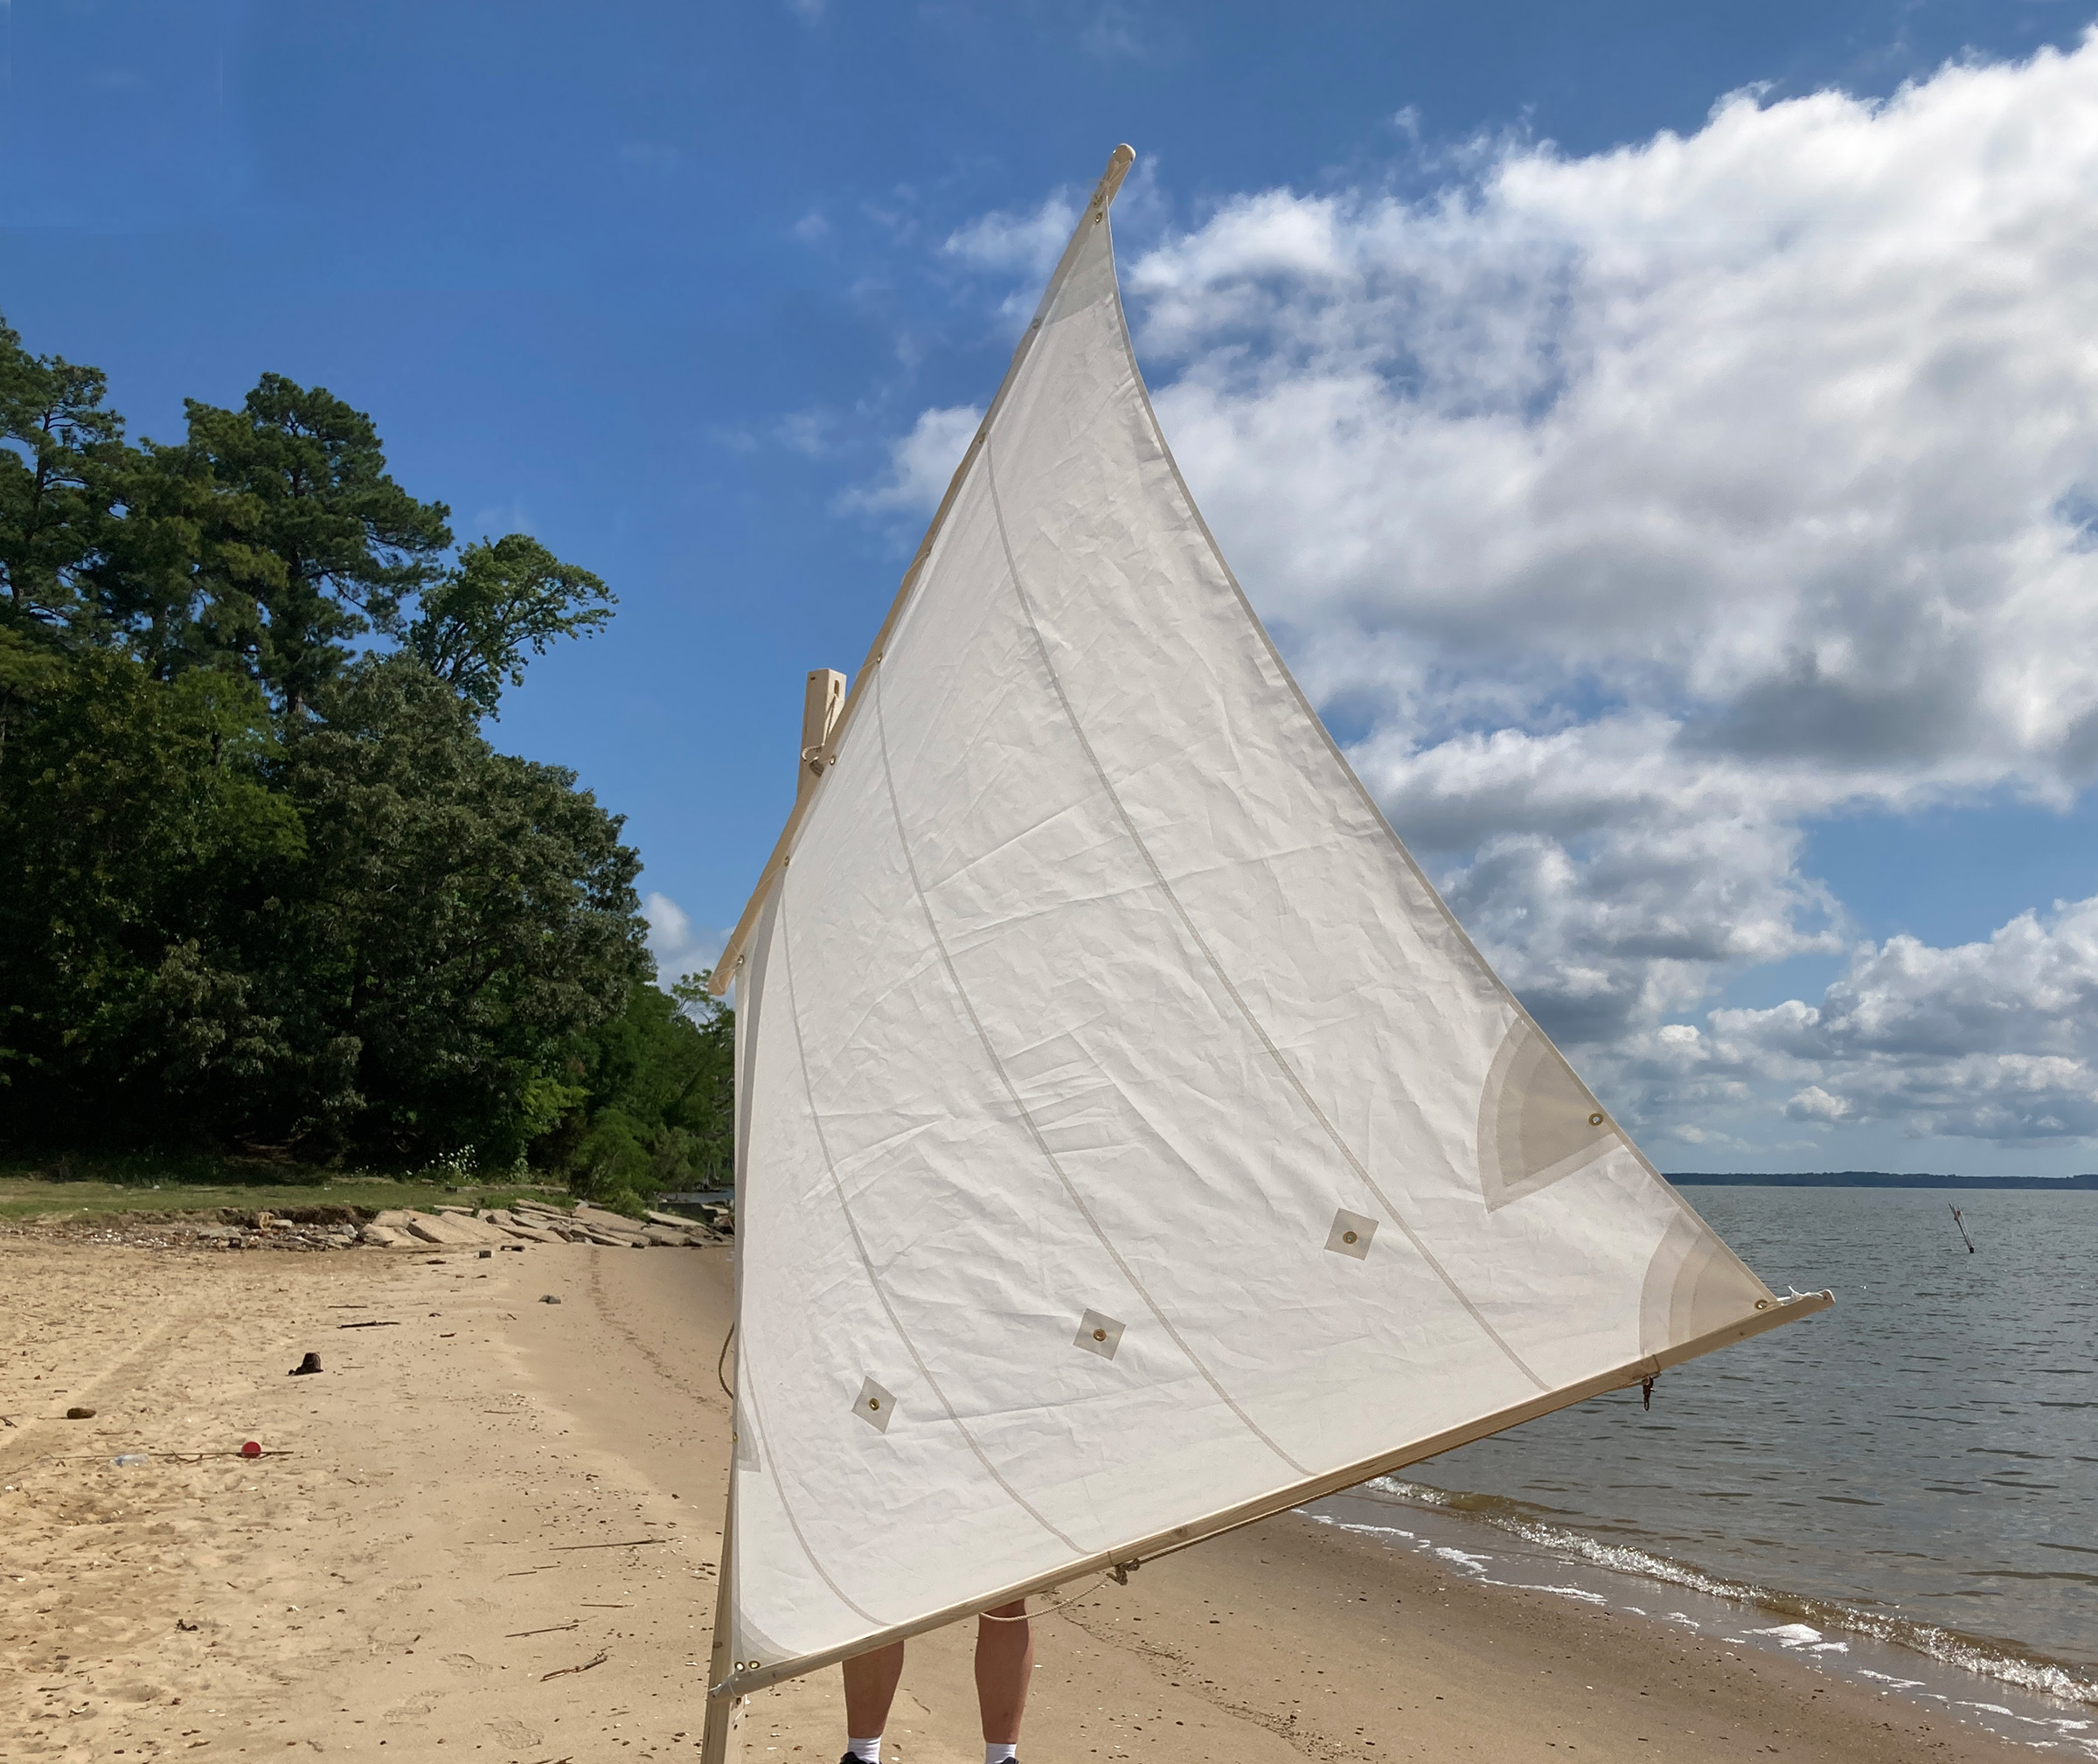
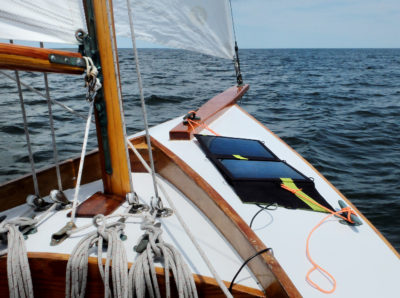
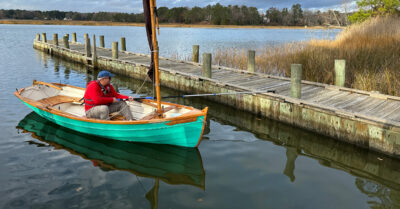
The Nutshell pram has not yet left the shop, but with the spars roughed out, the finished sail can show its curves.
The finished sail is laced to the yard and mast, and the sail is set loose-footed on the boom. The vertical seams between the sail panels give the sail a classic look, and the shape will provide good performance for the small pram. ![]()
Audrey and Kent Lewis mess about in the Tidewater Region of Virginia, and look forward to the launch of their mighty pram, EXCUSE ME. Their adventures are logged at www.smallboatrestoration.blogspot.com.
The Nutshell sail kit in white Dacron costs $169.90. It is also available in cream ($289.20) and tanbark ($295.20). Sailrite offers sail kits for a wide array of boats as well as fabric, hardware, and sewing machines. If a sail kit is listed as “Out of Stock,” it is still available, though perhaps with some substitutions of materials; call or email Sailrite for further information.
Is there a product that might be useful for boatbuilding, cruising, or shore-side camping that you’d like us to review? Please email your suggestions.


We recently put together a Sailrite kit for our boat. My spouse is an experienced tailor and she found the instructions easy to follow. We made mistakes, but everything came out fine in the end. Our only issue was with knowing how a sail is assembled. We erred in what happens when. Make sure you understand the terminology and do not take the steps out of order from the instructions. And yes, the sail works great!
We know it is easy to miss a step and not read that very last sentence in a long paragraph 🙂 A “read twice cut once” approach is good for the few parts that need to be cut. And even the best tailors have seam rippers.
Sailrite has excellent customer service to help with each step, or to let us know if our mistake was a big one or one that wouldn’t be noticed by someone galloping by on their horse.
Have fun with your sail!
Cheers
Skipper and Kent
Interesting article, well explained, maybe it will encourage others to have a go themselves.
Do you have instructions or details of how you handled the boom-to-mast connection for the standing lug? I am building a 9’6” nutshell and am about to hit that point and haven’t puzzled it out. I have built a Caledonia Yawl but that is a balanced lug.
Hi Joshua,
There is a beehole at the forward end of the boom for the tack of the sail, I tied a bronze snap shackle (from our Sunfish parts bin) to the boom through the same beehole with a piece of 1/8″ diameter New England Rope Dacron cord. Pick the marlinespike artwork that works for you. On the mast we screwed on a bronze eyestrap (more Sunfish bits) with piloted Frearson-head silicon-bronze wood screws. The snap shackle connects and disconnects easily to the eyestrap.
We guessed at where to place the eyestrap on the mast based on where the yard crossed the top of the mast, a little bit down from the mast top beehole, then I noticed a few days later on the spar plan page that the location of the boom attachment point is marked on the plans, 17 1/2 inches up from the base of the mast. Our spot was within 1/2 inch 🙂
You might check out our Pram build on our blog.
Cheers,
Skipper and Clark