Preparation is the key to any good paint or varnish job. Many boats come to my refinishing shop with a good-quality finish but with ragged edges that indicate a poor masking job. Some other boats I have seen still have leftover residue from masking tape. This makes the paint job look much worse than it really is. Here are some tips to make masking easier and give you a better-looking finish.

Sponsored by: Fisheries Supply
Purchase and Storage
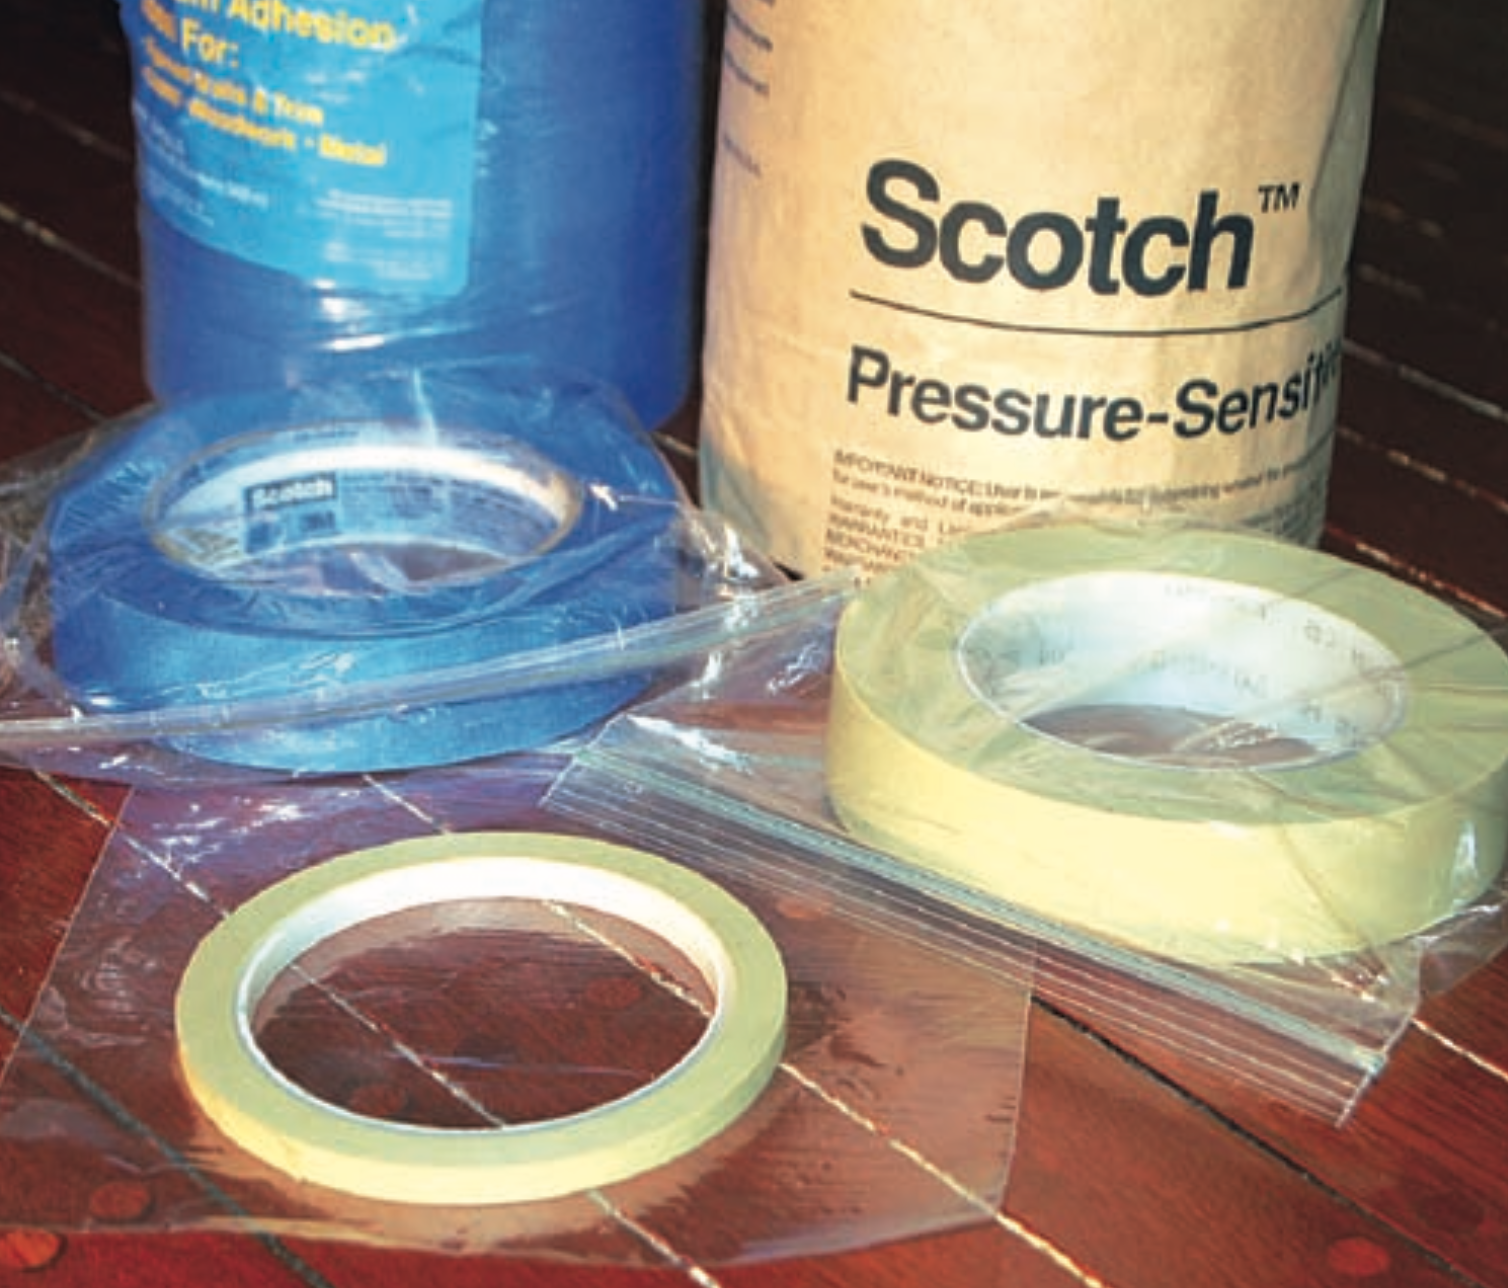
There are many types and brands of masking tape: green, blue, gray, silver, fine-detailing, long-mask, easy-release, masking paper, and the old standard natural-color masking tape. There are general-purpose tapes and specialized tapes; some are good, some not so good. To get the best results you’ll need the appropriate tape for the job at hand.
I primarily use 3M products, not because they are better, but because they are widely available and the company offers such great variety. The tapes I use the most are the blue long-mask (No. 2090) and the greenish plastic-like Fine Line tape (No. 218). Other favorites are the green and silver extended-use and easy-release tapes. I use these latter two only when working outdoors, in extreme conditions.
 Gary Lowell
Store individual rolls in plastic bags. The tape’s edge does most of the work; bagging is the best way to ensure that the edges will stay clean between uses.
Despite its availability and low cost, I do not recommend the standard natural-colored masking tape for use with marine coatings. The adhesive is too strong to peel away easily, it may leave a residue, and I have found that it doesn’t leave a clean edge.
Proper storage is important and often overlooked. Remember, it is just the very outside edge of the tape that does the work. If the edges of the roll are exposed to dust and dirt, particles will stick to the adhesive, making it difficult to get that clean, sharp edge. If you set the roll down on a dusty surface, that roll becomes useless as a fine-detailing tape. Be careful when buying rolls of tape through mail-order companies, too. Individual rolls are often dropped into the shipping box with packing peanuts, covering the adhesive edges with dust and dirt particles. Although some rolls are individually shrink-wrapped, the plastic usually does not fully cover their sides, and it is perforated in places, leaving some areas exposed and vulnerable to damage. To avoid these problems, I buy all of my tape in bulk packages of nine rolls that come double-wrapped in plastic. Keep individual rolls in sealed plastic bags and take care to keep them clean while in use.
 Gary Lowell
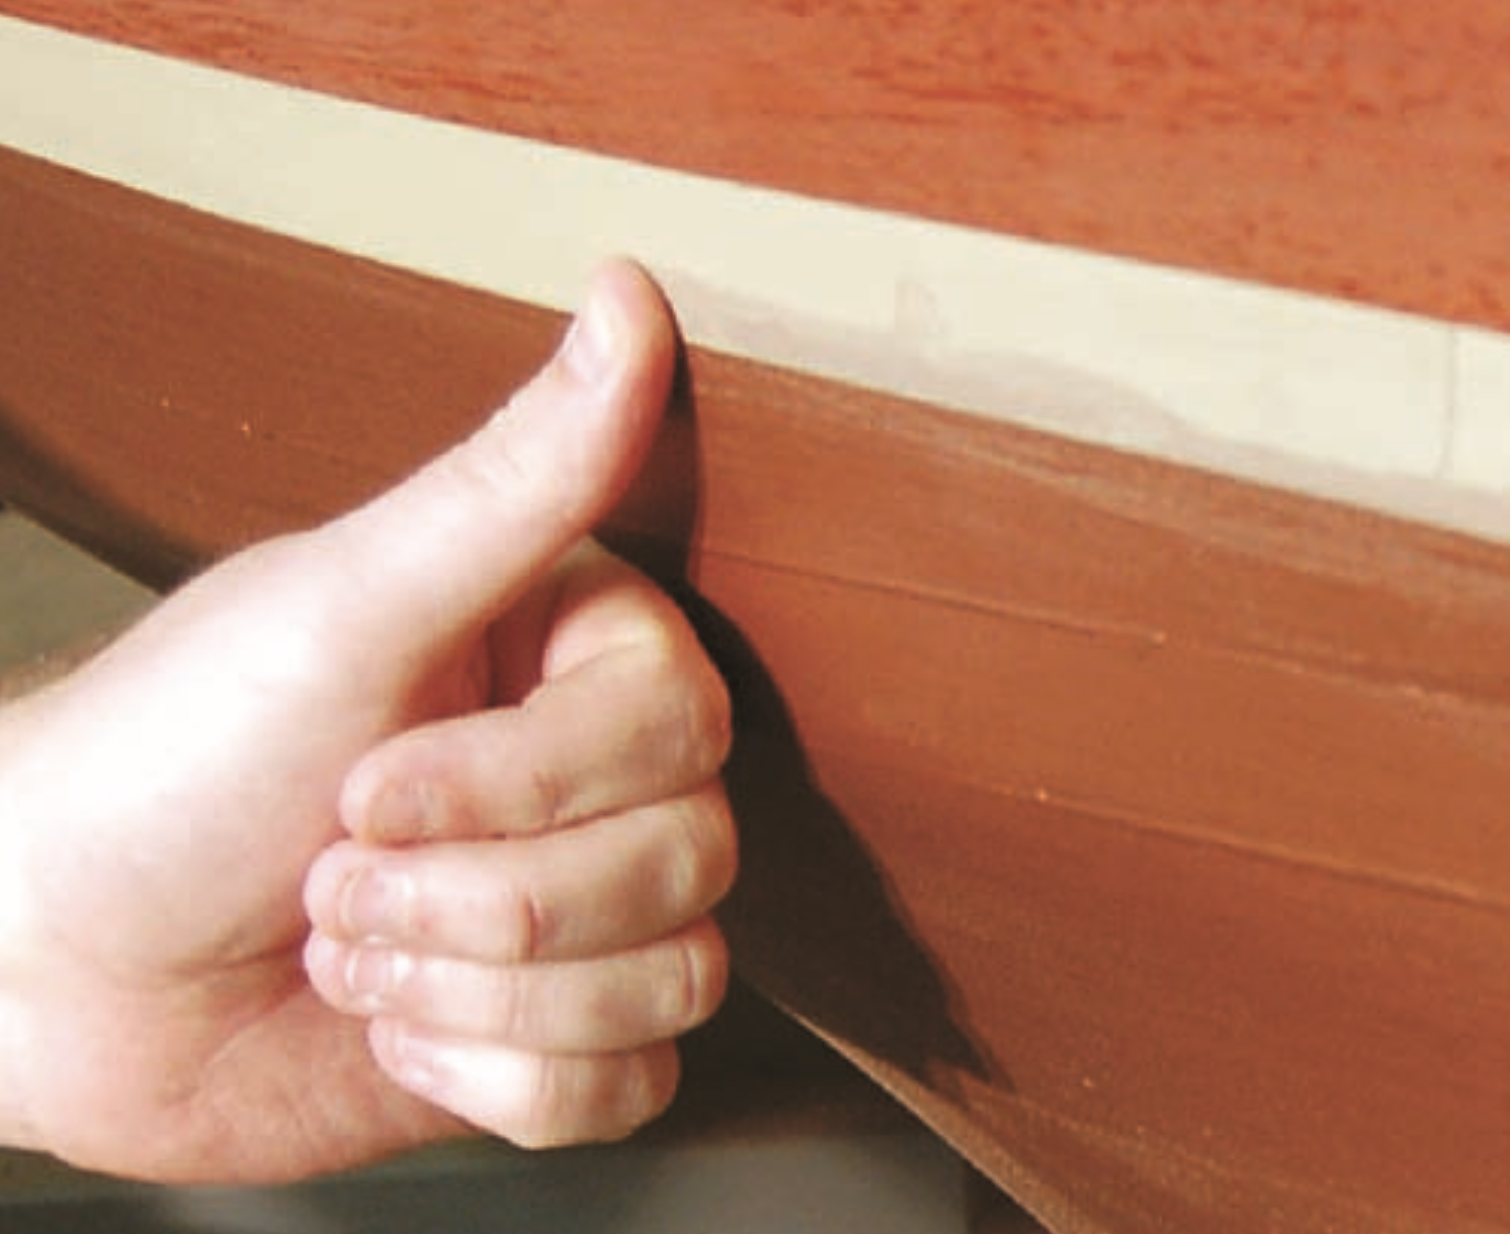
Once the tape is lying fair on the boat, burnish it with your thumb, noting how the tape changes color when it is pressed down.
Masking 101
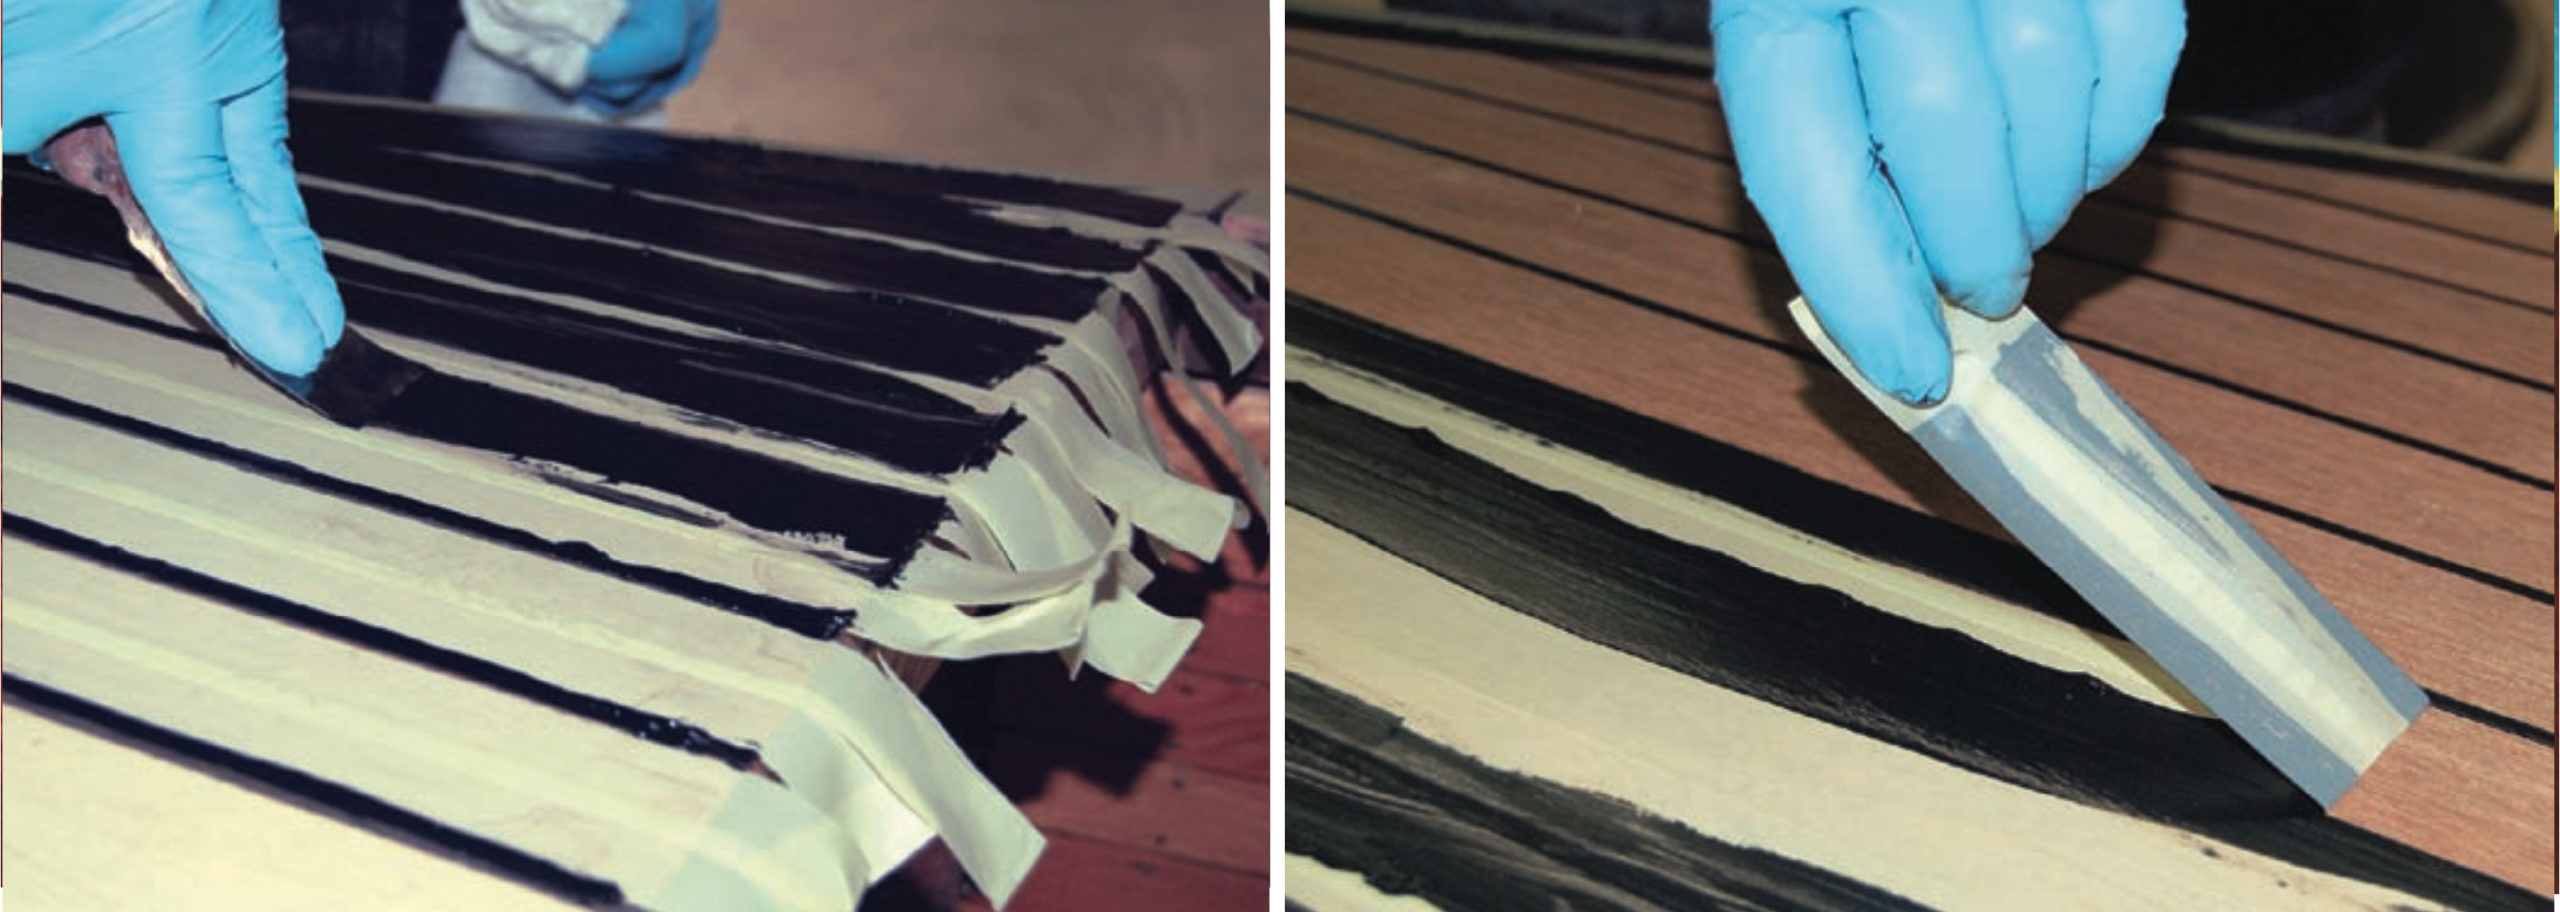
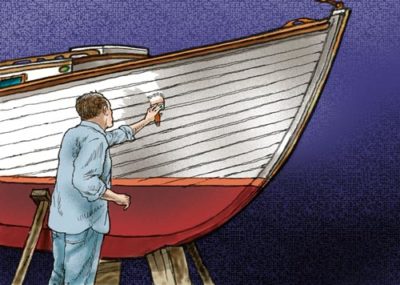
The main reason we use masking tape is to get a crisp line between two different colors. Let’s say you want to mask off an area to paint a waterline stripe, as I recently did at my shop (see photos at left). It is important to make sure that your line is clean and fair.
Here, the topside varnish and bottom paint have already been applied, meeting at the scribed boottop lines. Before applying tape to the boat, unroll and fold over the first little bit of it to make a tab. This will help immensely when it’s time to remove it, especially if you have gloves on. There will be situations that require a tab-less piece of tape, but make tabs whenever possible. Begin at a corner of the stem or transom and roll out about an arm’s length of tape. Press the tape lightly against the hull as you work your way along it. It is better to use a few long lengths rather than several short pieces. Longer lengths better enable you to make fairer lines.
 Gary Lowell
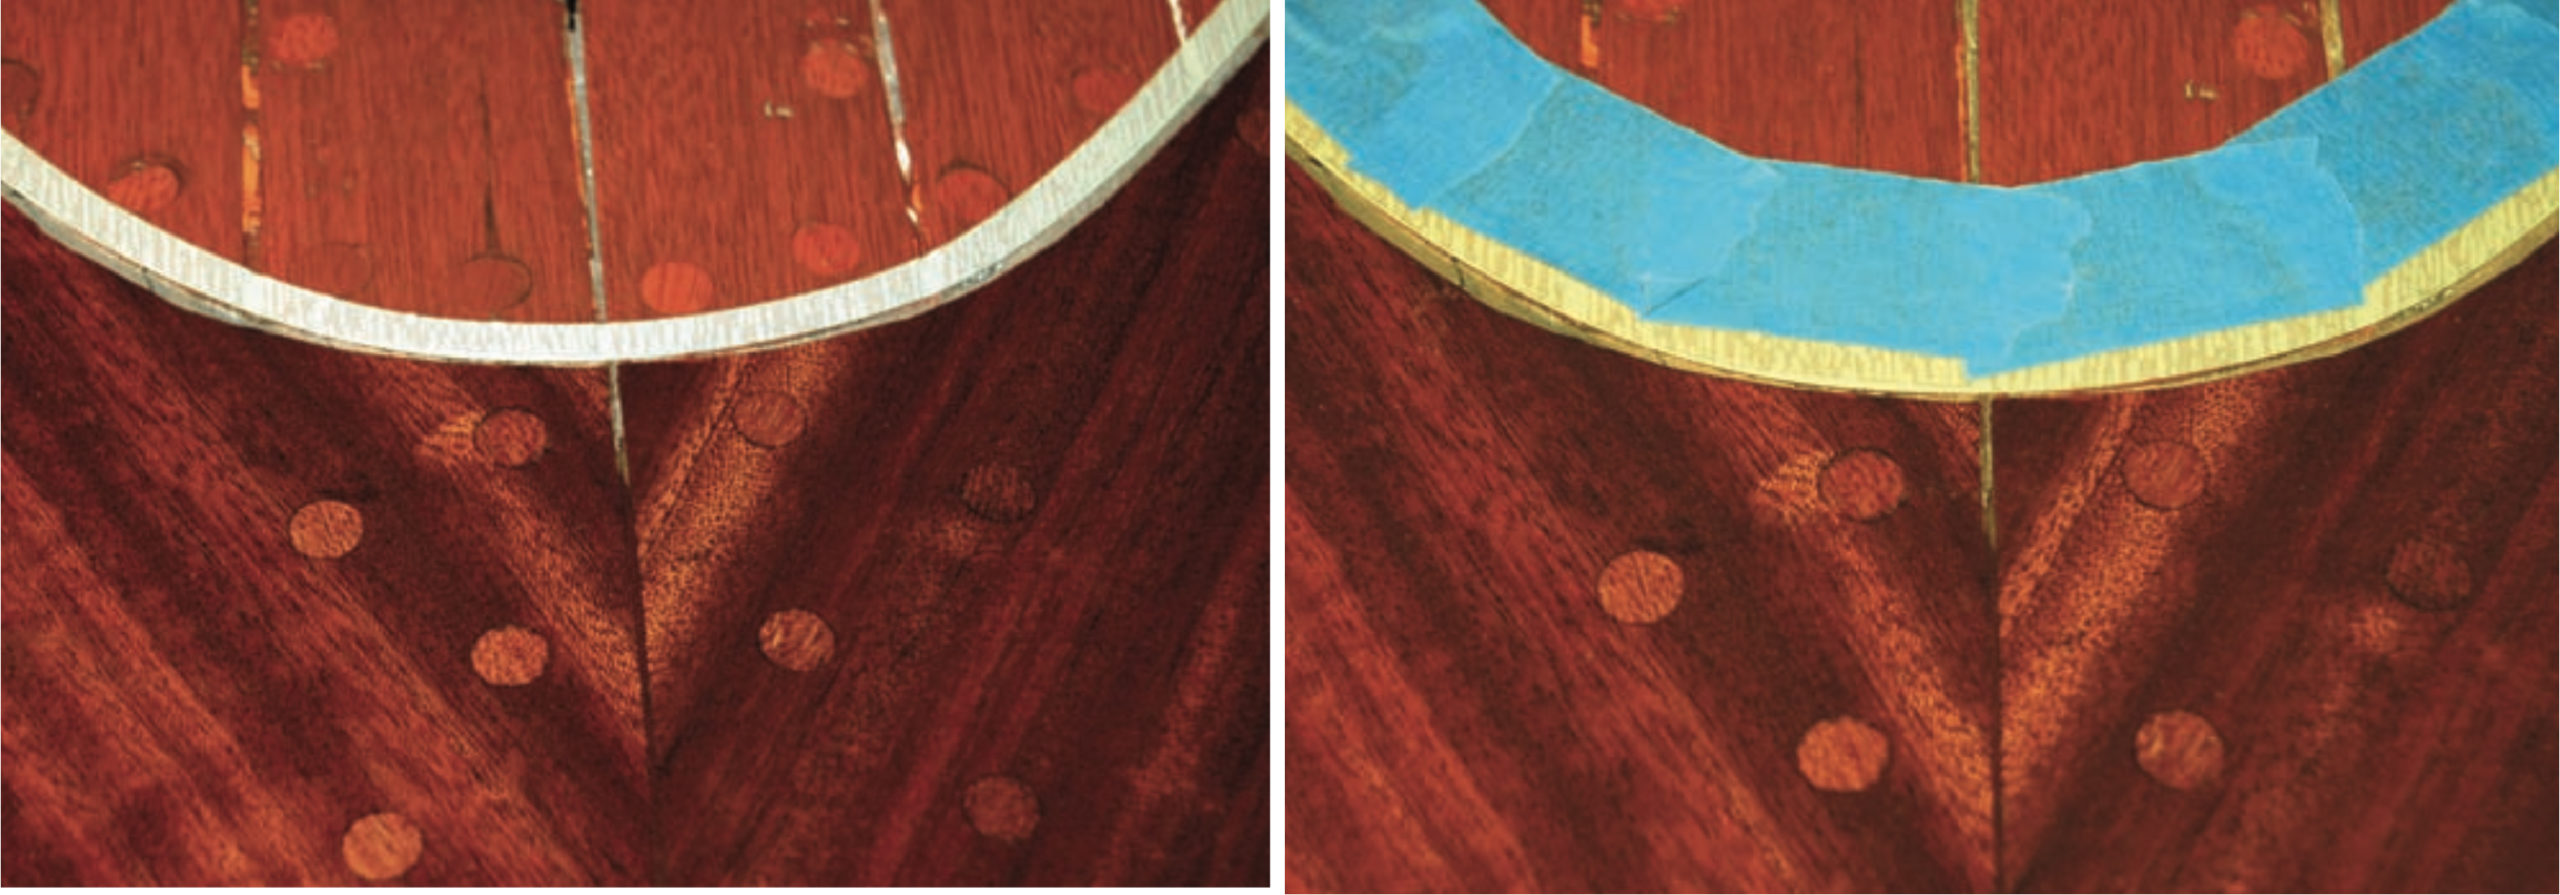
Left—For a tight radius, use a 1⁄4″ fine-detailing tape. This will wrap much more easily than a wider type. Right—Once the fine- detailing tape has defined the edge, use a wider tape to mask the brush-line area.
Once you have applied the tape lightly to one side, sight along its edge from bow to stern, then go to the other end of the boat and sight the opposite way. If it looks fair in both directions, press it down firmly. If not, lift an end and retape the unfair section. Then, press firmly to burnish the tape against the surface, making sure to get good contact throughout its length. You don’t need to press down on the whole width of the tape, just the edge that is doing the masking.
There are very few places on a boat where you’ll have a straight line. Most masking lines will be curved; some, very tightly. While paper tapes allow for slight curves, plastic tapes will bend much better. If you need to follow a tight curve, I suggest using a thin (1⁄4″ ) plastic fine-detailing tape or other conformable tape. Its narrow width will let you wrap it around the smallest of radii, such as a small cleat or other deck hardware. You may then add wider tape outside for more protection.
There will be situations where you’ll need to mask a wide area to protect surfaces from drips or over-spray. Taping paper or plastic sheeting over the area is the best method. However, don’t rely on a simple run of masking tape for both tasks. Use one run to get a nice, clean masked edge, and then tape the masking paper to that with another line of tape. The second line of tape does not have to be the expensive plastic type; it can be of the natural-colored, crepe-paper variety.
Post-Paint Procedures
Although many people think they must wait for their paint to dry before removing masking tape, this is not true in the vast majority of cases. In fact, most often, prompt removal of the tape is critical to success. After you apply paint or varnish, leave the tape on for only the few minutes it takes to clean your brushes. Keep your gloves on. Then remove the tape by grabbing the little folded tab and gently pulling it back beyond 90 degrees (see opening photo). I keep a putty knife handy to help grab those little pieces of tape that had to be applied without tabs. If the coating was properly applied, it should not run when the tape is removed. If it does, you have applied your paint too thickly. If you leave the tape on too long the adhesive may stick to the surface, leaving a mess; it may even pull off the paint.
 Gary Lowell
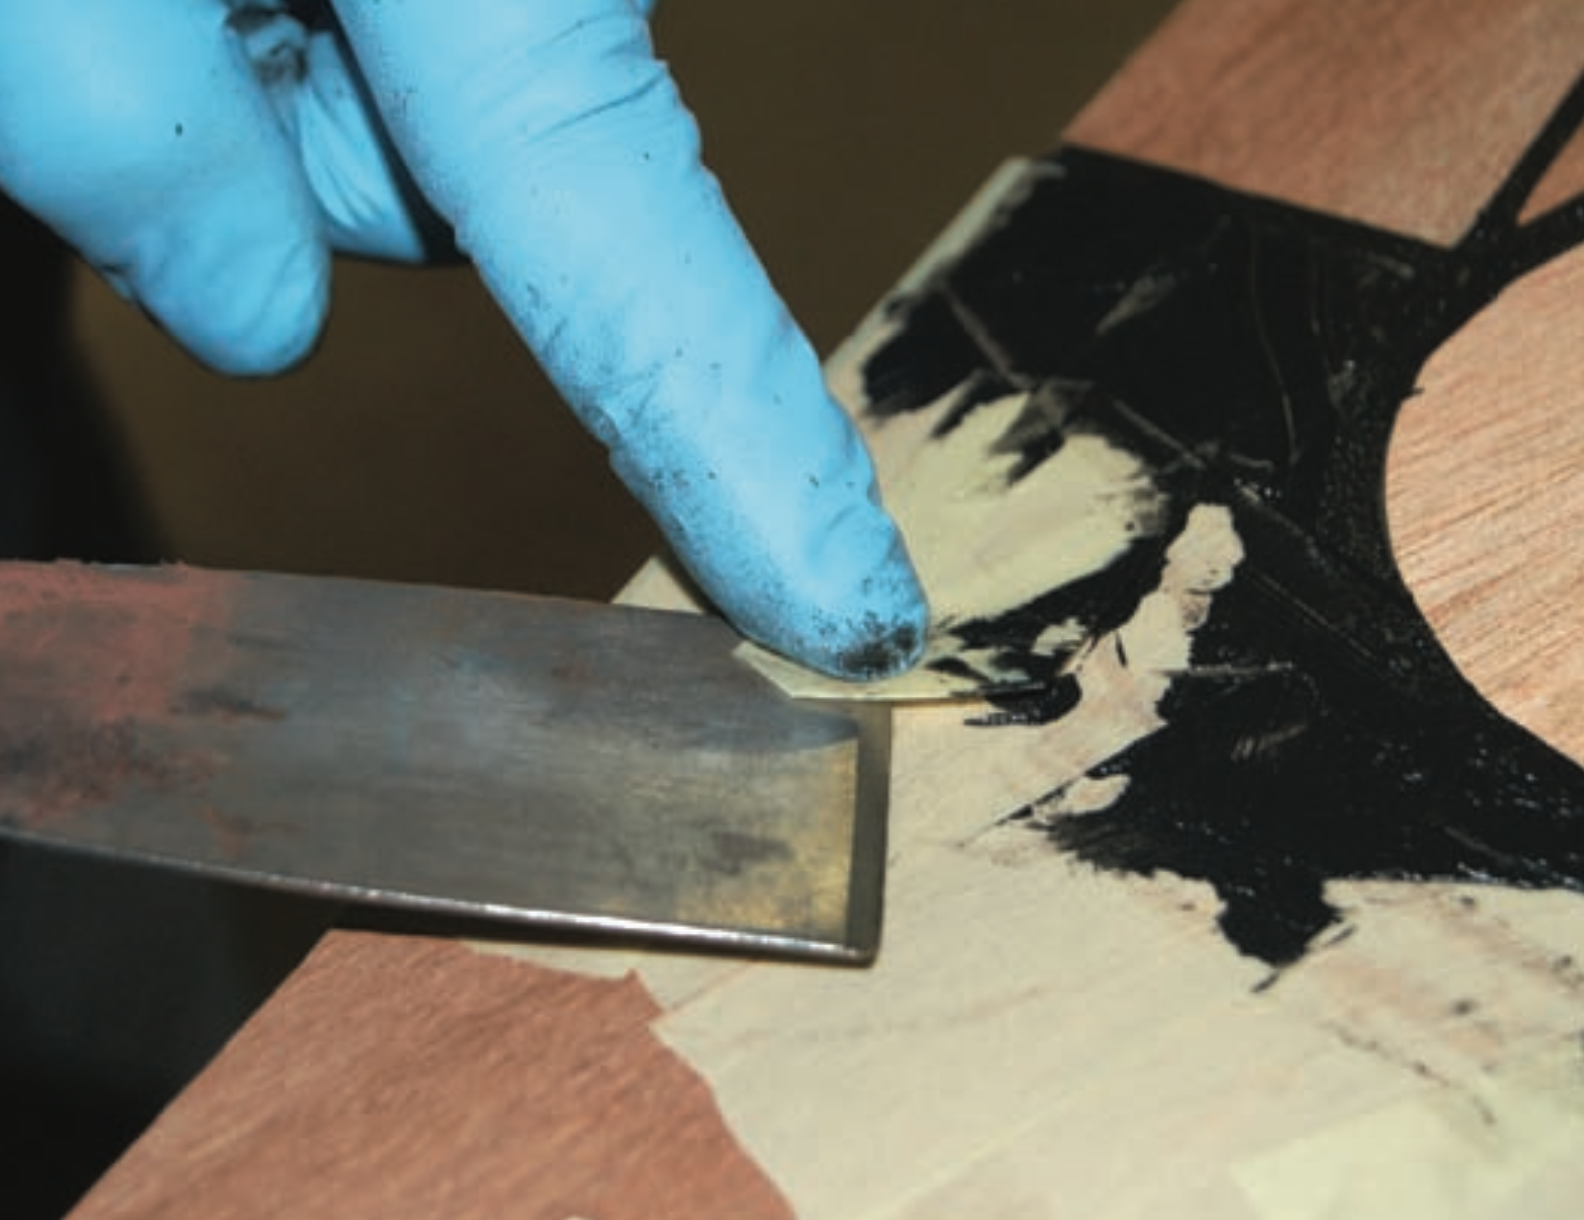
Use a putty knife to remove small pieces of tape. The job will go much more easily and be neater than if you attempt this using your fingertips.
Sometimes you may find little “flags” of paint that have leaked under the tape. This means that there was a small length of tape that was not pressed down securely. It usually happens at tape joints, another reason to use as few pieces of tape as possible. Now is the time to get rid of these flags, before the paint dries. Fold a paper towel over the end of a putty knife or flat-blade screwdriver. Dip it in solvent, and then use the tool like a pencil eraser to carefully “erase” the paint flags.
 Gary Lowell
Wrapped in a paper towel and dipped in solvent, the corner of a putty knife becomes an effective eraser of paint “flags.”
Masking tape is not just for paint. Use it any place you need a clean edge for a coating or want to protect an edge while sanding. If you have to add some caulk around a fitting or along a seam, don’t just squirt it all over the place. Take a few minutes to mask along the seam’s edges, apply the caulk, level it with your finger or a putty knife, and then remove the tape. You’ll have a nice, clean line that looks like it is supposed to be there rather than looking like a quick and messy fix.
 Gary Lowell
Masking tape is not just for paint; here it’s used to mask a messy deck-caulking job. Notice the tab at the end of each piece of tape. Make tape tabs wherever possible for easier removal, especially while wearing gloves.
Remember to use the proper tape for the job, keep your tape clean, and, in most cases, remove it as soon as you’re done with your application. Follow these simple steps, and you’ll find masking to be a helpful process rather than a difficult task.
Exceptions to the Rule: When to Leave Tape in Place
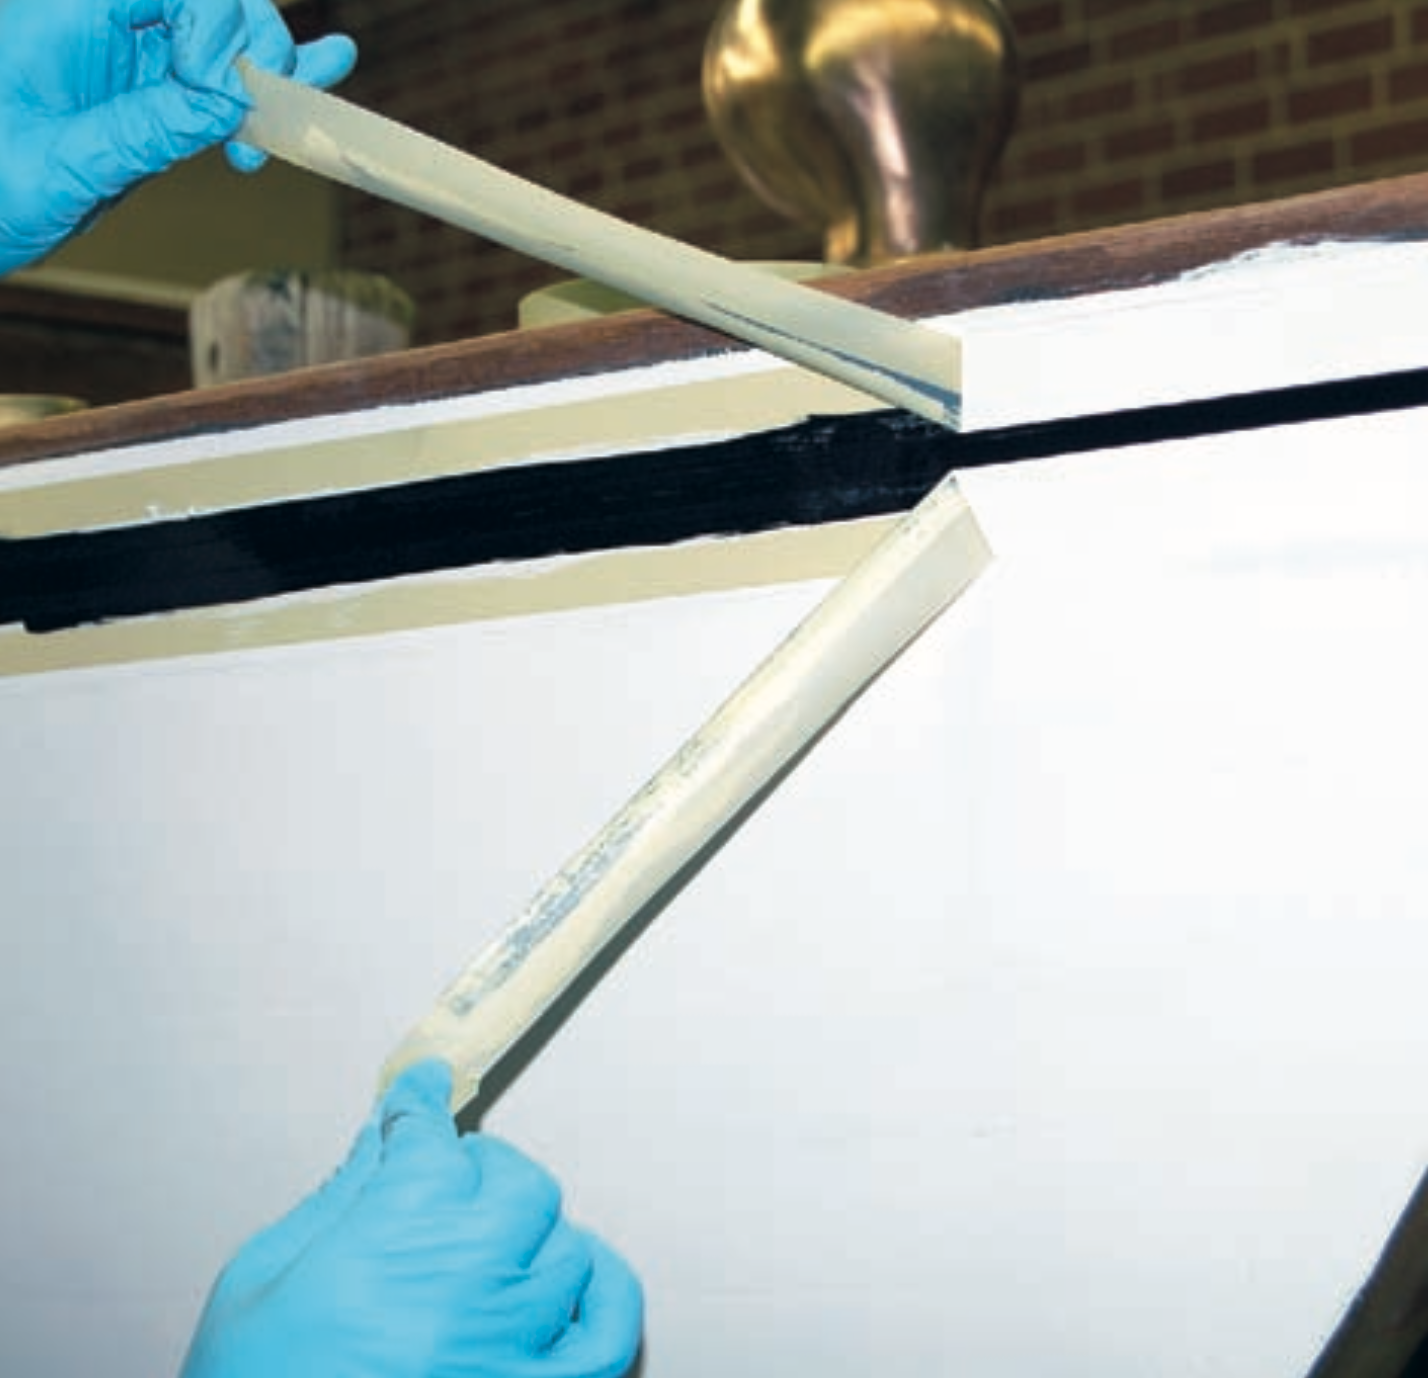
As mentioned, in the majority of cases you should pull off the tape early. There are exceptions, though, such as when using epoxy or when there is a highly detailed masking job that requires several coats of paint. A good example follows as I describe a sign painter’s technique that I now apply to boat painting.
 Gary Lowell
To prevent a contrasting color from bleeding under the tape, begin by applying a coat of the base color (in this case, white topsides paint), which acts as a sort of filler. Once the base- colored paint is dry, apply the topcoat as shown. Don’t wait longer than a day between applications. When the second coat has dried, carefully remove the tape.
This technique will produce a very crisp line on a smooth surface or a decent line on a rough surface. Let’s say we are painting a black covestripe on a white boat where there’s significant wood grain to contend with. The paint could seep under the tape through pores of the wood. Apply the fine-detailing tape as you normally would, making sure to press it firmly against the hull. Then before you paint the black line, apply a coat of white paint. This will fill in the tiny holes and seal the area between the tape and the wood. Leave the tape in place. When the white paint is dry, apply your topcoat of black. When you remove the tape, you’ll see that you have a razor-sharp line.
Gary Lowell, a Society of Accredited Marine Surveyors Surveyor Associate, owns Lowell Boats Inc. in Greensboro, North Carolina, and teaches Marine Painting and Varnishing at WoodenBoat School.


Gary, thank you for your input. It is a wealth of information. I’m currently doing some custom painting on my 1976 SRV Sea Ray and have incorporated your teachings as I do this paint job. You talk about clean edges, smooth edges, and a over-all finished product. Using your tips made my boat look noticeably hot hot hot.
Thank you.
Marty
Colorado Springs, CO
Hi there,
I have a 70-year-old 16′ wooden clinker-built boat. Would appreciate any advice suggestions regarding masking for waterline.
Many thanks,
Duncan
John Brooks and Ruth Ann Hill wrote a detailed article, “How to Paint a Lapstrake Waterline,” in WoodenBoat #191.
—Ed.