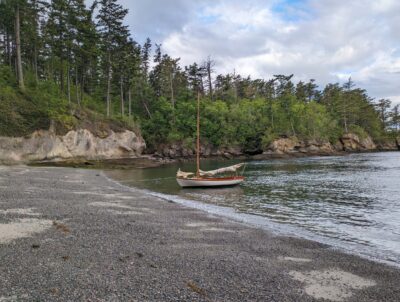
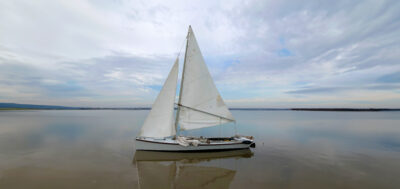
Whenever I decide to spend a night on board at anchor, there are two problems I have to solve. The first is determining the depth in an anchorage. In areas with big tidal ranges, it’s especially important. Handheld electronic depthsounders are available but I, like many other open-boat cruisers, don’t own one. The second problem is deciding how much scope I have out. I can get pretty close by measuring the rode in arm spans, but it takes longer than just feeding it out and is a nuisance when I lose track and have to start again.
 Alex Zimmerman
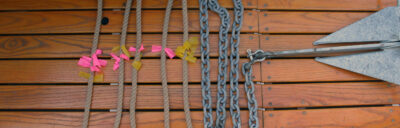
Plastic flagging tape is inexpensive, easily threaded between the strands of a three-strand rope, and in my experience, stands up well showing little or no deterioration after six years and several hundred anchorings.
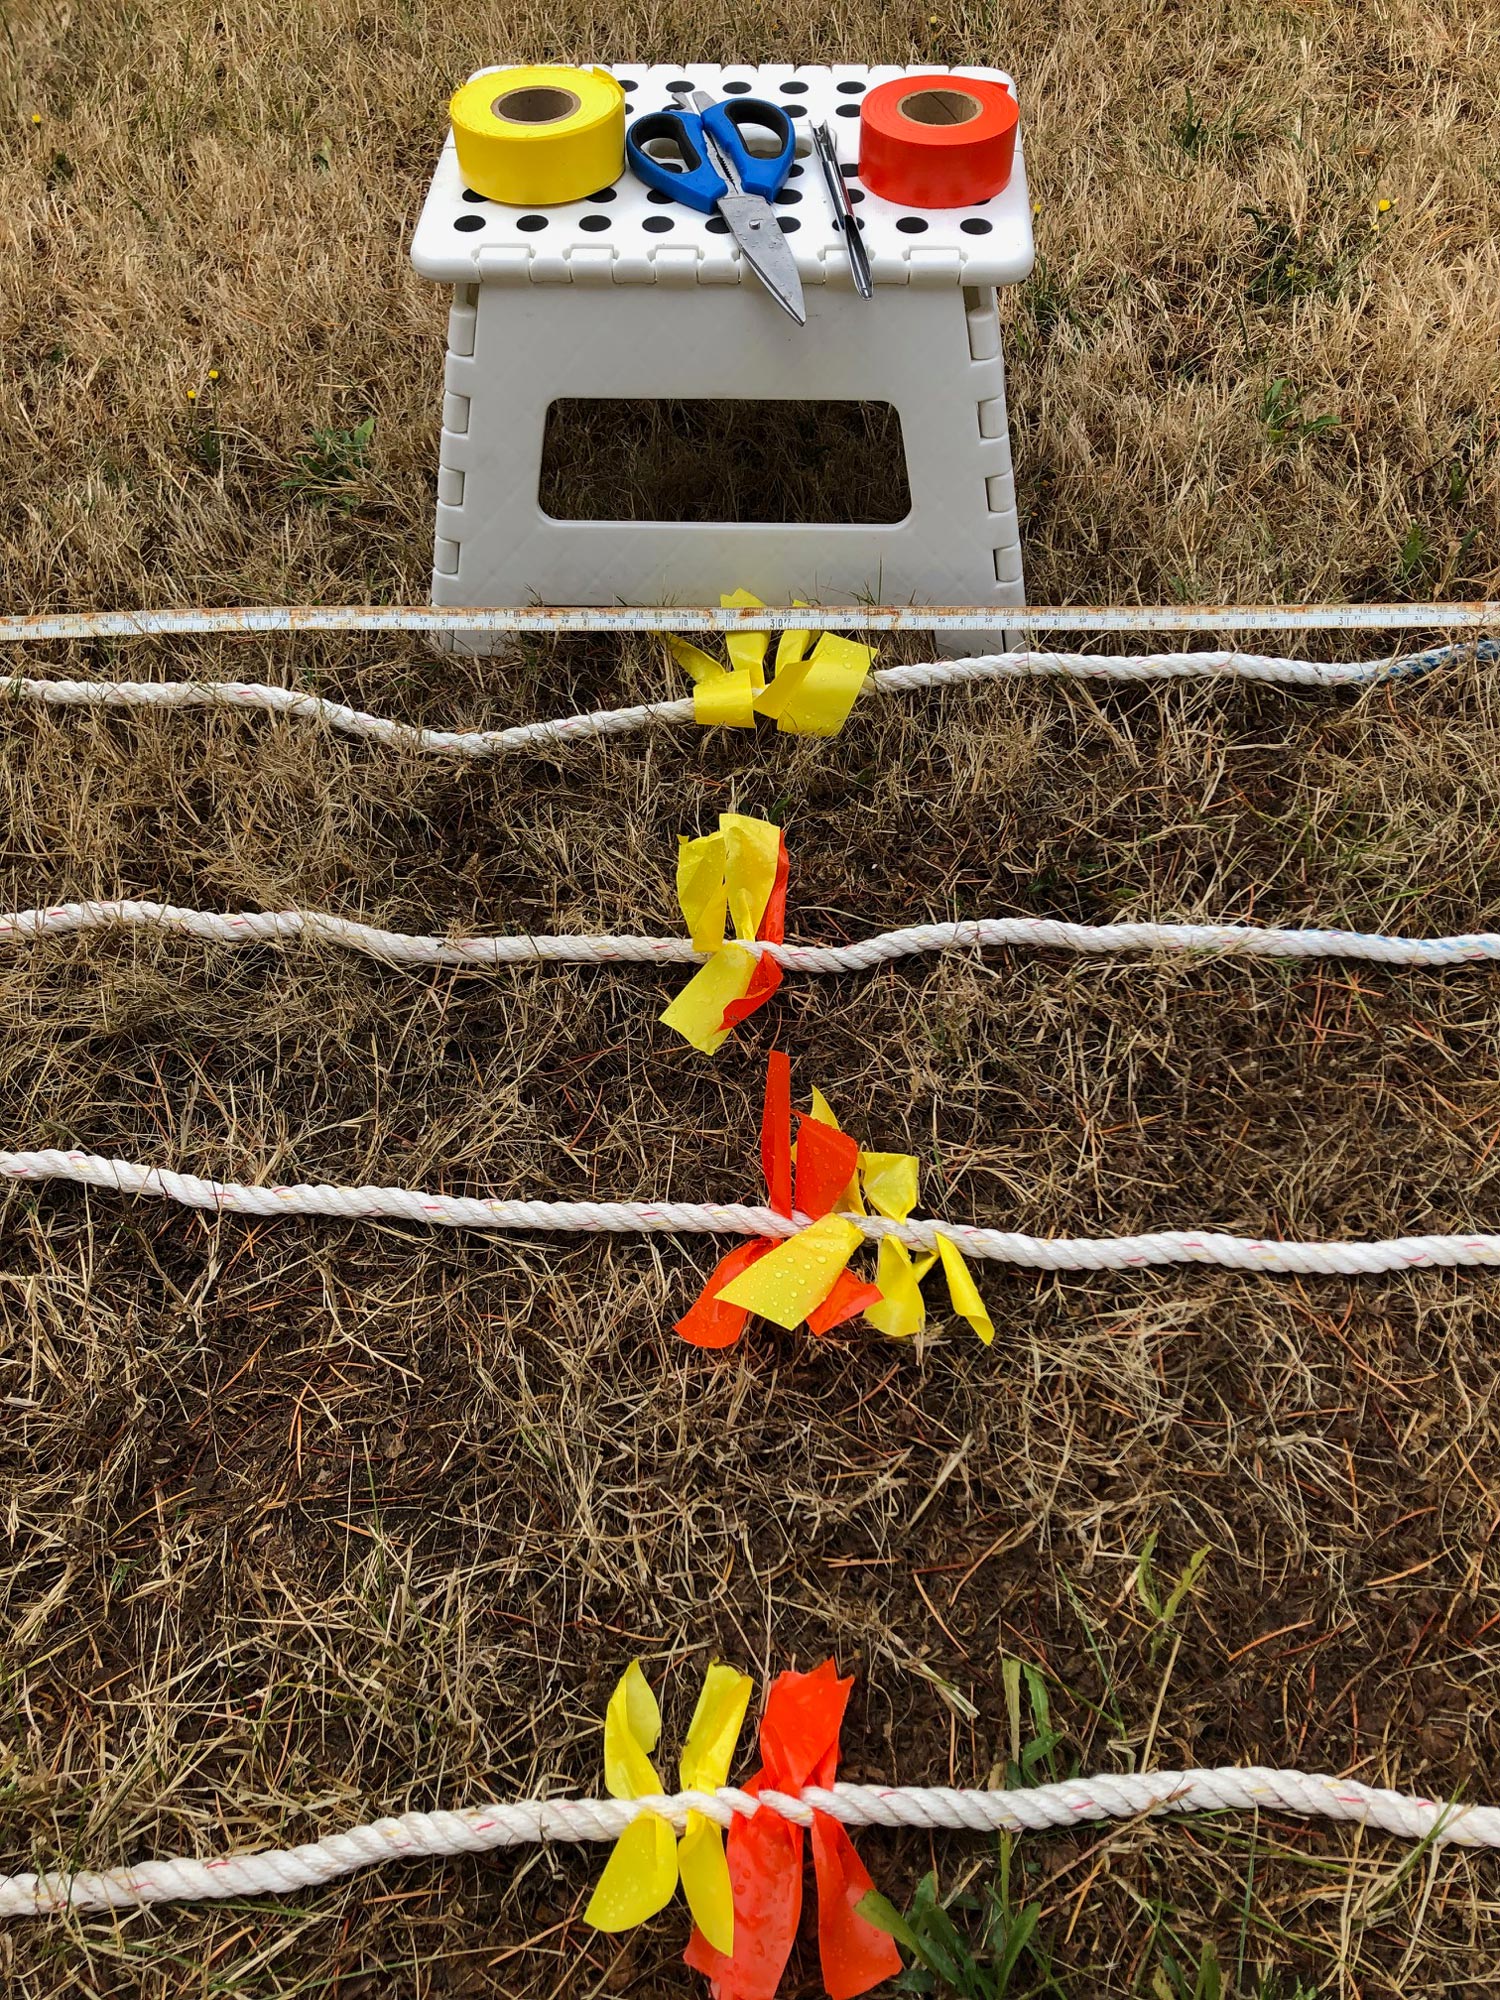
I came up with a single, simple, cheap solution to these problems, one that I have used on three boats so far. I insert small strips of colored plastic flagging tape into the anchor line to mark lengths, so that I know how much line I am letting out. When I feel the last of the chain coming to rest on the bottom, the marked rode then serves as a lead line: the length of the rode that I’ve paid out, minus the 21′ of chain gives me the depth. When I know the depth, I can take the local conditions into account, decide how much rode to use, and pay it out using the markers. They take the chain into account and directly indicate the scope.
 Alex Zimmerman
Laying out the anchor rode alongside a measuring tape makes it easy to measure and keep track when inserting the flagging tape, but it’s not essential. The anchor and 21′ of chain are at the top of this picture, and are counted as the first 21′ to the first set flags: three yellow flags at 30′. The red flags nearest to the camera are the marks for 50′ (one red flag) and 100′ (two red flags).
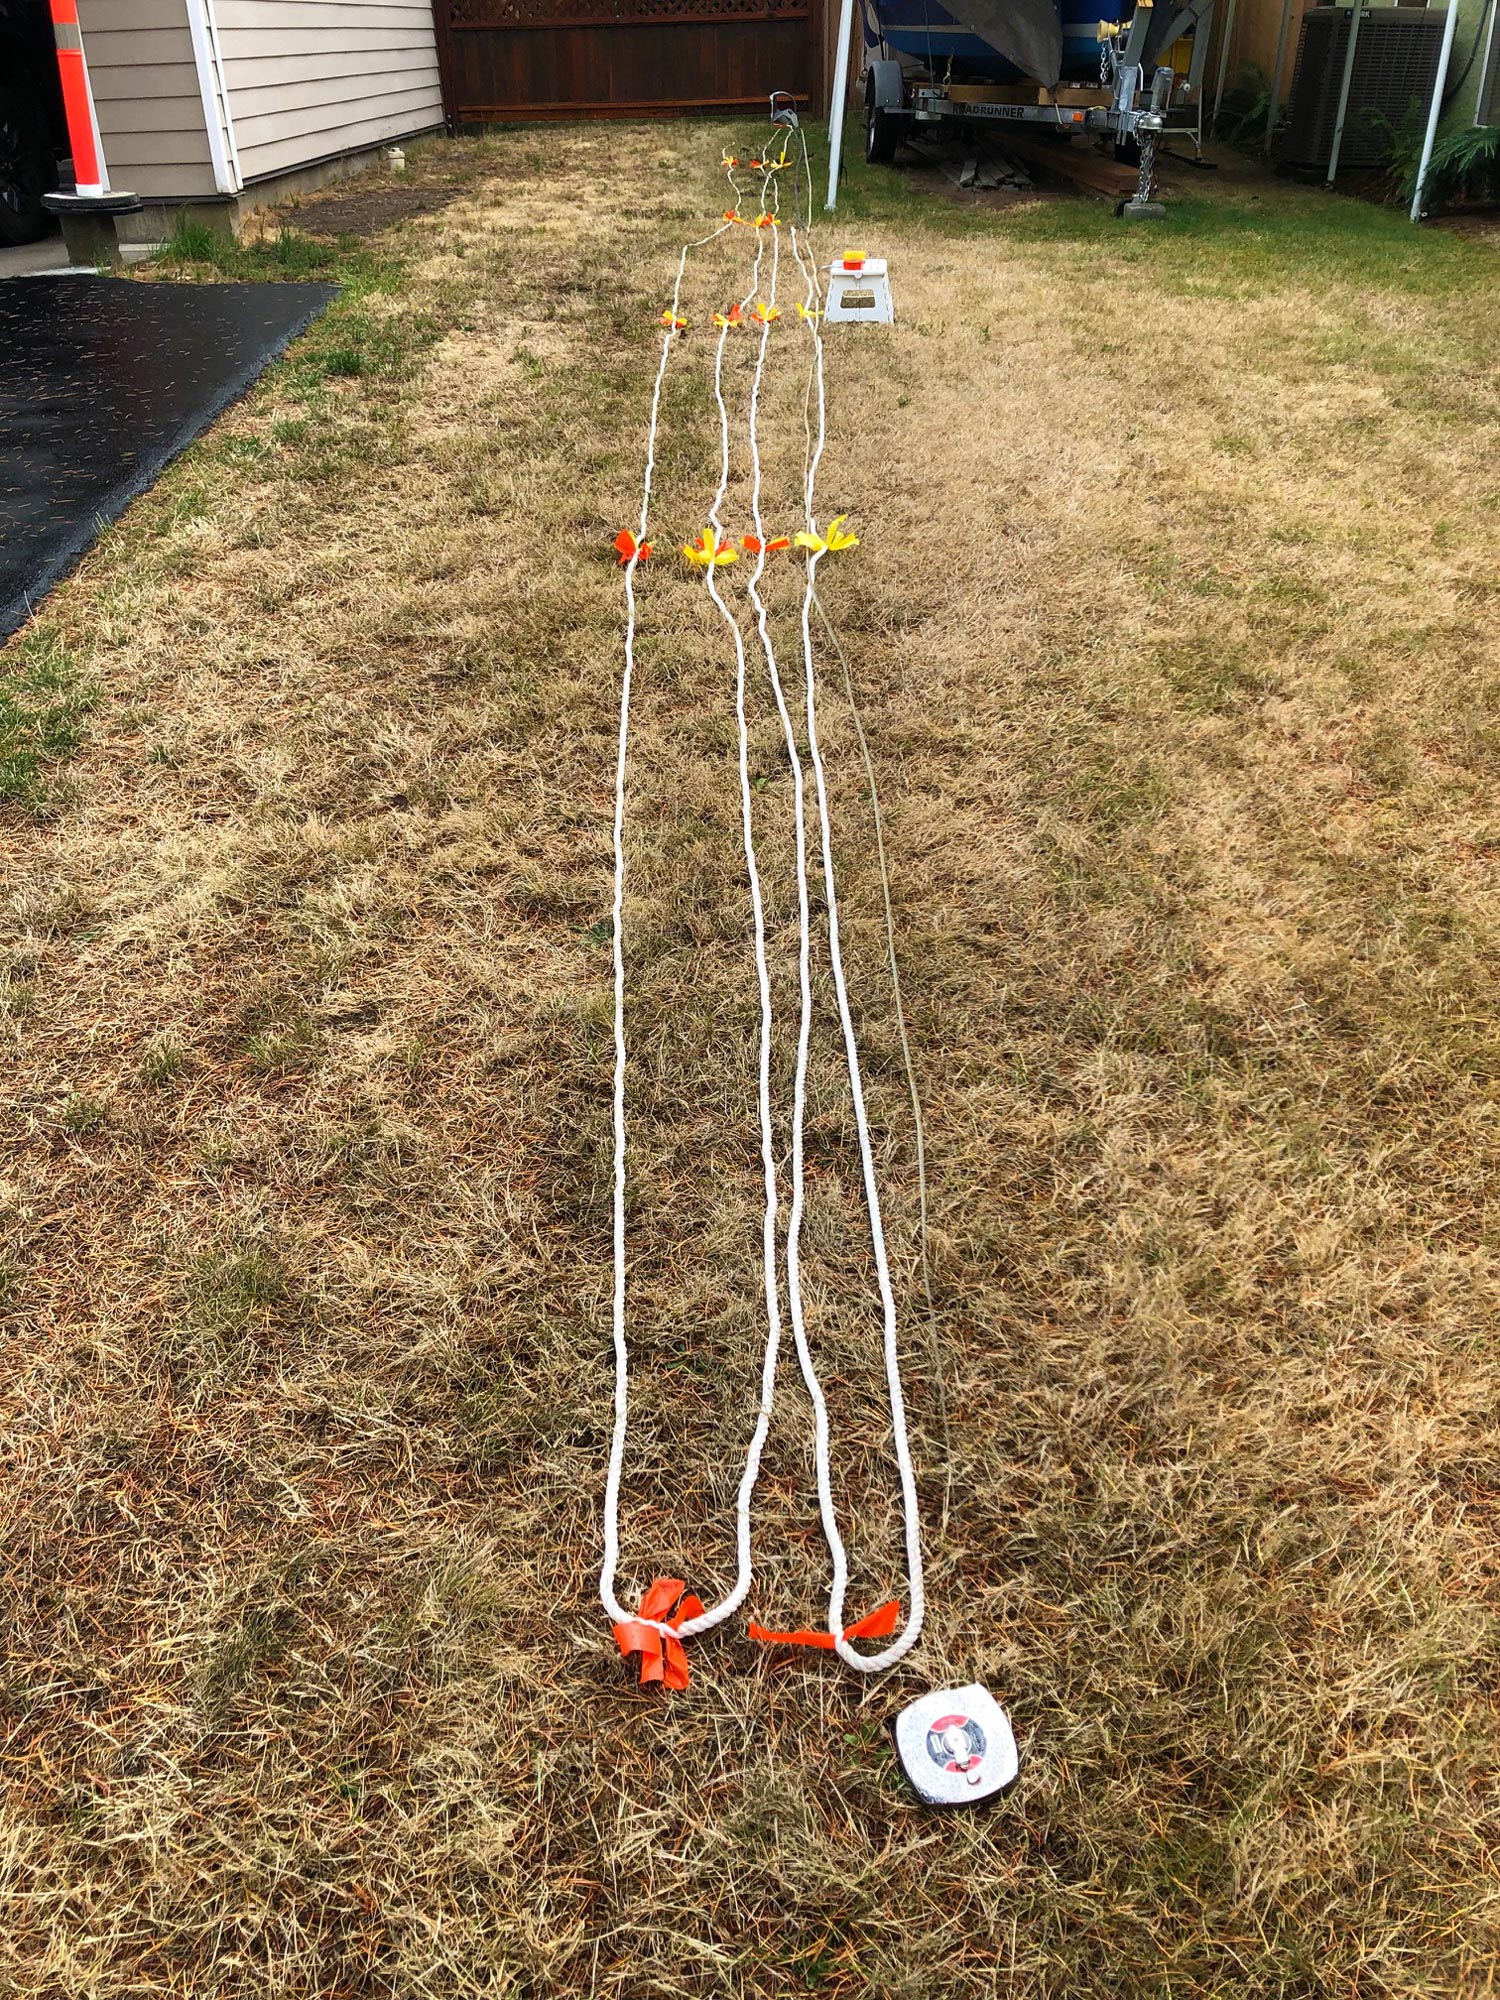
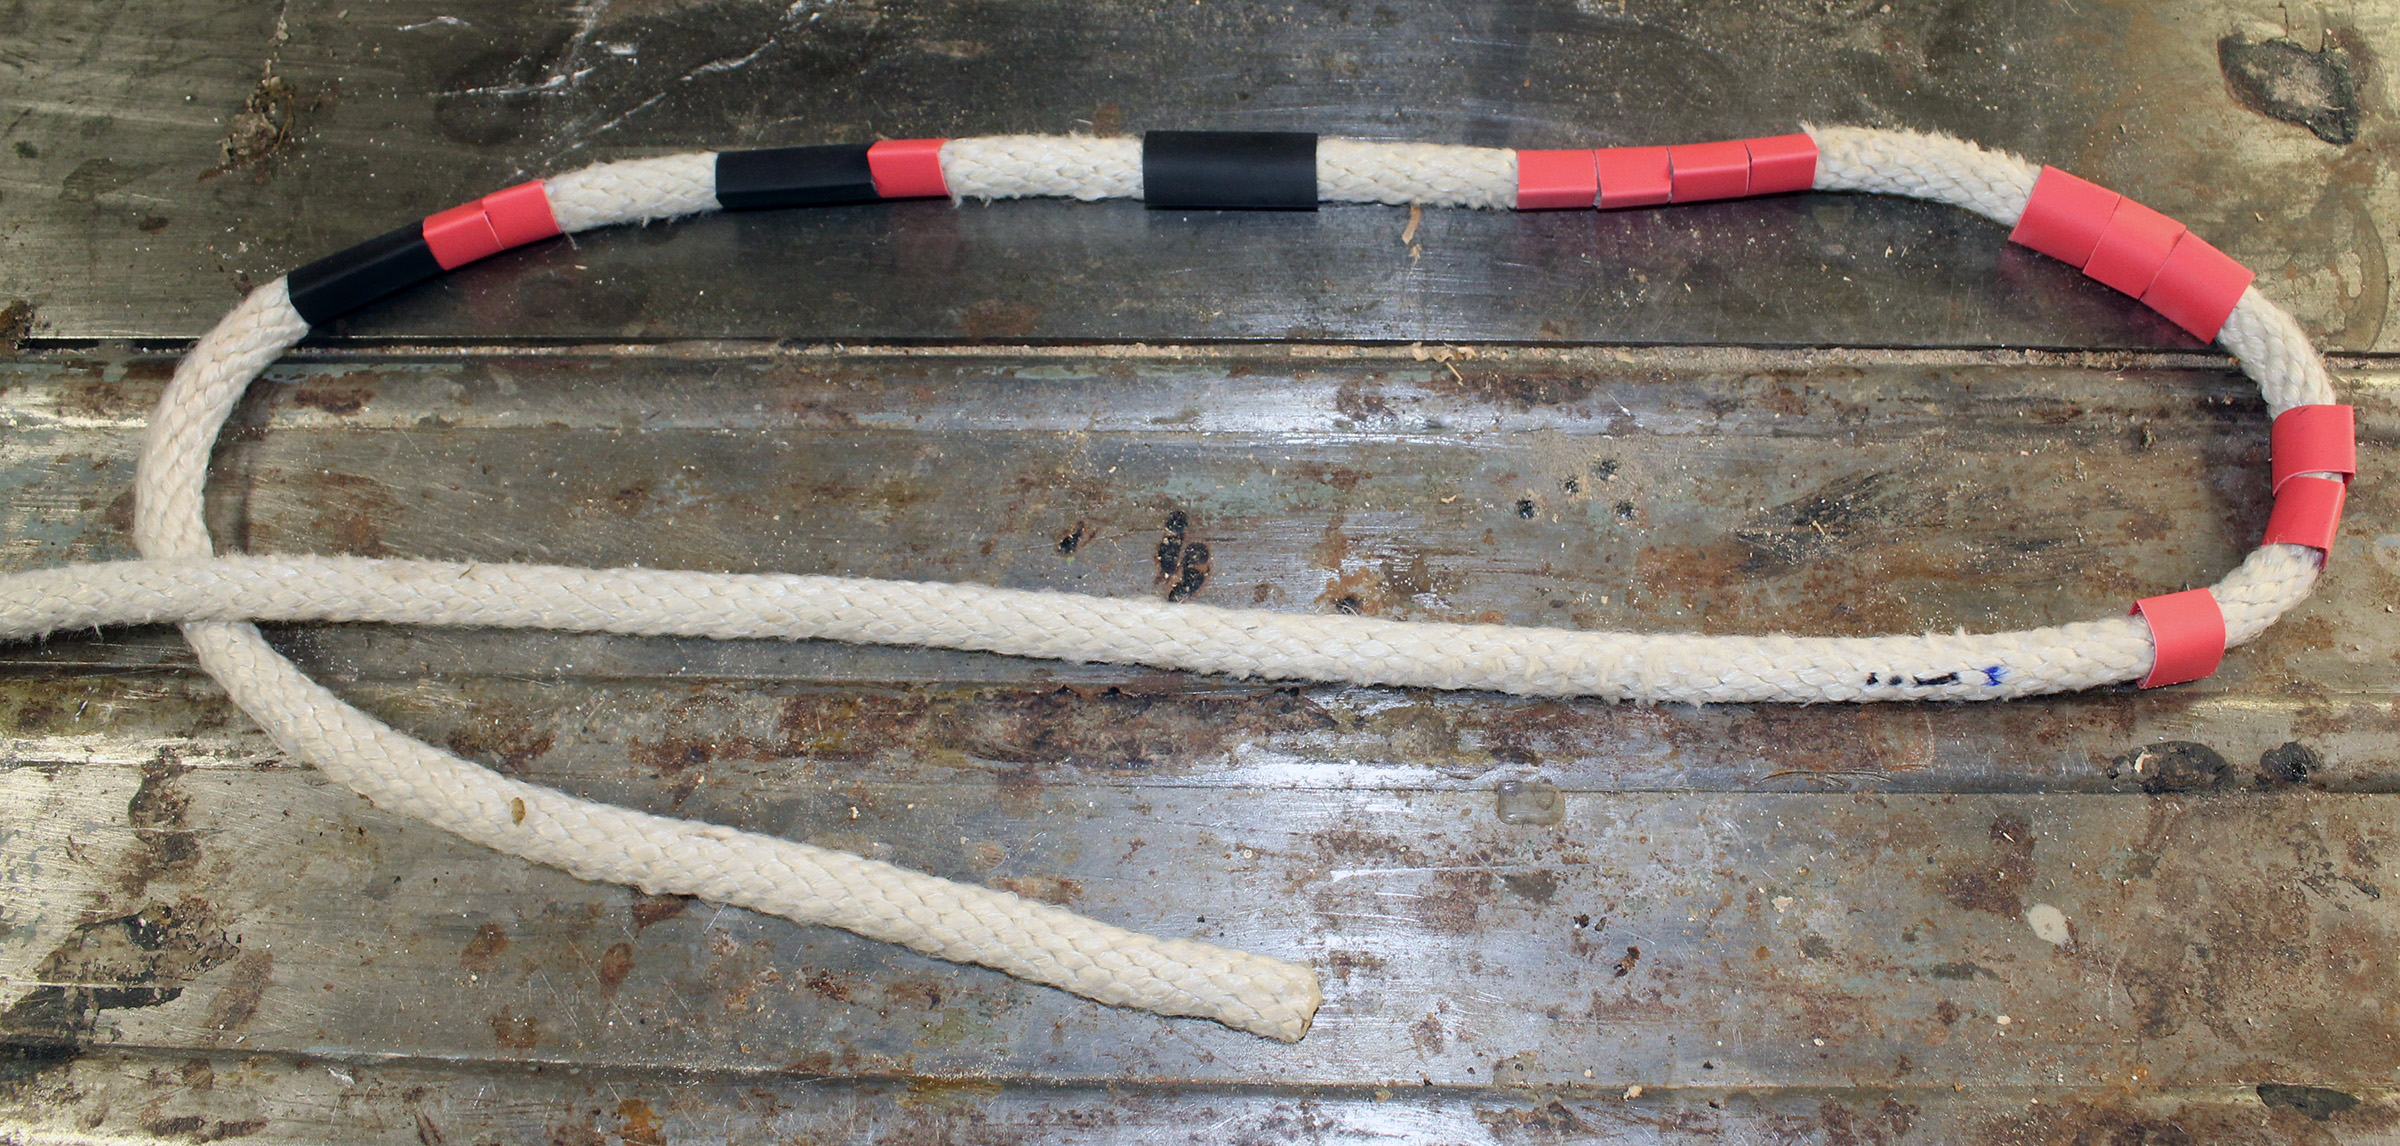
My three-strand nylon anchor line makes it easy to insert strips of tape between the strands. The marking scheme I use is to insert one strip of yellow tape at 10′, with an additional strip of yellow tape every subsequent 10′ increment: two for 20′, three for 30′, and four for 40′. At 50′ I insert a single strip of red tape. Then 60′ gets one red and one yellow, 70′ gets one red and two yellow, and so on. At 100′ there are two strips of red, and the pattern continues. I have a lead line marked this same way.
Of course you could use any intervals that make sense to you: feet, fathoms, meters, or whatever aligns with the charts you use; and any colors of flagging tape that you prefer. I chose yellow and red for good visibility in low light or near darkness. Flagging tape is inexpensive and easily obtainable. It is also easy to renew if it becomes too tattered with use, but I have found that it lasts quite well. With this system in FIRE-DRAKE, my previous sail-and-oar boat, I anchored several hundred times over six years, both for short stops and overnights, and the original tape was still in place.![]()
Alex Zimmerman is a retired executive and engineering consultant who became enamored with the sea and sailing after he learned basic seamanship in the Royal Canadian Navy. From his home in Victoria, along the coast of British Columbia, he has put several thousand miles under the keels of the various small boats he has built for himself. His book, Becoming Coastal, chronicles many of those journeys. He continues to write about wooden boats and the people who build and sail them.
Editor’s Note:
The 1⁄2″ solid-braided nylon line I’ve been using as an anchor rode doesn’t take well to having bits of flagging tape inserted. It can’t be twisted open like three-strand, and the braid is too tight to open with a hollow fid. After a brief struggle, I was able to pick up one loop on the outside of the braid with a Swedish fid, but then the edge of the fid severed the fibers.
I switched to heat-shrink tubing for markers. I bought a marine-grade version that came in a package that included two 4′ lengths of tubing—one black, the other red—both with a heat-activated adhesive. The tubing is listed as 1⁄2″, but had an inside diameter of 9⁄16″, which made it easy to slide over my 1⁄2″ line. My heat gun effectively shrank the tubing. It was done when I could see the texture of the braid showing through and a bit of the clear adhesive emerging from the ends of the tubing.
The applied tubing compresses the rode a bit, but its edges stand proud, enough that I can easily feel them but not get scratched. I also used it for some quick whippings on the rode’s ends. The tubing also works on twisted line and other types of braided line of similar diameter.
 Christopher Cunningham
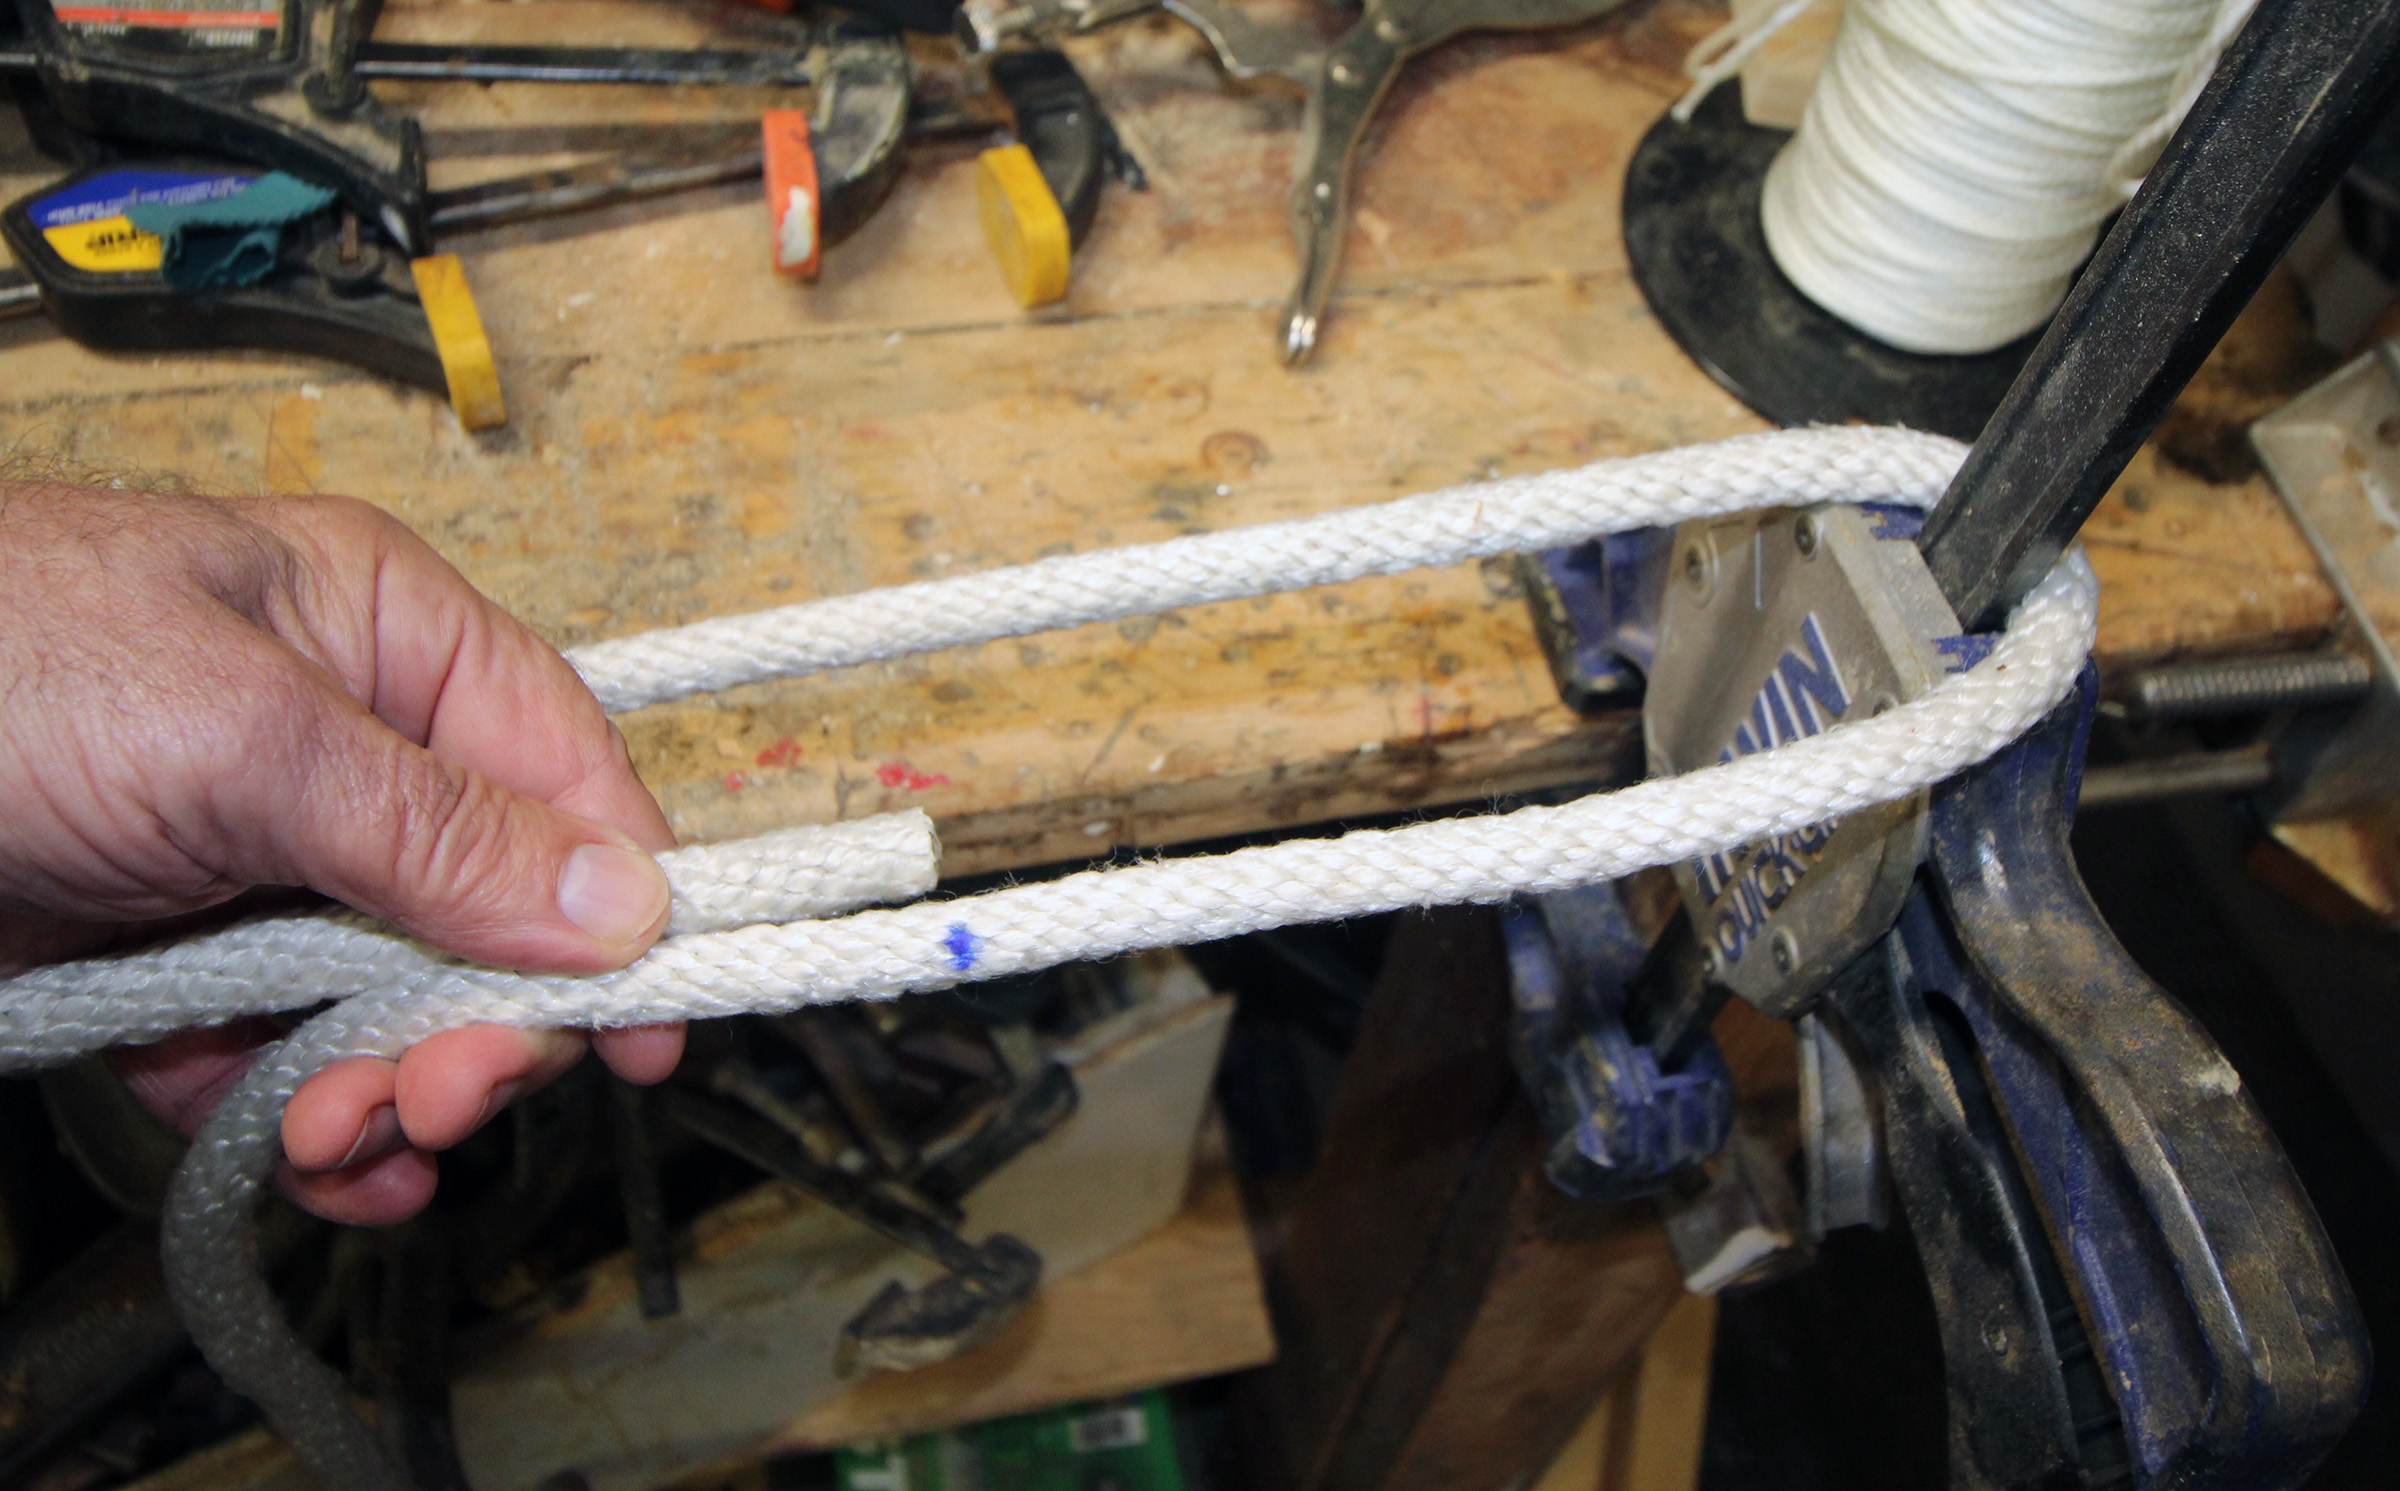
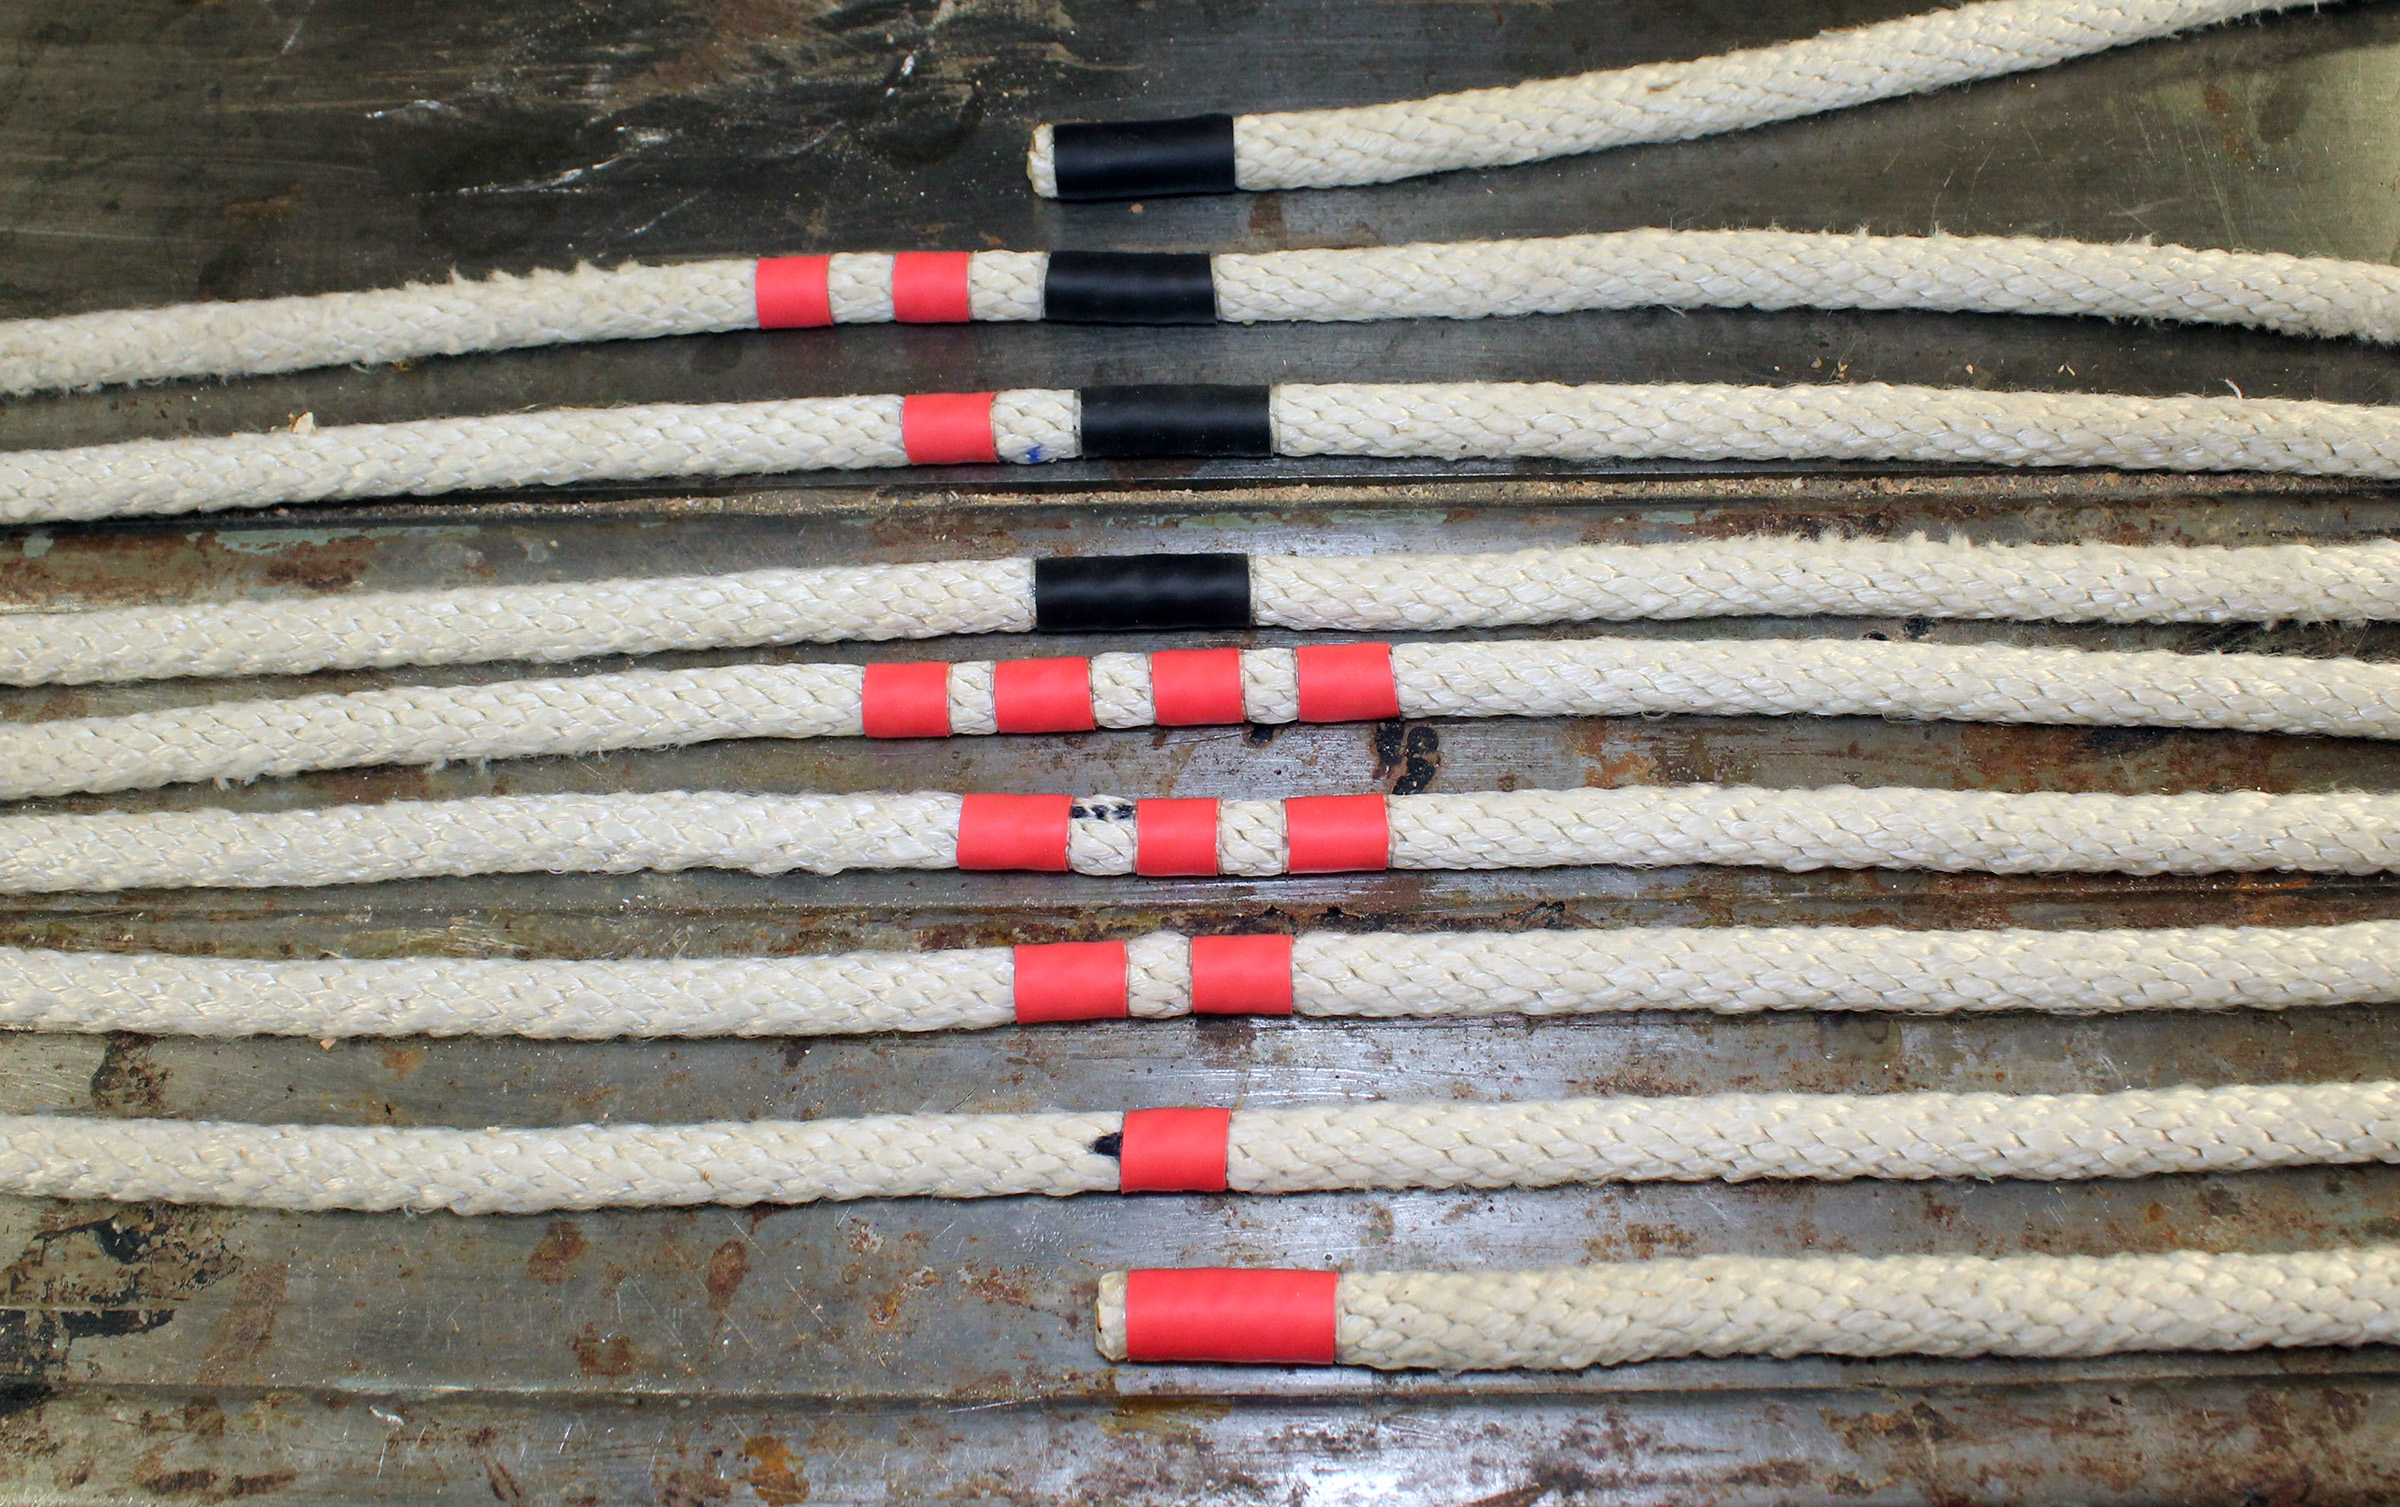
I measured out 10′ of my rode with a tape measure and made the blue mark seen here. I set two bar clamps on the edge of my workbench about 5′ apart, with the bars up, then looped one end of the rode around them. The braided line curves around the bars, so a 5′ spacing between them makes a loop of line longer than 10′. I shifted one of the clamps until the end of the line was even with the mark I’d made.
 Christopher Cunningham
I tied a loop in the end of the line in the same way I’d tie it to the end of an anchor chain and set the loop over one of the bar clamps. I will use the rode markings to measure depth directly when I feel the last of the chain come to rest on the bottom. Alex includes the chain in his markings, so he subtracts the chain length from the length of rode payed out and measures scope directly from the markings. I made blue marks for each 10′ in the middle of each bend around the bar and added black marks as indicators of length from the end—dots to tally multiples of one and bars to tally multiples of five.
 Christopher Cunningham
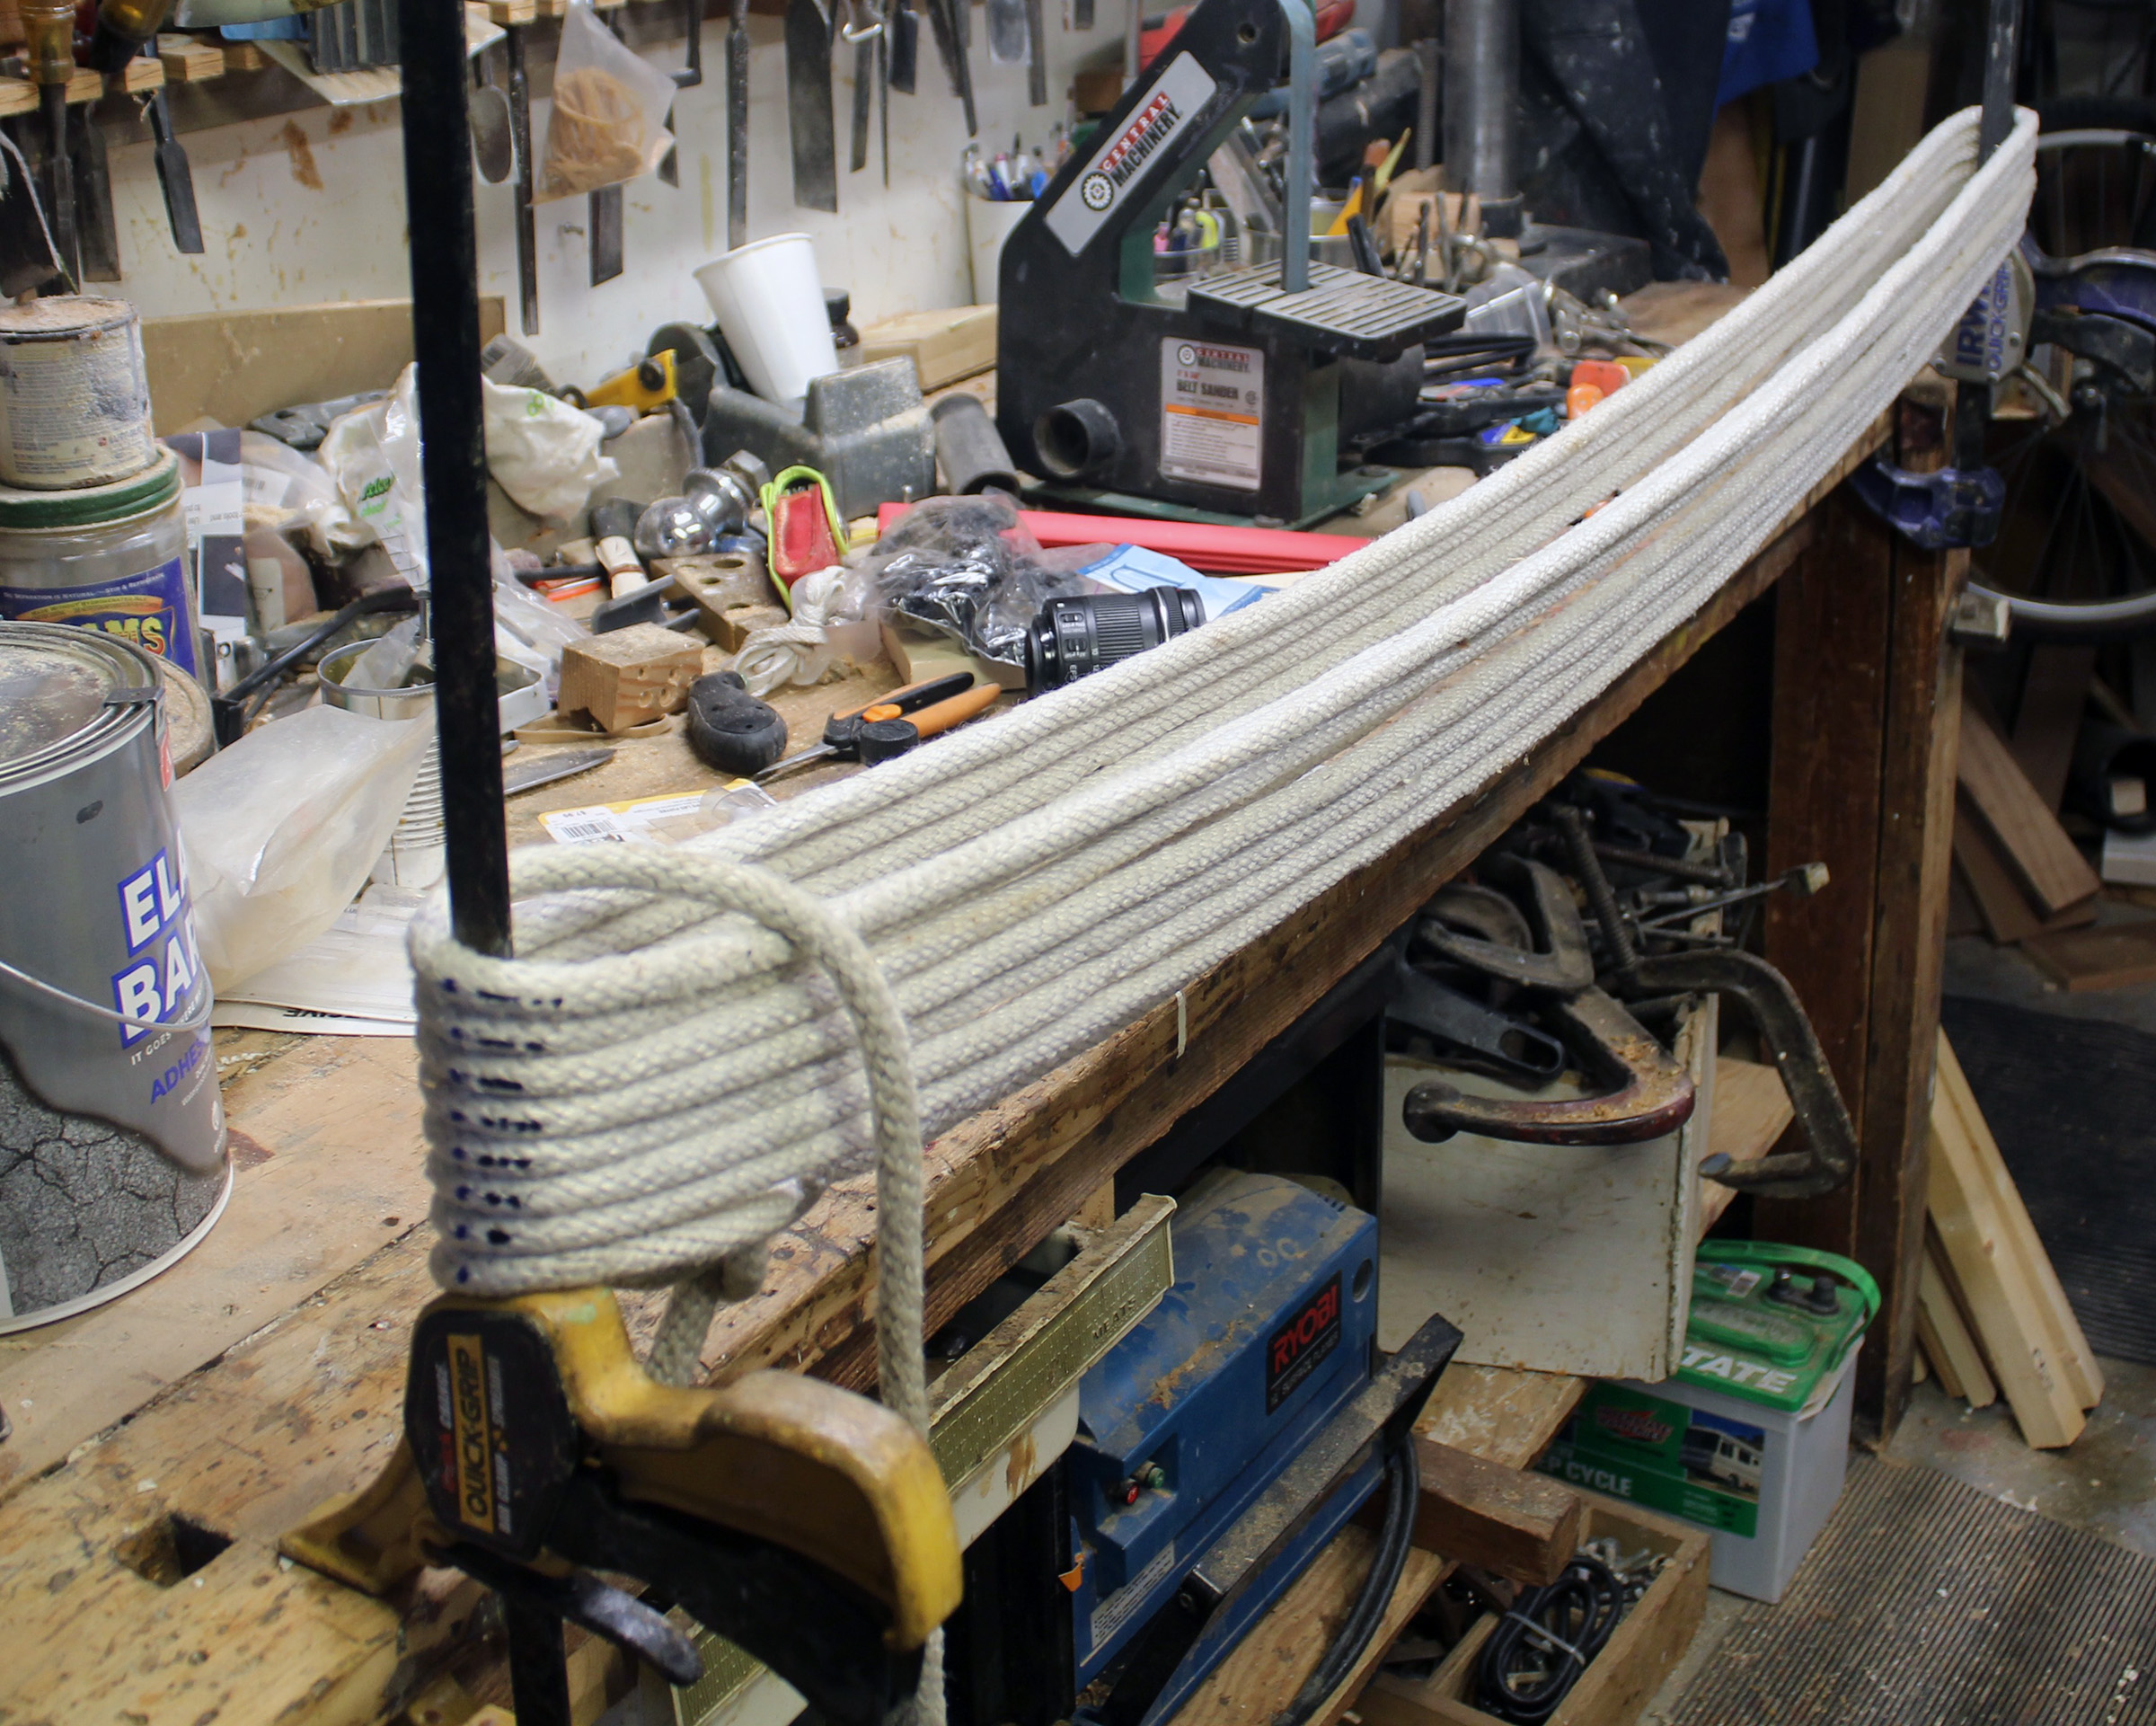
I cut pieces of the heat-shrink tubing—longer pieces of black for 50′ increments and short pieces of red for 10′—and slipped them over one end of the line in the order I’d use them.
 Christopher Cunningham
Once the sections of tubing were in the right positions, I shrank them with a heat gun. I used a couple of extra pieces as “whippings” on the ends of the rode.
You can share your tips and tricks of the trade with other Small Boats readers by sending us an email.


I’ve been intending to solve this problem using colored lashings sewn through braided line with a blunt tipped awl/needle used for lacing leather.
Somewhat more sophisticated version of what I did. I just went with single color and just keep track of where I am after the first 50. Colors would be a fine addition to the system. Didn’t know that shrink wrap came in diameters to work with braided. Great idea.
I like the heat shrink tape idea. I’m going to experiment with it.
OT, but you mention you use 21′ of chain. How long is your boat?
Thank you.
Cheers,