Those of us who have built boats know that boats are complex shapes and joining their various parts can be a tricky business. Back in 1981, I discovered a good way to make accurate fits in Roger Simpson’s article, “The Incredible Joggle Stick,” in WoodenBoat No. 39.
Simpson cut the device he called a joggle stick from 1/4″ plywood, giving one side a sawtooth edge with “teeth” about 2-1/2″ apart and the “gullets” numbered. To create a pattern for a cabin bulkhead that would fit the inside curve of the hull he’d built, he clamped a piece of plywood as a “tally board,” which would serve in a way similar to a spiling batten, to an overhead deckbeam. He pressed the joggle stick against it, positioned with its point in contact with the hull. He then traced both edges of the joggle stick on the tally board and wrote the number of the gullet at the corresponding spot on the tracing.
After tracing on the tally board as many locations as he required to define curves, straight lines, and corners, he set it on the plywood that would become the bulkhead. With the joggle stick positioned on the tally board in alignment with the tracings, he would make a pencil mark at its point. Connecting the dots plotted on the plywood provided the line he could cut to for a precise fit. Simpson noted the joggle stick was “fiendishly simple, revoltingly accurate, and beautifully fast.”
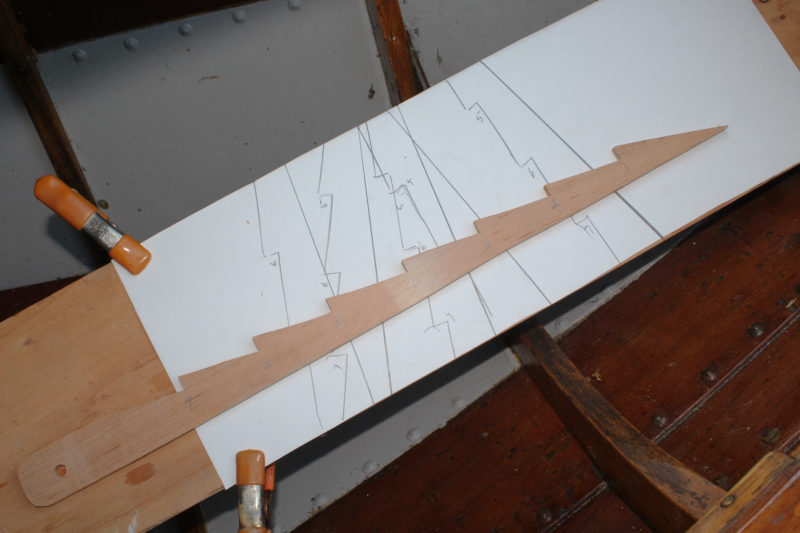 Photographs by the author
My copies of the joggle stick were challenging to use. Tracing each facet requires a separate action, often requiring switching the angle of the pencil. It’s a slow process that increases the likelihood of making the stick slip.
The method worked well for me, and I used it frequently for fitting thwarts and sternsheets. It was especially useful when working on thwarts that were notched to fit around sawn frames in dories. The multiple tracings and numbers on the tally board, even by Simpson’s own assessment, could get a bit confusing when a lot of them overlapped. I stopped tracing the straight side of the stick to eliminate some of the clutter. Later, I got frustrated tracing the sawtooth edge. Each facet required a separate stroke with the pencil, increasing the likelihood of the joggle stick slipping out of position.
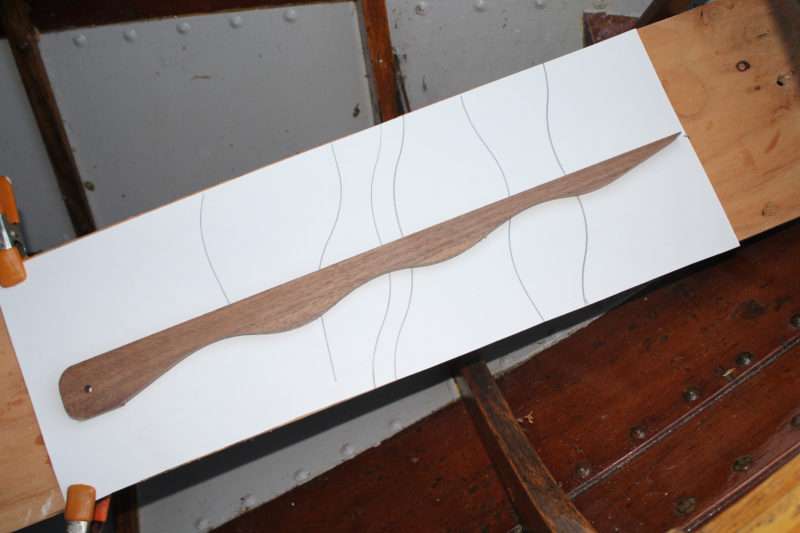
Joggle sticks with freehand-cut curves were my first modification, just as accurate as the sawtooth type and much faster to trace.
I made new joggle sticks with one wavy edge. I could trace the edge with one quick pull of the pencil. Because the curves were cut freehand on the bandsaw, none of them were alike, so there was no need to number them. That made the “joggling” appreciably faster.
An article by Arch Davis in WoodenBoat No. 177, “Measuring Interior Joinery,” provided another variation on the patternmaking system with a straight-edged “tick stick.” Davis not only did away with tracing both sides, as I had, but also made the traced side straight. The edge had numbered marks, one of which was used to record the position of the stick with a pencil “tick” and the corresponding number next to the traced line.
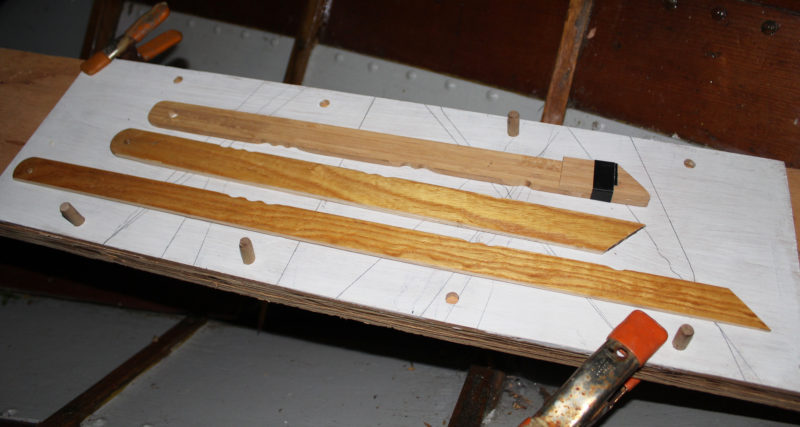
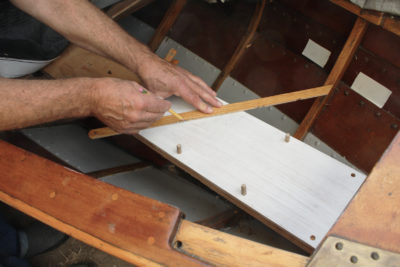
My current tick sticks have straight edges with sets of shallow arcs to record their position. The top stick has a block taped on the end to account for the thickness of the story board. The story board has short dowels that can be inserted or removed as needed.
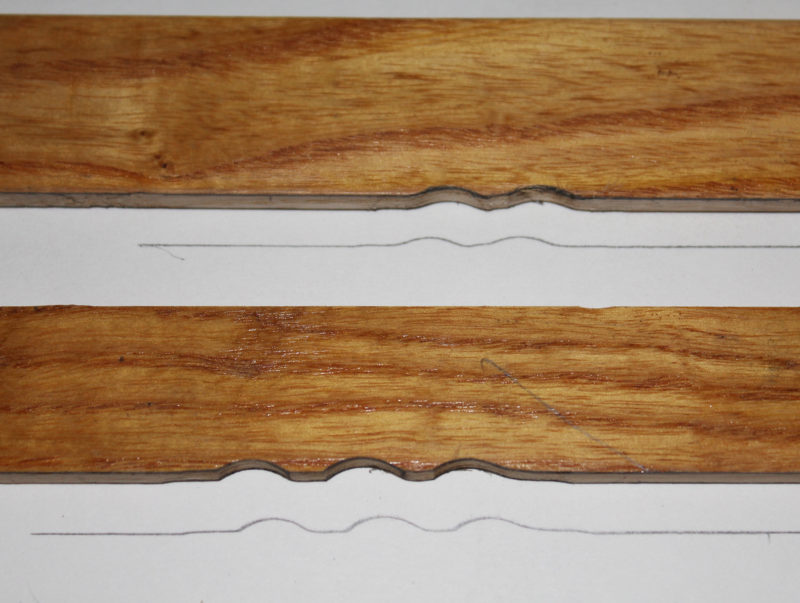
Shallow grooves without sharp corners are easy to trace with a single pass and aren’t prone to breaking the pencil lead.
I quickly traded my joggle sticks in for tick sticks. I preferred having some irregularity on the edge to register the stick without having to eyeball markings along a stick with a straight edge; a 1/2″ sanding drum on a Dremel tool made shallow grooves that would be traced along with the edge. Making a single groove, a pair of grooves, and a set of three grooves at intervals along the stick allowed me to use its full range on the tally board. And I can flip the stick over to change the side the point at the tip is on, and the little scallops on the traced line will indicate which way to place the stick.
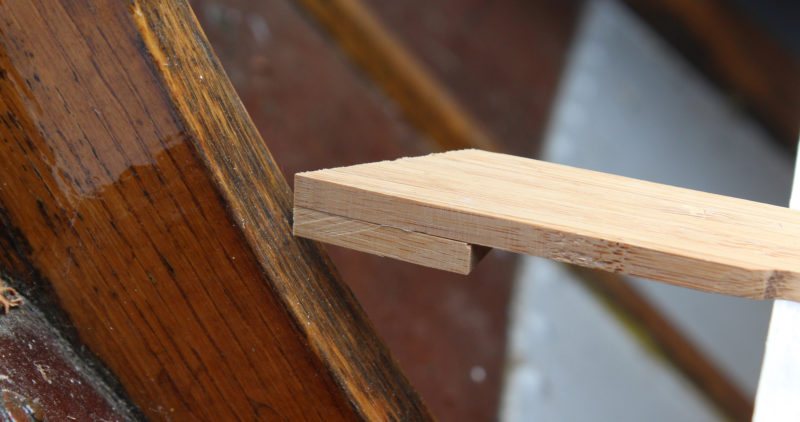
If your tally board is sitting on a support that is on the same plane as the piece you’re making, you’ll need to bring the point of the tick stick down to that level. Having a block on both sides comes in handy if you need to flip the stick over.
Davis raised a good point about adding a block of wood under the tip of the tick stick if the reference surface secured in the boat is underneath the story board. Without it, a surface angled away from the story board would lead to an oversize piece and a poor fit. To meet angled surfaces, the new piece will need to have bevels cut. You can take the angles with a small bevel gauge using the tick stick to orient on leg of the gauge.
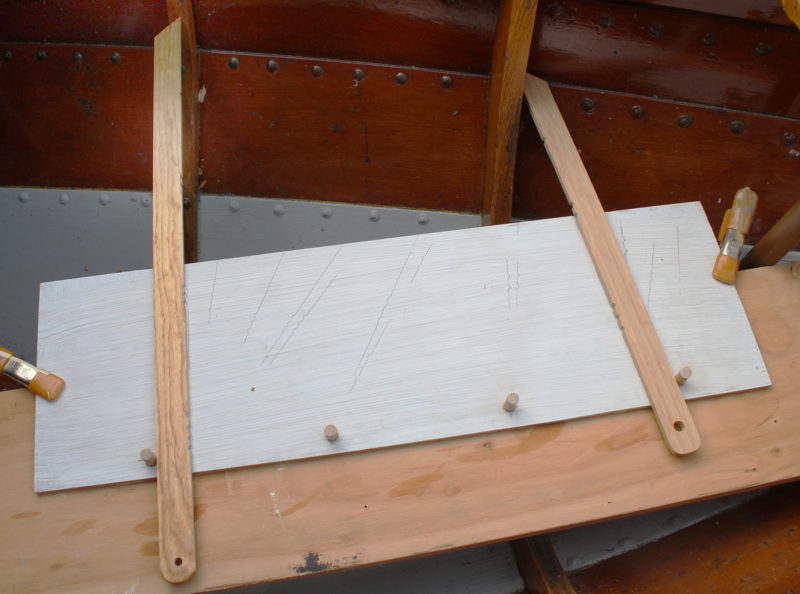
Pegs slip-fit into holes in the story board can help keep a tick stick in place when making the tracings and quickly locate the stick when it’s time to transfer the marks.
Even with these improvements, a tick stick, especially a long one, can easily slip when you’re drawing a pencil line along its edge, especially when the pencil is at a distance from the hand holding the stick. I added pegs along the edges of my story board. They not only help stabilize one end of the stick, but also organize the pencil lines as radii that don’t overlap. When the points recorded are being transferred to the piece to be cut, the peg holds one end of the tick stick in the proper position, so I only have to focus on the pencil line and the scalloped marks. Making fine adjustments there doesn’t move the end at the peg, speeding the process.
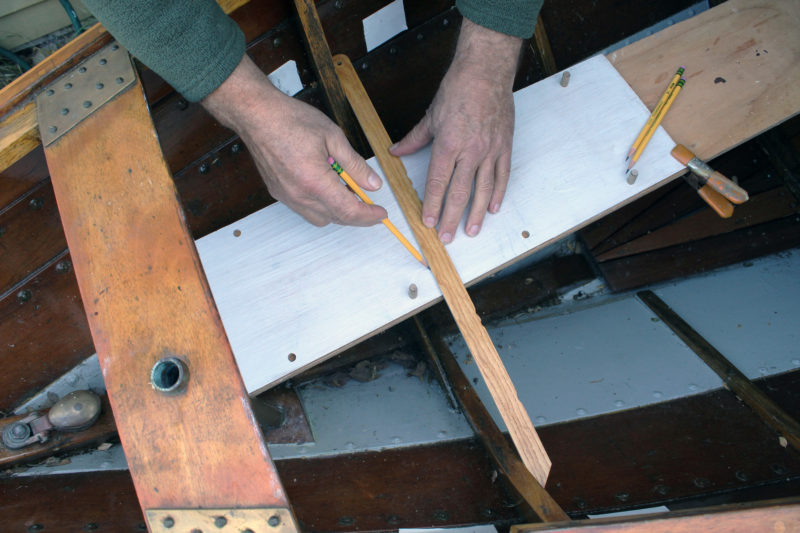
This story board is set crossing the thwart intended to set on this pair of sawn frames. One of the tick sticks is just long enough to span the frames so a line can be drawn between them. From it, the edges of the thwart can be drawn on the story board so it can be oriented on the plank to be cut.
I have a tick stick 24″ long and another 17″ long, and it only takes a few minutes to make another if the space I’m making a pattern for requires it. Simpson’s original joggle stick was indeed “fiendishly simple, revoltingly accurate, and beautifully fast,” and I’d like to think he’d find the quick tick stick is even more so.![]()
Christopher Cunningham is the Editor of Small Boats Magazine.
You can share your tips and tricks of the trade with other Small Boats Magazine readers by sending us an email.




I used a variant of Simpson’s tick stick, but marked inches along the length of the stick and then just drew a straight line and a tick mark with the inch number on the reference board to use as a guide on the markup.
Thank you for taking the tick stick to a new, more efficient level!
If any tip ever needed a video to go with it, this is it.