You may have heard that when it comes to building a boat, you can never have too many clamps. While that’s true, a large collection of clamps can be expensive and take up a lot of room in the shop. Fortunately, there are shop-made spring clamps that cost only pennies and are small enough for dozens to fit in a gallon bucket.
 Photographs by the author
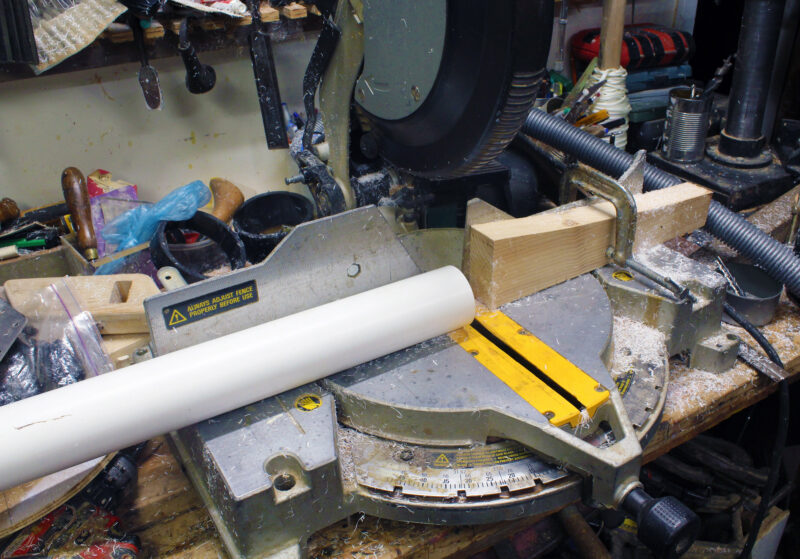
I used a chop saw to cut the 2″ PVC pipe. A scrap-wood stop clamped to the saw’s fence set the width of the pieces for the clamps at 1″. Almost any wood-cutting saw and hacksaw can be used to cut the PVC.
These spring clamps are cut from Schedule 40 PVC (polyvinyl chloride) pipe, which is made in white for plumbing and gray for electrical conduit. (The black Schedule 40 ABS pipe used for drains doesn’t have the spring-like quality of PVC and isn’t suitable for use as clamps.) I have more than 100 clamps made from 1 1⁄2″ and 2″ PVC pipe.
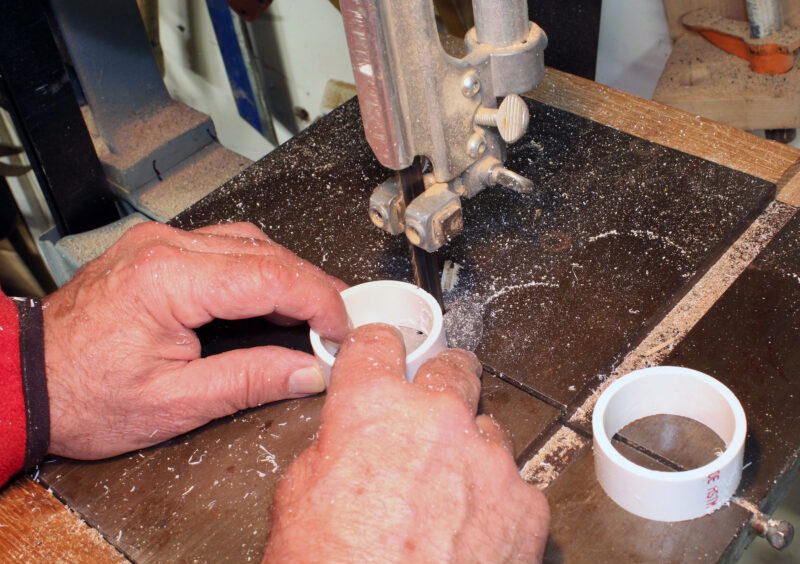
A bandsaw makes quick work of cutting through the PVC rings so they can open to clamp things. With the wide blade I could make the cut and pull the pipe back before it closed behind the blade, which would make it more difficult to remove the ring.
I cut the 1 1⁄2″ pipe in 5⁄8″ widths and the 2″ pipe in 1″ widths. The PVC cuts easily with power tools, but the pipe’s slick cylindrical shape requires care to keep it in place during the cut. A chop saw makes the cuts quickly, and I can hold the pipe in place against the table and fence. When using a table saw, I employ a sled. I have also used a bandsaw but a block with a groove to cradle the pipe is required to keep the saw teeth from catching the pipe at the beginning of the cut and rotating it. Whichever power tool I am using, I stop cutting while I still have enough pipe to hold it securely in place. If you don’t have access to a suitable power tool, you can use a hacksaw to cut the pipe; it just takes time. Once you have cut your rings of pipe, the last step is to cut through each one so it can open. I do that on the bandsaw. Again, you can use a hacksaw.
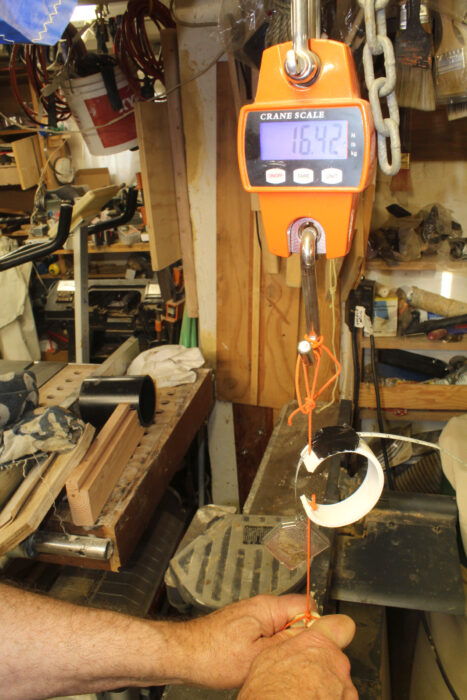
I used a hanging scale to measure how much force is required to open the clamps to measured increments. The force required to open the clamp is also the force the clamp exerts when in use.
PVC spring clamps can be applied by hand if they’re not too hard to open. The clamps I cut from the 1 1⁄2″ pipe take 5.5 lbs of force to open them 1⁄2″ and 16 lbs to get to 2″. The clamps cut from 2″ pipe take 7 lbs to open them 1⁄2″ and 18.75 lbs to open them 2″. These numbers are also measures of the clamping force of the pipe clamps. As a comparison, a Pony Jorgensen 2″ spring clamp applies roughly twice the amount of pressure at the ends of its jaws. Iron C-clamps can apply even more pressure, but that’s not necessary for working with epoxy when glued joints need only to be pressed just tight enough for the excess epoxy to be squeezed out, while leaving a thin film in the joint—excessive pressure starves the joint of epoxy and weakens the bond. I’ve used PVC clamps for countless epoxy glue-ups and have never had a joint clamped with them fail, so they’re evidently not squeezing too tightly.
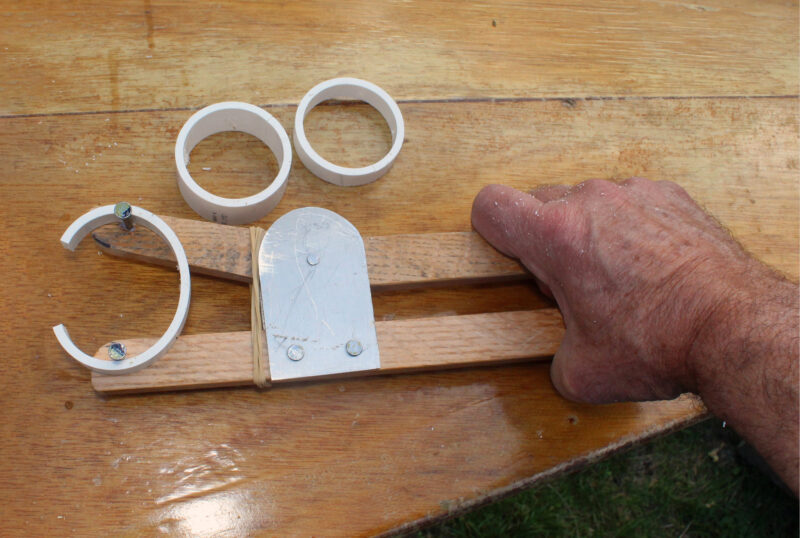
My 1 1⁄2″-pipe clamps don’t take too much strength to open. However, to open and apply my 2”-pipe clamps easily, I made a tool.
However, applying the clamps can be a chore once my gloves become slippery with glue, and if I have a thick stack of pieces to be glued, it’s hard to open the clamps wide enough to apply them. Opening them by hand to 2″ is too much of an effort for me, especially when I need to work fast and finish before the epoxy kicks off.
I have seen some pipe clamps equipped with handles—either nails or machine screws—that open the clamp when squeezed together. They may work on wide pieces of pipe, but when I drilled holes in my spring-pipe sections, I significantly weakened the clamp. And, installing handles in every clamp adds time, expense, and bulk.
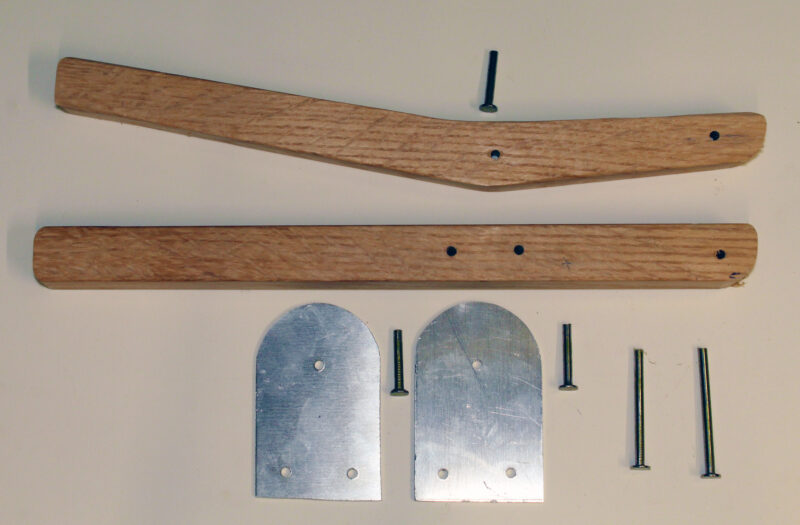
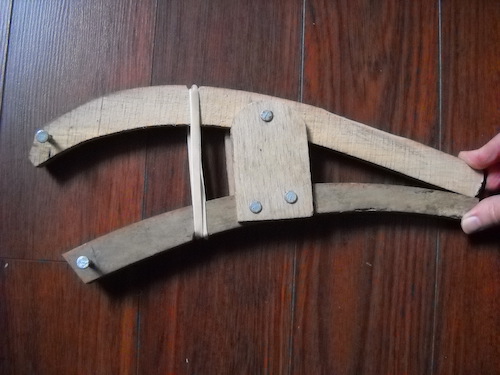
The reverse-action pliers are simple to make and require common materials: two 12″ lengths of hardwood, two small pieces of aluminum, steel, or 4mm plywood, and a handful of 16D nails, here already cut to length and ready to be inserted and peened.
Instead, I came up with a pair of DIY reverse-action pliers. The business ends of the pliers spread apart when the handles are squeezed together, and not only does the geometry provide a mechanical advantage, but the tool also takes advantage of my grip strength, which is more powerful than using two hands to pull something apart. Because the handles don’t cross each other, which would require a complicated pivot point, reverse-action pliers are easy to make.
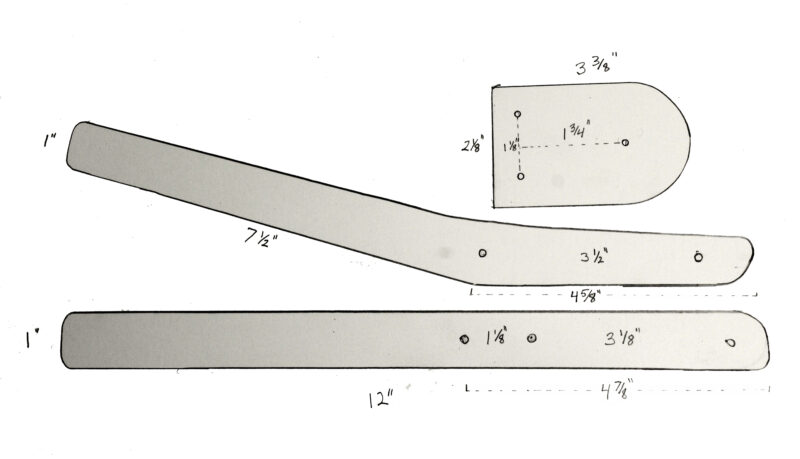
Pliers made to these dimensions work well with clamps made from 1 1⁄2″ and 2″ PVC pipe. They can open the smaller clamps to 2 1⁄2″ and the larger clamps to 2″. I used 1 3⁄4″-thick white oak for the handles. The upper, moving handle has an angle of 16° between the handle and the jaw and can be cut out of a piece of wood 12″ long and 1 5⁄8″ wide.
I used 3⁄4″-thick white oak for the plier handles, 12-gauge (0.08″) aluminum for the side plates (4mm marine plywood would work as well), five 16D sinker nails, and rubber bands to make the pliers self-closing. I used a 5⁄32″ bit to drill all the holes for the nails. Three of the nails are used as rivets to hold the aluminum plates in place. After hammering, the ends of the two nails on the straight handle are cut by either hacksaw or bolt cutter approximately 1⁄16″ proud of the plate and are then hammered to flare them until the plates are tight against the wood. Before applying the third nail, which fixes the plate to the angled handle and holds the two handles together, a thin metal shim—a piece cut from a soft-drink can works well—is inserted between the plate and the wood. The nail is then flared as before, but when the metal shim is removed there is enough open space between the plate and the handle for the handle to move freely. The finishing touch is to stretch a couple of rubber bands over the pliers’ handles in front of the plates to make the pliers self-closing.
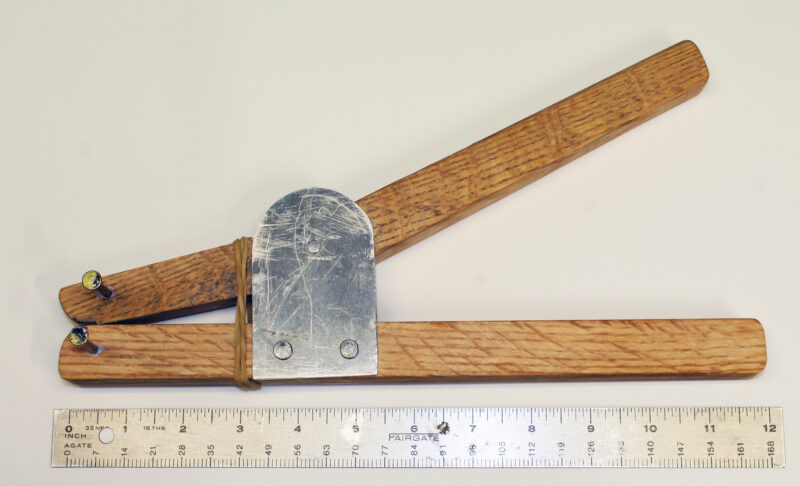
The nails that fasten the metal plates are cut to length and peened to secure them. On the side shown here, the nail serving as the pivot for the angled handle is peened. The two nails on the straight handle are peened on the other side; their heads can be seen on this side.
The two nails at the business end of the pliers will be glued in place, so sand or file the vinyl coating off each one and roughen the underlying steel. I’m right-handed, so I inserted the nails on the left side of the pliers so I can grip the tool with my right hand and apply the clamps to it with my left hand. The nailheads should stand 1 1⁄16″ above the wood to provide enough space for PVC spring clamps cut in 1″ widths. Once the nails are in position, drops of CA glue—the thin stuff that will pull itself into the perimeter of the hole—will lock them in place. When a clamp is opened by the pliers, the nailheads prevent it from flying off. An opened clamp stores a lot of potential energy, so the shop rule—wear eye protection—applies here, too.
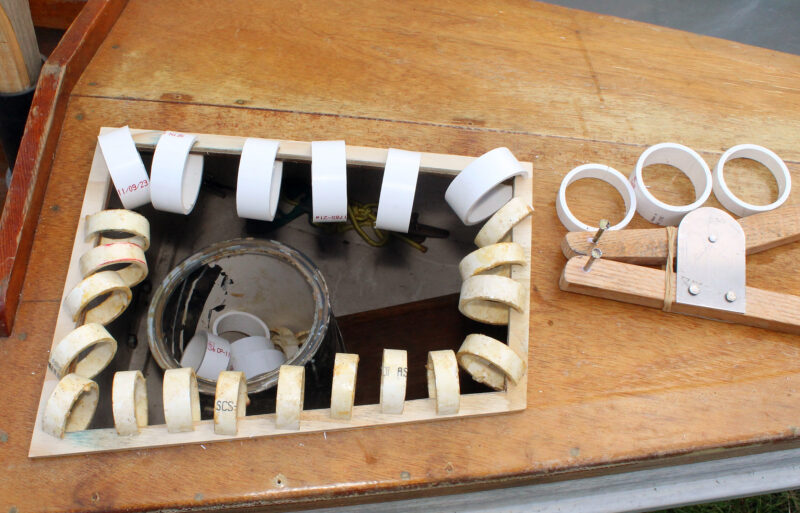
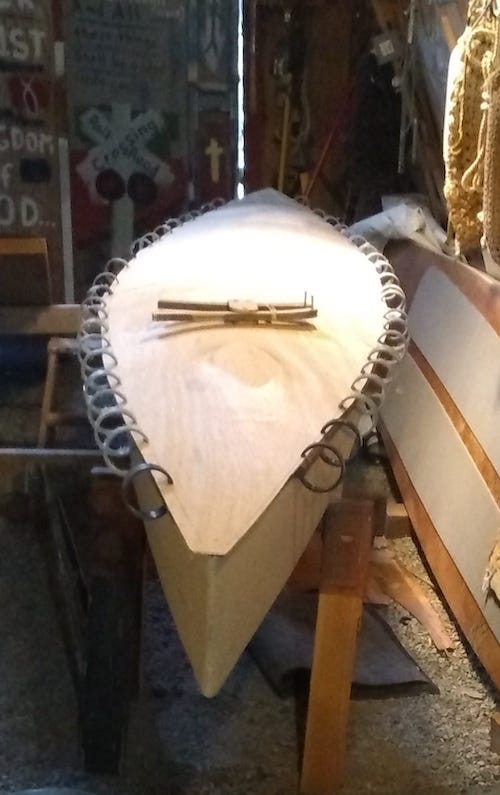
The pipe clamps work well when assembling the various layers for deck hatches. Here they’re holding a 1⁄2″-wide plywood coaming. When using a right-handed tool, seen here, the clamps should be applied from left to right so that they can be spaced close together but not impede the removal of the tool.
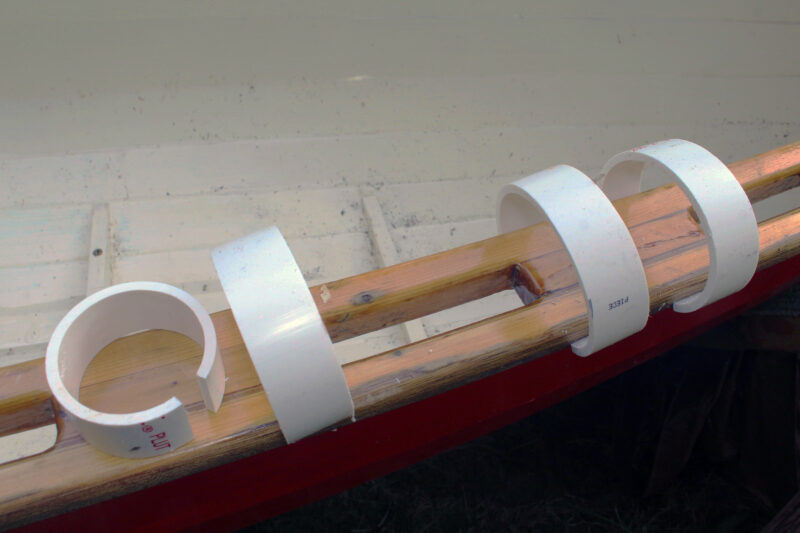
The 2″ pipe clamps didn’t have the capacity to span the gunwale of this lapstrake canoe—2 1⁄2″ from spacered inwale to outwale. I cut about 1⁄2″ from one end of each clamp, which allowed me to open the clamps to the desired width without having to modify the pliers.
In the decades since I started building boats, I’ve acquired a multitude of clamps, but there are some jobs that are best done with PVC spring clamps. They’re much quicker to apply than other clamps, they weigh next to nothing, they don’t stick to epoxy or get jammed by cured glue, and you can make as many as you like without breaking the bank or crowding the shop.![]()
Christopher Cunningham is editor-at-large of Small Boats.
You can share your tips and tricks of the trade with other Small Boats readers by sending us an email.


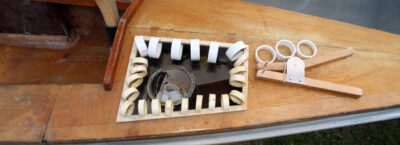


These will work great for the deck replacement project on my kayak and the reverse pliers is a great addition. 😉
What a great idea, I have been using PVC clamps a bit but by the time I get my hands in place, get the clamps opened, hard to see what I am clamping! Off to the shop to make up a set of these pliers.
The pliers work great. Once I cut the clamps, I held them in the pliers while I split them on the band saw and opened them slightly to back them out. I made these from 2″ electrical conduit, and they have plenty of clamping pressure.
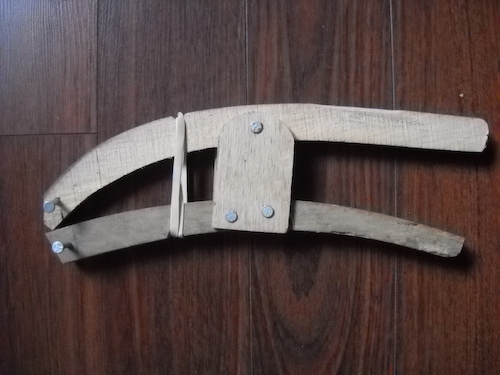
A good idea. I will try to make one from a broken hockey stick. I may have to cut some waste off the bottom of the heel to get the appropriate leverage.