The air-cooled tool guide angles upward underneath the wheel. The top face of the wheel can be used, with the help of the tool support at left, for large or curved blades. In the box at right there is a slotted disk that provides a view of the blade being sharpened on the tool guide.
I spent a few years looking at some pretty crusty plane irons and chisels, tried sharpening them with conventional stones and old-school methods, but I was not satisfied with the dubious results that I was getting. So, I did some research on sharpening systems and came across Work Sharp’s WS-3000 Woodworking Tool Sharpener. It promised consistent and accurate sharpening of the tools that I use in boat building and restoration, so I bought it to give it a trial run.
The Work Sharp WS-3000 is a dry sharpening system that uses air cooling while sharpening, avoiding the mess of a wet system. The high-torque 1/5-hp motor turns the wheel at just 580 rpm, which keeps tool heat down during sharpening. The WS-3000 has a cast-aluminum top and a sheet-metal housing, yet it has substantial weight to minimize vibration. It has four tabs for mounting the machine on a benchtop, but the machine doesn’t vibrate enough to walk across the bench, so it’s not necessary to bolt it down.
Chisels and plane irons up to 2″ wide rest beneath the wheel on an adjustable guide that incorporates fan-forced airflow to take heat away from the tool being sharpened. This sharpening rest allows precise, repeatable bevel selections of 20, 25, 30, and 35 degrees for chisels and plane irons up to 2″ wide. Another feature of this “plunge-pull” sharpening port is a 2″-square pressure-sensitive-adhesive (PSA) P400 ceramic oxide abrasive patch on the port’s tool rest that removes the burr that curls away from the tool’s bevel. It hones both sides of the tool in a single operation, speeding up the process.
The WS-3000 works quickly and is easy to use. The face of the horizontal sharpening wheel provides more sharpening surface than that of a vertical wheel system. The kit comes with two tempered glass wheels with flat and true surfaces on which to attach various PSA abrasive discs. Different grits of PSA abrasive discs are included; we set our wheels up with 120, 400, 1,000, and micro-mesh 3,600. Finer grits and a leather strop wheel are also available. A crepe-rubber stick is included to clean the abrasive discs. The glass wheels are changed out with the twist of one knob, which makes it easy to start with a coarse grit to remove nicks in a blade and then put a fine edge on it.
The kit also comes with an “Edge-Vision See-Through Slotted Wheel”. The slots, when matched with the same pattern of slots on the abrasive disks, allow observation while sharpening so I don’t have to remove the tool repeatedly to check progress. That makes the job not only faster and easier but lets you know when to stop.
On top of the WS-3000 there is an adjustable tool rest for sharpening blades wider than 2″ and the curved blades of gouges.
I like using hand planes and chisels, but I’ve never acquired the skill and patience required to get good results with sharpening stones. The WS-3000 helps me keep my woodworking tools at a respectable level of sharpness with minimum effort.
Kent Lewis and his wife Audrey have a small fleet of boats in Florida, having built a Penobscot 14 and restored many other wooden boats. They blog about their adventures in their blog.
The W-3000 is available from Work Sharp for $249.95 and comes with a 2-year warranty. Prices listed by online retailers are as low as $190.
Is there a product that might be useful for boatbuilding, cruising, or shore-side camping that you’d like us to review? Please email your suggestions.
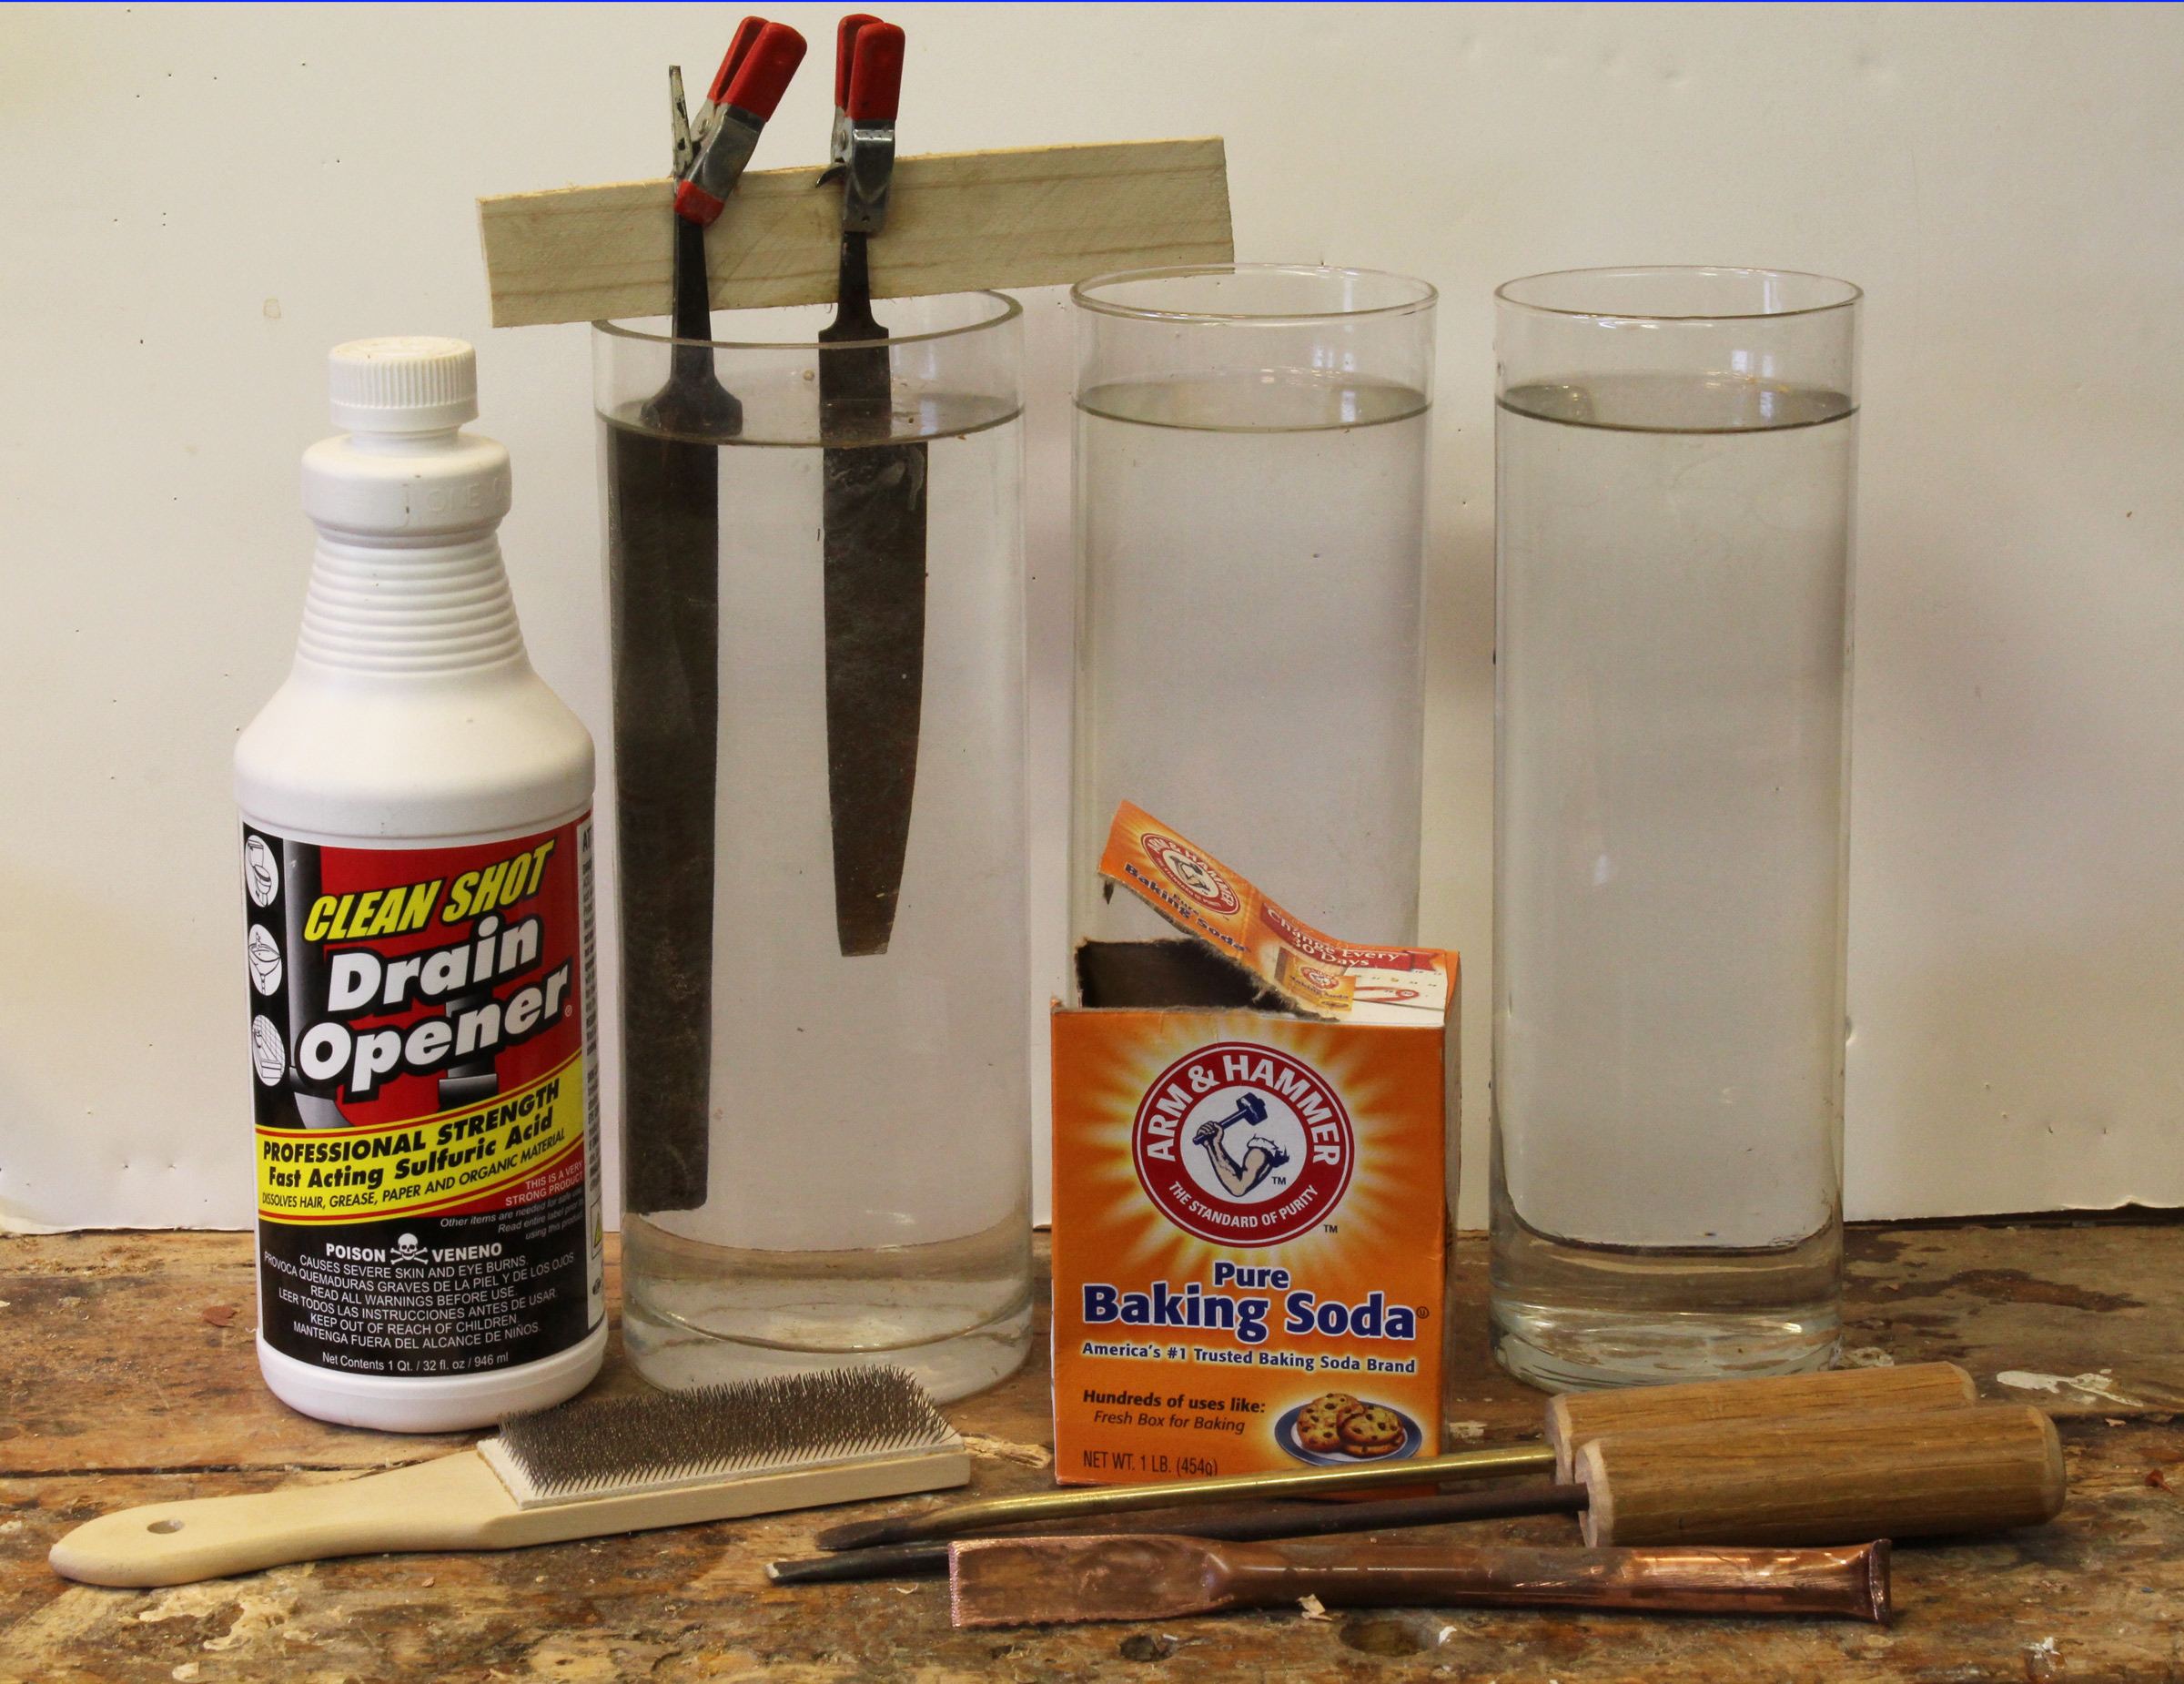
My equipment includes three glass flower vases I bought at Goodwill for 69 cents apiece. A thin stick and some small spring clamps hold the tangs out of the acid. Drain cleaner provides sulfuric acid to etch the files and a saturated baking-soda solution neutralizes the acid. The third vase has a fresh-water rinse. The file card (lower left) cleans file teeth and shop-made tools of copper, brass, and steel remove the debris the file card leaves behind.
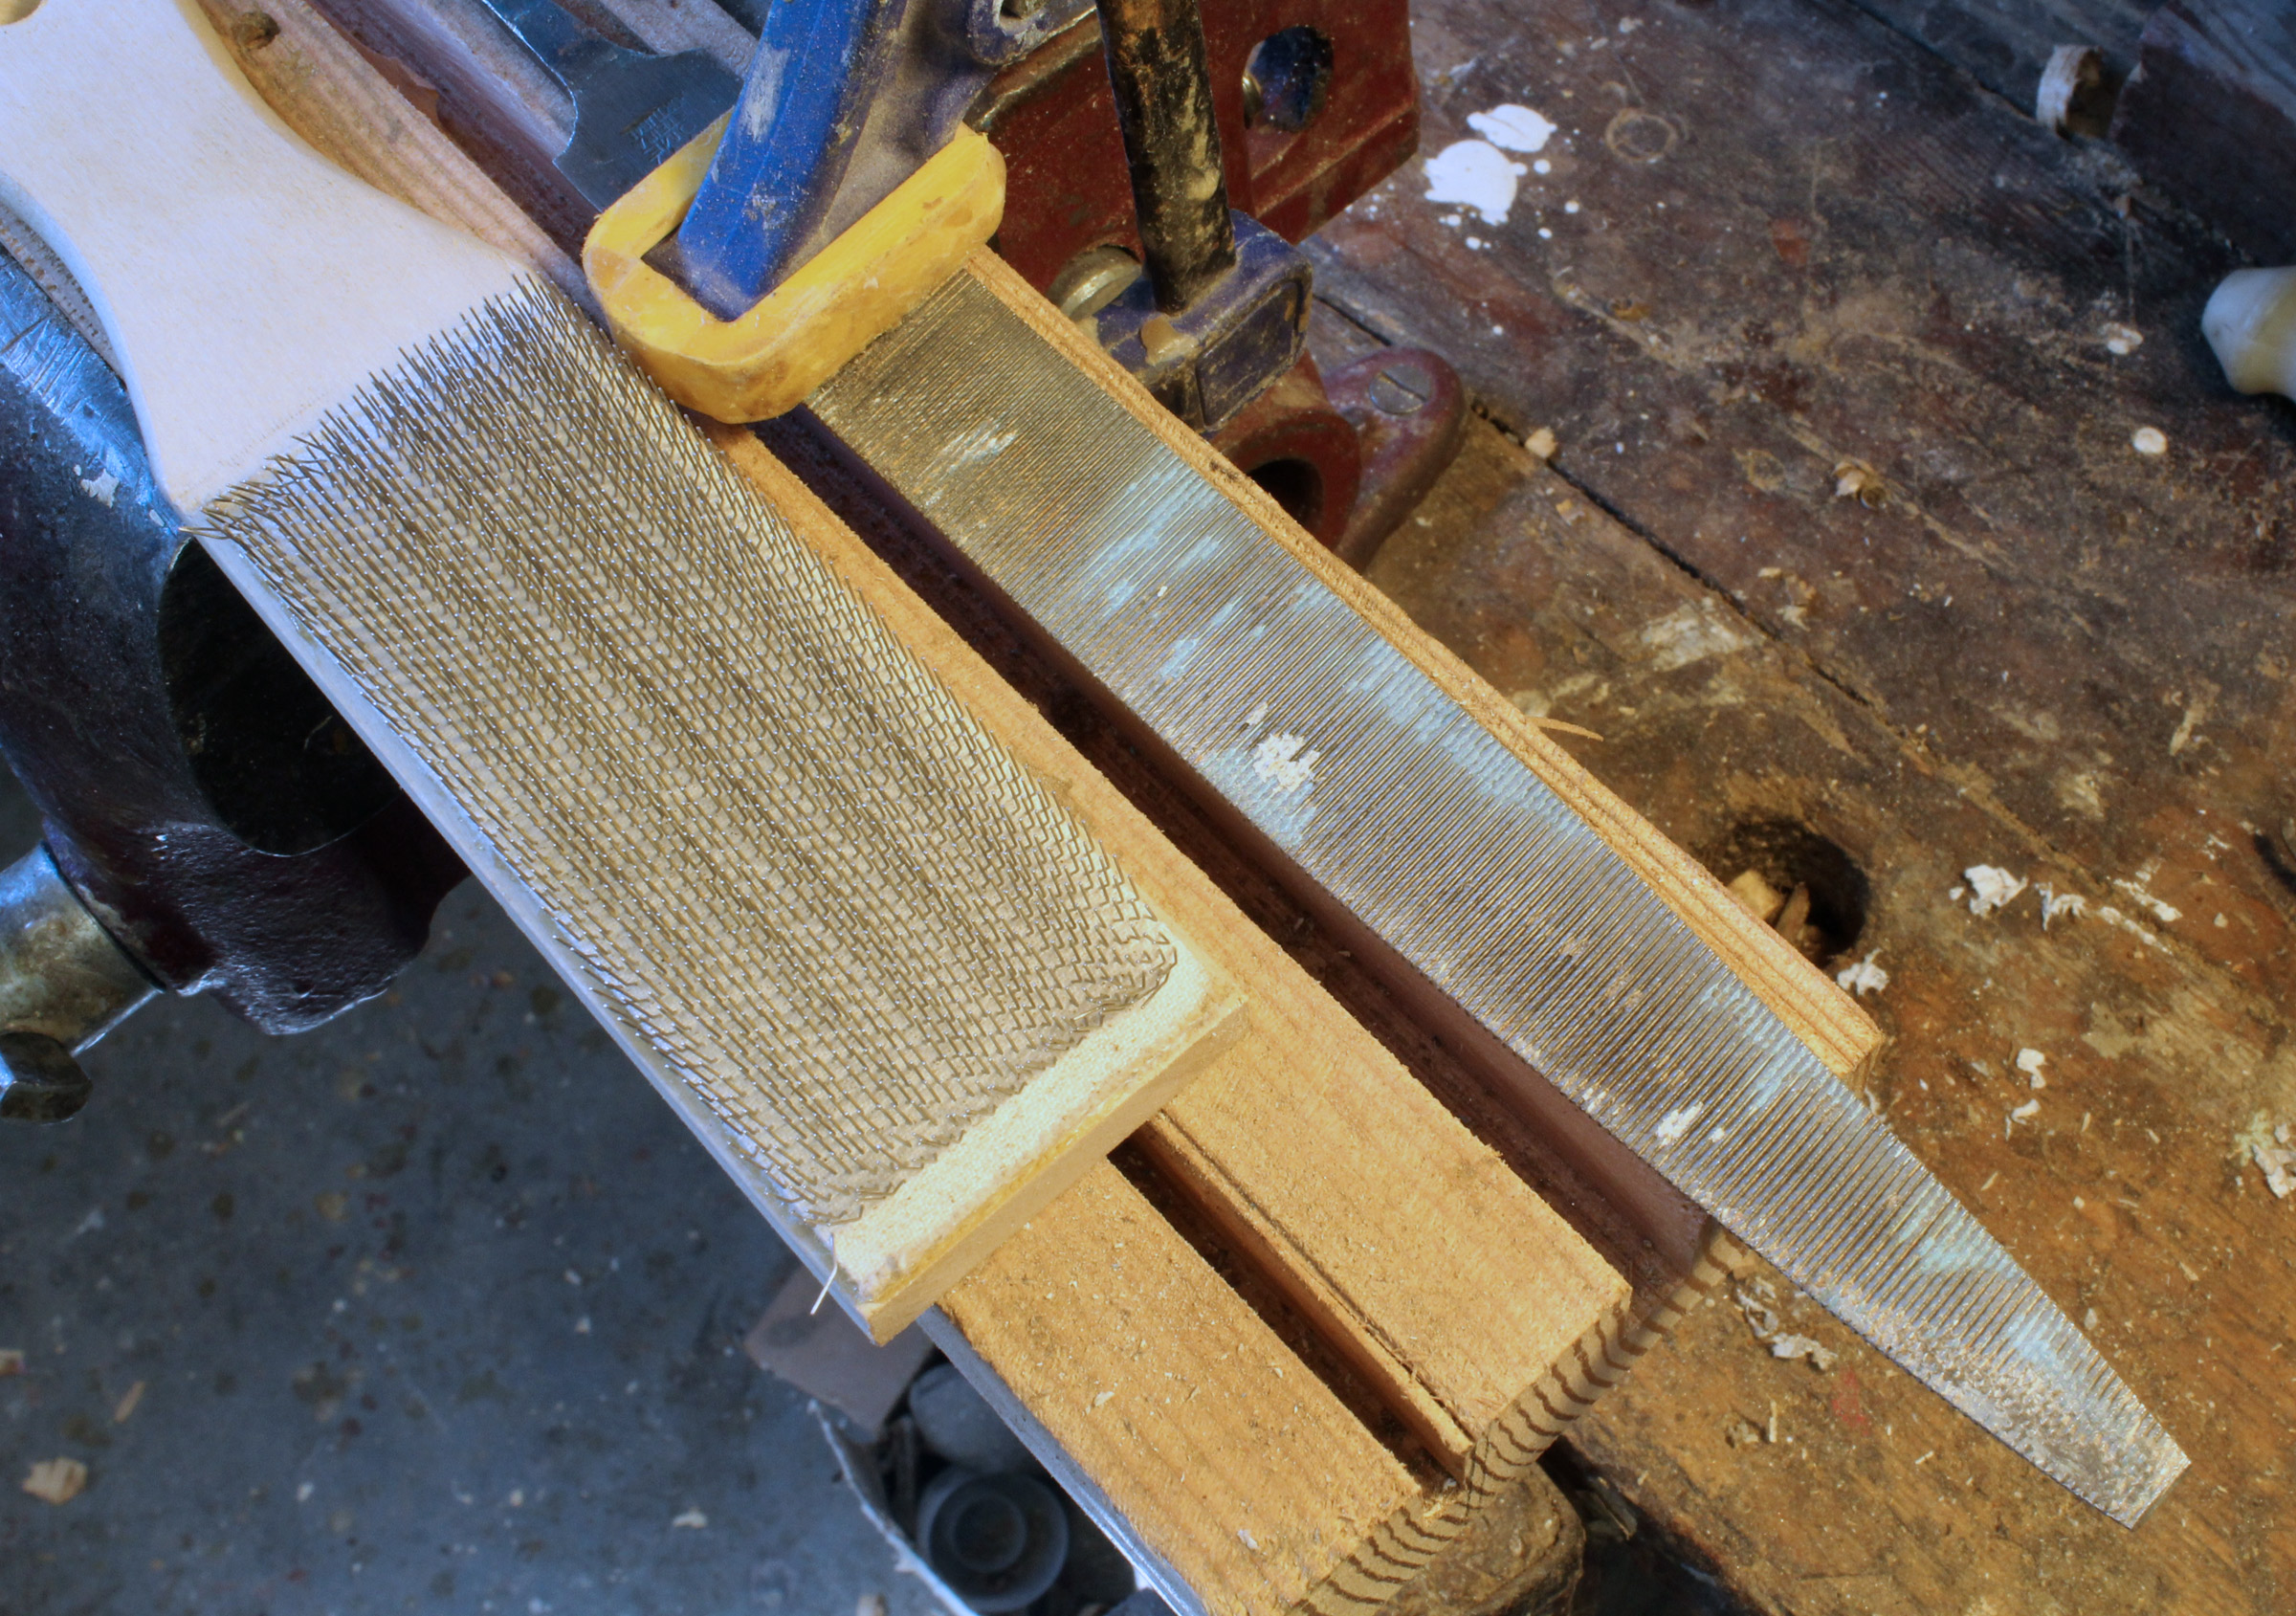
Files don’t get the attention that planes and chisels receive, but they are cutting tools too work best when they’re sharp. Because files are made of hardened high-carbon steel and their teeth are numerous and small, the easiest way to sharpen them is with an acid. I’ve used vinegar—acetic acid—and drain cleaner—sulfuric acid. The acids react with the iron in steel, removing metal from the surface. A dull cutting edge is rounded over with wear, and as the metal dissolves, the radius of the curve diminishes and the edge gets sharper. Before putting acid to work, the file needs to be cleaned. Anything stuck between the teeth will prevent the acid from getting to the metal. A wire brush will get some of the debris left by the work, but a file card, with its short, stiff wire bristles will do a better job.
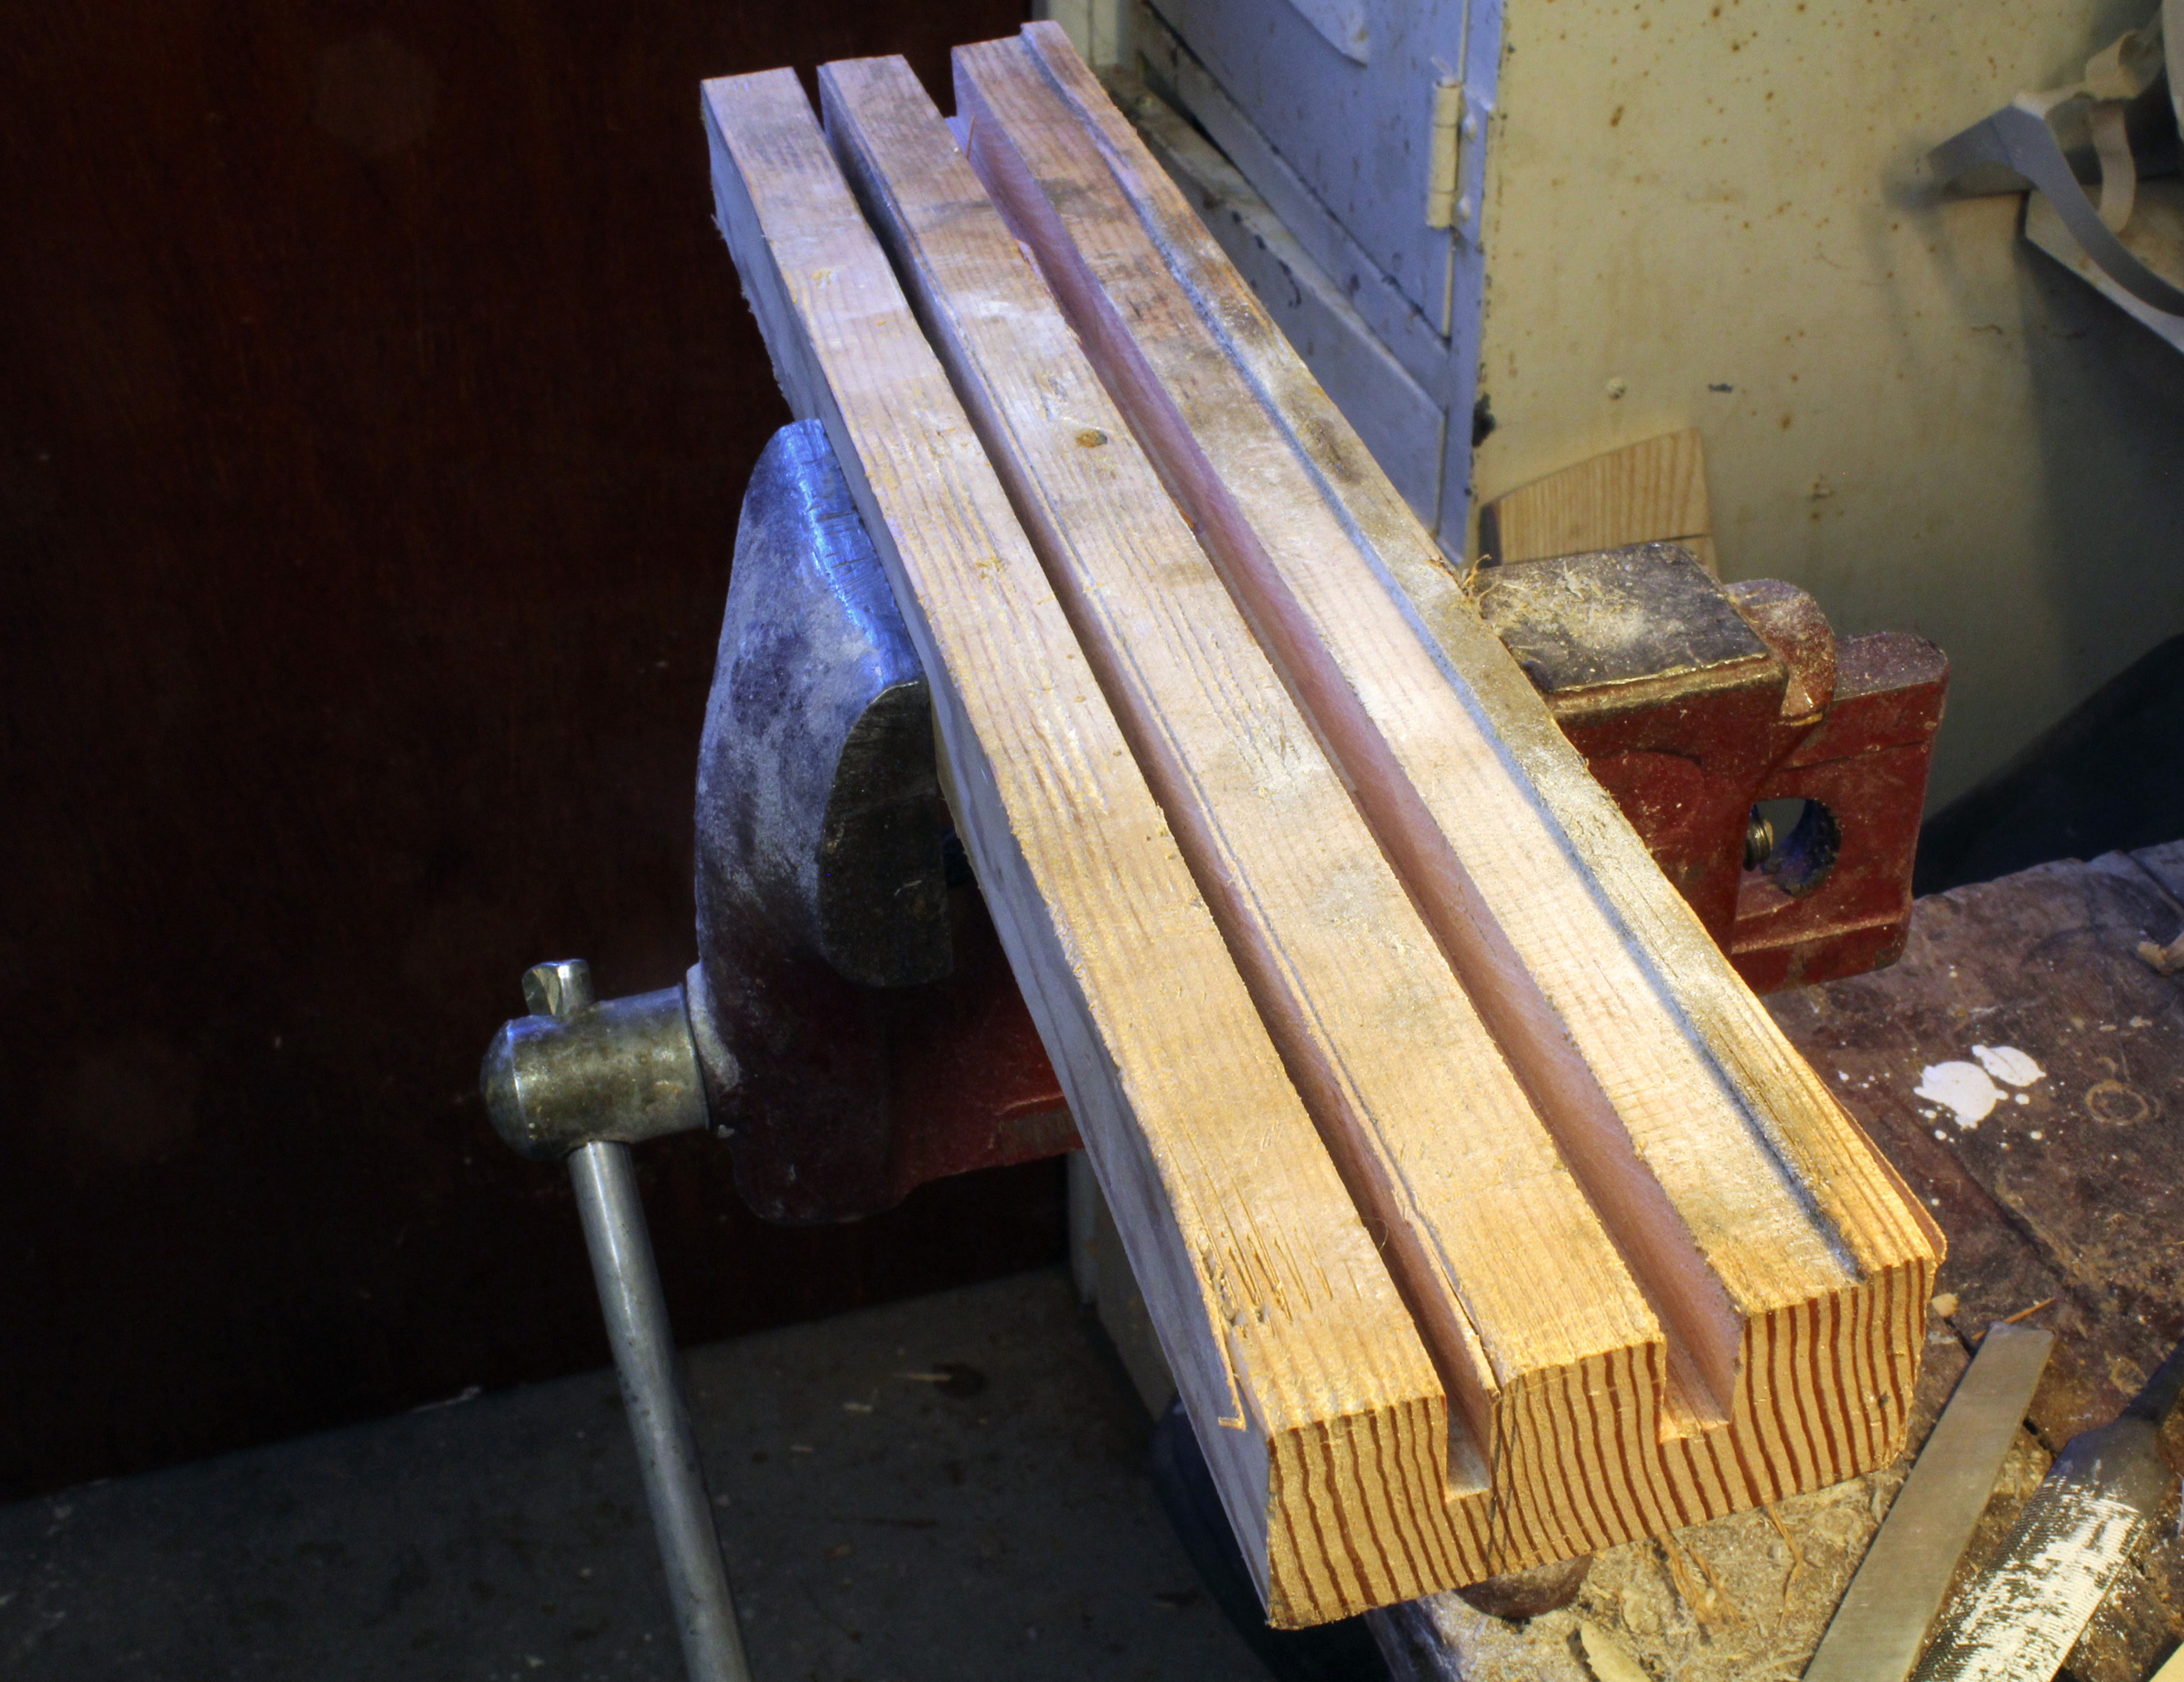
I work files with my vise holding a block of wood that I’ve run through the table saw to make a raised lip along to restrain files set on the flat and a couple of grooves to hold files on edge.
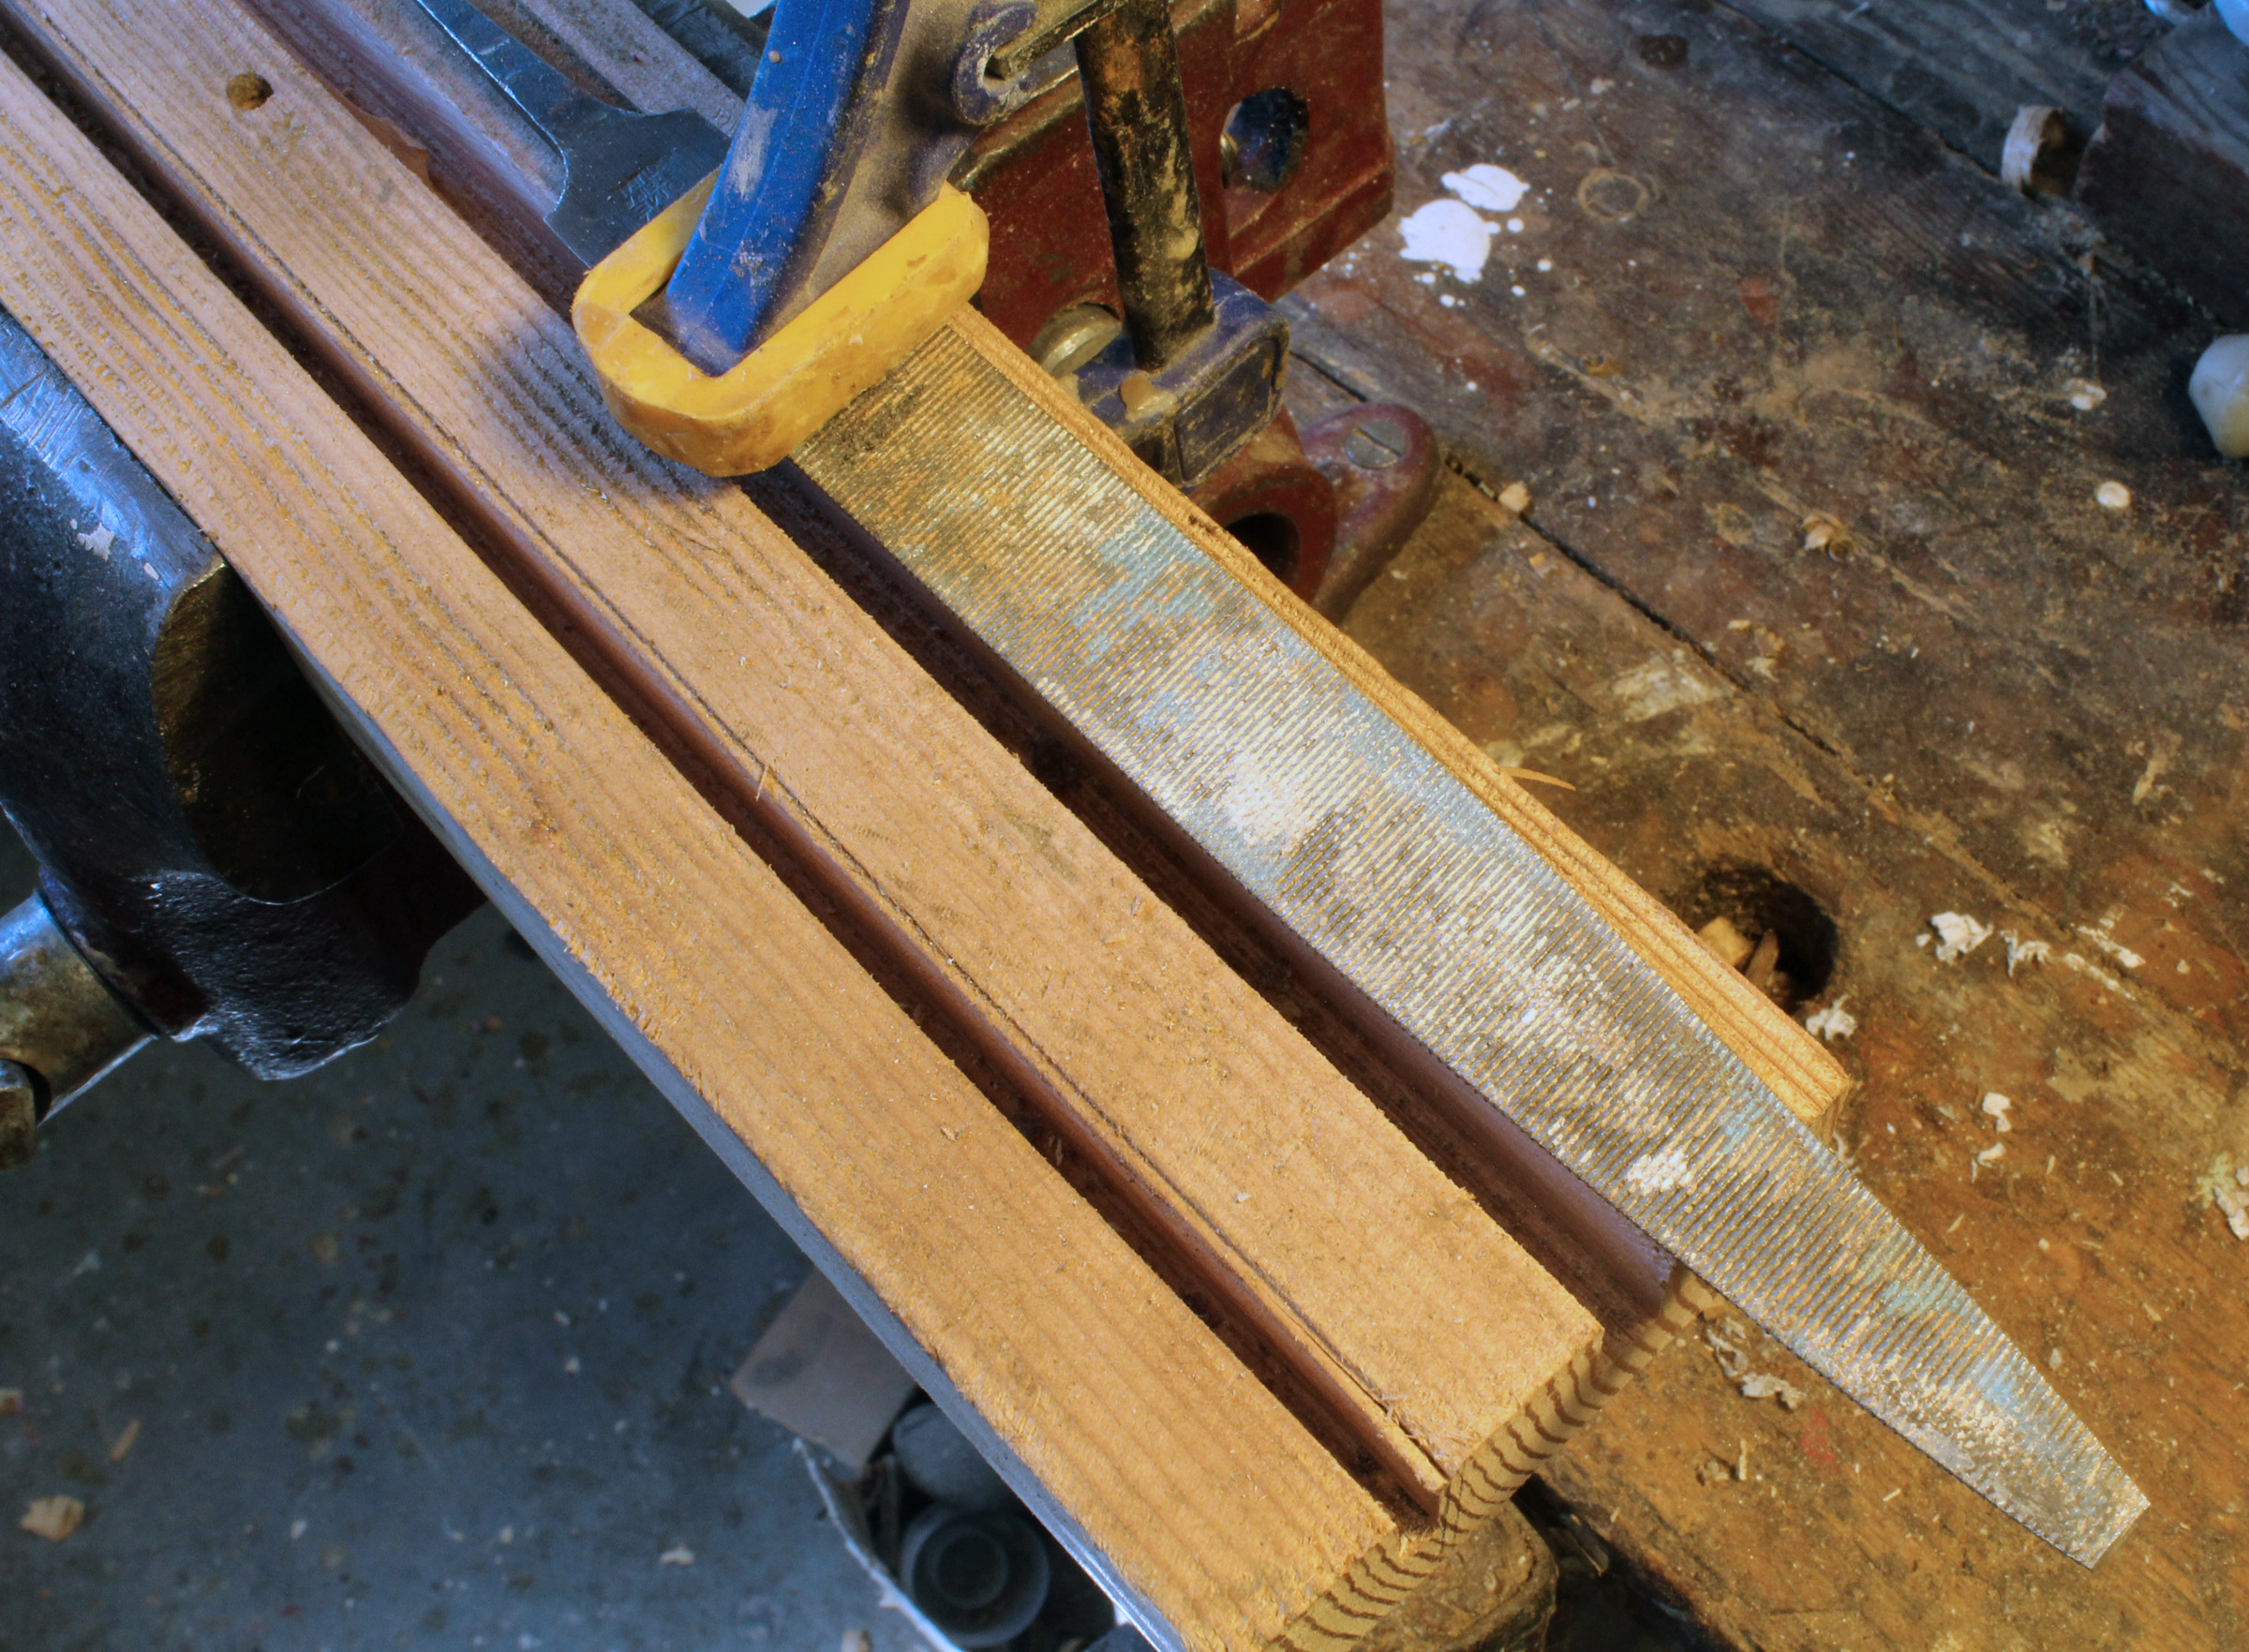
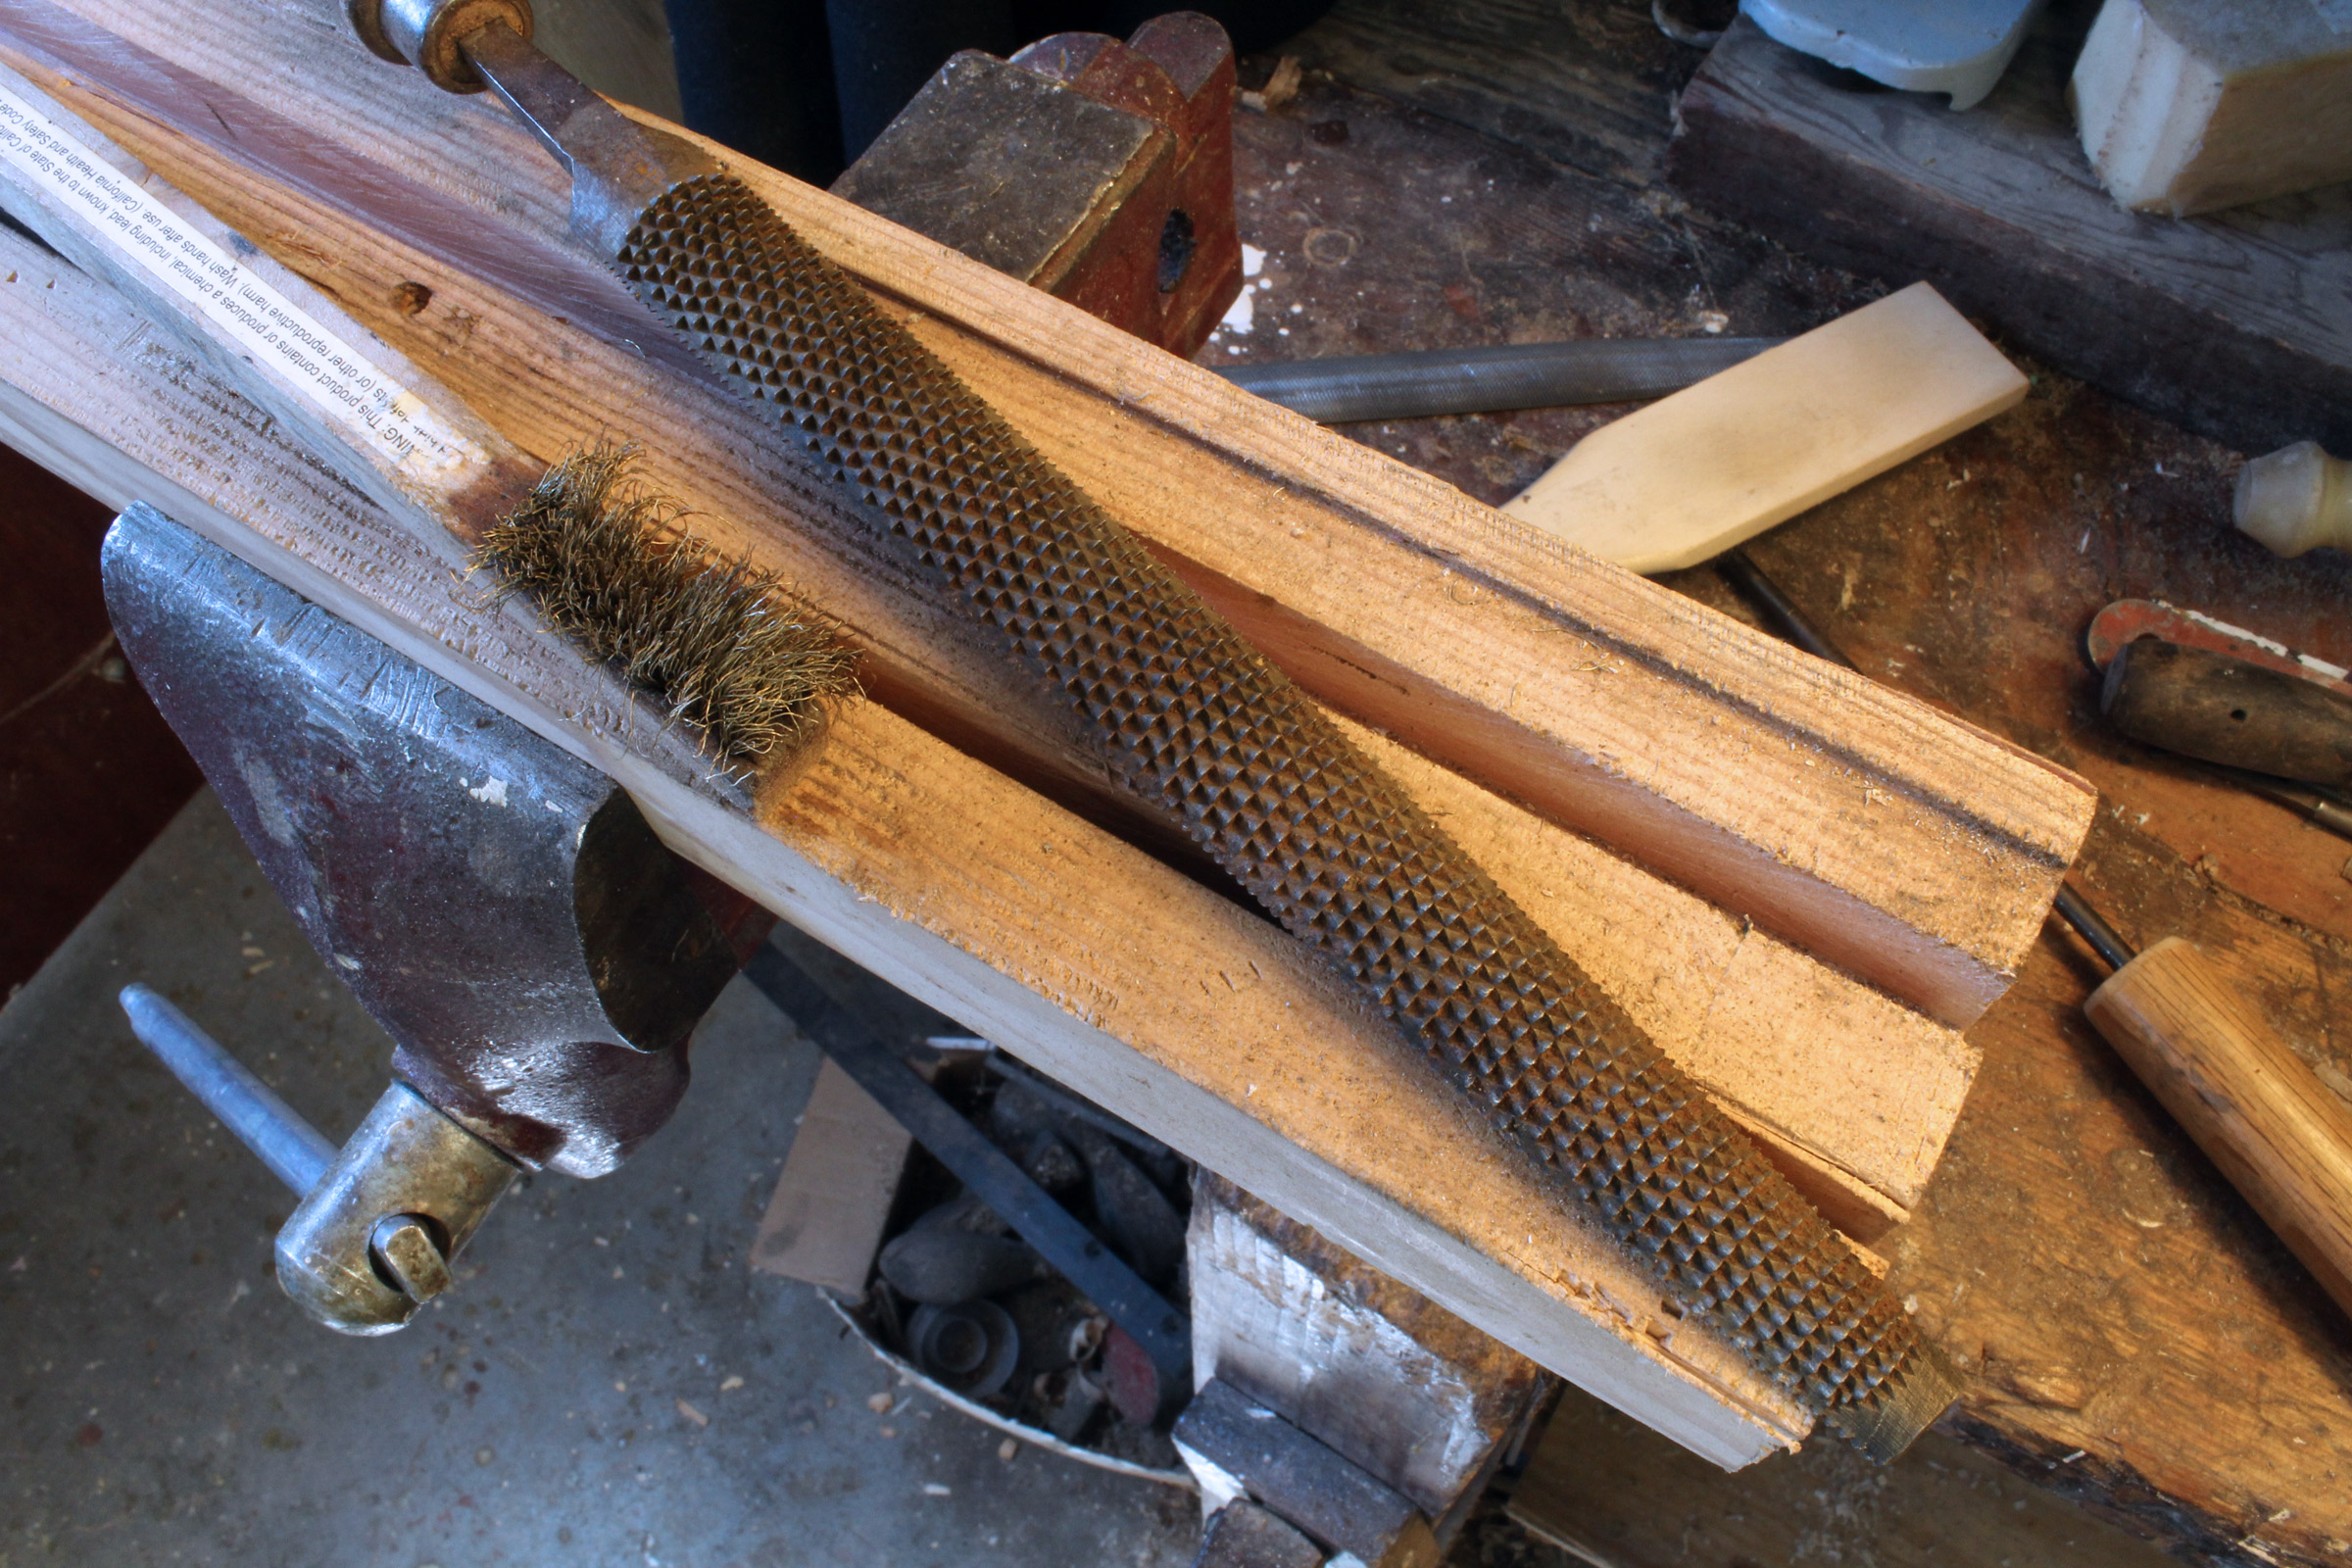
A pistol-grip bar clamp with padded jaws holds the file for cleaning. This file is clogged with paint. Its back is rounded so it covers a bit of the lip on the wood block.
The first step is to scrub the file with a file card. If you don’t have a file card, use a stiff steel-wire brush. Even after a thorough scrubbing, some debris remains.
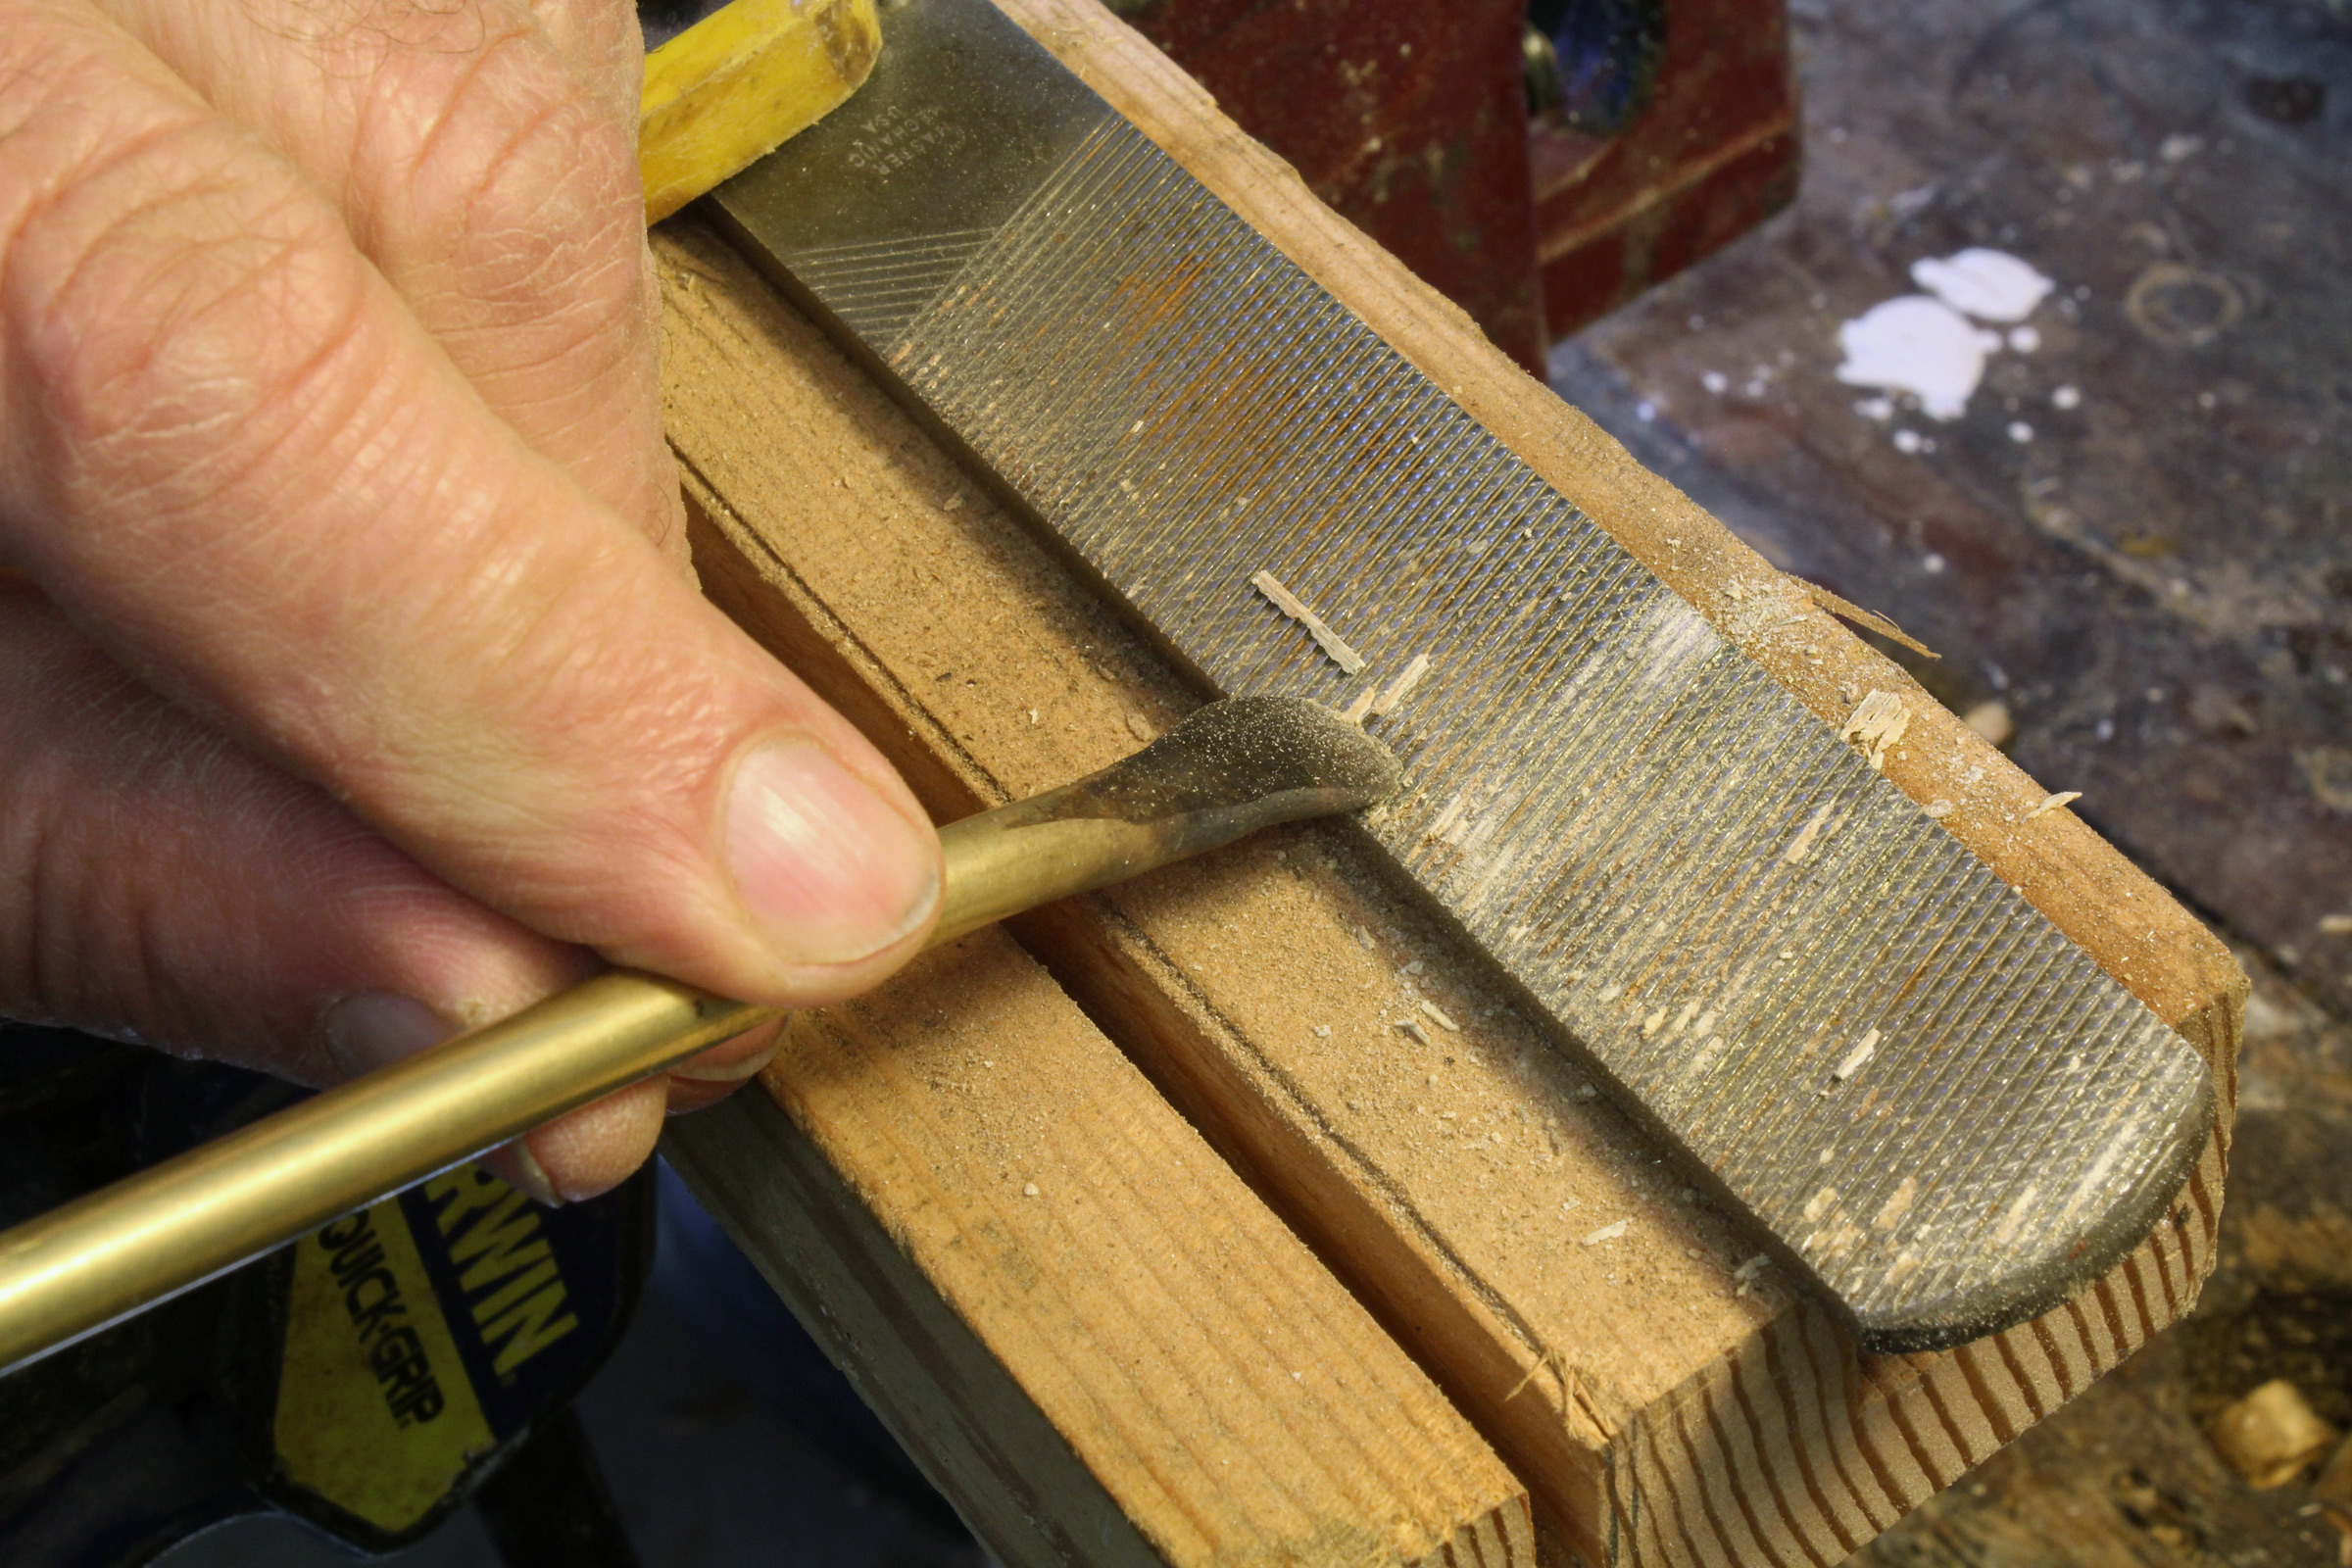
If there is still debris stuck fast in the gullets between teeth—paint, epoxy, and aluminum are my usual culprits—a piece of copper pipe with one end flattened or a piece of brass will dislodge it. Pushed parallel to the file’s teeth, the copper or brass will wear away, creating a saw-tooth-like edge with tips that reach down into the gullets. For very stubborn debris, piece of mild steel, heated and hammered thin and flat, is the most effect cleaning tool I’ve found. I used a piece of 1/4” steel rod; a big ungalvanized nail could work too.
Whatever debris that the file card leaves behind can be forced out by pushing parallel to the grooves with metal softer than the file’s hardened high-carbon steel. Here a flattened brass rod does the work on a 4-in-1 rasp and file.
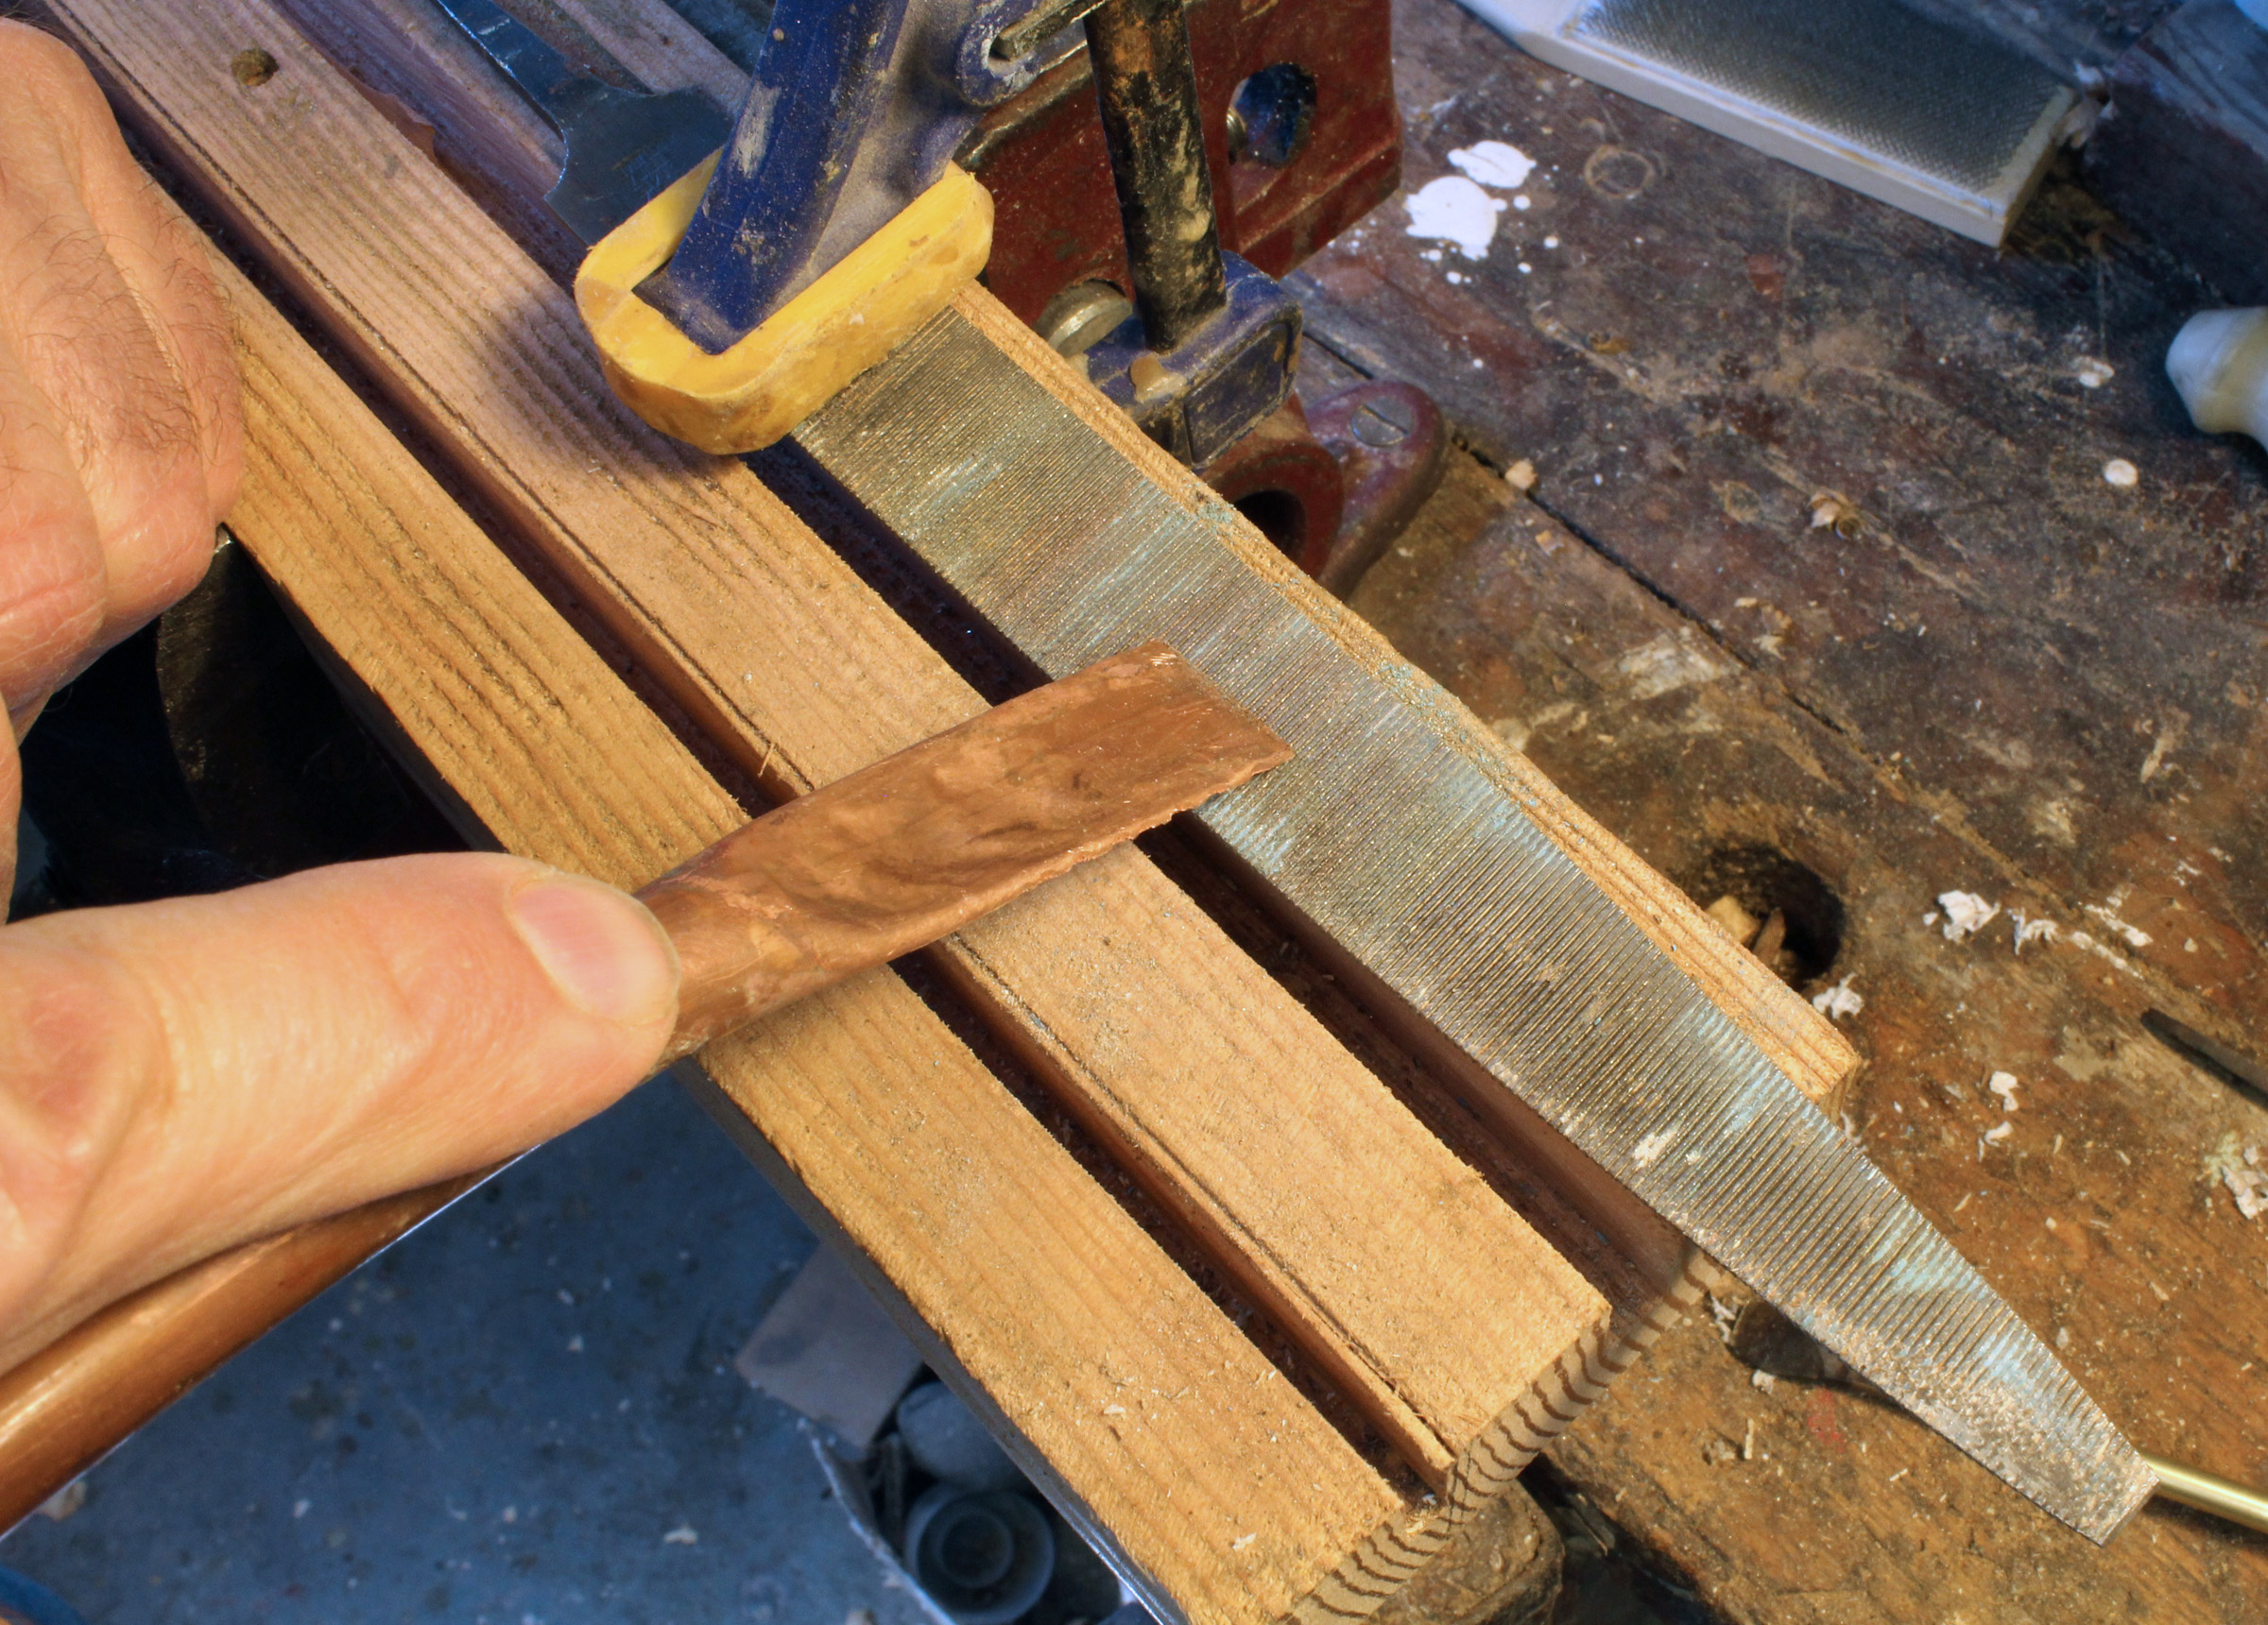
The flattened end of a piece of copper pipe can also work down into the grooves. For stubborn bits of debris, called “pins,” angle the flat edge of copper to apply pressure with one corner.
I made this file cleaner from a length of mild steel 1/4″ rod that I heated to red-hot with a propane torch and hammered flat. Pushing the tip parallel to the file’s grooves quickly creates an edge of teeth that will chisel out debris. The soft steel won’t damage the file. The same grooves develop when using copper and brass to push the pins out.
White vinegar is often recommended as the acid for sharpening files. The type you’ll find for kitchen use is 4-percent acetic acid. There’s also a 6-percent cleaning version that you’d find at the store among household cleaning products. Even the stronger version is very slow at etching a file. I found that after three days it would begin to make slight progress. The sulfuric acid that is available as drain cleaner is much more aggressive and can do the work in about an hour. The Clean Shot Drain Opener I bought at a home improvement store is 93 percent sulfuric acid. It contains “metal inhibitors,” but they clearly don’t prevent the acid from sharpening files. This high concentration of acid makes the product very harmful if it gets on you or almost anything else, so it requires handling with care. I wear glasses, the full face shield I use for lathe work, rubber gloves, and an apron.
This drain opener with 93 percent sulfuric acid, gets diluted with water to a 10-percent solution that can sharpen a file in about an hour. When the acid is poured into water it generates heat, so I prefer to use glass instead of plastic containers that might get softened when warmed. I bought these three glass flower vases at Goodwill for 69 cents apiece. I prefer the vases over glass baking dishes because I can suspend the files and keep the tangs away from the acid and dry for safe handling. The vases also give the acid less surface area to emit vapors and I can clearly see the acid at work. In a baking dish the bubbles would obscure the view through the surface of the liquid. I marked the acid vase with levels for the water (9) and the acid (10) so I could easily make the solution and require I pour the water in first. The other vase gets filled with water and then baking soda is added until no more can be dissolved. The third vase, to far, right is water for rinsing.
The acid is too strong to use undiluted; 10 percent acid/90 percent water is strong enough. Never pour water into acid. It can splatter and raise a little cloud of vapor because of a quick exothermic reaction. You’ll notice that a bottle of sulfuric acid will feel heavy. It is almost twice as heavy per unit of volume than water. When poured into water, the 10-percent solution will noticeably warm up, which is why I prefer glass containers to plastic. Keep away from the vapor rising from it by working outside or wearing a respirator.
Prepare a baking soda solution to neutralize the acid after the file has been etched. Mix baking soda until the water can dissolve no more and soda begins to accumulate at the bottom.
Before you immerse the file, check how sharp it is by pressing a fingertip against the teeth and slide it toward the tang. With a dull file, you’ll feel some resistance but won’t feel the teeth catching the skin.
Submerge the file in the acid solution and give it a gentle swirl to dislodge any air bubbles. The chemical reaction will quickly produce very small bubbles of hydrogen. The acid does the work in about 60 minutes. To check the progress, I remove the file from the acid and rinse it in water. I do the same fingertip test and when I feel the teeth catching, the sharpening is done.
Dipping the file in the baking-soda solution will neutralize the acid. The residual acid on the file will produce a flurry of carbon-dioxide bubbles. Rinse the file with fresh water and dry it with a heat gun, hair drier, or a blast of air from a compressor.
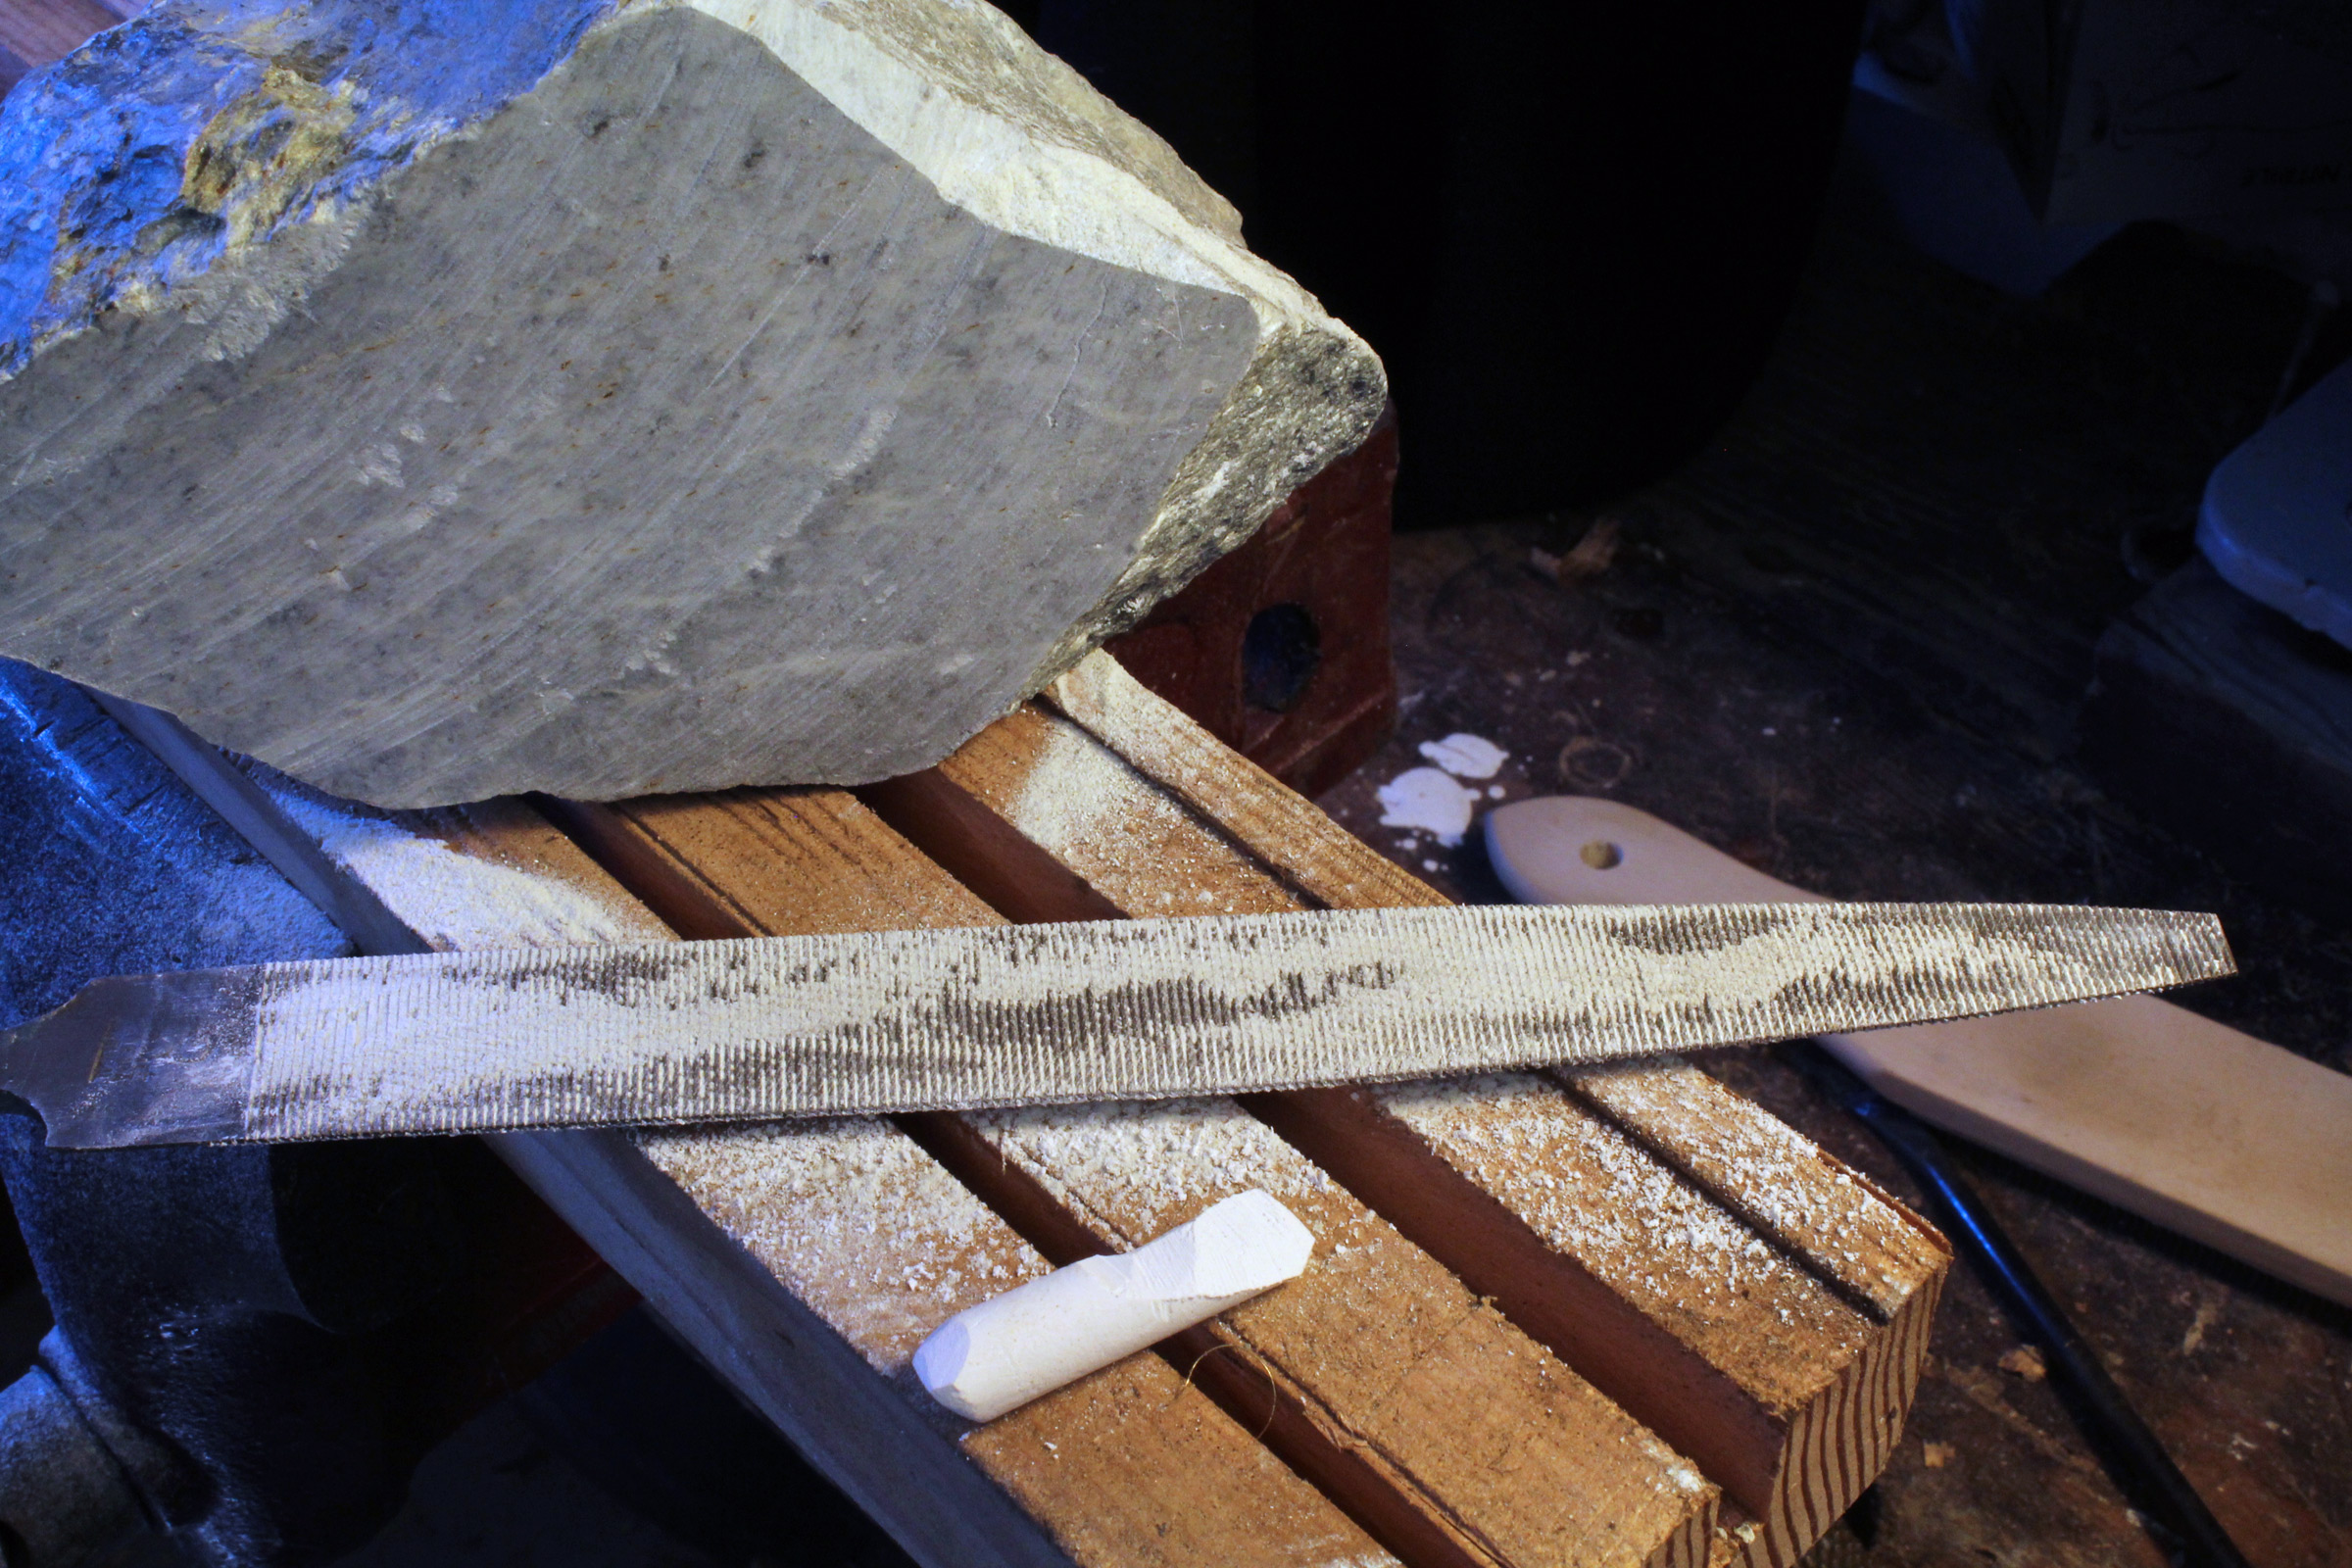
After dipping in acid, baking-soda solution, and water, the file needs to be thoroughly dried to keep from rusting. When the file is dried, rubbing chalk or soapstone on it will absorb any remaining moisture. I lightly brush the excess off with a brass-wire brush. Soapstone, often carried by art-supply stores for carving, is slippery stuff and leaving a thin film on will, for a while at least, prevent clogging when the file is in use.
Some do-it-yourselfers spray a lubricant such as WD-40 on the file to prevent rust, but I find that gets pretty messy and the lubrication might make the teeth slide across the work rather than cut into it. Rubbing chalk or, my preference, soapstone over the teeth will assure the file is dry and won’t rust, and then help prevent clogging when it’s being used.
After rubbing the newly sharpened rasp with soapstone, I use a brass-wire brush to clean up.
To dispose of the sulfuric acid solution, I fill a 5-gallon bucket half-full of water and pour the solution in. Next, I slowly pour the baking-soda solution into the bucket. It creates a lot of froth as carbon dioxide bubbles up from the reaction. The mix is still likely to be acidic, so I sprinkle in baking soda, straight out of the box, until the frothing stops. It can take a whole 1-lb box. At that point, the mix in the bucket is no longer acidic and the remaining by-product of the reaction is a solution of sodium sulfate, a neutral salt. It is safe to pour down the drain—it won’t harm plumbing—and isn’t an environmental hazard. The sodium and sulfate ions in the solution are, according to the source linked above, “ubiquitous in nature.”
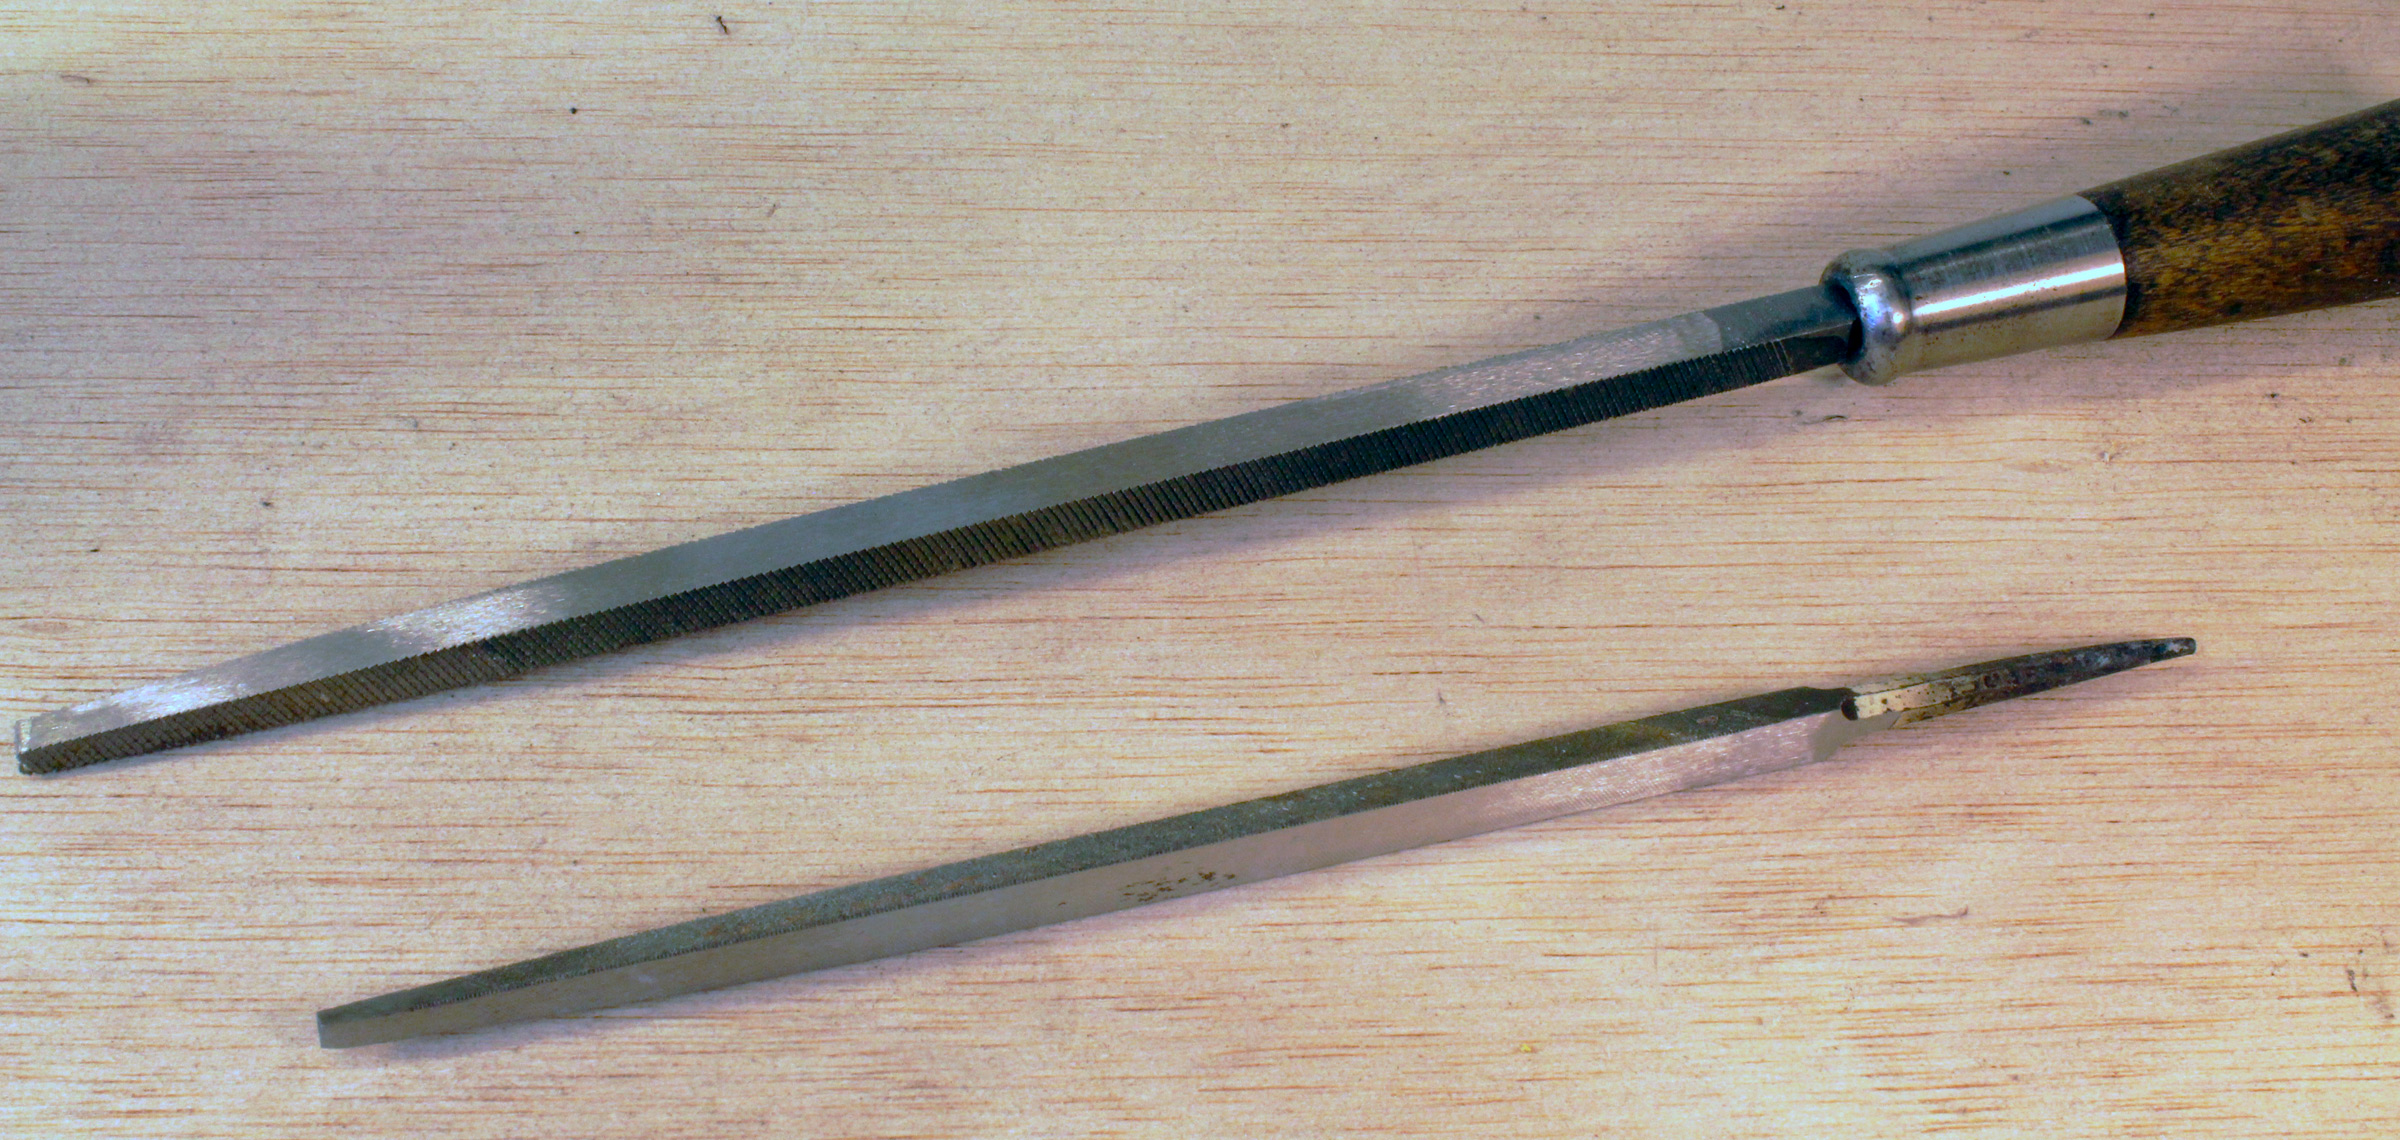
While you’re devoting some attention to sharpening your files, consider grinding the teeth off one side. Some flat files come with toothless safe edges to assure you’re only working one side of an angle. I use square files for cutting through-mortices in the gunwales of Greenland kayaks. With cutting faces on all sides, it’s difficult to tune the corners accurately.
Grinding a safe edge on a file can make it easier to work accurately, working a corner one surface at a time.
By making one face smooth I can concentrate on one mortice surface, knowing the adjoining surface will be unscathed. I remove the teeth with a bench grinder and a 1×30 belt sander/grinder. As an added benefit, the intersection of the safe surface and the cutting surface will cut a sharp, precise corner. The file’s original edge cuts a slightly rounded corner.
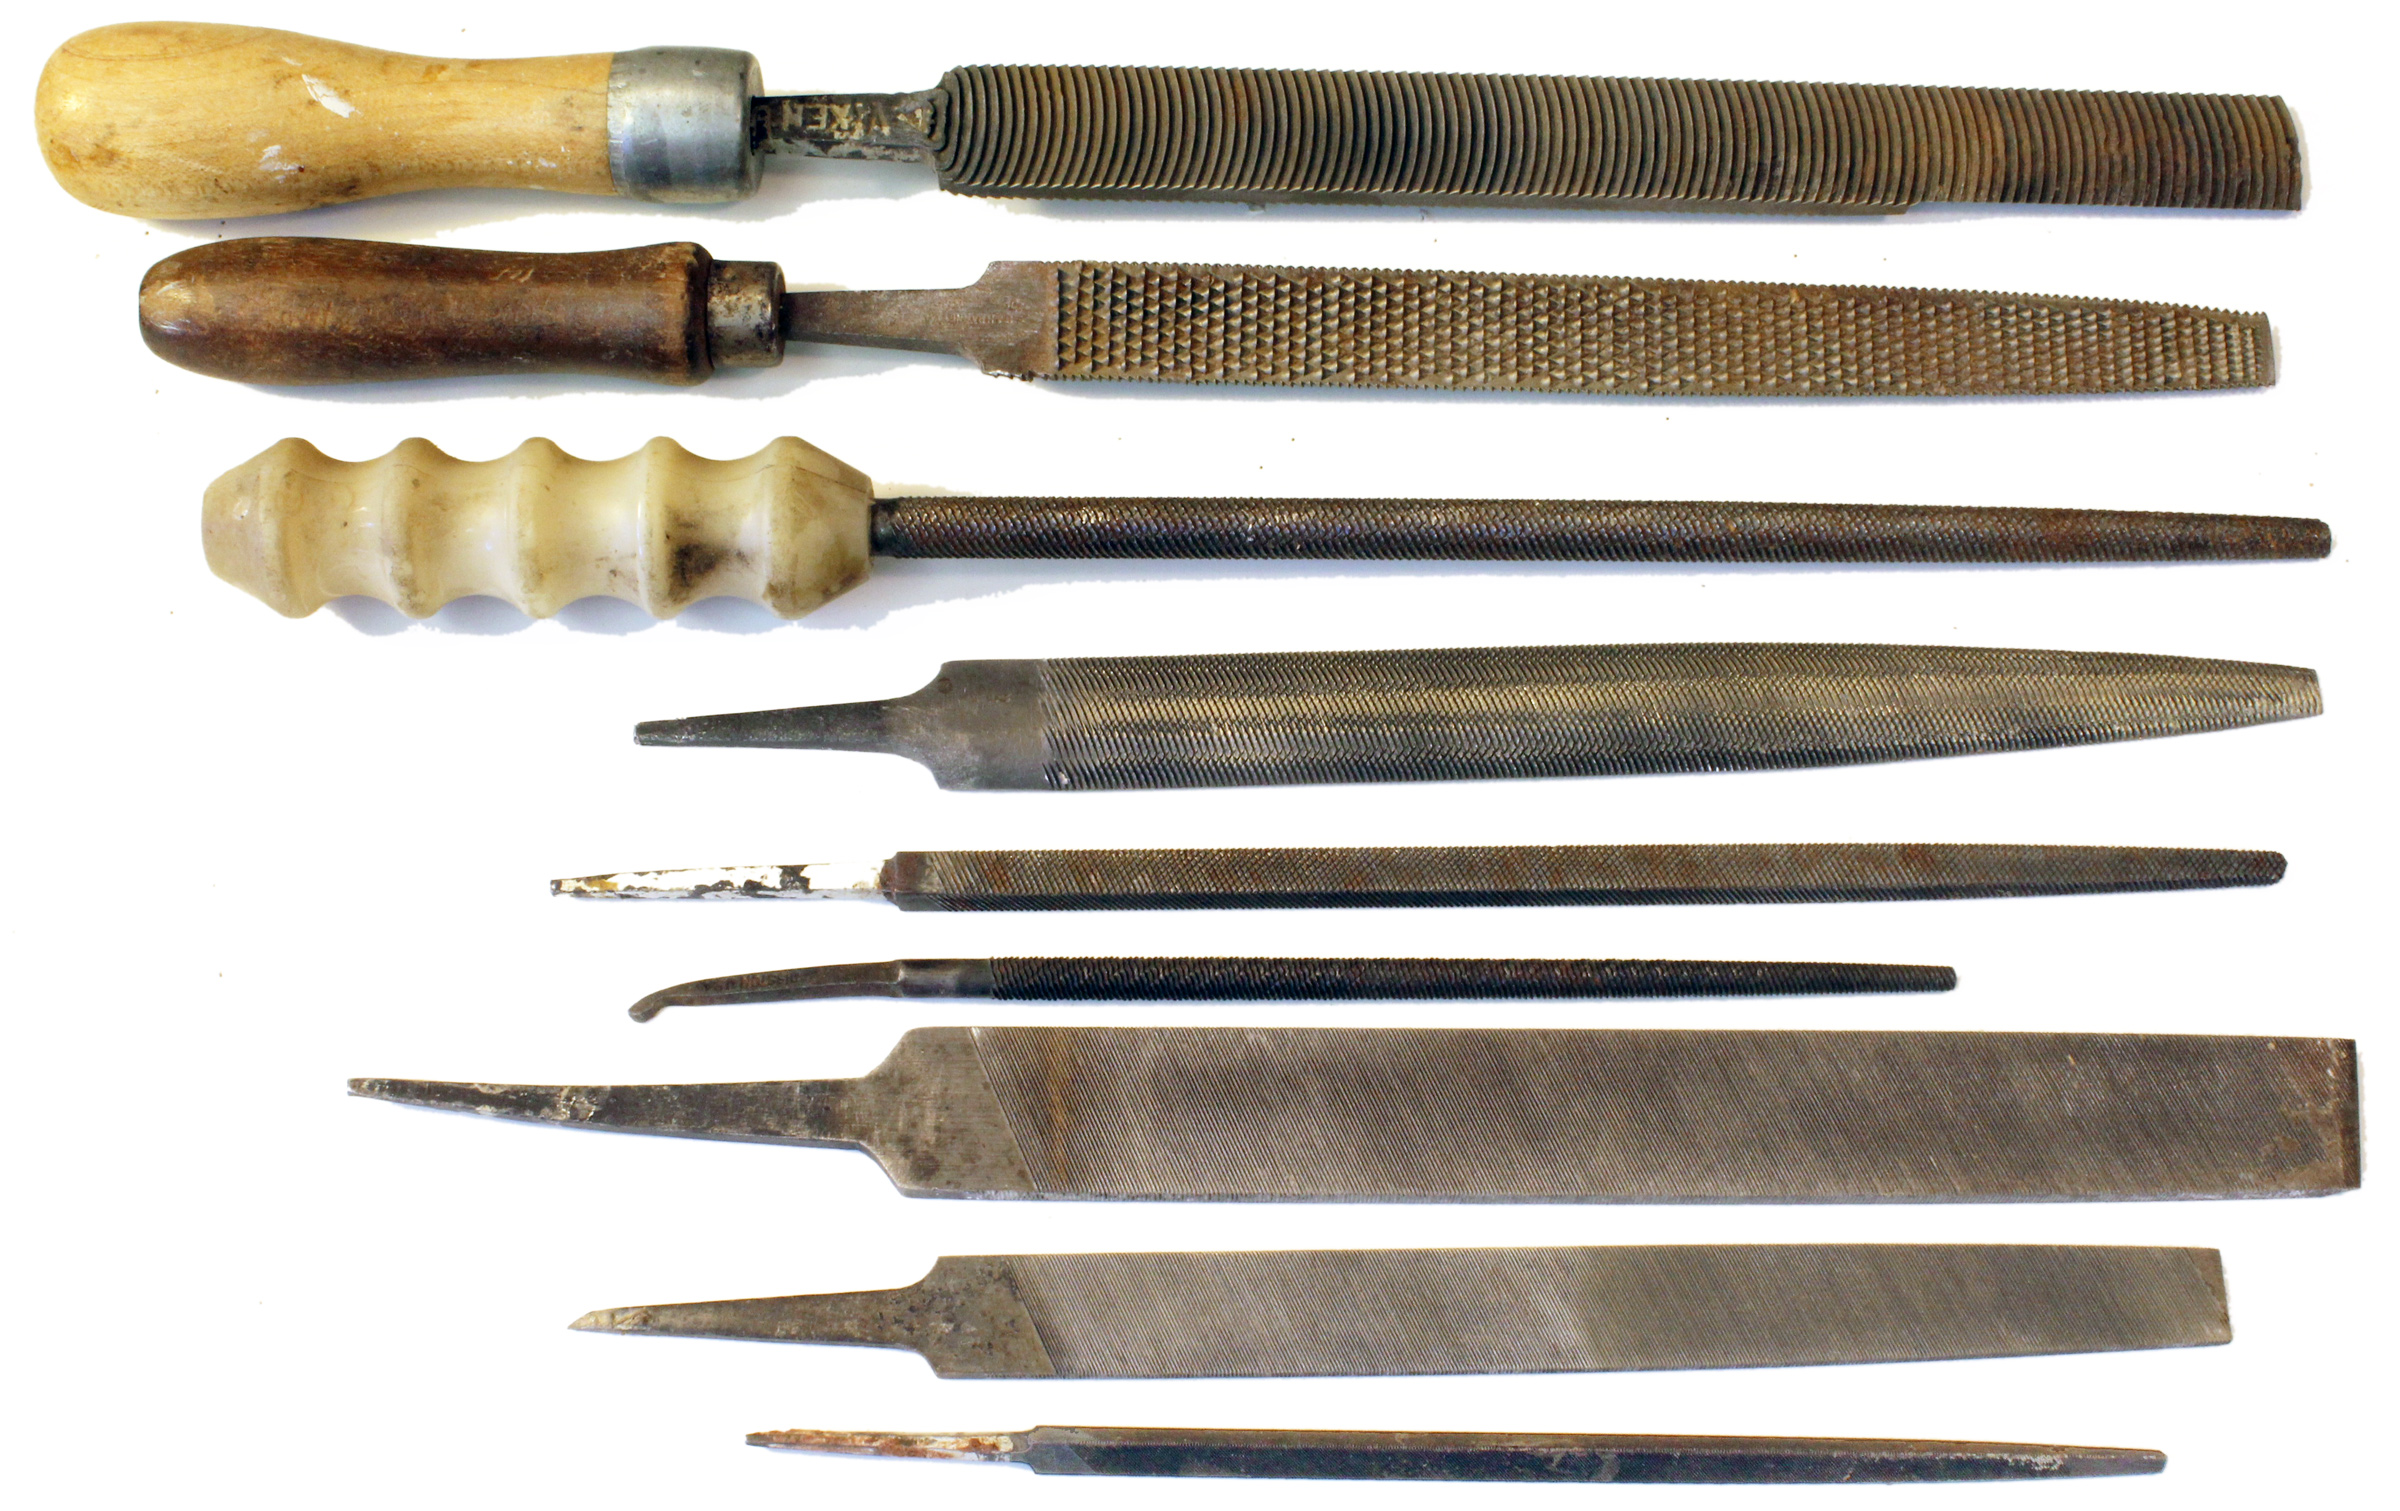
All of these files and rasps got a better bite after a dip in the sulfuric acid solution.
After you’ve sharpened your dull files, treat them with the same care you accord your other cutting tools. Keep them separated from each other instead of tossed together in a drawer.
Christopher Cunningham is editor of Small Boats Monthly.
You can share your tips and tricks of the trade with other Small Boats Monthly readers by sending us an email.
Continue Reading - Enter your email to log in or subscribe
New to Small Boats? Create a free account to get our weekly emails and two free articles each month.
Time to upgrade!
You've read all of your free content for the month. Upgrade to a paid subscription for unlimited access.
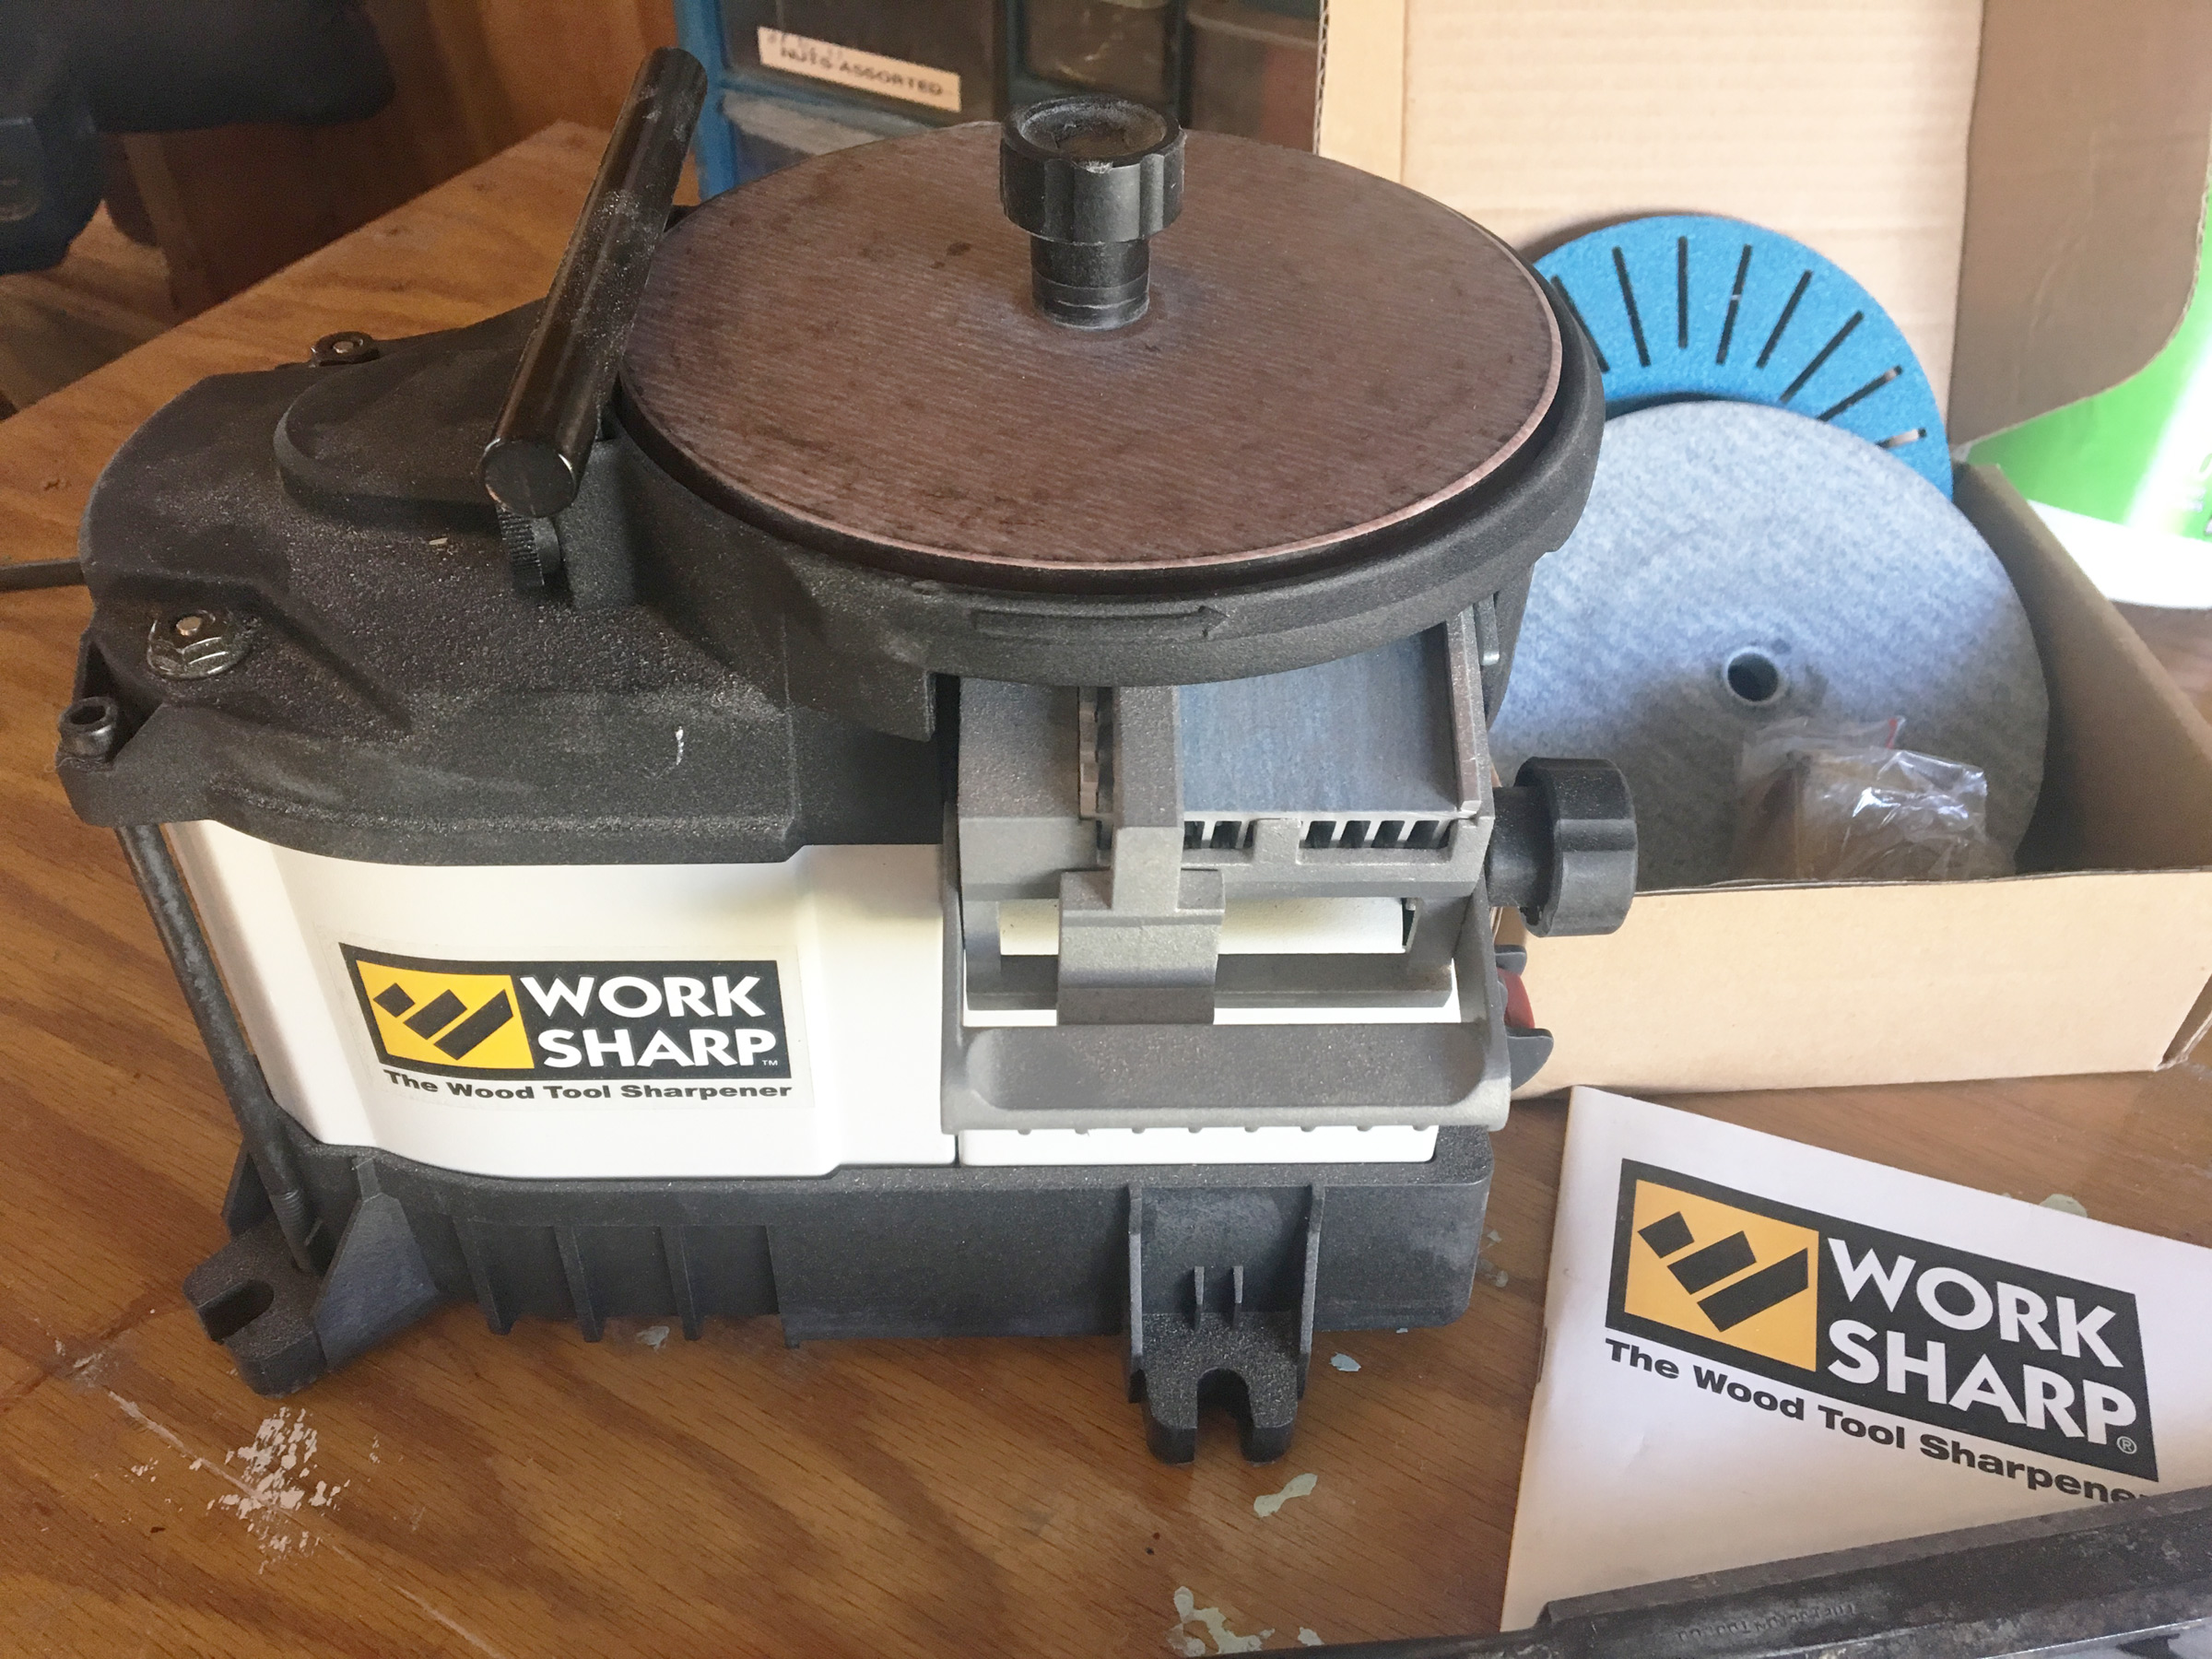 Photo and video by the author