dory Archives | Small Boats

Albion Pacific Power Dory

Lying in a hospital bed in 2014 after a short illness, I decided it was time to tackle one of my lifelong dreams, building my first-ever boat—from scratch. Since our boating consists of leisurely trips on lakes and rivers, I wanted plans for an open cockpit design with space for four deck chairs. After a lot of research, the Albion seemed to be the answer. Along with the plans I ordered, Spira included his 50-page Illustrated Guide to Building a Spira International Ply-On-Frame Boat. His website has an extensive collection of photos, blogs, and videos for ideas. One builder had even contributed a very helpful series of videos of his Albion build to the Spira website.

I started working on the boat in February 2015. To make sure the Albion would provide us with enough room, I drew a chalk outline of the boat on the garage floor. After I put four deck chairs on the area we’d have in the cockpit, I realized I needed an extra foot of deck space to be able to space the chairs comfortably. I contacted Jeff and he was completely amenable to this change—he notes that most of his designs can be stretched by 10 percent without having much effect on performance or cost—and worked out a new plan for the placement of the frames, adding a bit more than 1” to the span between each to add 1’ to the length.

The plans recommend using “standard dimensional lumber” for the frames, but I decided to use clear Douglas-fir from a specialty lumberyard in our town. I thought the straight, uniform grain would be easier to work and that the fir would be less prone to rot than some of the species sold as common lumber. The frames are 2x4s and the decking beams 1x4s.

I was able to find a 22′-long, knot-free 2×8 at the same lumberyard, perfect for the 20′-long piece needed for the keelson. This saved having to scarf two shorter pieces together. A Douglas-fir board this length was an amazing find for an East Coast lumberyard!

I used top-grade Douglas-fir plywood: 5/8″ for the bottom, 1/2″ for the sides, 5/8″ for the transom, and 1/2″ for the foredeck I added to the otherwise open cockpit. I built the strongback out of wood I had in my shop, and put wheels on it so that I could move it inside or out.

The boat can be built without lofting, so, using the measured drawings/offsets in the plans, I made full-sized templates on kraft paper for each of the 11 frames and the transom frame. The plans stress that the accuracy of each frame is the most crucial aspect of the build, and I wanted to be sure that I got it right, so I precisely lined up the frame pieces on the templates when drilling the holes for the bolts that hold the pieces together.

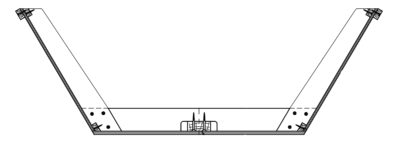
When building the transom frame, I missed the note on the plans that for a standard-shaft motor, the motor bracket frame member should be 5″ lower on the transom frame. Because of this error, I bought a long-shaft, 60-hp Mercury outboard, the smallest long-shaft motor Mercury makes. I originally wanted to buy a motor in the 30–35 hp range.

The frame is made up of common construction lumber: 2x4s for the frames, a 2x8 for the keelson, and 1x4s for the sheer clamps and chine logs.photographs by the authors

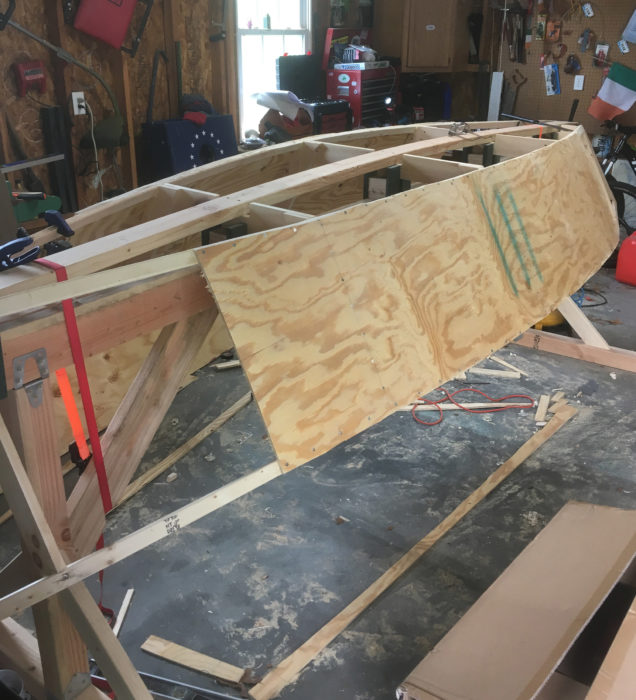
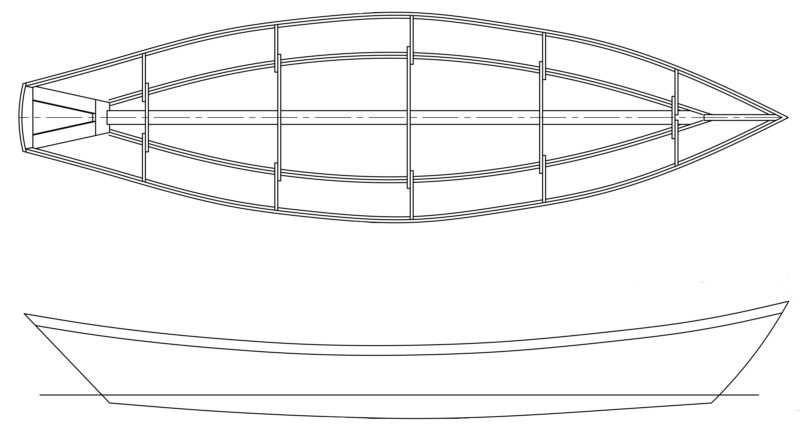
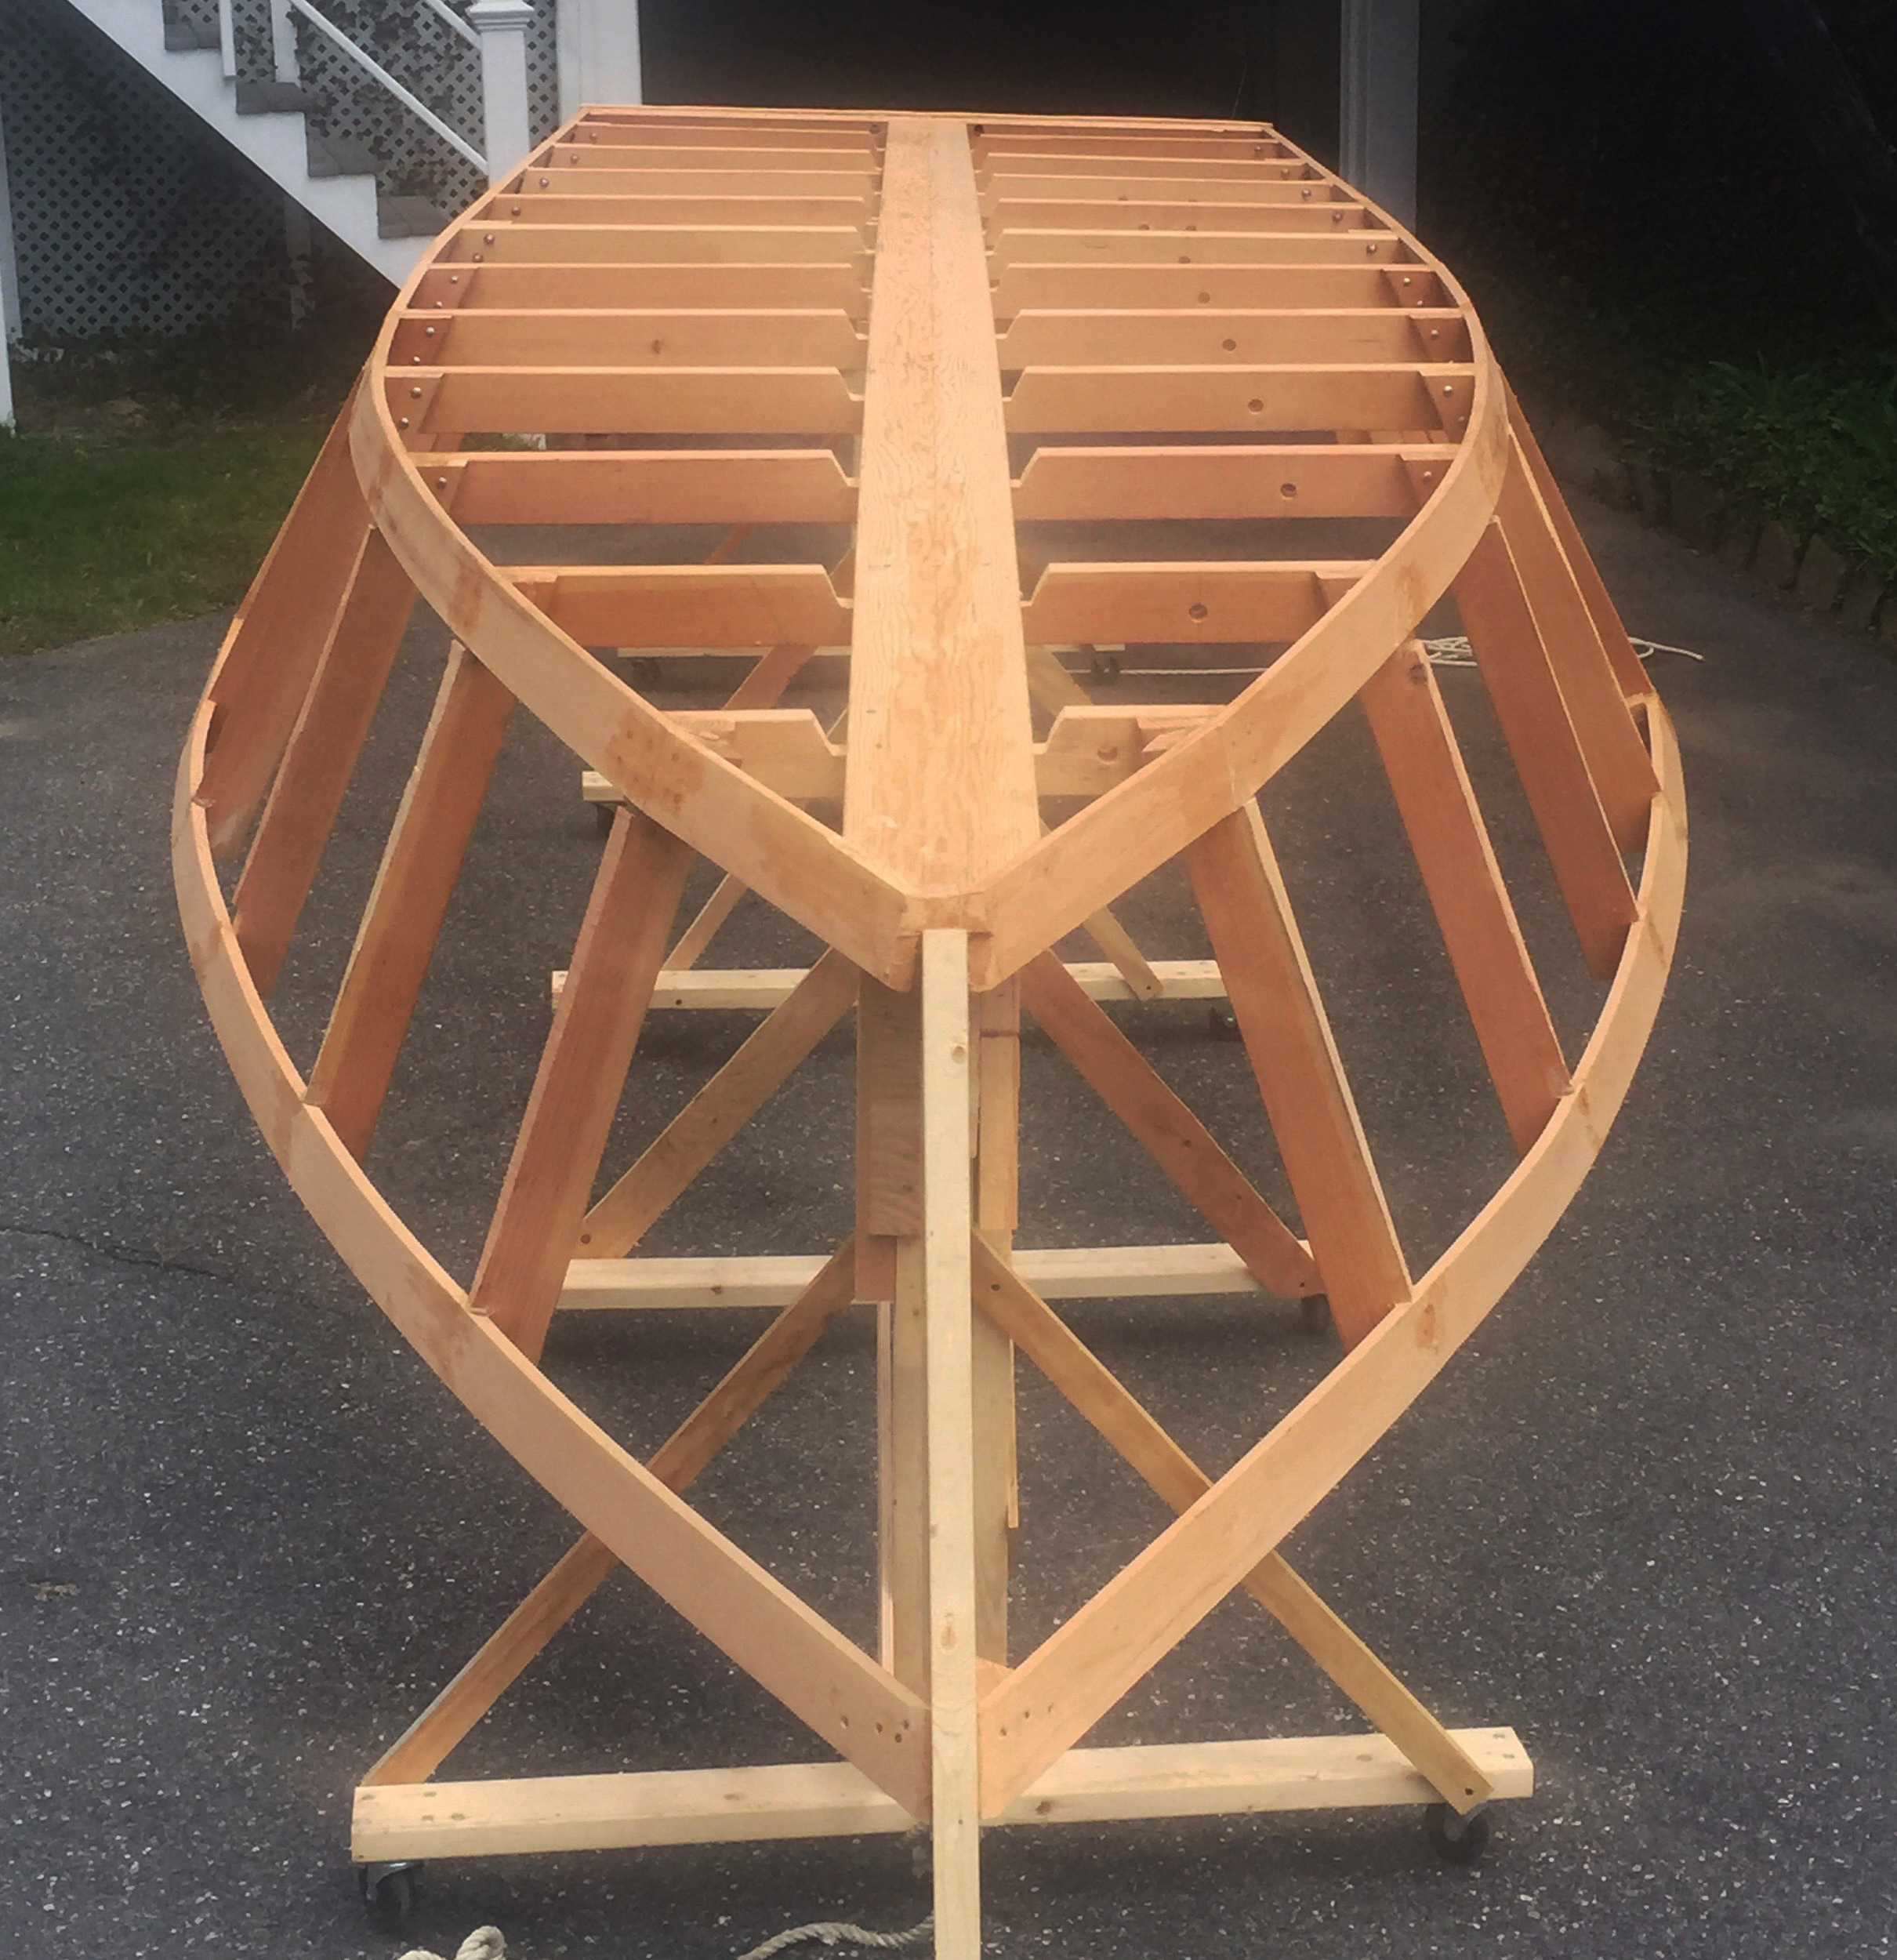
The framework is made up of common construction lumber: 2x4s for the frames, a 2×8 for the keelson, and 1x4s for the sheer clamps and chine logs.

Hull assembly begins when the frames and transom are placed in position on the strongback. The longitudinals—keelson, chine logs, and sheer clamps—make the structure rigid enough for the plywood to be bent over the frames.

The forward end of the keelson has to be bent to bring it to the attachment at the stem. I didn’t have a steambox, so I wrapped the keelson with towels and poured boiling water on the bundle several times, then slowly pulled the keelson down to meet the stem.

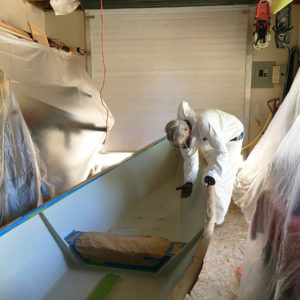
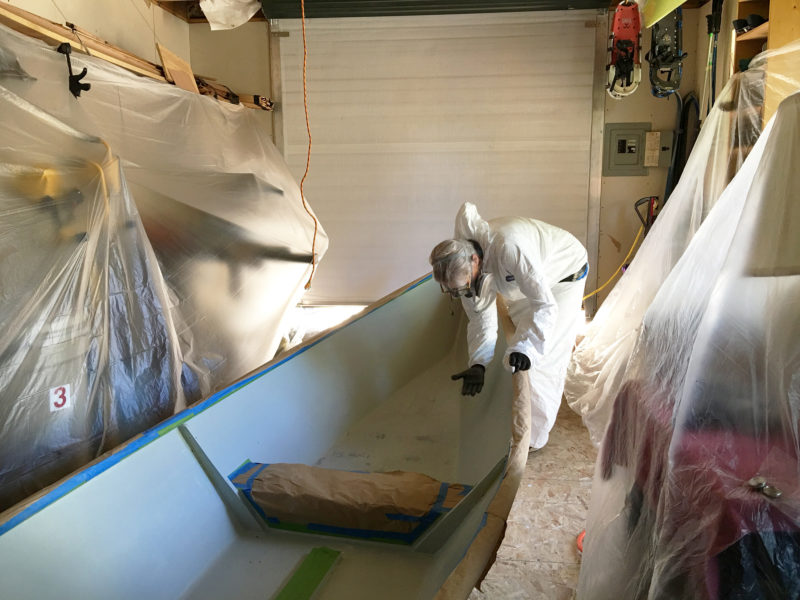
The plywood panels for the sides are bent around the framework first; the chines, sheer clamps, transom, and stem give them their shape. The bottom follows. The panels for the sides and bottom are butted together to achieve the full length and the seams are later reinforced with plywood backing plates, secured with screws and epoxy. After the plywood bottom and sides are screwed and epoxied to the frames, two layers of 6-oz fiberglass cloth, saturated with epoxy, cover the entire hull. The plans called for sanding the second layer of fiberglass cloth smooth, but I had a person from the local auto body shop apply an epoxy coating to the bottom. This made the bottom smooth without sanding, and I felt this would be a more durable finish. I then painted the bottom with two coats of George Kirby marine paint which includes UV inhibitors.

I added a 2×2 PVC keel, 16′ from the stern forward. The plans did not call for this, but I grew up rowing flat-bottomed boats and found that those with small keels seemed to track better.

At this point, the hull was ready to be turned over for placement on the trailer. My friends and neighbors helped, with excellent advice from a video on the Spira website, to gently roll the boat over with the aid of ropes and my tractor.

I followed the plans for forming the sides to the stem. Then I screwed on a stainless-steel bow plate that I had fabricated and polished. This was both for aesthetics and to add protection to the bow; I got the idea from the old inboard lake boats of the ’40s.

I was on my own for outfitting the interior. Jeff had learned that each builder inevitably has their own ideas for the interior, and so the handbook he provides with the plans simply states, “There are infinite possibilities, so have at it and enjoy,” and that is exactly what I did.

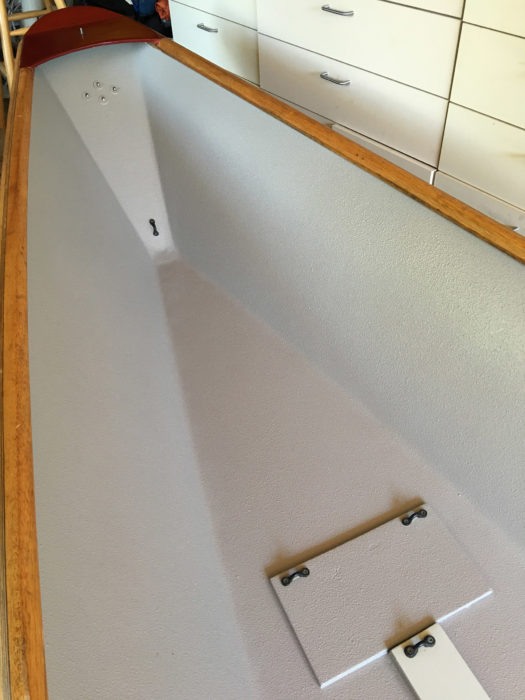
The drawings indicate optional caprails that cover the frame heads, sheerstrake edges, and outwales, but I extended those caps to 8” wide, allowing us to sit on them and swing our legs over the side to board and deboard the boat when it’s nosed up on the beach. As an added bonus, the side decks provide seating all along the sides of the boat. The canvas gunwale guard I installed along the sheer is easy on the legs when stepping over the side and protects other boats we may come alongside.

The plans leave the interior design to the builder. The off-center console offers easy passage from bow to stern; the carpeted area forward has enough room for four folding chairs.

The plans leave designing the interior up to the builder. This off-center console offers easy passage from bow to stern; the carpeted area forward has enough room for four folding chairs.

The side decks curve into a 2′-long foredeck that creates space for locker in the bow section to store life jackets, cushions, and other gear. The compartment also includes an area for stowing the anchor rode, and I mounted a roller on the bow, allowing the anchor rode to go into a pipe and feed into the locker below. The foredeck also provides a safe platform while handling the anchor at the bow.

Jeff calculated the weight of the Albion hull to be 980 lbs; the decks, floorboards, and console I added brought my boat in at 1,420 lbs, and 1,680 with the motor installed. With the maximum displacement listed at 4,800 lbs, there was plenty of capacity left for crew and cargo.

I applied one coat of clear epoxy to the interior sides and two coats to the bilge area. I hired a professional painter to spray the interior sides with Raptor’s tan pickup-truck bed liner, which contains UV protection. This completely covered and sealed the wood, giving a nicely textured finish while concealing imperfections.

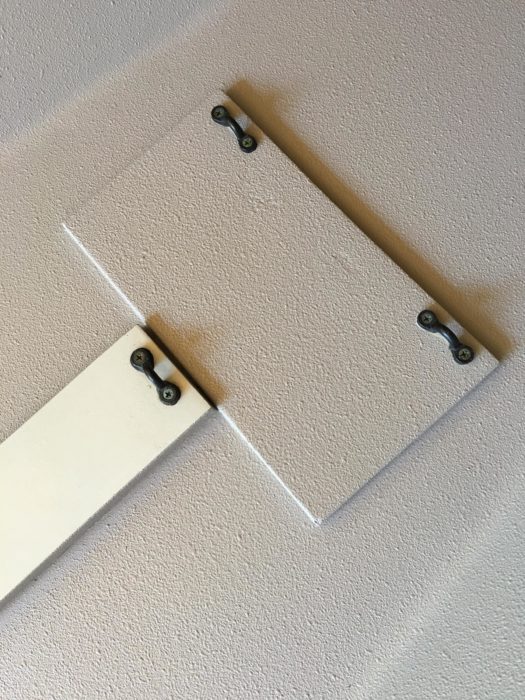
The plan suggested 1x2s for an optional cockpit sole; I chose to use 1×4 Douglas-fir to make six removable panels for bilge access. I coated those with Penofin Oil Finish, then assembled the panels and installed both those and some permanent floorboards.

The plans leave the accommodations up to the builder. Albions have been built with consoles, tiller-operated outboards, and even cabins.

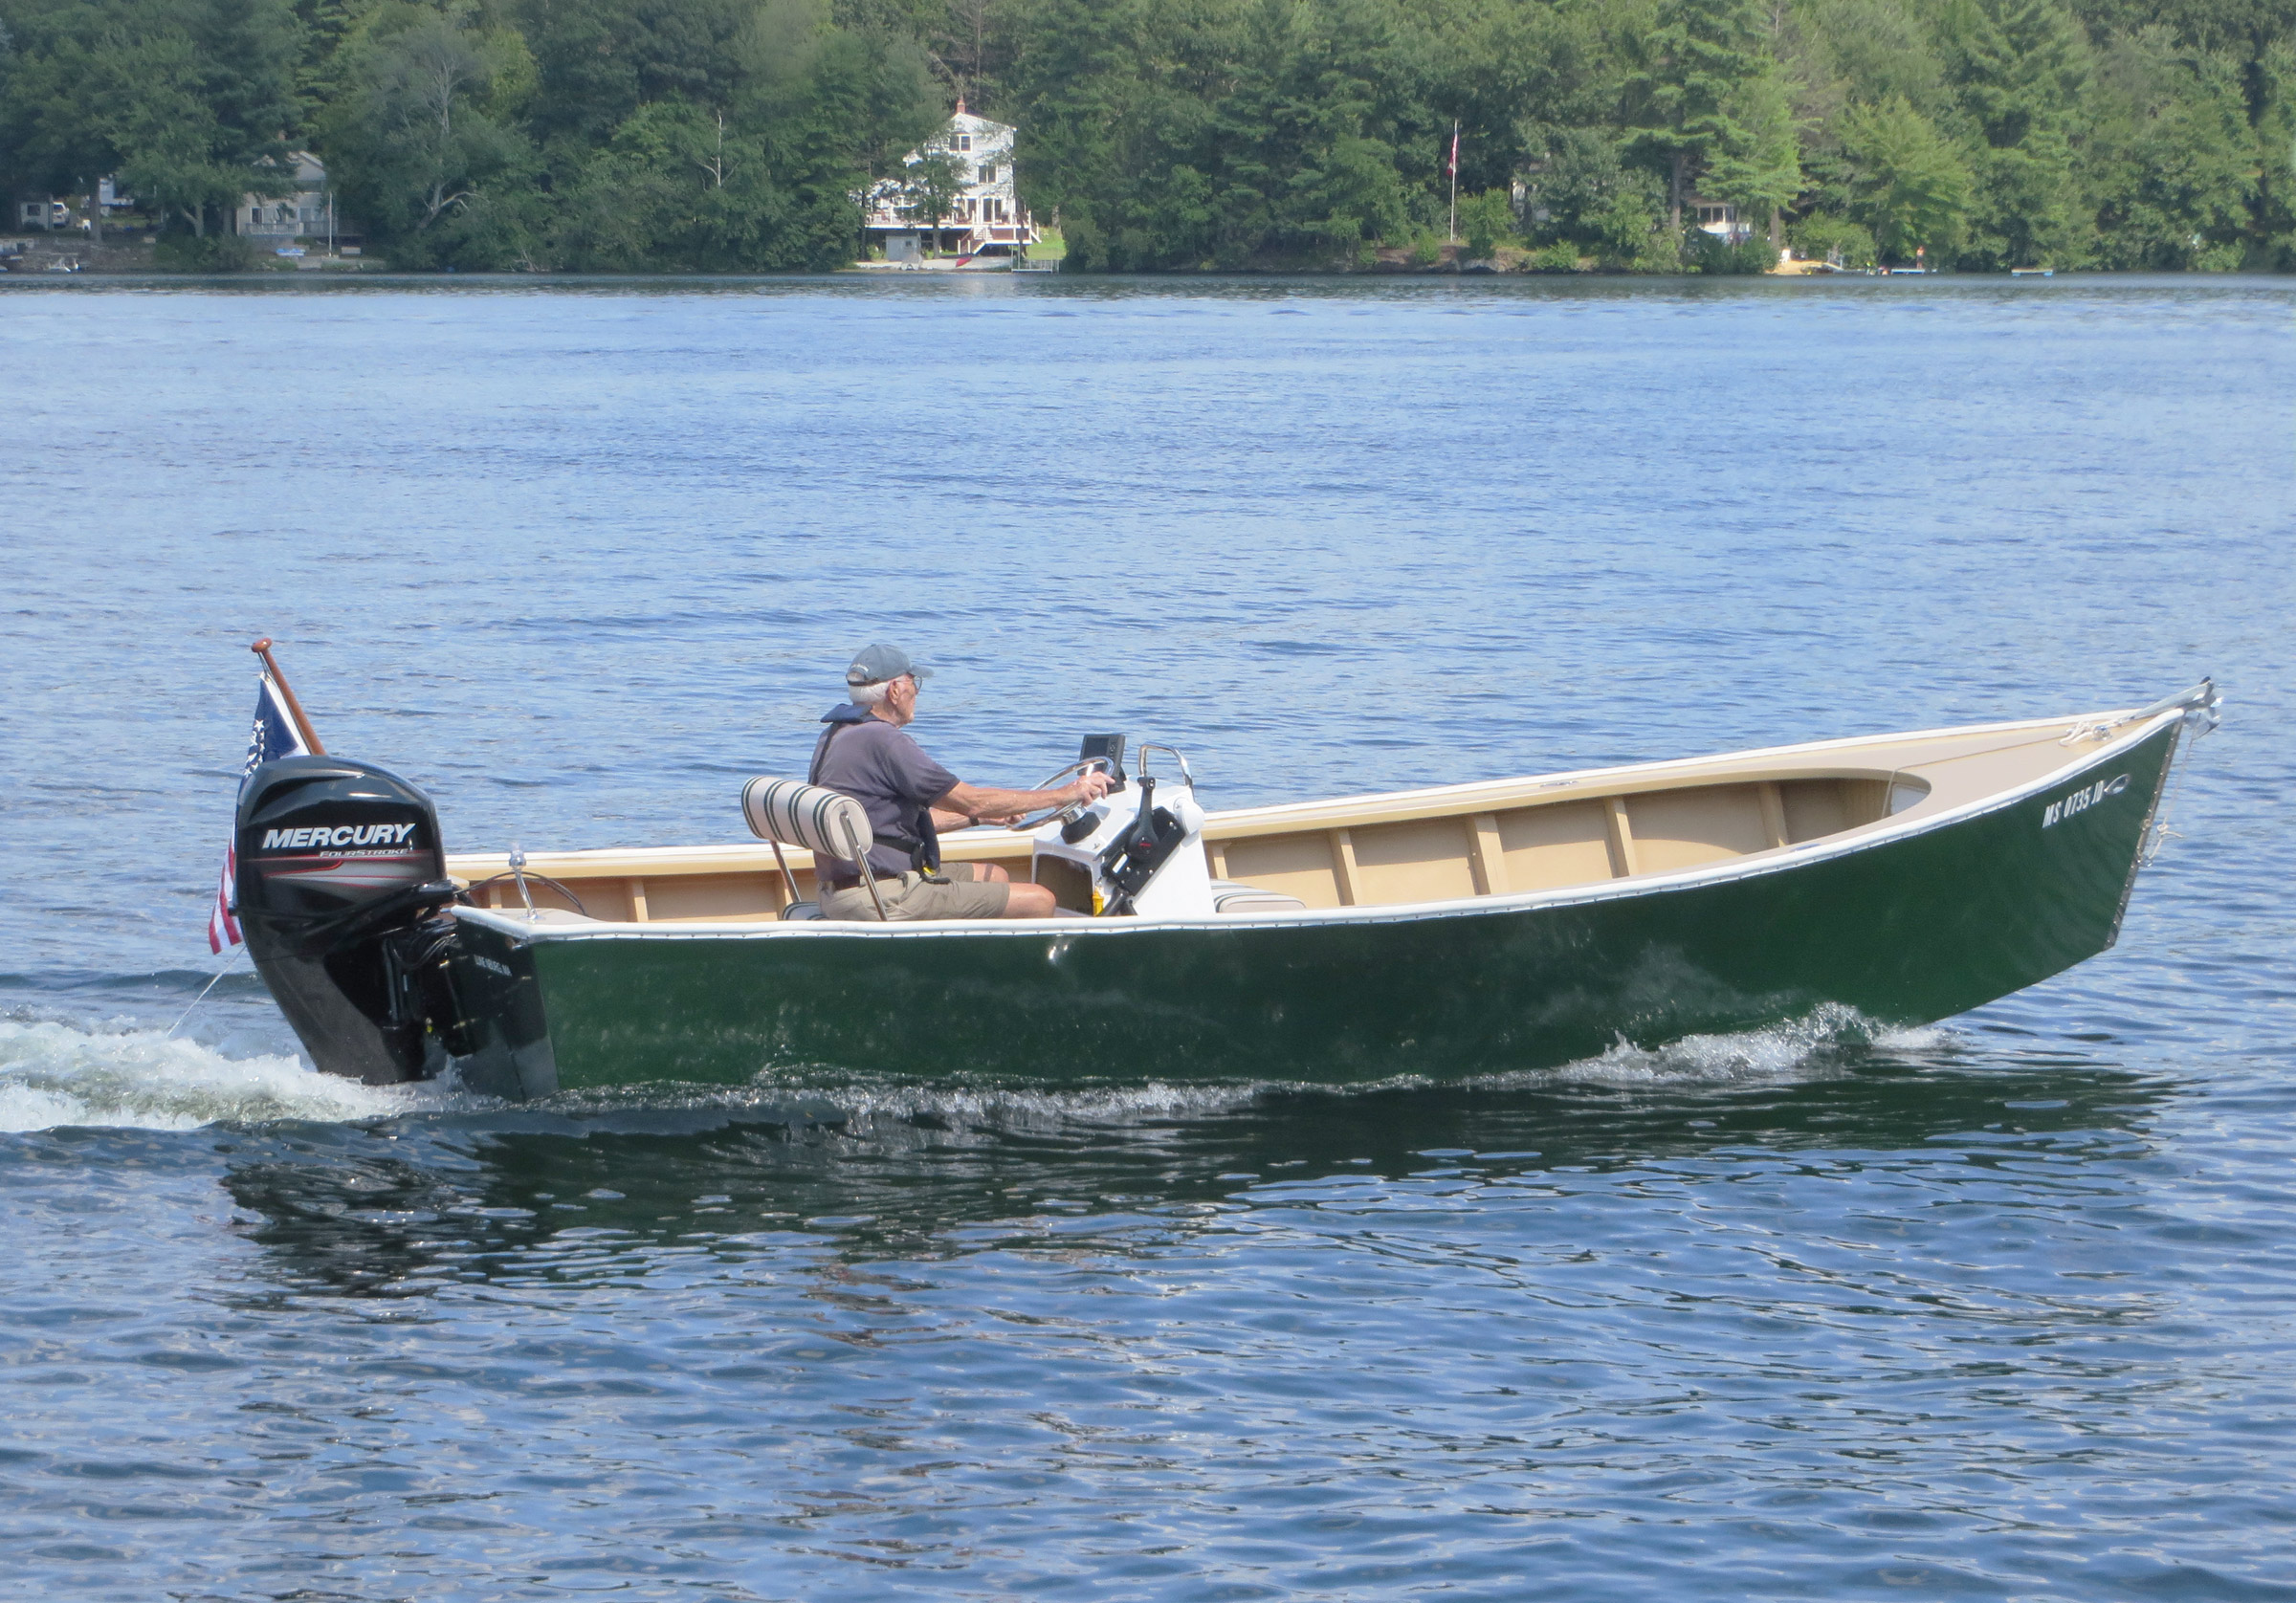
The broad buoyant stern can easily support the weight of a 50-hp outboard.

I purchased a prebuilt fiberglass center console into which I installed the steering controls, electric control panel, horn, and GPS. To make the wiring as invisible as possible, I ran all the wiring and motor controls under the side decks and into the console. Wires for the running lights run through a PVC pipe under the deck then up inside the console.

Finally, I hired someone to apply an epoxy coating to the hull and deck, then primed and painted them with the same marine paint as was used for the bottom.

The Albion's broad stern can easily support the weight of a 50-hp outboard.

This 60-hp outboard can get the Albion moving at 29 mph.


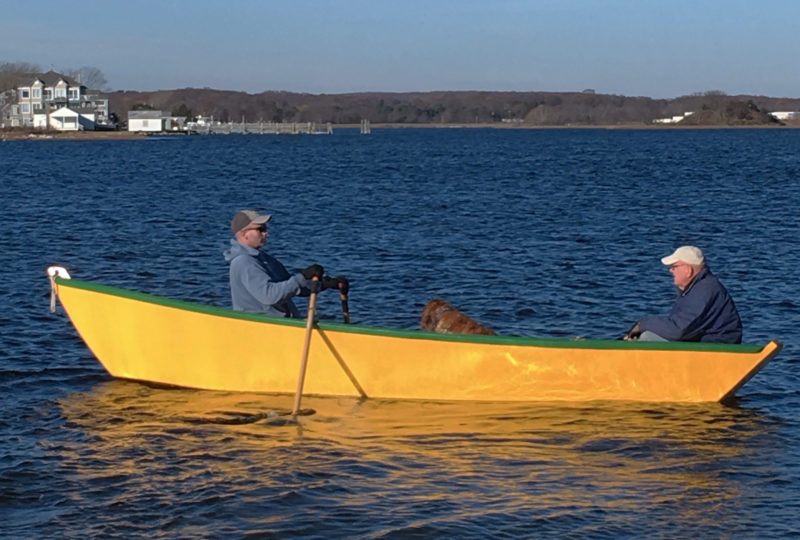
My trials in a local lake proved that the boat trailered, launched, and performed remarkably well. The bottom is 5′ 9-1/8” at its widest point, and because of the narrow beam at the waterline, I feared the boat would be rocky, but was pleasantly surprised by its stability. Having the helm 13-1/2′ from the bow on a 20′ boat and off-center does not seem to hurt the performance or the balance. Even with the added foredeck and side decks, the cockpit is still quite open and we are able to move around freely with no obstacles or wires and cables to trip over (most important at our age!).

Forward of the helm, there is ample space for four people to sit comfortably in folding chairs, my main purpose for building this boat.

Coming up on plane, the bow stays low and doesn't obscure the view forward.

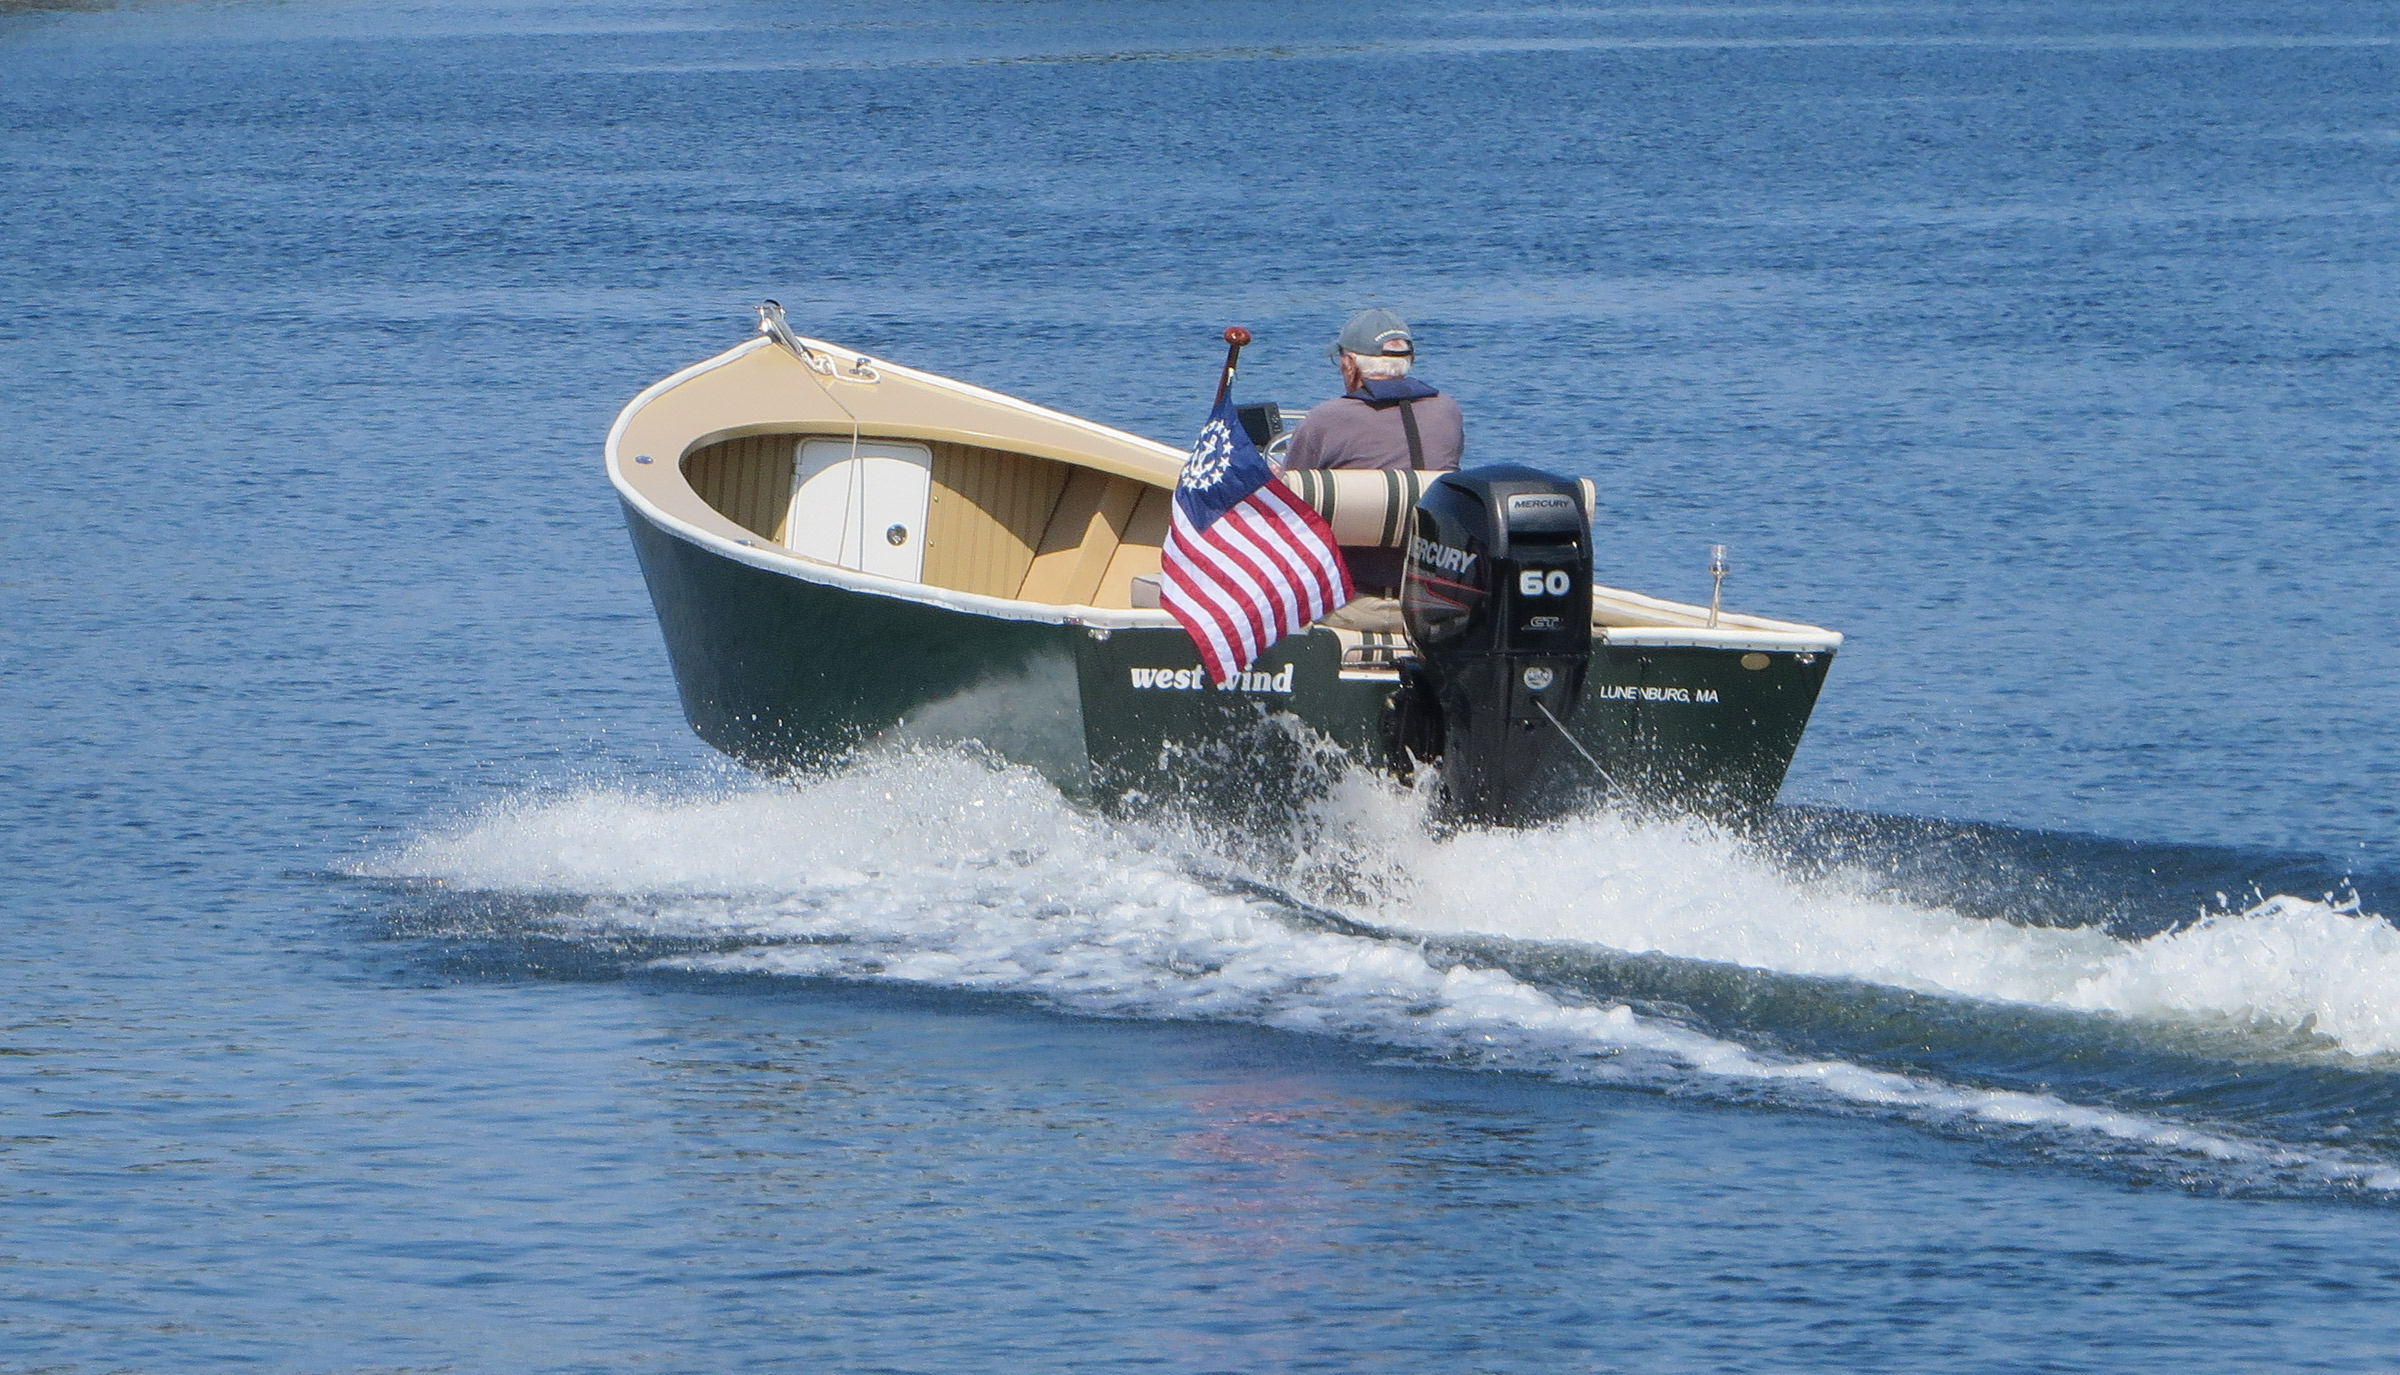
Coming up on plane, the bow stays low and doesn’t obscure the view forward.

Powered by the 60-hp motor, the Albion gets up on plane pretty quickly and does a GPS-measured 29 mph. It stays flat, even when climbing on plane, allowing me to have full visibility ahead. Sharp turns at full throttle, with weight in the back half of the hull, go very smoothly without any side skidding.

With the 60-hp outboard at full throttle, the Albion carves turns without skidding.

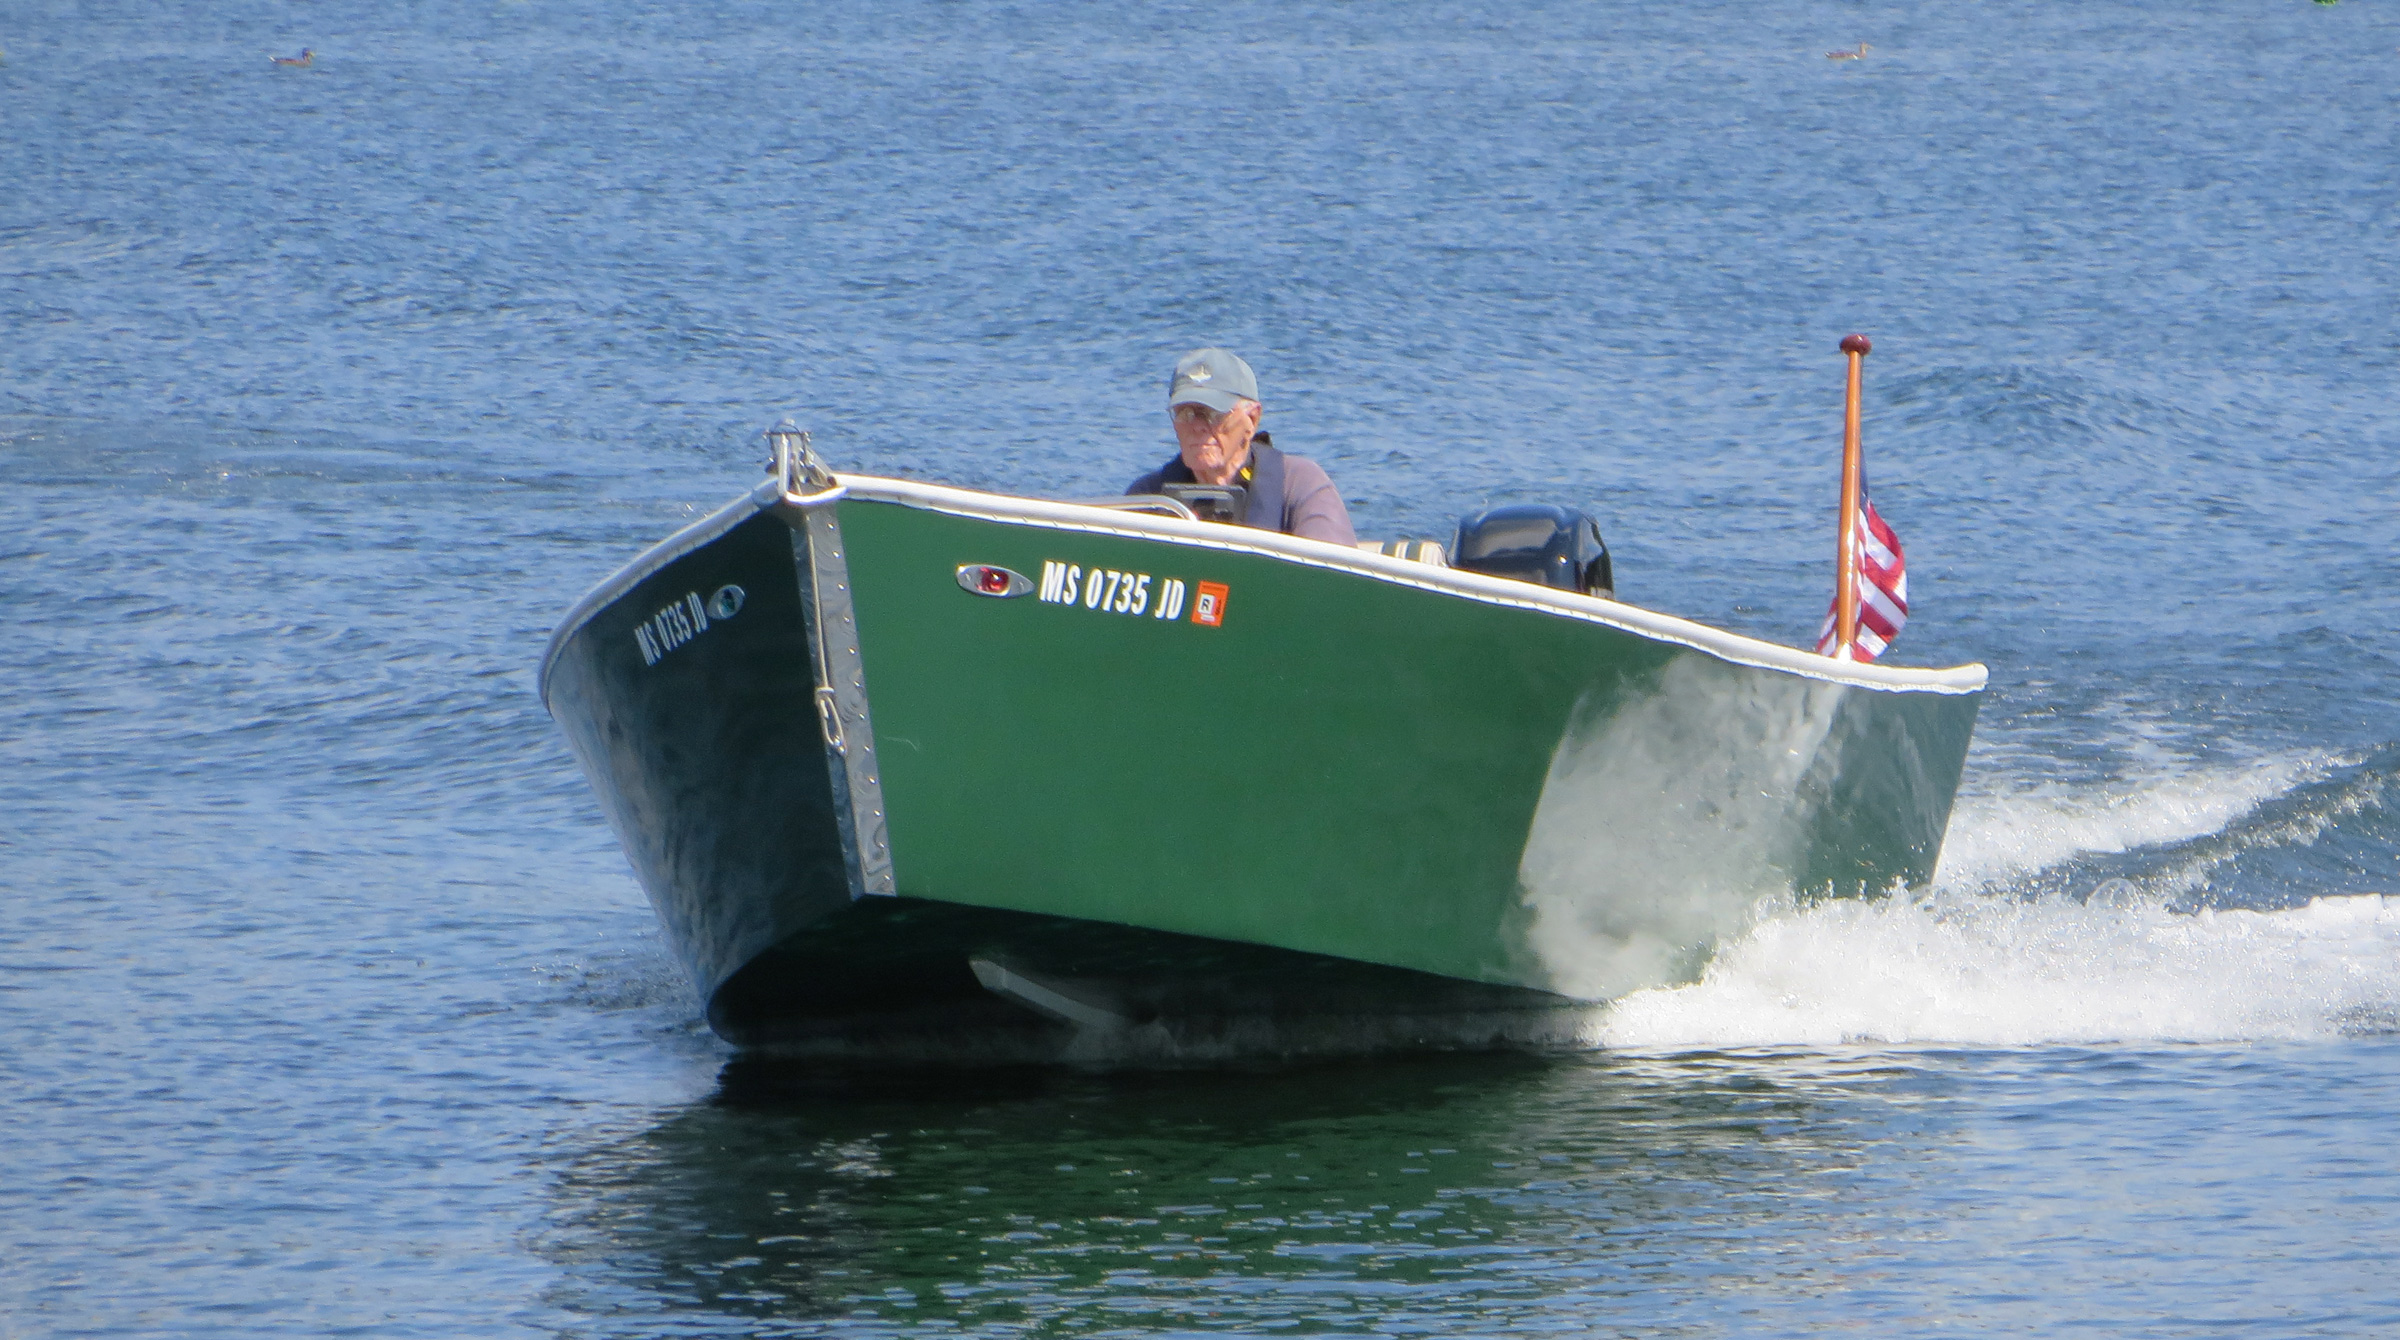
With the outboard at full throttle, the Albion carves turns without skidding.

We don’t encounter any rough water as all of our boating is done on small lakes and rivers, so we have no complaints about the flat bottom. One of the reasons I chose this design was because it would allow us to get up on the beach and disembark without the boat tipping.

Our aluminum trailer was designed to handle the Albion. We back the trailer into the water over the fenders and the boat floats off. When we reload, the boat floats on easily between the guide posts.

No matter where the boat is, on land or in the water, it draws a lot of attention. People are in awe and want to know what it is, where I got it, if I built it, where I got the plans, and how it handles. This build, transforming a pile of wood into a thing of beauty, has been the most satisfying project I have ever done.

June and Al Dettenrieder of Lunenburg, Massachusetts, have been messing around in boats all 58 years of their married life. They started with a rowboat with a lawnmower engine and a washing-machine transmission that Al rigged up. There were many boats after that, even a 38′ sailboat. Now they enjoy puttering and picnicking in local lakes and rivers in the outboard dory Al built at 79 years of age. His Albion dory won Best Power Boat in the “I Built It Myself” event at the 2018 WoodenBoat Show in Mystic, Connecticut.

Albion Pacific Power Dory Particulars

[table]

Length/18′ 10.9″

Waterline length/16′ 2.5″

Beam/7′ 10.6″

Draft/7.8″

Maximum displacement/4800lbs

Hull weight/980lbs

Recommended horsepower/50hp

Maximum horsepower/150hp

[/table]

Update: Jeff Spira passed away unexpectedly in the spring of 2022. His website is no longer operating and it is presumed that his boat plans are no longer available.

Is there a boat you’d like to know more about? Have you built one that you think other Small Boats Monthly readers would enjoy? Please email us!

Nova Scotian

My father’s father was born on Cape Breton Island, Nova Scotia. Though he emigrated to New York before my father was born, he took his family on summer trips back to visit his family in Louisbourg. My father has fond memories of these trips, but most of them revolve around adventures in dories. Slab-sided with tombstone transoms, these stalwart workhorses of the Canadian Maritimes have a well-deserved international reputation for being easy to build, easy to row, exceptionally stable, and capable of carrying heavy loads.

My father has owned a couple of small, traditionally built dories, and when I was in my early twenties he bought a 15′ Gloucester Gull based on the famous Philip Bolger design. A few years later, Roger Crawford of Marshfield, Massachusetts, built a 16′ Swampscott dory for him. My father has had this boat for 20 years, and still enjoys it.

The manual includes a section on types of wood and notes that some types of common construction can be used for Spira's ply-on-frame construction. Kevin Power

The manual includes a section on types of wood and notes that some types of common construction can be used for Spira’s ply-on-frame method for the dory.

Naturally, when I decided to get a boat, I started looking for a dory. It didn’t take much searching on the web to realize that there weren’t many available, and with my limited boat funds I couldn’t afford to hire someone to build one for me, so I started looking at plans. Jeff Spira and his business, Spira International, were among the top hits on Google for “dory boat plans.” Jeff’s site is mesmerizing. There are pictures of boats, videos of builds, a blog with builder contributions, and over 100 plans to choose from. I knew I wanted a Grand Banks–style dory about 16’ long, and Jeff’s Nova Scotian fit the bill perfectly.

Jeff goes to great lengths to promote the ease with which his boats can be built, even for those with no boatbuilding experience. He goes so far as to say you can complete the project with no prior woodworking experience, although he suggests building a couple of sawhorses first to get acquainted with some of the tools required for boatbuilding.

The beauty of Jeff’s designs is their simplicity and accessibility. The wood is all readily available at the big-box stores and is relatively inexpensive—about $250 for lumber and plywood. The epoxy and fiberglass cloth totaled about $400, and I found all the stainless fastenings on eBay for another $150.

The plywood panels take their shapes from the chine logs and inwales. The butt joints will be backed with plywood plates.Kevin Power

The plywood panels take their shapes from the chine logs and inwales. The butt joints will be backed with plywood plates.

The construction begins with the assembly of the five frames and the transom. In his plywood-on-frame construction manual, Jeff recommends using a framing square on a large surface (a sheet of plywood, for example) to draw up the five frames according to the measurements provided, then to assemble each frame piece over its drawing. The framing members are joined with simple lap joints, screwed and glued. The transom frame pieces are assembled with butt joints. Here I used pocket-hole joinery, which I favor for a tight attachment.

The hull build takes place on a strongback. The assembled frame members are spaced along it according to the measurements in the plans, with the bottom crosspieces of frames one and five placed directly on the jig and frames two, three, and four raised up on blocks cut to give the bottom its rocker. The ends of the strongback are cut at angles to fit the stem and the transom, which get temporarily secured in place. Once the frames are in position, the 2×4 keelson is set in notches previously cut in the five frames. After I applied epoxy at the intersections, I used ratchet straps to bend the keelson over the frames and hold it while I screwed them all together.

Plans from Spira typically don't include the arrangements for the interior but outfitting the dory with risers and thwarts requires little guidance.Kevin Power

Plans from Spira typically don’t include the arrangements for the interior but outfitting the dory with risers and thwarts requires little guidance.

The chines and sheer clamps follow. I wasn’t able to find 1x2s in the proper length, but Spira provides instructions for scarfing pieces together by cutting the ends at a 1:8 ratio. I built a jig to make consistent angles in the ends of my 1x2s, then simply glued pieces together. The full-length longitudinals are then glued and screwed in notches in the frames. Then I did a bit of fairing to bevel the bottoms of the chines and to present a smooth surface for the plywood sides.

The plywood sides and bottom are then screwed to the framework and cut to fit while in place. This is the part of the process that makes Spira boats particularly easy to build: there is no precise precutting and fitting prior to attaching the sides. I clamped the oversize plywood panels to the sheer clamp and the chine log and screwed them in place. I needed three pieces of plywood to get from the transom to the stem. The two seams created are butt-blocked with a 6”-wide piece of the same plywood spanning 3″ to each side of the joint on the inside of the hull. Once the sides and transom are skinned with plywood and the excess material is removed, the bottom is put on in the same manner. I was able to get from stem to stern on the bottom, creating only one seam.

The plans leave the outfitting of the interior up to the builder. Installing three rowing stations at each of the three central frame was an easy task and in keeping with traditional Banks dories.Sean Power

The plans leave the outfitting of the interior up to the builder. Installing a rowing station at each of the three central frame was an easy task and in keeping with traditional Banks dories.

The screw holes and seams get filled with epoxy mixed with wood flour. I had never worked with fiberglass before, but there are tips in the Spira book and in the blogs on his site. The plans recommend two layers of glass on a smaller boat like this one. In the guide included with the plans, Spira notes that some people opt to use fiberglass tape on all the seams before applying the sheets of cloth. Just the suggestion of it was good enough for me. I’d be using the boat at times on rocky shores, so I added extra ’glass tape and strips of cloth along chines, and particularly, over the stem.

To finish the exterior of the hull I found paint of excellent quality in a nice selection of colors from George Kirby Jr. Paint Company in New Bedford, Massachusetts. One gallon of yellow for the hull exterior and a quart of green for the trim (a common color scheme for Nova Scotia dories) were more than enough.

When the dory comes off the strongback and sits upright for the first time, you’ll have an empty hull. Jeff Spira does not give any direction for the interior of the boats, leaving that up to the builder. That was fine for my boat, because I was never planning on any decks, consoles, or cabins. I did fancy a place to sit, though. I used frames one and five to create compartments in the bow and stern, and filled them with foam for flotation. I used 1x3s as risers to support 2×10 thwarts at the second, third, and fourth frames. Banks fishing dories had removable thwarts so they could be compactly nested on the decks of fishing schooners. My dory’s thwarts are not permanently attached but slotted to slip around the frames. I installed three pairs of bronze oarlocks so there would be a place to row from each thwart.

There are few things in life more satisfying than launching a boat you built. I was so pleased with the way the boat rowed and tracked, that I had to remind myself to be critical of the build. At first I could not tell if I was just riding on the excitement of the accomplishment. But many hours and many nautical miles later, I still love rowing this boat.

My original intention was to have the dory join the family kayak fleet and become a part of our adventures in the rivers and bays of southeastern Connecticut, and it exceeded my expectations. It easily handles the loads of coolers, beach chairs, blankets, towels, two big dogs, and anyone who gets too tired to paddle their own kayak. It does this with ease.

With two passengers and a dog aboard, the dory still has plenty of freeboard and the capacity to carry even more weight.Courtesy of the author

With two passengers and a dog aboard, the dory still has plenty of freeboard and the capacity to carry even more weight.

The middle rowing station is the most preferable for a single rower, and the forward and aft rowing stations are ideal when one of the kids wants to lend a hand with rowing. Once you get the Nova Scotian moving, it tracks beautifully and glides effortlessly. Typical of dories of its type, it is a bit tender at first, but the secondary stability is reassuringly solid. You can lean it over to one side, but it’ll stop there. I’ve hauled my 110-lb golden retriever over the side more than once without feeling I was risking putting the rail under. I also intended to use the dory to extend the boating season. I now enjoy getting on the water year-round and row through the winter when the Mystic River isn’t iced over. My dory doesn’t go into storage; it is always ready to go.

Kevin Power is a home inspector who lives with his wife and three teenage kids in Mystic, Connecticut. He has been boating for 44 of his 47 years and his fleet includes the dory, two kayaks, a rowing dinghy, a sailing dinghy, a Sunfish, a sloop-rigged centerboard dinghy, and a 20′ outboard fishing boat. He has always enjoyed simple woodworking projects such as rolling cooler carts, beer-growler caddies, and Adirondack chairs. As a beer-fueled joke, he started the Mystic Cornhole Company. The dory is the first boat he has built. His wife works at Electric Boat Division of General Dynamics in Groton, Connecticut, where the U.S. Navy gets its nuclear submarines. Kevin notes she doesn’t find it as amusing as he does when he says they are both boatbuilders. 

Nova Scotian Particulars

[table]

Length/16′

Beam/4’10”

Height of stem above bottom/2’6″

[/table]

Update: Jeff Spira passed away unexpectedly in the spring of 2022. His website is no longer operating and it is presumed that his boat plans are no longer available.

Is there a boat you’d like to know more about? Have you built one that you think other Small Boats Monthly readers would enjoy? Please email us!

Truck-Bed Liner Paint as Interior Finish

The author was equipped to spray the truck-bed liner, and while that produced the desired results, she decided that rolling the coating on would be quicker and less expensive.photographs by the author

The author was equipped to spray the truck-bed liner, but while that produced the desired results, she decided that rolling the coating on would be quicker and less expensive.

The first time I saw truck-bed liner paint as the interior finish of a pulling boat was while reviewing Sam Devlin’s Duckling for Small Boats Monthly. Thick for durability and textured for traction, it immediately made sense to me. I grilled Sam about where to find the thick coating, how to apply it, how long it lasts, and if there were any fading or chalking issues with the product he used. I row year-round in the San Juan and Gulf islands, where long hours of exposure to the summer sun and gravelly and sandy beaches mean my boats get hard, grinding use. The bed liner won’t stop an errant sharp knife point from puncturing it, but it will handle anchors and anchor chain, the bottoms of coolers transferred from a sandy beach, and gravel stuck on the bottom of rubber boots. Sam has even used truck-bed liner on the exterior of some small boats where a durable finish is more important than a perfectly flat one.

Black is the longtime standard color for truck-bed liner paints, but too dark for my taste and too hot in the summer sun, so I surfed the web looking for a do-it-yourself tintable bed liner. Some manufacturers—Duplicolor, Plasticoat—make water-based bed liners that may be easier to work with, but my research suggested they produced poor results. I went with Monstaliner, a tintable aliphatic hybrid urethane polymer that can be rolled or sprayed, and ordered a couple of free paint chips from among the 39 colors available.

I chose a light slate gray color that will, combined with the pebbly texture, reduce most of the glare I used to get from the previously high-gloss surfaces in my rowing dory, MAC. It is also guaranteed to have 100 percent UV permanent color for a minimum of five years. The online application instructions are detailed and complete. Monstaliner comes in a kit that includes textured rollers, masking tape, abrasive pads, and more—just about everything you need to do the job—but I already had all of the prep materials and was equipped to spray it on, and so just bought the “coating only” kit with the coating, tint, catalyst, stirring stick and mixing paddle for an electric drill.

Proper surface preparation and careful taping are a universal requirement for applying any coating. The supplied instructions reminded me that the time spent on application is only a fraction of the time prepping and cleaning up. After taping gunwales and those surfaces I didn’t want to spray, I scuffed the remaining painted interior surfaces with Scotchbrite pads and vacuumed up the fine dust, followed by a wipe-down with a rag and MEK (methyl-ethyl-ketone). Bed liners have a high VOC rating so I suited up with goggles and a respirator and got lots of ventilation going in my shop. Just before spraying, I ran my gloved hand along the inside of the hull to make certain it was dust-free.

Whether sprayed on or applied with textured rollers supplied by the manufacturer, the truck-bed liner creates a thick coating with a textured non-slip surface.

Whether sprayed or applied with textured rollers supplied by the manufacturer, the truck-bed liner paint creates a thick coating with a textured non-slip surface.

Following instructions, which called for over 10 minutes of constant mixing with the paint paddle in my cordless drill, I added tint, then catalyst, to the bed liner paint. To apply the coating, I used a gravity-fed spray gun and a 1½-gallon hopper connected to a 10-gallon compressor at 120 cfpm (cubic feet per minute). I used a a 1/8”-diameter texture tip on the spray gun—the larger the diameter on the tip, the more texture on the finished surface. The 10-gallon capacity of the compressor made it easier to do long sweeps with the sprayer without the compressor motor constantly running.

I went through a lot of nitrile gloves—the coating that got on them got sticky rather quickly. An hour after finishing the first coat I repeated the process. Cleanup took gallons of MEK and acetone. If you get the kit with the disposable rollers, a quart of MEK or acetone should suffice—much kinder to the environment. In retrospect I would have saved time, money, and solvent if I’d bought the kit and rolled the finish on.

As thick as the coating is, it conceals imperfections and wear and tear in a well-used boat.

The coating is quite thick, concealing imperfections and wear and tear in a well-used boat.

The results speak for themselves. Spraying all interior chines, corners, and edges prior to the sides and bottom effectively softened and hid 15 years of dings, scrapes, and small gouges that I had filled, sanded, and painted in previous years. I could see them before spraying, but they are now under a uniform, consistent, and virtually impermeable surface. The marked contrast between MAC’s unrefinished seat and the new bed liner reminds me of how worn my old boat was looking. I plan on fastening a varnished mahogany plank on top of the old plywood seat to complement the gunwales. With my old dory given a new and very appealing finish, I look forward to taking an overnight rowing/beach-camping trip with my 11-year-old grandson and seeing how the truck-bed liner holds up to the sand and gravel we’ll bring aboard when launching from the beaches.

Dale McKinnon began rowing in 2002 at the age of 57, and in 2004 rowed solo from Ketchikan, Alaska, to her home town, Bellingham, Washington. In 2005 she rowed from Ketchikan to Juneau. Her previous articles for Small Boats Monthly include rowing the Columbia River and the Columbia River estuary, how to row rough water, and reviews of NewGrips and CrewStop rowing gloves, Exped sleeping pads, and the Devlin Duckling 17 and Fairhaven Flyer.

Monstaliner is only available from the manufacturer and shipped only to the US and Canada. A gallon of base coat plus catalyst for spraying runs $128.60 and the tints, sold in one-pint cans, cost $18.50 to $48.75. A gallon roll-on kit costs $145.40.

Is there a product that might be useful for boatbuilding, cruising or shore-side camping that you’d like us to review? Please email your suggestions.

Continue Reading - Enter your email to log in or subscribe

New to Small Boats? Create a free account to get our weekly emails and two free articles each month.

Yes! I would like to access this article and the Small Boats newsletter.