beach Archives - Small Boats Magazine

Beer Beach Boat

Bryn Morgan has spent all his working life at sea, but until now he had never had a boat of his own. For many years he had his eye on an 18′ Plymouth Pilot, a fiberglass production boat with lines based on a 1930s pilot vessel that operated out of Teignmouth in Devon, on the south coast of England. But when his son-in-law, Adrian St. Aubyn, a Venezuelan with Cornish ancestry, enrolled at the Lyme Regis Boat Building Academy in 2015, he realized there might be a better opportunity.

Six years earlier, another student at the Academy, Alasdair Grant, had built STEADFAST, a 16′5″ version of a 15′3″ Beer Beach boat called WILD DUCK. Beer is a village located in the middle of the Lyme Bay coast, and the boats built there had evolved over many years and came in various shapes and sizes, all seaworthy enough to cope with the exposed coastline of south Devon and durable enough to be hauled up the steep, heavily pebbled beach there. WILD DUCK was built in 1963 for crabbing and bareboat charter, and she was still on Beer Beach when Alasdair and his classmates took the lines off her.

When Bryn saw photographs of STEADFAST, he fell in love with her and started talking to Adrian about building something similar while he was at the Academy. Bryn wanted something bigger than WILD DUCK, around 21′ but the administrators were concerned that would be too big to complete in the time available. They settled on 19′ with a raised foredeck and wheelhouse, agreeing that STEADFAST’s lines were a perfect starting point.

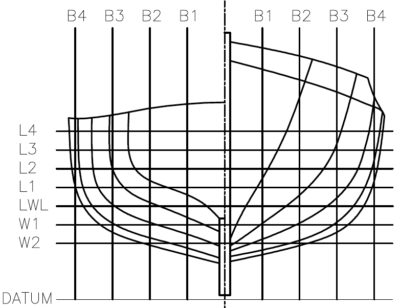
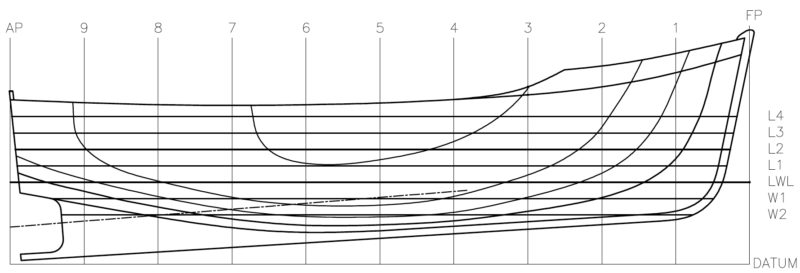
Adrian took STEADFAST’s table of offsets, put it into AutoCAD, and scaled it up to the desired 19′ with all other dimensions increased proportionally. He then faired the lines on a full-sized lofting and adjusted the offsets.
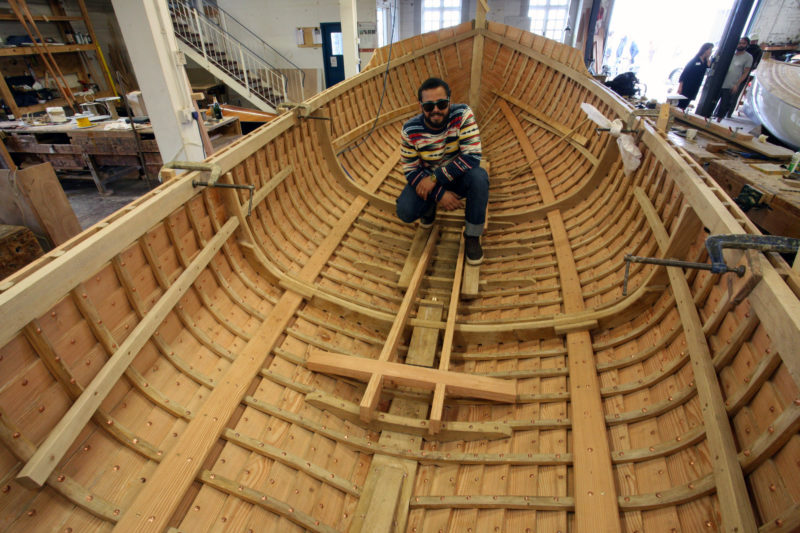
Builder Adrian St. Aubyn perched on the engine mounts to enjoy his handiwork.photographs by the author

Builder Adrian St. Aubyn perched on the engine mounts to enjoy his handiwork.

Construction began with an all-oak backbone. The stem was laminated from 18 pieces of 5/32” veneer; the 5-1/2″ x 2” hog and 2-3/4″ square keel were both laminated from two pieces; and the deadwood, made up of 14 pieces, incorporated a swelling through which the stern tube would be bored. An extension from the deadwood’s lower edge provided an attachment point for the bottom rudder pintle. All the pieces were joined with epoxy and copper and bronze fastenings.

Adrian cut rabbets in the hog and keel for the garboard, and in the stem for the hood ends of all the planks. The whole assembly was then erected on a temporary structure about 2′ off the workshop floor, and the top of the stem was secured to an overhead beam.

The 2-1/4″ stern knee and 1-1/4″ oak transom were then fitted, and then the nine temporary molds were set up at their stations and secured to the overhead beam. Sixteen ribbands were laid along the length of the boat so that the position of the top edge of each plank could be determined and then marked on the molds, transom, and stem. When the ribbands were removed, it was time to fit the 3/4” larch lapstrake planking.
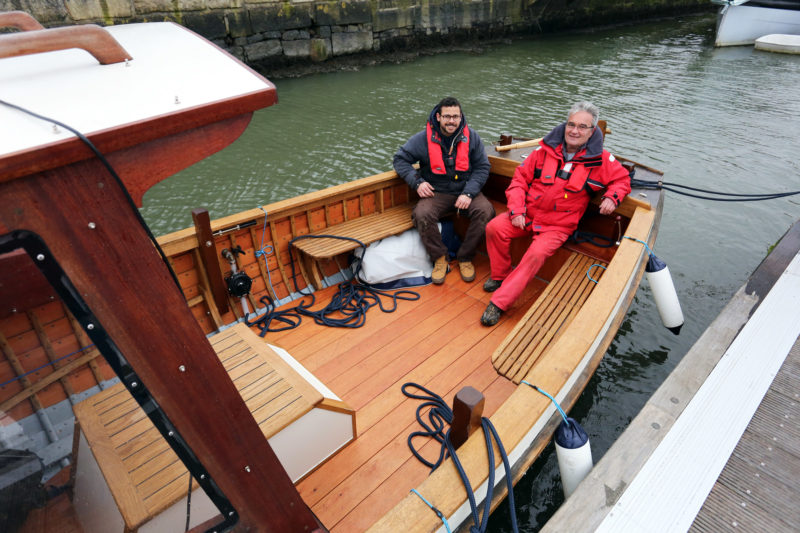
The builder, left, and owner Bryn Morgan make themselves comfortable in the sternsheets. The throttle used while steering with the tiller is just below Bryn's left hand.

The builder, left, and owner Bryn Morgan make themselves comfortable in the sternsheets. The throttle used while steering with the tiller is just below Bryn’s left hand.

The garboard plank—8″ wide at its widest point—was taken a little further up the stem than initially lined with the ribbands to induce more taper and lift to the forward ends of the other planks for a more pleasing profile. As soon as this was fitted, the gains, known locally as geralds, were cut at each end of the top of the garboard to allow the next plank to finish flush with the outer part of the stem and transom.

From there the remaining 14 strakes were fitted. They all had to be steamed at their ends to cope with the twist, and most had a scarf joint in them. In each case, the lands were bedded with an oil-based mastic and then fastened with copper clench nails while the ends were epoxied and screwed to the stem and transom.

The 1-1/4″ x 5/8″ oak frames were then steamed and fit between the molds on 6” centers. Almost all of these were continuous from sheer to sheer, but the forward-most five were fitted in separate halves on each side. The molds were then removed after two braces were temporarily laid across the hull to retain its shape, and the remaining frames were fitted. The sheer forward was then extended upward for the raised foredeck by fitting an extra plank flush with the sheerstrake and supported by an extra 10 short frames.
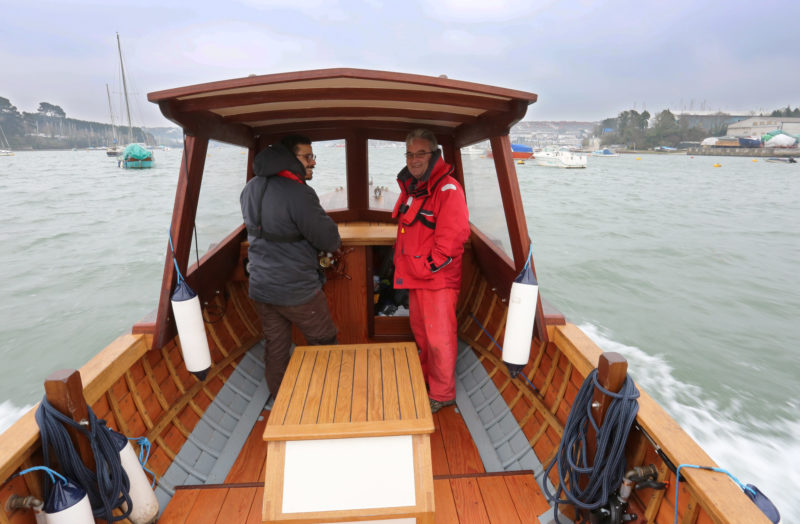
 

The motor housing conceals a 14-hp two-cylinder Yanmar diesel.

The motor housing conceals a 14-hp two-cylinder Yanmar diesel.

Adrian fit the internal structure: the 4-5/8″ x 1” oak beam shelf, the 3-3/4″ x 7/8″ larch bilge stringer, the 1-1/2″ x 1-1/8″ oak risers (the aft parts of which would support the side seats), and five 1-3/8″-thick laminated oak floors. Two sawn frames, 1″ thick and averaging 3″ deep, are joggled with limbers above every lap and doubled up from about the riser downward to stiffen up the open part of the boat. The 3-1/2″-thick engine beds span the sawn frames.

After the 1-1/2″ x 2″ oak deckbeams were fitted forward and aft, an oak laid deck with no plywood subdeck was fitted over them. The oak railcap, running the length of the boat between the decks, is 4-5/8″ x 1″. The wheelhouse is made up of 1 ¾”-thick solid sapele sides and front, with 1-7/8″ x 1-5/8″ roof beams, covered by 3/4″ ply and a layer of ’glass and epoxy.

The four 3″-square mooring posts were made of reclaimed wood that had been Falmouth docks. They were the only pieces of wood on the boat for which no money changed hands, but Adrian described them as “priceless, because they belong to this place,” referring to ELLY ROSE’s home port. That was where Bryn, Adrian, and I met up for a sea trial on ELLY ROSE on a blustery winter’s day.
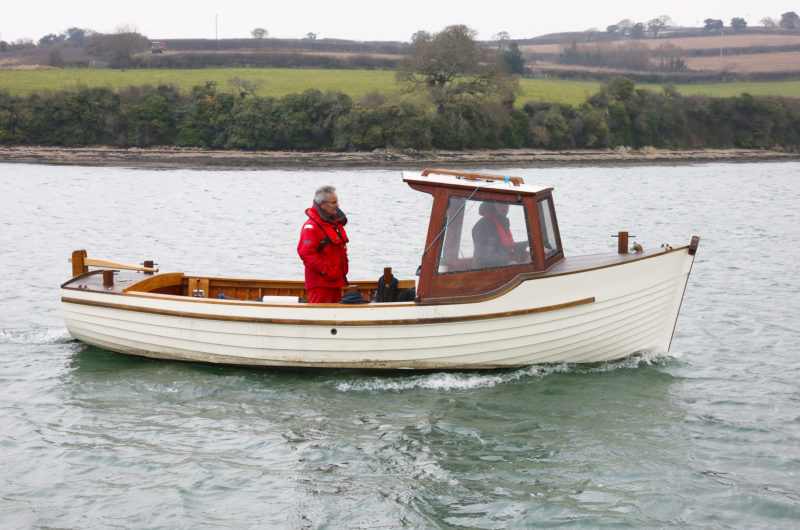
The cruising speed with the 14-hp diesel is around 5.5 knots.

Cruising speed with the 14-hp diesel is around 5.5 knots.


With Adrian at the helm, we maneuvered our way out of a tricky berth and then motored down the Penryn River. The Yanmar 14-hp two-cylinder diesel gave us 5.2 knots at the cruising rpm of 2,500, and 5.6 knots at 3,000, but the Force 6 headwind was clearly having a significant effect on the sizable wheelhouse. So we turned around and found that going downwind, she went a little faster: 5.4 knots and 5.9 knots at the respective rpm. Not surprisingly, her turning circle was also affected by the conditions. While it was about three boat-lengths (at 2,500 rpm) turning into the wind, it was little more than half that turning away from it.

Bryn and Adrian told me that they had decided to fit the engine in the deepest part of the boat without calculating the effect on the center of gravity. When the boat was launched, they found that she was bow-down and difficult to steer, especially when in reverse. The prop was too close to the surface and not really biting properly. They put around 575 lbs of lead ballast aft, which seems to have done the trick—I found her easy to steer in both directions. They have in mind moving the engine aft at some point in the future.
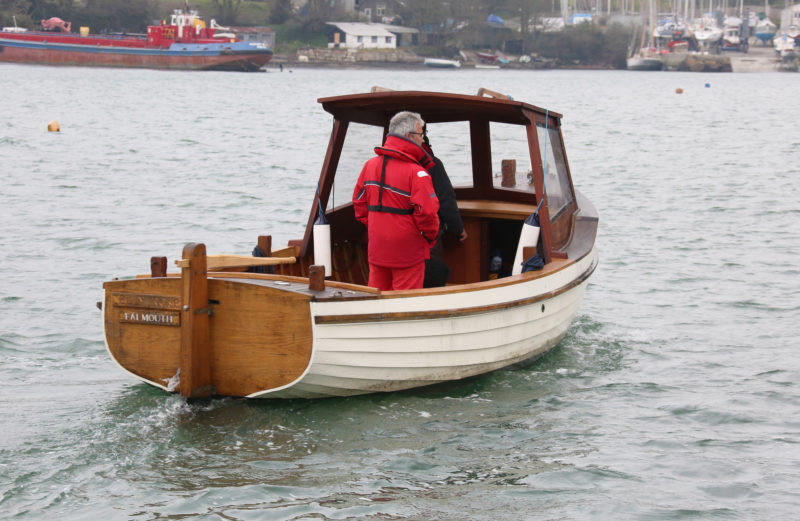
The rudder can be operated by the tiller or by a wheel in the pilothouse. A hydraulic piston is connected to a bolt through the rudder stock that extends through a slot high on the transom.

The rudder can be operated at the tiller or by a wheel in the pilothouse. A hydraulic piston mounted under the aft deck is connected to a bolt through the rudder stock that extends through a slot high on the transom.

There are two steering positions: a wheel in the wheelhouse (especially welcome on that very cold day!) and a tiller aft. Both have gear and throttle controls, and it is a simple matter to make sure one is in neutral before assuming command at the other station. A valve in the aft locker disconnects the hydraulic wheel steering to allow the tiller to be used. I am 6’ tall and, although I could stand in the wheelhouse, I had to stoop a little to get a clear view forward. I also had to stoop at the tiller to get a view through the wheelhouse windows. Bryn is 5′8″ and has no trouble in that respect, and neither of us did when sitting on the engine box forward or on the seats adjacent to the tiller.

Bryn and Adrian had been farther out to sea than we went that day, and Bryn said he was delighted with ELLY ROSE’s seakeeping qualities, especially when punching her way through the waves in a more exposed stretch of water.

Bryn is very much looking forward to using ELLY ROSE during his impending retirement. He plans to use her for fishing, hauling crab pots, picnicking, and visiting secluded beaches accessible only by boat. She will, I am sure, be perfect in all those roles.

Nigel Sharp is a lifelong sailor and a freelance marine writer and photographer. He spent 35 years in managerial roles in the boat building and repair industry and has logged thousands of miles in boats big and small, from dinghies to schooners.

Beer Beach Boat Particulars

Length:   19′
Beam:   7′ 3 1⁄2″
Waterline length:   18′
Draft:   25 1⁄2″


Adrian St. Aubyn

.

For lines and a table of offsets, email Mike Broome at the Boat Building Academy.

Is there a boat you’d like to know more about? Have you built one that you think other Small Boats Monthly readers would enjoy? Please email us!
All-Terrain Roller

I have developed a pretty good system for getting my lapstrake rowing canoe to the water. The canoe alone is pretty heavy, close to 80 lbs, and with the sliding seat, outriggers, and oars aboard, it tops 100 lbs, a lot more than I want to lift all at once. I keep the canoe on a shelf built into the garage so it slides straight across to my car’s roof rack and at the launch ramp I drag it off the back of the car, rest the stern on the ground at the water’s edge, and then lift the bow off. A pool noodle is all it takes to roll the canoe down the ramp into the water.

Getting the canoe launched at a beach is more of a challenge. I’ve been using the roller carts that I built for Ben Fuller’s article in our January 2017 issue. One has a wooden roller and the other a plastic pipe. The pipe has a larger diameter, 7”, and I figured it might work on sand. With the cart strapped to the canoe about amidships, the pipe made a lot of noise but worked fine over pavement, a gravel path, and a boardwalk. To my dismay, the pipe couldn’t handle sand. In short order, it bulldozed a pile of sand ahead of it and that was the end of it. To be fair, Ben had noted in his article that these carts are used upside down on soft ground and remain stationary while the boat rides the upturned roller. That does indeed work, but I have a broad beach to get across, and moving the canoe one boat length at a time and shuttling the roller ahead makes progress slow and tedious.

Several years ago, I had toyed with the idea of using an inflatable boat fender as a roller. The type of fender with a hole down the middle makes it possible to skewer one with a steel rod for an axle. The roller cart I made worked, but I didn’t really need it because I could just as easily carry a kayak on my shoulder. If I made a cart for the canoe with a larger fender, I thought I might have an easier time launching my canoe. Fenders are quite expensive, but I’ve had the good fortune to live by a mile-long lake almost completely hemmed in by marinas and there are a lot of runaway fenders. Just this fall I found five tucked under wharves and in the brambles.

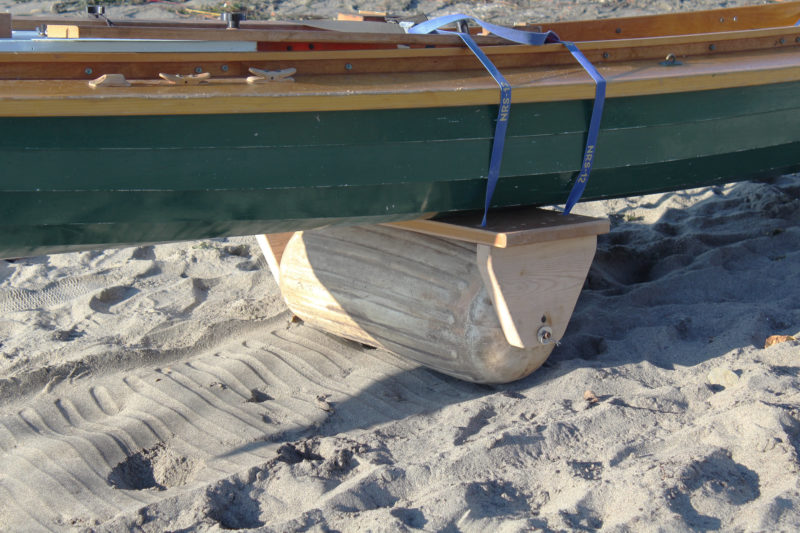
A fender with a hole through the middle looked like a promising solution for managing hard and soft terrain.

A fender with a hole through the middle looked like a promising solution for managing both hard and soft terrain.

I bought a length of 1/2” steel rod for an axle to fit an old fender 24” long and 10” in diameter. With the kayak roller cart I’d made previously, I had hammered a length of PVC water pipe down the length of the hole in the fender to create a more rigid “bushing” for the axle. I didn’t bother with that for this new cart. The distances I haul the canoe are relatively short, and if I did wear through the hole down the middle of the fender, it had cost me nothing.

The wooden frame was easy to make from a piece of 5/4” Douglas fir that was once a gymnasium bleacher and some ash milled up from a windfall. The fender bowed up in the middle when I put weight on the axle so I pumped some more air in and added extra clearance under the deck of the cart frame.

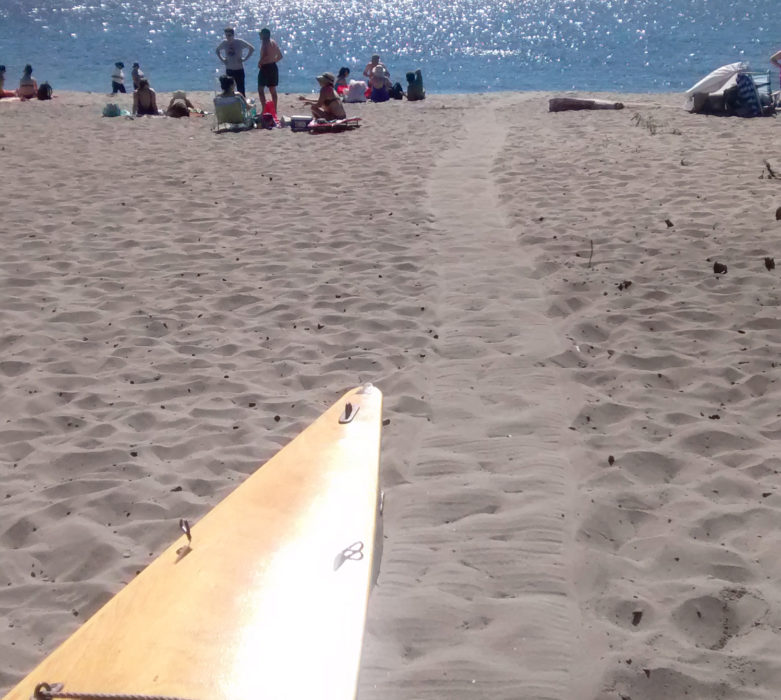
The fender rolls almost as easily as the solid rollers on my other carts and is a lot quieter—the molded ridges on the fender make a nice soft on rumbling sound on pavement. On grass or cobbles there isn’t perceptible difference in drag and on sand, even soft dry sand, there is surprisingly little extra resistance to rolling. The roller has such a large area of contact that it doesn’t sink or pile sand up ahead of itself. The flattened trail it leaves doesn’t even fill in the deepest footprints in the sand. When the canoe is afloat, I unstrap the cart, slide it to the side and it floats to the surface.

The old fender and I had some good runs before it gave out. A newer fender less prone to cracking may be the solution.

The old fender and I had some good runs before it gave out. A newer fender less prone to cracking may be the solution.

My fender cart worked like a charm, but the old fender eventually gave out. I had noticed a small crack at the edge of the inflation valve, a sign that the aging material was losing its flexibility, so it wasn’t a great surprise to have a leak develop where axle bears on the hole at one end of the fender. I’ll try again with a fender that isn’t quite so old and still has good flexibility. Maybe a pair of smaller fenders. And I may take another shot at bushings, at least short ones in the ends. For now my heavy-duty all-terrain cart, built on the cheap, just needs the right fender to go adrift.


Mud Pattens

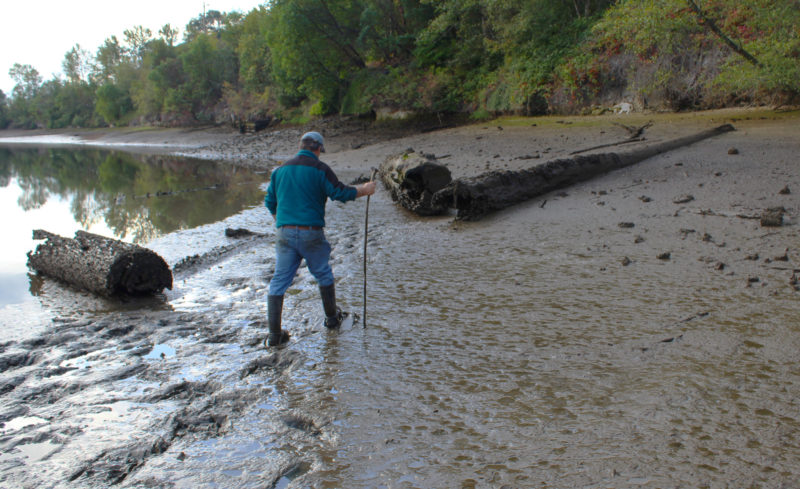
Mud flats don't invite strolling, so with a pair of pattens you can have the intertidal all to yourself.photographs by the author

Mud flats don’t invite strolling, so with a pair of pattens you can have the intertidal all to yourself. A staff is a useful accessory for checking the depth of mud and water and maintaining balance.

When I rowed down the Ohio River, mud was something I had to deal with almost every day. It was the consistency of vegetable shortening and often as deep as my rubber boots were high. Ferrying camping gear from the boat to shore in the evenings and from shore to the boat in the mornings was an arduous process. I would have had an easier time of it if I had known then about mud pattens that waterfowlers use on the mudflats surrounding shoal inland waters along England’s southern coast.

If you’ve read Arthur Ransome’s book, Secret Water, you may remember splatchers: “two large oval boards, with rope grips in the middle of them for the heel and toe, and stout leather straps for fasteners.” Ransome’s drawing of them shows them about twice as long and twice as wide as the soles of the boots of the boy who is wearing them. I once improvised a pair of splatchers with driftwood and rope, and didn’t get far on an intertidal mudflat before I found myself stuck. Both splatchers were so firmly held by suction that I had to cut my feet out of the rope bindings to escape.

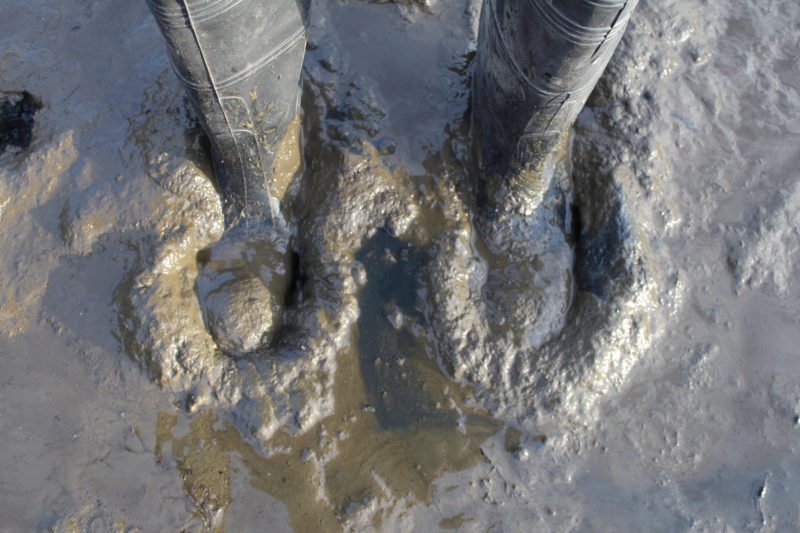
Boots alone sink into the mud, and suction can sometimes pull them right off your feet.

Boots alone sink into the mud, and suction can sometimes pull them right off your feet.

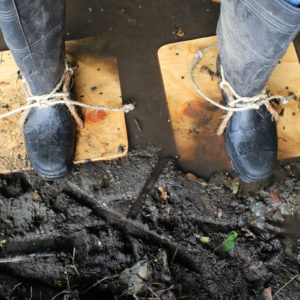
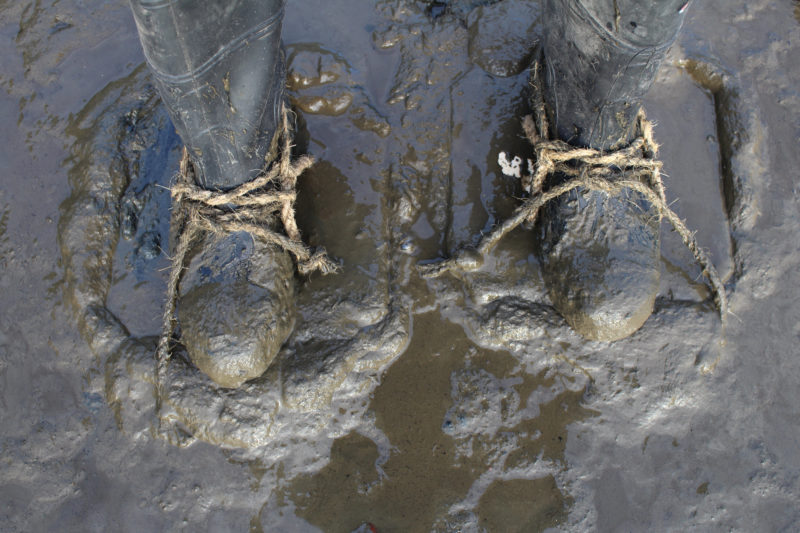
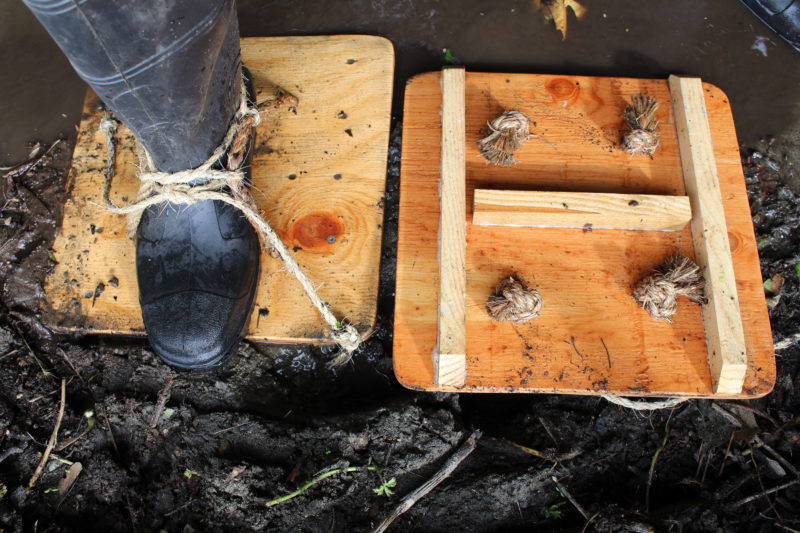
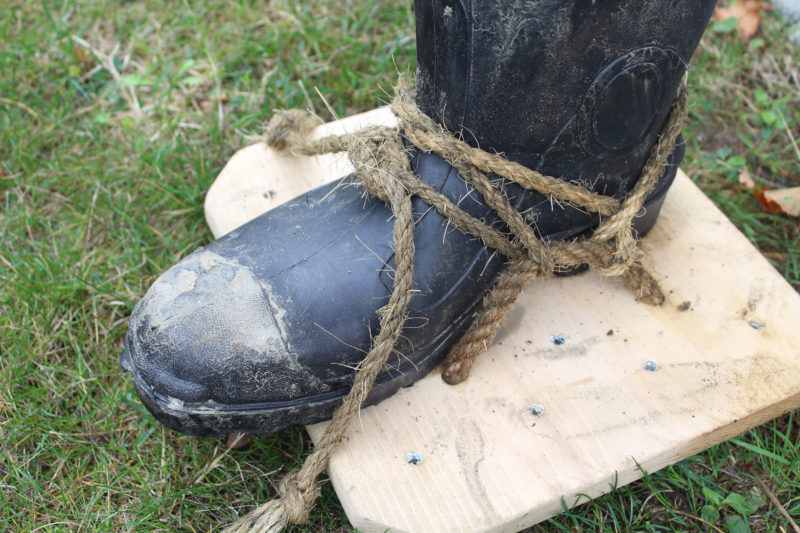
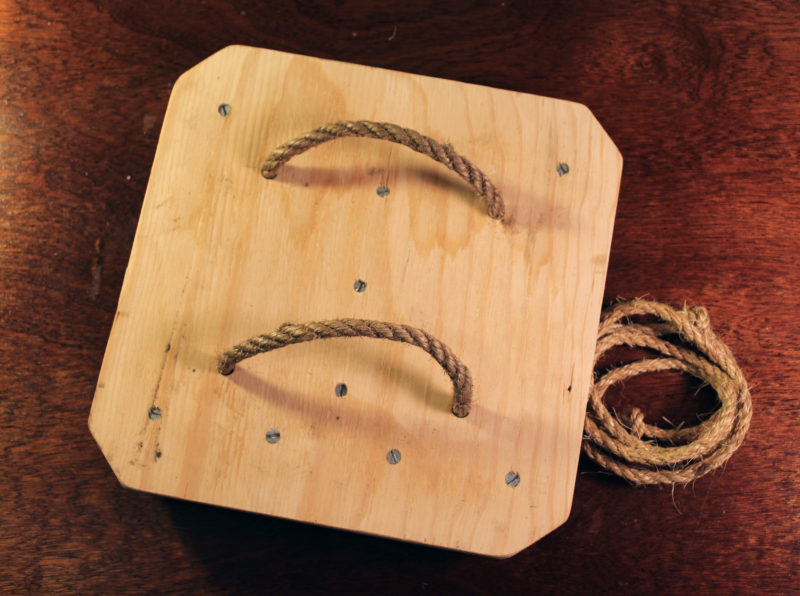
Mud pattens have been in use for centuries and are effective for walking on mud. They’re squares of wood or plywood with three cleats on the bottom, and two loops of thick rope on top. A separate length of lighter rope binds the thicker rope over the boot heel and instep. It’s best to use line that is not slippery, such as nylon, so the knots don’t loosen. I use manila; it has a coarse texture and stays tight.

Pattens distribute spread weight out over a larger area to minimize sinking. The positioning of the ball of the foot at the edge of the patten is what makes it possible to break the suction.

Pattens distribute weight out over a larger area to minimize sinking. The positioning of the ball of the foot at the edge of the patten is what makes it possible to break the suction.

I made my first two pairs of pattens 12″ square, a common size in England. They can vary in size according to the softness of the mud and the weight of the wearer. I made my third pair 14″ square, and it’s a better match for my 220-lb frame.

Cleats on the bottom add strength and traction to the pattens.

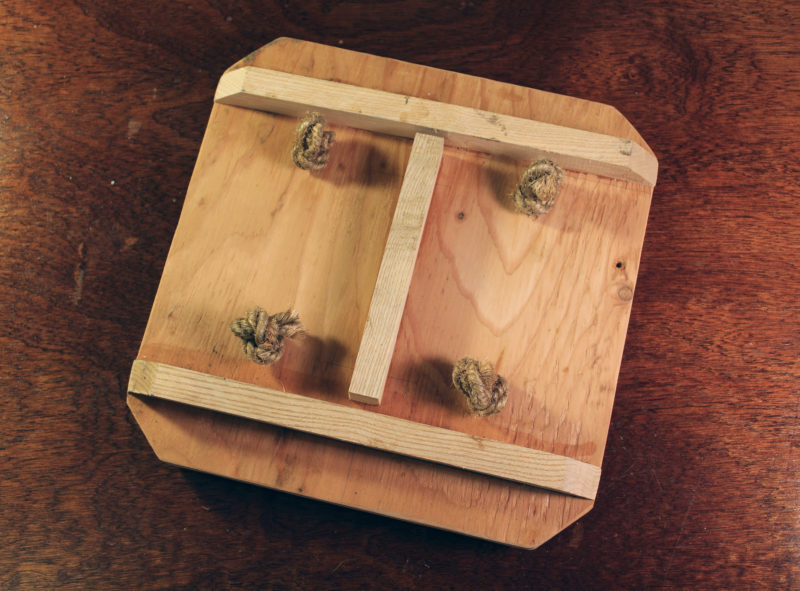
The grain of the board or plywood runs perpendicular to the boot. The bottom is reinforced with three hardwood cleats—two running the full length from front to back and beveled at the ends, and one in the middle running side to side. The middle cleat stops shy of the longer pair; the gaps make it easier to wash mud off that would otherwise get stuck at the intersections of the cleats. The H-pattern of the cleats help the pattens resist slipping in all directions.

The traditional method of tying a platten on is makes solid connection to the boot. Manila rope holds the knots well. See the video below to see how the line is tied.

The traditional method of tying a platten on makes a secure connection to a boot. Manila rope holds the knots well. See the video below to see how the line is tied.

The proper placement of the boot on the patten is with the toe sticking beyond the edge. This puts the ball of your foot close to its forward edge, and your heel near its middle. When walking on mud, you use a normal stride, putting your weight first on your heel, where it is distributed evenly across the patten. At the end of the stride, your weight transfers to the ball of your foot and the front edge of patten. That edge sinks while the back edge lifts, breaking the suction and prying the patten out of the mud.

That transfer of weight to the edge is what sets the mud patten apart from the splatcher. Splatchers extend beyond the toe of the boot, as well as the heel, so the weight remains within the perimeter of the splatcher. Since you can’t use the downward force of your weight to break the suction, you have to resort to lifting. That’s not only an ineffective way to break the suction, the upward force you apply with one foot adds to the downward force on the other foot. The more you struggle to release one splatcher, the more difficult you’re making it to release the other. That’s what I discovered with the improvised splatchers I had to cut myself out of. Trying to lift them only got me more deeply mired.

This 12”-square plywood patten has ash cleats, 3/4” by 1”, set on edge and screwed to the base. The cleats on my 14’ pattens are a bit heavier—7/8” by 1-1/4”. The 1/4” gaps at the ends of the middle cleat let water sluice the mud out of the corners when it’s time to clean up. The stopper knots on the rope ends are Figure-8 knots.

This 12″-square plywood patten has ash cleats, 3/4″ by 1″, set on edge and screwed to the base. The cleats on my 14″ pattens are a bit heavier—7/8″ by 1-1/4″. The 1/4″ gaps at the ends of the middle cleat let water sluice the mud out of the corners when it’s time to clean up. The stopper knots on the rope ends are Figure-8 knots.


The 1/2” manila loops are set at a boot’s width and each loop, requiring about 2’ of line, is laced through holes drilled 6” apart. The lacing line, coiled up here, is about 6’ of 1/4” manila with a half hitch in each end to keep it from unravelling. The base is made of 1/2” plywood, the same as I used for my 14” pattens. My other 12” pattens have a base of 3/4” pine.

The 1/2″ manila loops are set at a boot’s width and each loop, requiring about 2′ of line, is laced through holes drilled 6″ apart. The lacing line, coiled up here, is about 6′ of 1/4″ manila with a half hitch in each end to keep it from unravelling. The base is made of 1/2″ plywood, the same as I used for my 14″ pattens. My other 12″ pattens have a base of 3/4″ pine.

It takes me less than an hour and a few pieces of wood from my pile of scraps and cutoffs to make a pair of pattens. With them, mud doesn’t have to be a barrier to exploration. They’ve opened up a new landscape just as snowshoes do in snow.

Christopher Cunningham is the editor of Small Boats Monthly. He’s grateful to the Langstone & District Wildfowlers & Conservation Association for steering him away from splatchers.

A note about safety: If you encounter mud that is so soft that the pattens begin to sink, retreat to firmer ground. Larger pattens may work, but it’s possible that the mud is too soft to be traversed safely. Given my experience getting stuck with my jury-rigged splatchers, I’d advise carrying a knife and extra lacing lines.