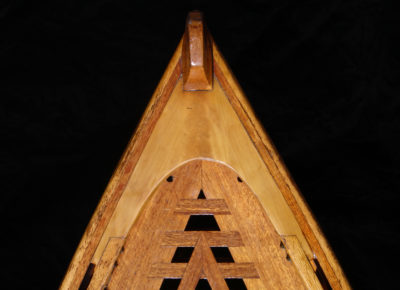
I started building boats in 1978, and only once was I able to collect enough crooks for a boat, a New York Whitehall. Its breasthook is apple, the six thwart knees and the bookmatched pair of quarter knees are cherry, and the transom knee is Alaskan yellow cedar. I think they’re easy on the eyes, and even though the boat is now 32 years old, the knees are as good as new. Crooks of sufficient size were hard to find, difficult to season without checks, and awkward to saw into workable stock. In other boats I’ve made straight-grained, laminated, and steam-bent knees, but none took a nice shape as well as the ones I made from crooks.
Back in February, Ben Fuller and I were corresponding about a variety of ideas for articles, and he wrote, as an aside to a comment on boom jaws: “And don’t get me started about clunky, short-toed fat knees.” When I was looking at knees in the small boats at the Wooden Boat Festival in Port Townsend this past September, I saw a lot of short-toed knees and thought it was time to get Ben “started” and have him write an article. While most of the knees at the festival were one-piece, straight-grained knees, one boat had some very nicely shaped half-lapped knees, but the joints that showed—vertical on one face, horizontal on the other—didn’t look right. I had a boatbuilder friend take a look at them, and he agreed that the shapes were good but the glue lines spoiled the effect.
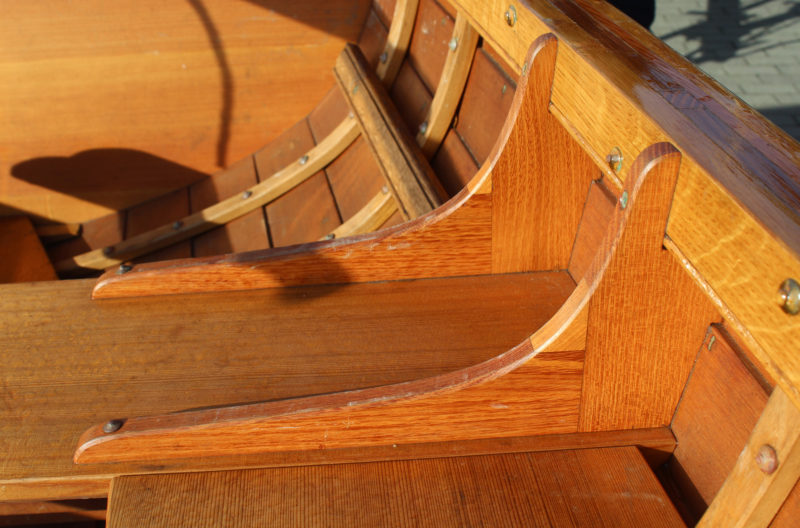
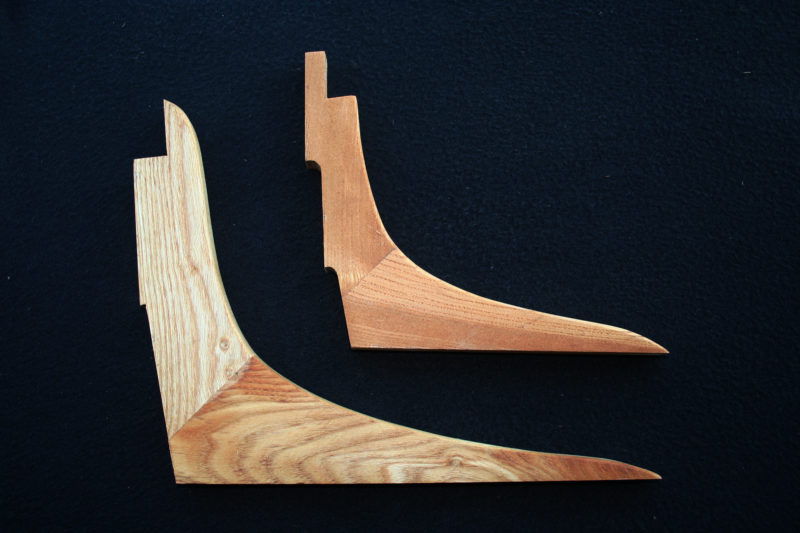
These knees are very nicely shaped, but the curves can’t compete with the rectilinear filler blocks and seams.
I made some sketches of other ways to make knees using straight-grained lumber, and thought that an angled joint would look much better. The easiest way to join two pieces in a mitered corner would be with a spline. I had made two-piece breasthooks with splined joints, and they’ve held up well over the years. The method should work just as well on knees.
I don’t have a boat in the works, so I made up some knees that could fit boats that I’ve already built, but they would be objets d’art at best. I made one in breasthook fashion with table-sawn kerfs running parallel to the angled miter edges. That worked, but left the spline exposed.
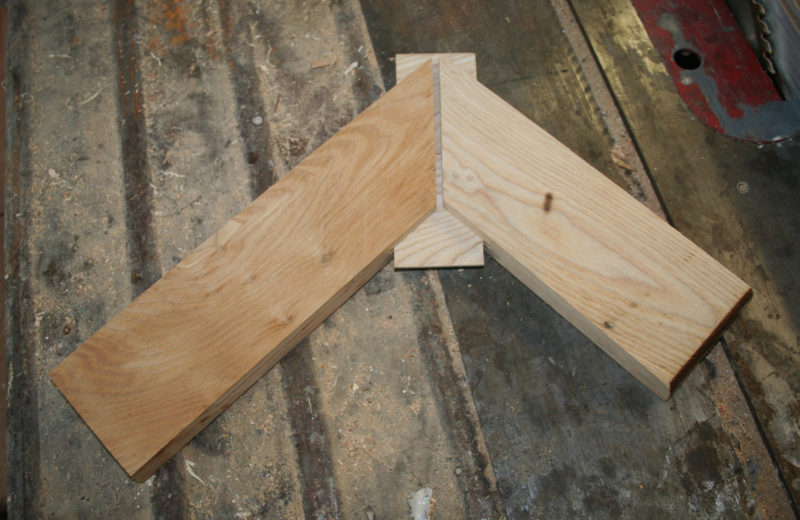
I then cut kerfs perpendicular to the miter edges, cutting about 1/2″ shy of what would become the curved edge of the knee. That was the way to go. The first mitered-and-splined test pieces were joined at a right angle, and when I cut the knee to shape to fit the slightly obtuse angle of the boat, the miter wound up well above where the knee would meet the thwart. I changed the angle of the miter to a 98-degree angle to match the flare of the side at the thwart, and then, by using slightly oversized stock, I would be able to arrange the template for the knee to put the miter angle where I wanted it as well as fine-tune the run of the grain in the ends of the knee.
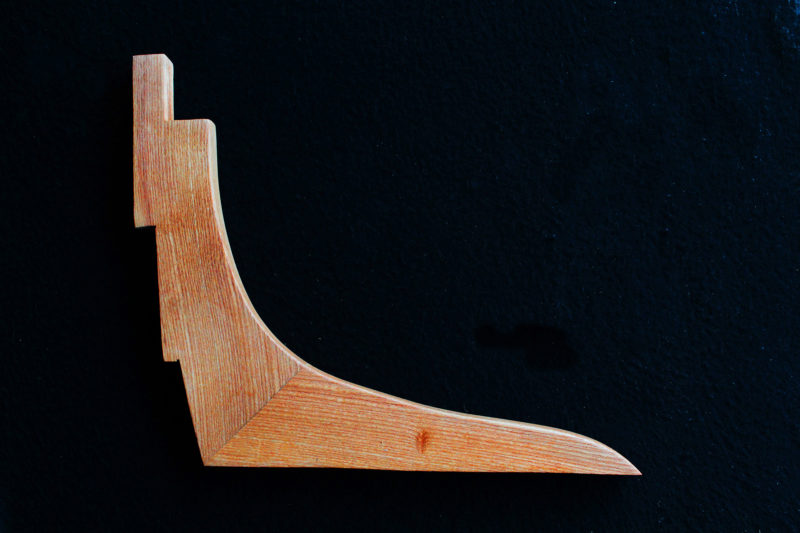
The kerfs cut at a right angle to the miter joint are quite deep. That increases the gluing area, which I think will make the joint quite stable. When I need knees for the next boat I build, I’ll make them this way, mitered and blind-splined.![]()
Kerfs cut parallel to the miter joint will leave the spline visible after the knee is shaped.
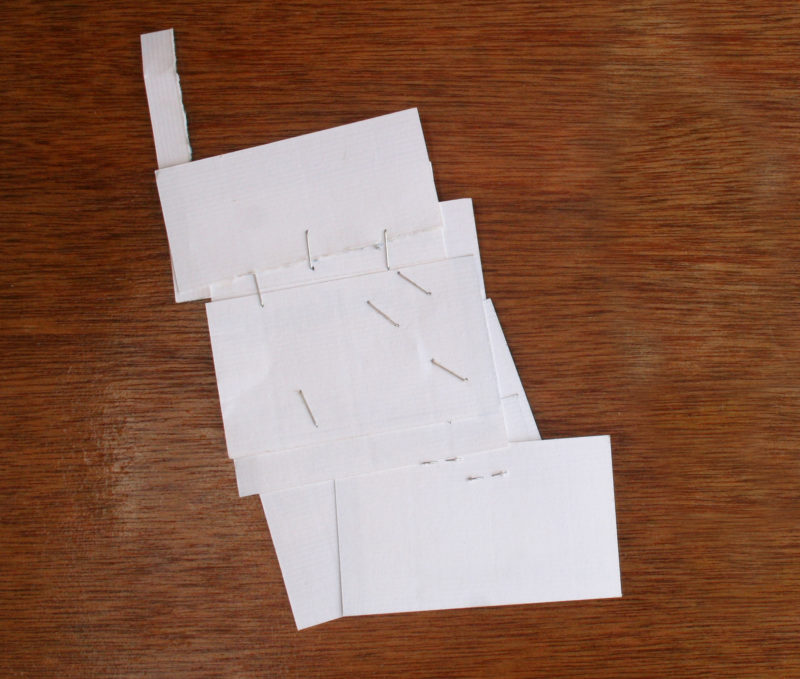
I initially made a business-card template for just the upright leg, not a pattern for the whole knee. The left edge and the bottom fit the contours of the lapstrake planks and the thwart.
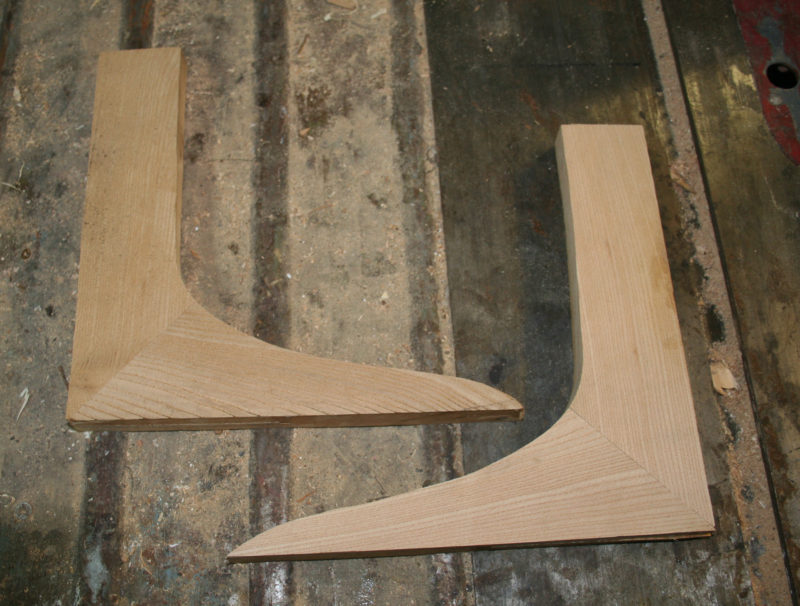
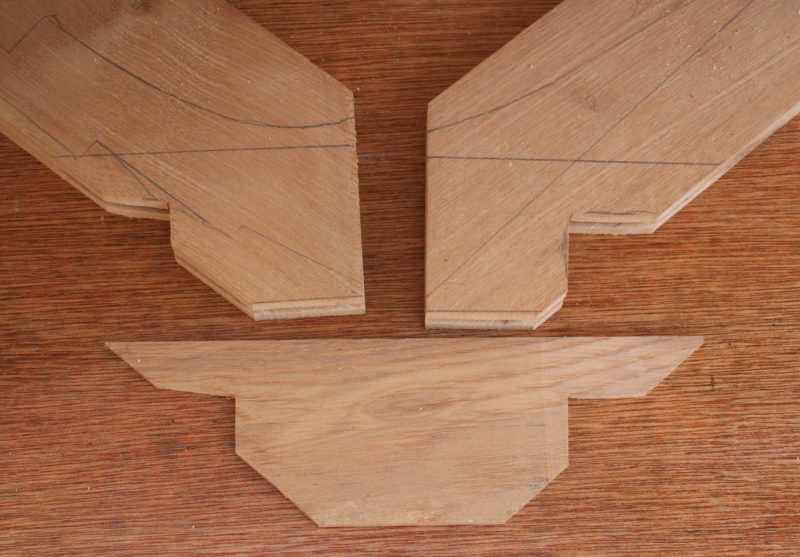
I started by making right-angled blanks for knees and cutting the toes before tracing the planking contours from the template on the upright. That approach didn’t give me the best run of grain on the upright nor control over the location of the miter joint.
Two early versions of splined knees had the miter joint higher than I had wanted and had poor color matches despite having each knees sections cut from the same piece of wood.
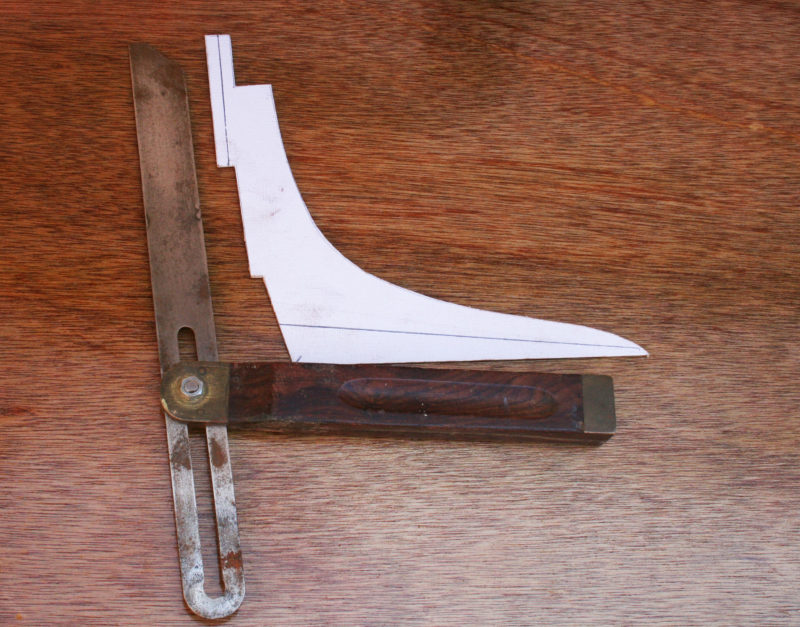
For my next trails I used the business-card template to make a full pattern for the knee. The pencil lines show the direction I want the grain to run in the finished knee. I set the bevel gauge to record the angle between the line, in this case 98 degrees.
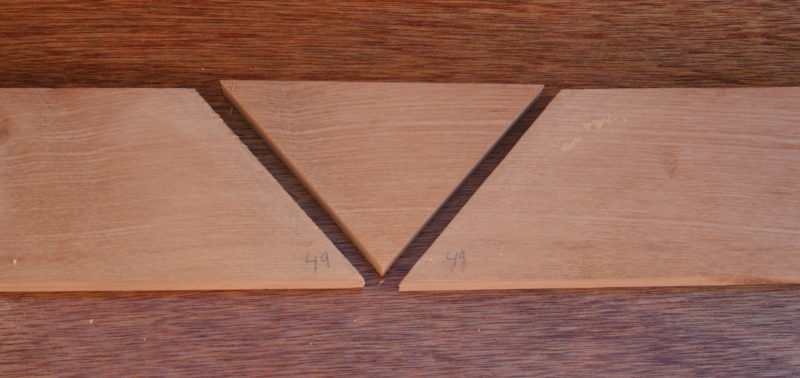
By making two cuts and “wasting” the triangle, I can get a better match of grain and color. When I made a singe cut and flipped on piece to get the angle, the color should have looked the same, but the angle the grain takes at the surface catches the light in different ways. Flipping one piece gave the wood a different look that was quite evident at the joint.
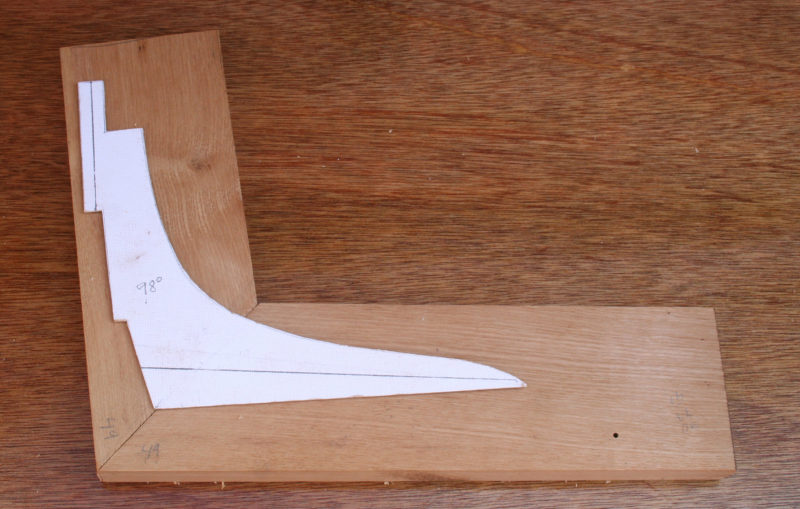
With oversized stock I could adjust the pattern to get choose the best run of the grain and the location of the miter joint that looked best.
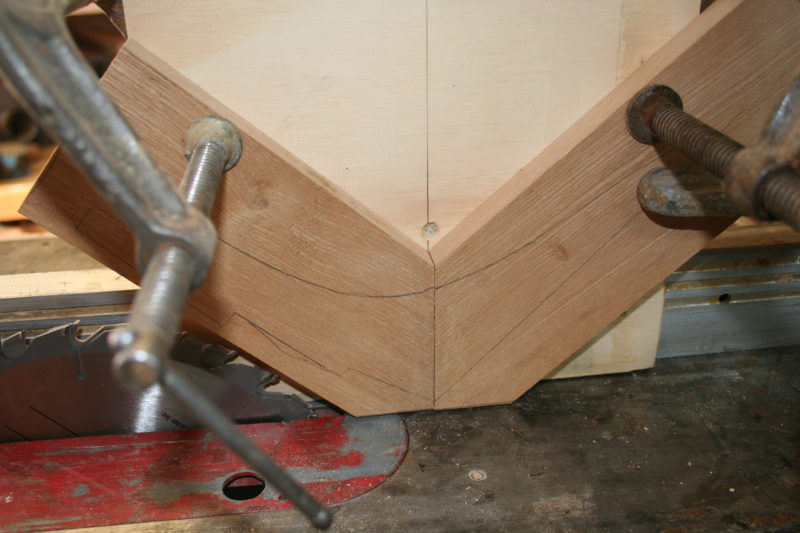
I used a shop-made tenon-cutting jig to cut the kerfs for the splines. It straddles and slides along the rip fence. Cutting off the corners of the two pieces being sawn removes wood that doesn’t need to be run through the saw. I have two blades stacked on the saw arbor to cut a 1/4″ kerf.
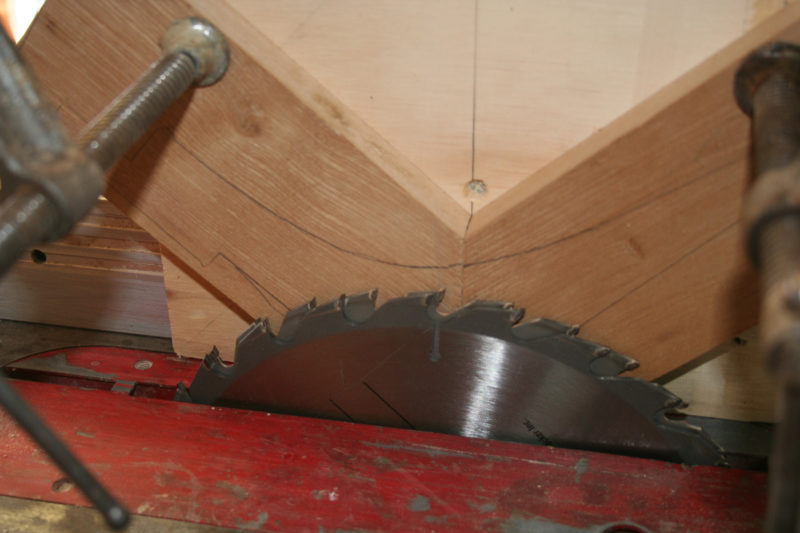
I set the depth of cut to fall short of what would eventually be the inside face of the knee.
Oversize blanks provide extra wood to make notches for a clamp to squeeze directly across the joint without slipping. The spline has a little more wood sawn off so the clamp won’t bear against it, preventing the clamp from squeezing the joint closed tight.
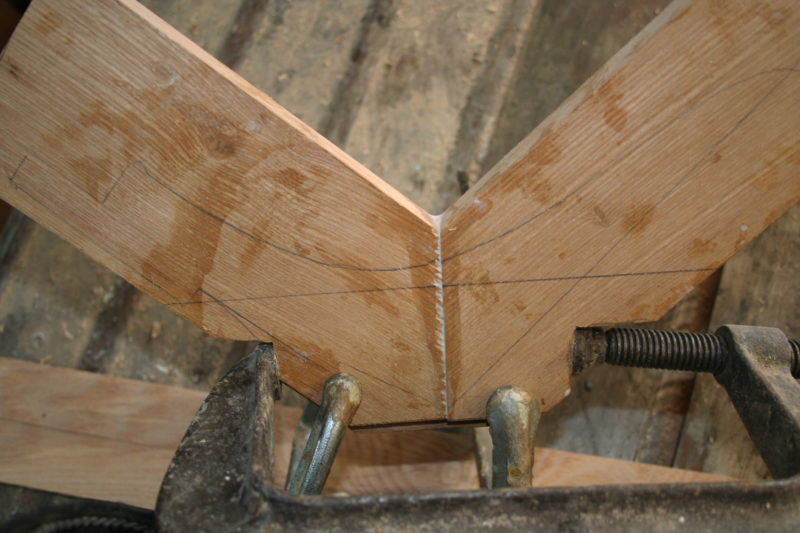
A large clamp squeezes the miter joint tight and two small clamps squeeze the wood tight against the spline.
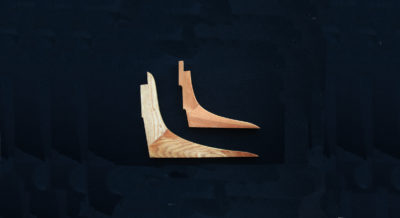
The finished knee has a close match of grain and a good placement of the miter joint.


While I haven’t yet started the build of my first boat, as a woodworker this is a great reference to help me create attractive and strong knees. It will certainly help this novice boatbuilder avoid several rookie mistakes. Great article!
I used to see ravines in Eastern Washington where orchardists had discarded prunings, and in some cases, whole apple trees. I used to fantasize about prowling through those wood piles to salvage good crotches and knees for boatbuilding projects. Though I didn’t do that, I did eventually have to put down one of my own apple trees, and was able to get some nice forks and elbows or crooks out of it. They should be left to air dry in a cool, dry location for as long as possible to prevent checking. They make the nicest knees and breasthooks. I found it’s best to avoid wood that has much twist to it. Even though the twist can be planed or jointed out of the piece, eventually it may come back to bite you.