On Church Pond in New York State’s Adirondacks, the day after their high-school graduation in early June 1969, Gary Carbocci and friend Rich Horehlad were fishing from an old wooden canoe borrowed from Paul Smith College on Lake St. Regis. The day had been a little chilly, but relaxed and uneventful. Then Rich hooked a 30-lb (or so) northern pike. As he strained to land the fish, Gary leapt to assist. “No!” cried Rich, “Don’t touch the line, Gary!” Too late; Gary pulled on the line, Rich lost his rhythm, and the fish swam away with a flick of its tail. Words were spoken, the boys resumed their positions, but there were no more fish that day.
Gary Carbocci has carried the memory of the “one that got away” for “55 years, 3 months, 11 days, and counting.” He felt bad as soon as it happened, and through the months and years that followed, he made and kept a vow: he would build an Adirondack guideboat (“the boat we’d wanted to borrow from the college”) and take Rich out on Church Pond to “claim his prize.”
 Gary Carbocci
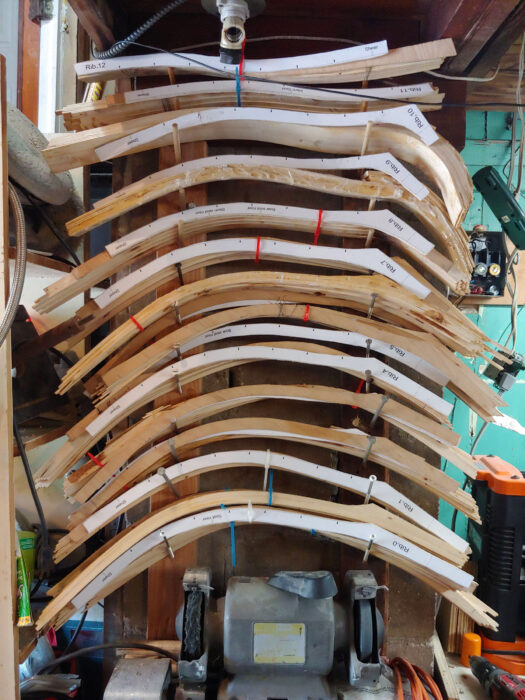
Each of the frame blanks was laminated in seven layers of spruce. Ultimately the frames would be 3⁄4″ × 5⁄16″. The frames in the ends of the boat (seen here at top) do not overlap and thus required no feet.
Gary had no boatbuilding experience. A professional arborist, he has decades of experience with wood, and for much of his life he’s used small rowing and paddling boats, but he’d never built one. His father, he says, has built museum-quality boat models, but Gary didn’t learn the skill from him. But still he dreamed of building that guideboat, and when a friend gave him Building an Adirondack Guideboat by Michael J. Olivette and John D. Michne, he was hooked. He decided he’d waited long enough. “I’d been thinking about it for almost half a century,” he says. “It was time.”
The book came with offsets but no plans (a second edition does offer downloadable CAD drawings), and Gary spent “countless hours on the drafting table lofting.” He describes the process taking hold of him, “I slipped into a gentle dream [that would ultimately last seven years], and then fell headlong in love with what I was creating.”
 Gary Carbocci
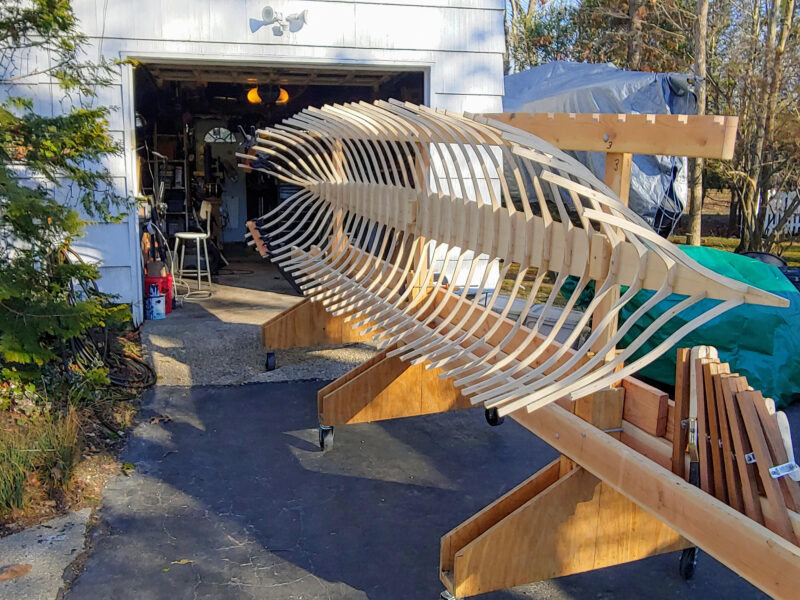
The boat was framed, in the traditional manner, while on its side, so Gary had easy access for fastening the overlapping frame feet to the bottom board. Once all the frames were in place, he turned the hull upside down for planking. The notched stock plank—seen here above and behind the frames—was lowered, and the bottom board was centered over it, the frames fitting into the notches.
Olivette and Michne’s book (Gary’s constant companion throughout the build) describes two building methods: traditional planking and strip-planking. Gary decided on the traditional approach. “I wanted it to be historically accurate as far as possible.” His frames would be spruce—laminated in seven layers to 3⁄4″ × 5⁄16″—and the planks 3⁄16″ white pine. He bought 2 1⁄2″-thick pine boards and milled them in his driveway, first to rough-cut planks about 1⁄2″ thick, and then to planed plank stock of 3⁄16″.
Along the way, Gary made many of his own tools, again following recommendations and direction in the book. He made a Grant-lap cutter to fashion the shiplap-style edges of his planks; a scarf-cutting ramp that utilized a router to accurately cut the plank scarfs (with at least one, sometimes two, scarfs per plank), and he made some of Michne’s deep-throat planking clamps, as well as many fast-action clamps based on a design featured in Gordon L. Fisher’s book, Tale of an Historic Adirondack Guideboat and How to Build One.
 Gary Carbocci
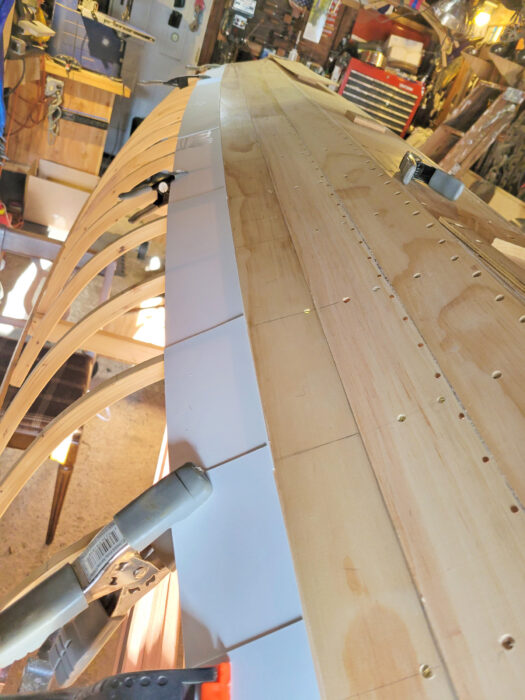
Spiling the planks was a slow process until Gary found the plastic strips marketed for creating kitchen-countertop templates. He cut the strips into short lengths, which he could glue together along the length of the plank and create a template in half an hour.
Everything was a new experience. He’d made small stuff before, fixed things around the house and yard, but, Gary says, “had never built anything so complicated; it’s all curves, there’s not a straight line on the boat. And every step took a long, long time.” After building the strongback, he moved on to creating the frames. There were a lot of steps—all of which he had to learn—and the 16′ boat has 33 frames, each built in two halves; “that’s a total of 66 pieces to be constructed. And they have to be right…it’s the frames that define the boat’s shape and give it its strength.” Each frame had to be lofted; spruce billets that would make up the laminations had to be ripped, and the billets bent around the forms and then glued up into frame blanks, seven laminates per blank. The blanks then had to be cleaned and shaped, and finally, each blank was sliced into four parts: two pairs of half-frames, one frame for each side of amidships. “At least with the two ends of the boat being mirror images of each other, I only had to build half the number of blanks.”
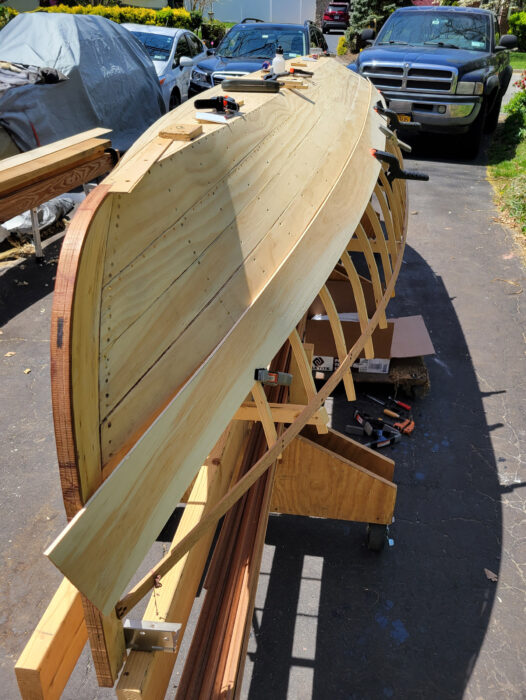
As with so many at-home boatbuilding projects, space was tight. Gary built the strongback on a wheeled platform so he could move the boat in and out of the garage, to work in the driveway in fine weather. “Assembling the frames was OK,” he says, “because I built it guideboat-style, on its side, but once that was complete, I had to flip it upside down to assemble the stems and the planking, and it was almost impossible to get around it in the garage.”
 Gary Carbocci
On fair-weather days, Gary was able to wheel the building jig out into the driveway where there was natural light and more space.
Like the frames, the stems were laminated in spruce. They are also the same in both the bow and the stern so Gary could laminate up a single stem blank and cut it in half, down from a 2″ thickness to 1″. The outer laminate of each stem was a 1⁄4″-thick strip of mahogany. he would fit and hand-shape the outer stems in place after the hull was planked.
From the outset the planking went slowly. The planks, Gary explains, are roughly 6″ wide and over their 16′ length they curve in “every direction imaginable.” Working on his own, constantly second-guessing what he was doing and seeing, it took him three weeks to make the first plank and three more weeks to install it. Nevertheless, he persevered. He moved on to the second plank, another three weeks to make and three weeks to fit. At that rate, he says, “I was looking at a total of 96 weeks, just to complete the planking; and that assumed everything went according to plan.” And things didn’t always go according to plan; in the early stages, Gary “ruined a huge number of hard-earned planks, and wasted hours of time.”
 Gary Carbocci
Planking complete, the end was in sight, but there was still a lot to do. Next, Gary would turn his attention to fitting the cherry decks, then the finishing, fashioning the brass stem caps and runners, and installing all the fittings.
Then he found a product that changed everything. “Plastic template strips…they’re long rolls of stiff PVC plastic, made for creating templates for kitchen countertops. I cut them into short lengths, butted and clamped a piece to the Grant lap of the plank above, then grabbed a second piece, laid it down so that it overlapped the first one, butted and clamped it to the plank lap, glued the two template strips together, and moved on, repeating all the way along the plank. It worked like a charm. Suddenly I was able to get a plank shape in half an hour. All I had to do then was take the long plastic template to the board, cut the plank, and mount it.” Theoretically, Gary says, he could have used each template for both sides of the boat, but he played it safe and made one template for each plank on each side.
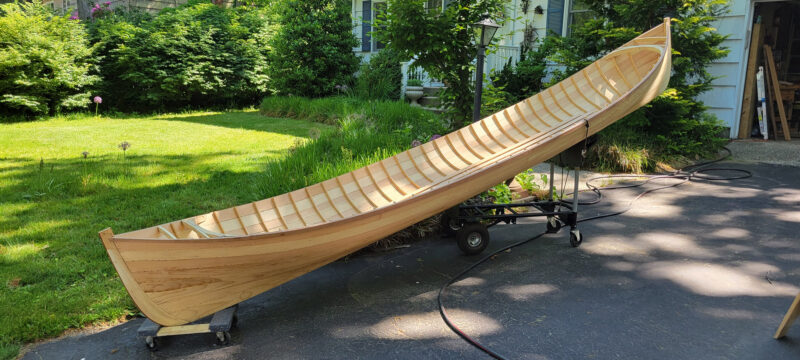
Four years into the project, Gary had a fully planked boat. He turned it upright and took a moment. “That shape,” he says, “when it was all ribs it looked like some prehistoric skeleton, but planked up, it was so beautiful.”
 Philip Simone
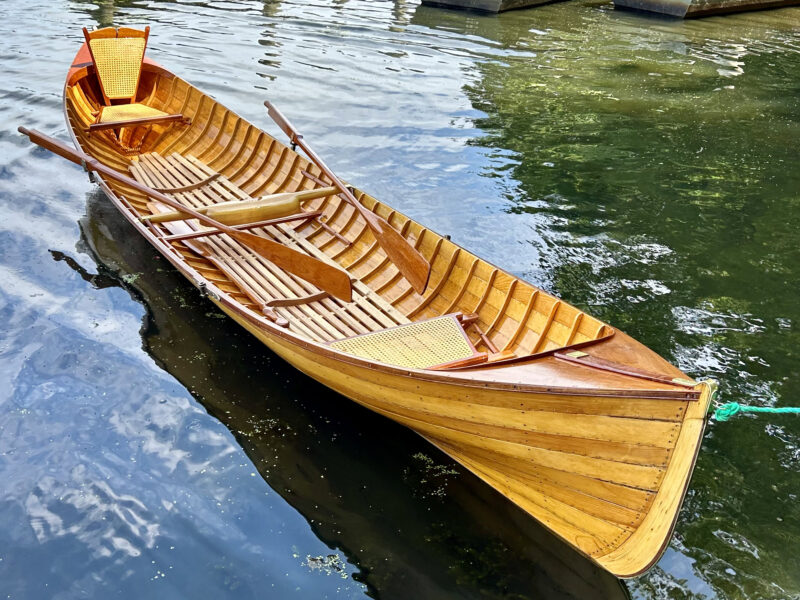
On launching day, PRINCESS BRYNN remained bone dry. There was, says Gary, not a single leak.
But he was still a long way from the end: There were the spruce carlins and cherry decks to fashion, the mahogany gunwale made from a single 22′-long piece of mahogany, the cedar floor grate that he made “one year to get me through the winter doldrums, but then was forever underfoot.” And there was the brass: three brass strips on the bottom of the boat to protect it when sliding across the ground or on the trailer, and two brass stem caps. Shaping the caps, Gary says, had seemed daunting, but once more the book helped him. “The authors did such a great job describing the process, it ended up being child’s play. I’d seriously thought about having the bands and caps made, but I’m glad I didn’t.” His only regret, he says, is that he went with 1⁄8″-thick brass, which he believes to be historically correct. “The book recommended 1⁄16″, and I wish I’d done that because I added too much weight. All told, the brass added close to 40 lbs and now the boat’s too heavy for me to pull up onto my shoulders by myself. Once it’s there I can carry it…I just can’t get it there!”
When he had embarked on his build in 2018, Gary had set a launch-date goal for the spring of 2024. As he neared the self-imposed deadline, however, he realized he wasn’t going to make it. “I wanted to make everything, but there was no way I’d be able to do that and get it in the water for 2024.” He decided that, for expedience, he would buy some of the parts from Newfound Woodworks. “I bought the bronze oarlocks, the oars and the paddle, and the three seats. They’re beautiful quality, but I’m still going to make my own at some point.” It bought him time and allowed him to focus on the finish: two coats of epoxy, eight coats of varnish.
 Philip Simone
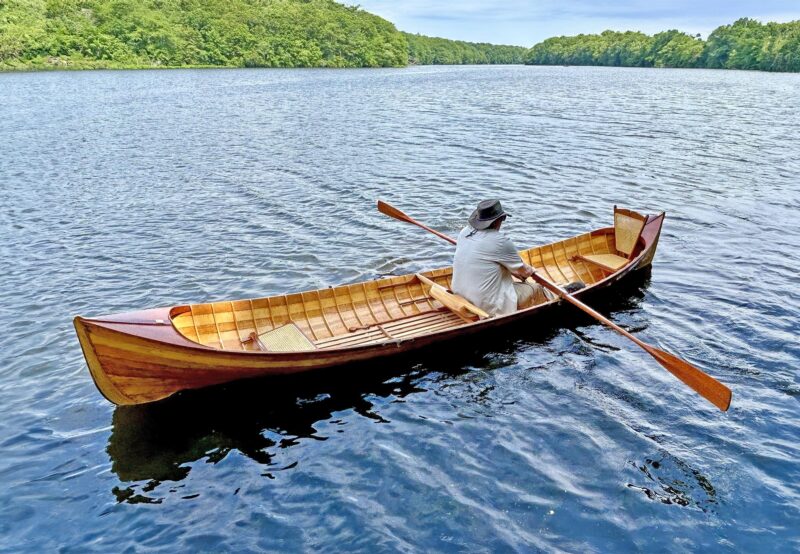
The rower sits on a cherry-framed caned seat suspended on seat cleats fitted on either side. The seat is not fixed and can be moved fore and aft to suit the size and preference of the rower. The carrying yoke, seen here in its cleats forward of the rower, will typically be removed for rowing.
By spring 2024, PRINCESS BRYNN (named for the most recent of Gary’s grandchildren) was ready. But then the plans went awry. “Rich’s daughter in Australia had a baby, so he had to go visit. Then his other daughter had a baby, so he had to go visit her. Then, just as it looked like we might be able to plan an excursion in the summer, Rich had to go in for heart surgery. Turns out, when you get older, it’s not the boat you have to worry about working, it’s yourself!”
Despite Rich being unable to join him, Gary did get PRINCESS BRYNN into the water this year. “She moves like a dream—the 2″ rocker built into the bottom board makes her so maneuverable, she glides over the water like you’re flying. And she’s so stiff, nothing flexes, so all the energy you put into the oars goes into moving the boat forward. The original builders knew what they were doing.”
 Philip Simone
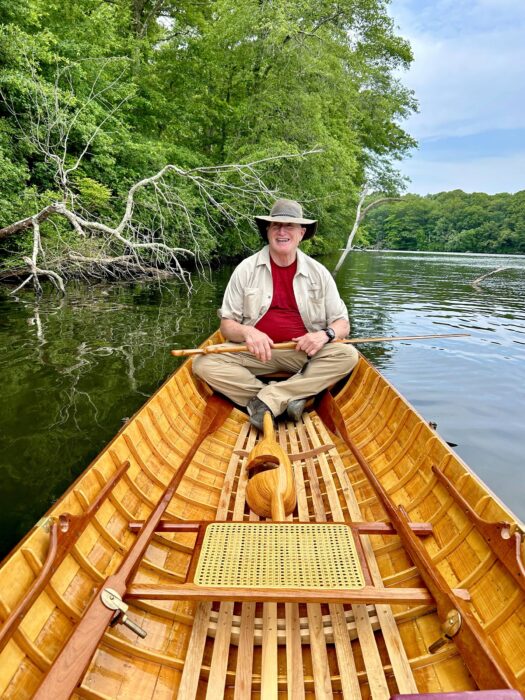
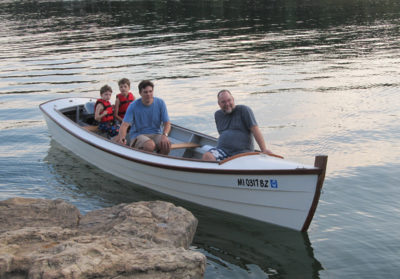
Gary Carbocci—proud builder and, for once, happy passenger.
Next summer, Gary says, he and Rich will make it back to Church Pond and they’ll land that fish. “It’ll happen,” he says, “I promised.”
Read More About the Adirondack Guideboat
Did you know this classic rowboat traces its lineage all the way back to the 1840s? Learn about how this design came to be, and how boatbuilders adapted it to the building methods of today.
The Adirondack Guideboat, from Small Boats Annual 2017
Adirondack Guideboat: A classic rowboat updated for modern construction techniques, from Small Boats August 2024
The Adirondack Guideboat Today, from WoodenBoat May/June 2023
Jenny Bennett is editor of Small Boats.
Do you have a boat with an interesting story? Please email us. We’d like to hear about it and share it with other Small Boats readers.

A beautiful craft!!
We built ours a few years back from the same book with strip planking, which went fairly fast compared to the frame fabricating!
I’m impressed with the lapstrake planking.
Hello John!
Thanks! I hope it does not look too much like a lapstrake. I had a Grant Lap Plane made in England for me. I used it to true up the Grant lab joint that I cut with a router set up. I also used the Grant Lap Plane to adjust the lap to get it close as possible. I had some trouble with using the tool because you need two to do a good job, one to cut the joint when the grain exits from the right and one plane to cut the joint when the grain exits on the left. I went through so many planks that I kept a few I would not have kept if I was not trying to meet a deadline. There were only eight planks on each side of the boat. I got much faster when I used the plastic template material to spile the planks! It was fun tacking the planks there were about 4000 tacks or so.
Wonderful build! Any further comments on where to purchase and how to use “plastic strips marketed for creating kitchen-countertop templates”?
John
You can see how they use it to template countertops but using it to spile a plank is just as easy. You cut the strips into 5“ to 6“ pieces and place them along the area you want a plank; glue the strips together as you go being careful not to glue it to your project. When the glue dries (which takes seconds) you remove the strips and that will give you the exact shape the mating top of the plank. You can see in the photograph in the article where I have the strips laid out on the boat I built. There are many companies that sell the material, including Stone Coat Countertops, if you do an online search for “countertop template material“ you’ll find lots of resources.
Kind regards
Gary
Lovely build! Where did you buy the wonderful oarlocks? I’ve looked for ages for anything other than the inexpensive chrome ones.
Hello Trinity Too
You can get those oarlocks at Newfoundwoodwoking.com. The have lots of items that will help you get your boat launched!
Gary
Wow! Impressive quality and authenticity in that build. And secondly…. it was six years between start and finish; your patience/perseverance is also impressive. When I lived in the Adirondacks, the Guide boat design caught my eye, but I don’t have the patience for the detail you put into this hull, and I like to experiment.
Thank you Wayne!
I followed the book to make it as close to museum quality as I could. I was hoping to take some black and white photographs just for fun, dressed in period clothes! We will see!
Kindest regards
Gary