 SBM photographs, captions, and video
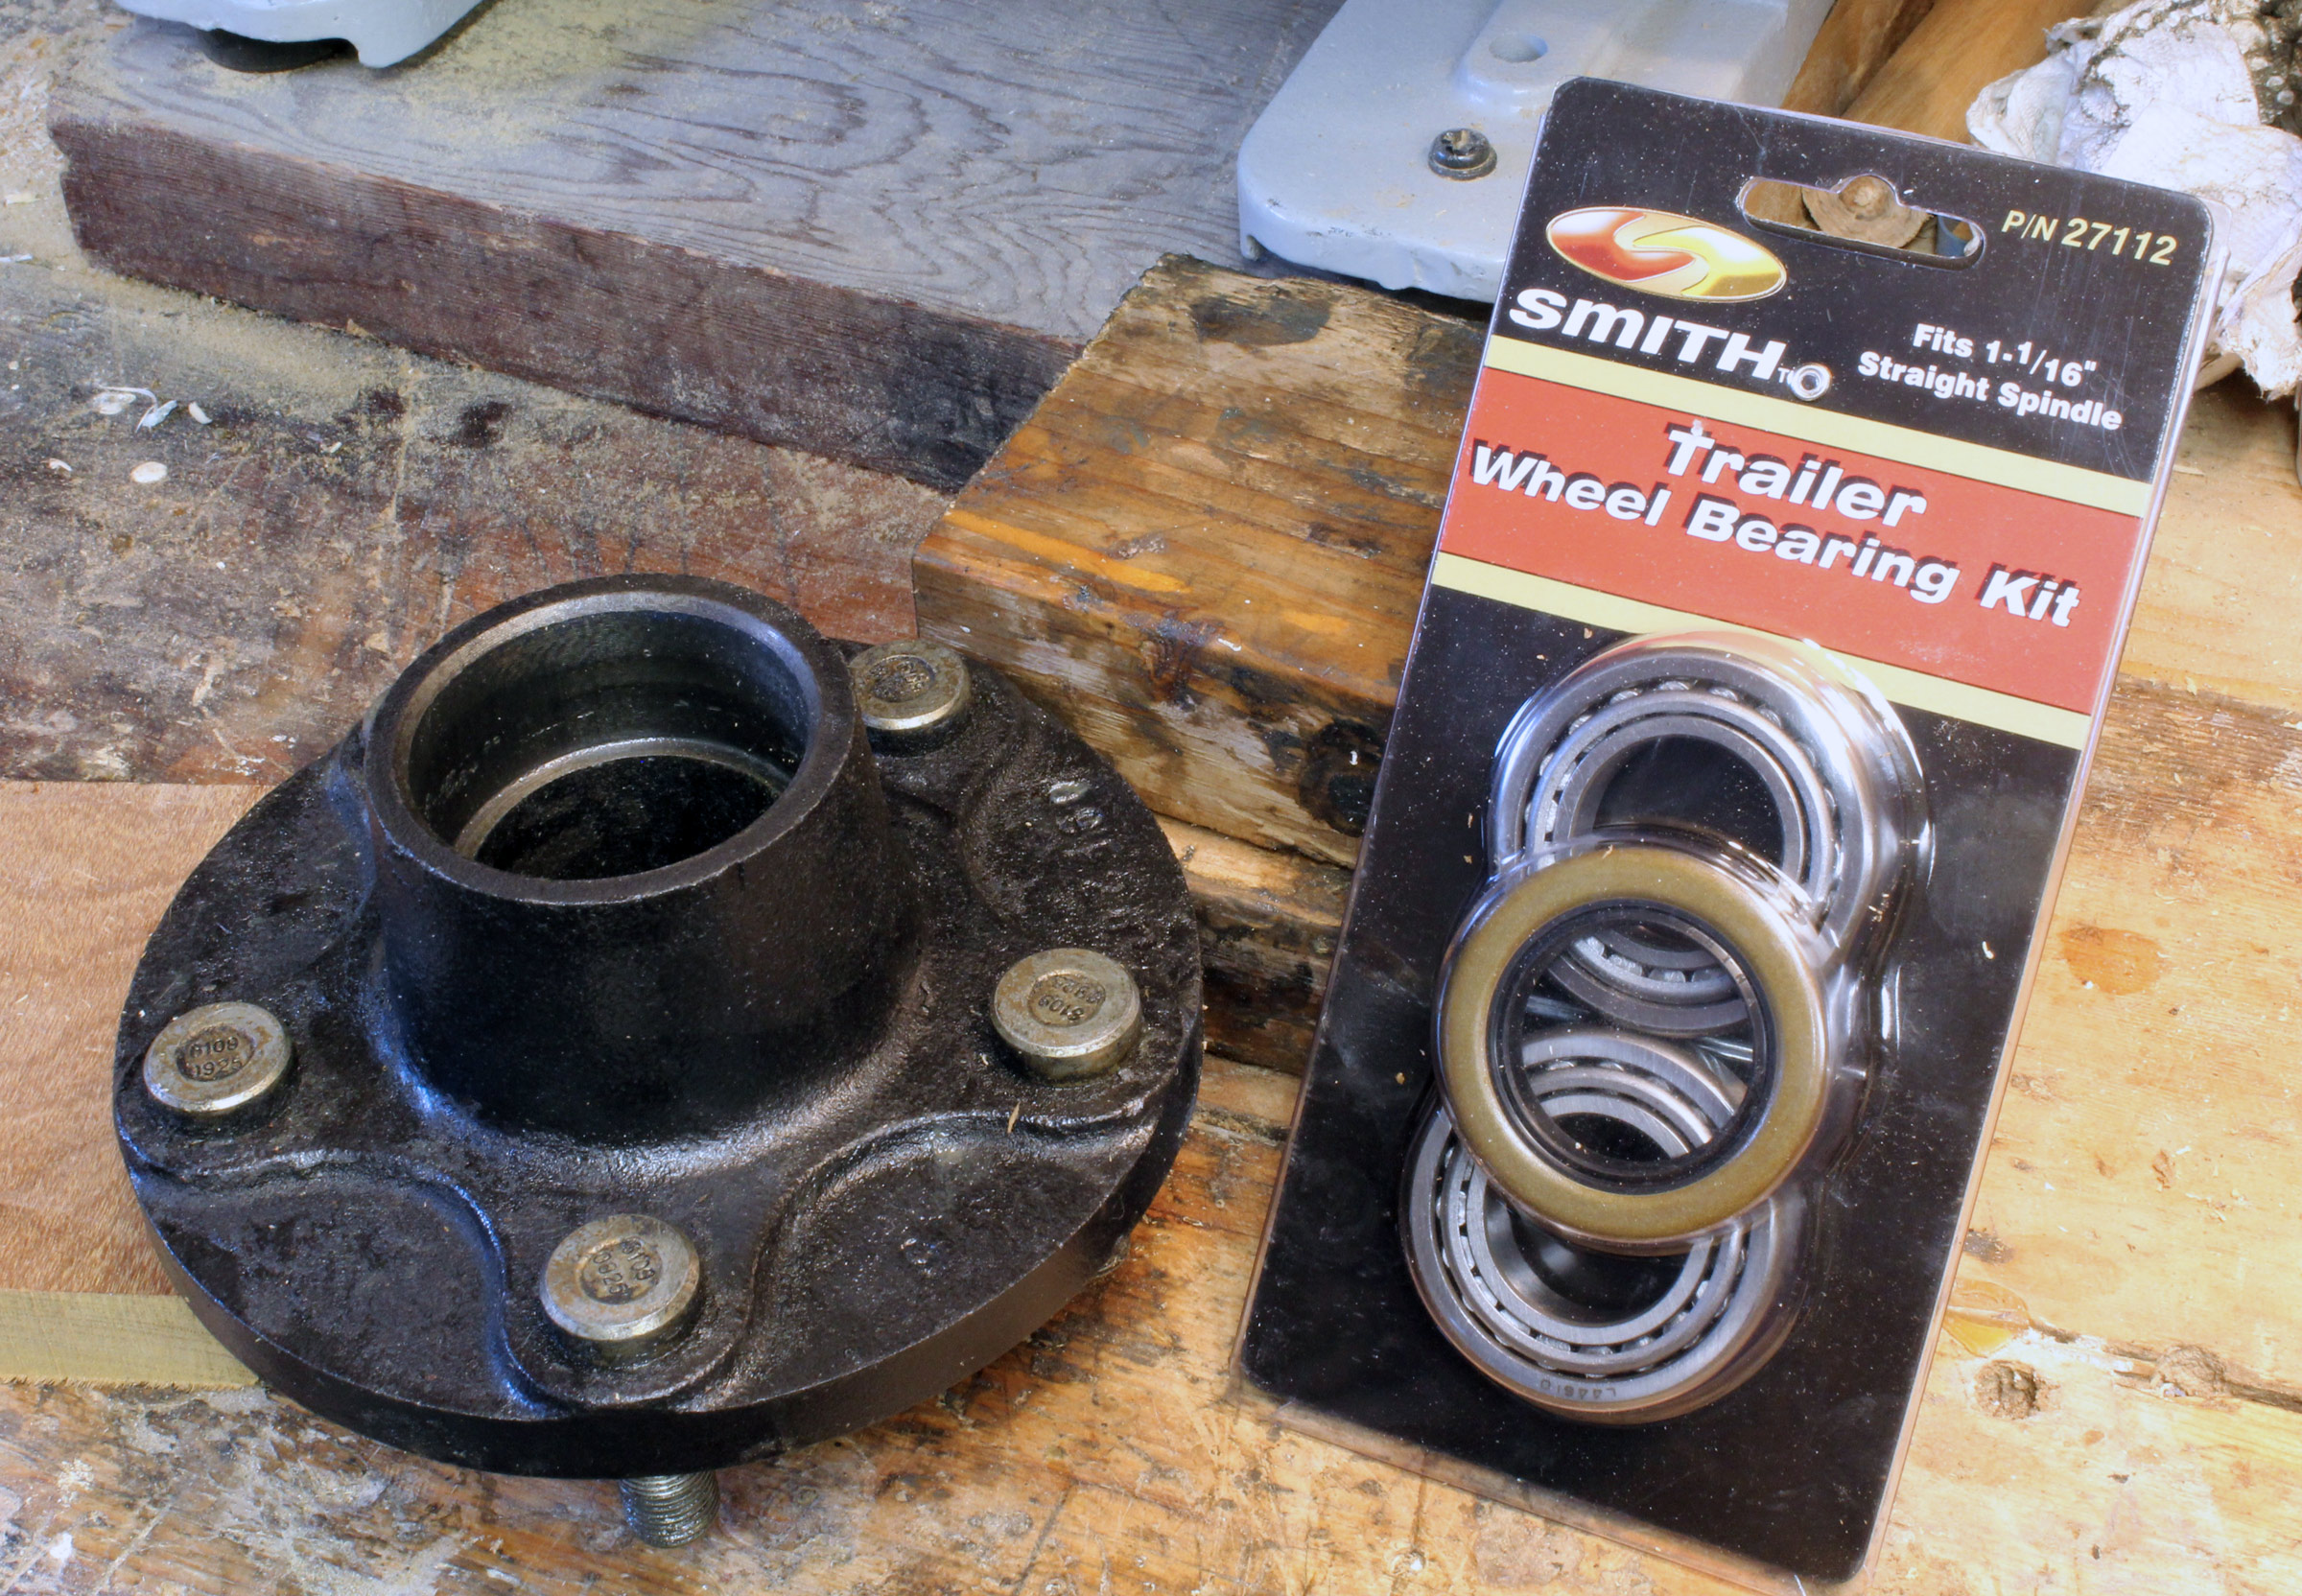
This $17 bearing replacement kit includes bearings, rear seal, and cotter pin.
Spring is our time to recommission our fleet of four trailers, so I recently made the rounds to check the condition of lights, tires, axles, and bearings. I found that the grease in the bearings of one of our trailers had a milky brown appearance, rather than the clear, thick motor-oil appearance that it normally has. The change in color was an indication that water had found its way into the grease. Grease that has been overheated by friction-generated heat will be darker than new grease. With this trailer, it’s likely that the seals had failed and the bearing needed to be removed, cleaned, and inspected. The cleaned bearings or their replacements then get repacked with grease and reinstalled with new seals.
Repacking a bearing with grease is a messy job, but relatively easy and even somewhat fun. Round up a couple of rolls of paper towels, protective gloves, and a piece of cardboard for a clean, disposable work surface. You’ll need bearing grease; boat trailer bearings require marine-grade grease, which has more hydrophobic qualities than regular trailer bearing grease.
Ensure that the trailer tongue is well supported, either blocked up or hitched to a car with the parking brake on, and chock the far wheel. Jack the trailer up until the wheel is free to spin, and support the trailer with blocks or a jack stand, just in case the jack fails. Hold the tire on both sides and twist it back and forth. There should only be a little play. Then spin the wheel and listen to it. If it’s making any noise, it’s likely there is damage to the bearings and/or races. Lower the trailer until the tire makes contact with the ground, then loosen the lug nuts, jack the trailer up again and remove the wheel and tire. Any grease on the inside of the wheel’s inner rim is an indication of a failed seal.
Bearing Buddies are removed by gently tapping them off with a rubber mallet or hammer. If you use a steel hammer, hold a piece of wood against the Bearing Buddy and tap it to prevent damage. Protective grease caps with a flange resting against the hub can be removed with a screwdriver. Clean the Bearing Buddies or caps and set them aside.
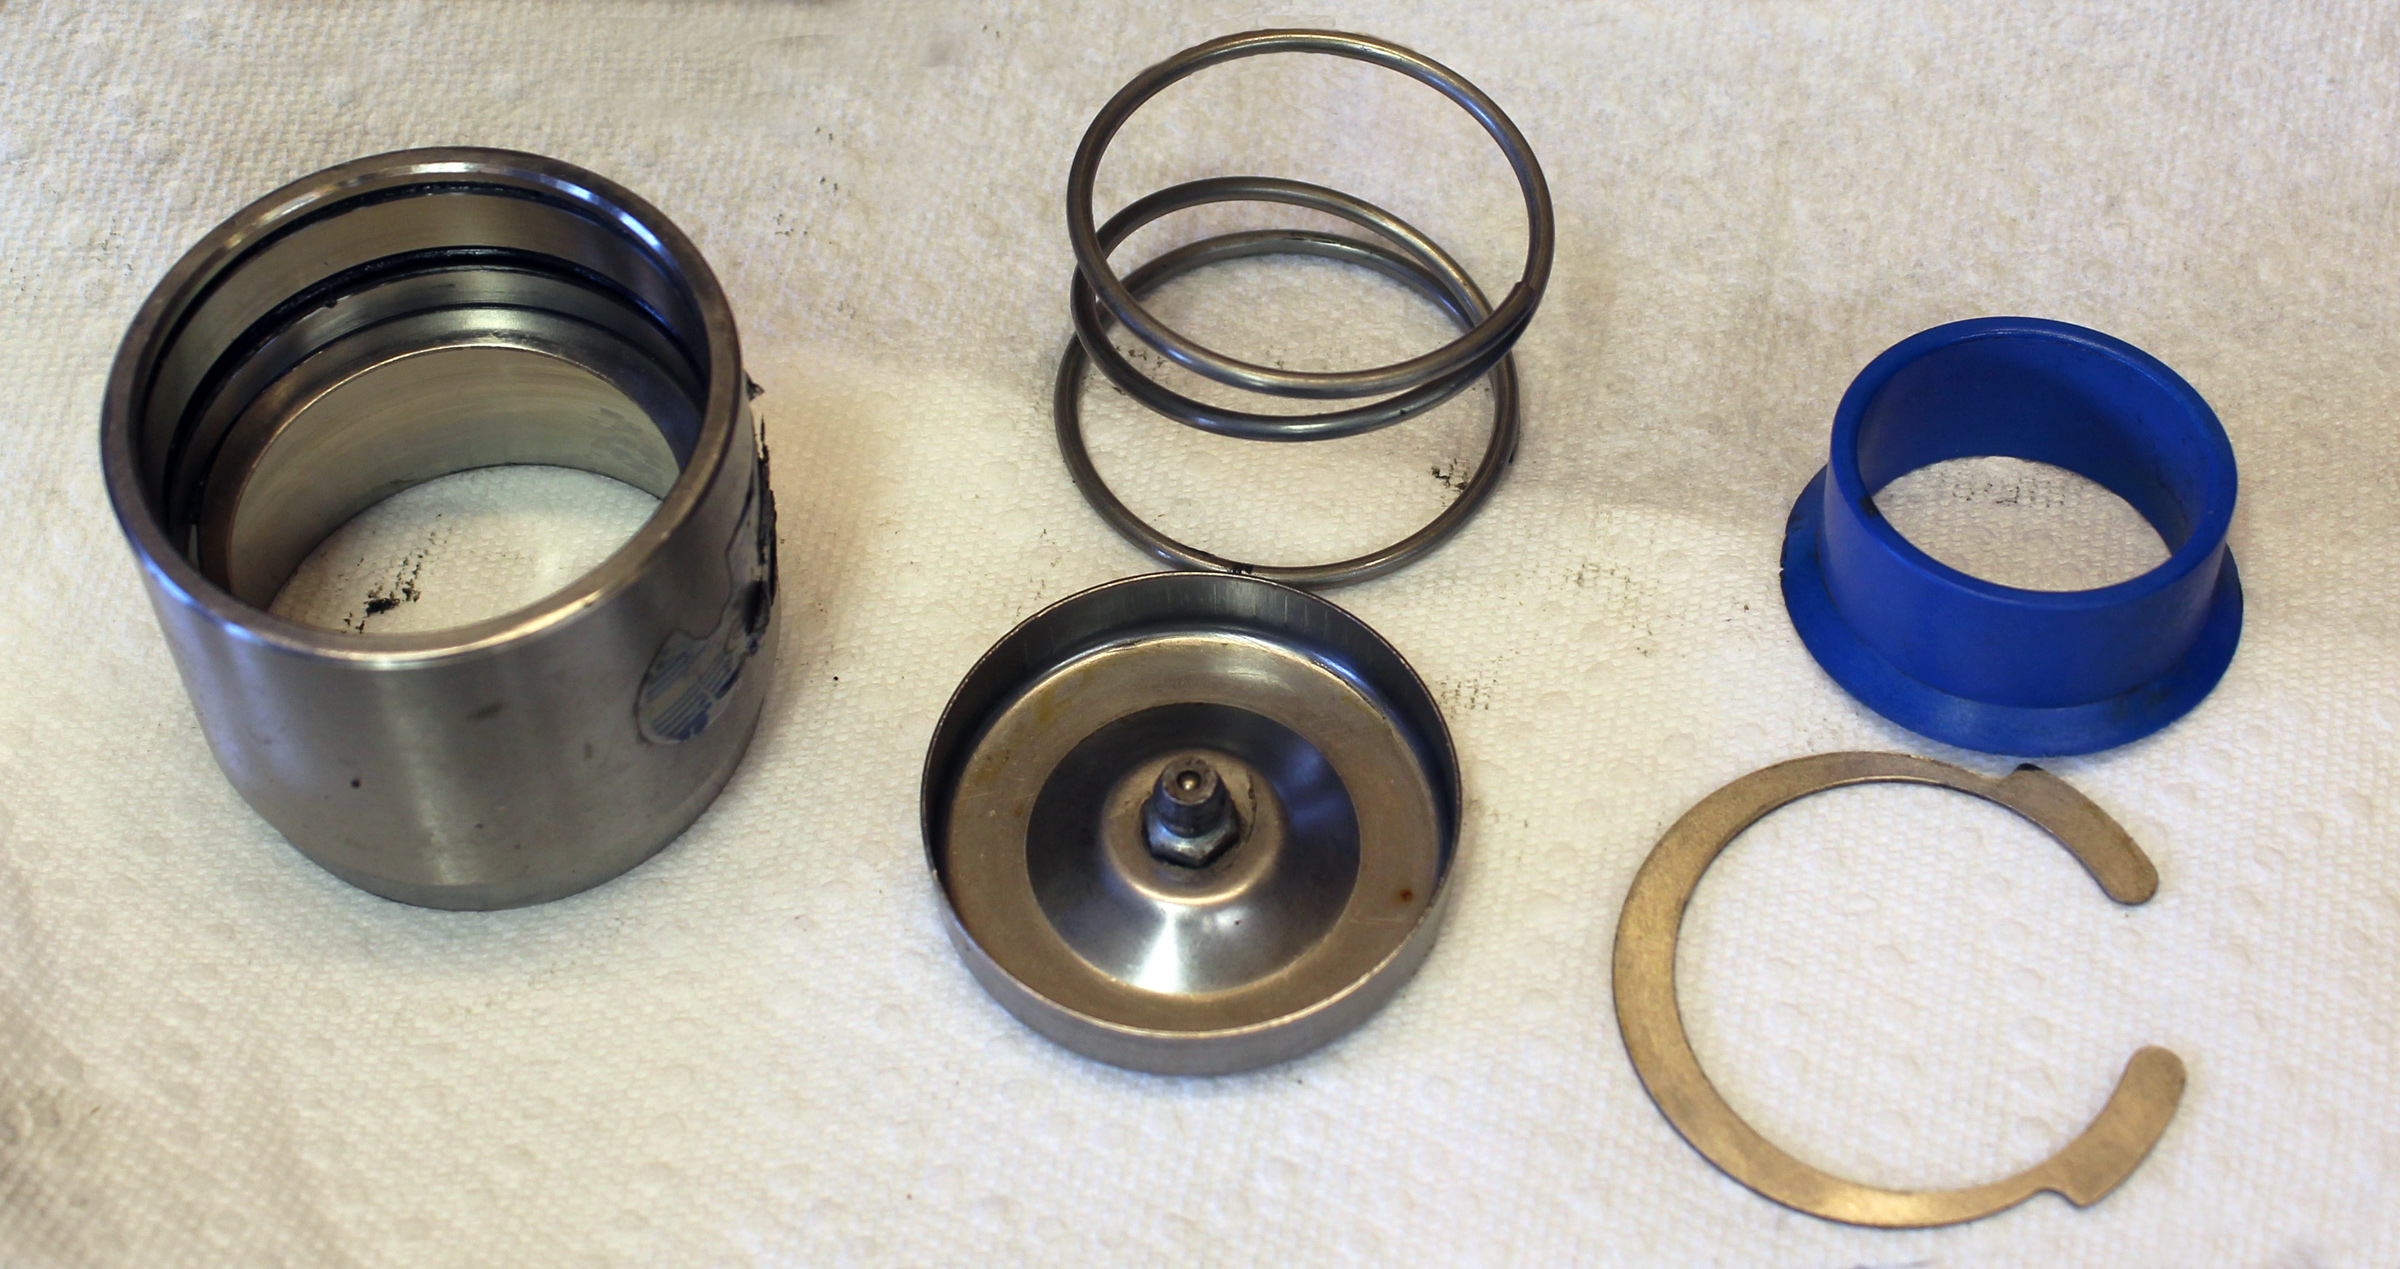
Bearing Buddies are not difficult to take apart for cleaning. Inside the shell of the Buddy, there’s an O-ring set in a groove, and the sliding “piston” seals against the O-ring. As you fill the Buddy with grease through the fitting on the piston, use a light touch and let the piston move outward as the grease fills the space behind it. As the Buddy reaches it’s maximum capacity for grease, the piston will slip past the O-ring and excess grease will slip leak to the outside. If you push against the piston as you pump, the piston will remain sealed by the O-ring and excess grease will be forced past the seal over the inner bearing. That might not damage or dislodge the seal, but the escaped grease will make a mess of the inside of the wheel.
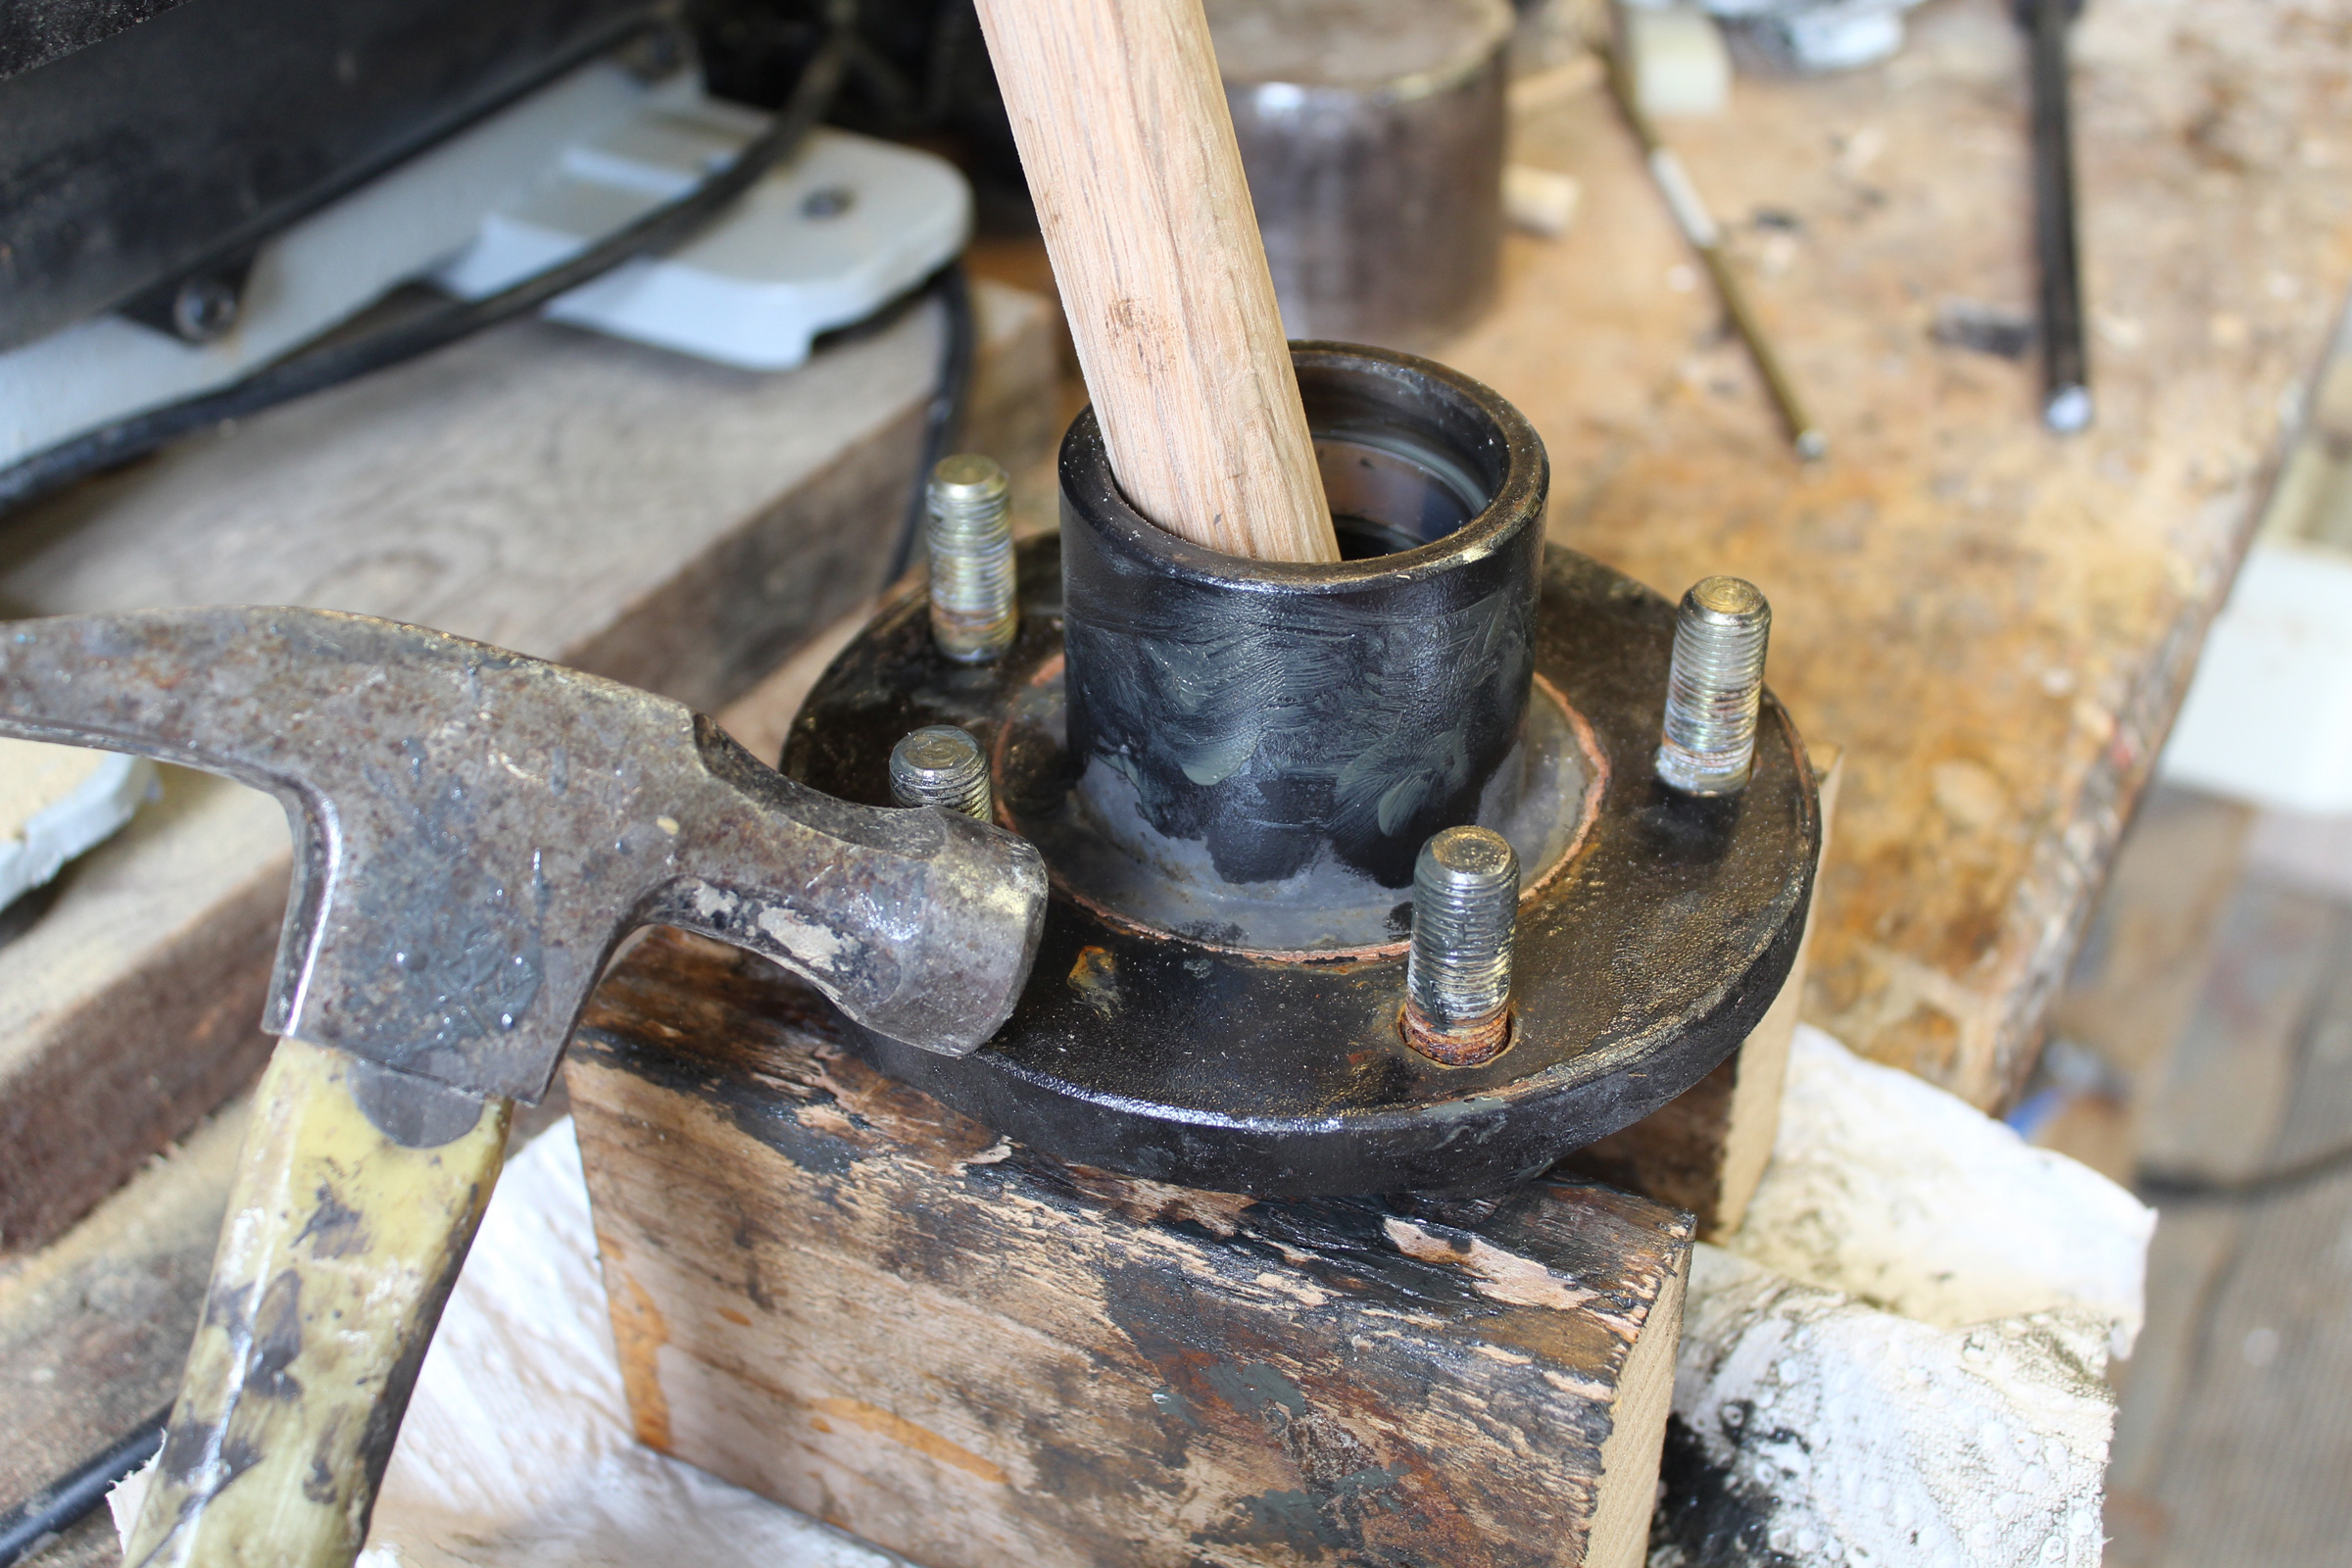
Once the cap or Bearing Buddy is off, clean up the old excess grease from the hub and remove the cotter pin that keeps the castle nut from rotating on the spindle. After your remove the castle nut and washer, you can slide the hub off the spindle. Keep track of the castle nut, washer, and cotter pin; they can be used or replaced as needed.
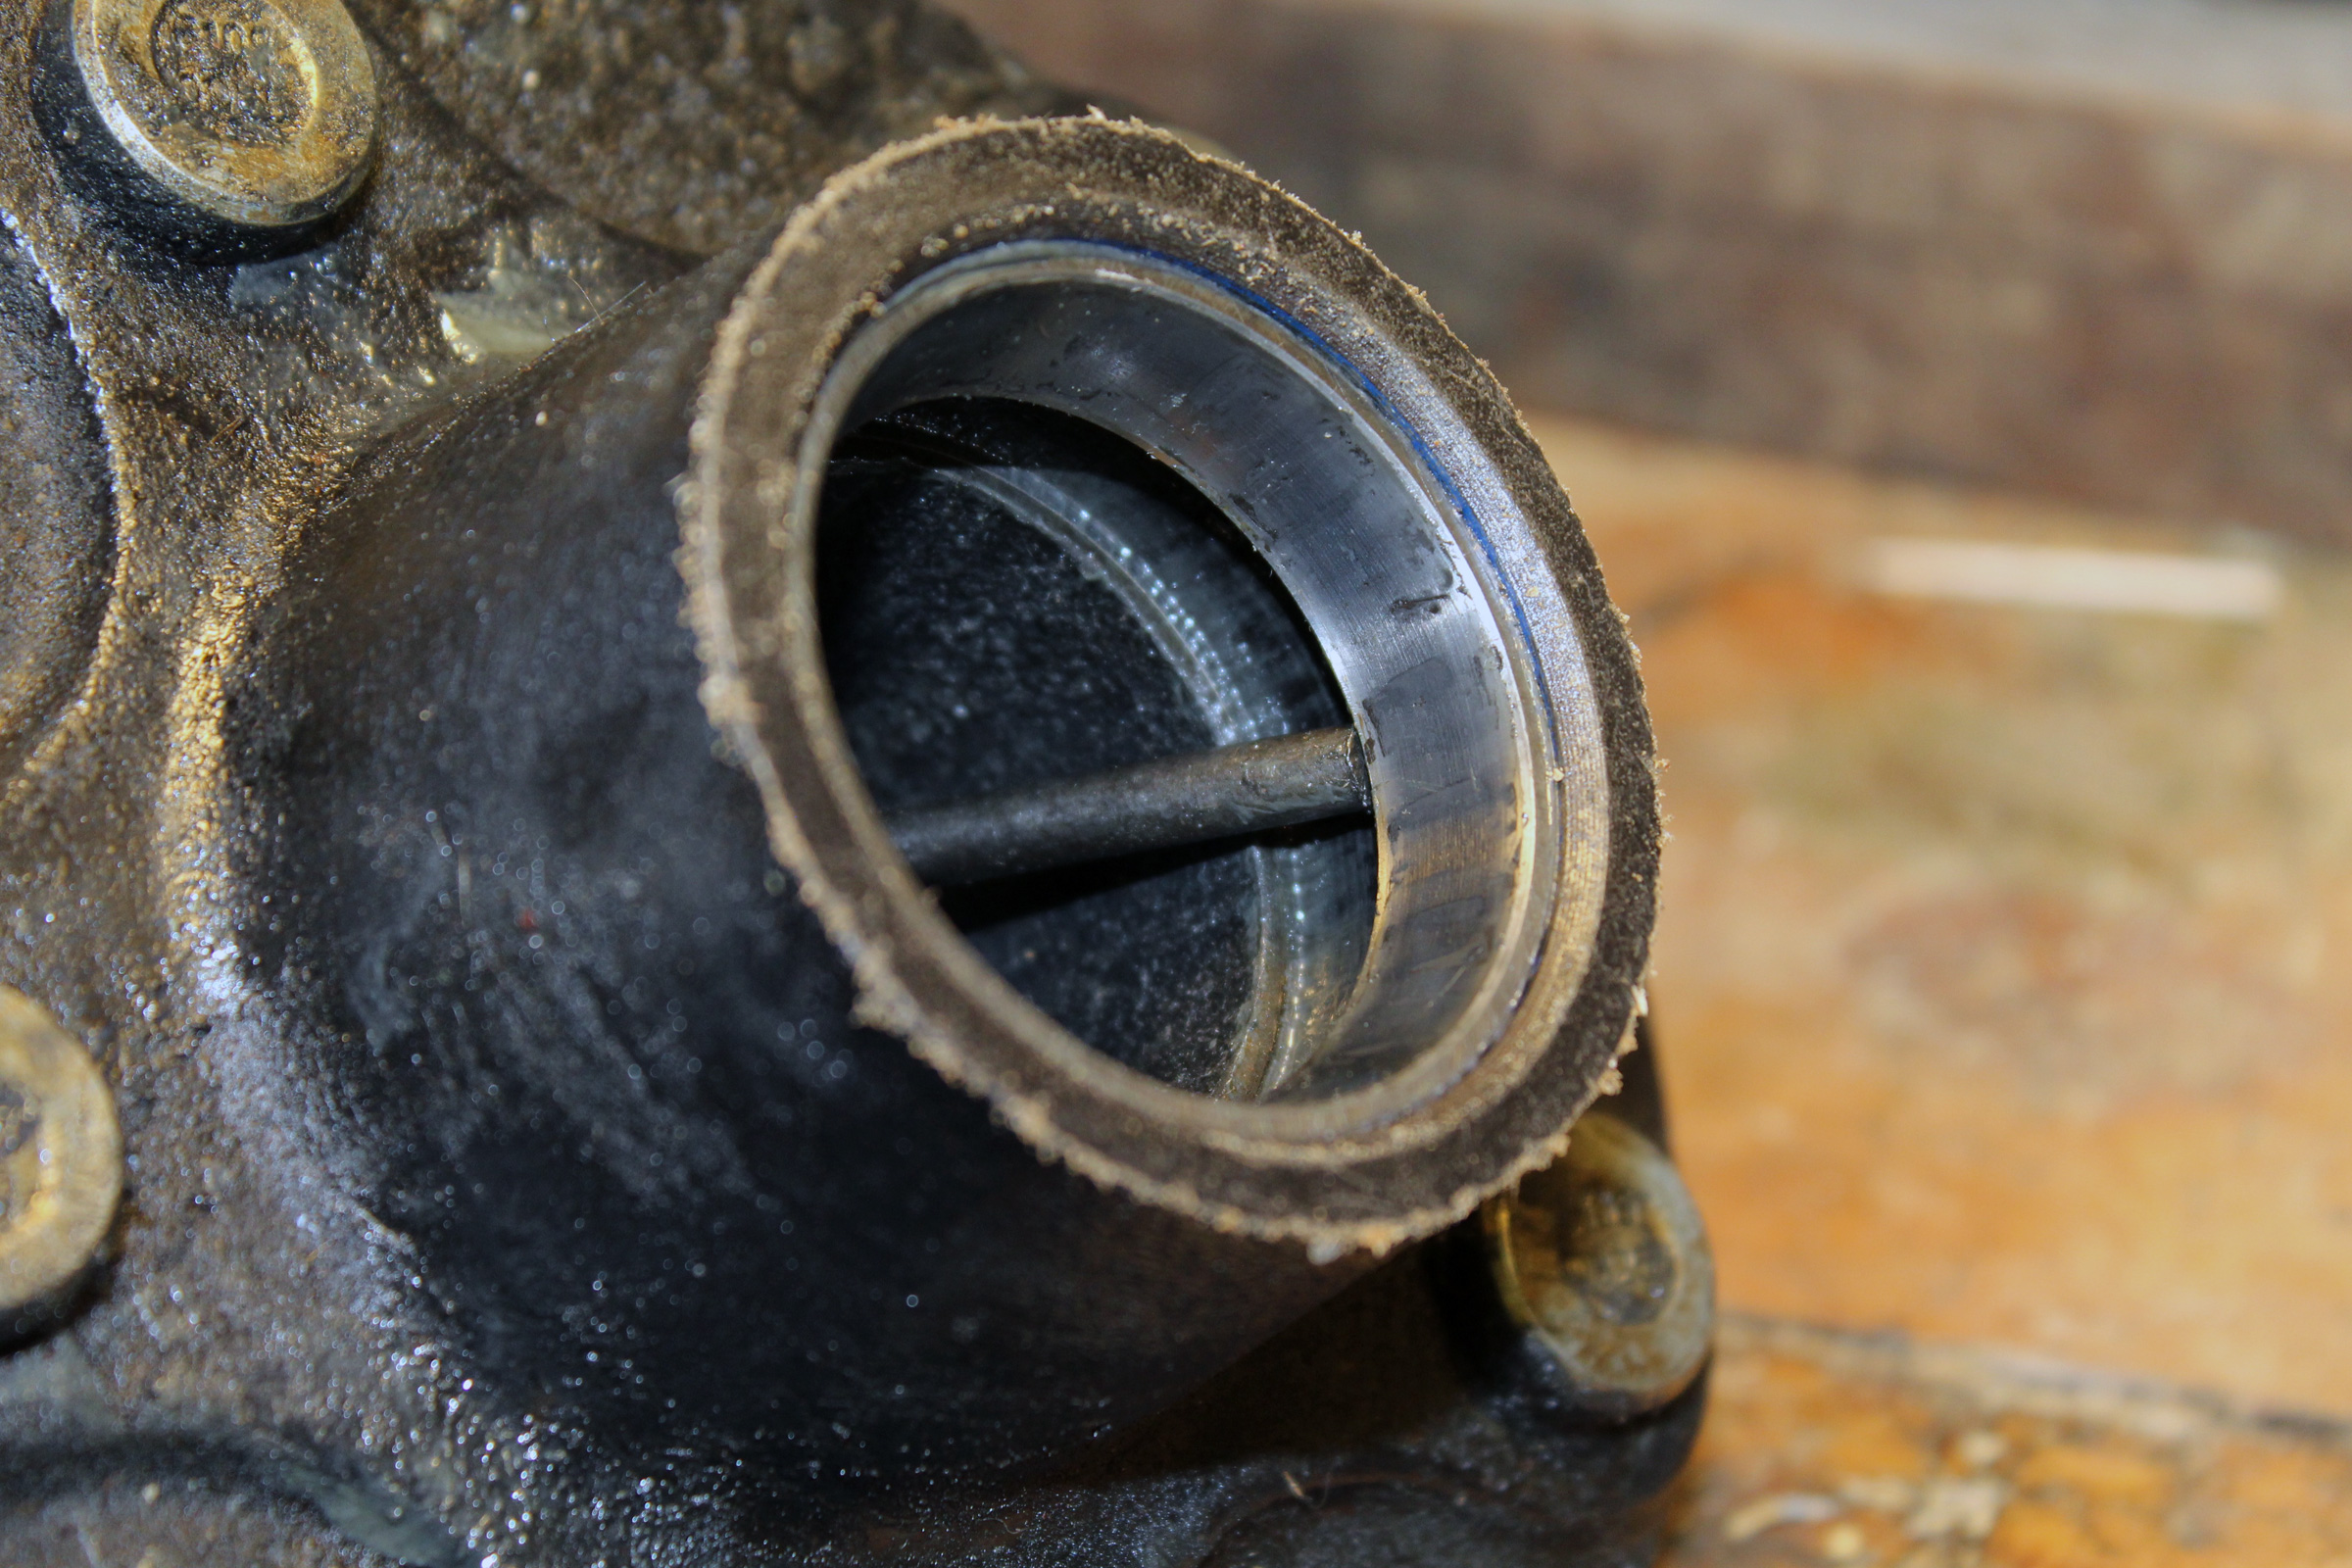
The hub has an outer bearing and an inner bearing, along with the inner and outer races that they ride against. Pull the hub off; the outer bearing will come with it and you’ll be able to remove it. Pry the seal off the back of the hub. The seals are inexpensive and it’s prudent to replace them whenever servicing the bearings.

Prying the old seals out may damage them, but they should be replaced whenever you work on the bearings.
Another way to remove the seal is to tap a large dowel against the inner bearing . It will push the seal out ahead of it. The hub is elevated to give the pieces room to fall out.
Remove the inner bearing. Take the old grease out of the hub and clean its interior. Wipe the old grease off the spindle, hub, bearings, races, and cap, keeping any eye out for metal shavings that would indicate bearing failure. Then clean any remaining old grease off with parts cleaner. Because grease comes in many different compositions and not all are compatible, all of the old grease must be removed before applying the new.
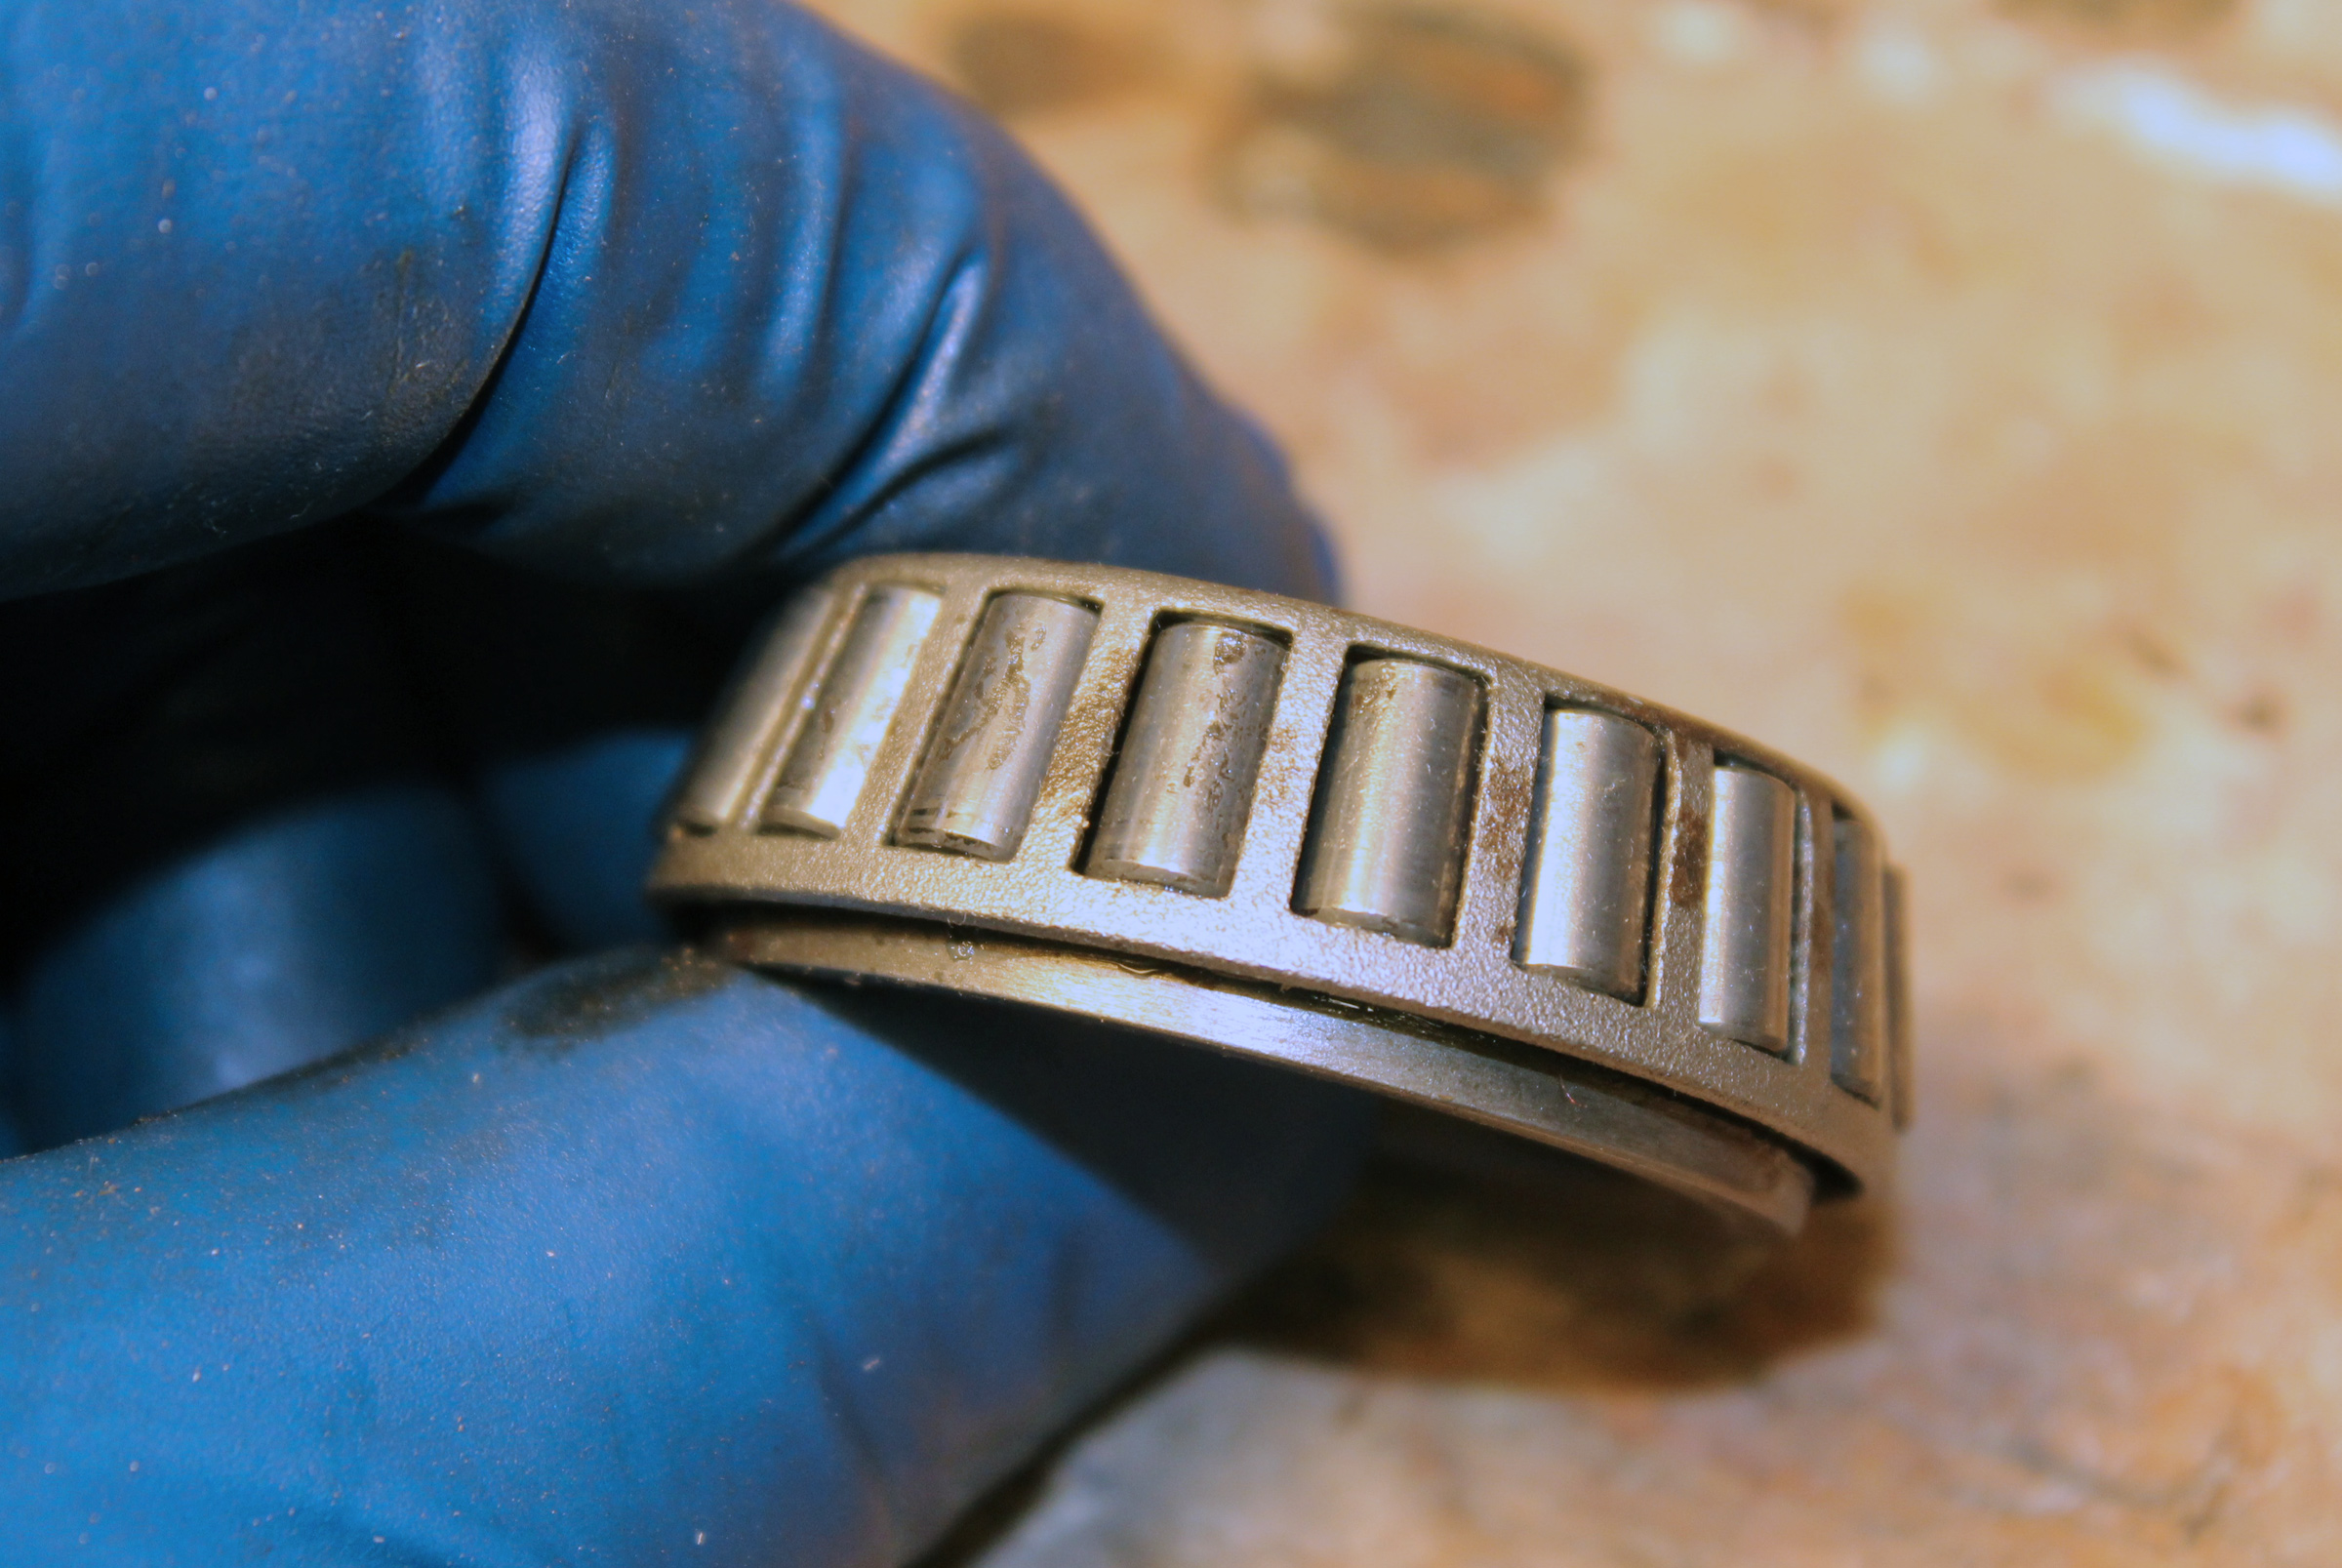
Discoloration on the rollers and the retaining ring are signs of corrosion and pitting. This bearing needs to be replaced.
Take a look at the condition of the bearings and the races inside the hub. They all should be bright and shiny with no rust, pitting, or discoloration. If they are not shiny, they’ll need replacing. Check the spindle for wear by sliding the inner bearing over the spindle. It should be snug with no play.
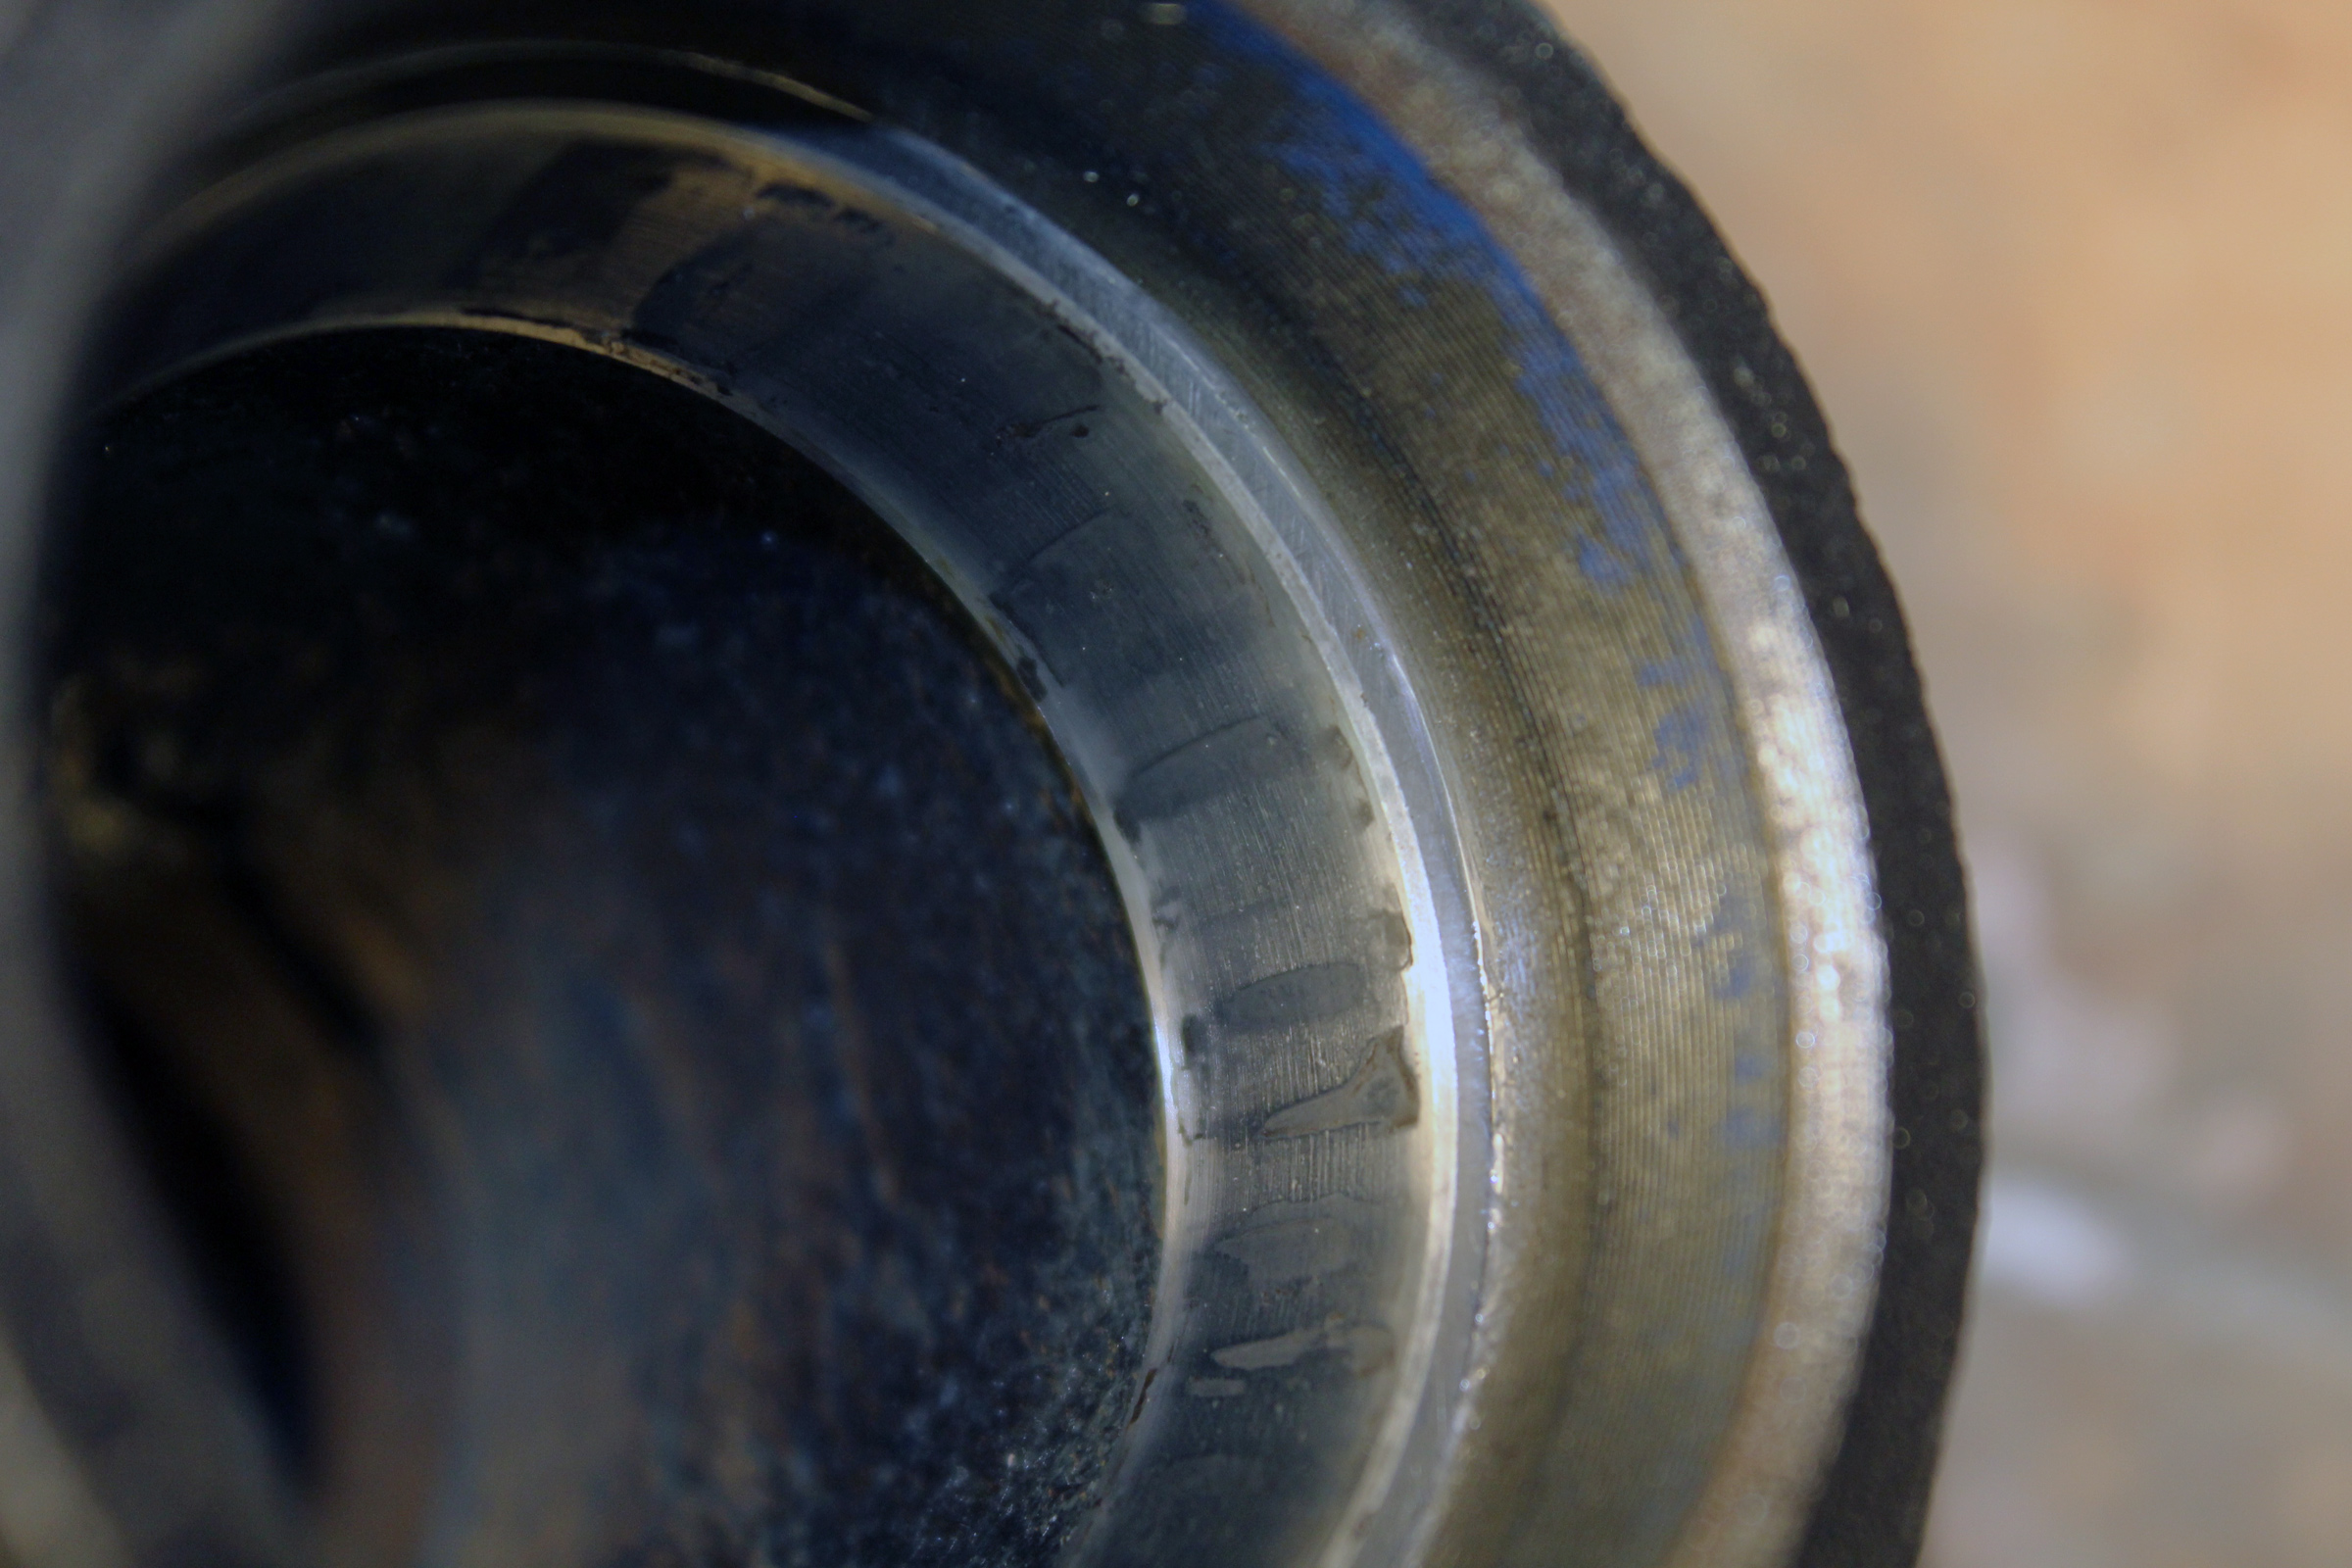
This race, still in the hub, has stripes indicating wear.

The race on the left is badly pitted, and done for. The race on the right is still smooth, but the blackened edge is a sign of heat damage. It too needs to be replaced.
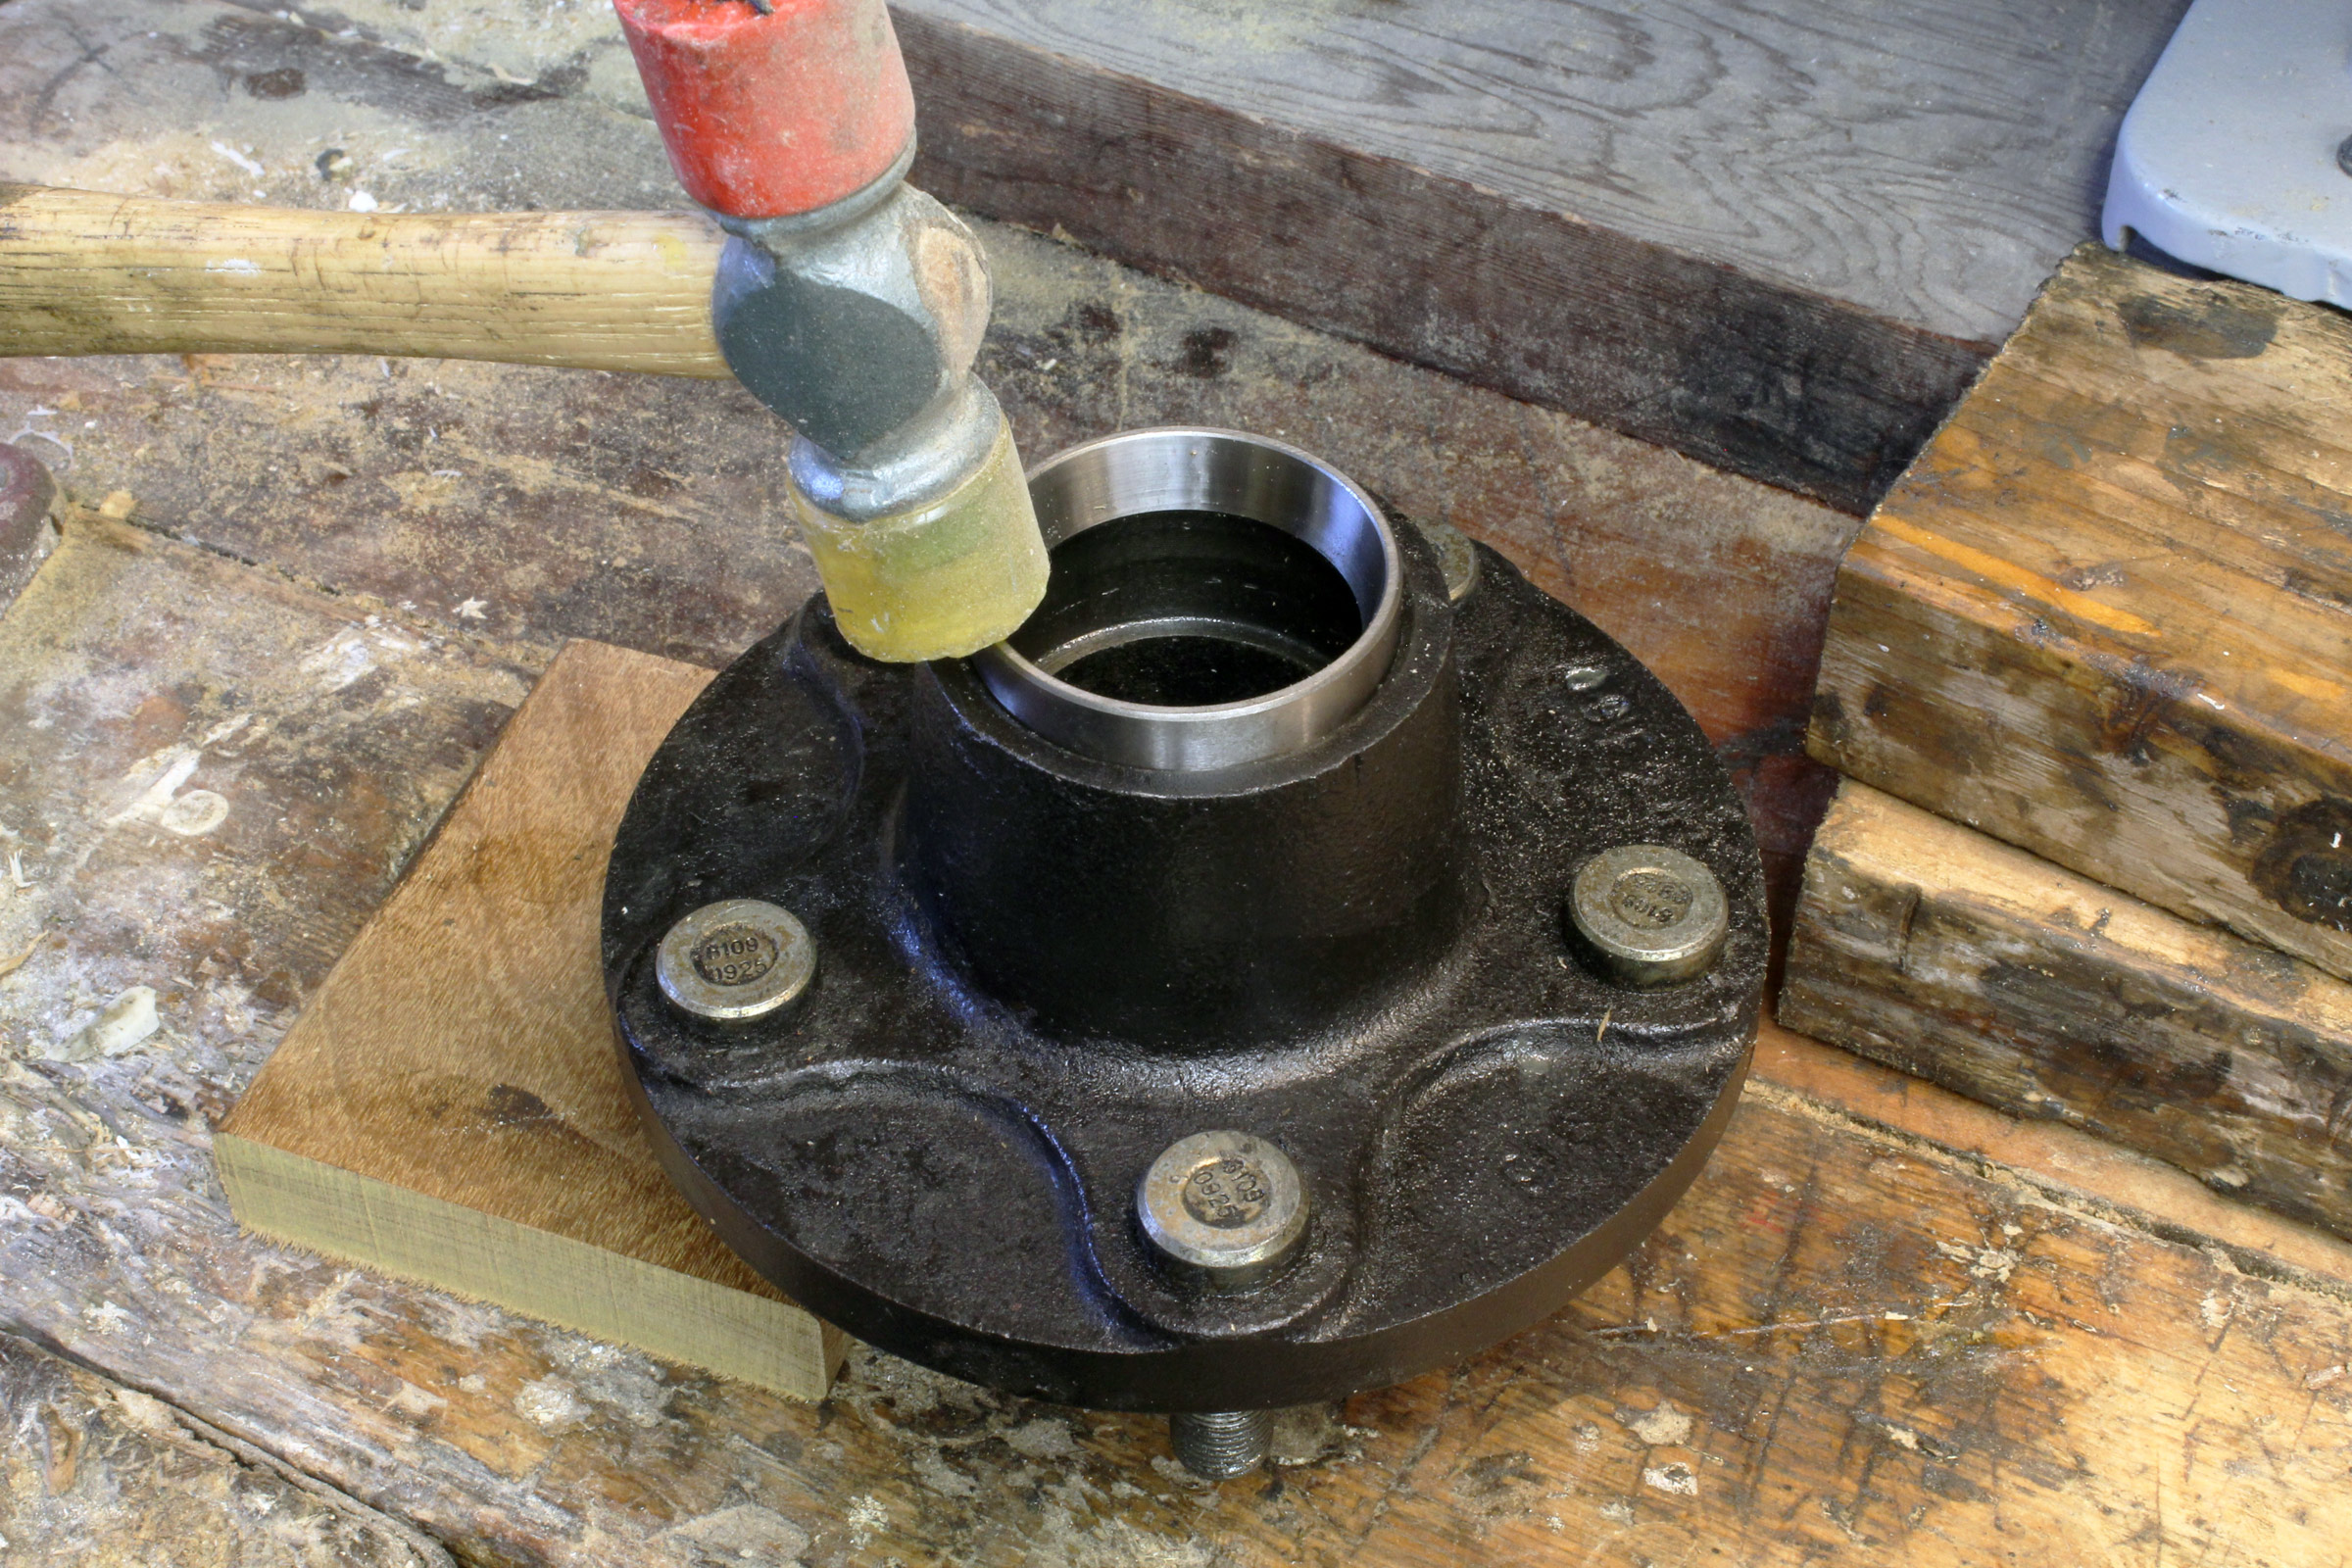
If you need to replace the races, set the hub flat and tap the old races out with a punch or a stout screwdriver, working one side then the other to keep the race fairly flat as it moves.
With the tip of the punch set on the protruding edge of the race, hold the punch tight against rim of the hub on the opposite side. The exposed part of the race may be very narrow, so make sure the tip of the punch has a crisp edge—a rounded edge will slip off the race. Tap on alternate sides to coax the race out. The race is made of very tough steel and not easily damaged, so don’t be timid with the hammer.
This race is halfway out, showing the ledge it rests on when in use and the punch pushing it out.

Getting the race all the way out will require elevating the hub.
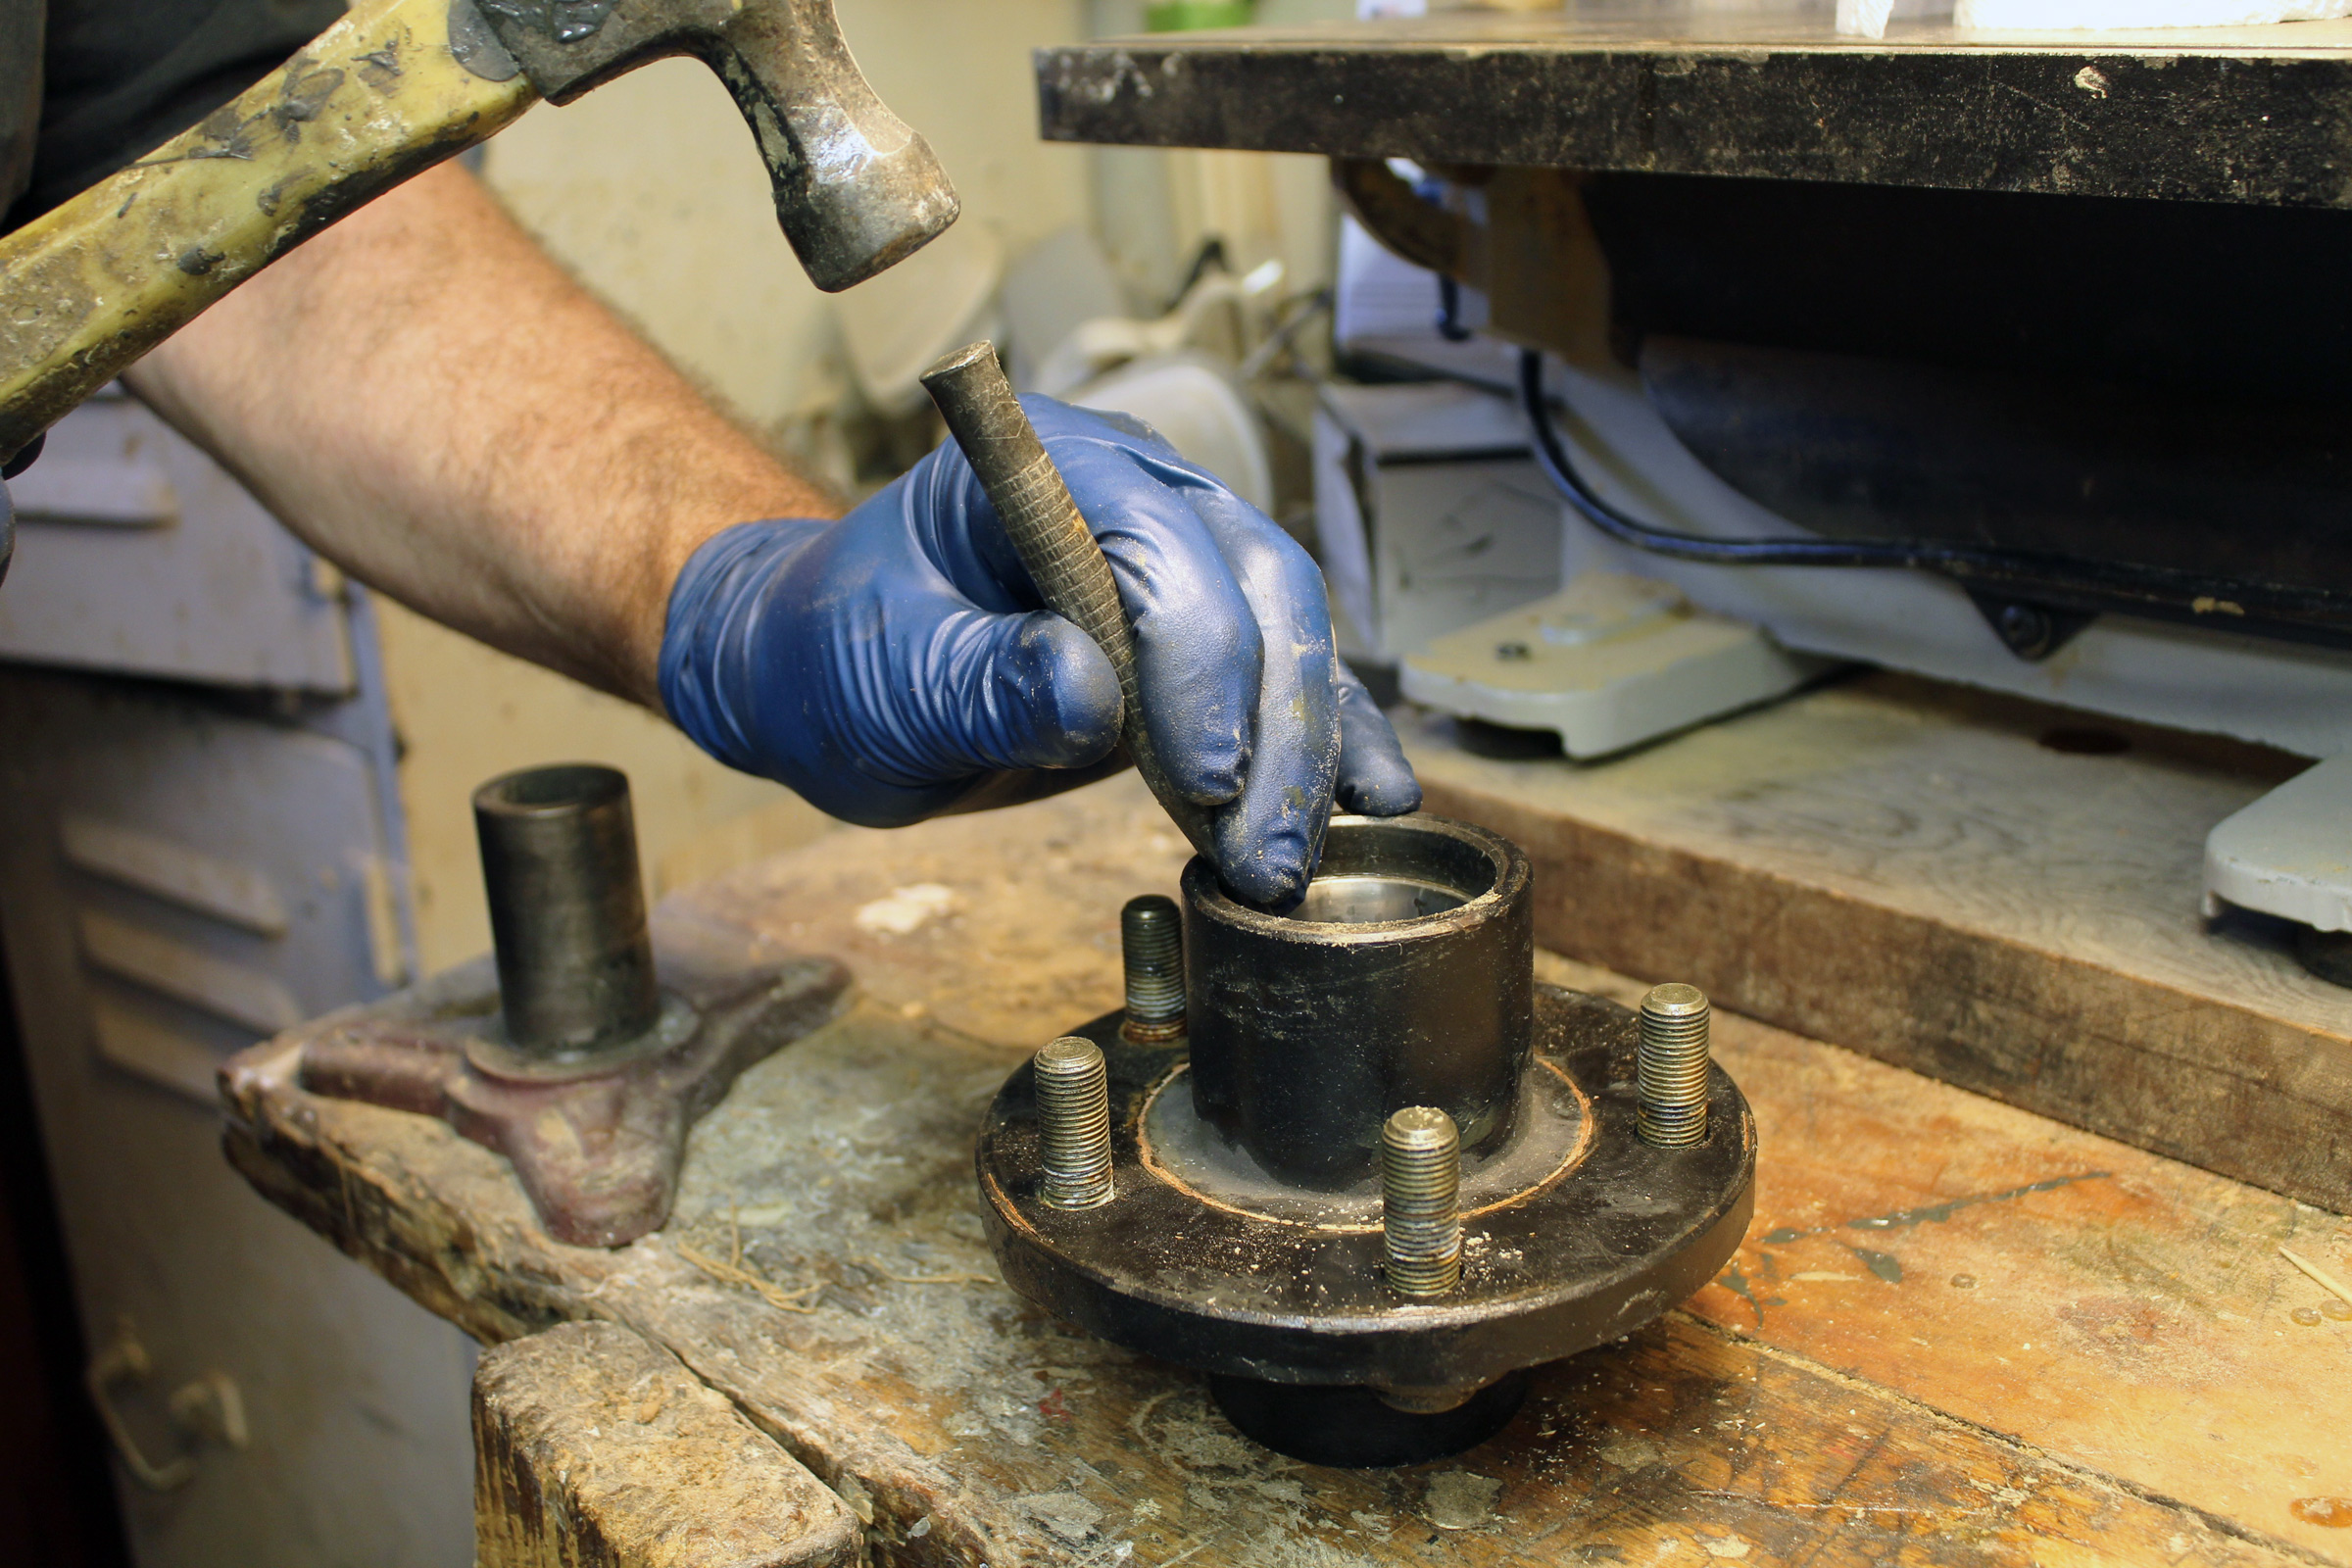
To insert a new race, gently tap it in until it is flush with the hub, then insert one of the cleaned bearings. Center a large socket or dowel over the bearing and hit that with a hammer to drive the race in until it is fully seated.
The thick side of the race goes into the hub. A few taps will get it started.
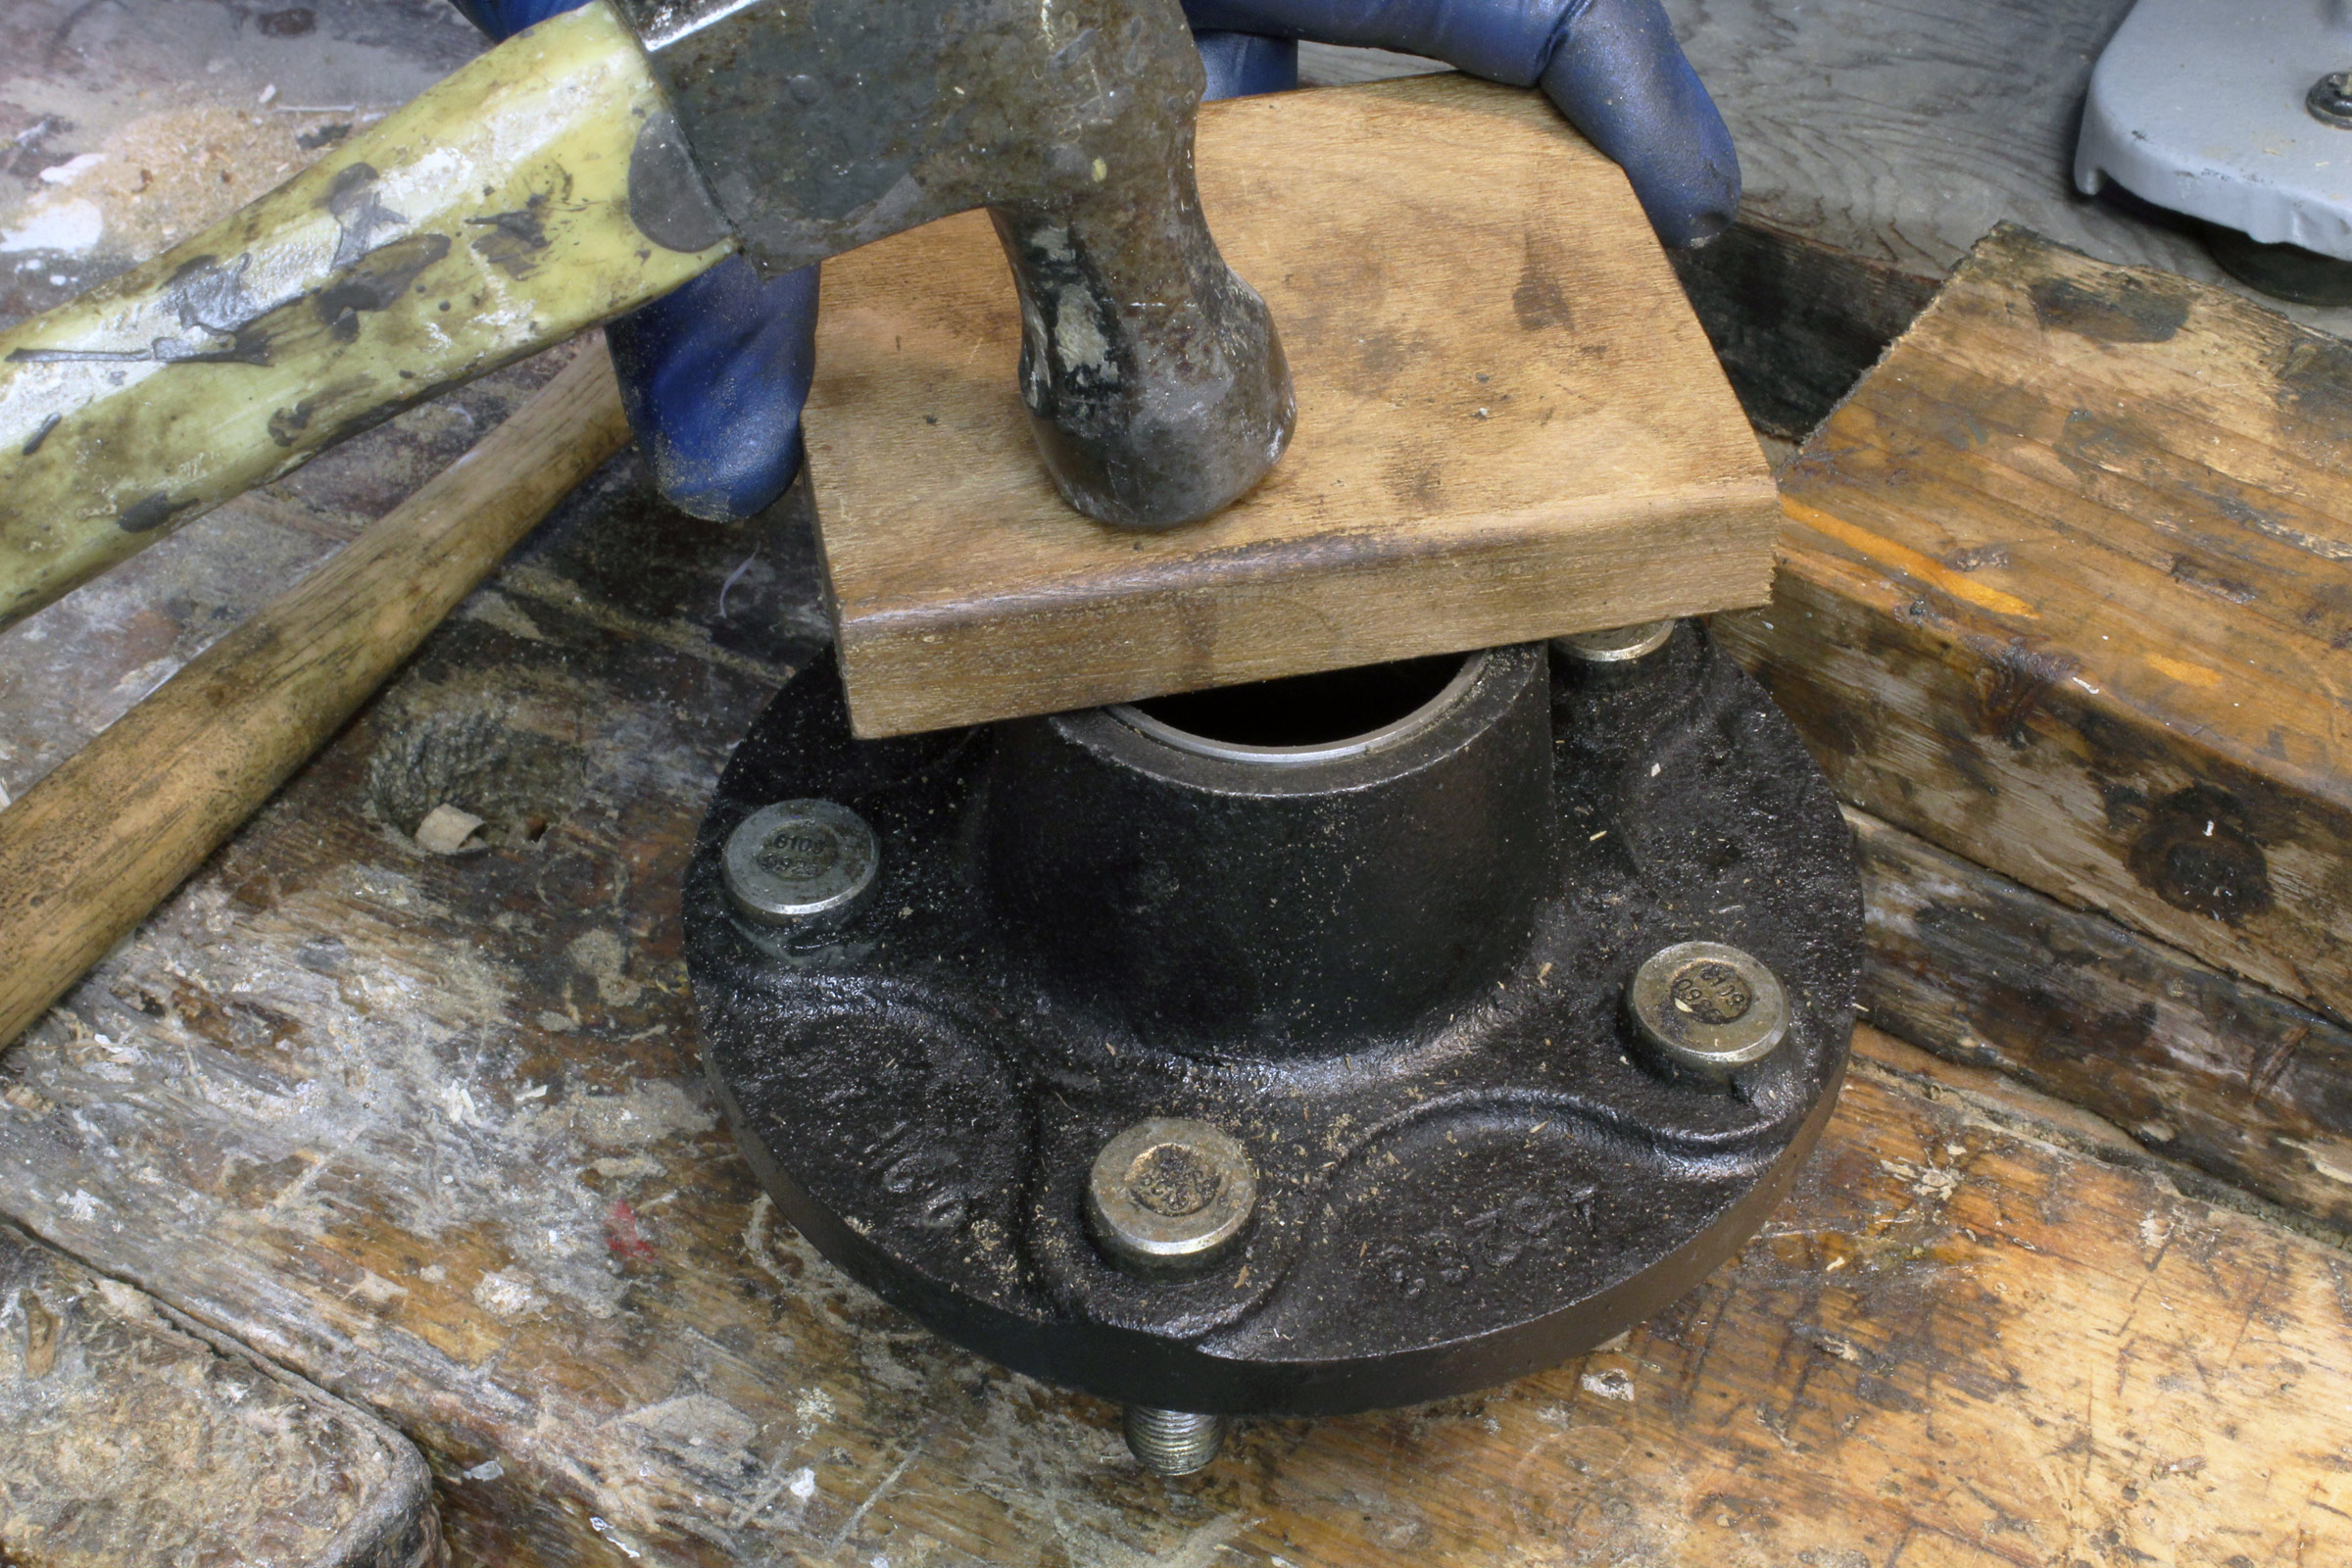
After the race is started, a block of wood makes a good driver. You can hit it in the middle and get the race to go down flat, rather than one side, then the other. When the race is flush with the hub it’s time to switch to another device to drive it home.
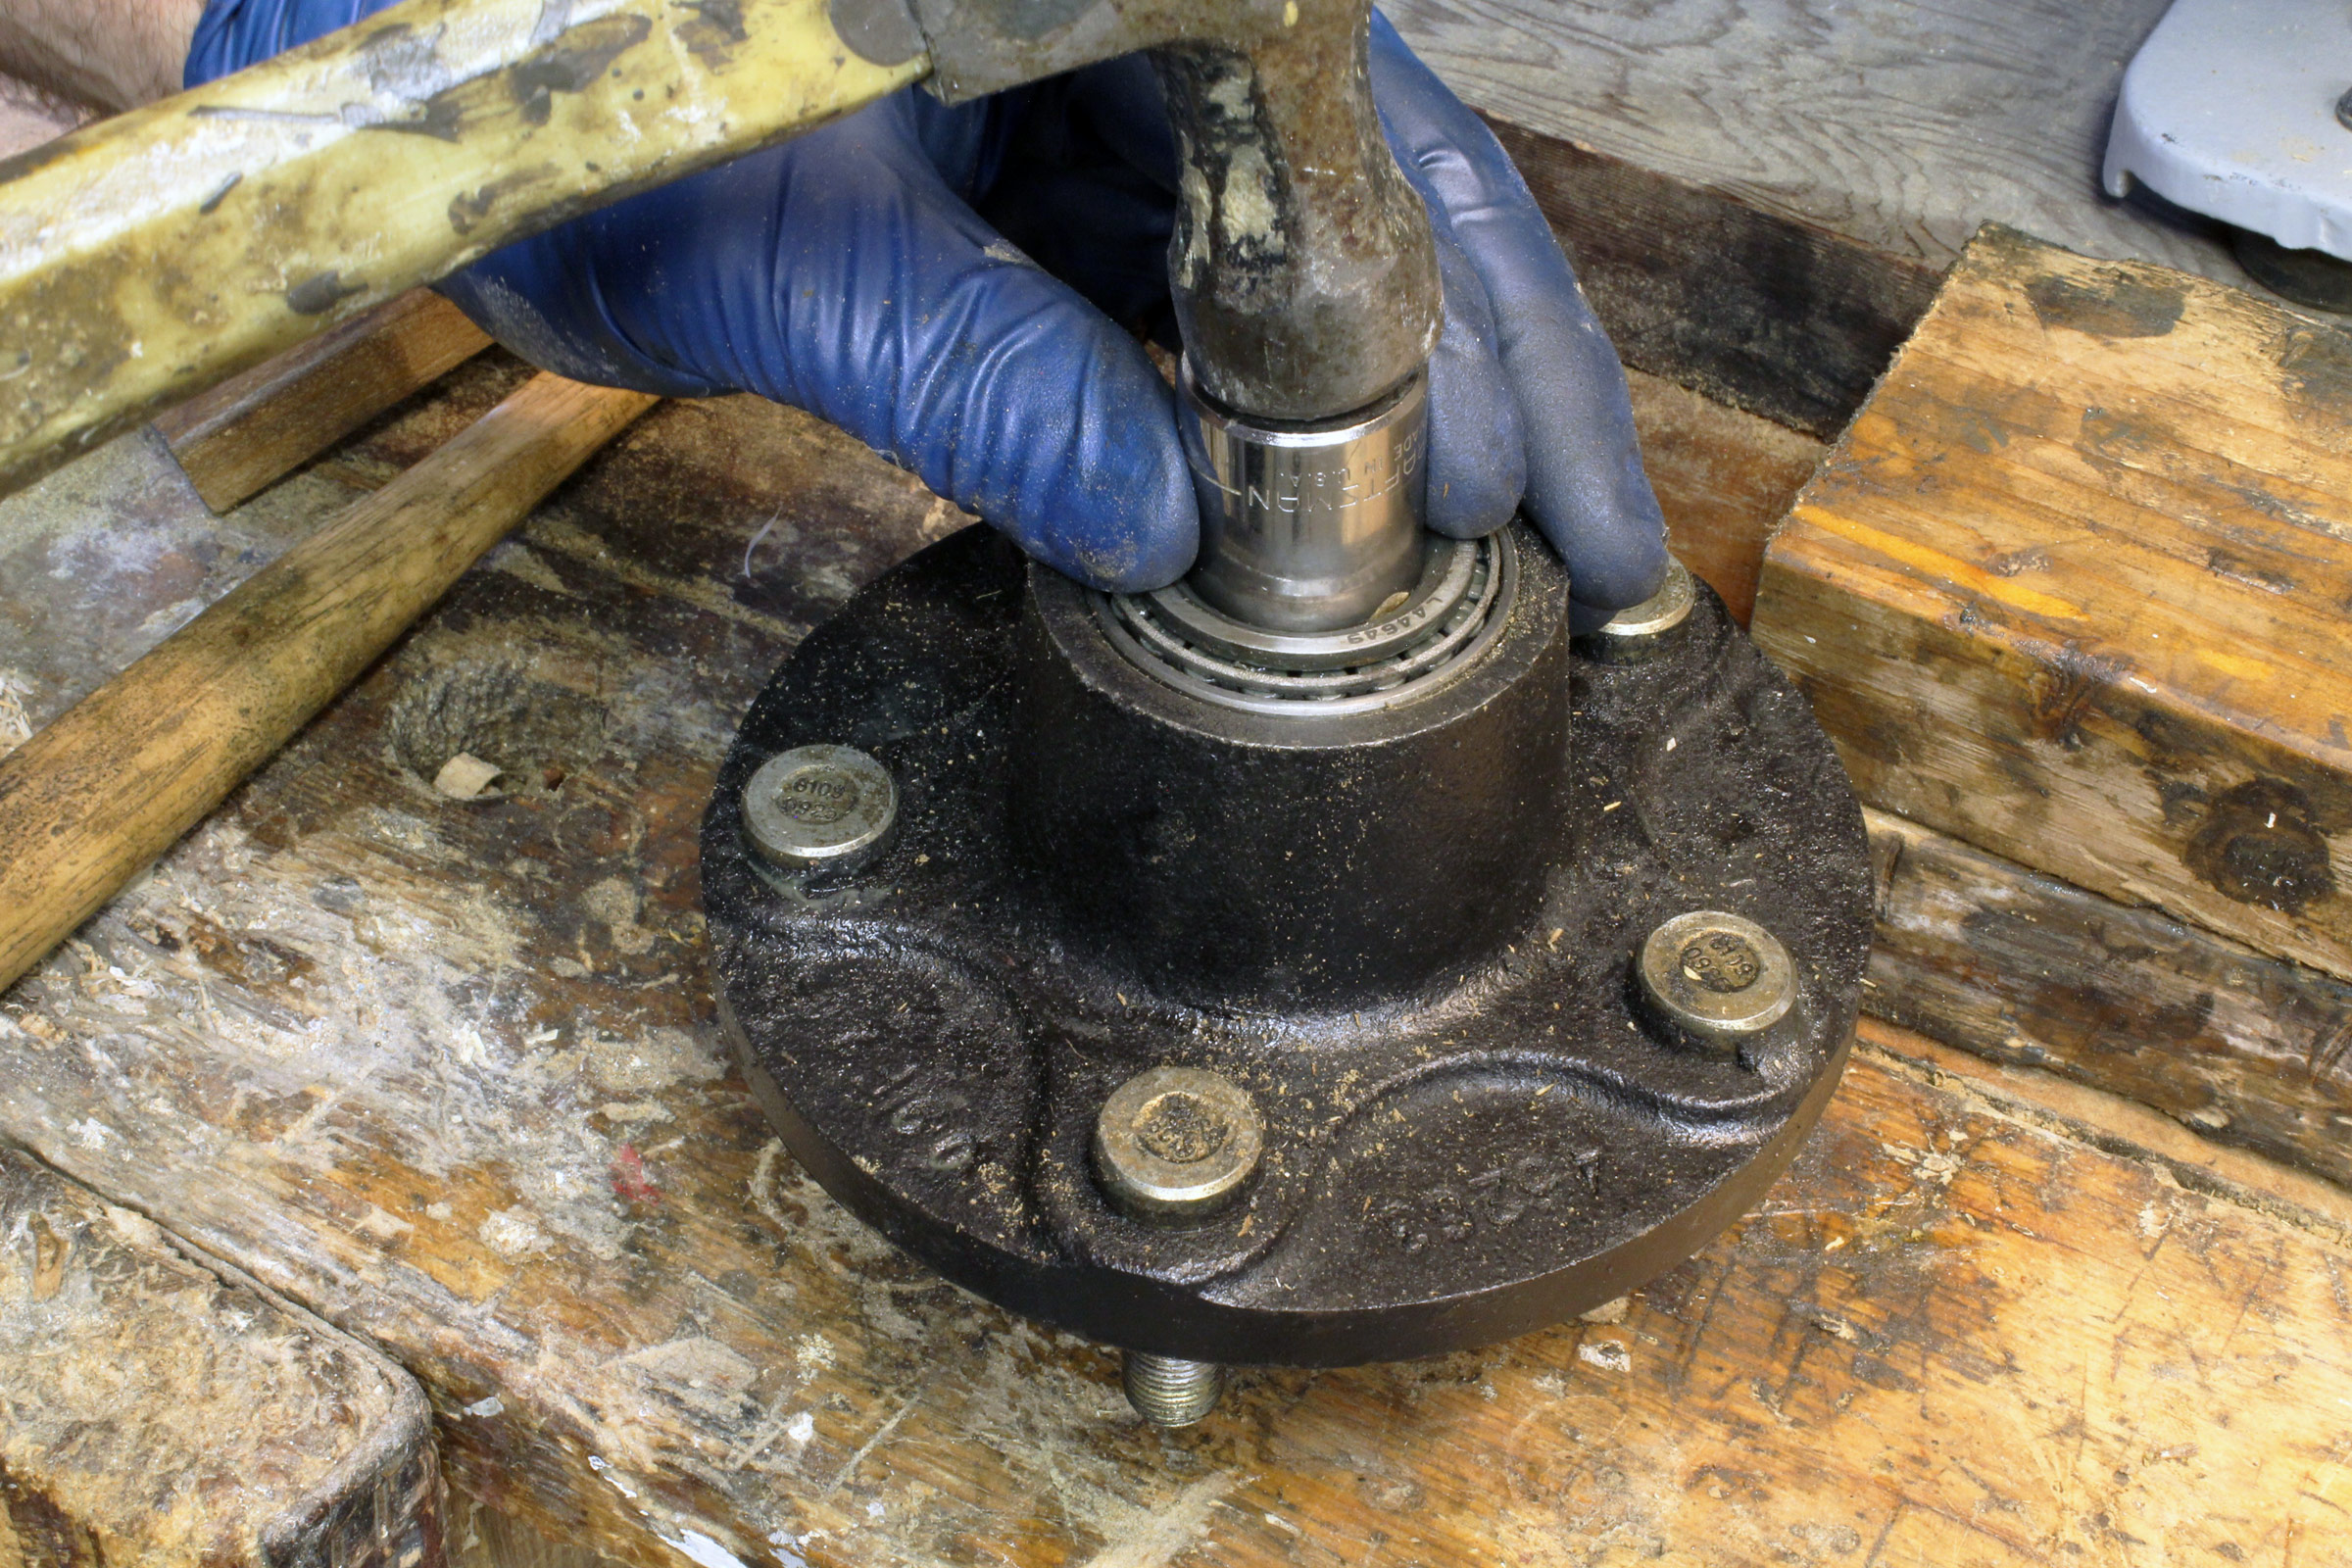
You can use an old bearing to drive a new race in place. A wrench socket, set in the recess around the bearing’s bore, can transmit the hammer blows. See the video and the comment below for alternate methods for driving races.
If using a wrench socket isn’t effective, use a large dowel or chamfered block of wood to drive the bearing and the race.
To pack a new or a reusable bearing, squeeze out a palmful of new grease and scrape the bearing across the grease to force it into the edge of the bearing from the large end until it emerges from the small end, making sure the grease works its way all the way through the bearing assembly, rollers, and cage. Rotate the bearing to help distribute the grease. A bearing packer, available from auto parts stores or online retailers, will do most of the job, but the fine tuning of grease distribution on the outside face of the rollers will need to be done by hand.

This plastic universal bearing packer cost just $7.50. With a grease gun connected to its fitting, grease is pumped through the bearing from top to bottom, assuring its interior is properly filled. The exterior will need a coating applied by hand.
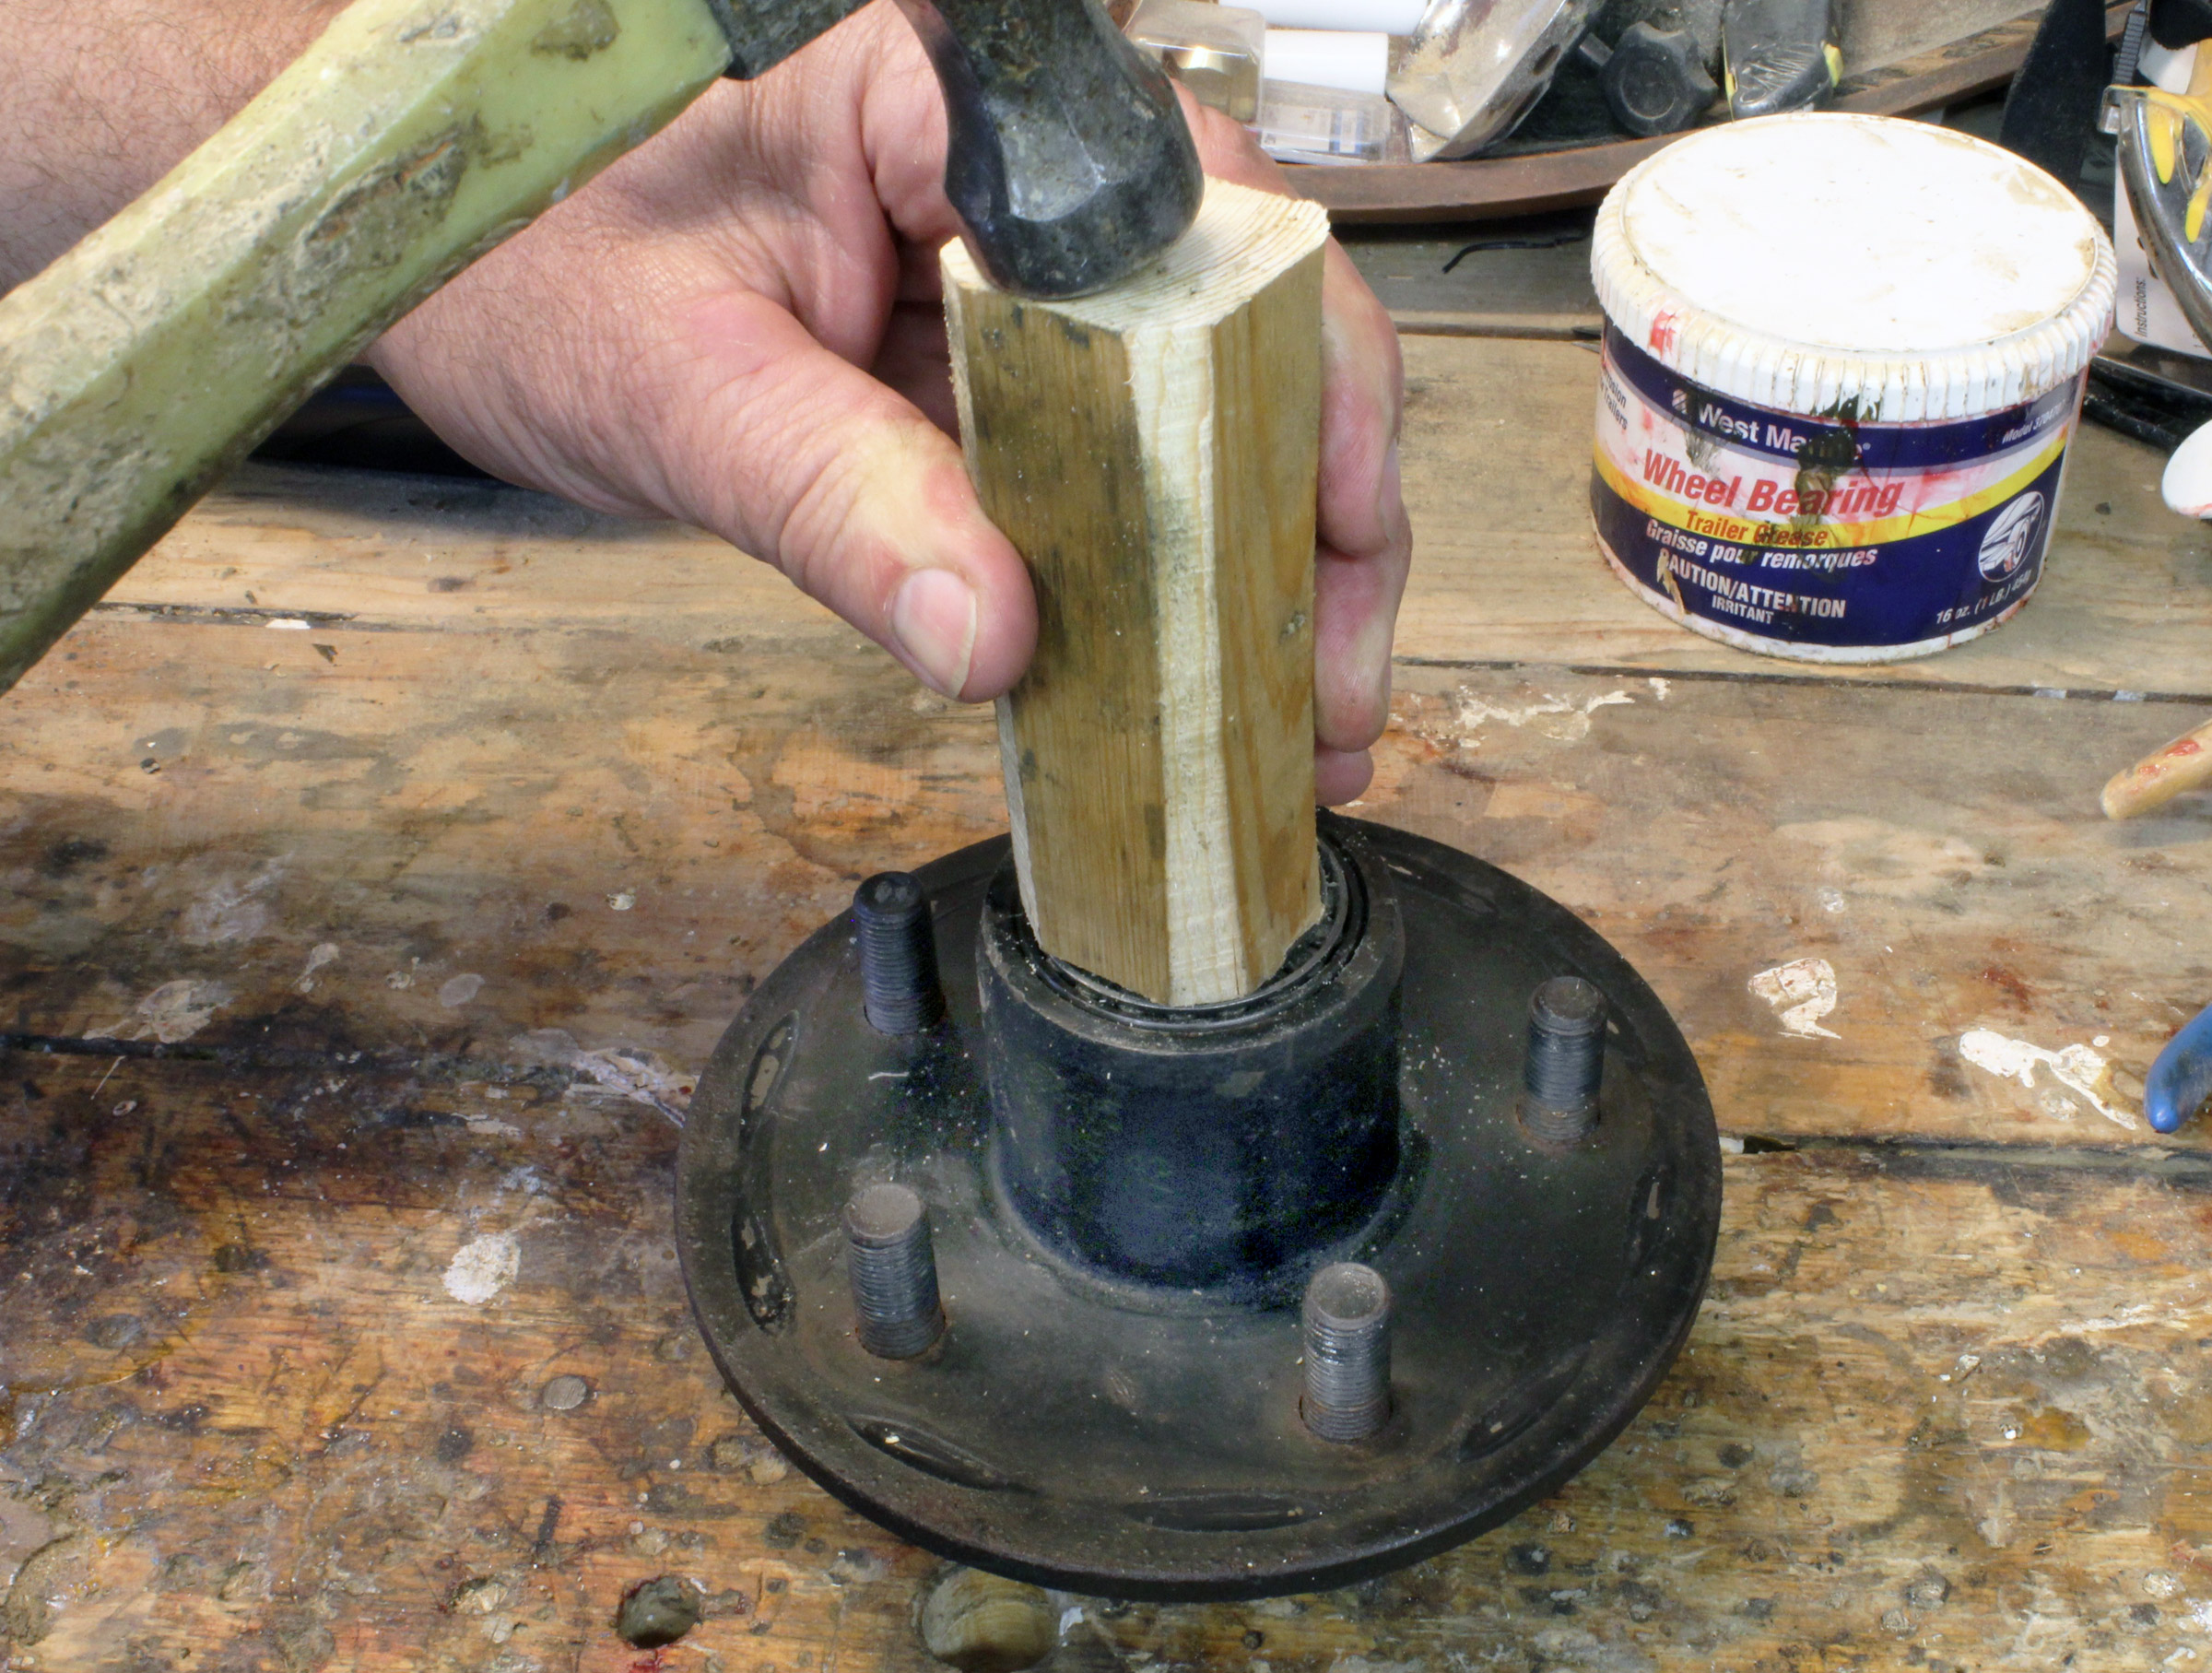
Now everything can go back together. Grease the inner race, then put the grease-loaded inner bearing into the hub. Grease the inside of the seal and gently tap it into position. Place a wood block over the seal to hammer it home. Preload the hub with fresh grease and grease the spindle. Slide the hub carefully over the spindle to avoid damage to the seal as you slide it in place over its matching surface on the spindle. Grease the outer race and install the greased outer bearing. Next, install the washer and castle nut. Reinstall the wheel and lightly tighten the lugs. Spin the wheel and tighten the castle nut with a wrench or channel locks until the wheel starts to drag when spun. Pull on the wheel, one side then the other, to make sure there is no side to side movement, then back the castle nut off to the first spot where the cotter pin can be inserted. There should be a very slight motion when you tug on the sides of the wheel/tire.
To finish up, reinstall the Bearing Buddy or protective cap, then get the tire safely back onto the ground and fully tighten the lugs. Recheck the lugs after 1, 10, and 100 miles to make sure they’re still tight after driving. While you’re at it check for wobbles indicating the bearings are loose. With a lightly loaded trailer you may not need to jack, but on heavily loaded trailers you’ll need to take a bit of weight off the wheel to be able to wiggle it.
A spare bearing replacement kit with bearings, races, a seal, and a cotter are handy things to have in the road-trip kit, in case the loose bits go missing on a dusty roadside bearing job. Better yet is to purchase a spare hub, and build it up with races and bearings, all packed with grease. At this point you could simply install the new hub, secure it, replace the tire, and be on your way (versus swapping bearings and races in the auto parts store parking lot).
If your hubs have caps, you should consider replacing them with Bearing Buddies. Bearing Buddies use a spring to provide a slight pressure to the grease in the hub to keep water out. We have used Bearing Buddies in the past, now all of our trailers are equipped with PosiLube spindles. The spindles have a hole through the spindle so grease pumped through the fitting goes to the inner opening of the hub and flows through the inner bearing, the hub, and the outer bearing. The old grease is pushed out by new without having to remove the hub or bearings.
After driving the trailer to the ramp, it is a good plan to find a few things to do to give the hubs have time to cool, as immersing a hot hub in cold water can cause water to be drawn in. So, rather than load your boat when it’s at the dock, put gear aboard before backing it down the ramp and into the water. Rigging our sailboats takes care of this cool-down step.
Check those bearings, take care of them, and they will take care of your boat and trailer.![]()
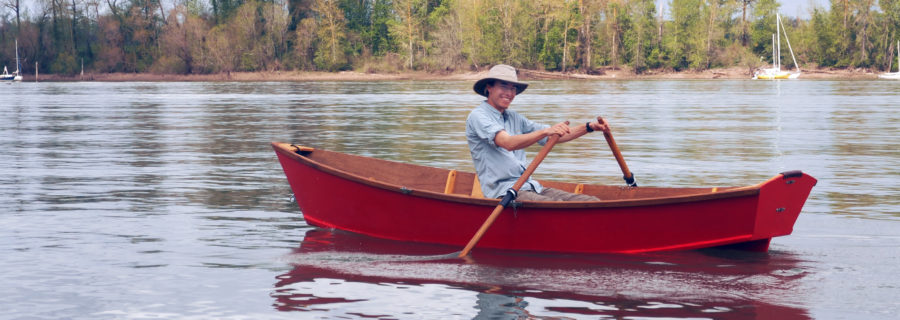
Kent Lewis sails, rows, paddles, and motors a fleet of small boats in the Florida Panhandle. Through the years he and his wife Audrey have owned over 20 trailers and have fond memories of changing trailer bearings in Pecos, Texas, during the heat of summertime with two toddlers supervising.
You can share your tips and tricks of the trade with other Small Boats Monthly readers by sending us an email.


I worry a bit about using an old bearing to drive a new race in–the main reason not to spin an un-grease-packed bearing is that the dry rollers can scratch up the race. One would think that hammering a bearing against a race would do the same thing.
I used a few different ways to drive the races for the photo shoot and I also worried about using a bearing to drive the race. The steel used for bearings and races is quite tough and I didn’t see any signs of damage from the tools I used to remove and to install them, though there may have been microscopic scratches caused by using a bearing to drive. Even if there weren’t any damage all of the loose parts in the—inner race, rollers, retainer—seemed to dissipate the impact of the hammer blow andI was uneasy pounding harder. The race drivers used by car mechanics are made out of aluminum and won’t damage the races, but I didn’t want to buy a whole set or wait for a special order for a single size. I made my own drivers of hardwood, plugs of hardwood (ipe and locust) roughed out on the bandsaw and trimmed on the disk sander to a slip fit in the hub. The plugs cracked partway through while installing races, but, being constrained by the hubs, they didn’t fall apart. They only have to survive six races for a trailer with two wheels and a spare. The first strike of the hammer compresses the perimeter of the plug so it then stays put on the race. Subsequent hammer blows push the race straight down. You can see the plug in use in the second video in the article.
Christopher Cunningham, editor, SBM
Maybe a brass punch? We use them at work for driving various steel items we don’t want to mushroom or scratch. I’ve used hardware store brass rods when we didn’t have the right size or length punch, though they mushroom more than a proper punch.
I’m using this Rigid Hitch 280453-2 trailer bearing and I can say that the oil seals are worth a special mention because they’re sturdier and overall better at keeping the bearing lubed up and moisture-free.