I was in my early teens when I bought a propane torch. I just wanted to burn things, but my father found it useful for more constructive uses, like making a case for drill bits. He always had racing shells in the garage, repairing them for crews in the Pacific Northwest, and the torch came in handy for making replacements for missing stretcher bolts. He’d file a small flat on a brass washer and set it in the slot of a brass machine screw, slip a 1″ length of copper pipe over the screw threads, and solder everything together with paste flux and lead-wire solder.

Dad used my propane torch to make this drill-bit case from a short piece of brass tubing. It rattled around in his tool box for nearly a half century and the bottom, soldered with lead, finally fell off. With a new bottom silver-soldered on, it’s good for at least another 50 years.
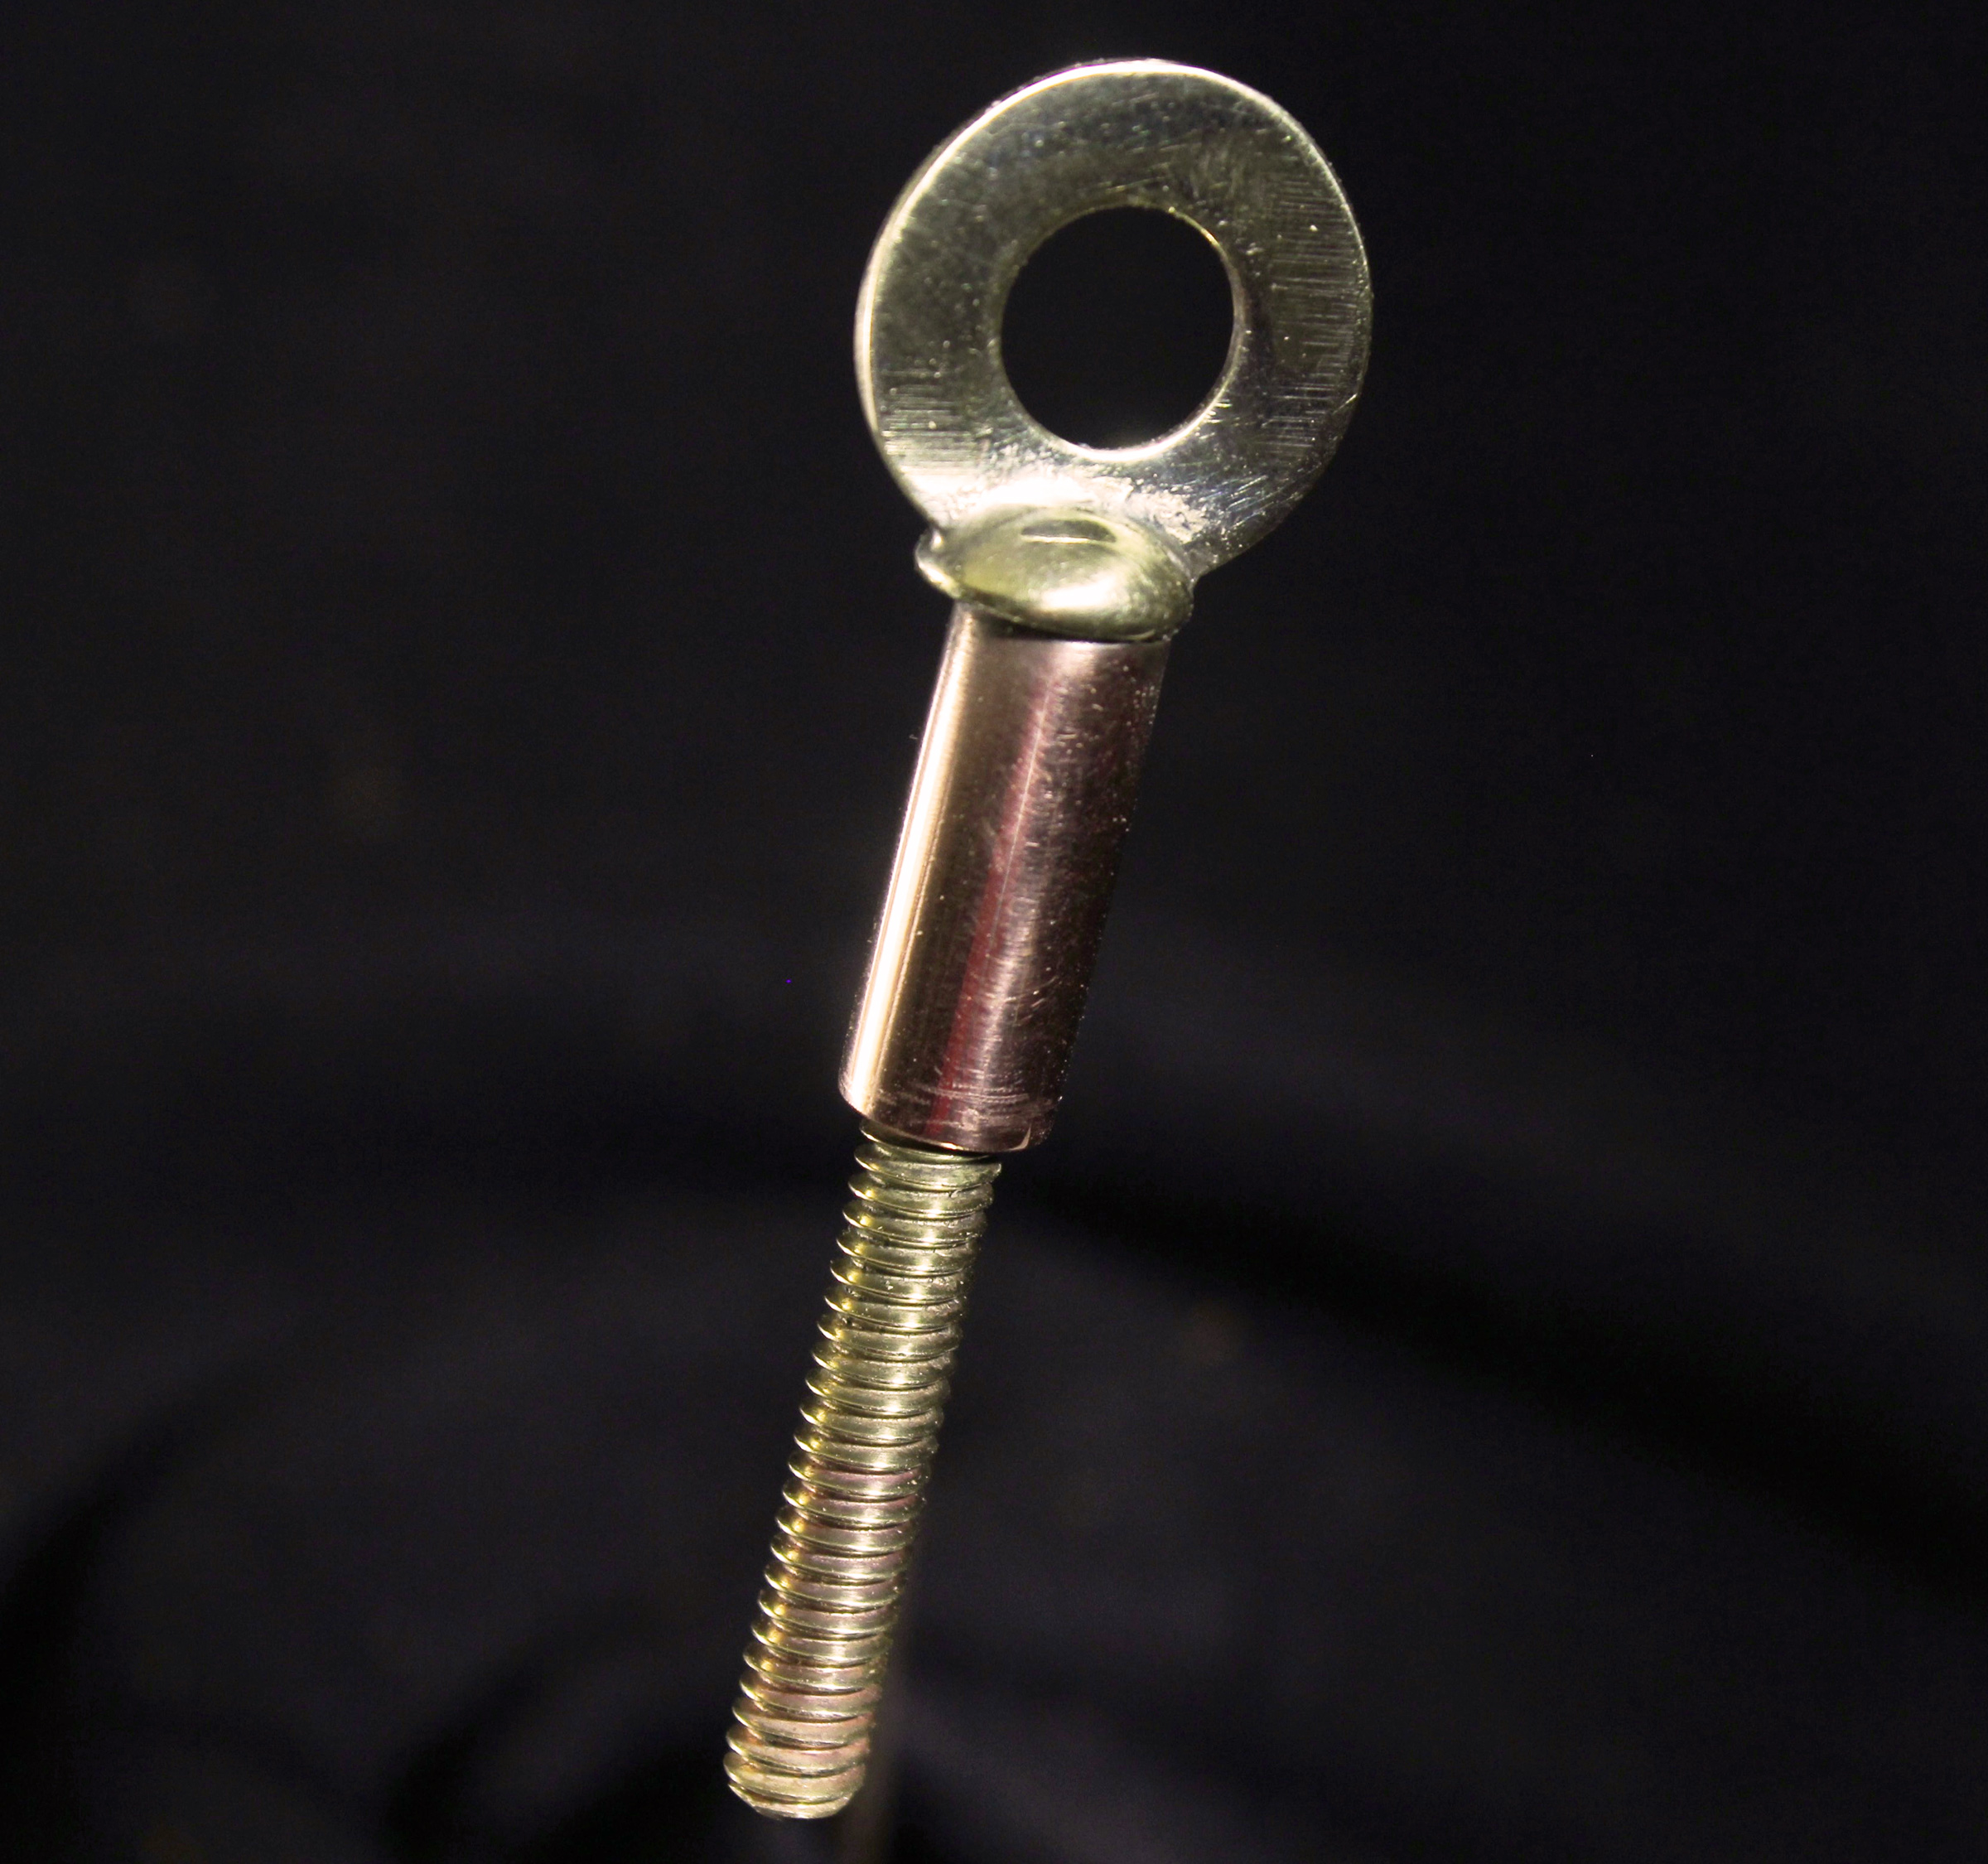
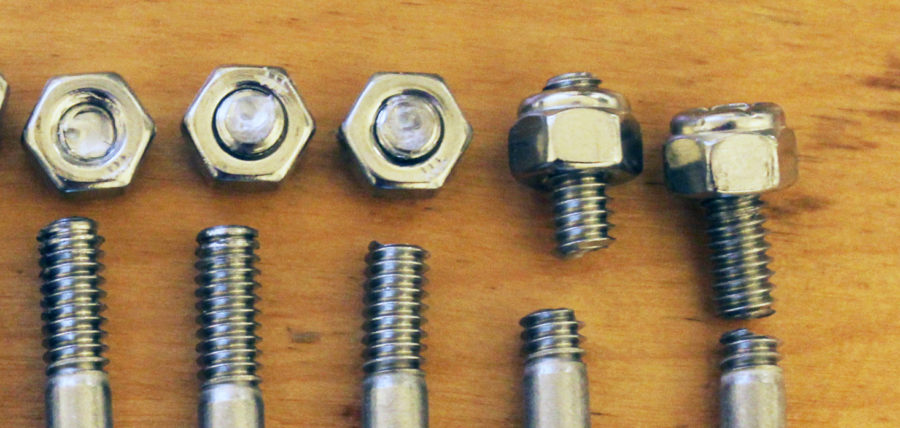
This is my replica of the stretcher bolts that my dad was making when he was repairing racing shells back in the ’60s.
When I built my first boat, a dory skiff, I didn’t consider making any metal fittings. I bought bronze pintles and gudgeons for the rudder but opted for oak tholepins over oarlocks and made all of the cleats out of hardwood. A few years later, a cruising canoe I was building needed a rudder, so I made one out of a discarded aluminum street sign, bent in a vise and pop-riveted together.
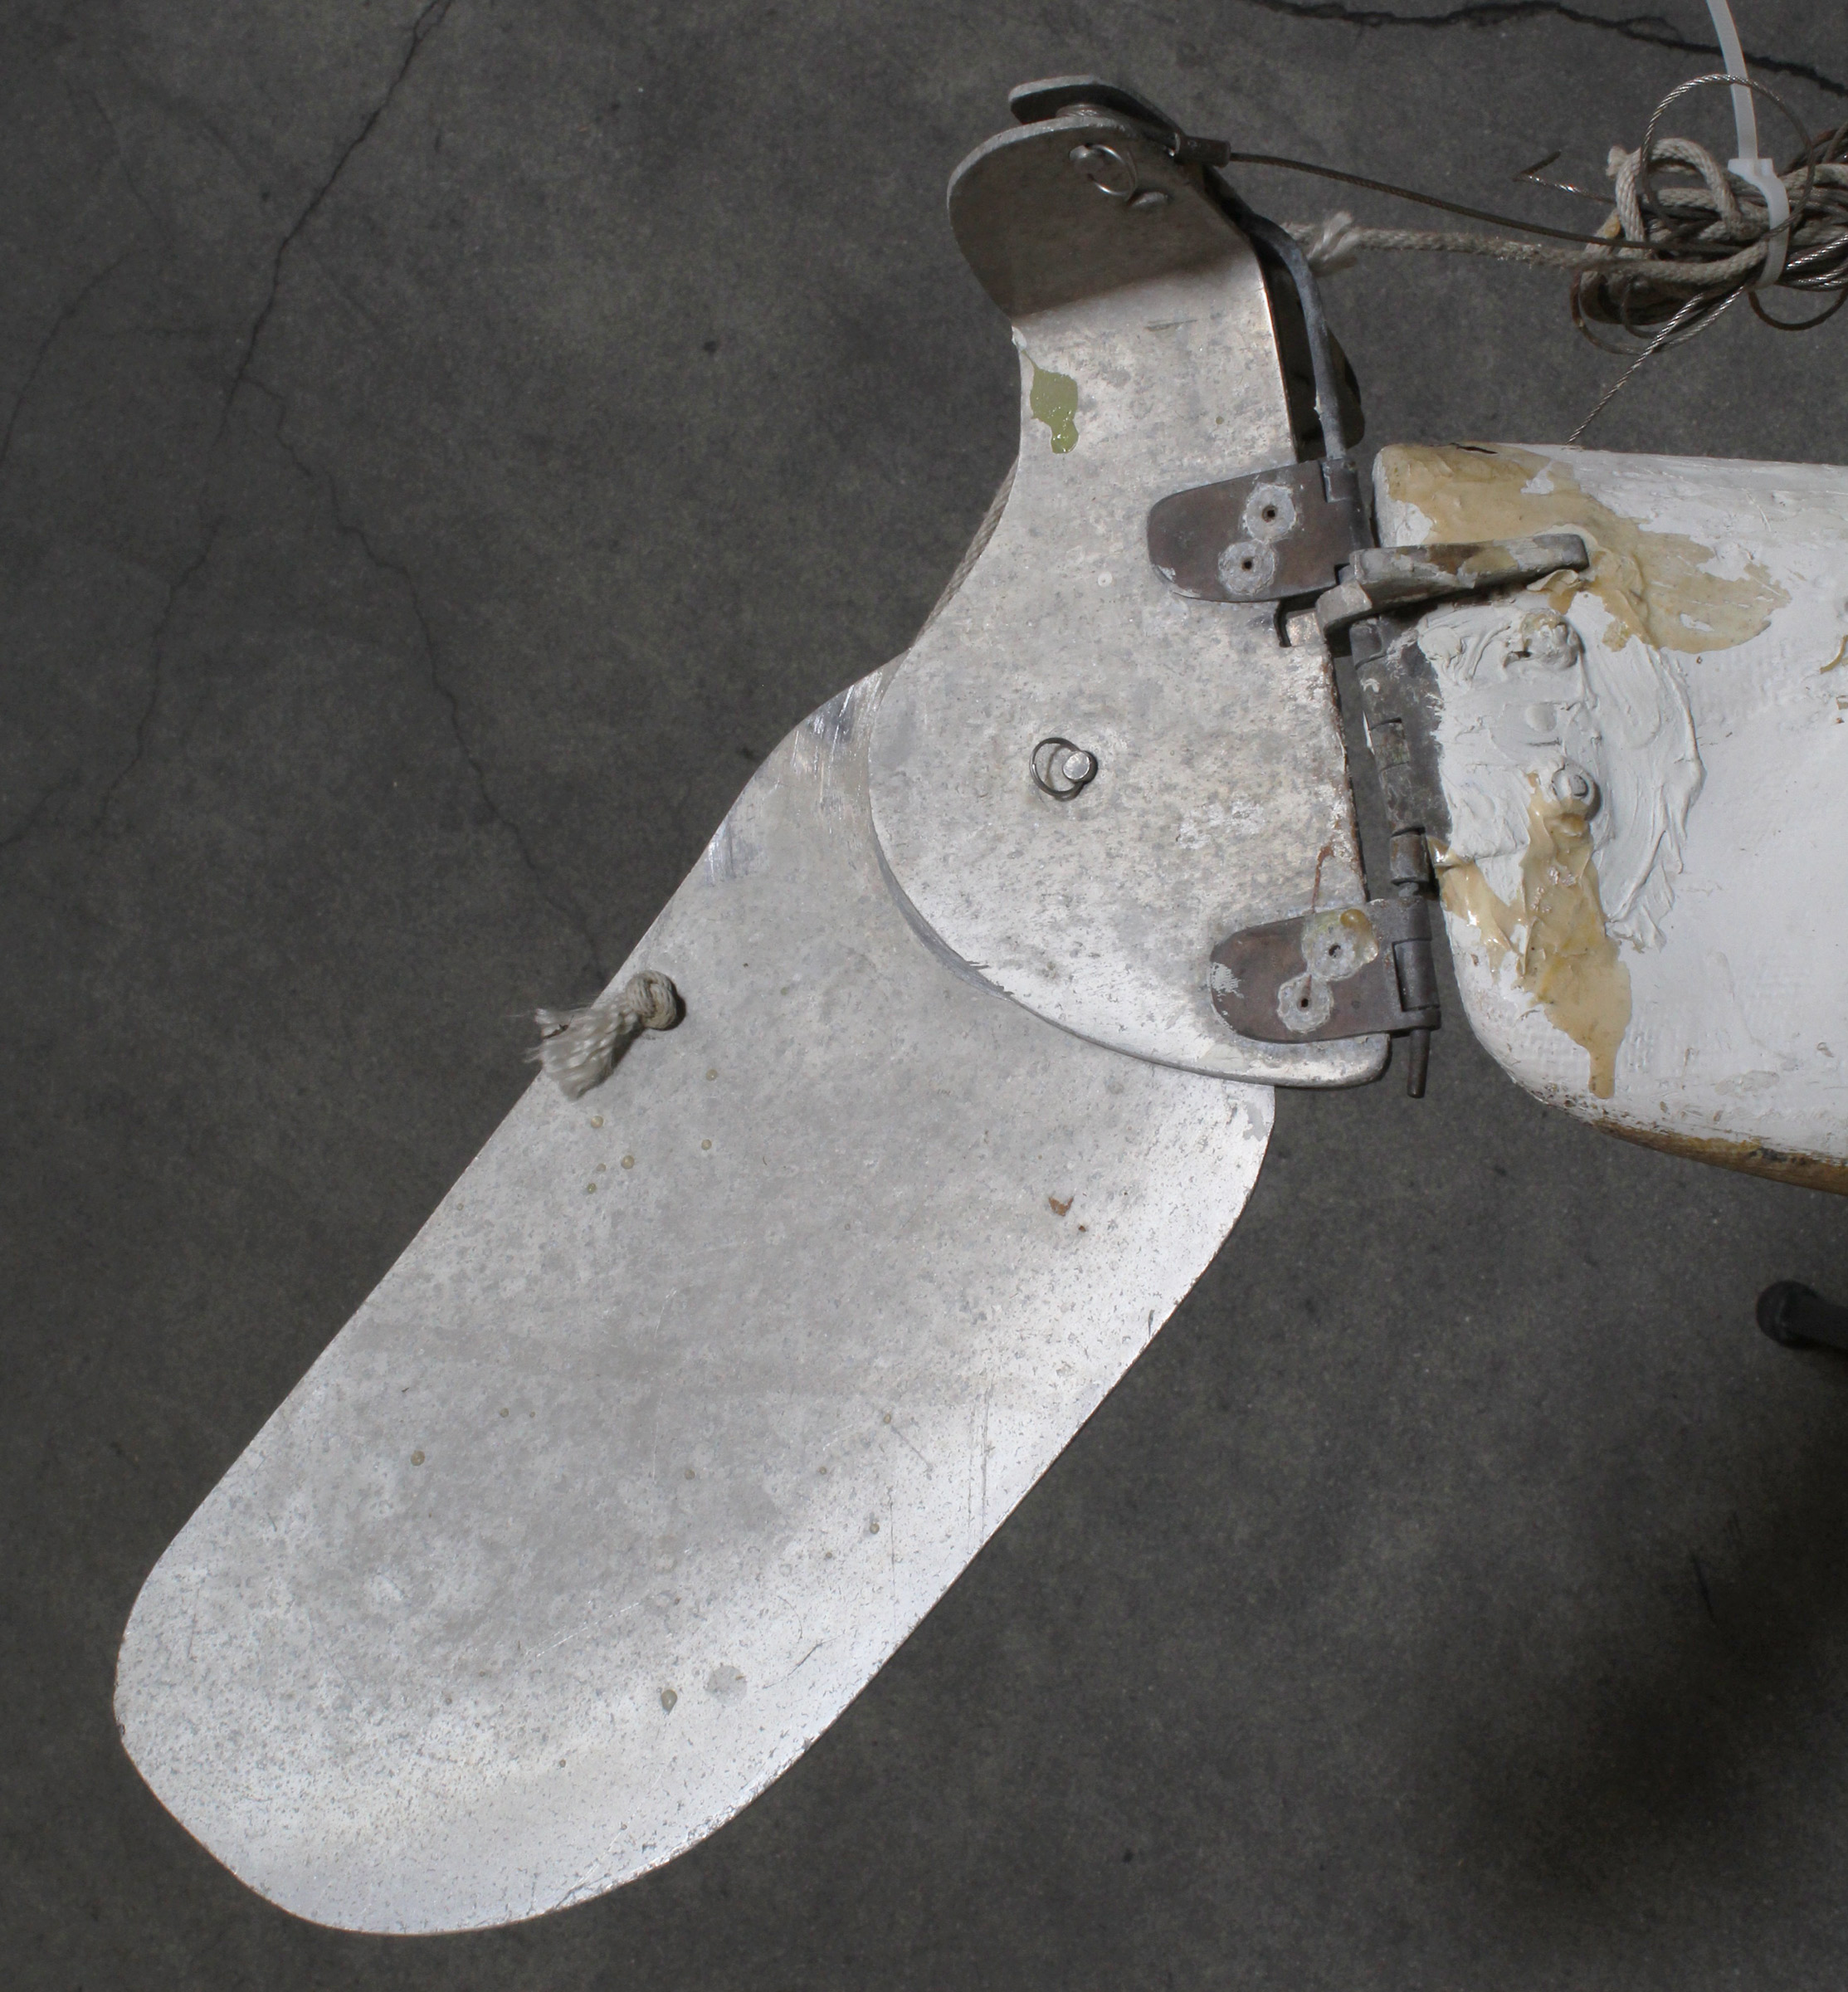
I made this aluminum rudder for the cruising canoe I built in 1983. The rudder held up pretty well, but the canoe, made of laminated paper—in the spirit of Nathaniel Bishop’s Voyage of the Paper Canoe—required constant repairs to keep it afloat during a 2,500-mile retracing of Bishop’s voyage.
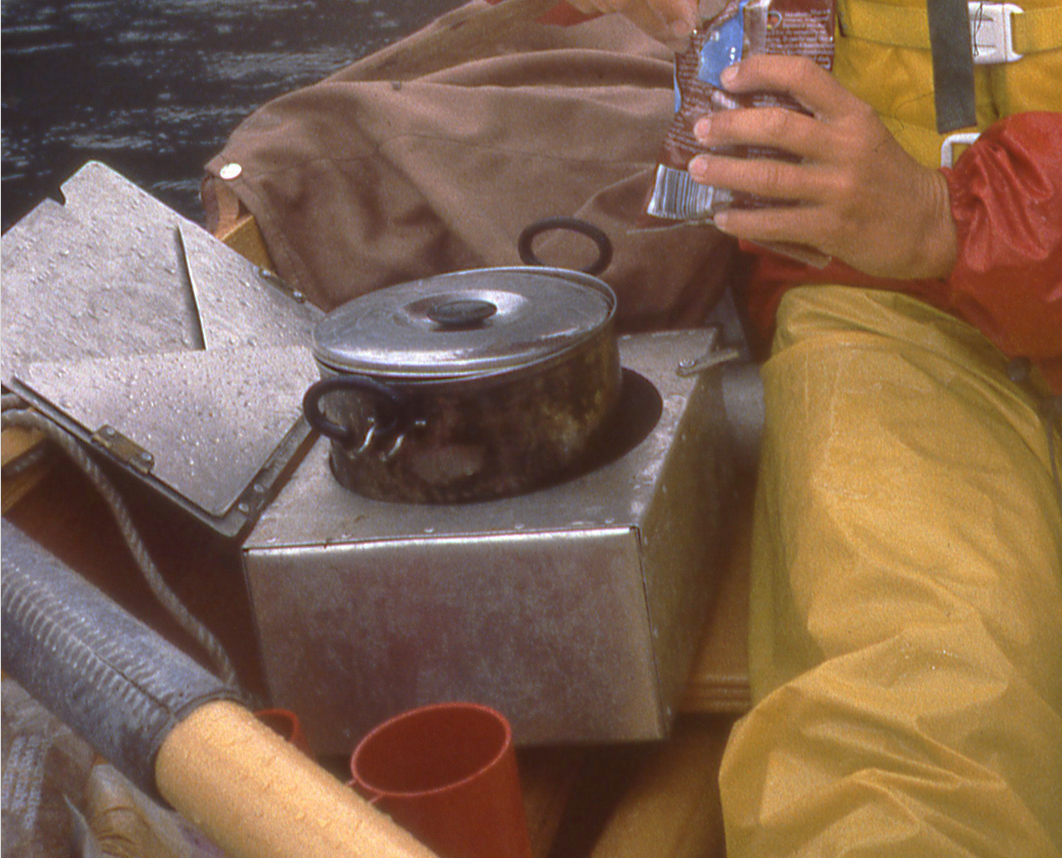
Another one of my earlier metalsmithing projects was a stove box for my MSR model G stove. Made of aluminum sheet, brass hinges, and pop rivets, it contained and protected the flame, held the pot, and kept the fuel bottle secure on the outside of the box. The lid had wings that could serve as a wind break to keep the pot warm. The box made it possible to have hot lunches while underway, a great improvement in the quality of life aboard an open boat in unpleasant weather.
It wasn’t until I moved to Washington, D.C. and landed a job at the Smithsonian Institution that I learned I could do more with metal. I was hired by the National Museum of African Art as an exhibits specialist, part of the crew making display cases and installing artifacts. For a few weeks I assisted contract workers brought in to make mounts to support the objects that would be put display. They used brass rod and flat-bar, annealing it to make it pliable and joining pieces with silver solder with an air-acetylene torch. I learned a lot watching them work, and after they left I did much of the mount-making for the museum.
The museum staged an exhibition of the work of sculptor Sokari Douglas Camp and filled the main gallery with her life-sized metal figures. Many of them were motorized: a dancer stomped his feet, a small girl clapped her hands, and a boat stroked with six oars. During the last stages of the installation, one of the sculptures failed, and Sokari asked me to weld the broken part. I’d never worked with an oxy-acetylene torch, so to be on the safe side, I wheeled the museum’s welding rig outdoors to the loading dock, read the instruction manual, and made the repair without setting the museum on fire.
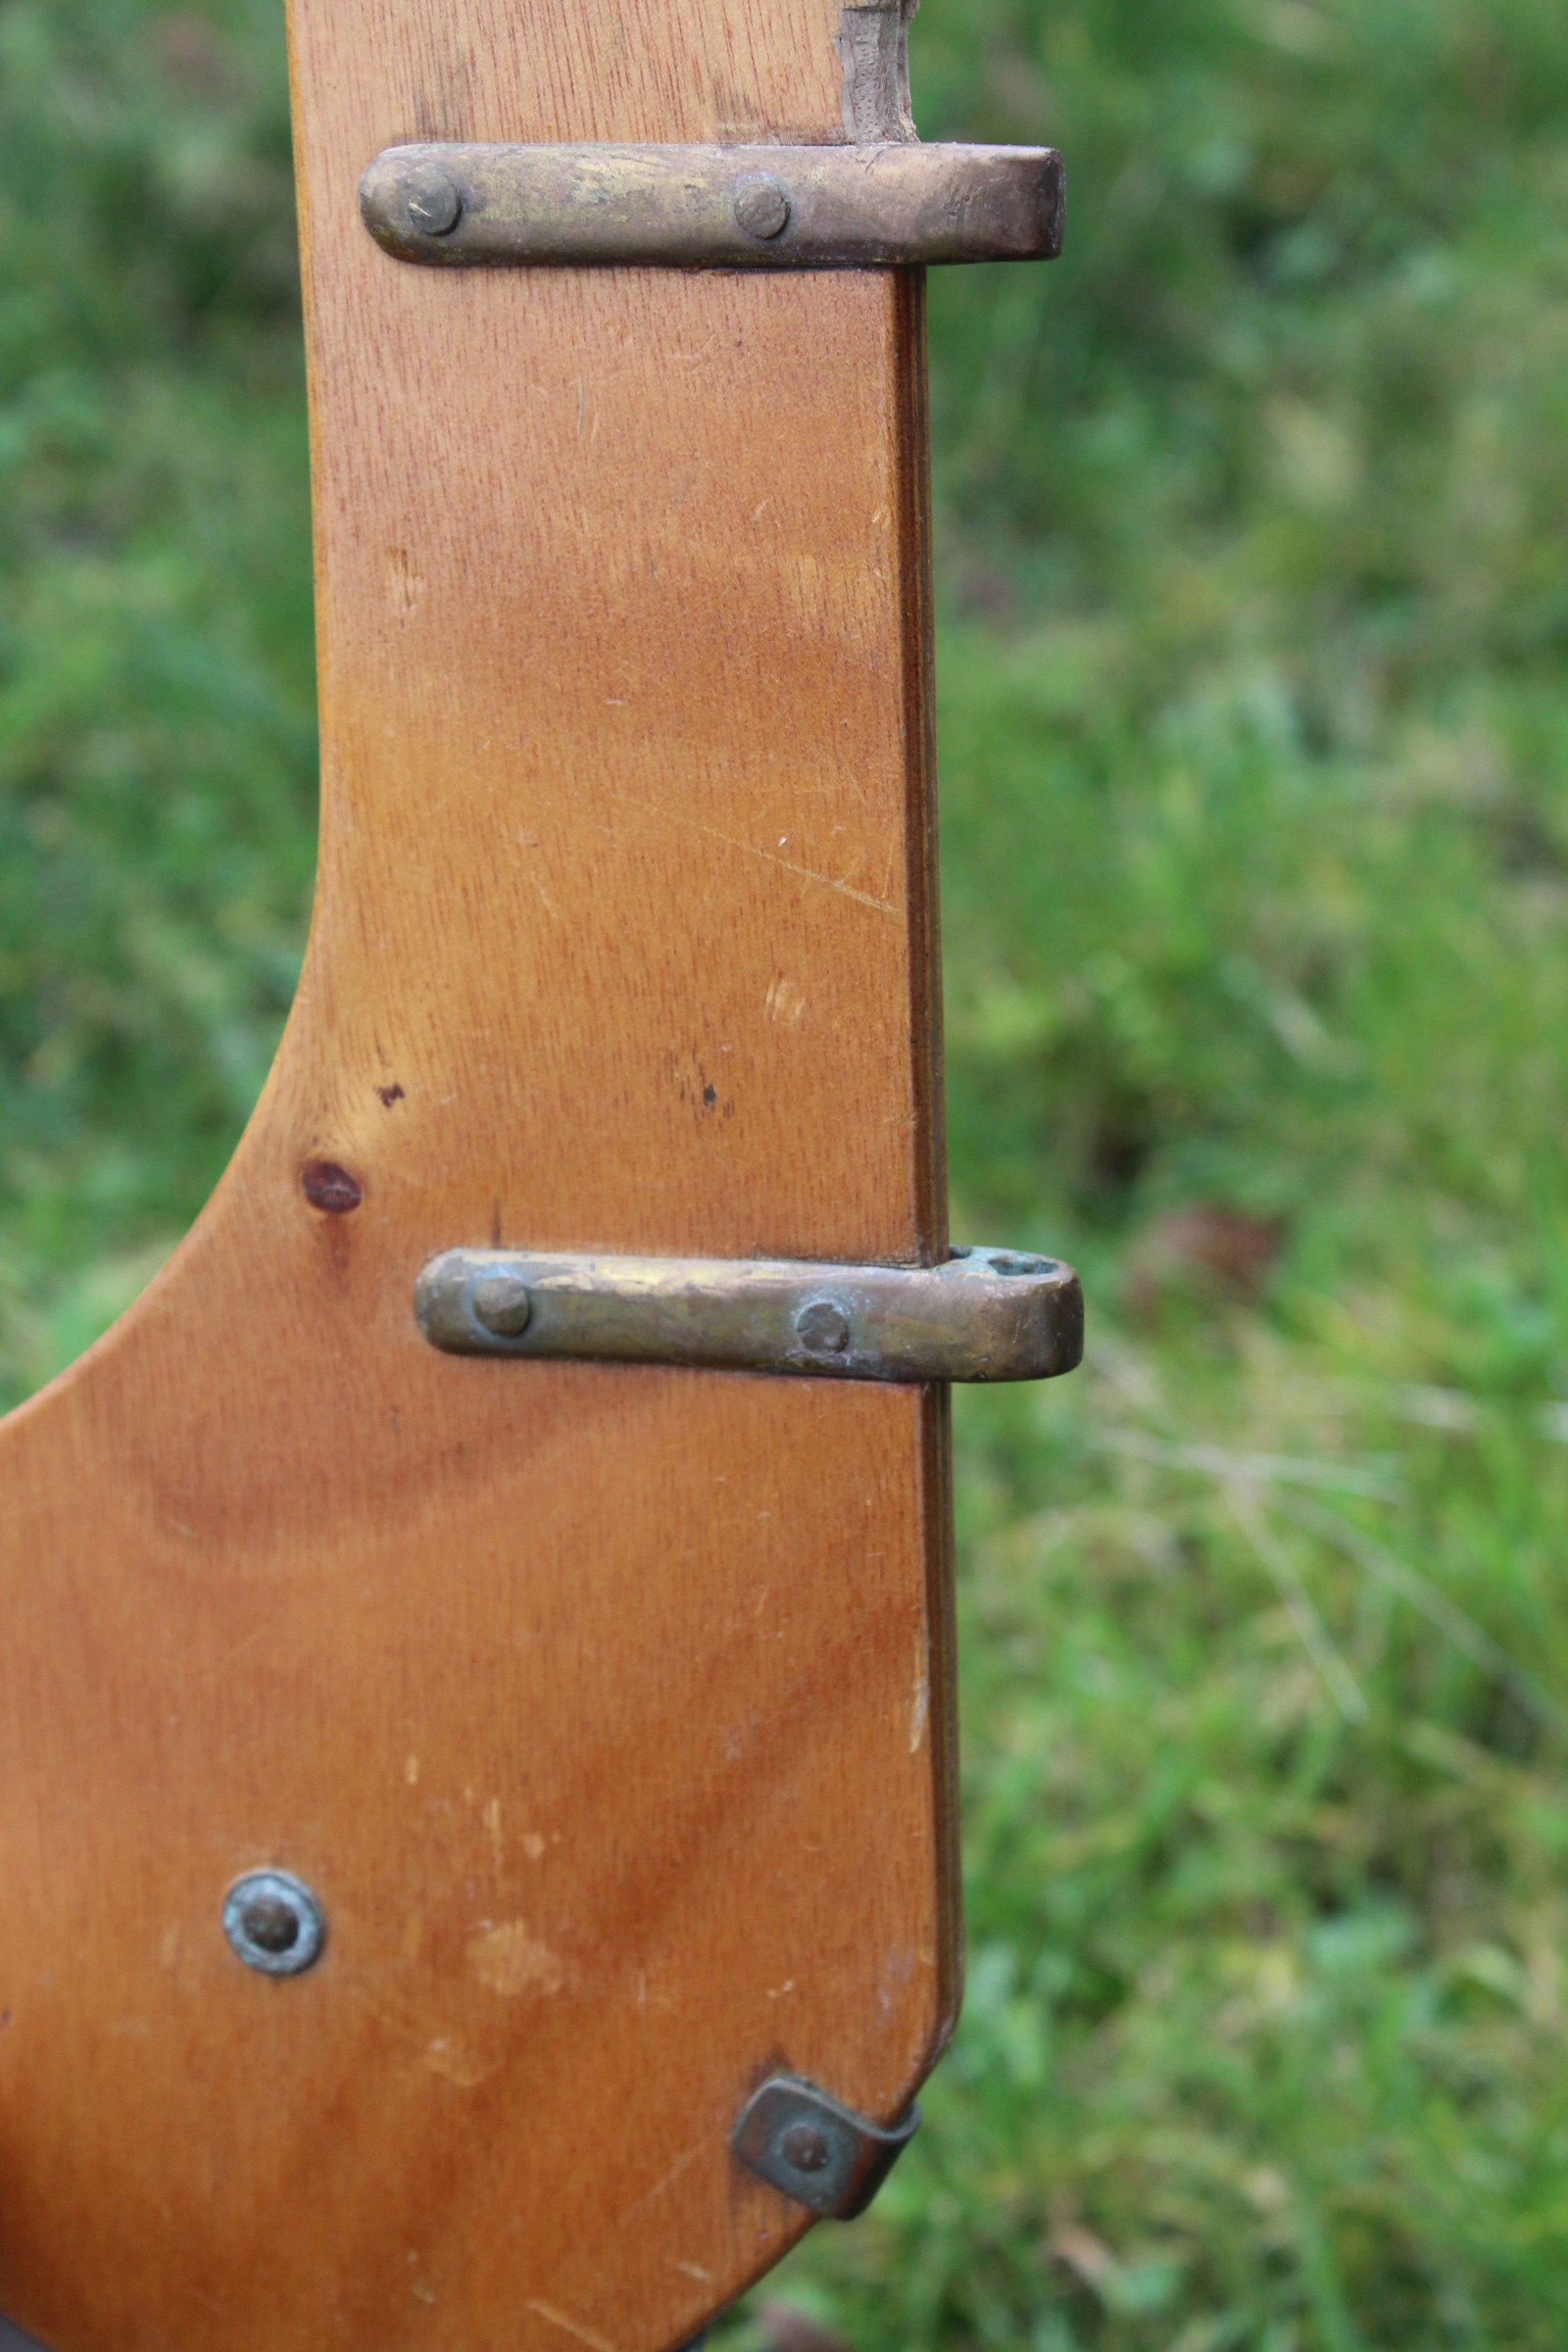
These brass rudder fittings for my lapstrake canoe were silver-soldered in 1988.
While I was working for the Smithsonian, I was living in a home just outside of D.C. and building a tandem decked canoe in the basement. It is said, “To a man with a hammer, everything looks like a nail,” and with my access to the museum’s metal shop, all of the fittings I needed for the canoe looked like metalsmithing projects. I made gudgeons for the rudder, a grab handle for the bow, and pad-eyes for the anchoring the sailing rig.
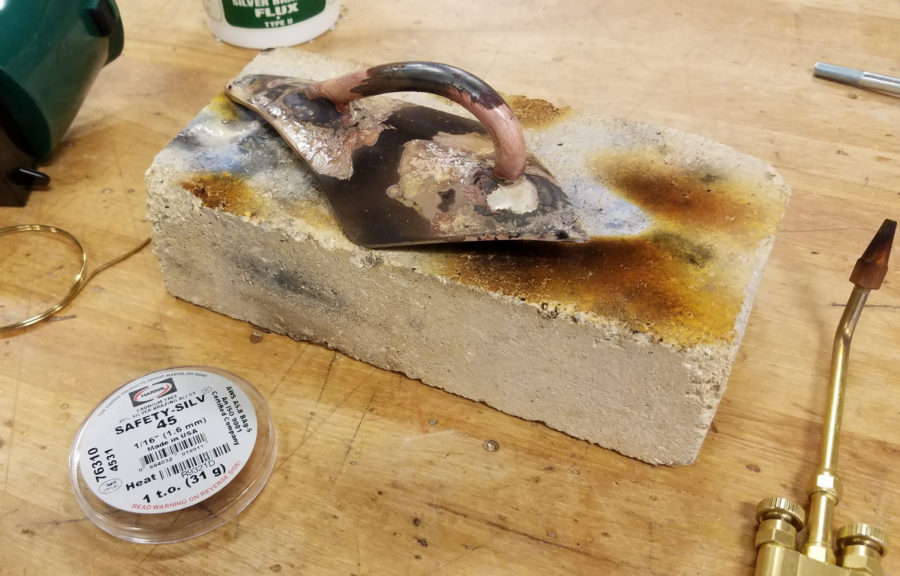
The handle on the bow of the canoe had to be silver-soldered in stages, as not all of the joints could be worked at the same time. The first joints were soldered with hard silver solder so they wouldn’t melt when the brass was heated for the second set of joints and soldered with medium solder with a lower melting point. The last joints were done with easy solder with a still lower melting point. The tube at the front is for a staff to fly my family’s private signal.
When I left D.C. in the late ’80s and returned to Seattle, I made a soldering station around an air-acetylene torch a friend I’d built a boat for had once used to make jewelry. I got a job making mounts for the Seattle Art Museum and continued making hardware for boats I built and for making simple tools.
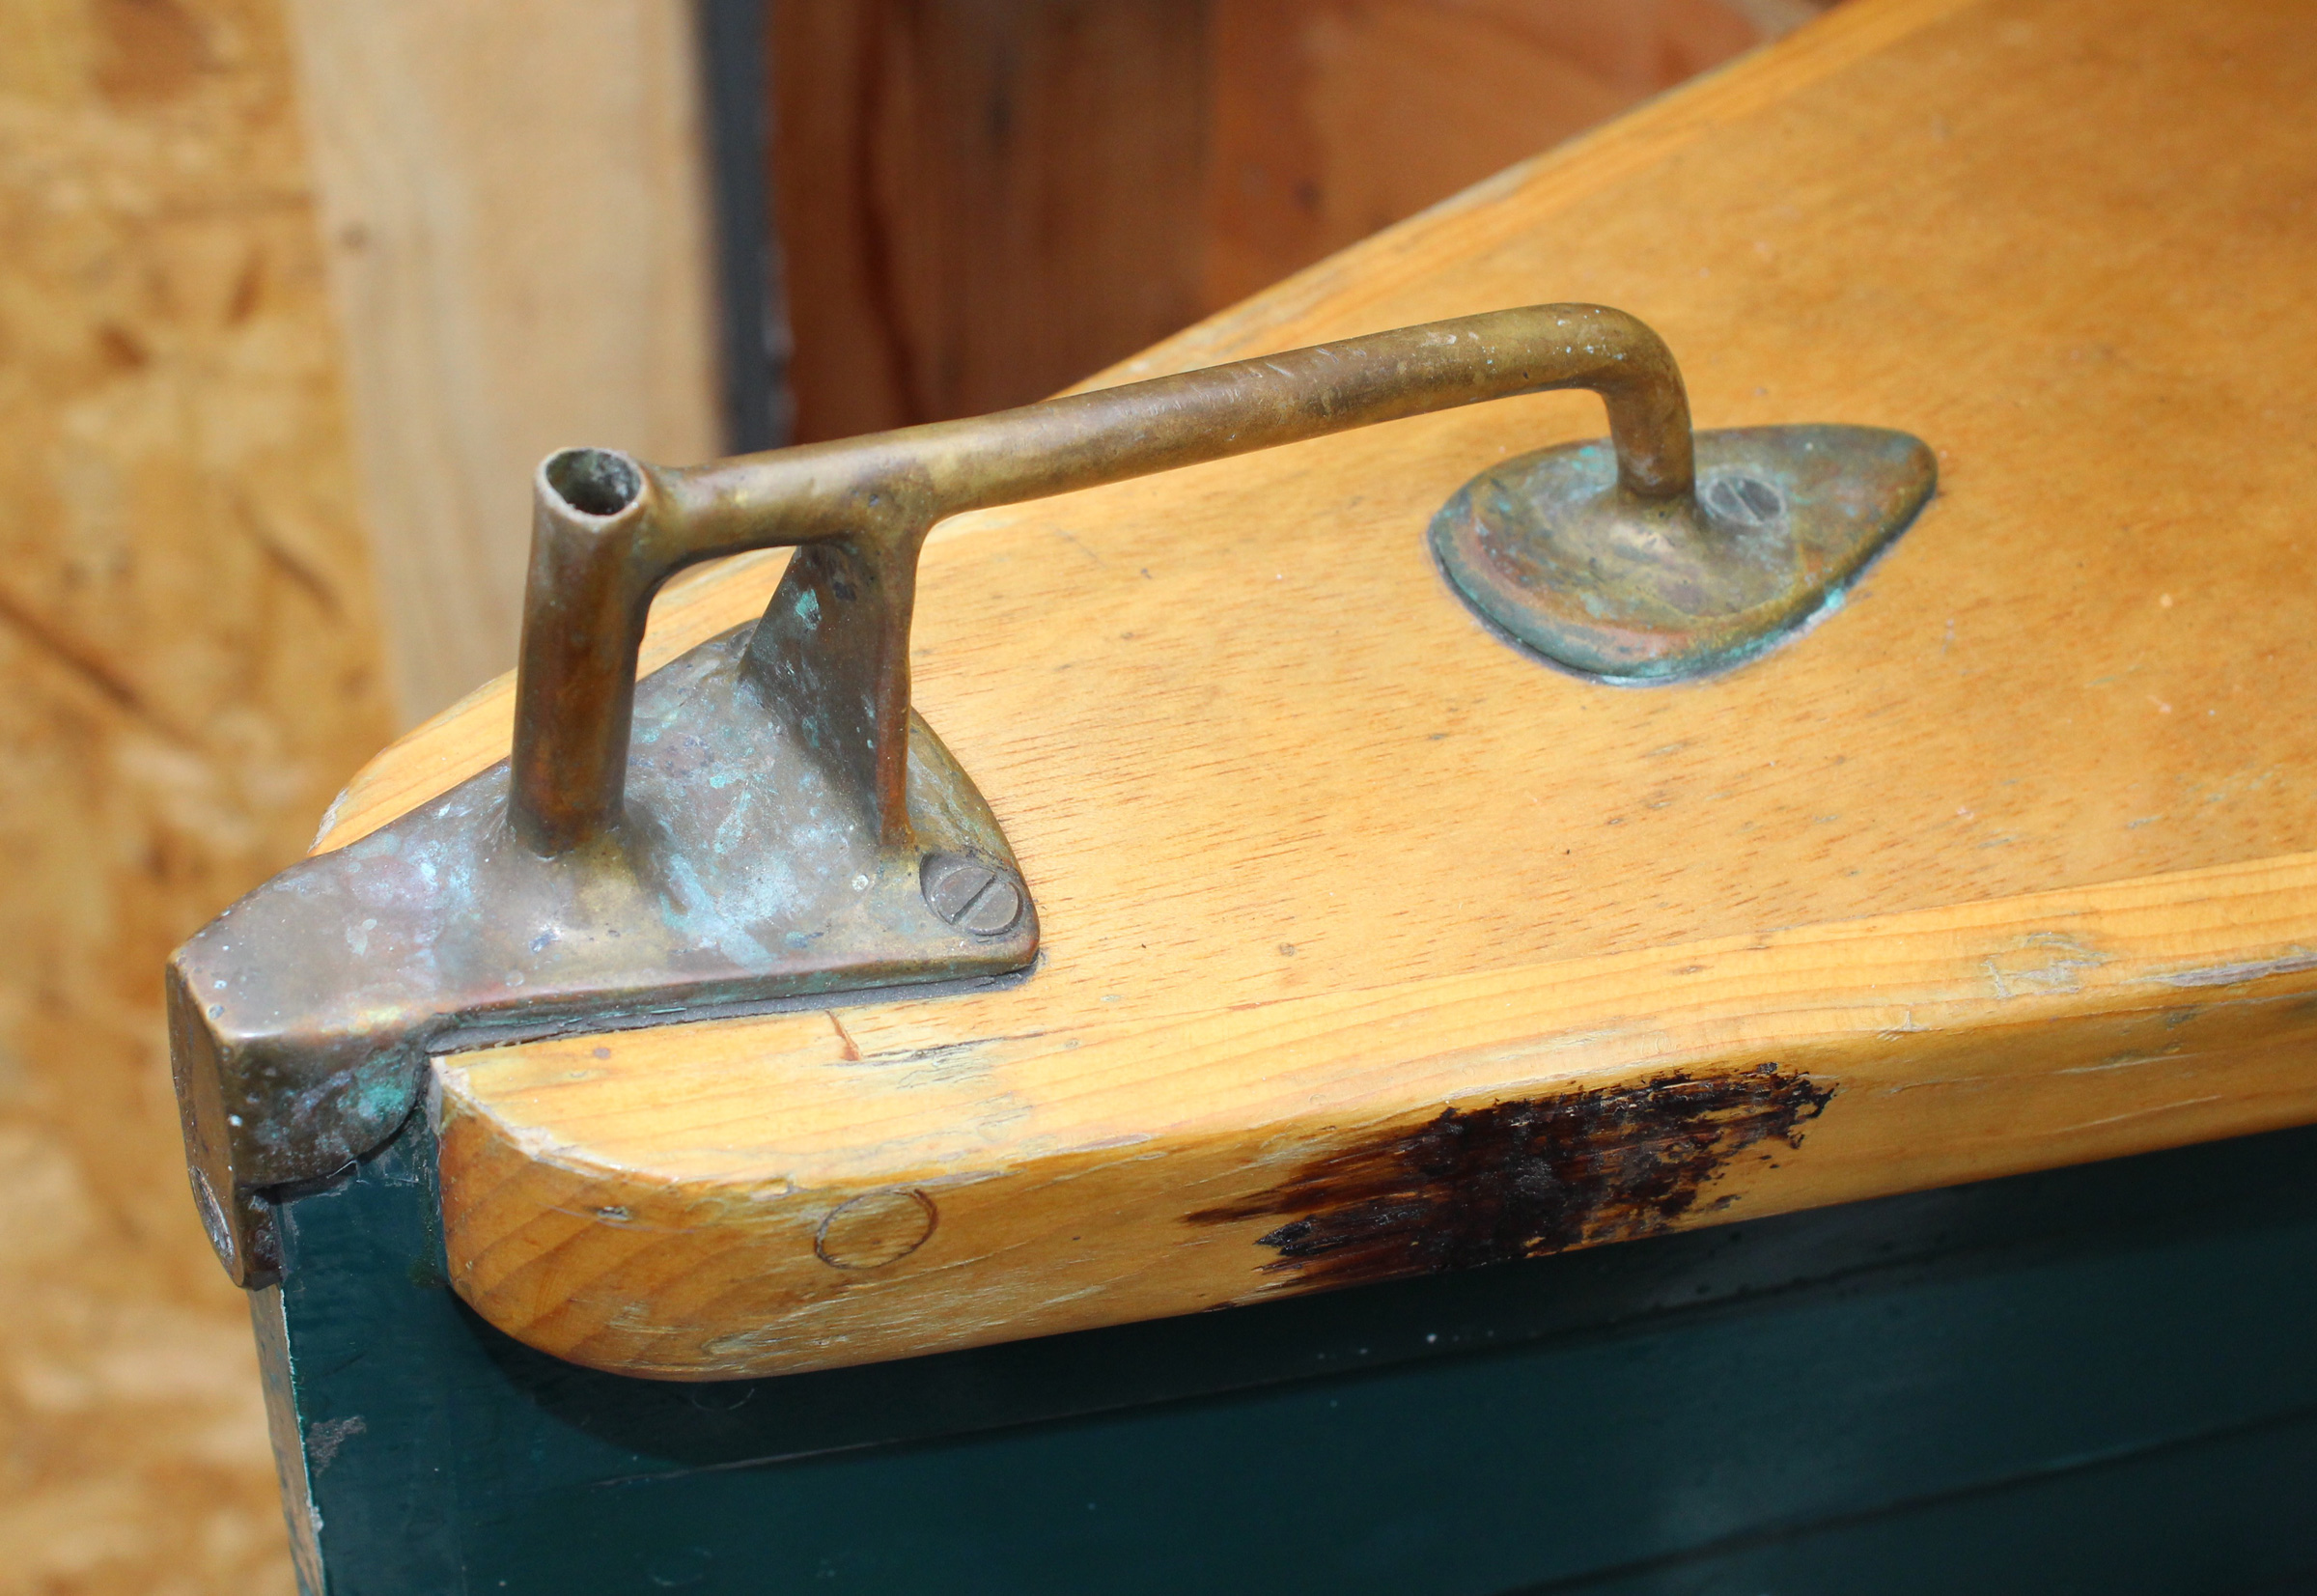
The brass gudgeons on HESPERIA’s transom have a patina of verdigris, just like the Statue of Liberty. The projecting part is made up of two layers of brass soldered together for strength and to reduce wear. I made these fittings in 2011.

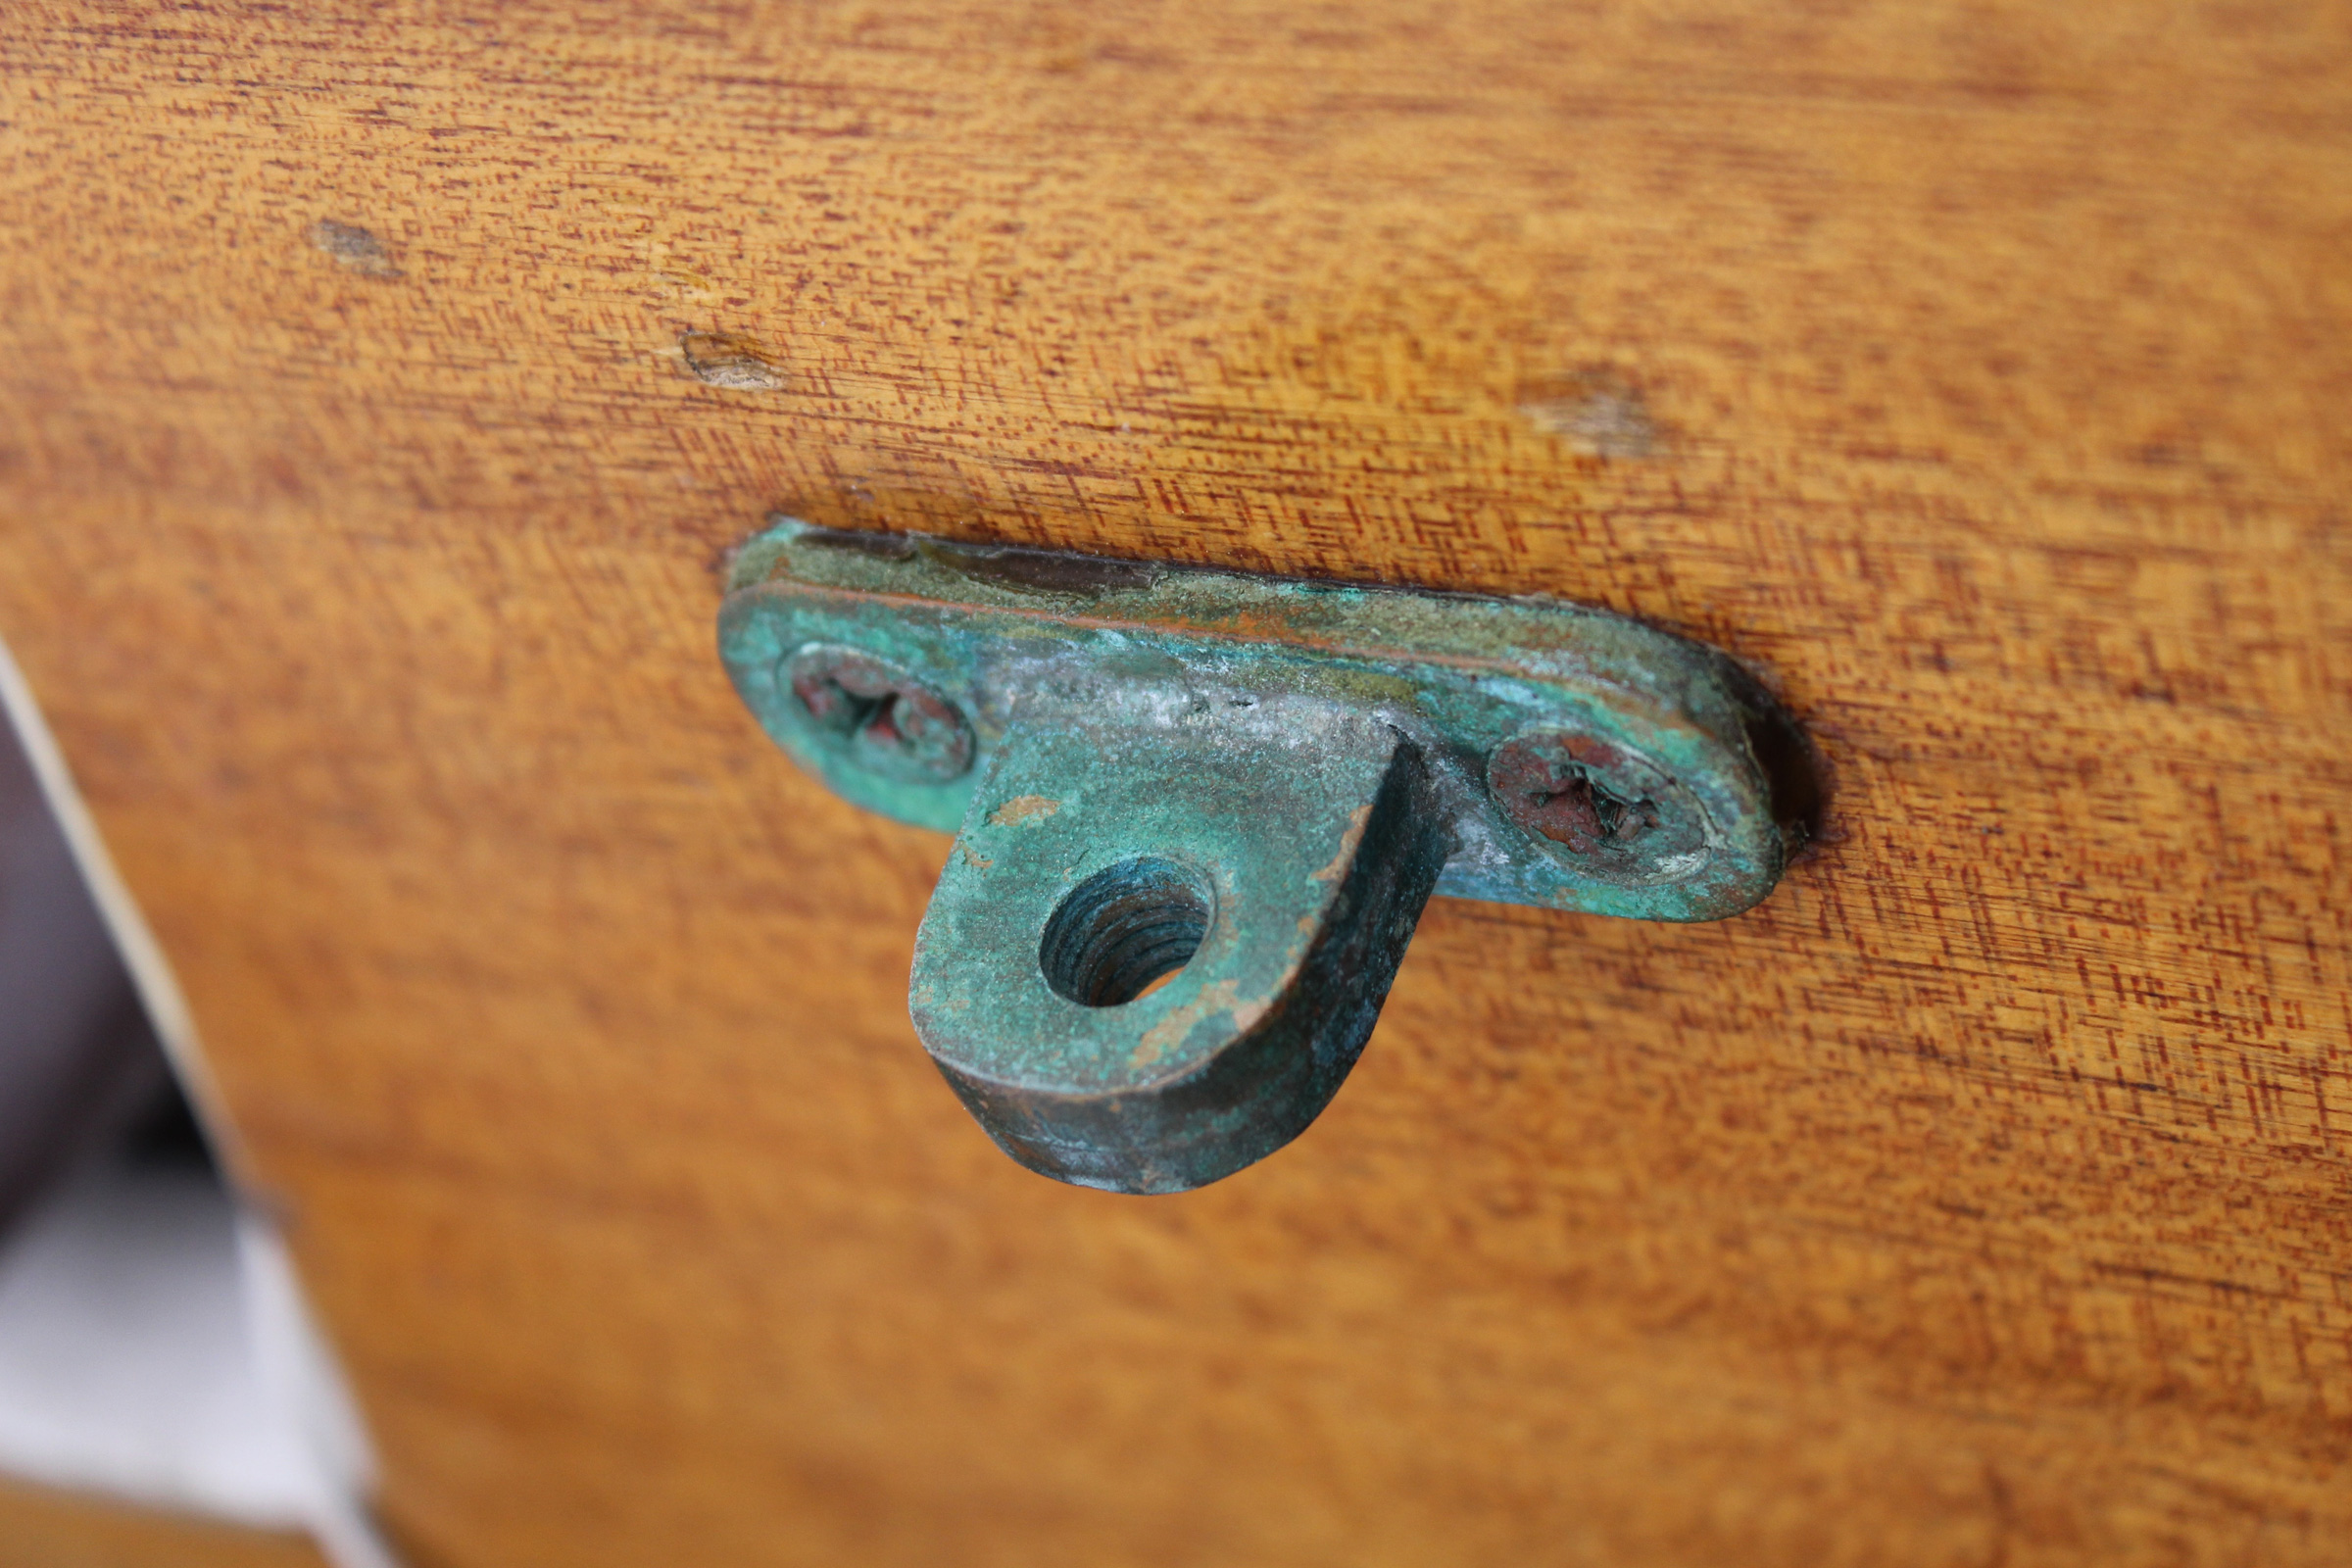
HESPERIA’s rudder had matching gudgeons instead of pintles. Brass loses some of its temper when heated for soldering and a projecting pin would not likely have adequate stiffness. A brass rod, heated only on one end to bend it, runs through all four gudgeons. I mounted the rudder gudgeons here on the the rudder’s forward edge, and through-bolted it to nuts inserted in the mortices. My plan was to fill the mortices with oak plugs, but I never got around to it.
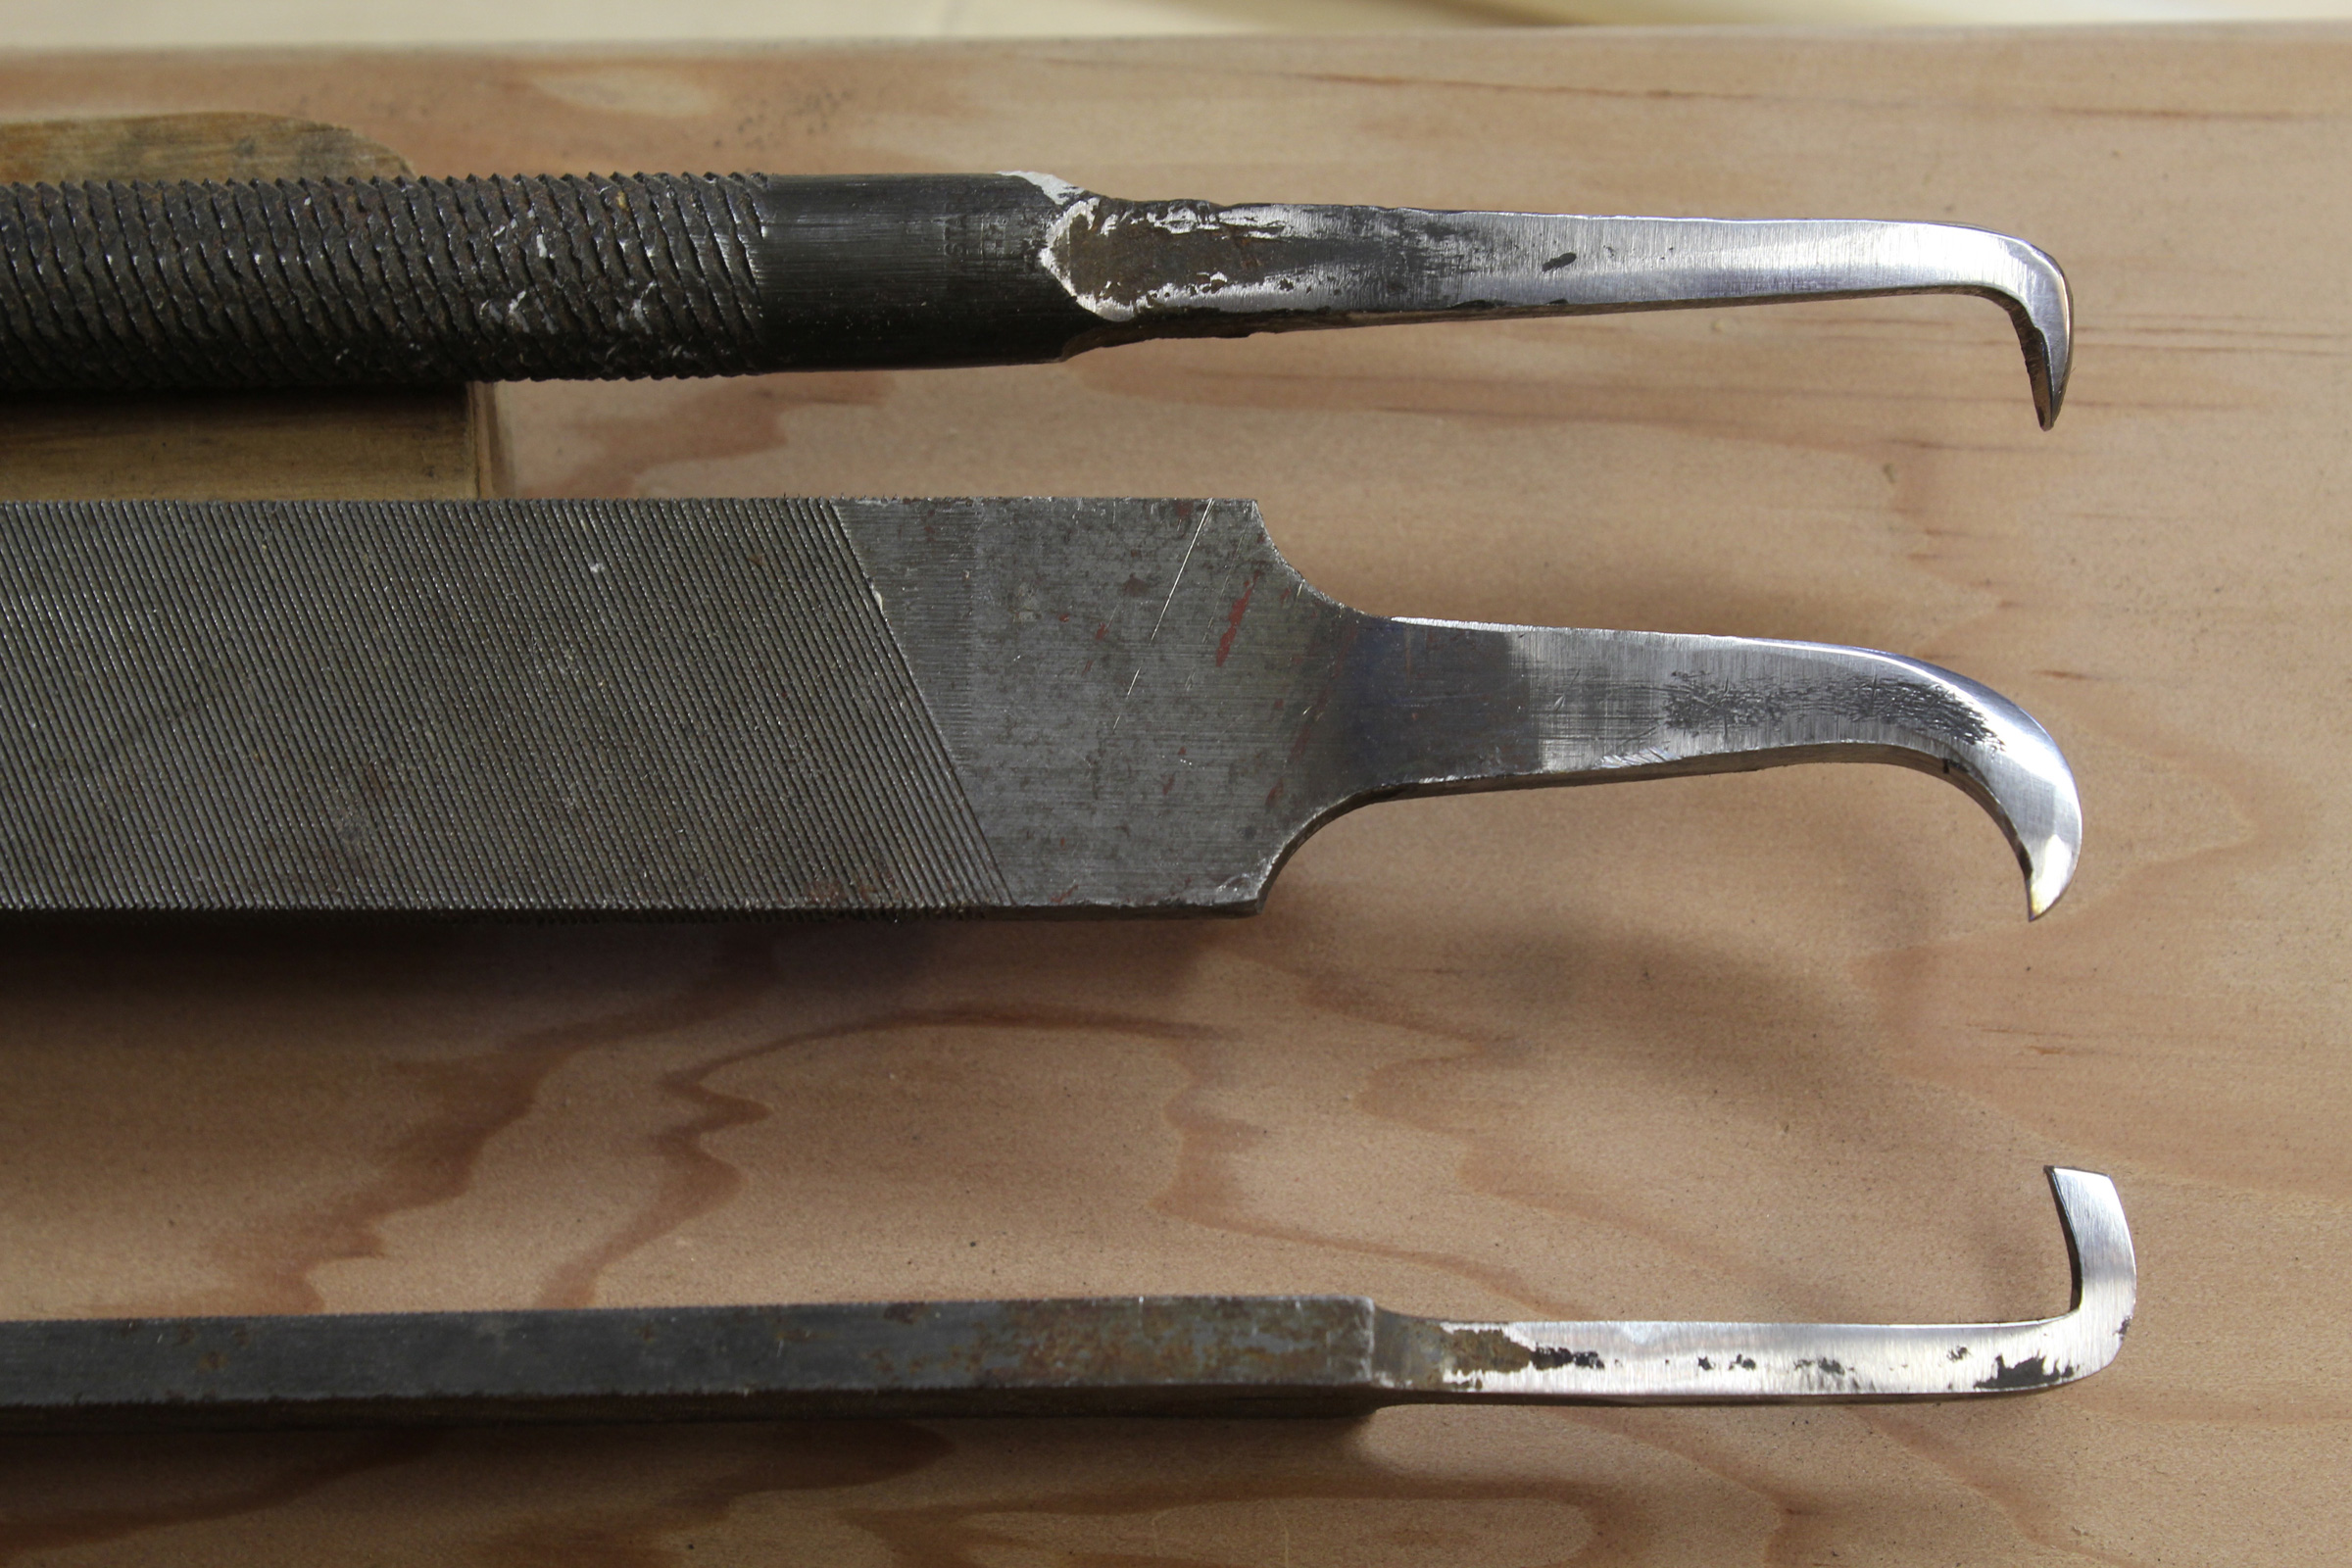
To make a tool for reefing seams, I heat the tang of a file until it is cherry red and then bend it into a hook. A grinder and belt sander shape and sharpen the point.
In 2007, an elderly friend of mine passed away and his family wanted to find good homes for some of his tools. I was given his oxy-acetylene welding equipment. I didn’t do anything with it until my son and his friend built BONZO, a 19’ Escargot canal boat, and we decided it needed a wood-burning stove for winter outings. I scanned the web for small stoves and found some meant for using in canvas wall tents, but they were expensive and too large for the space we had available in the boat. I had the torch and a large sheet of 1/16″ steel, so I decided to figure out gas welding.
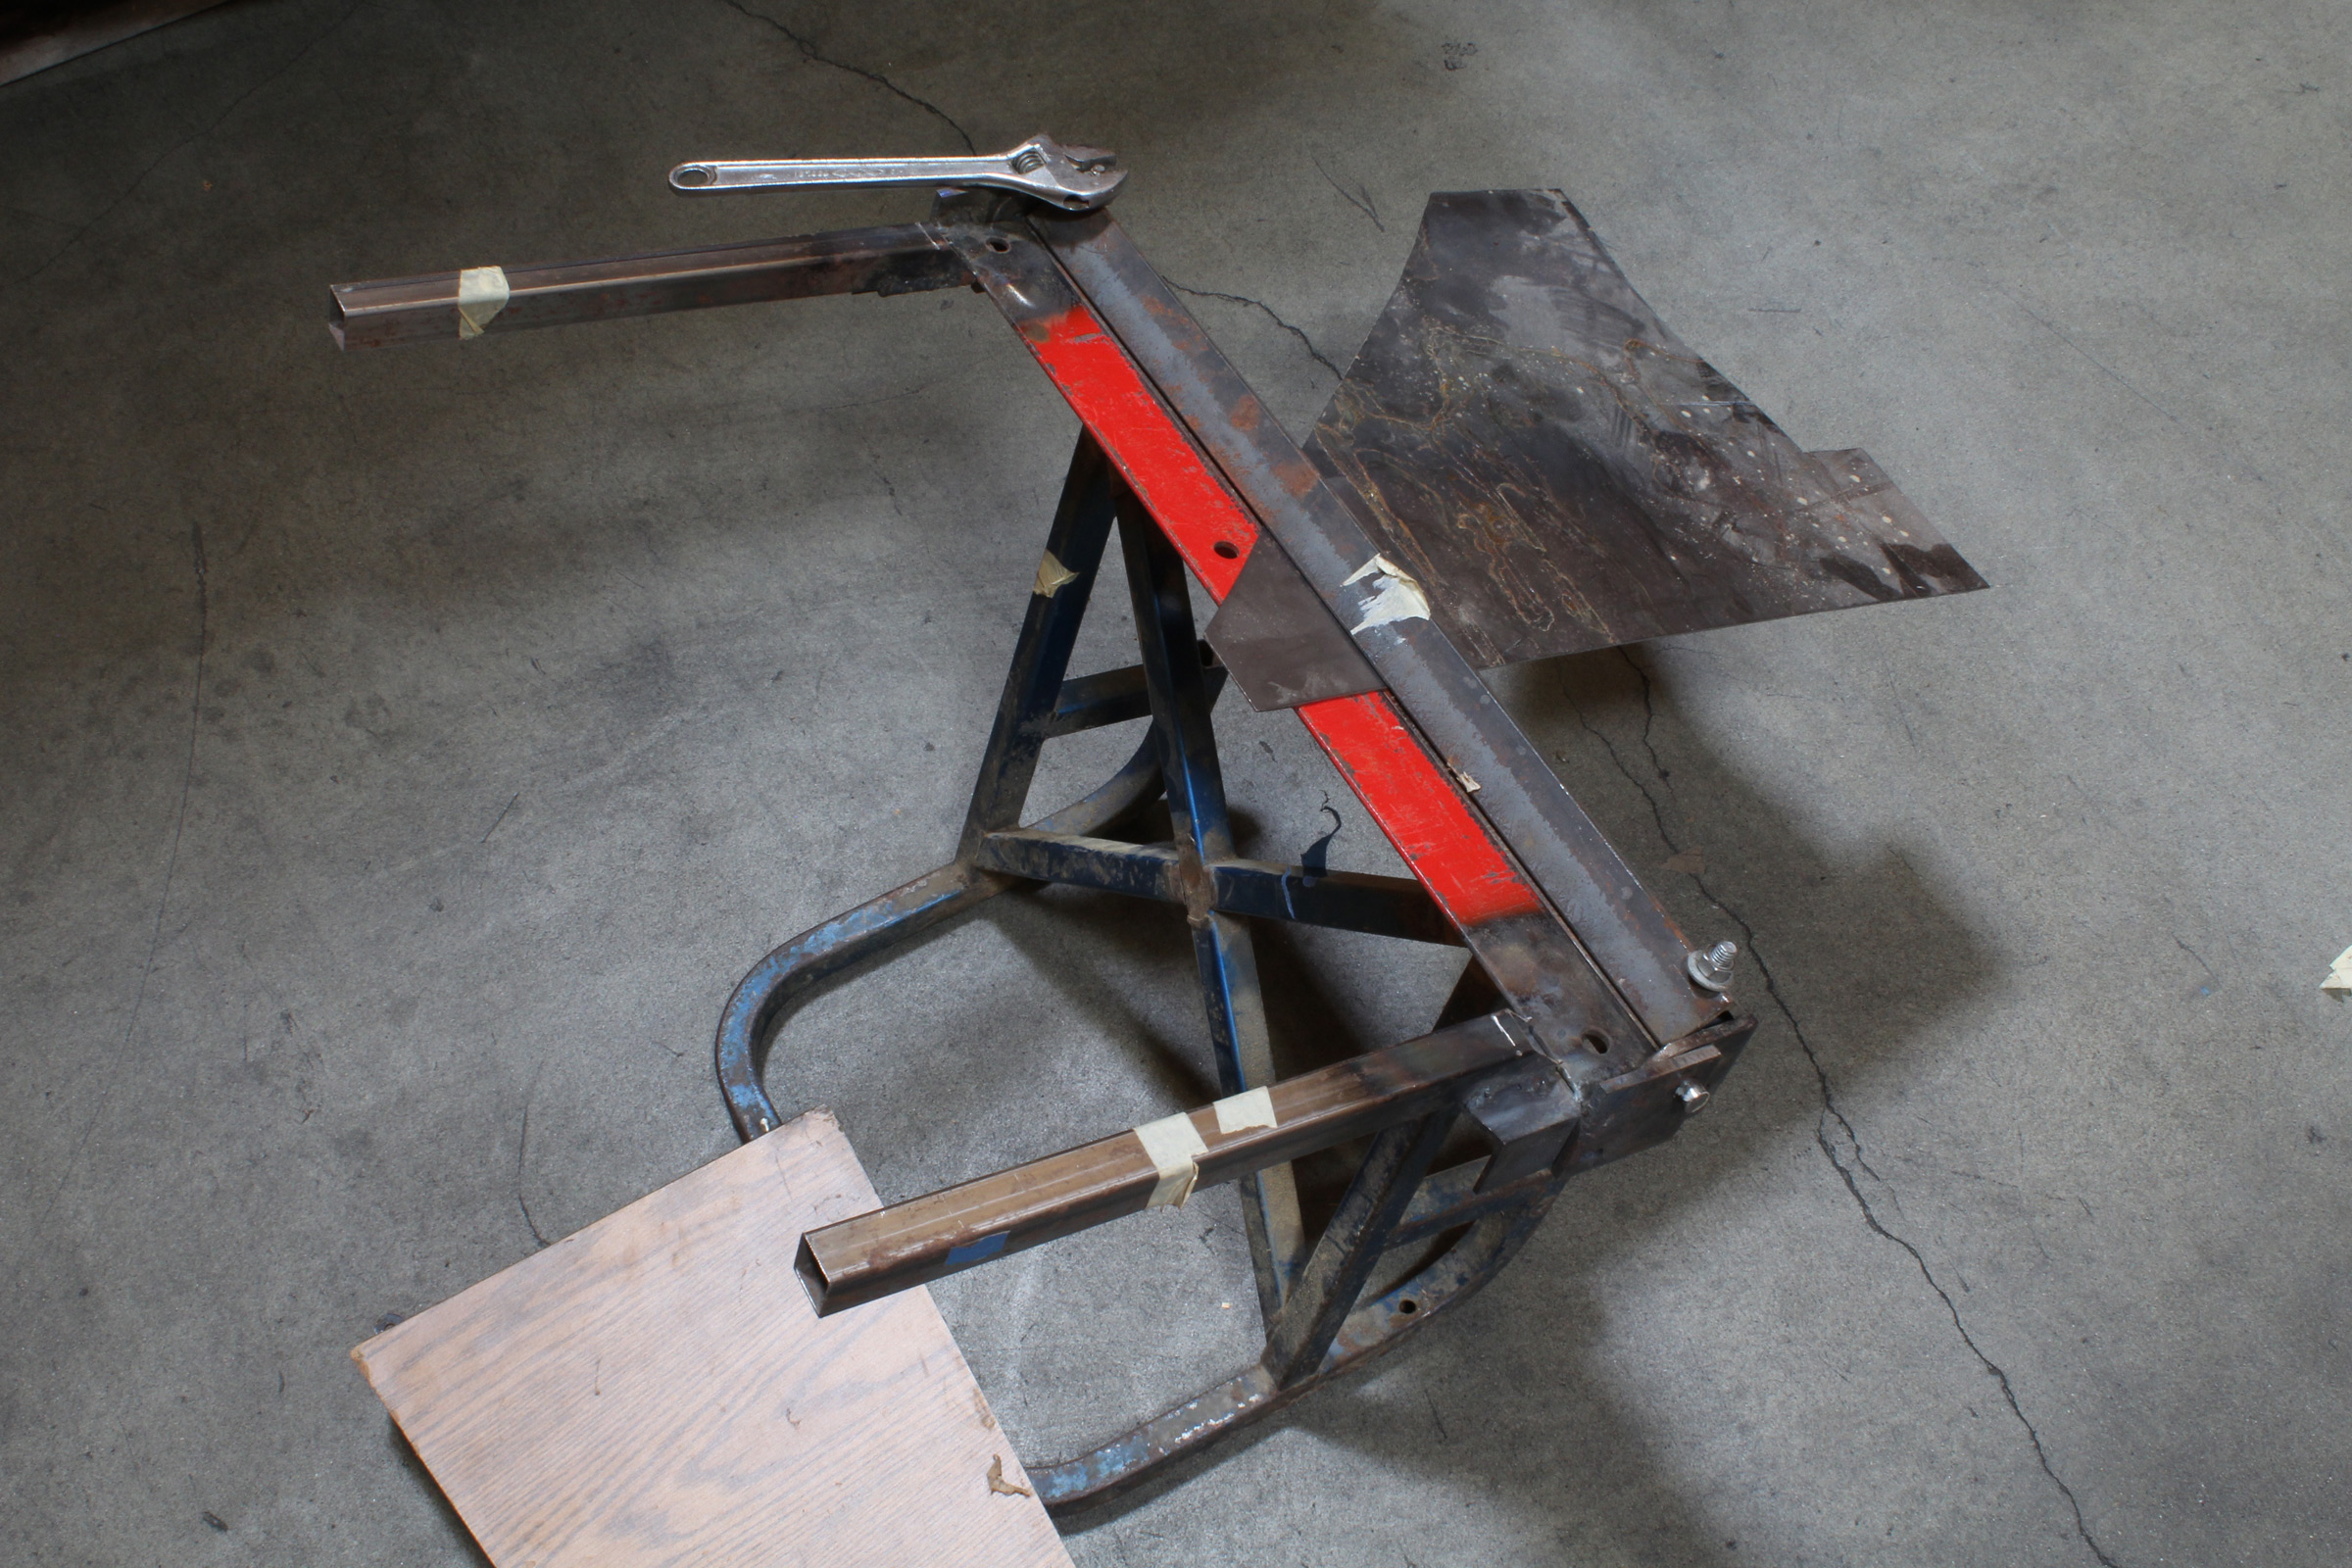
Every angle that can be bent is a joint that doesn’t need to be welded. To make straight, tight bends, I made a sheet-metal brake, using the frame of an electric drain-pipe rooter as a base, a few pieces scavenged from a retired boat trailer, and odd bits of mild steel. Gas welding put it all together.
The weld I’d made for Sokari was only 1″ long, so I didn’t know that a long seam required tacking to keep pieces aligned. Consequently, some of the edges I welded are far from straight, but as things went wrong, I did more research and applied what I’d learned. In time I got the hang of heating the steel and feeding welding rod into the liquefied metal. When I ran out of the few rods I had, I straightened wire coat hangers and welded with them.
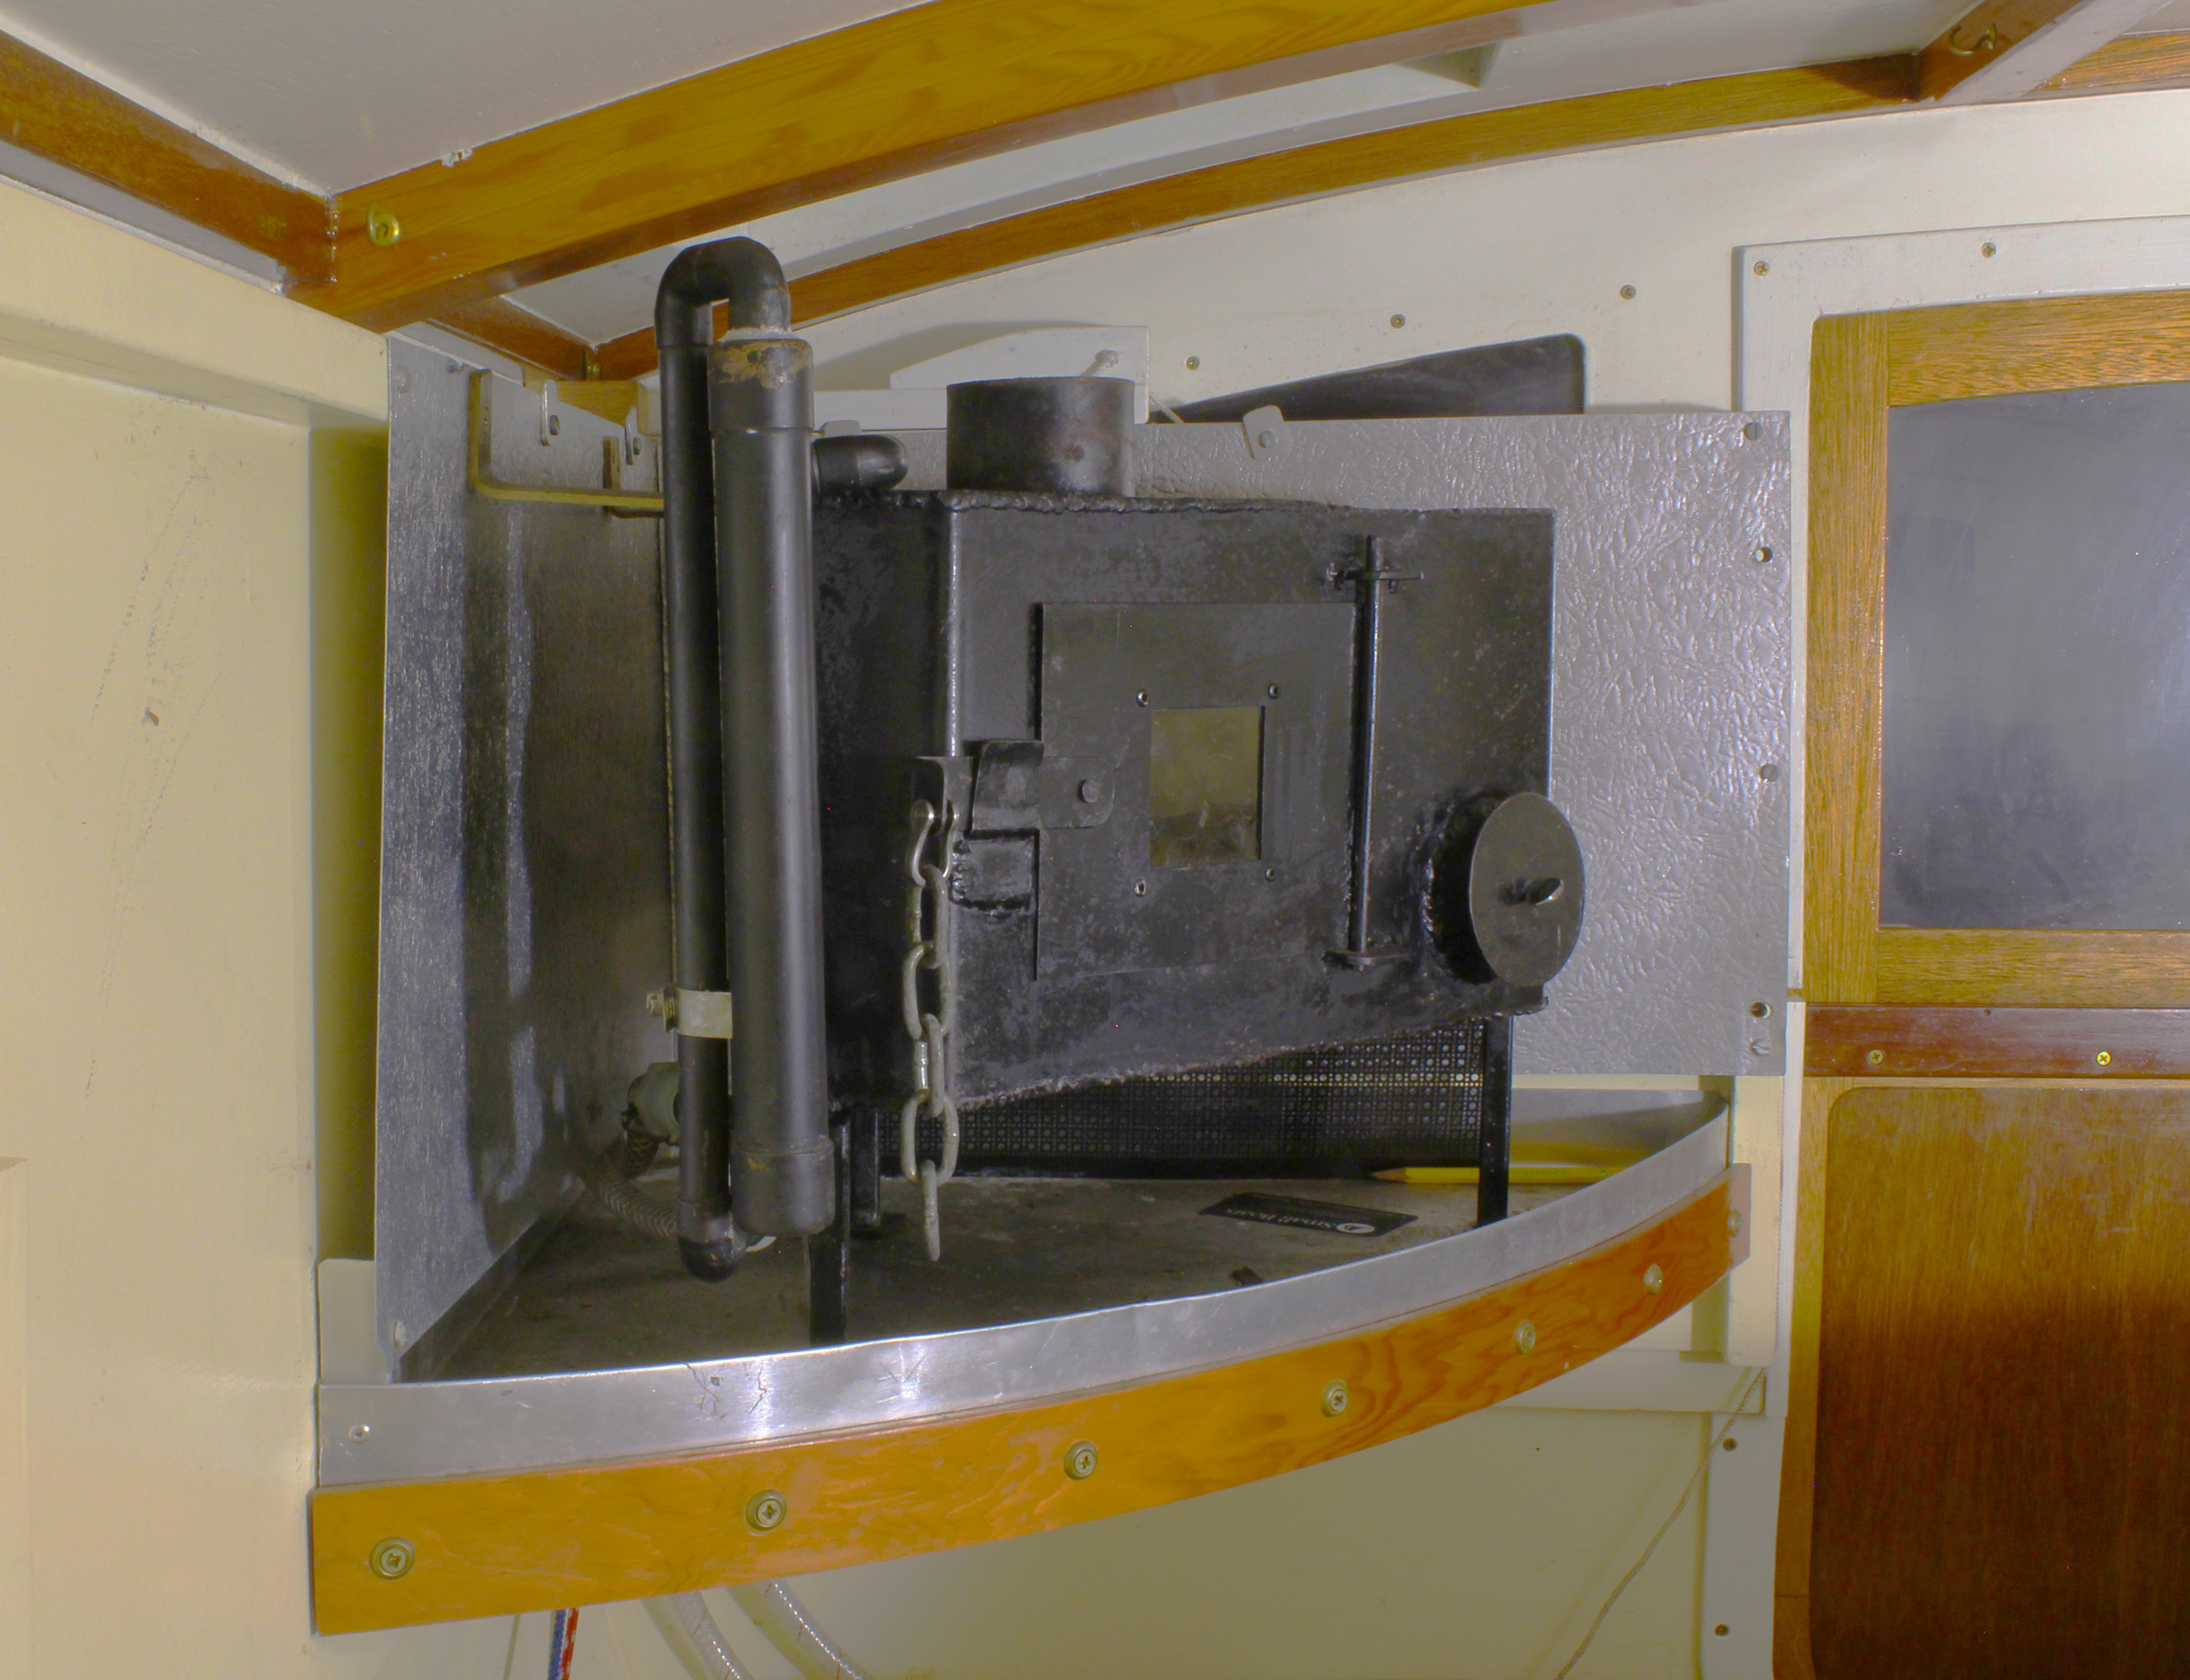
HESPERIA’s wood stove, shaped to fit in the cabin corner, was my second gas-welding project. The seams are not perfect, but much straighter, thanks to tack welds. A mica window in the door lets the firelight illuminate the cabin at night. The vertical pipes at left are parts of a heat exchanger that supplies the sink, set in the opposite corner, with hot water. The exchanger is made of copper pipes silver-soldered together. The cabin roof has been lowered here; it is raised while at anchor.
Gas welding turned out to be a great pleasure. Seen through the dark lens of welding goggles, the molten metal, like lava, glows and flows, leaving a trail of overlapping crescents. After making BONZO’s stove, I made two more, for my cruising garvey, HESPERIA, and my teardrop trailer.
A few years ago I bought a cheap arc welder. I’ve never been able to do even a spot weld with it—the rod just sticks to the metal—but I haven’t given up on it. Arc welding is just another challenge of metalsmithing. Like soldering and gas welding, it might just open up another world of possibilities.![]()


Phos-copper rods (obviously an alloy of phosphorus and copper), work really well on brass and bronze. I first used it with the old solid oxygen/propane welders that were around 25 or so years ago (may still exist?). That was a terrible technology, as you had to ignite the oxygen pellets (looked like a cylinder of dog poop), which wasn’t always easy, and then had to weld quickly before they burned out. I never understood how they worked, burning chemicals to produce oxygen. Later came one with oxygen cylinders, same size as propane bottles, but they were expensive and the oxygen depleted very rapidly. At least you could shut off the oxygen if you hadn’t already depleted it.
I never tried regular arc welding, but instead bought a Harbor Freight mig welder and taught myself how to use that. It had the option of using flux-core wire, which saved having to buy CO2, argon, helium, or mixed gases, though I think the gases give a cleaner result. I also made a tiny boat stove for my little 21′ Ed Monk Sr. cutter (boat was named PLATERO, if you ever ran across it. A new owner brought it to the Port Townsend show 2 or 3 years ago). I made an extra, and put it into a local used marine gear chandlery (now defunct), and eventually sold it, or rather swapped it for some gold nuggets to an Alaska gold panner. I cut out the plates for another one, but have never assembled it. It was a great little stove, and burned bark that I’d scavenge from beaches as I cruised around. Fir bark makes a great fuel.
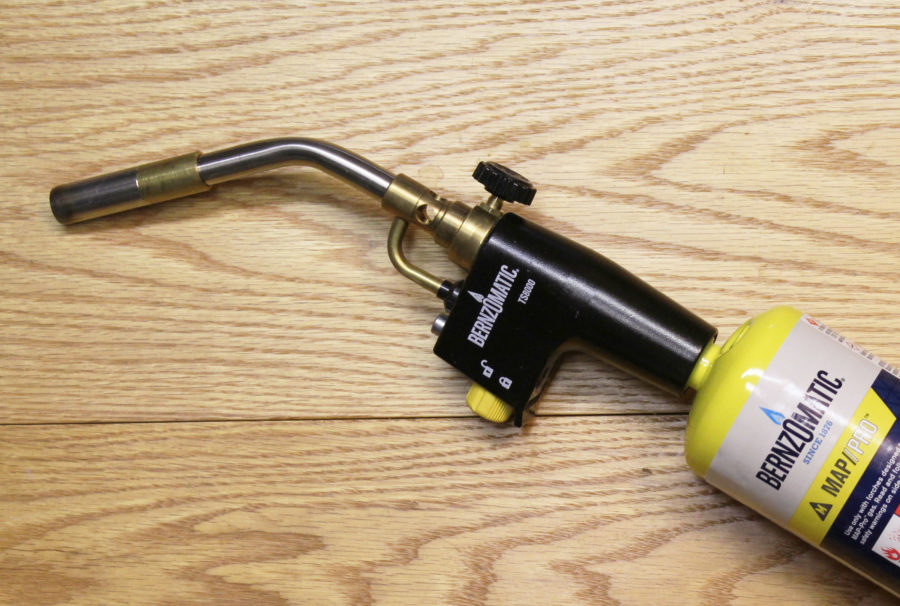
Silver solder (the expensive, high-silver content type) works well on stainless also. That is a high heat solder, but Mapp gas works with it.
This reminds me of the first things I made in metal. My metalwork teacher in the technical school I attended was a real time-served craftsman; it was in later life he ventured into teaching. In the short time at the school, I learned a great deal from him, partly because I showed an interest in some of the extracurricular projects he was working on, one of which was an elaborate pewter trophy for the school, which he allowed me to help with. I asked him if I could make a set of bronze pintles for my boat. His reply was “What the devil are pintles?” He wasn’t from a boating background. I explained that they were rudder hangings, so he agreed to show me how to make them providing I came up with an accurate engineering drawing, which, of course, I did. Part of the construction involved brazing; he showed me how to do that and it proved to be an interesting and valuable lesson. Gas welding is something I really enjoy doing, a very patient old timer showed me all the tricks and tips to become proficient at gas welding most metals, including cast iron.
The next items I made were similar to those you’ve shown, old files made into tools to rake out seams, the only difference with those I made, the other end of the file was heated in the forge and bent at right angles, then ground back to make a very effective coarse scraper, a useful dual-use tool. In 1963 while still at school, I made two of them for my brother, who worked in a boatyard. They were put to good use and I still have one of them today.
Hi Chris, great article! You’ve inspired me to make fittings for my sailboat too. I have a question about galvanic corrosion between the bronze, the silver solder, and the rest of the fittings on the boat. Any issues?
I haven’t noticed any corrosion that I believe is caused by the silver solder and the brass and bronze metals. My earliest soldered pieces are all still in good shape. The only galvanic corrosion I noticed is in the canoe rudder, which isn’t soldered, where the aluminum rivets in the brass hinges have been eroded. On the galvanic scale, which ranks metals from noble to base, with gold and platinum being at the top and zinc and magnesium at the bottom, silver solder, Monel, bronze, copper, and brass are close together, so there wouldn’t be a strong galvanic reaction when silver solder and those metals are in contact. Salt water is the electrolytic solution that causes corrosion, so if a boat is not kept in the water, the soldered fittings won’t be continually subject to the electrical cycle. The silver solder, by the way, is higher on the galvanic scale than the metals, so it will be the metal, not the solder that will corrode. I’d guess that since there is a lot more metal in the fittings than solder, whatever corrosion might occur extremely slowly, even if immersed in salt water. I may be out of my depth here, so those with more knowledge are welcome to chime in.
As far as an effect on other fittings, they’re all separated by large expanses of wood, so there wouldn’t be any electrolysis. It would be an issue for a boat with a metal hull, either aluminum or steel, with fittings of dissimilar metals.
Thanks for the nice article. I shall study it, in detail, soon. In the meantime, I went back and re-read your San Juan Solo article. The captions for the photos are awesome!: “… and it should, of course, go without saying that sterling silver is an unnecessary extravagance aboard a small boat. Silver plate is more than adequate.” And: “The spork is, I confess, a silly affectation. I have plenty of room aboard HESPERIA to carry a separate spoon and fork and needn’t put on airs as if I were through-hiking the Pacific Crest Trail.” Made my morning brighter 🙂
I too, really enjoyed your soldering/welding stories. I grew up on a family potato farm in Aroostook, Maine, and by age 14, was wielding a 300-amp arc welder doing repairs on machinery,
…….and building a go-cart. I think arc welding is easier, but lacks some of the flexibility of gas welding. Match the type and size of rod to the type and size of metal, and adjust the amperage…….then find that light touch that is required strike an arc without sticking the rod to the metal. Years later I bought a Sears 70-amp welder, which I used during a ground-up restoration of an MGA. Retired now, I build a boat now and then, and buy hardware wherever I find a good price. Once in a while I dust off the welder.