 SBM
SBMA common ball-peen can be tiring for the user and, if it has a head that is too heavy, it can buckle a rivet’s shaft within the wood pieces it’s joining. Tom DeVries made riveting hammers to do a tedious job more effectively.
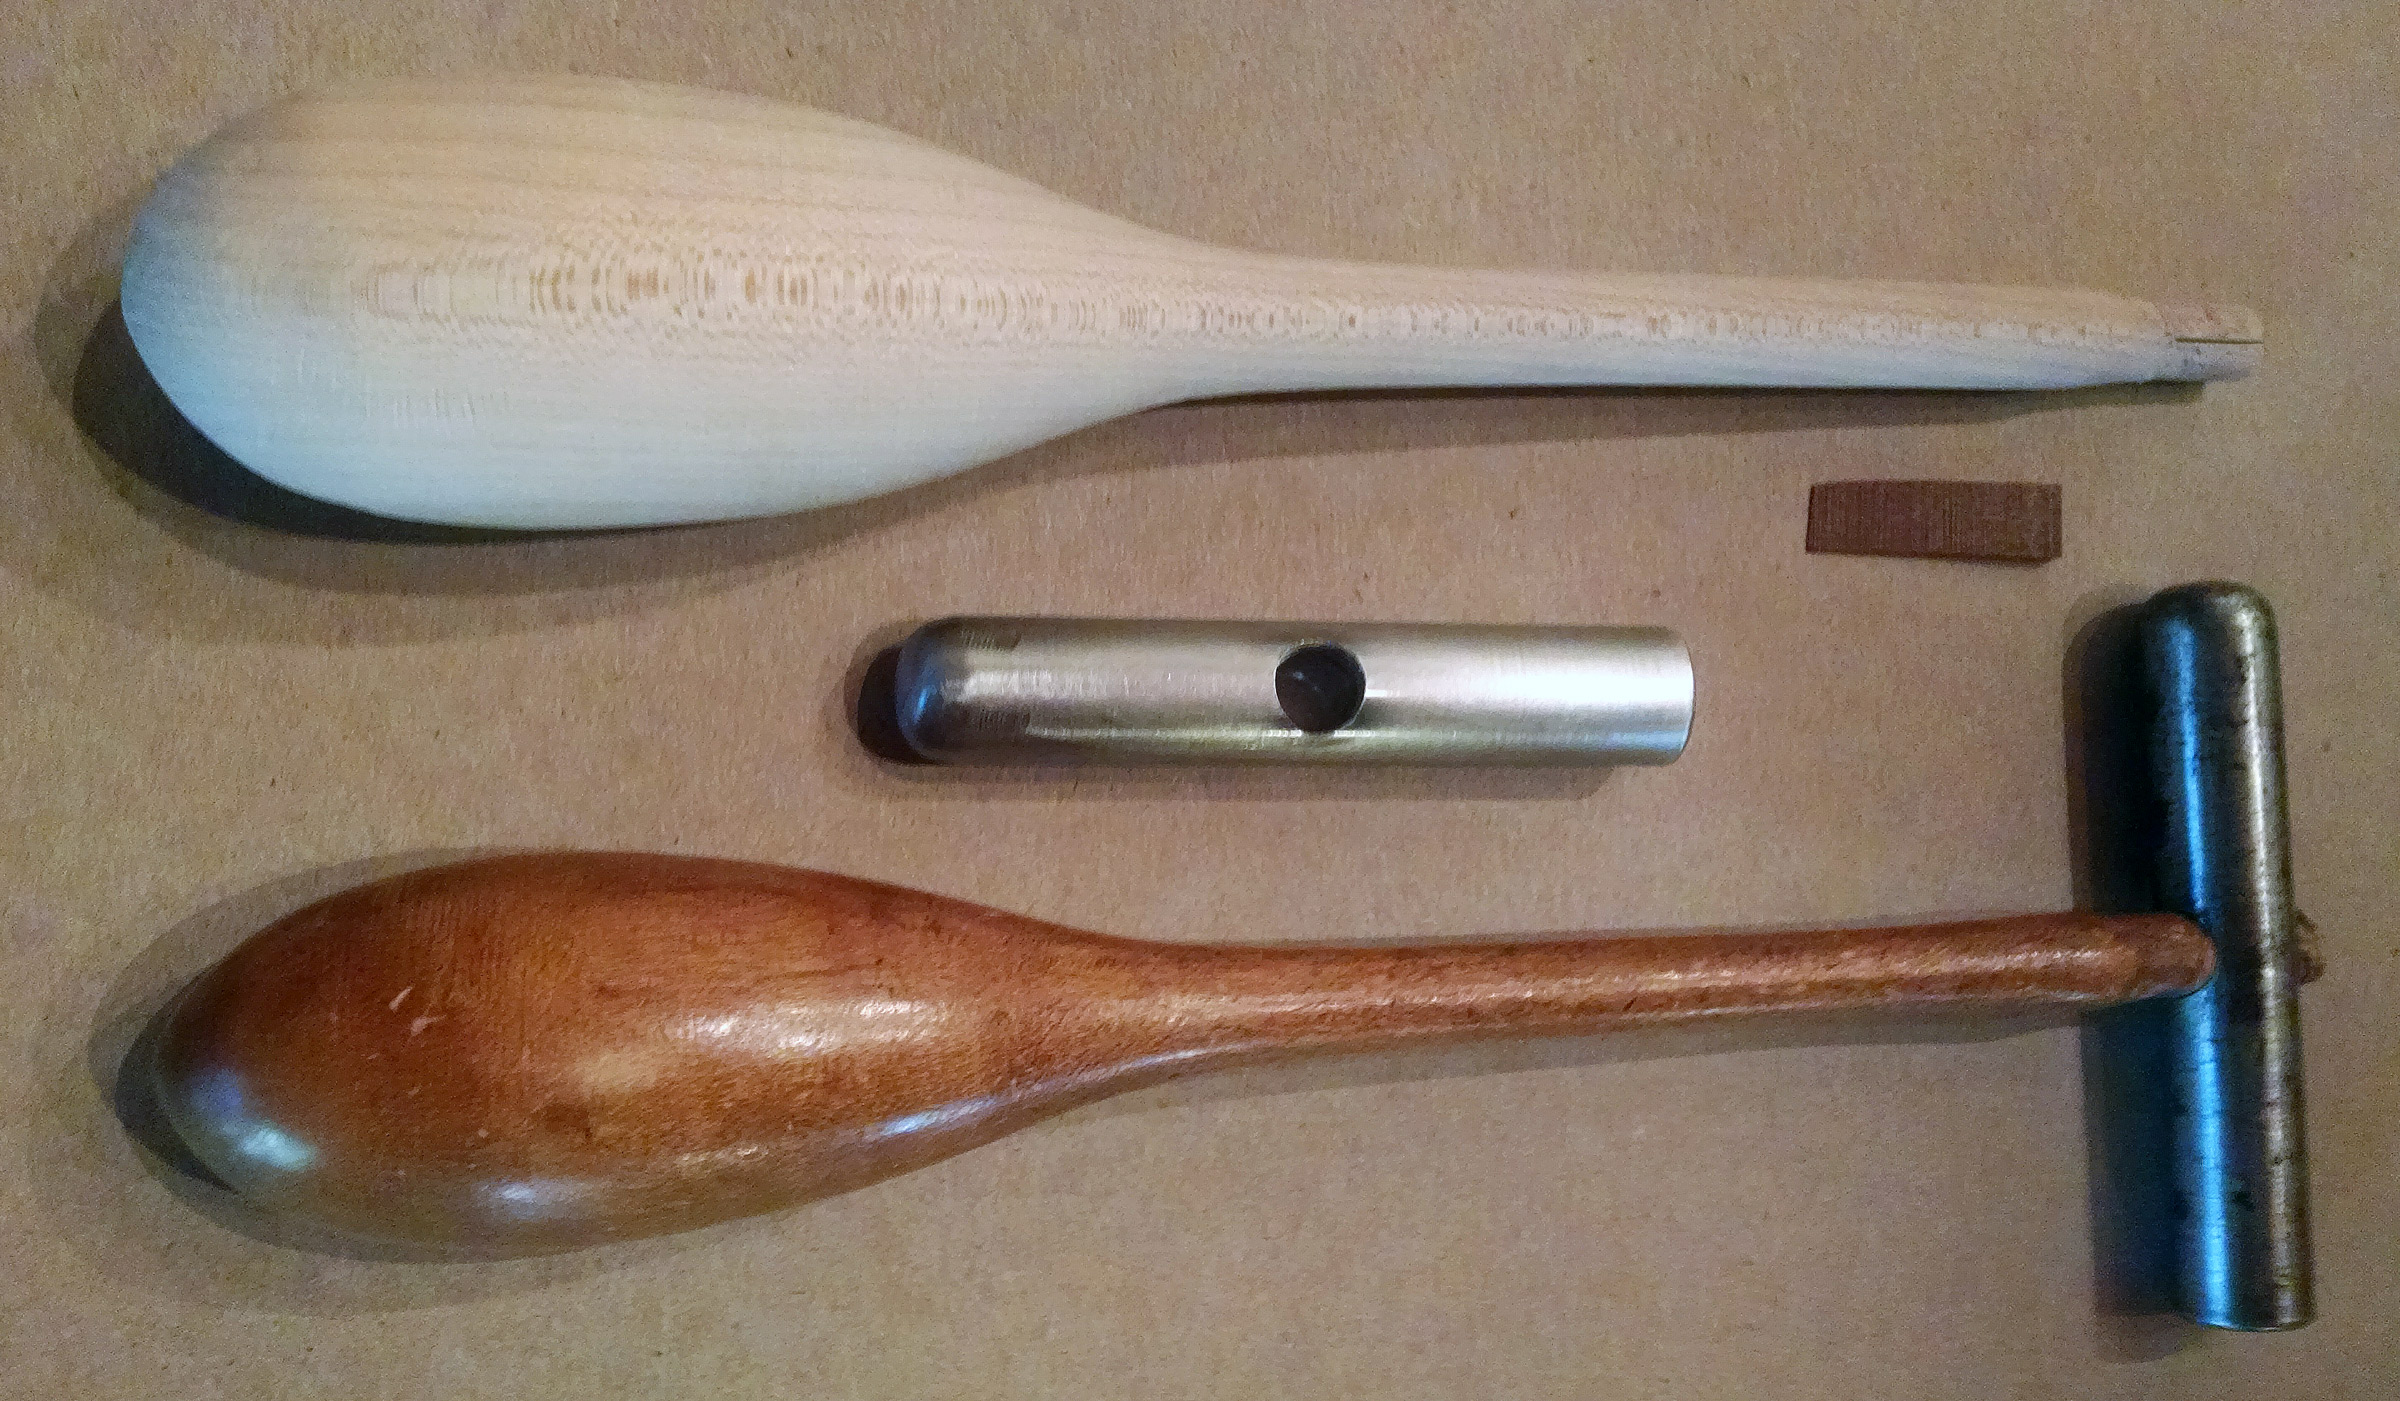
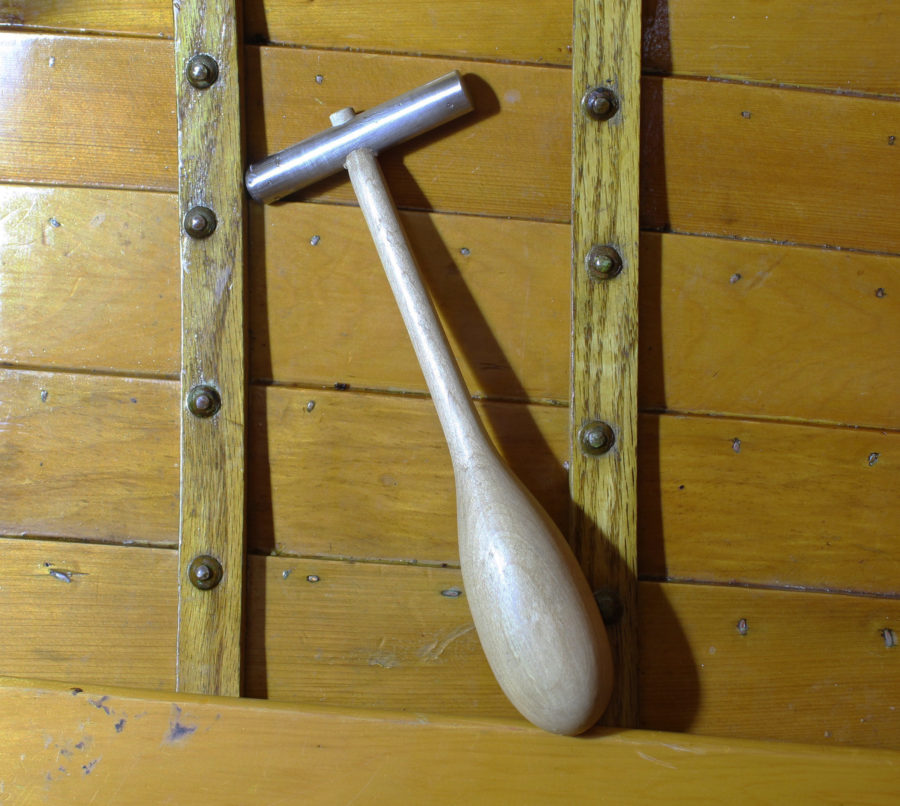
To do good work you need good tools. Some tools you can’t readily find in a store, and a proper riveting hammer is one of them. Happily, it’s not hard to make your own fine hammer. Rivet hammers come with cross-peen or ball-peen heads. This hammer’s head is fashioned from 5/8″ stainless-steel rod, the handle is turned from a 12″ chunk of 1-3/4″ square maple, and the wedge that flares the handle in the head is a sliver of ironwood.
 Tom DeVries
The bulbous handles on these shop-made riveting hammers are a feature common to chasing hammers, which are used to emboss sheet metal. Their handles are shaped to ease the fatigue of lightly tapping chasing punches for hours on end, a task similar to peening copper rivet heads.
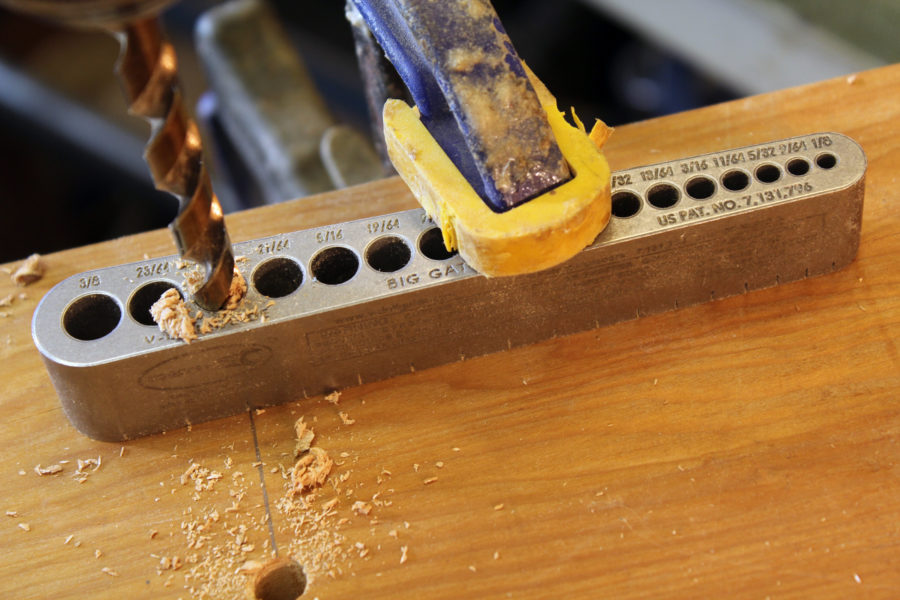
Work the metal head first. I start by drilling a 3/16″ pilot hole for the handle. Make a dimple with a center punch to keep the bit from wandering and clamp the rod to the drill press table.
Make adjustments as necessary to keep the bit straight and vertical. Follow the pilot hole with a 3/8″ bit. Next, round the end of the rod with a grinding disc on an angle grinder and smooth with a file and/or 80-grit sandpaper. Then, with a cutting disc in the grinder, cut the rod to length and finish off the flat side of the head. Remember that the steel gets hot after drilling, grinding, and especially cutting.
 Tom DeVries
The author’s sketch provides dimensions for the hammer’s handle, head, and wedge.
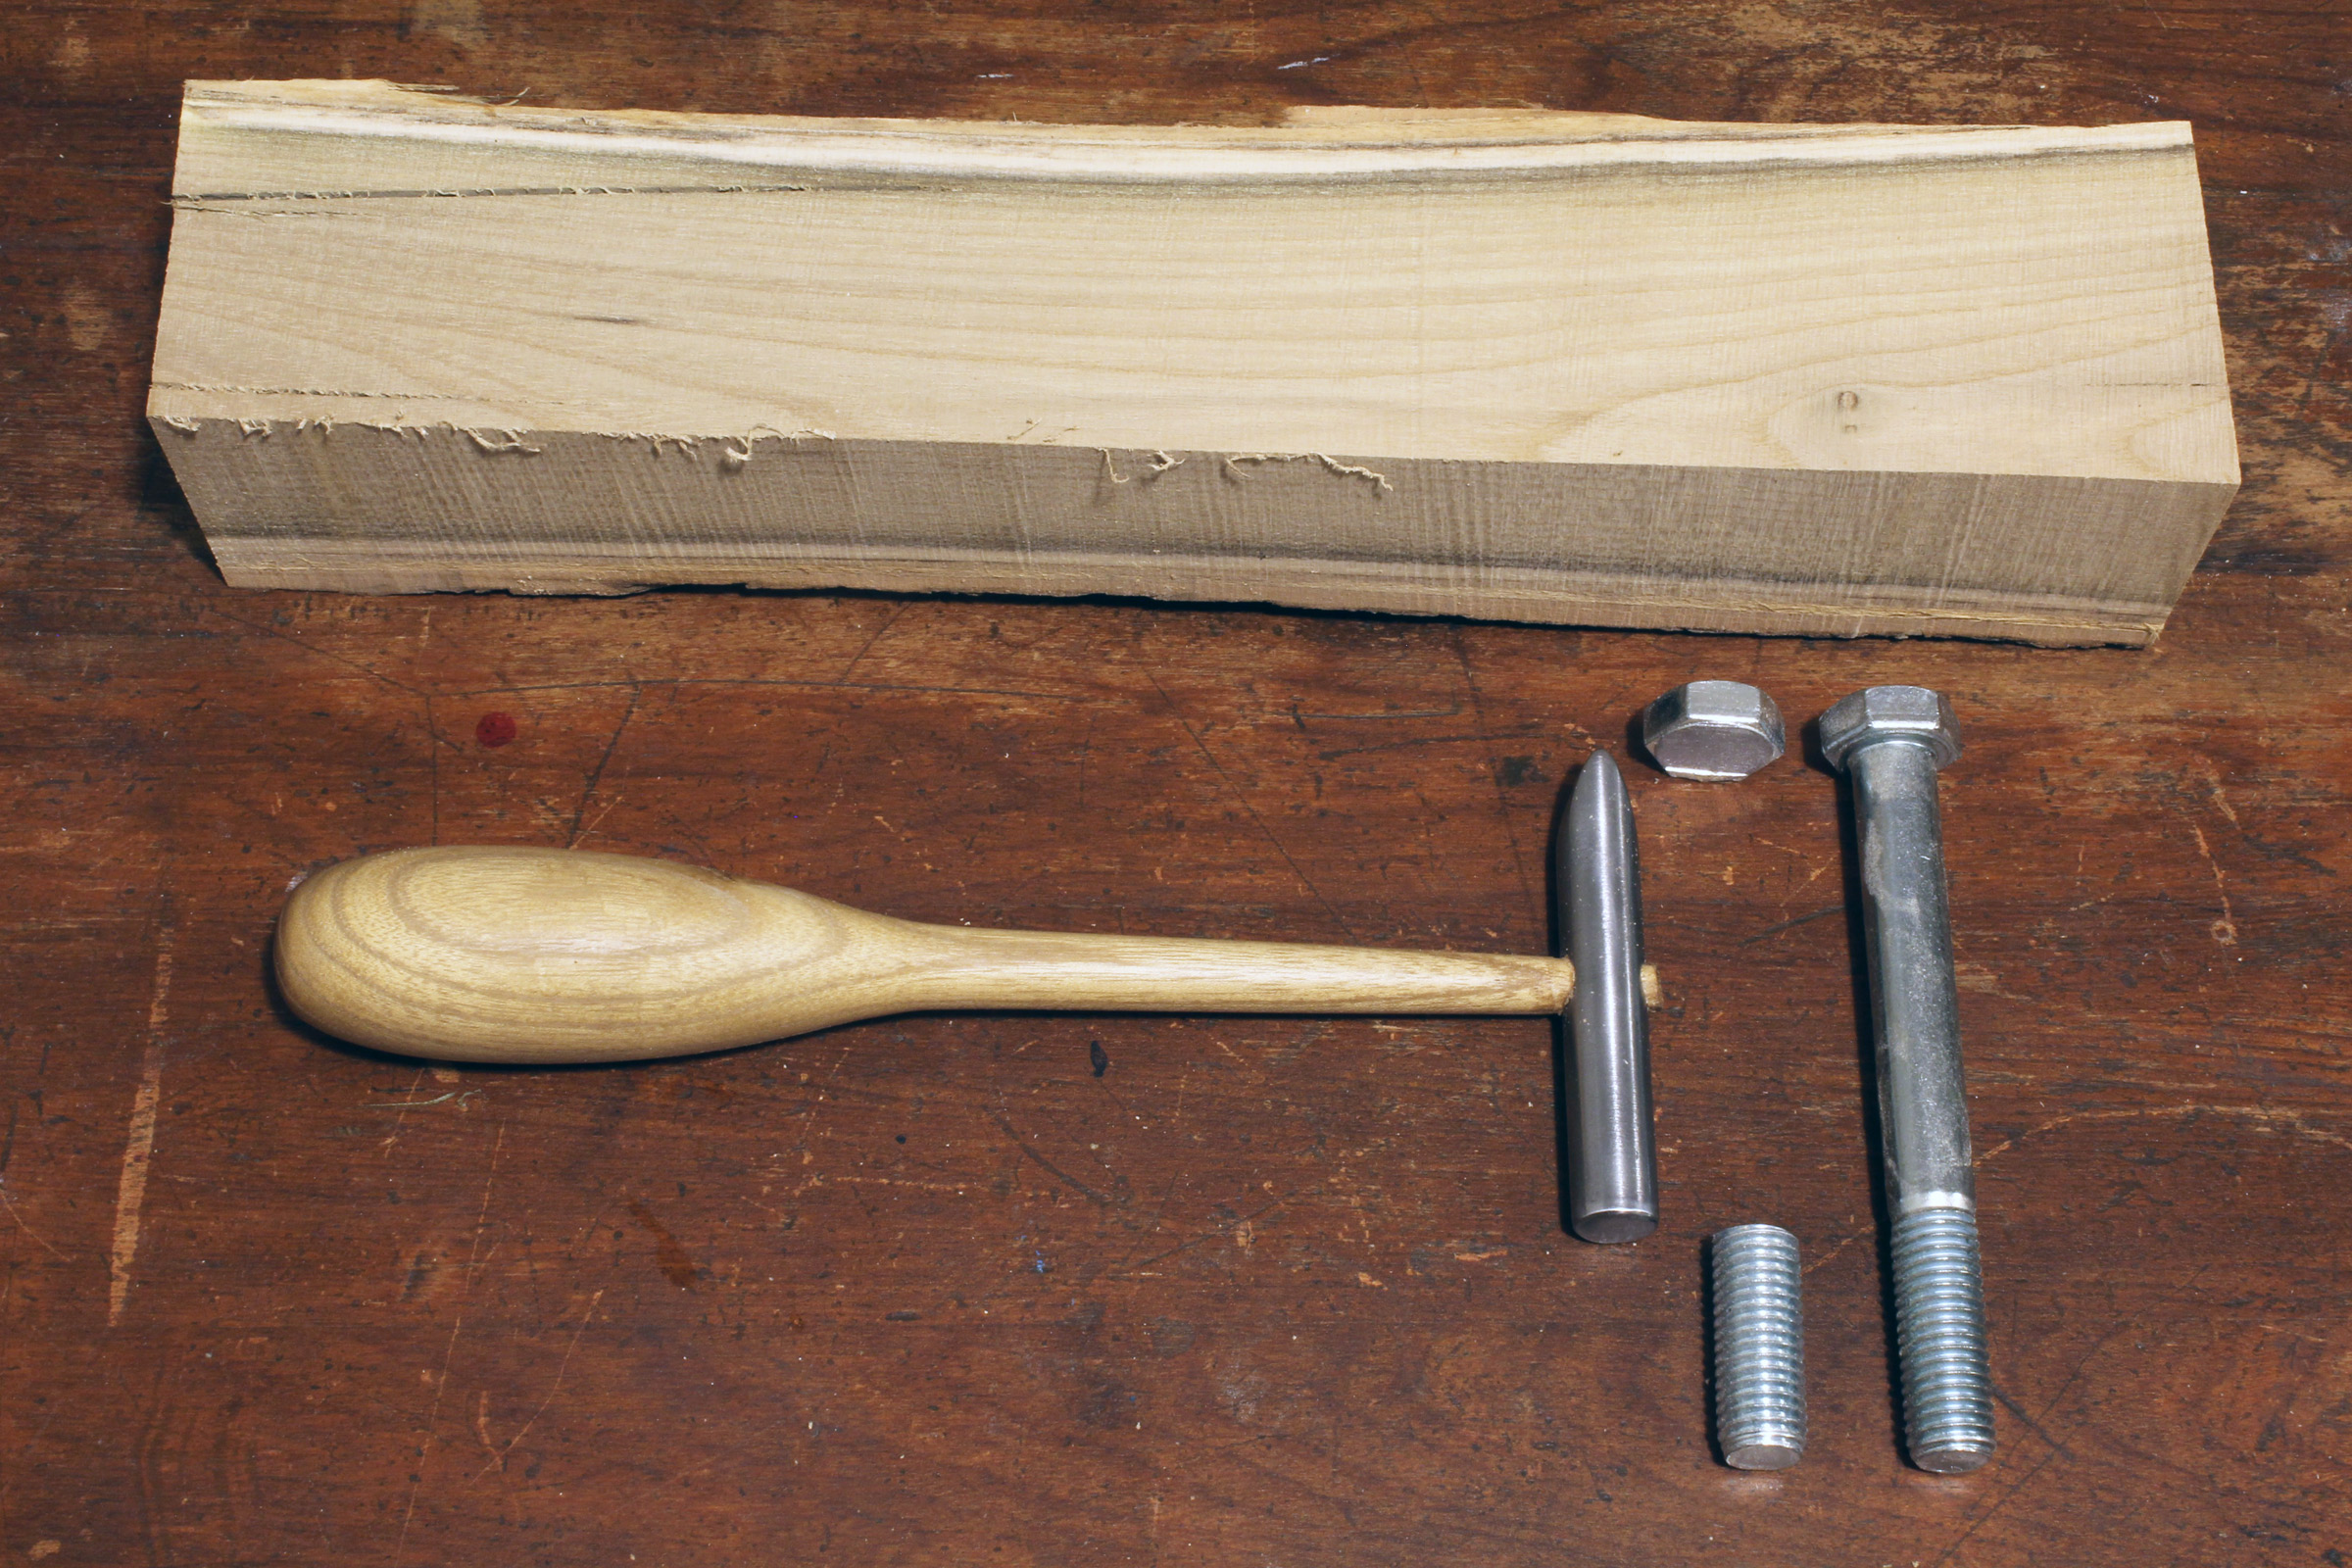
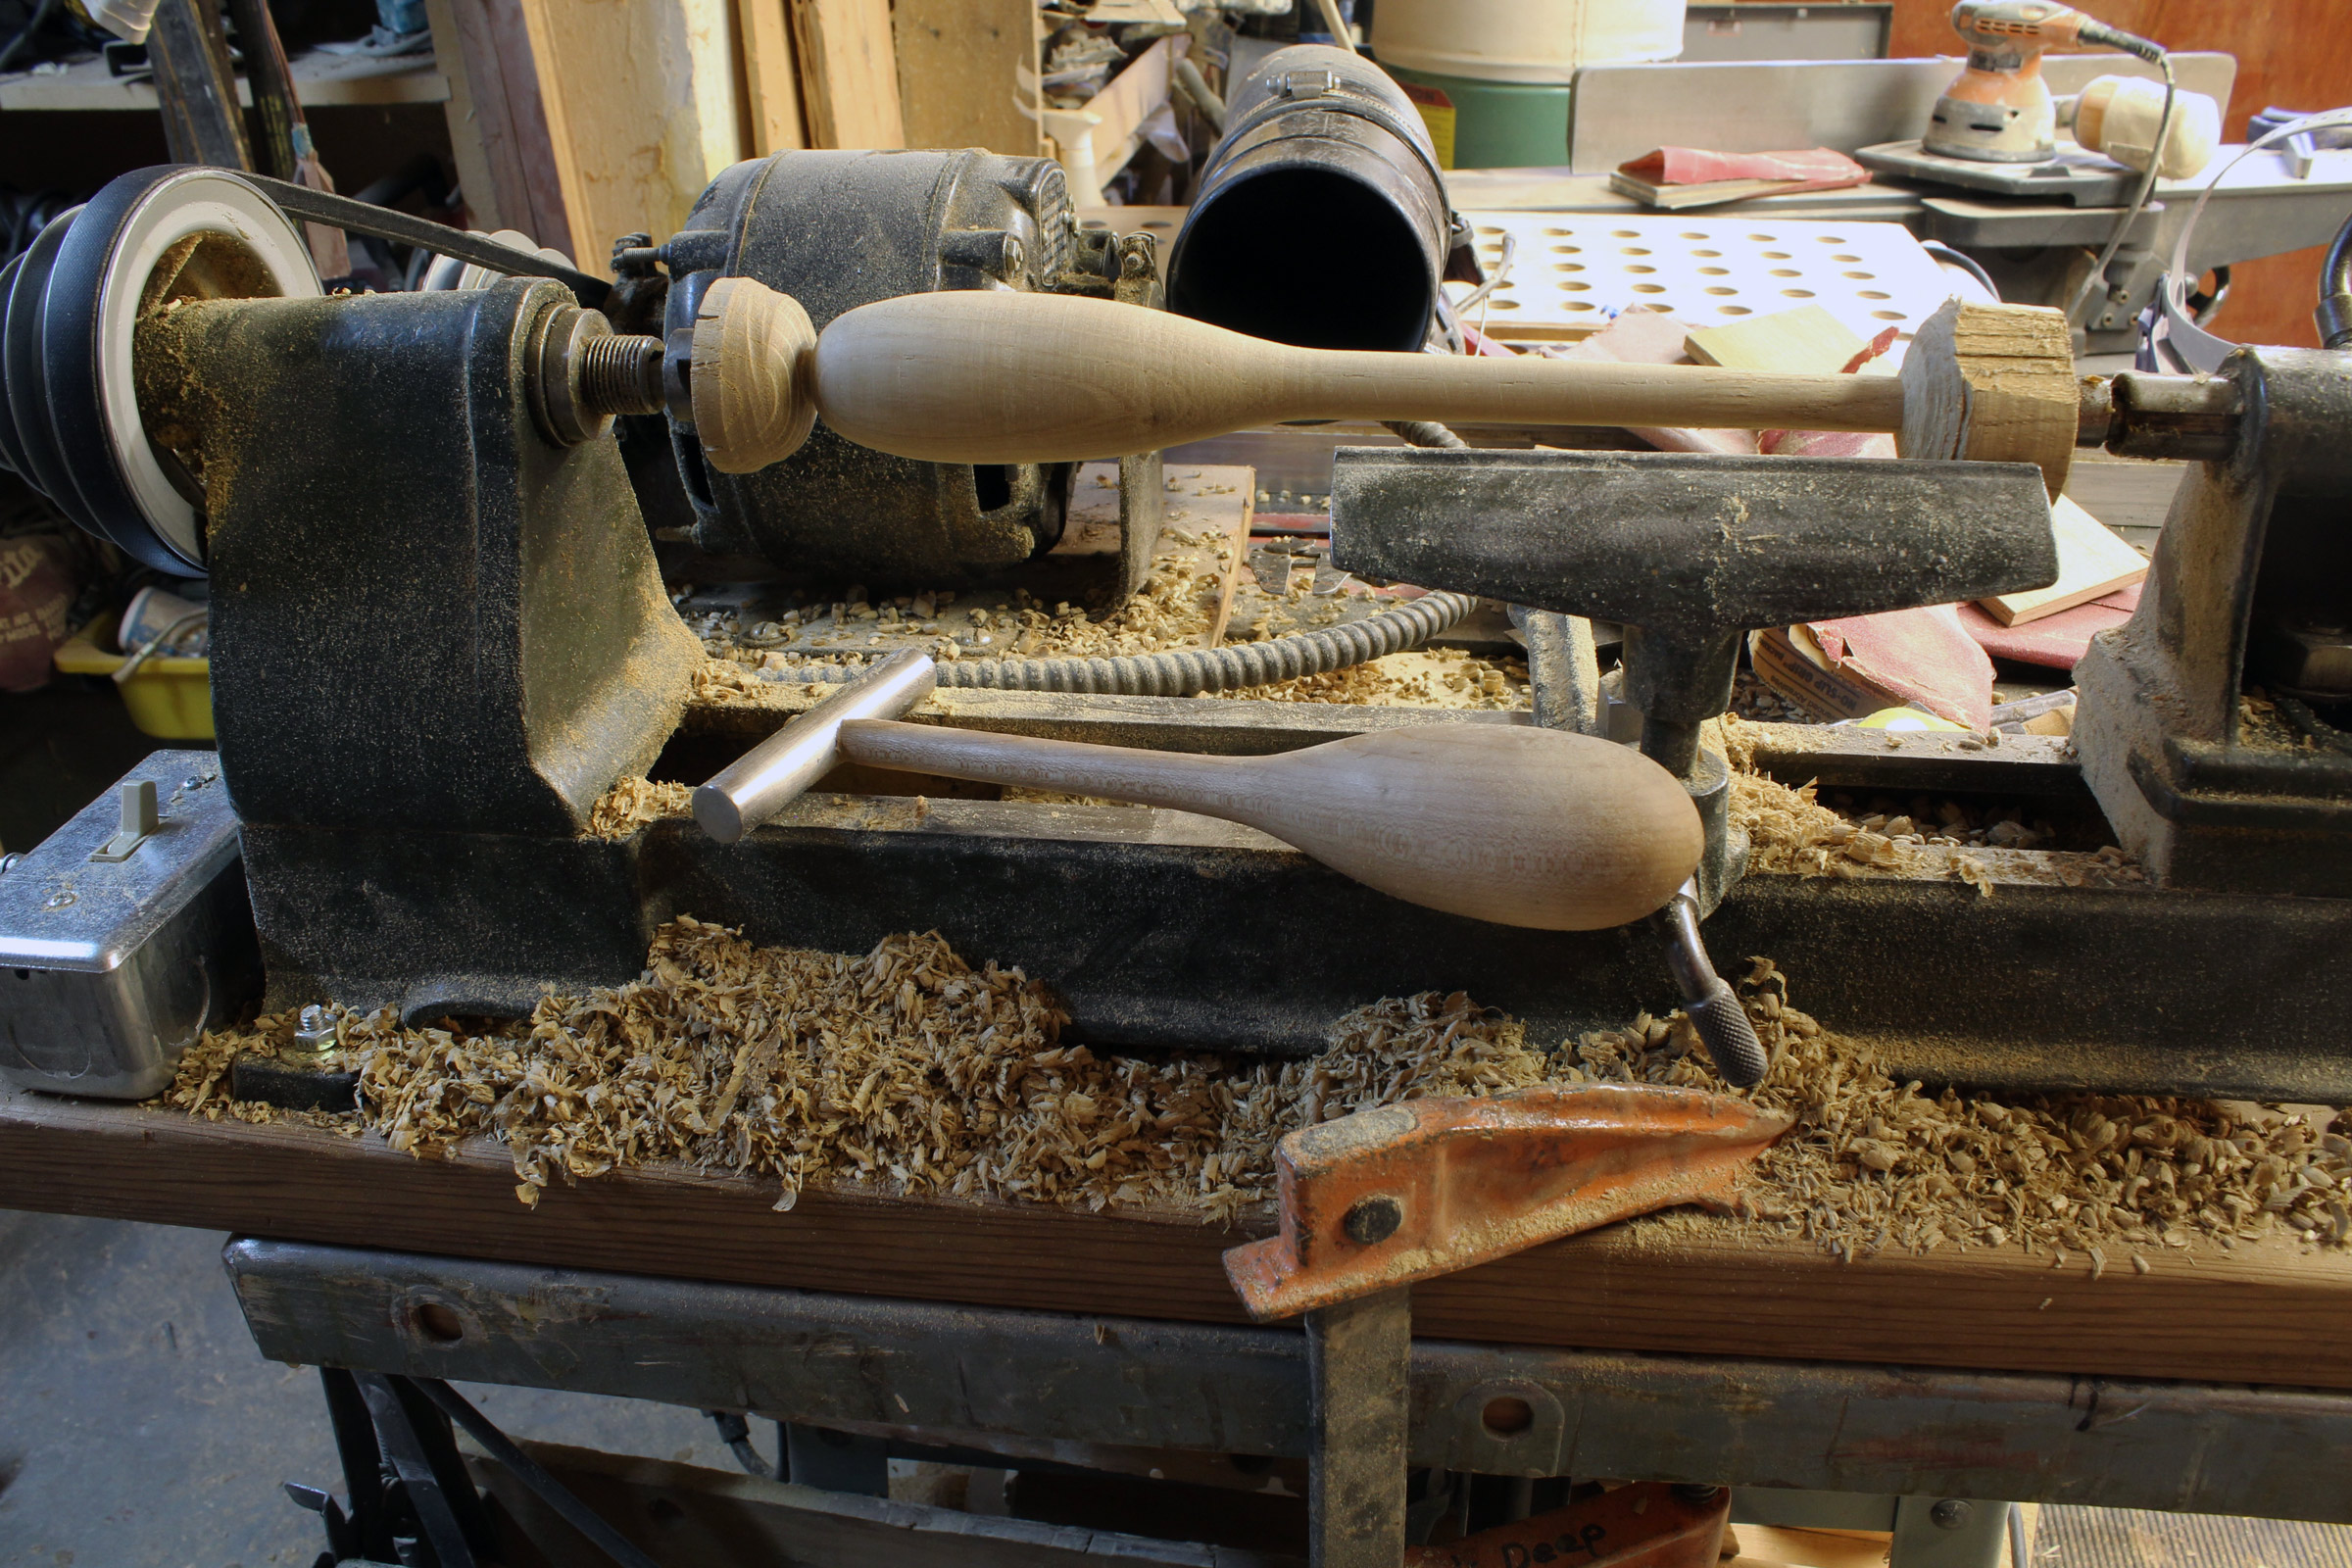
I used a lathe to turn the hard-maple handle. Hickory, oak, and ash are also suitable. Commonly, riveting hammers have slightly contoured straight handles, but the one I use has the bulbous handle of a chasing hammer, another type of metalworking hammer that does its work with light, repeated strikes. As the neck of the handle is pencil-thin for flexibility, a tight, straight grain is essential. The pencil-thin shaft of a ball-peen hammer I made 25 years ago has set thousands of copper rivets and will easily outlast me. Though I turned my handle on a lathe, you could do a fine job sawing out a blank and shaping with chisel, spokeshave, and files. Hammer handles are like chicken soup—there are a lot of recipes that make really good soup.
Using a fine-kerf saw, cut a slot parallel with the grain for the wedge. Finally, choose a wedge from maple, hickory, or a dense tropical wood. Oak and ash tend to crumble or split.
Fine-tune the fit of the handle and gently get the wedge and hammer head started. Orient the handle so the grain runs parallel to the head. Rest the assembly head down, straddling two wood blocks or an open vise, and tap the bottom of the handle with a mallet to start seating the head. Flip the hammer head-up and tap in the wedge a bit. Continue this upside-down, right-side-up tapping, gradually increasing the power of your blows, until the head is solidly seated. Trim the handle and wedge proud of the head.
As the drier air of winter descends, you may need to set the wedge a bit deeper. It’s good to have the option. Finish the wooden handle however you like. I use a mix of tung oil, varnish, and turpentine and occasionally rub on a coat of wax.
My hammer weighs just 7 oz. Copper rivets require light tapping to head them without distorting their shanks, and a small, light hammer is the best tool for the job. About 20 or 30 raps with the ball-peen flares a 14-gauge rivet, and a few final taps with the flat end seats and smooths the mushroomed head.![]()
Tom DeVries and his wife Tina live in New Braintree, Massachusetts. Now that both of their kids are off to college, he spends more time in Beyond Yukon Boat and Oar, his woodworking shop, and imagines that away he and Tina will be spending more time together fishing, paddling, and sailing in little boats. In years gone by, Tom has pirogued on the Congo, canoed on the Yukon, fished commercially in Alaska, and sailed his skipjack on the Chesapeake.
Editor’s Notes:
 Christopher Cunningham
For the hammer head, I cut the ends off a 5-1/2″ x 5/8″ bolt that I bought for a couple of dollars at a hardware store. That left me with a 3-1/2″ tempered steel rod. The bolt had a zinc plating, so I sanded that off with a belt sander equipped with a 150-grit belt. The wood I used was a locust windfall I gathered a few years ago. Chasing hammers often have handles made from fruitwoods.
 Christopher Cunningham
Using Tom’s sketch and one of his hammers as a guide, I turned a handle with bulbous grip that is slightly longer and skinnier than Tom’s. I wanted to have two different shapes so I could explore my preference.
 Christopher Cunningham
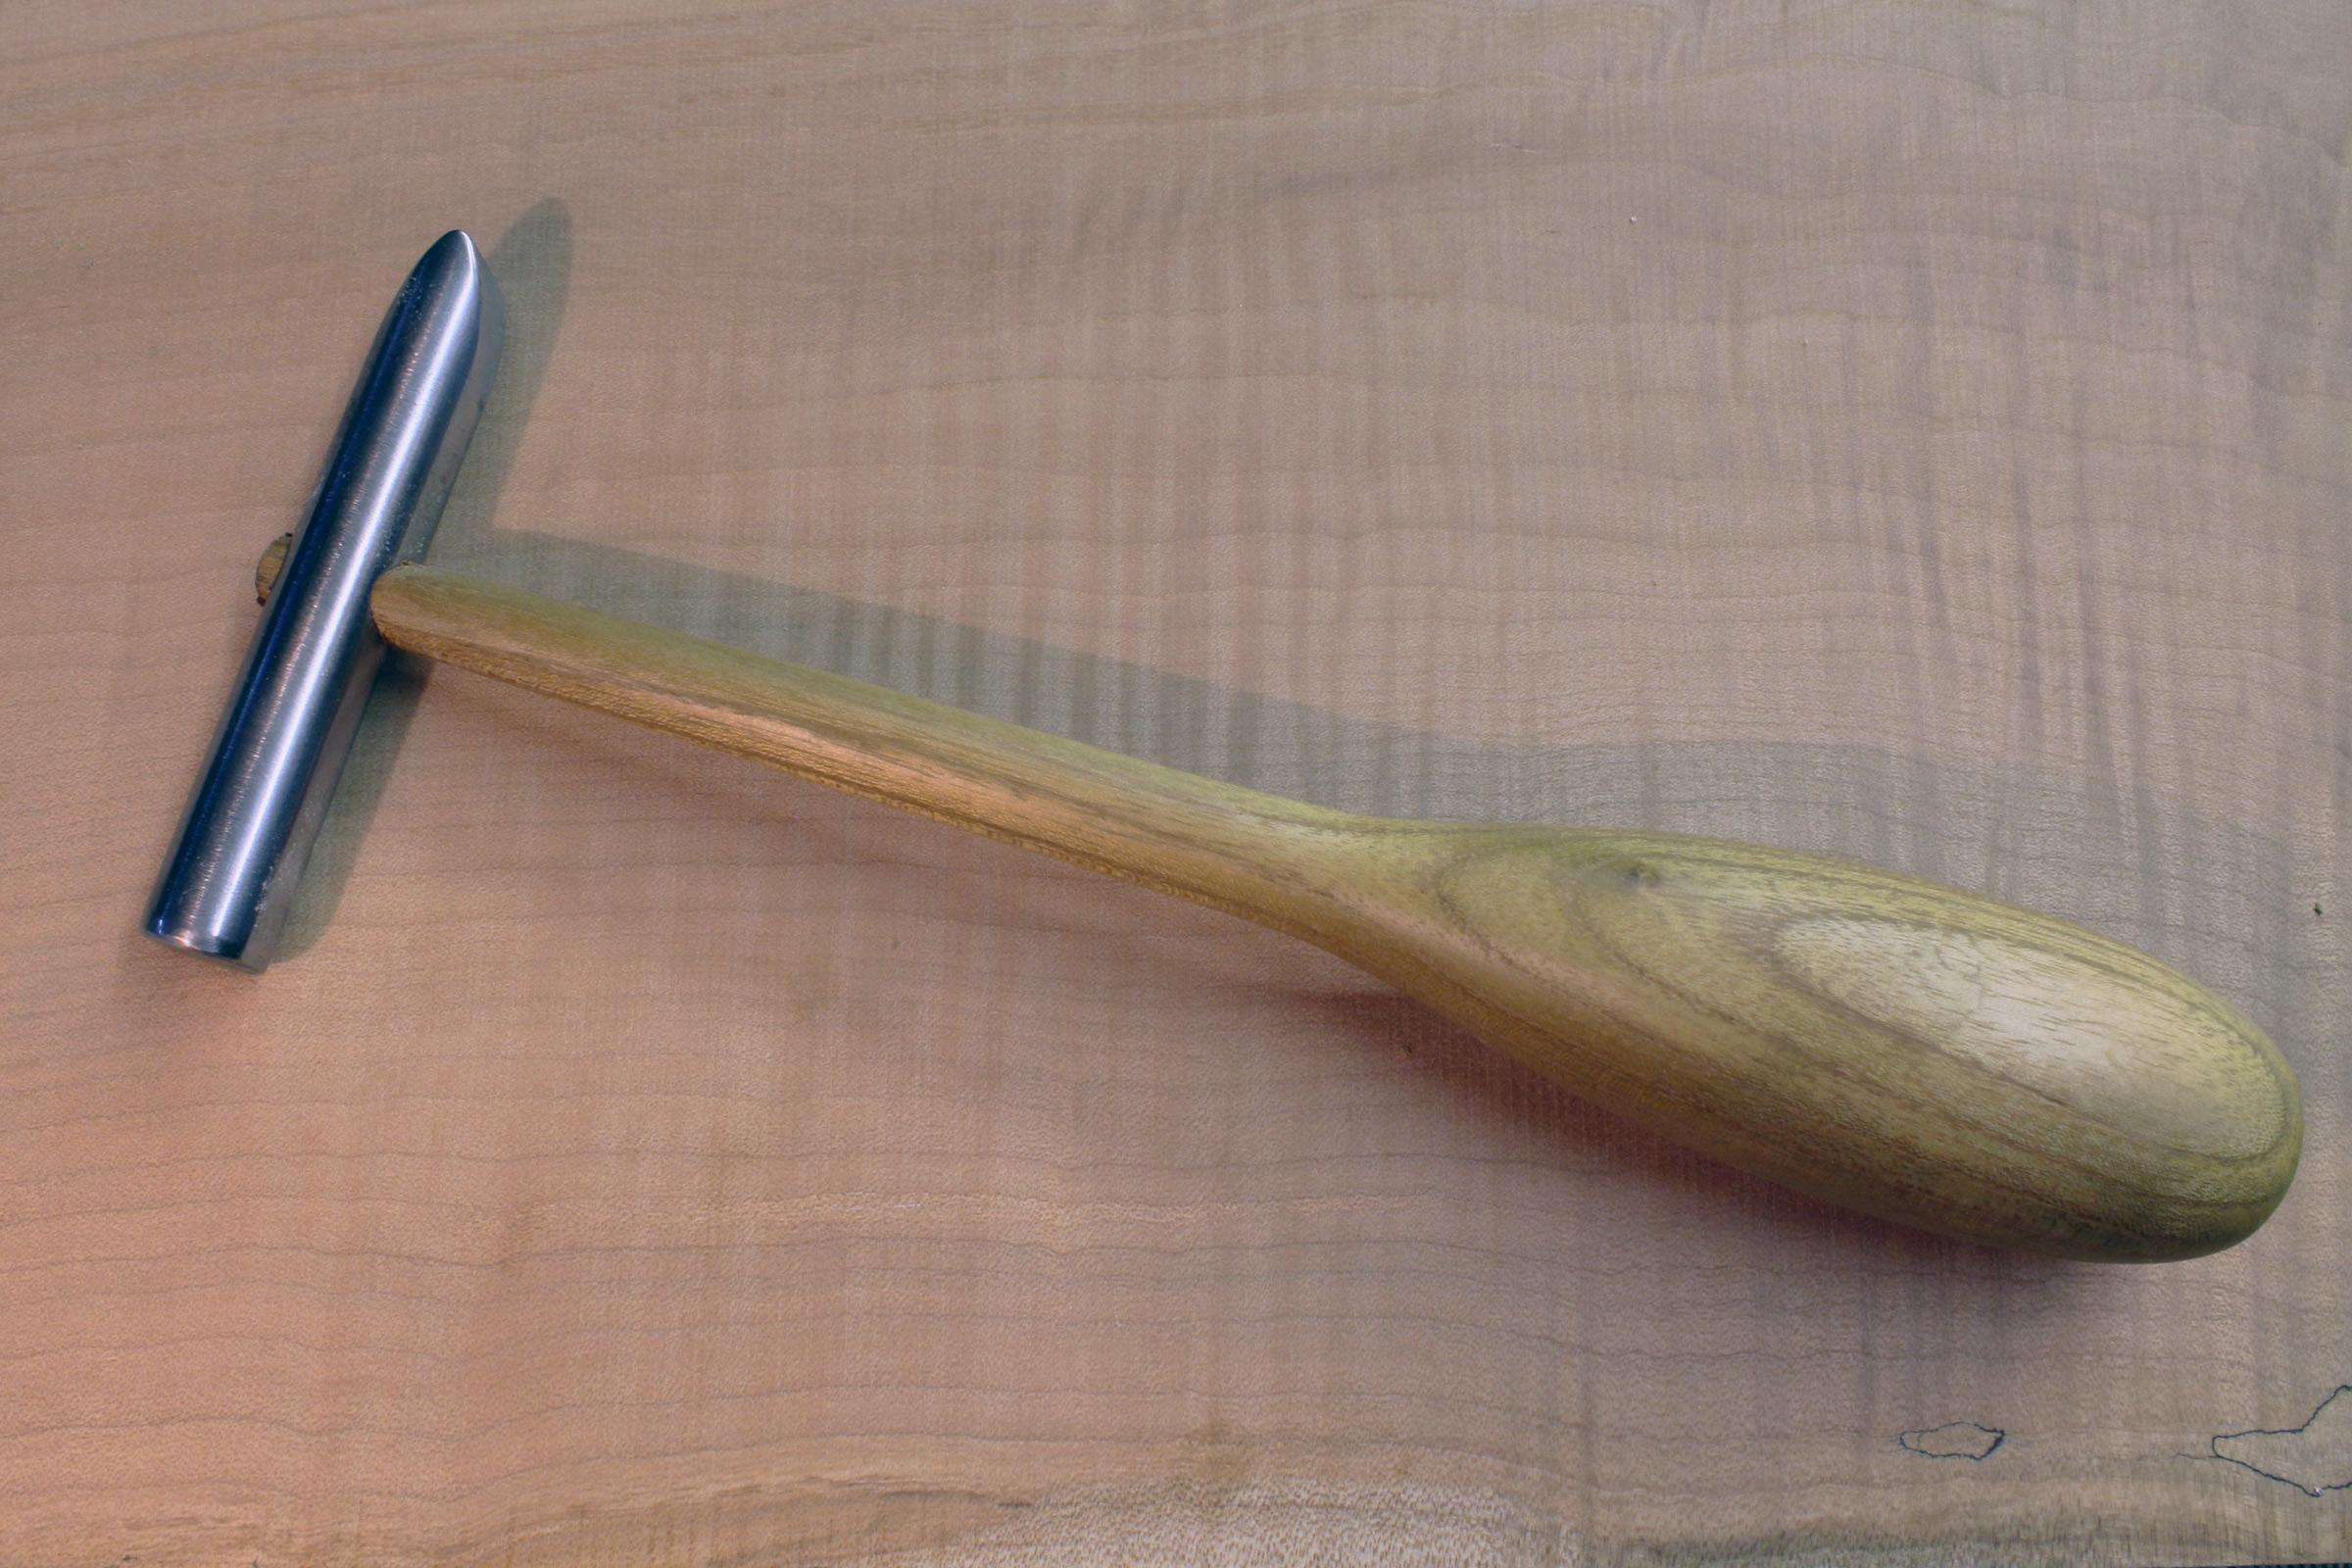
For my first hammer, I made a cross-peen head instead of a ball-peen. It’s better suited to small projects that I can rotate underneath the hammer to spread the impacts evenly. A ball-peen has the advantage working in a boat because the hammer can be used in whatever orientation is most convenient.
You can share your tips and tricks of the trade with other Small Boats Monthly readers by sending us an email.


Nice looking tool. Anything that makes that job easier has got to be good. On anything other than a small dinghy, a quick light double tap indicates to the person holding the dolly on the outside of the hull that you’re ready to move on to the next rivet. Keeps a nice rhythm going without needing to speak to each other.
Though riveting can be tedious, I enjoy the tap, tapping rhythm (with earplugs in) and truly like the look of copper rivet heads inside a wooden hull. Each rivet peened also adds to the history of the tool, and using the same hammer time and again reminds me of other boats I’ve made. It’s like catching fish with an old rod or cultivating garden rows with my grandfather’s hoe.