The peapod might be one of the most easily identifiable, traditional small craft found on the coast of Maine today. Peapods were used as nearshore lobstering boats; a lobsterman could stand on the gunwale and haul a trap by hand without the boat swamping. The shallow draft of these vessels allowed fishermen to work the various shallow nooks and crannies that dot the Maine coast. They were also quite seaworthy in deeper water and were favored by lighthouse keepers to get to and from offshore lighthouses.
Joel White’s 14′ Maine Coast Peapod is a classic take on this timeless design, perfectly suited for both sailing and rowing. His design is intended for recreational boaters, not working fishermen, and has a deeper draft than a traditional workboat for better tracking during sailing. They are sleeker for better speed under oars, a design element that trades away the stability required for hauling traps.
When my wife and I decided that we wanted to build a small boat that our family and friends could use, there was never much of a question as to what type. We were sold on the Maine Coast Peapod by our friend Dale, who owns one built by the Apprenticeshop of Rockland, Maine, during the late ’90s. For years he had graciously let us use his boat almost whenever we wanted, and after spending hours upon hours cruising around Rockland Harbor, both alone and with the boat loaded with friends, we decided that we’d have to build one of our own.
The Maine Coast Peapod is a design for traditional plank-on-frame construction. It’s a good project for someone with moderate carpentry skills interested in learning how to do carvel planking, cotton-caulked seams, copper rivets, and steam-bent frames. The plans I ordered from The WoodenBoat Store are straightforward and easy to follow. No lofting is necessary, as the mold patterns are drawn out to full size. This peapod is symmetrical stem to stern, so the three patterns in the plans are all that are necessary for the six molds. The stem and stern posts are identical, and in the plans their profiles are drawn out full size with the rabbet line, stopwater, and bolt locations identified. The remaining parts such as centerboard trunk, spars, and rudder are diagrammed to scale. A full fastening schedule is also provided to simplify ordering materials.
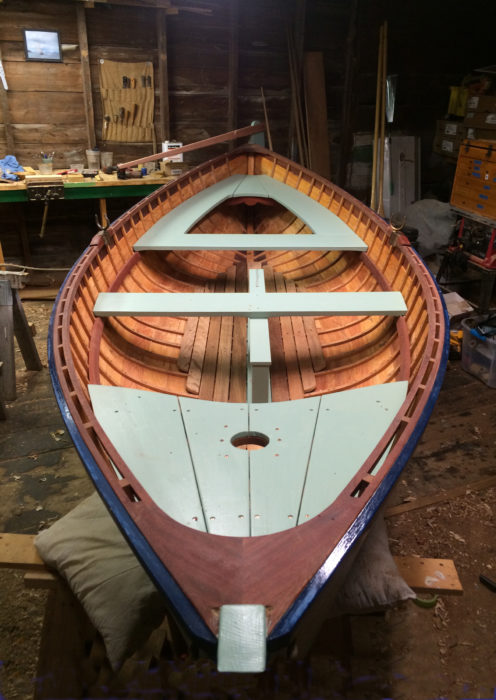
I set the molds up on a strongback about waist-high for easy access. The stem and stern posts connect to a 1-7/8″ by 2″ keel, and this backbone is then placed on top of the molds and temporarily held on with screws. The molds are drawn to the inside of the frames, so the ribbands are let into notches in the molds. The 1/2″-thick, white-oak frames are steam-bent over the ribbands and fastened to the backbone with bronze ring nails. The frames are spaced 5-1/2″ apart, with the first four frames on each side as half frames connected to the stem and sternpost. The remaining frames are bent full length over the keel from sheer to sheer. Framing required two people, one on each side, bending the frames and zip-tying them in place to the ribbands.
 photographs and video by the author
Freshly oiled, the peapod awaits launching. The aft side thwarts provide ample room to put your feet up and lean back while out for a ride.
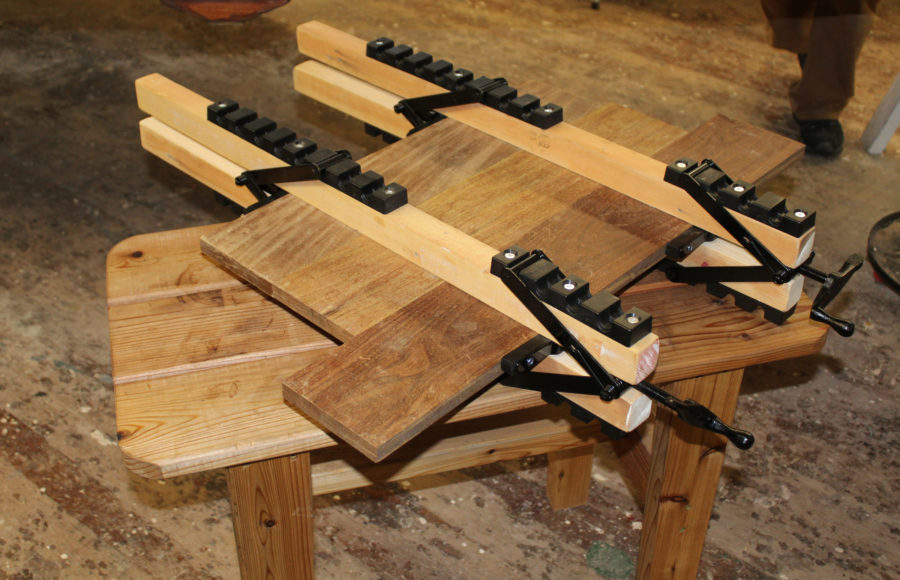
The plans show the plank widths at the two middle stations, which is a helpful starting point for lining off where the 10 strakes go; I used battens to line off by eye. I spiled each plank using strips of 1/8″ pattern plywood and swinging arcs with a compass. The plans, drawn in 1988, call for butt-blocks to join plank sections, but I find scarfing with today’s epoxies simplifies the planking process and makes joints stronger and less prone to leaks. Each plank, other than the sheer, needed to be backed out (a concave surface planed on the interior side of the plank) to accommodate the curve of the frames. I made the garboard out of mahogany, which was commonly done on other larger boats I’ve worked on, in order to provide some extra strength and durability. The hood ends of the planks need to be steam-bent to take the bend and twist into the stem rabbet, so I clamped the shaped plank to the frames and then wrapped the ends in a trash bag to create a pouch. I then poured in boiling water and after 15 to 20 minutes removed the bag, clamped the plank into place, and let it sit overnight.
The plans call for an oak sheerstrake, but I opted to use mahogany as I thought it would look a little nicer while being just as structurally sound. The planks are initially nailed to the frames with copper rivets, and when planking is finished the roves are set. Peening the rivets over the roves requires two people, one bucking the rivet head, the other peening the clipped rivet end over the rove. While the plans call for the rivets to be peened once the boat is off the molds and upright, I contorted myself around the molds and peened most of the rivets while the hull was still upside down. By leaving the hull in the strongback I could fair the hull more easily after all the nail heads were bunged.
The centerboard trunk is slightly offset so that the board emerges along the edge of the keel. One of the trunk’s bedlogs is fastened to the keel and the other to the port garboard. The trunk is a key structural part of this boat as it is tied into a center thwart, which ties into risers as well as the sheer via steam-bent knees. One of the reasons I used hardwood for the garboard was to provide extra rigidity for fastening the base of the trunk. The plans call for the garboard to be caulked right to the keel without the use of a keelson. In my experience, small boats without keelsons tend to leak along the garboard as they age. Additionally, the mahogany garboard I used wouldn’t swell up against the keel as much as a cedar plank would.
The plans call for a liberal amount of 3M 5200 adhesive along the centerboard trunk, which would make replacing the garboard quite a challenging task. For these reasons I chose to edge-glue the garboard to the keel with epoxy. I then notched the frames into the bedlogs and epoxied the trunk to the backbone and garboard in an effort to prevent leaking as the boat ages. While this technique may seem controversial, a boatbuilding shop I used to work for has had success in this way. I talked with a couple of boatbuilding friends whose shops have started experimenting with edge-gluing hardwood garboards on traditional craft. So far, after one full season, my garboard has held up perfectly.
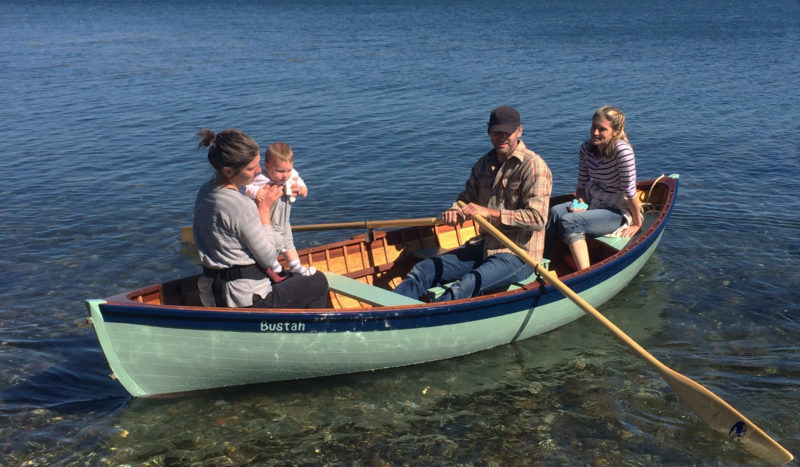
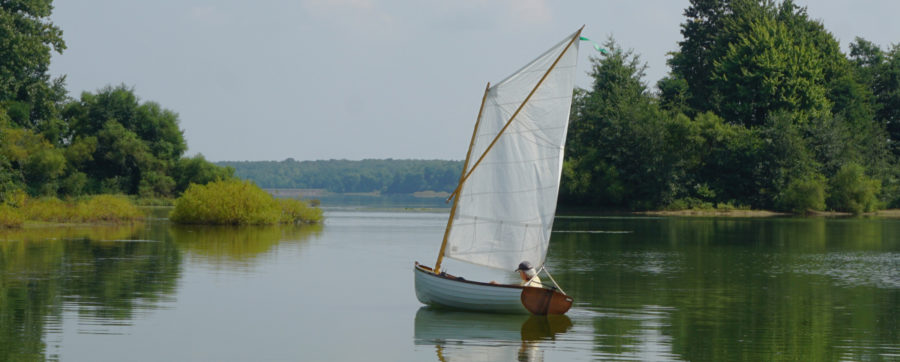
Friends and family explore the shallows along the tide line. With the centerboard up, the peapod only draws 7″.
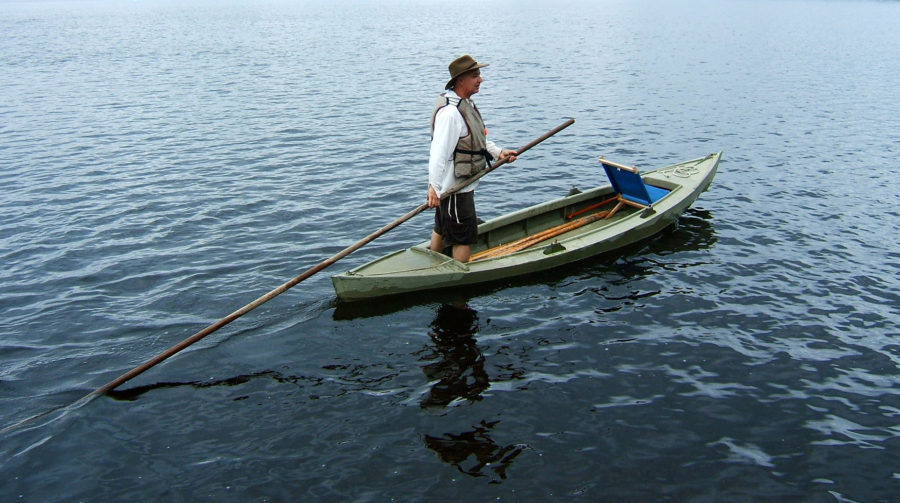
The peapod is designed with four thwarts; I connected the aft two thwarts with side sheets. My friend’s peapod was built that way, making it easy to put your feet up while sailing. There are two rowing stations at the forward thwarts, although I suspect the forward oarlock pads are for rowing while standing up facing the bow. Rowing this boat with two people would be quite difficult, and rowing from the forward thwart would be awkward. Although the plans do not call for one, I added a teak sole to keep feet off the planking. The boat is designed to carry a lug rig with a boom, yard, and 12′ mast. The rig is not all that heavy or long and can be easily stepped at the dock.
A challenging yet rewarding aspect of building this peapod was procuring the necessary materials. The planking came from a cedar tree that had recently been struck by lightning. A friend gave me black locust, which I used instead of oak for the keel, stem and stern posts, and teak for the cockpit sole. Most of the hardware, such as the oarlocks, came from various yard sales and antique shops. The rudder hardware was among one of the most difficult pieces to find. The plans call for a V-shaped, custom-cast bronze gudgeon that fits around the sternpost, but I found gudgeons that mount on the face of the sternpost, with a curved bronze rod used in lieu of pintles to secure the rudder.
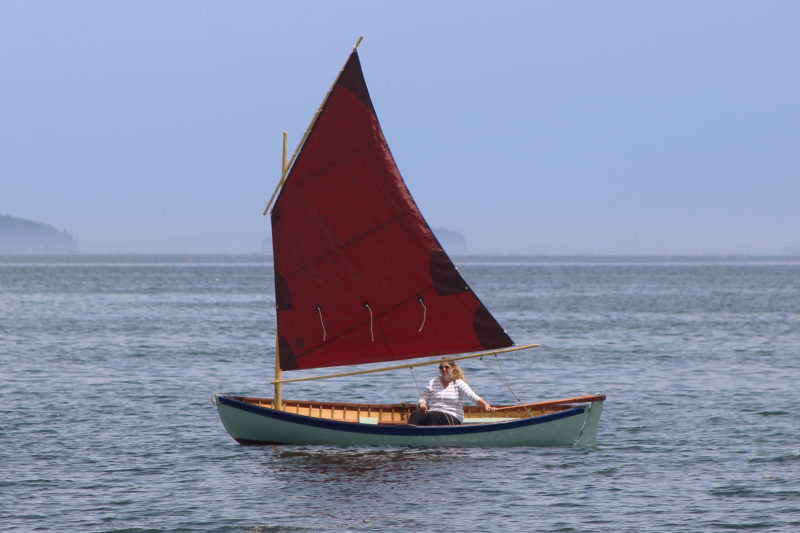
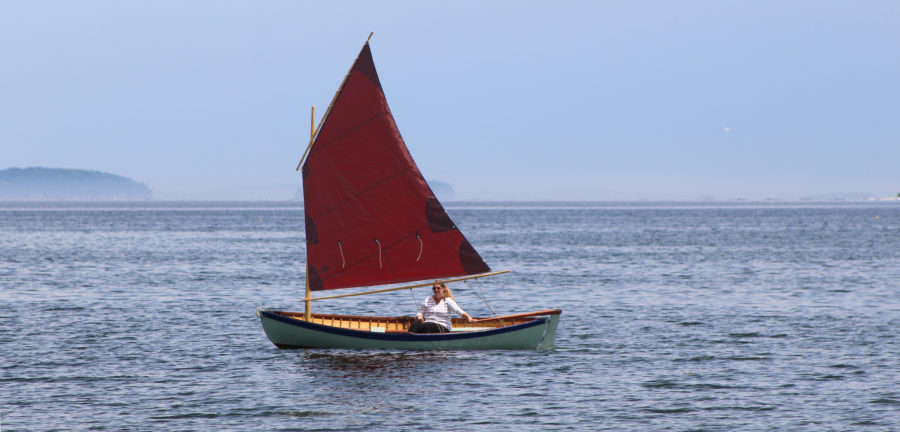
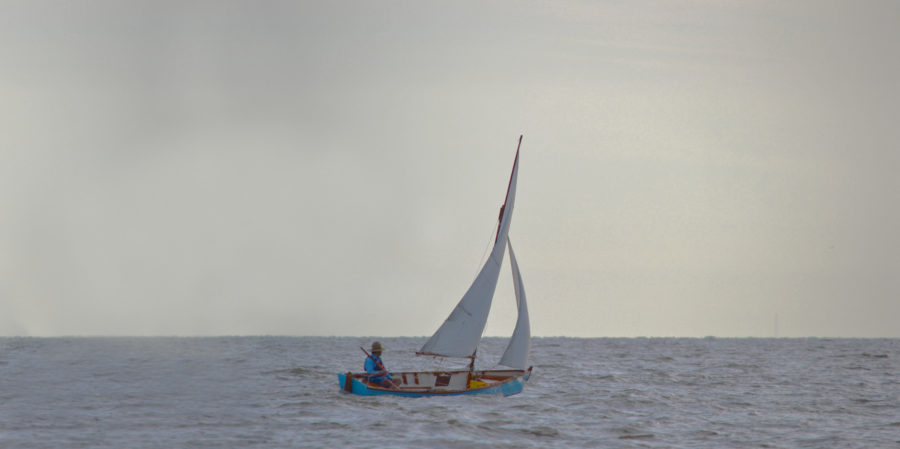
The wide beam gives the hull good stability, while a simple lug rig makes sailing a breeze.
I applied a workboat finish to my peapod in order to minimize the springtime maintenance needed. The boat’s topsides are painted with Kirby marine enamel, and the bottom with an Interlux semi-ablative paint. The boat’s interior and spars are saturated with a mix of boiled linseed oil, turpentine, and a pinch of pine tar. Over time, the oil turns a beautifully weathered black, hiding dings and scratches that naturally come with use. The mixture is applied easily with a rag, encouraging annual reapplication. Prep time for the peapod in the spring usually only totals around three hours.
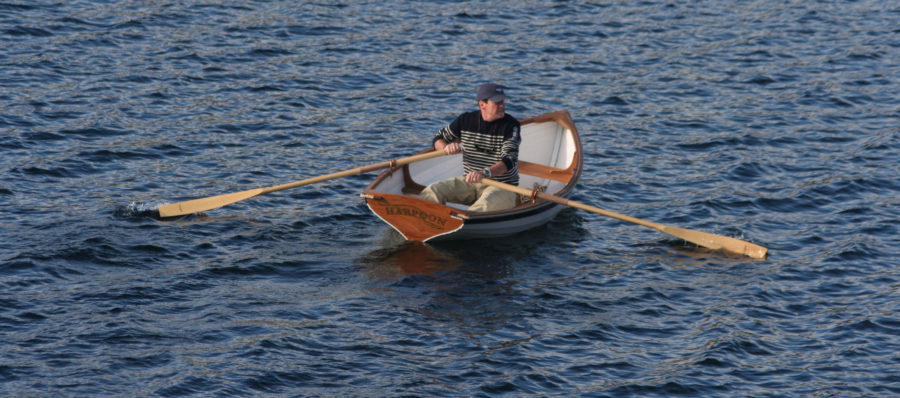
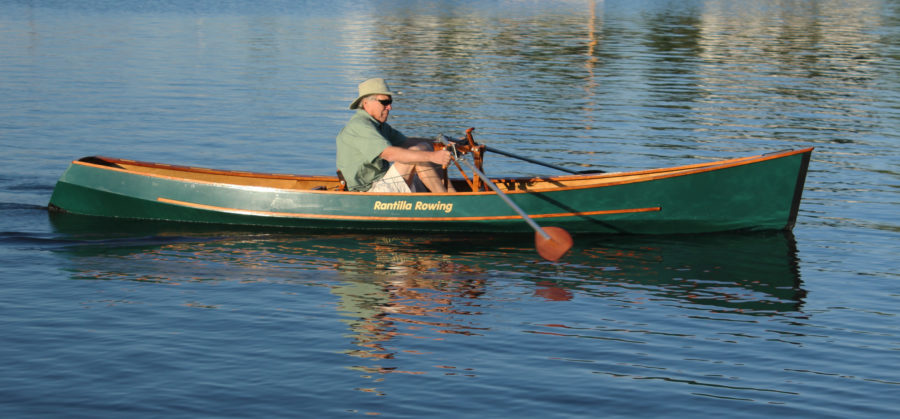
Joel White’s peapod is an excellent daysailer and an able tender. It tracks well when towed, is small enough to be tied to a dinghy dock and easily launched and retrieved with a trailer, yet it’s large enough to comfortably fit two or three adults and their gear.
The boat is fun to row, the perfect vessel to explore the coastline around an anchorage. It tracks well yet is easy to maneuver, and a single rower can make a pretty good speed. The double-ended design allows for rowing backward when leaving a beach or getting the boat off a trailer.
While heavier than your average yacht tender, the peapod can be carried by two adults a short way down a beach without too much trouble. We usually set a small anchor if we’re stopping on a protected beach to save ourselves the hassle of carrying the boat any great distance, especially if the rig is in and the boat is loaded with gear; an outhaul anchoring system would be ideal.
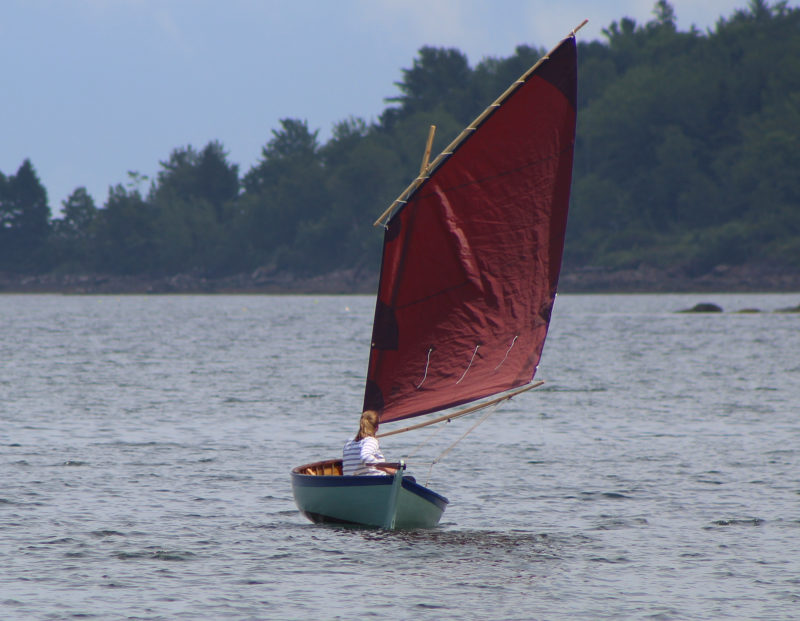
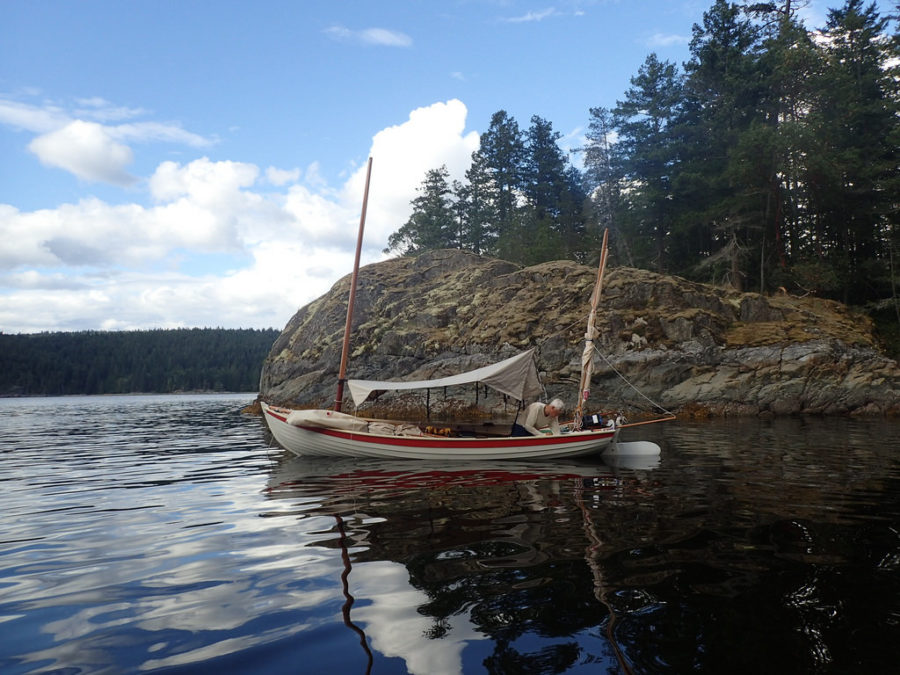
With just the halyard and the sheet to manage, the rig makes solo sailing easy.
The peapod performs just as well under sail as under oars; she ghosts along easily in light airs and holds her own in a stiff breeze. The simplicity of the rig makes the vessel very easy to use under sail, even for a novice. It tacks easily, except in the lightest of airs when there’s not enough forward momentum to avoid getting stuck in irons. Then it is easier to tack by wearing ship—jibing around to avoid getting stuck in irons. In higher winds, the peapod does well and stays relatively dry unless there is a lot of chop. In a lot of wind the boat will sometimes become overpowered, which is probably an indication that you shouldn’t be out in such a small boat in the first place. For safety’s sake we added a set of reefpoints to our sail.
There are a few other tweaks to the rig that make things a little easier. For singlehanded sailing the halyard can be led through a small hole in the forward thwart to a small block or fairlead mounted on a frame and then aft to cleat. This allows one to set or douse the sail without having to leave the tiller. The tiller as drawn in the plans is rather long and best suited to sailing singlehanded. With passengers aboard it would be more advantageous to use a shorter tiller with an extension, so that the helmsman can sit farther aft.
We named our peapod BUSTAH, my great-grandfather’s nickname. The boat now sits in the water in front of his cottage in Owls Head, Maine, where we hope that our friends and family can enjoy sailing and rowing it for years to come.![]()
Josh Anderson attended the Apprenticeshop
Particulars
[table]
Length/14′
Beam/4′7″
Draft (board up)/7″
Draft (board down)/ 1′7″
Weight/200–225 lbs
Sail area/75 sq ft
[/table]

Plans for the Maine Coast Peapod are available from the WoodenBoat Store for $60.


Great article, Josh. It’s a handsome boat and I particularly liked your color choice for the hull. The boat’s design is the epitome of a Maine/New England small craft. It has graceful lines and looks like it handles well with a sail rig. I appreciated the video that was included with the article, as it’s always wonderful to see these boats in action. Thank you.
I took a course at WoodenBoat School last summer taught by Sam Temple (Joel White’s grandson) in which we built most of a Maine Coast Peapod. By the end of our second week we’d hung the seventh plank. The same course is being offered next August, and the plan is to finish off last year’s boat while also beginning another. One point of interest: Joel’s plans do not, in fact, call for the use of butt blocks, as Josh claims. Instead, they provide full-scale patterns for what Joel calls “belt frames,” i.e., two frames located at stations three and four that are significantly wider (2″) below the thwarts than the other frames (1/2″). These wider frames serve much the same purpose as butt blocks, but result in a much cleaner looking interior. The use of belt frames also saves time over the course of a build. In practice, belt frames are a simple and elegant solution to “messy” butt blocks. As Joel writes on page two of the plans: “Planking – 1/2″ cedar, ten strakes per side. Garboard and next five strakes are butted alternately fore and aft on belt frames. Last four, including top strake, which is lapstrake, are full length without butts.” Sam Temple pointed out during our course that alternating between just two belt frames technically violates the “rule of threes,” but that it doesn’t matter in a boat the size of the Maine Coast Peapod. He also suggested that Joel White was not the first to make use of belt frames and that Brooklin, Maine peapod builder extraordinaire Jimmy Steele used them as well.
It would be great to see at least the young members of the family wearing PFDs. Do you not believe in them?
You’re quite right that the child should be wearing a PFD. State law in Maine, as in many other states, requires children under the age of 10 to be wearing “at all times on all watercraft.” I should have at least stated that when choosing to publish the photo. I did question the author about the safety concern and wanted the caption to make it clear to readers that the boat was very near shore. The bottom is visible in the photo, indicating the water was quite shallow. Even so, the law’s requirement and the prudent thing to do is to have children wearing PFDs.
Christopher Cunningham
Editor, Small Boats Monthly
I usually put in at least two rowing stations, one forward, one amidships (or close) so the boat will balance well under several circumstances. With just two aboard, the forward rowing station allows the boat to balance better fore and aft. I even did this with my Nutshell 7’6″ version. My 17′ faering has three stations. The extra stations are easy to install and pay big dividends. The forward station would eliminate that problem of the bow out of the water shown in the video. That is a very pretty boat, and moves well. You have built yourself a lovely craft.
These small ‘pods are sensitive to weight distribution. Generally’ when there are two rowing stations, the forward one is for trim when carrying a passenger, the midships one is for solo rowing.
Fourteen feet is at the small end for a working double ender (“peapod” came along as a name once summer people came to Maine). Most were 15′ and had quite hard bilges to make them stable for trap hauling where you could roll the boat down taking up on the warp then roll it back to help the lift. And as work boats, if they had rigs, they were simple loose-footed sprits. Boomed sails make trimming much easier on double enders.
Sockets for standing locks were usually place about amidships, aft of the aftermost rowing sockets and were 8″ to a foot high, They could be removable oak stanchions with sockets mounted on the top, pipe and oarlock affairs or special cast bronze ones which Walt Simmons can supply.