 photographs by the author
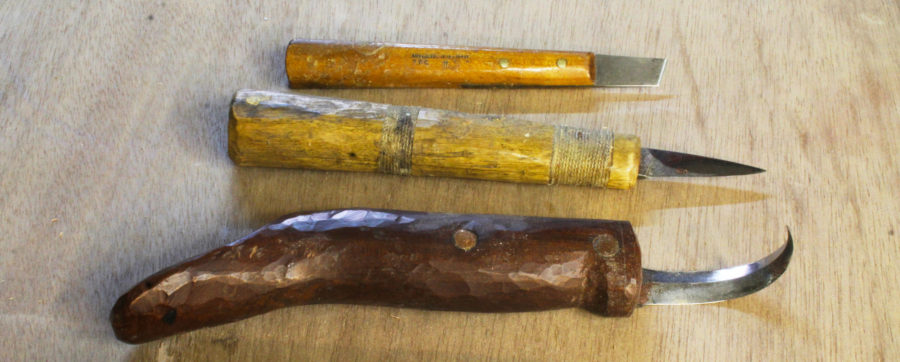
The wood I like best for cleats, snotter thimbles, and parrel beads is locust, and I get all I need for free by the side of the road after a wind storm. Making the first cuts on the bandsaw used to be the part of the process that made me rather nervous.
The worst of the winter storms here in Seattle produce some very good wood for salvage. High winds drop a lot of limbs from my neighborhood’s hardwood trees and wind-whipped waves bring fresh driftwood to the local Puget Sound beaches. City crews often cut locust, cherry, and alder windfalls into short lengths and leave the wood in the roadside brush; yellow and red cedar occasionally get added to the driftwood that piles up above the high-tide line. Some pieces of wood are too good to pass up—I’ll often collect locust for cleats and parrel beads, and yellow cedar for carving and modelmaking.
The hardest part of putting this found wood to good use is making the first two cuts to turn round logs and irregular driftwood into dimensional lumber. I’ve freehanded pieces through the bandsaw, but the cuts aren’t straight, and working unstable round shapes on a bandsaw scares me. I found some gizmos on the web—bandsaw log milling sleds—that make the job of getting straight cuts on logs a lot easier.
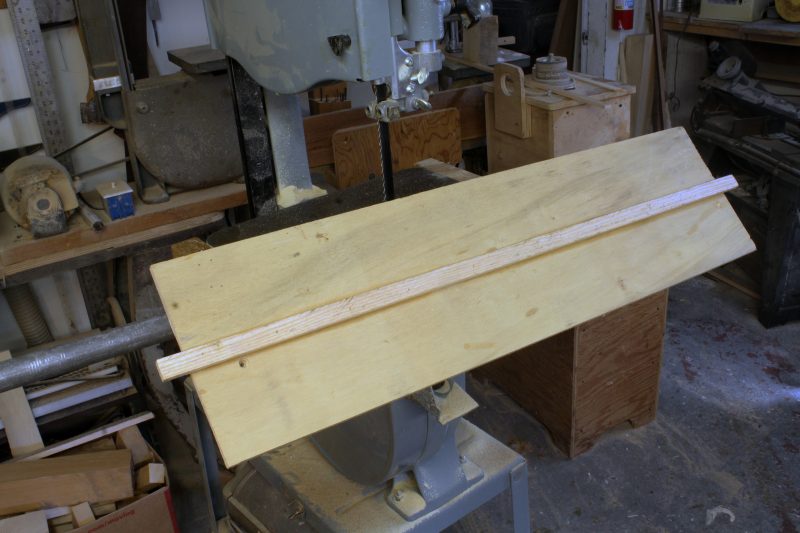
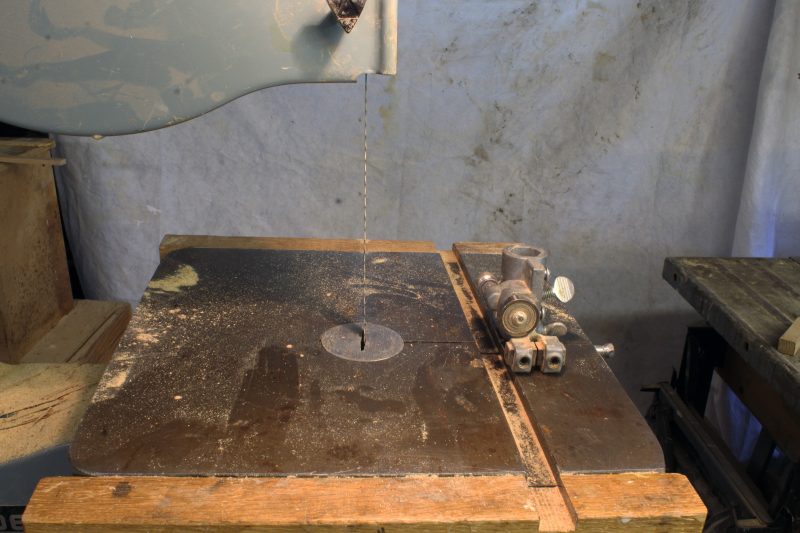
The hardwood runner glued to the bottom of the plywood fits the miter gauge slot in the bandsaw table. The extra bit extending beyond the plywood makes it easier to locate the runner in the slot.
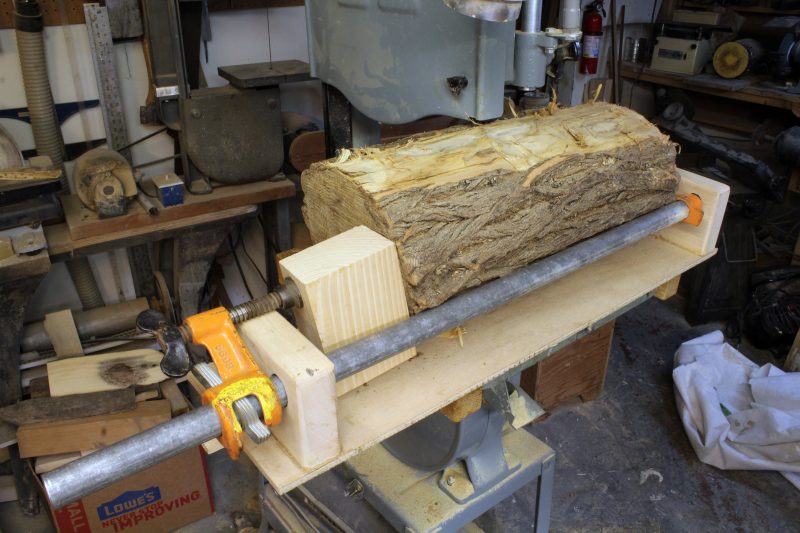
The sleds are guided by a hardwood strip milled to slide in the miter-gauge slot on the bandsaw table. A piece of plywood serves as the sled’s base. I used 9mm plywood, thick enough to do the job without taking up too much of the bandsaw’s capacity. On top of the plywood I secured two blocks of ash, each with a couple of holes to fit a pipe clamp. The diameter of the pipe is just over 1″, so after drilling the holes with a 1″ Forstner bit, I had to use a rattail file to open them up to get a slip fit.
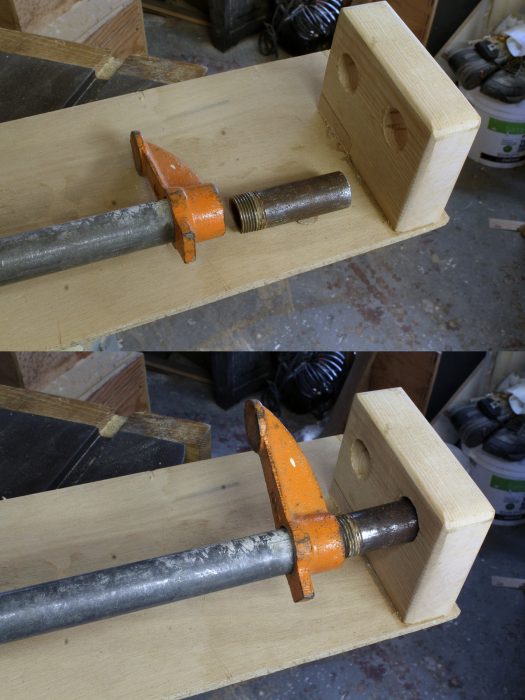
A short length of pipe is added to the tail end of the clamp. Loosening the foot of clamp makes some of its threads available for the extension.
The fixed jaw of the pipe clamp is threaded onto the end of the pipe, and by backing the pipe off halfway I could thread in a short length of pipe to provide an extension to slip into one of the 1″ holes in the ash blocks.
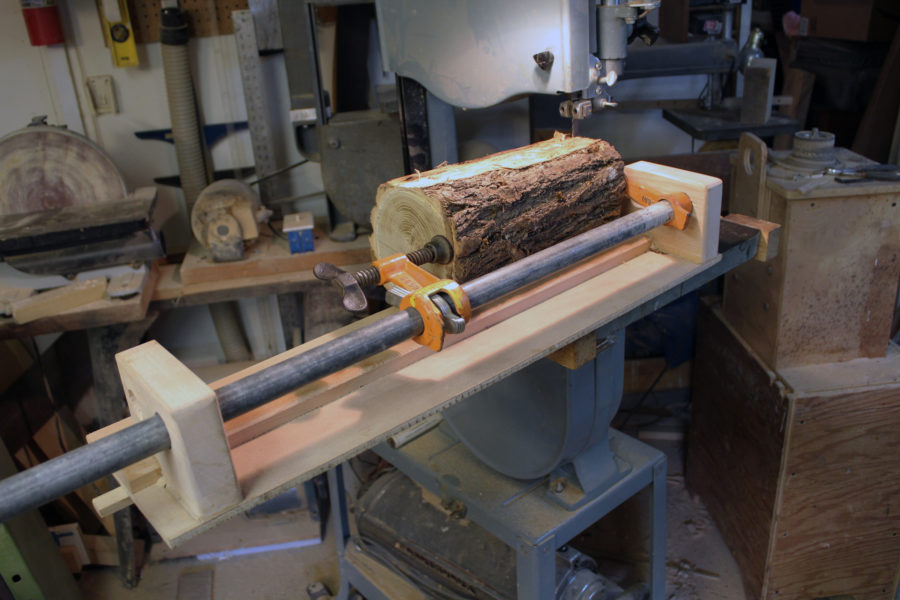
Running the sled through the bandsaw trims the slightly oversized base to size and after that, the pipe clamp is taken apart and reassembled between the two blocks. With the driftwood or windfall clamped in place, I’m ready to saw.
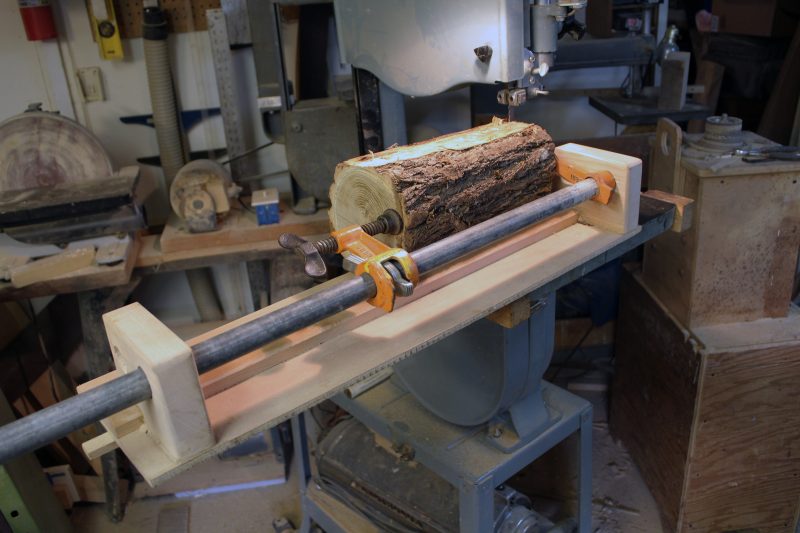
Trimming bark away from the top and bottom is sometimes required to provide clearance. This first iteration of my sled had a 3/4″ x 2 1/2″ stiffener. It turns out that it wasn’t necessary and only got in the way, so I removed it. This locust log shown has been drying for a few years.
Bandsaw blades can drift to the side when using a fence that is parallel to the blade or when using the miter slot as a guide, so I minimized that three ways: I centered the blade on the crown of the bandsaw wheels, used extra blade tension, used a sharp blade, and went with a slow feed rate to minimize deflection caused by pressure and heat.
The piece of Alaskan yellow cedar driftwood has exceedingly fine grain, around 100 rings per inch. Wood gathered from a beach often has sand driven deep into the cracks; the grit can quickly dull a blade.
My sled is short because the wood I mill will be used for small pieces; fire-wood lengths are what I often find. Shorter cuts make blade drift less of a problem. The blade might go 1/32″ into the sled or veer away by as much but that’s not enough to worry about.
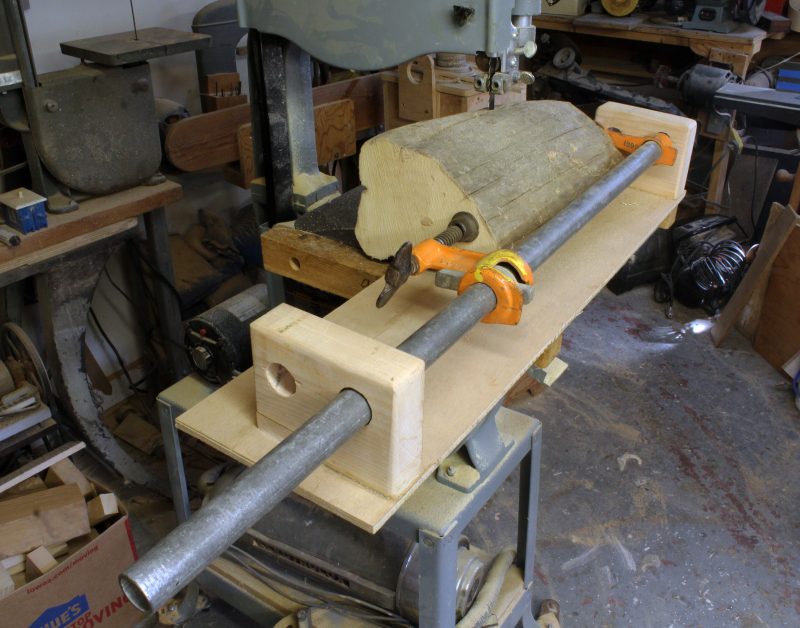
This piece of locust was a bit long for the clamp in its normal configuration, so I slipped the moveable part off and set it outside of the block. A bit of scrap wood bridges the gap. After I trimmed the bark from two sides, the log measured about 7 1/2″. To get enough clearance I removed the bandsaw’s upper guide.
Removing the upper guide adds 1″ of additional clearance.
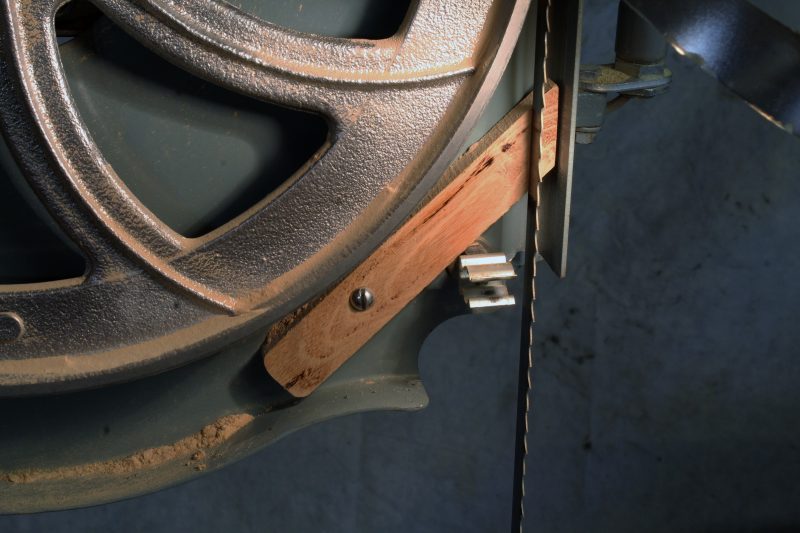
With the upper guide removed, I temporarily bolted a piece of hardwood to the back of the upper blade guard. It is sized to just touch the back of the blade when it is centered on the wheel. I didn’t bother with installing blocks at the sides of the blade. Using a slow feed rate and applying very little pressure on the blade allowed it to cut with a minimal drift.
After making the first cut, the newly sawn flat surface is placed on the base of the sled for the second cut. With two cut surfaces at right angles to each other I can continue milling with the sled or move the work to the tablesaw.
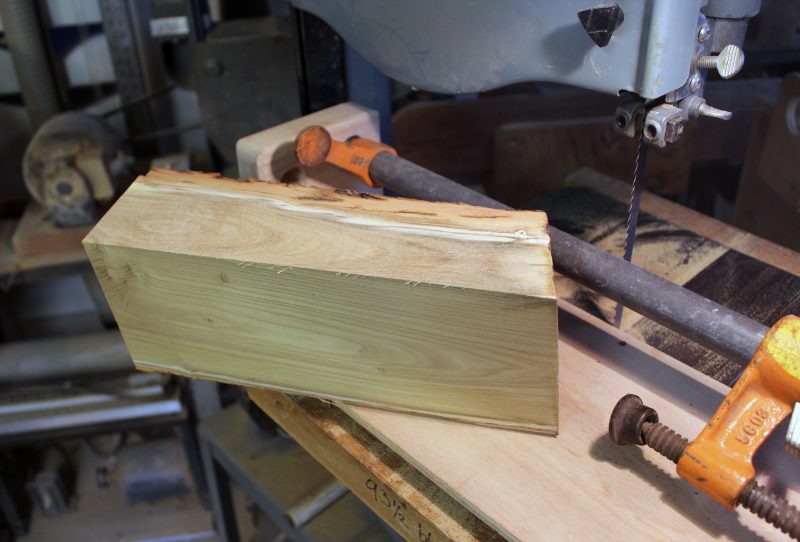
Having made two cuts with the sled I can continue working using the usual fences on the bandsaw or tablesaw.
The sled has turned my bandsaw into a mini-sawmill, and I can work salvaged wood faster and with greater safety.![]()
Christopher Cunningham is the editor of Small Boats Monthly.
You can share your tricks of the trade with other Small Boats Monthly readers by sending us an email.


May I suggest a riser block kit for your bandsaw? Allows me to slowly resaw 12″ material under the upper blade guides on my 1947 Delta Milwaukee bandsaw.
I have a riser block on one of my old 10″ bandsaws, but haven’t installed one on my 14″ bandsaw. It would indeed increase the capacity, but I don’t often need to mill really thick stock.
Great idea, which I will copy, thanks. I have to ask though, if you do this often in sizes that necessitates removing the blade guide why not make a new guide to fit where that piece of wood is? Check your local bearing factor for miniature bearings, they are cheap and come open, shielded or sealed.
I’d given some thought to making a complete blade guide that I could tuck inside the upper wheel housing, and had even pulled some bearings out of an old roller-blade wheel with that in mind, but as you note, the bearings have to be rather small to fit the space. With a sharp blade and a slow feed the arrangement I have seems sufficient for the occasional milling I do and the size of much of the wood I collect. I’d take the time to make a new guide if I needed to mill a lot of stock for some reason. I currently have to remove the bit of hardwood to restore the clearance for the blade guard that’s attached to the normal blade guide. I’d have to modify the guard if I had a permanent guide inside the housing.
Worked in the boat-building industry since late ’60s, seen many inventive ways of getting the job done using what was available. Good work, keep it safe.
Very interesting concept. I’ll keep this idea for a time when I may need it. Gathering driftwood is not something I thought of doing here in Florida.
Brilliant! Great idea, Christopher. If I find anything particularly tasty I will come knocking!
Hi, Christopher.
What a great idea! How long are the pipe clamp and the base? What would be a safe maximum size….3ft?
Thanks,
Bryan (It is thawing now here in Ottawa.)
The sled in the article is 28″ long and its pipe clamp about 36″ long. I recently made a smaller sled, 21″ long, that uses a bar clamp. The holes in the wooden blocks have a snug slip fit on the bar. The two sleds are long enough to serve my purposes but I suppose a 36″ sled would be as large as I’d go. A bandsaw table isn’t very big, so I think it would be awkward to support a sled by hand when only a few inches are engaged in the miter slot. An infeed support roller would help.
One of our readers was having trouble finding the pipe clamp I used—it was designed to be used as a clamp and a spreader so the tail end was threaded and could be screwed on facing either in or out. The screw fixture was adjustable along the length of the pipe. Pipe clamps where the tail is the adjustable fixture are more common. If that’s the kind of pipe clamp used, the screw end would be on the outside of the sled. The tail would go either outside of the block or in between them.
Thanks very much, Christopher…..now to make it happen!
Bryan
After reading about your log sled, I built my own featuring the Jorgensen (although it’s a Bessey equivalent) Pony clamp that you put to such simple but effective use on your jig. The majority of YouTube versions of bandsaw log mills require the log to be fixed with various screws to hold it steady, but seeing your original video was a lightbulb moment for me!
My version is a development of what you made insomuch as I can adjust the clamp through x, y & z axis to accommodate any size of log up to 15” x 10” x 10”. This negates having to re-fix the work after each cut unless I want to change the orientation of the piece. It runs on an aluminum T-bar which runs in the table’s left-hand T-slot as this to me, is a safer and more stable approach with the cut pieces being expelled off to the right and away from the blade. I milled the aluminum T-bar on my router table which was fun. I am pleased with the end result.
Thanks again for your input on the clamps which was the key to pursuing this jig.
Hi,
Cool project, thanks for inspiration!
I’m learning how to use AutoDesk Fusion 360 and I used this as inspiration for my first CAD model 🙂
It’s very basic, but thought I’d share in case anyone else is interested: Bandsaw Log Jig
Hi,
Great idea. To realize your project I searched for an appropriate clamp. Unfortunately I could’t find it. Could you give me a clue, where I can buy it.
Thanks in advance,
Horst
I found the pipe clamp you used in the article, the one with a screw-in tail stop online. It is a # 56 Pony clamp.
Thanks