 photographs by the author
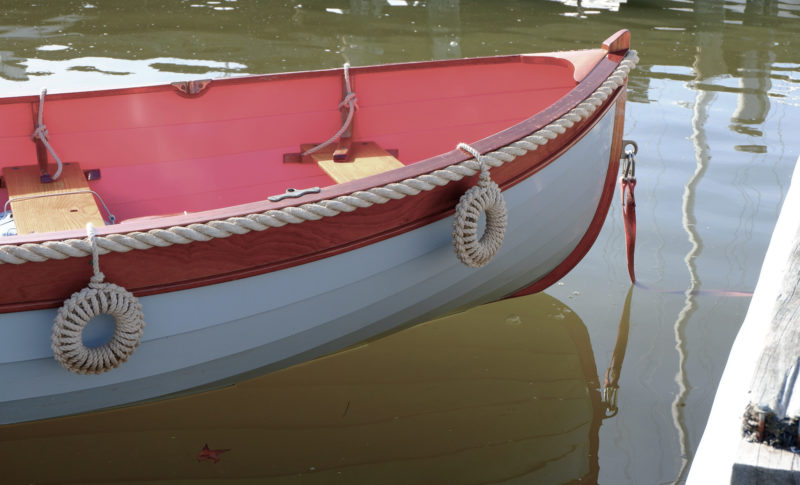
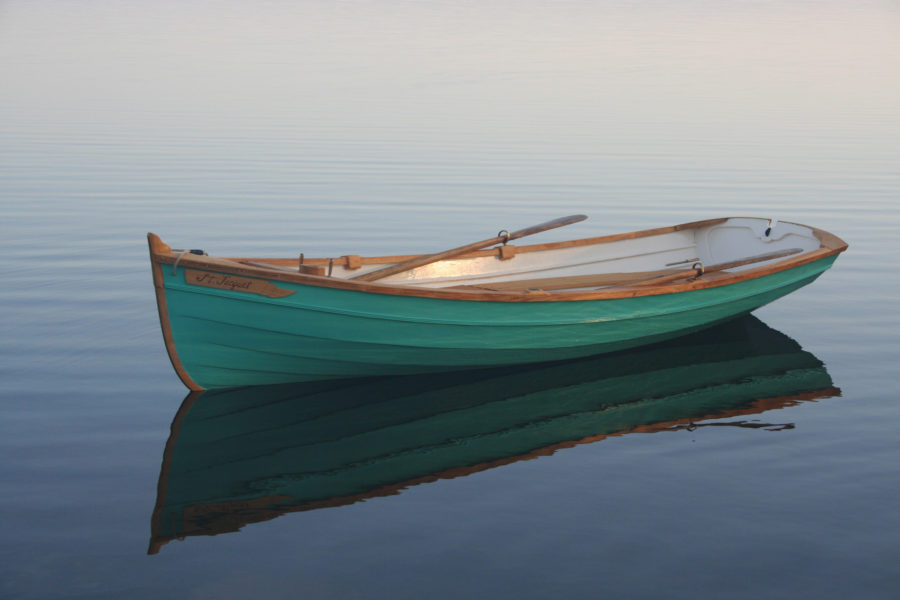
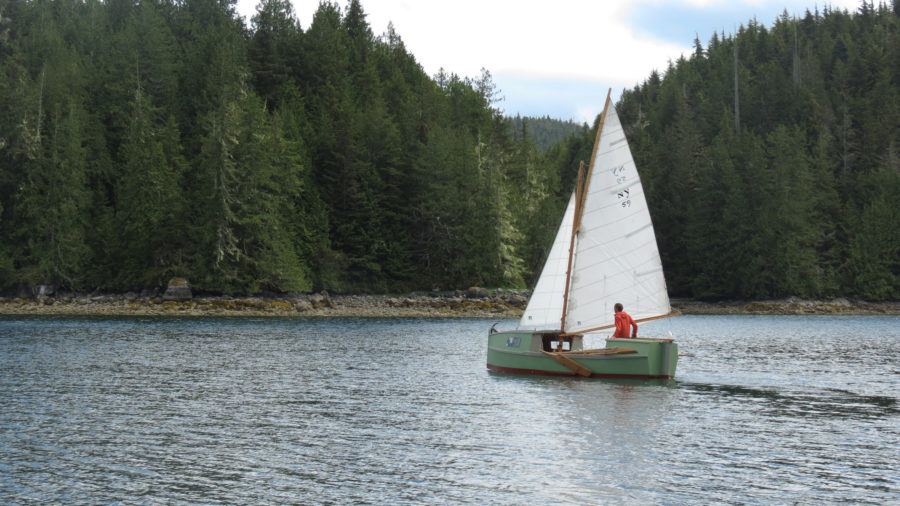
A set of doughnut fenders provide distinctive protection to the hull of the author’s tender. Note the tails of the fenders on the port side tied to thwart knees.
In the eyes of our traditionally minded peers on Maryland’s Eastern Shore, my wife Jenny and I tread dangerously close to the gates of hell by sailing a fiberglass boat. Our redemption comes by way of the plywood lapstrake dinghy we built as a tender to it. I had installed a robust length of line along the sheer to provide a nice cushion to protect the mothership, but we needed something more to protect the tender from the dinghy dock and the loitering tenders-of-others.
My Internet search for rope fenders led to a lot of cylindrical versions similar in shape to their modern air-filled cousins. Scrolling down a little further in the search results, I eventually found doughnut-shaped fenders that I discovered were not difficult to make.
The basic principle of most rope fenders is to create a core and then wrap it prettily. My process may be different from others, but once one method is understood, variations come easily. The core of the doughnut fender is a coil; I use a darker line for it, which has the pleasing effect of contrasting with the lighter-colored line I use on the outside. I wrap the core using a type of loop hitching. To see other ways on how to wrap the core, you’ll find examples of ringbolt hitching and buttonholing in The Ashley Book of Knots, pages 569 to 571. (The book is also available in digital format for free online.)
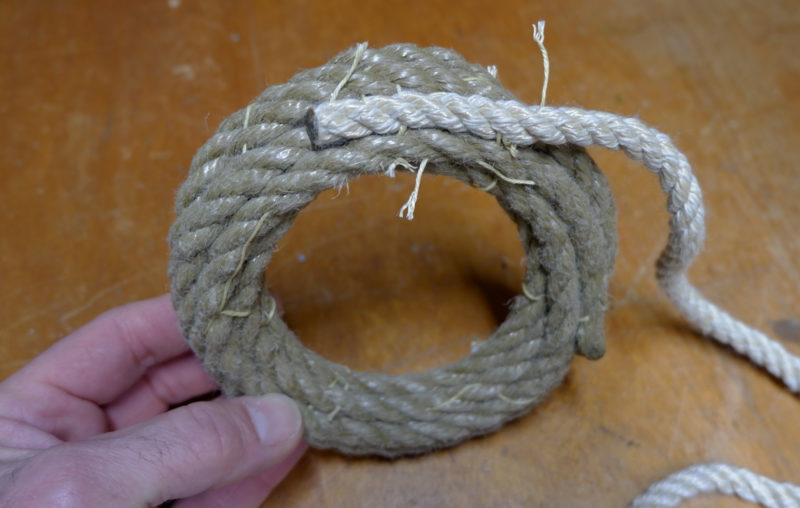
To create a core, coil a single length of line, making sure that each loop lies close to the previous one. To keep each loop from drifting away or crossing over the others, stitch marline through the loops to hold them together as you lay them down and to keep the core a consistent diameter. I sequentially increase and then decrease the number of loops. The first row—the innermost one—has one loop; the second row has two loops; the middle row three; the fourth two again; and the last row one loop. Larger fenders will require more loops for the core.
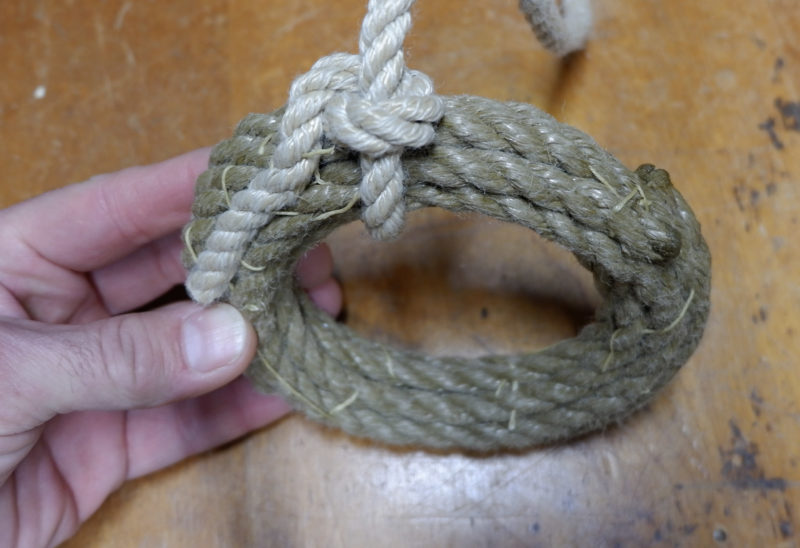
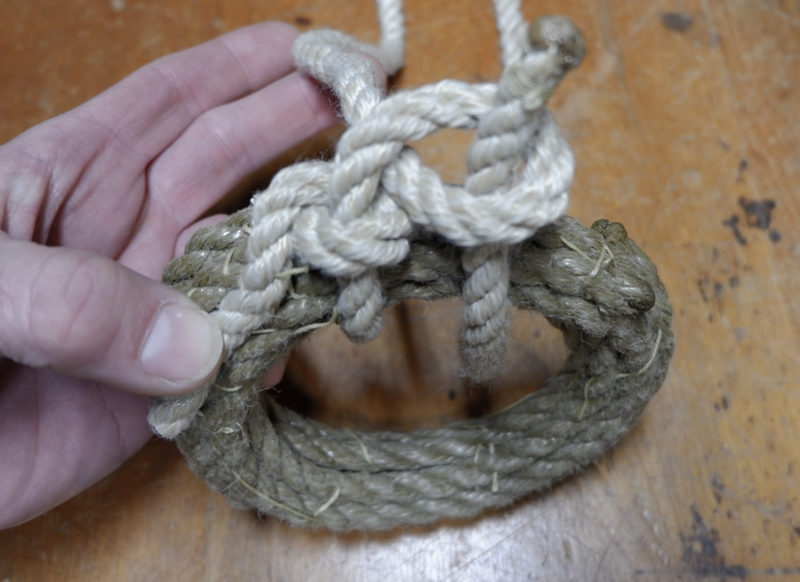
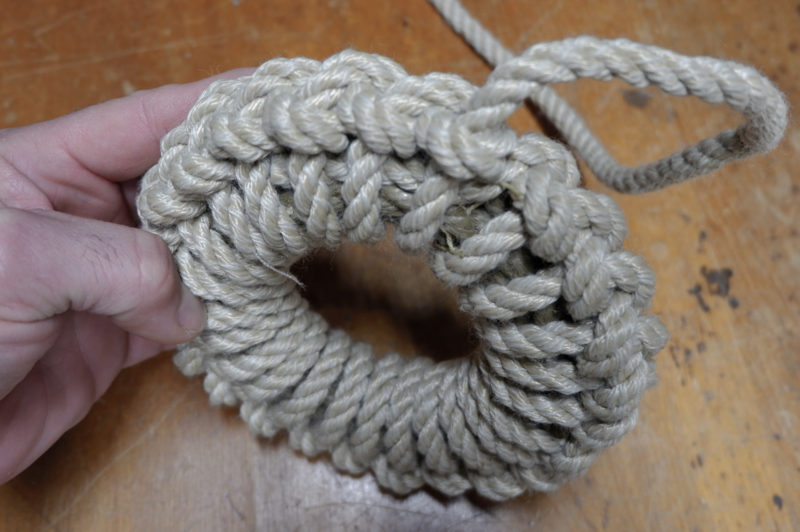
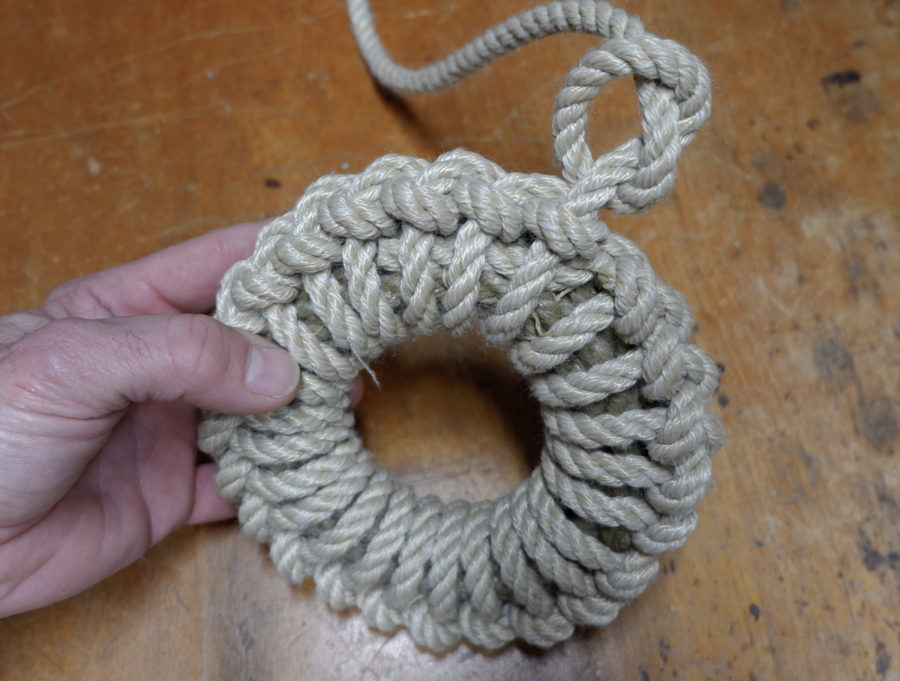
To begin the decorative wrap, I stitch a lighter-colored line to the core loops for a few inches to fix it in place. I begin hitching with a loop on the outside, tucking the working end under the standing part. Drawing the line around the core, I pull the end up through the just-made loop, snug it up, and continue with another loop. I keep each turn tight against its neighbor, and take up any slack before moving too far ahead. When the core is covered and I can make no more turns, I lock the hitching with a simple overhand knot after drawing the line up through the last loop. I leave a generous amount of line to secure the fender to the dinghy and whip the tail end.

The core starts with a single loop with an inside diameter of about 3″. The 9 loops of 3/8″ Spunflex 3-strand polypropylene the author uses for the core take up around 9′ of line. Stitches of marline hold the coil together.
The lighter colored line used for the wrap provides contrast for a decorative effect. A 16′ length of 3/8″ polyester New England Vintage 3-strand covers the core and leaves a tail to secure the fender on the dinghy’s rail.

The loop hitching for the wrap begins with a twisted loop.
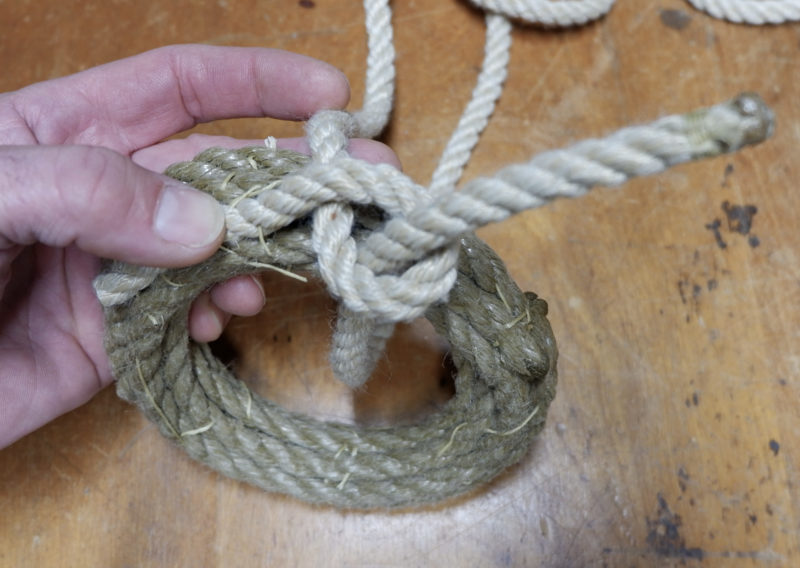
The tail end of the line passes around the coil and through the loop.
The wrap is drawn up tight.
The next loop is made, a repeat of the first.
The loop hitching continues around the coil and back to the beginning.

A half hitch in the tail end, pulled up tight against the last wrap, keeps the fender from getting looser with use and age.
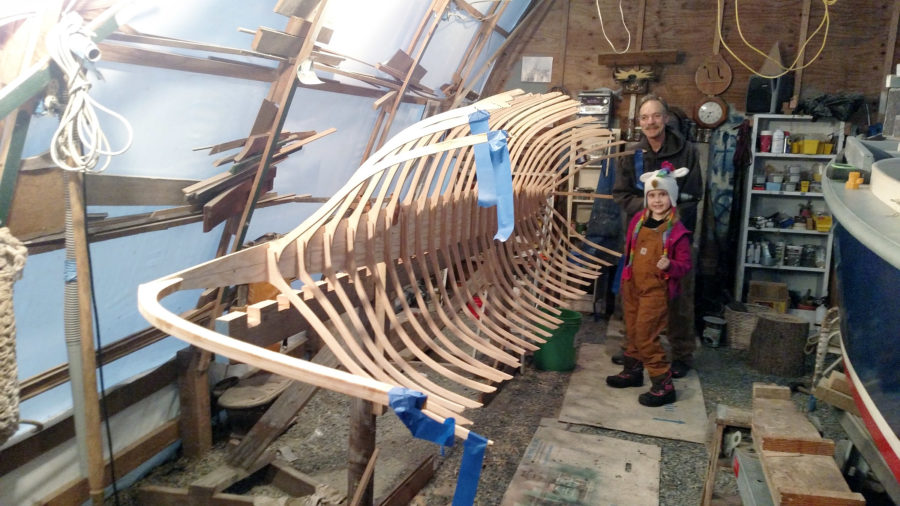
Andy and his wife Jenny have been messing about in small wooden boats since they met in 2005. They have built and restored a number of boats that they use for canoe-camping in the Adirondacks and sailing in company with their fellow Delaware Valley TSCA members. When their daughter Ella came along eight years ago, they needed a larger vessel and bought the aforementioned fiberglass boat for weekend outings on the water. They cruise the upper Chesapeake Bay and explore its shallow creeks and byways in their homebuilt tender.![]()
Editor’s notes:
 SBM photographs
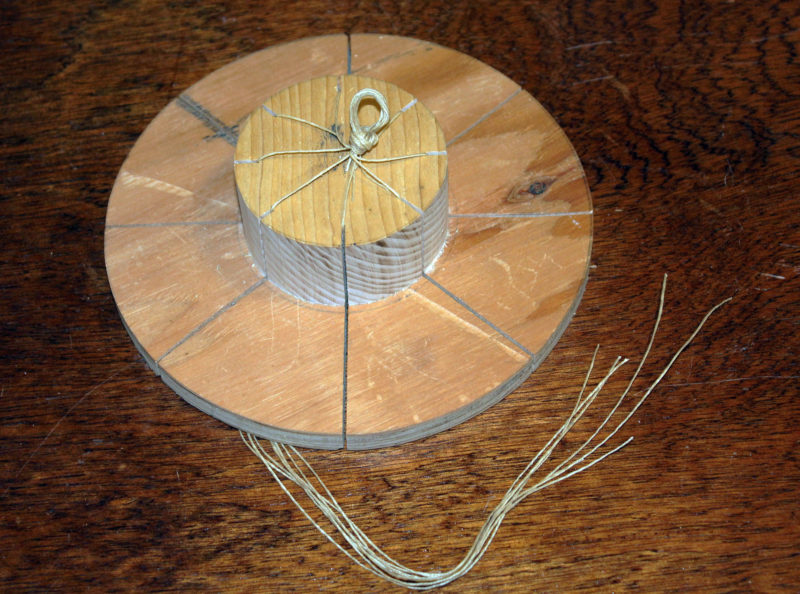
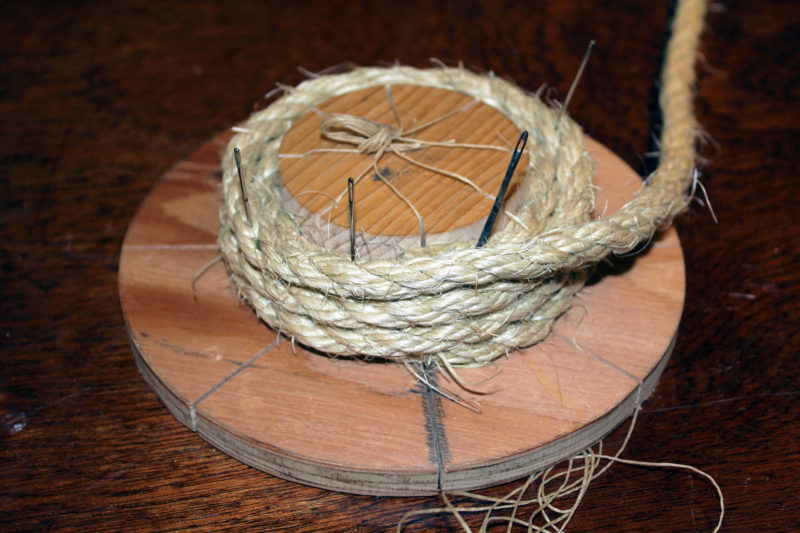
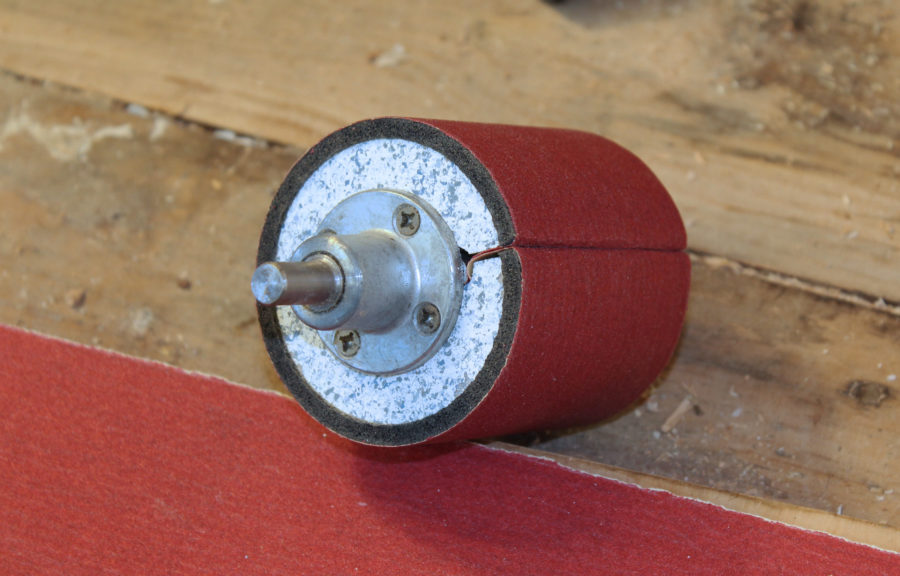
I found that I could make the core coils faster and more uniformly by using a jig. I cut a 3” disk cut from 1 ½” stock and fastened it to a 7” plywood disk. Eight bandsawn kerfs accept lengths of marline that will later hold the wraps of the coil together.
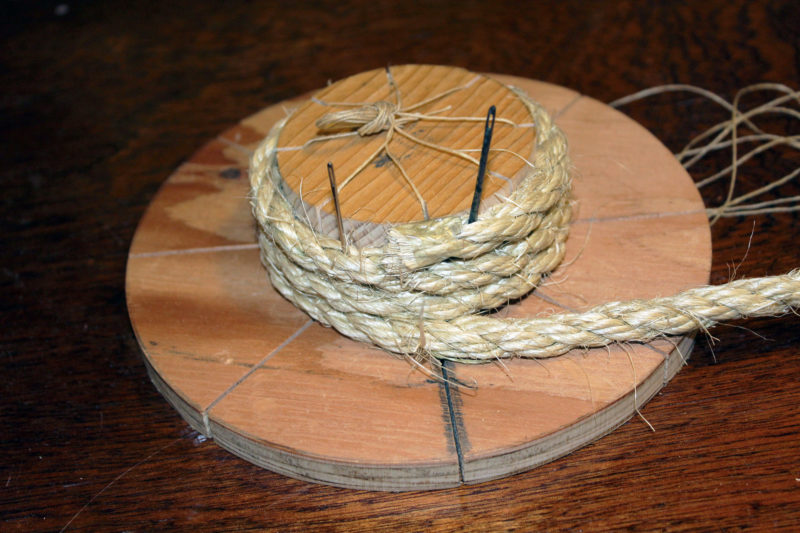
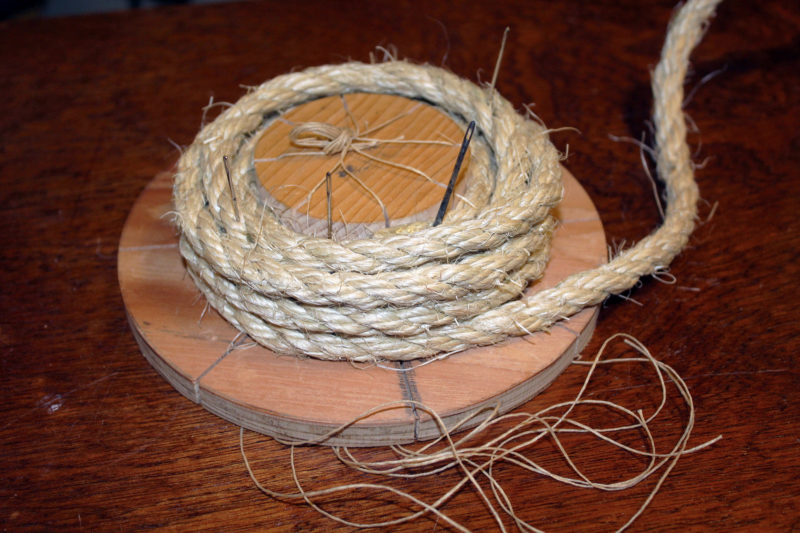
The jig is designed for 3/8″ line and requires about 25′ to make a fender with a continuous core and wrap. The first wrap starts at the top and winds down around the core three times. Needles temporarily hold the coils together and tight. The pencil-marked kerf indicates where the transition to the next wrap starts.
The second set of three coils goes from the bottom up.
The last wrap adds three coils, wound from top to bottom. This core, like Andy’s, has 9 wraps, but they’re arranged in a cross section that is a square (3-3-3) rather than his diamond (1-2-3-2-1). When the wraps are applied, the cross sections of both become nearly circular.
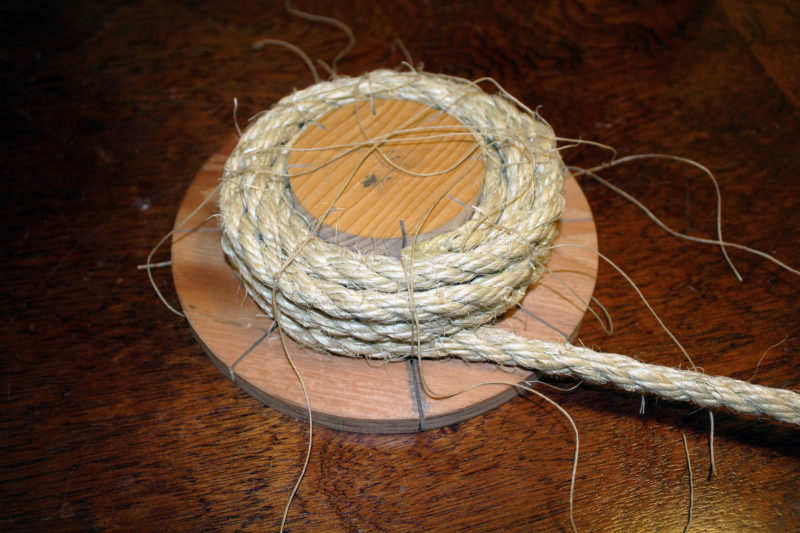
Once the eight lengths of marline are tied around the core, the needles can be removed.
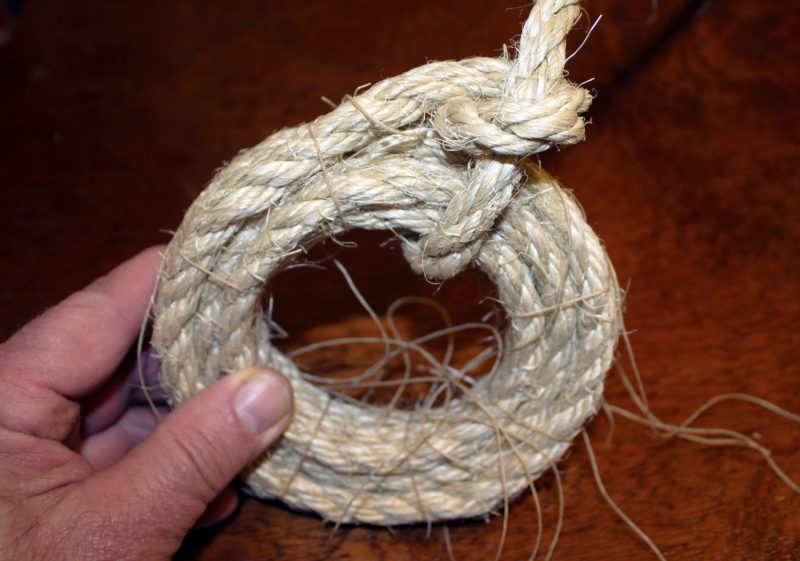
The entire fender can be made of a single length of line. Here the first hitch of the wrap has been made directly from the coil. The remainder of the process follows Andy’s instructions.
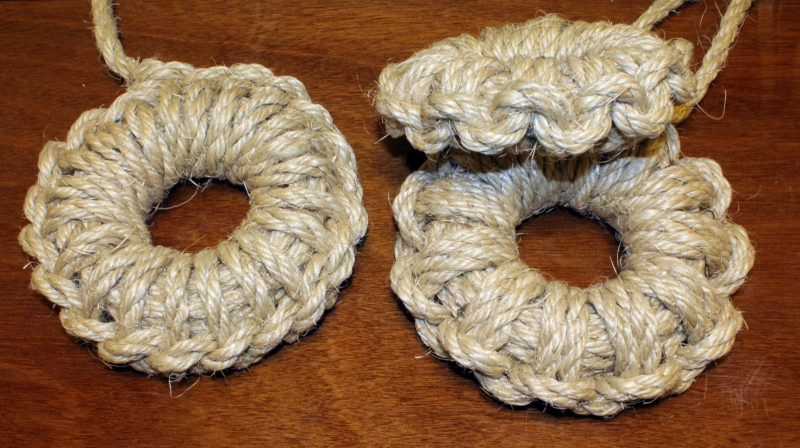
The fender on the left was wrapped with Andy’s form of loop-hitching. The two fenders on the right are wrapped with kackling, hitches that alternate left and right. The loop hitching I used for my first fender took up 27′ of line; the kackling took 25′ and I could get two fenders from a prepackaged 50′ length of 3/8″ sisal.
You can share your tricks of the trade with other Small Boats Monthly readers by sending us an email.

I’ll have to try those. I made a set of four tubular Norwegian-style rope fenders last summer which work very nicely and look great. Once you get the hang of tying a 6-strand crown sinnet, it’s quite easy and fun. But these ones look great in a different way.
Sure, I can really make those from the photos supplied in the article. Not!! This looks like it would be a good one-day class at WoodenBoat school if they would consider doing a Saturday or Sunday class during the summers. I’d like to try making these, but it would be best with hands-on instruction. Thank you.
Oh, they’re really not at all that hard to make. The finished fender may look very complicated, but the single hitches Andy uses are quite simple and look great when they’re all line up together. A 50′ package of 3/8″ sisal rope costs only about $9 at home-improvement stores.
Looks like a good use for old lobster-pot warp. I’d go with one of the petrochemical-based lines as my tubular natural fiber fenders I have for the ducker take a wicked long time to dry.
Beautiful,disciplined, and clever work. I wonder how many grown men will lose the marbles over this very complicated pastime?
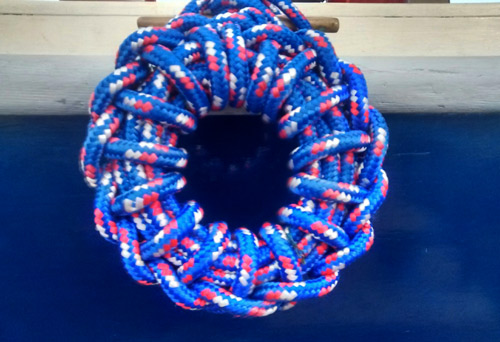
The article about doughnut fenders was interesting and here is my patriotic version of one. I wrapped the core strands around a small coffee can and wired them together.
I love the idea of the jig. Holding the coils while I try to stitch them would challenge my dexterity, I think. They are beautiful. My dad would have loved to make some of these!
A great, well-illustrated tutorial—especially the offer of jig ideas and the choices of coil, making this a rewarding confidence-builder with a fine, finished product! I was a military parachute rigger, and grew to admire the discipline behind all manner of knots and rope work. Your straightforward few pages of mentoring are well done.