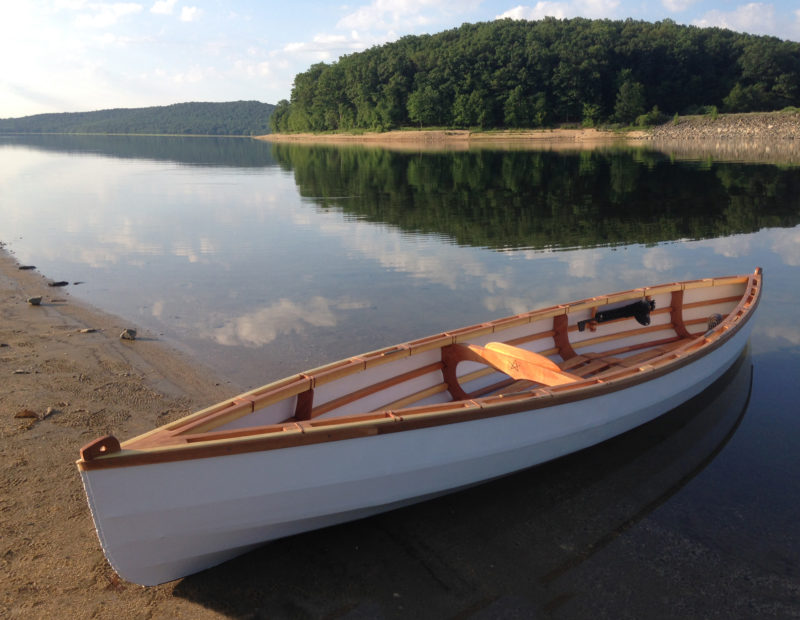
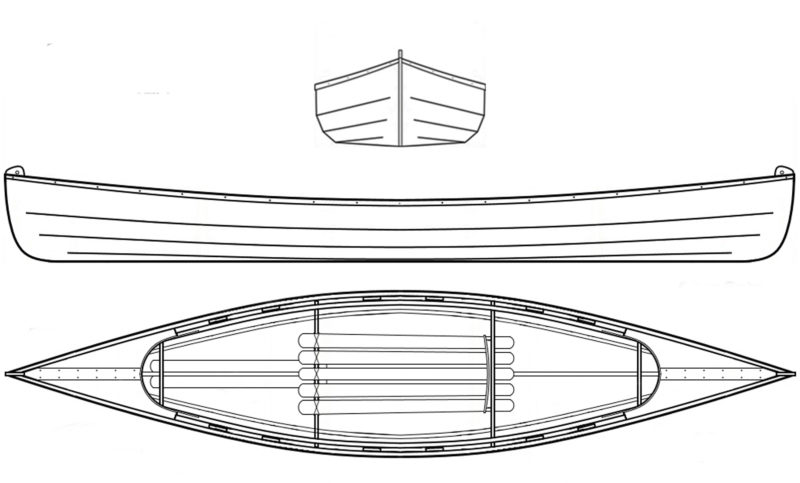
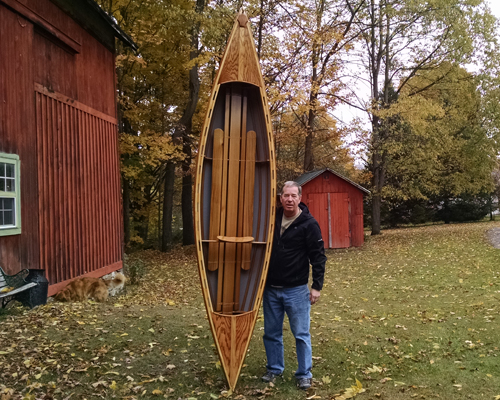
I already had a sailing dinghy and a sail-and-oar skiff in our two-car garage, but I thought there was room for one more boat, a small one, alongside my wife’s car. I decided to build Dave Gentry’s Wee Lassie. In the 1880s, Henry Rushton designed the original Wee Lassie as a beautiful lapstrake canoe and since then, his iconic design has been rendered many times, in many ways, by many builders. Gentry’s skin-on-frame (SOF) version is 10′ 6″ by 27″, just like the original, and, at 19 lbs, about a pound less. With his advice I also lengthened mine to 11′ 6″ by extending the keel 12″ and moving the two end frames out from the center.
 Tom Clarke
Building a Wee Lassie from plans takes an estimated 20 to 25 hours, a remarkably short time to get afloat.
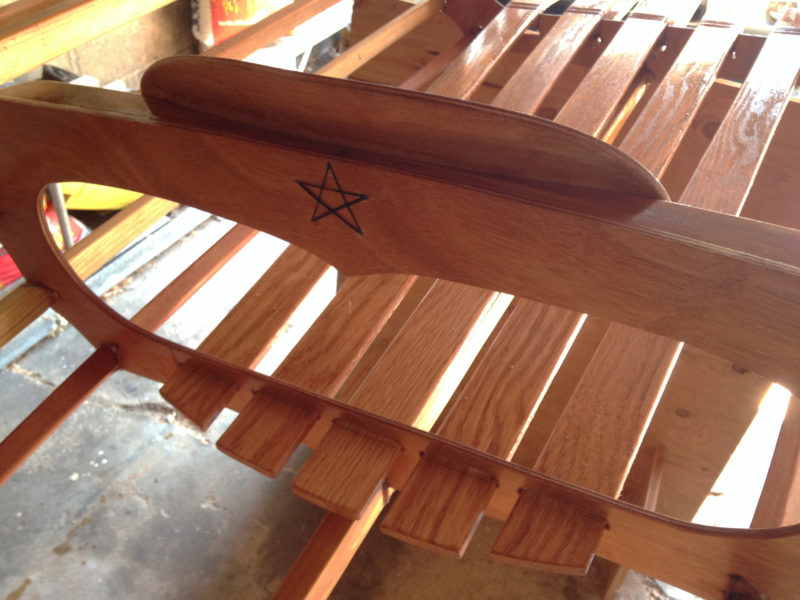
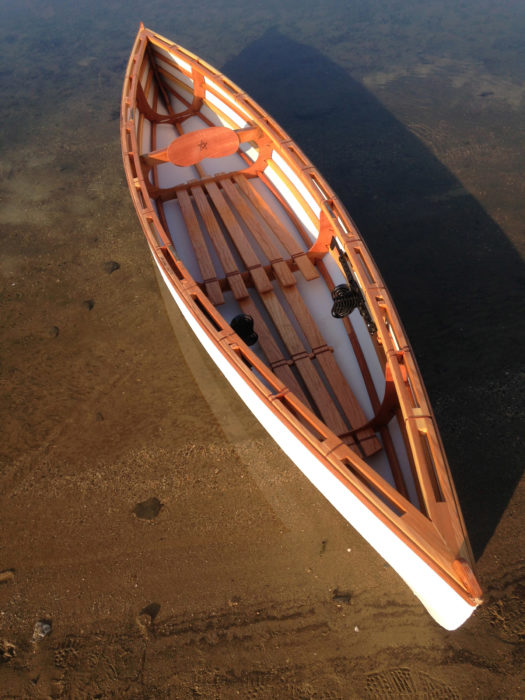
The four frames, two stems, and backrest are cut out of a half-sheet of 12-mm okoume plywood, using the full-size patterns included in the plans. The third frame from the bow supports a backrest; I used a piece of red cedar to make a sturdy cross beam at the top of the frame. Cut with a curve in the middle at about 20 degrees, it has a comfortable shape and angle. The keel, three pairs of chines, inwales, and gunwales were all ripped from western red cedar to dimensions provided in the comprehensive building manual. The instructions call for the chines, gunwales, frames, and keel to be held together with wood screws and epoxy or artificial-sinew lashings. I had previously built a baidarka using lashings so I used that option for most of my Wee Lassie’s fastenings. I notched the longitudinals to recess the lashings and avoid wear-prone lumps in the skin.
 Tom Clarke
The seating slats float freely in slots cut into the plywood frame that serves as the backrest; the slats flex when the paddler is seated, providing an even distribution of pressure for greater comfort.
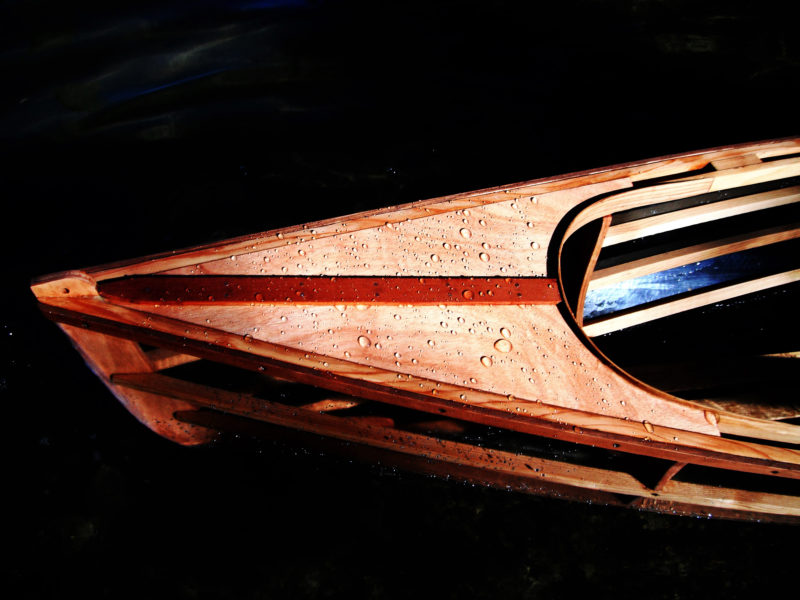 courtesy of Gentry Custom Boats
The decks can be quite simple or used as an opportunity for some elegant woodworking.
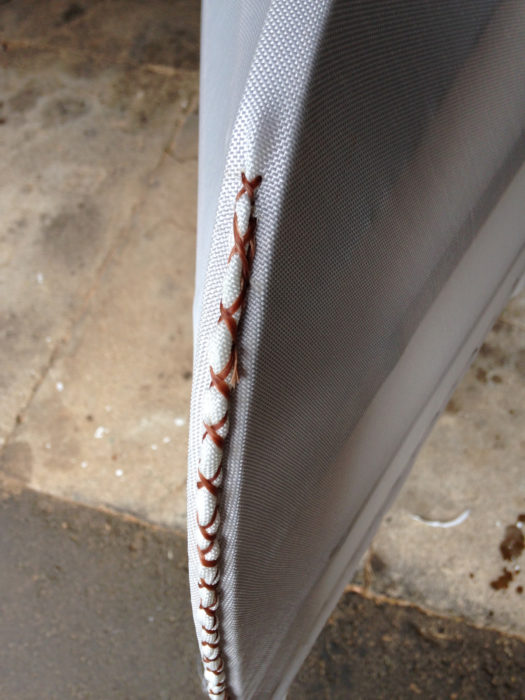
I sealed the frame with multiple coats of penetrating oil before turned it keel-up to attach the 10-oz polyester cloth. Starting in the middle of the hull and using 1/2″ stainless-steel staples, I stapled the cloth to the port gunwale every 3″ for about 2′. Then I stapled the opposite side to the starboard gunwale. I alternated sides, working toward both ends of the hull. Wrinkles appeared as I got closer to the bow and stern. Heating the polyester cloth would shrink it and eliminate the wrinkles, as long as I tucked small puckers of fabric between every staple to avoid creating any wrinkles too big to be removed with heat. To finish fastening the cloth, I drew it tight along the stems and held it with spring clamps. Once clamped, I ran a simple stitch with artificial sinew every 1/2″ close to the stem. With excess cloth cut about one inch from the hem stitching, I then rolled the fringe tightly and used two needles to do a cross pattern of sinew stitches to hold the roll tight against the stem.
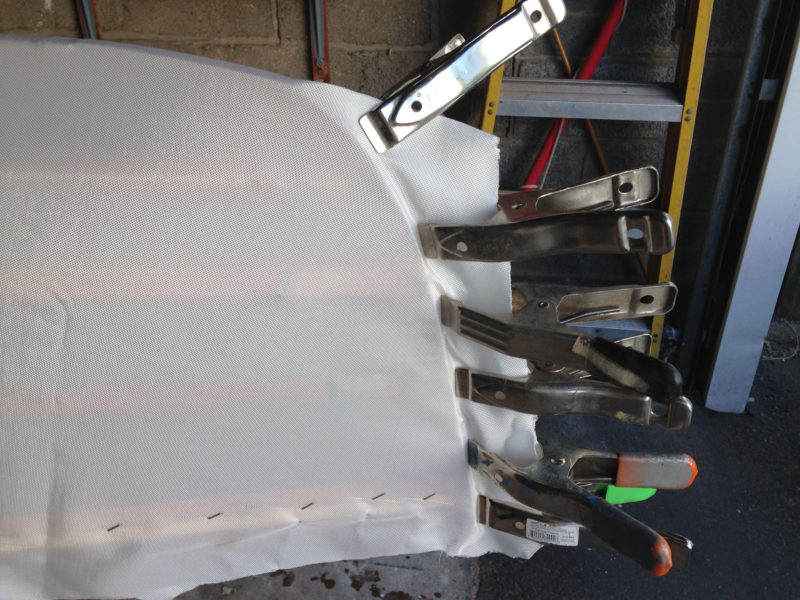 Tom Clarke
Spring clamps help tension the skin and smooth any puckers after it has been stapled along the gunwales.
I shrank the fabric with a heat gun, removing the wrinkles along the gunwales and tightening the cloth over the entire hull. Since it is very easy to burn a hole in the cloth with the heat gun, it has to be kept moving. As I applied heat, I continually tapped the cloth with my finger to test its tension—the resonant drum-like sound was the best indicator of a tight skin.
 Tom Clarke
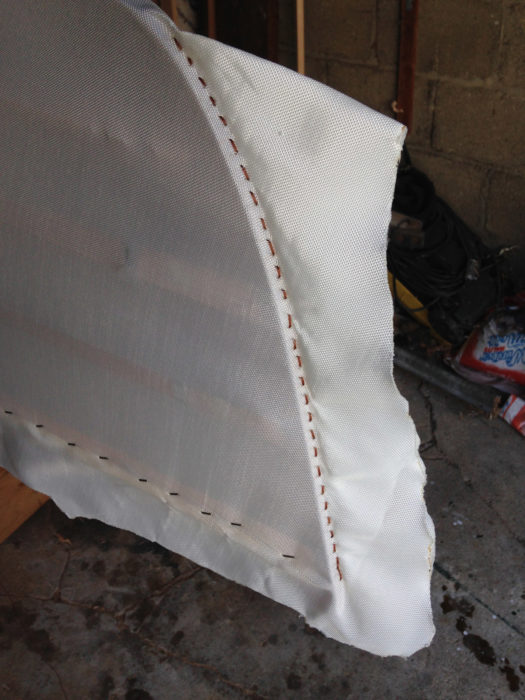
After the fabric has been tensioned along the stem and held by a row of stitching, the excess cloth is trimmed with a hot knife to keep it from unraveling.
Any waterproof coating you put on the outside of the fabric will bleed through to some extent to the inside. If you don’t mind a mottled appearance on the interior, let it bleed. Dave suggests painting the inside surface of the cloth before putting it on the frame; the fabric will still stretch and heat-shrink. Another option is to apply a thin coating of polyurethane construction adhesive (specifically, Loctite’s PL Premium) on the cloth’s exterior surface after it is on the hull and shrunk. The PL Premium does not bleed through, and it provides an additional protective layer on the cloth that helps to resist abrasion and puncture. This is the technique I used and would definitely do again if I were to build another SOF canoe.
 Tom Clarke
A crossing stitch sewn with two needles finishes the seam at the stems.
The PL Premium dried overnight, and left the surface bristly, like a two-day growth of beard. I sanded it lightly; it took just 5 minutes to do the whole hull. I then applied two coats of Rustoleum latex primer over the PL Premium, lightly sanding between coats. This was followed by four coats of Rustoleum latex white exterior paint, again sanding lightly between coats, resulting in an almost mirror-smooth skin.
Once the painting was completed, I turned the hull back right-side up and trimmed the excess cloth about 1/8” below the top of the gunwale. I fastened a 1/4″ by 1″ rubrail of western red cedar to the gunwale with 1/2″ stainless-steel screws every 10″, covering the staples and edge of the skin.
 courtesy of Tom Clarke and Paul Truszkowski
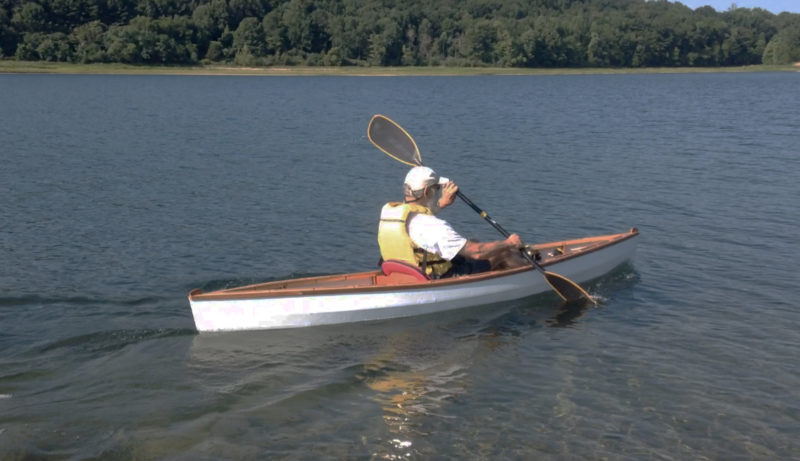
Construction time for the canoe is about 20 to 25 hours, according to Gentry. The foot braces, designed for kayaks, aren’t required, but improve a paddler’s connection with the canoe.
For the seat I ripped five oak slats to 3/8″ by 1-1/4″, soaked one end of each in water overnight, and then clamped them on the bench to lock in a curve at their forward ends. This curve prevents the slats from digging into your legs. Three additional slats serve as floorboards. All of the slats then got coated with oil and inserted in the slots cut into the frames. Even though the 3/8″ oak flexes quite a bit in both the seat and floorboards, there have been no fractures.
 courtesy of Tom Clarke and Paul Truszkowski
The polyester fabric is quite tough and unlikely to fail in normal use. While it is possible for a very sharp object to puncture the skin, damage won’t spread by tearing.
The plans don’t call for them, but I installed a set of adjustable kayak foot braces, bolting them to vertical struts set between the gunwale and the upper chine. The foot braces help provide power to the paddling stroke and keep the knees slightly bent, a position more comfortable than having one’s legs resting flat on the floorboards.
 courtesy of Tom Clarke and Paul Truszkowski
The Wee Lassie, according to the designer, is best suited for “exploring lazy rivers, hidden coves and backwaters or just tooling around the pond or lake.”
At the top of each stem, I drilled a 3/8″ hole used to tie down the canoe for cartopping. Where the gunwales rest on the car rack, I screwed four 4″ lengths of 1/2″ half-round brass to protect the wood from chafe.
I’ve built a number of boats, and building skin-on-frame was the most fun. At every step in the process, the boat makes steady, discernible progress toward completion, and the finish work isn’t a barrier. It’s certainly not like a stitch-and-glue build where 20 percent of the time is devoted to building and 80 percent of the time is devoted to sanding and applying layer upon layer of finish.
 courtesy of Tom Clarke and Paul Truszkowski
Skin-on-frame construction achieves the same light weight as Rushton’s original lapstrake canoe, but without the expense and complexity.
It’s a joy to have a boat that I can single-handedly onto the car rack, tie it down in two minutes, and drive without the limitations imposed by a trailer. And launching is just as easy: Throw it into the water, get in, and start paddling. The seating position is low and contributes to the good stability; I’ve felt very comfortable from the outset and have never felt at risk at any time.
 courtesy of Gentry Custom Boats
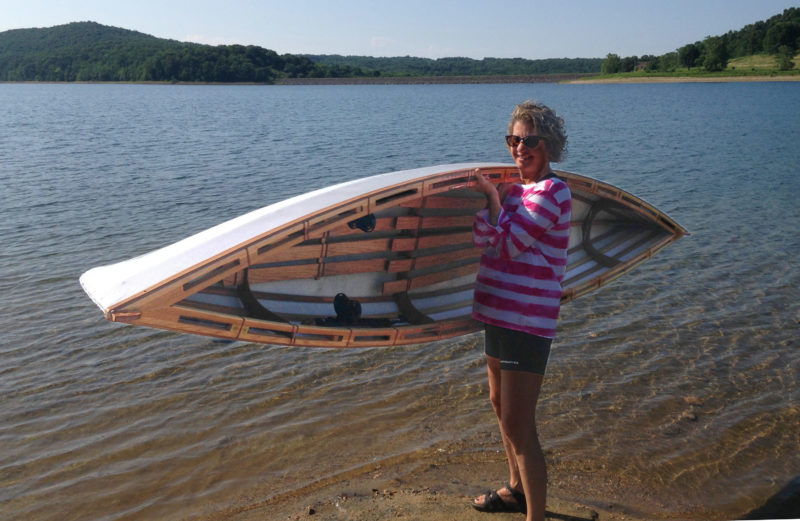
The original Wee Lassie was intended for use with a double-bladed paddle, but a single-bladed paddle can be useful in tight quarters or in discreetly observing wildlife. The transparent skin is an optional way of finishing the hull.
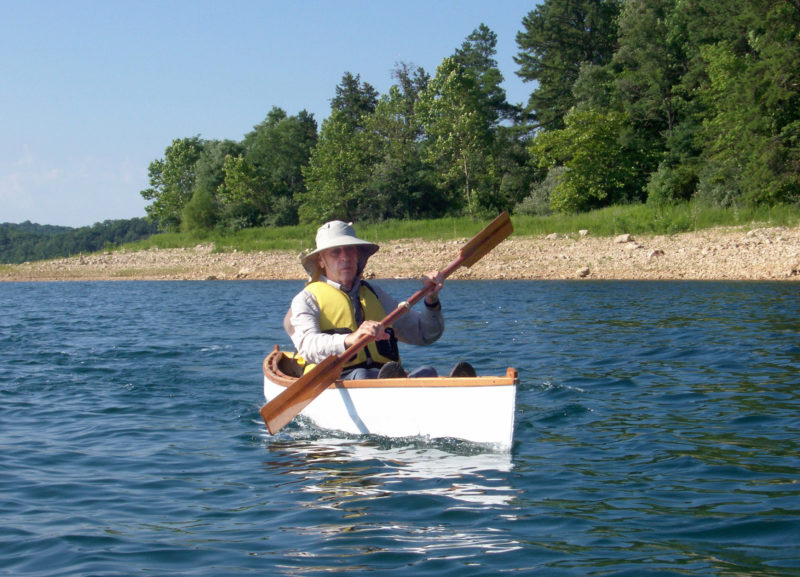
Paddling at a leisurely pace—for me, 3 mph—takes virtually no effort because the canoe is so light. My GPS reading was 3.7 mph average speed for an hour’s paddle and top speed was 4.1 mph, using a Greenland-style, double-bladed paddle.
 courtesy of Tom Clarke and Paul Truszkowski
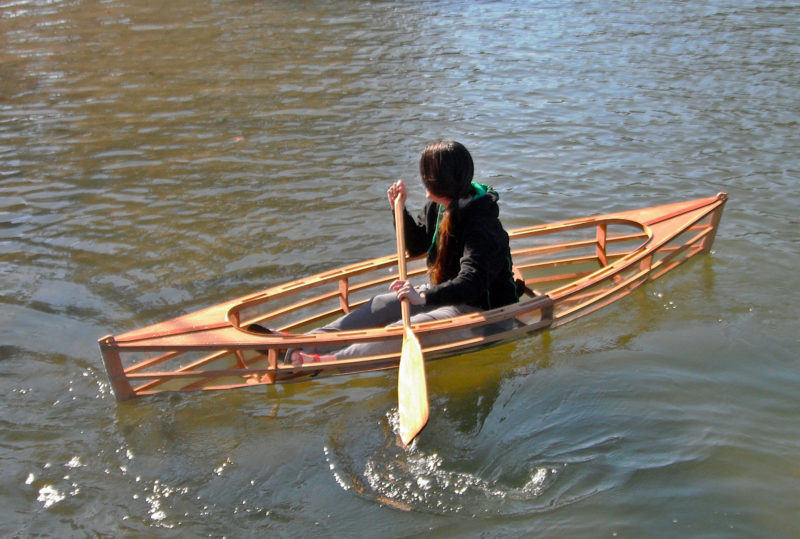
A double-bladed paddle, the type used for sea kayaks, is the best choice for general paddling in the Wee Lassie. It offers better course holding than a single-bladed paddle.
The canoe tracks very well and its bow yaws only a couple of degrees with each paddle stroke. It takes about 10 sweep strokes to do a 180-degree turn. Because it has no decks, I would not take it out in conditions rough enough to create white caps. However, it is so light and responsive; I’ve never shipped water from any motorboat wakes I’ve encountered.
The Gentry Wee Lassie is easy to build, store, and carry, and is an ideal boat for that spur-of-the-moment call: “Hey, let’s go out for a quick paddle.”![]()
Tom Clarke lives in New Jersey and does his boating in local North Jersey reservoirs, New York Harbor’s Upper and Lower Bays, and Barnegat Bay. He has been around boats his entire life. His father was a boatbuilder and Tom had lots of boats while he was growing up and lived on a boat for a couple of years. He has built a number of boats and writes a blog—TheOarCruising.Blogspot.com— primarily focused on oar-powered small boats that can be cruised in.
Wee Lassie Particulars
[table]
Standard length/10′ 6″
Beam/27″
Weight/ around 19 lbs
Capacity/200 lbs
[/table]
Plans ($55) and kits ($400) for the Wee Lassie are available from Gentry Custom Boats.
Is there a boat you’d like to know more about? Have you built one that you think other Small Boats Monthly readers would enjoy? Please email us!

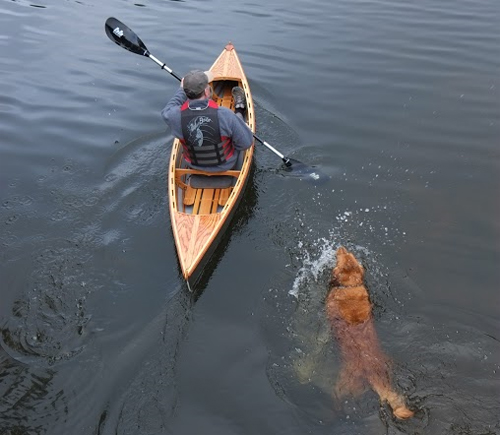
I love this little boat and so does my dog, Cody!
Hi James. I like the way you did the floor boards, looks really nice and provides dry place behind the seat for backpack/whatever.
Thank you. I wanted space for my Adirondack pack basket!
Enjoyed the article and pictures; lots of good construction tips.
I’m curious why the you and the designer decided to lengthen
the boat by 12″.