 Randall Davie
Four blades on a single arbor increase accuracy and dramatically shorten working time.
When I was getting ready to build a cedar-strip kayak, just the thought of ripping about 900′ of 1/4″ x 3/4″ cedar strips was daunting. Pushing 18′ planks through the tablesaw 50 times was not how I wanted to spend my time—I’m rather impatient and like getting jobs done quickly. I started playing with the idea of gang-sawing, putting more than one blade on my tablesaw to make multiple cuts with each pass. Using four blades to make just 13 passes for the kayak strips I needed sounded a little more reasonable.
A full-sized saw with an arbor long enough to take a stack of blades and spacers is required to do this. I have a 10″ tablesaw that can accommodate a stack of four blades with spacers. I didn’t need 10″ blades to cut the 3/4″ stock I needed for strips, so I bought four identical 7-1/4″ narrow-kerf carbide-toothed blades. The smaller blades are cheaper and, being lighter, don’t strain the motor when starting up. I don’t recommend using more than four blades; it would make for an awful lot of material for your tablesaw to remove.
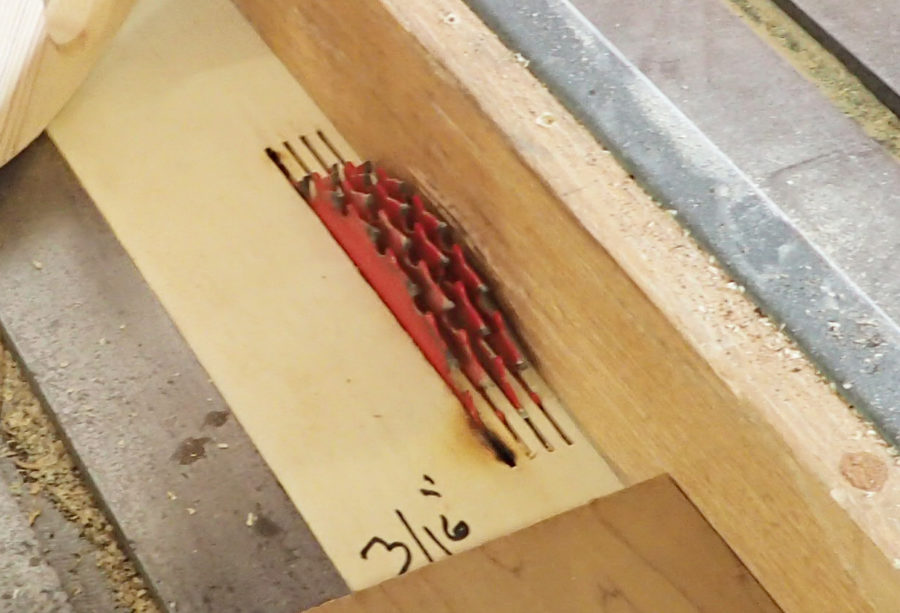
The three plywood spacers between the blades needed to be thicker than the strips I would be cutting to make up for the difference between the kerf cut by a blade and the thickness of its body. A 5/16″ plywood spacer gave a strip just shy of 1/4″.
 Randall Davie
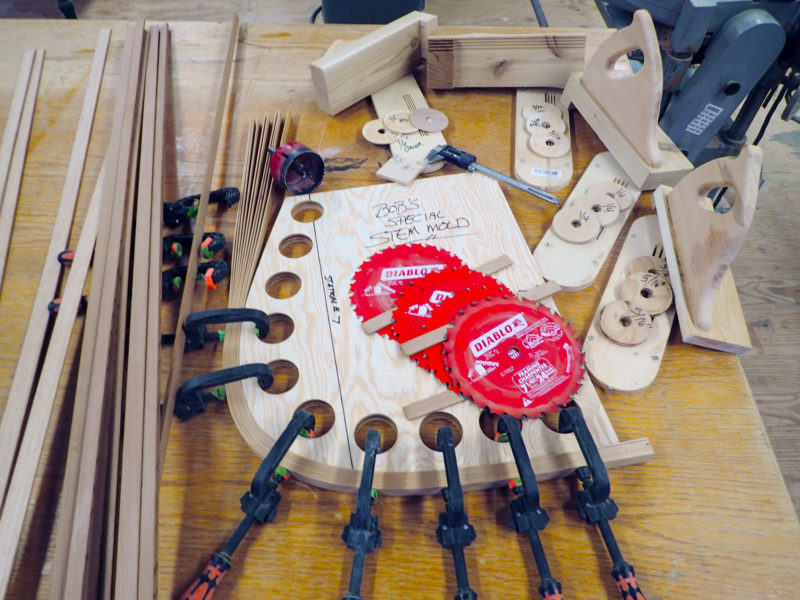
The author’s collection of gang-ripping pieces surround a plywood mold for the stem of a canoe. The strips for the stem were cut using 1/8″ mahogany plywood spacers between the blades. The ten strips were thin enough to bend cold around the form, and added up to the 3/4″ thickness.
I can cut strips of any thickness, four at a time, by varying the thicknesses of spacers. Any high-quality panel stock—MDF, plywood, acrylic sheet—can be used for spacers. A hole saw and a drill press are nice for making the spacers but not absolutely necessary.
 SBM
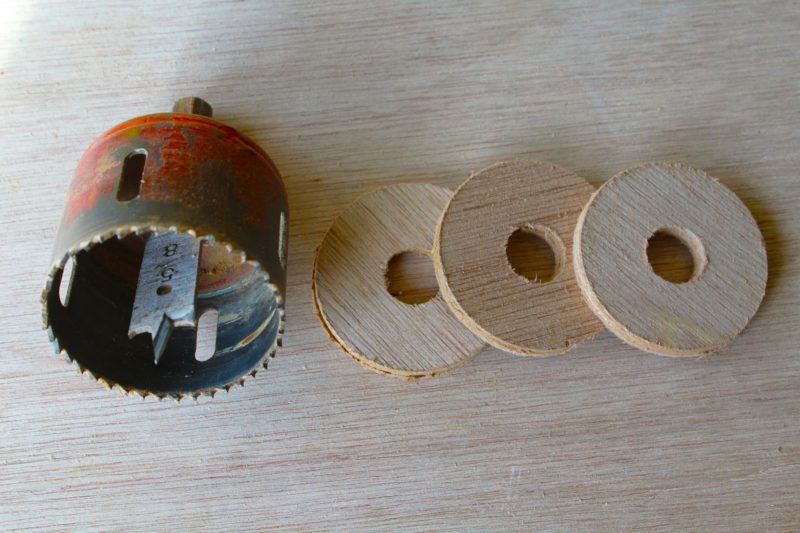
SBMIf you want to set up for a lot of different strip thicknesses, this hole saw modified to take a 5/8″ spade bit will make perfect spacers quickly. The shaft of a spade bit may be too large to replace the usual 1/4″ pilot bit in a hole saw; drilling the hole saw to fit is the quickest way to make this one-step tool. Shorten the shaft to fit and grind a small flat on on it for the set screw to bear against. Drill from both sides of the spacer stock to eliminate tear-out.
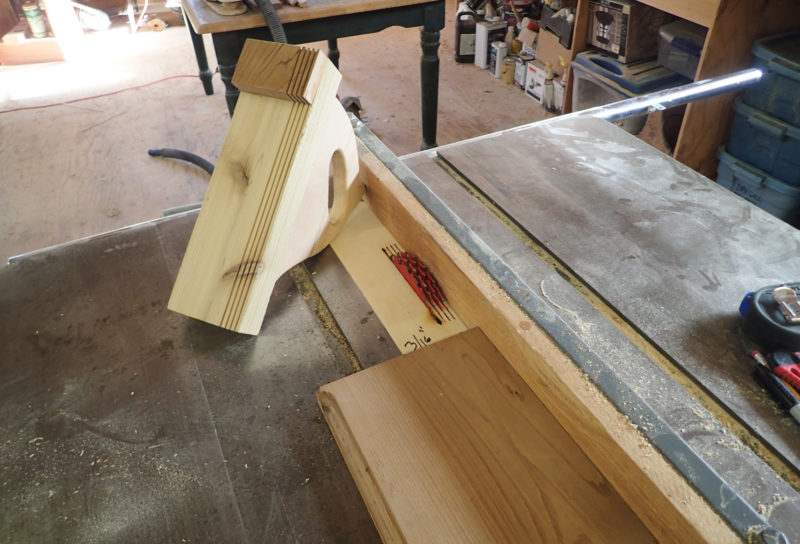
You’ll need to replace your saw’s table insert to accommodate the multiple blades. I make zero-clearance inserts of 1/2″ birch plywood and #6 x 3/8″ round-head screws, one in the tail to prevent kick-up and four on the bottom for height adjustment. I mark my sets of spacers and their matching inserts according to spacer thickness and the thickness of the strips they produce.
 Randall Davie
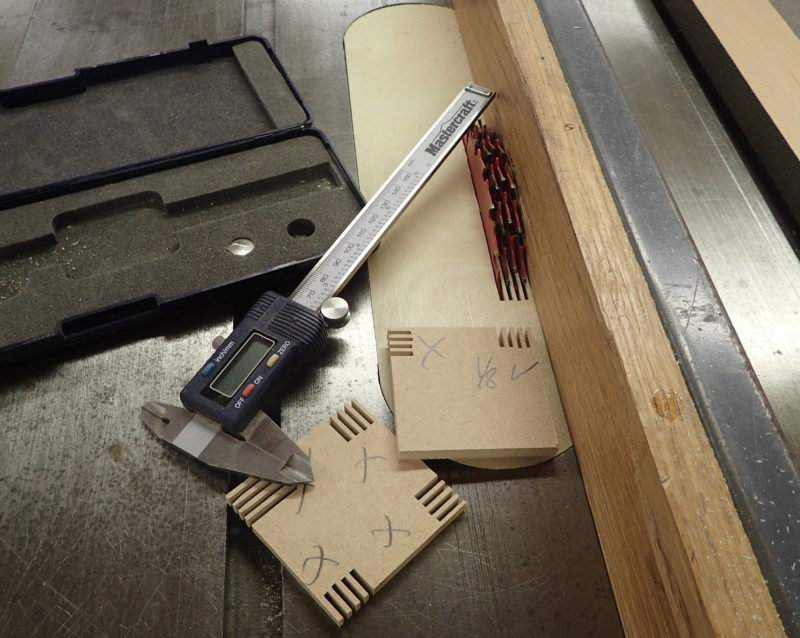
Each set of blades spaced for a particular thickness of strips requires its own push block and tablesaw insert.
A purpose-built push block clears the strips all the way through the blades with almost no chance of kick-back. A thin strip can shoot back like an arrow, so even with the push block it’s always best to stand to the side.
 Randall Davie
The author uses a scrap of 1/4″ MDF (medium density fiberboard) for set-up. A 3″x3″ piece gives him four tries at setting the fence to make the strip equal in thickness to the others cut in the same pass. For a laminating project, accuracy is not critical, but if you want to mill strips for a strip-built hull, set-up is crucial. A variance of 1/100″ doesn’t sound like much, but it works out to a lot of extra sanding.
With some careful setup of the fence I’m ready to rip. I found the gang-sawing process produced more consistent results than using a single blade. With any setup on the tablesaw, accuracy and safety are the secrets to success. I hope this saves you time, materials, and fingers. Work safe.![]()
Randy Davie is a certified carpenter and tile setter living near Powell River, British Columbia, who often goes to work by boat. He has built several boats and intends to build many more, enjoys sea kayaking and canoeing, and happily notes he has “an awesome shop and an awesome wife.”
You can share your tricks of the trade with other Small Boats Monthly readers by sending us an email.


What hp table saw for this setup? I only have a 1-1/2 hp contractor style saw and am guessing it wouldn’t be up to this task.
1-1/2 hp is plenty,but you need an arbor long enough; most direct-drive saws can’t take a dado set. I think my arbor is around 1 3/8″. I hope that helps.
Definitely worth a try. I built two wood-strip canoes cutting every strip individually. I need to make some lams for some mahogany thwart knees and this looks like the way.
Steve, I bet you’d be ok. I’ve done 7/8″ dados on a similar saw, and that’s removing more wood per pass than this setup would.
Very cool. Although I don’t have a molder, I can see setting up a gang of 4 with saw-kerf-width spacers to cut concave on one face of the board and another molder head to cut the convex shape on the other face before ripping the strips. Four complete strips in 3 operations!
Thanks, Randall. Most of us do plenty of laminating these days, and your idea is wonderful. I will definitely use it. My table saw is a 40-year-old Craftsman 10″ I bought for a couple of hundred and have been using heavily ever since. It has an arbor long enough. Excellent article.