 photographs by the author
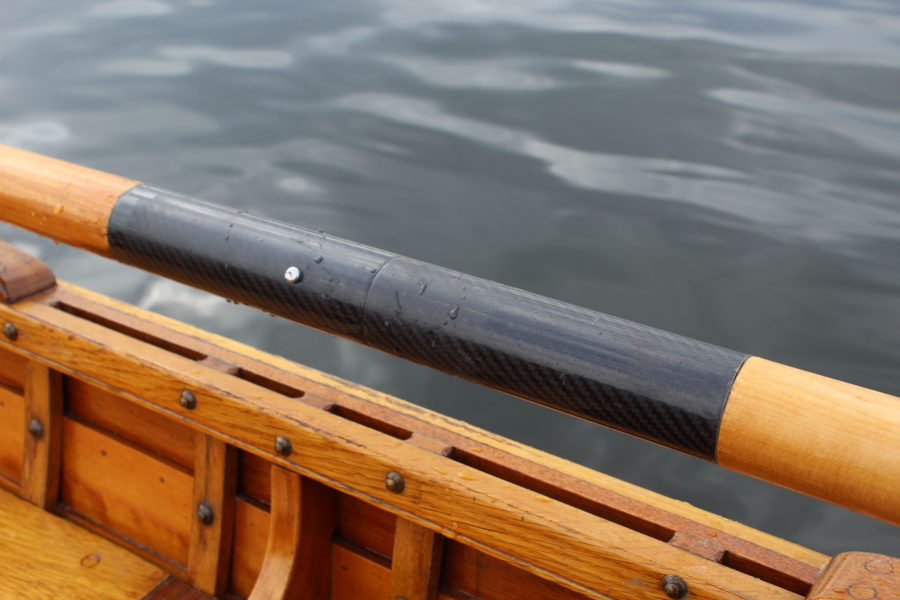
The carbon-fiber ferrule weighs just 9 3/4 ounces.
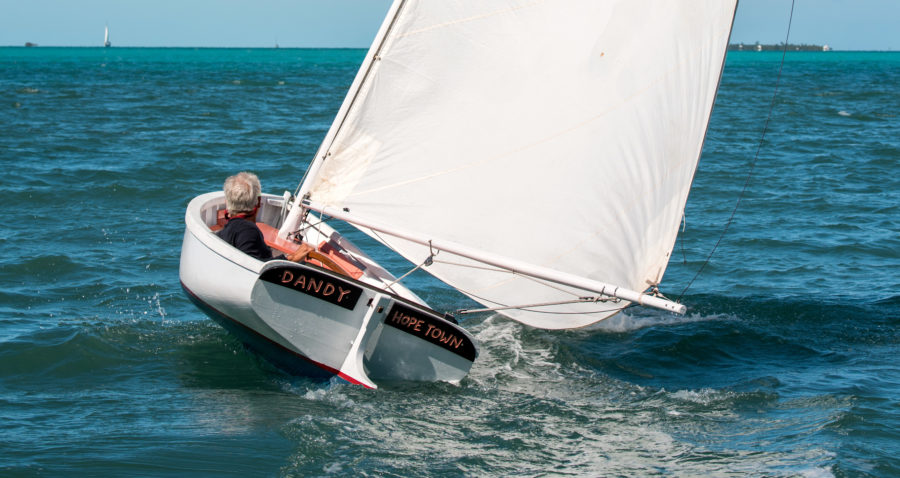
Most of my boats are outfitted for rowing, and while I always have a pair of oars aboard, they’re often in the way when I’m sailing, motoring, or at anchor. Duckworks offers a solution: carbon-fiber ferrules to make sectional oars, which are much easier to stow when they’re not being used.
The ferrules are cylindrical and work best on oars with cylindrical or minimally tapered looms. All of the oars that I’ve made have tapered looms and carry an oval cross-section through much of their length, so they were not good candidates for the ferrules, but I was given an old pair of commercially made 10′ oars that were. They’re Sitka spruce, made by the Lister Brothers in Vancouver, British Columbia. With a bit of trepidation—I’d seen a pair of Lister Brothers oars for sale on an antiques website, priced at $1,500—I put those oars in my chop saw.
If you want the sections to be equal in length and both fit in the smallest possible space, don’t cut your oars in half—you’ll wind up with one section 3-1/2″ longer than the other. To make the sections of equal length, find the midpoint of the oars, and make the cut 1-3/4″ to the handle side of that mark. Then put the longer male side of the ferrule on the handle section and the female side on the blade section. (That puts the mating surfaces of the ferrule farther away from the oarlock where they’re subject to less strain.)
The 14″-long ferrules will add 7″ to the overall length of the sectioned oar. The additional length made my 10′ oars a better fit for the boats I’d be using them for, but if you want your oars to remain the same length, cut the oars as noted above and then trim 3 1/2″ from each end.
If your oars have a diameter less than 45 mm, you’ll have to add some thickness. The Duckworks website has a note from one customer who used wraps of fiberglass and epoxy to fill the gap. The looms of my oars have a diameter a bit larger than the 49mm outside diameter of the ferrule and needed to be trimmed to fit inside diameter of 45 mm, or 1 25/32″. I needed to reduce the diameter of the looms to take the ferrules. To do that I made a cradle to the hold the oar sections on my tablesaw: With the blade of my tablesaw at 45° I cut a groove along the face of a 2 x 4. I then set the fence of my tablesaw 3 1/2″ from the far edge of the blade (the length that gets inserted into the ferrule halves). With the blade lowered, I clamped the 2×4 across the table and, with the saw running, cranked the blade up through the bottom of the 2×4 until it cut into the groove.
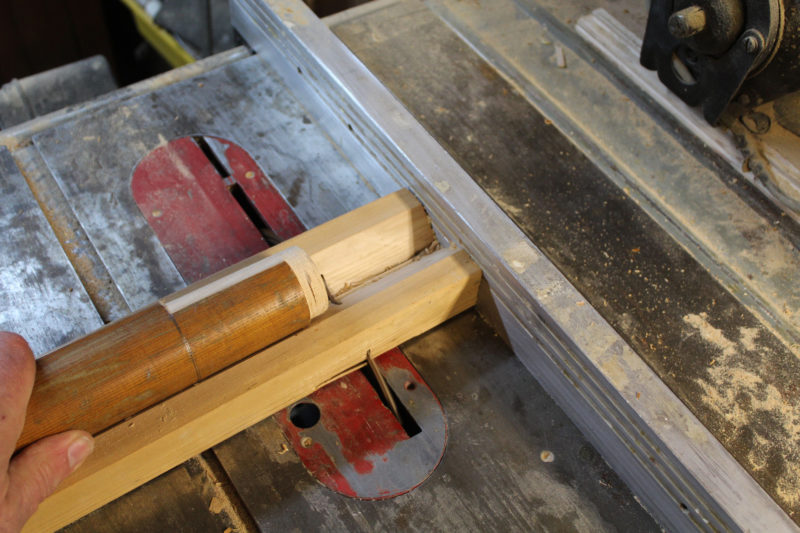
Repeatedly sliding the loom across the tablesaw blade trimmed it down to size. I got less tearout at the shoulder by making the first cut with the end butted up against the fence and making a full rotation of the loom.
With an oar section resting in the groove, I raised the blade in small increments, cutting just the end of the loom until I got a tight fit in the ferrule. With the blade set to cut just enough wood away, I butted the loom against the fence, rotated the loom to cut the shoulder, then slid the loom back and forth across the blade rotating a few degrees at a time.
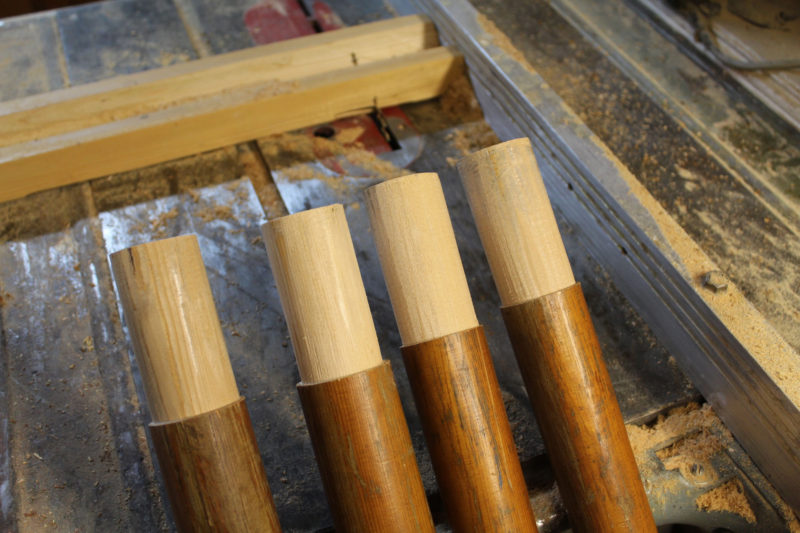
Testing the fit in the ferrules and light touch with a fine-toothed rasp finished the trimming.
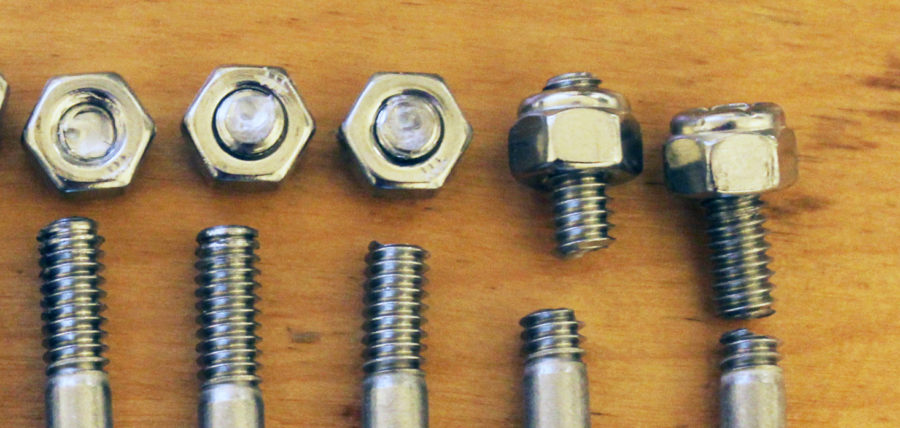
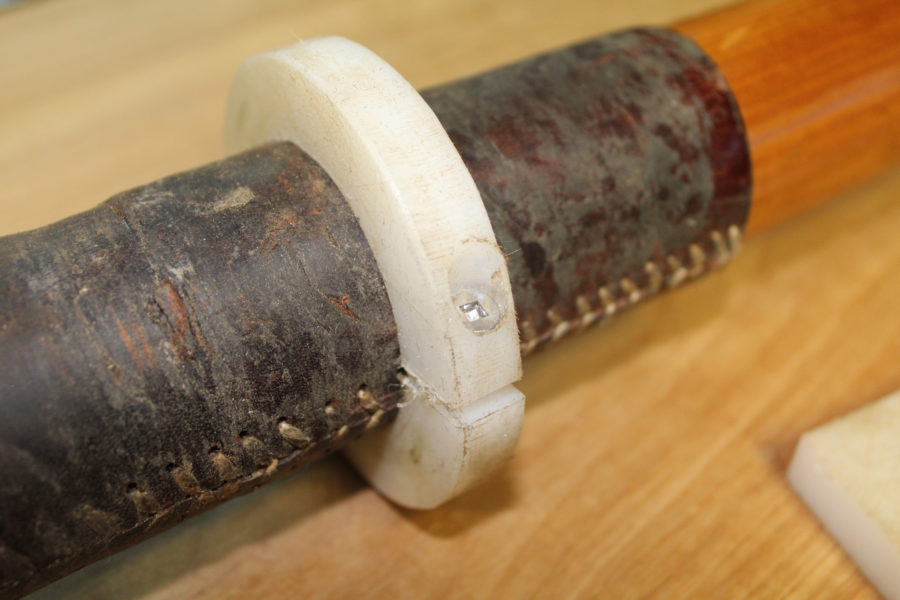
You should do a dry fit before gluing the ferrules in place. If the button for the ferrule’s latch doesn’t pop up through the hole, you might need to trim a bit off the loom that fits the female half of the ferrule. Don’t take a rattail file to the button’s hole to enlarge it; you don’t want to give that a loose fit.
When you’re ready to assemble the pieces, paint epoxy on the ferrules and the sawn ends and newly trimmed surfaces the oars. Be stingy with the epoxy when coating the female side of the ferrule: A thin film on the inside surface of the ferrule is all that’s required; any excess will just get pushed ahead of the end of the loom and need to be completely removed. Clean up any epoxy that will cause problems joining the oar sections later. Set the oar sections with the ferrules up while the epoxy is curing to avoid any drips fouling the joint. After the epoxy cures, you’ll be ready to row. An easy way to assemble the sectional oar it to rest each half on the gunwale—to take the weight—and slide the ferrule ends together in the middle of the boat.
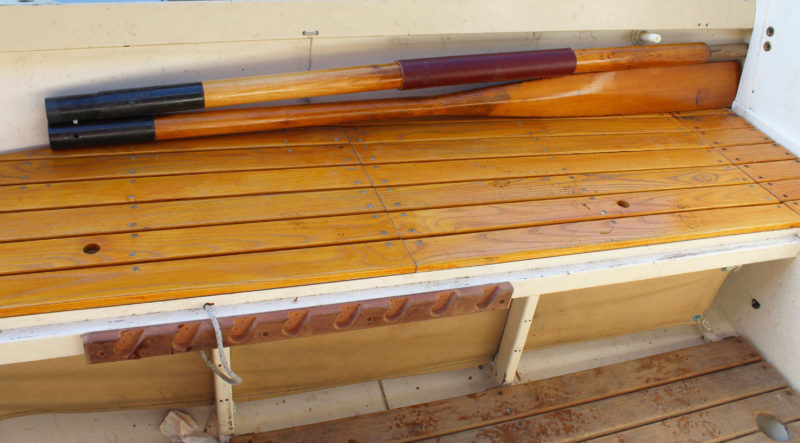
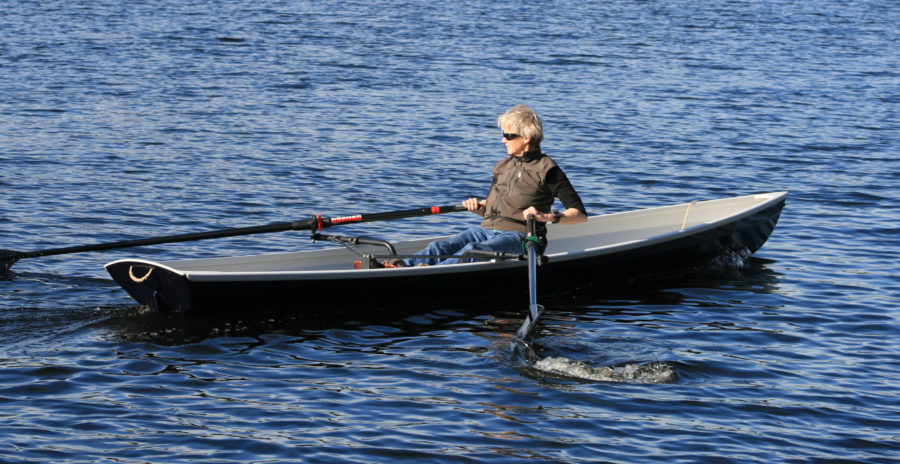
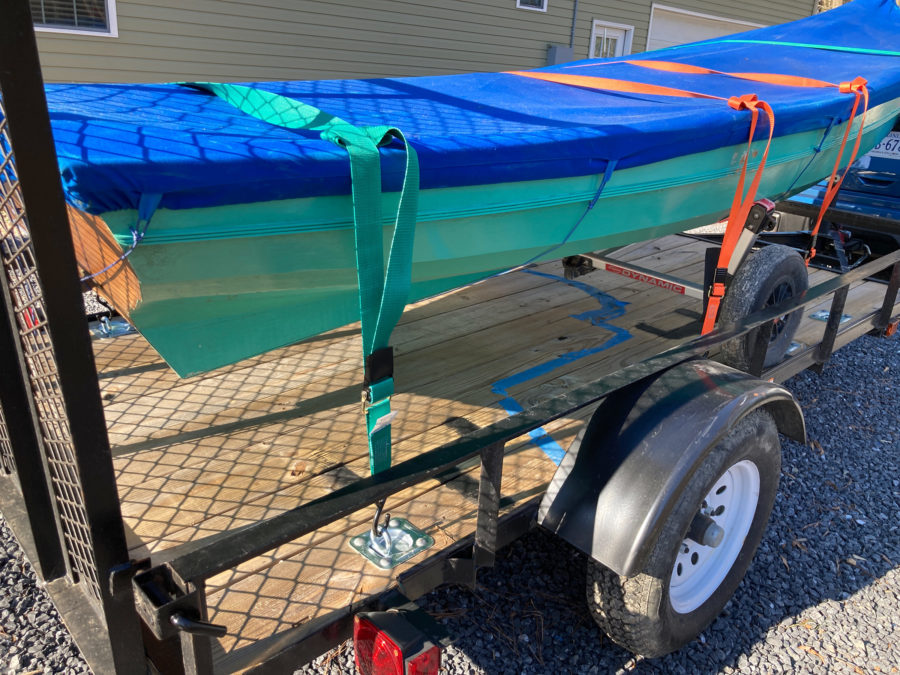
I’ll be able to stow the oars tucked along the sheerstrake or against the uprights supporting the side benches. Note that the oar sections are of equal length, but the connections with the ferrules (and the hidden cut ends of the loom) are staggered.
The sectional oars performed just as well as they did before being sawn in two. The ferrule is tight and takes the strain without any movement or complaining. With the halves of the oars each at 5′ 3-1/2″, I had lots of places to stow them on the boats they are meant for.
A word of caution: The earliest sectional paddles I used, both in fiberglass and in carbon fiber, had the same type of ferrule and over the course of several years of use and wear they tended to loosen up. Newer kayak-paddle ferrules solved the problem with joints that used compression to hold the two paddle halves together and take up any slack that might develop over time. The Duckworks oar ferrules are substantially larger and have a much broader area of contact between the two halves, so I suspect they’ll be very slow to wear and loosen. I’ll use one-piece oars when I intend to do a lot of rowing, but I’d still carry the sectionals for backups. Saved for use when a one-piece oar breaks or goes missing, the motor conks out, or the wind won’t fill the sails, the sectional oars will have a good tight fit for many, many years. Best of all, while they’re waiting to save the day, they can be tucked somewhere out of the way.![]()
Christopher Cunningham is the editor of Small Boats Monthly.
The carbon-fiber ferrules are manufactured for and available from Duckworks Boatbuilder’s Supply. The set of two is priced at $59.
Is there a product that might be useful for boatbuilding, cruising or shore-side camping that you’d like us to review? Please email your suggestions.

Got to say, my oars are never in the way. Neither are rigs when they are down. I follow the Norwegian way and use them as “bowsprits”. I have a convenient strap on RANTAN to hold everything in place and my skiff doesn’t need a thing with butts under the thwart and blades forward. The Delaware boat sharps thought about this and oars are tucked under the side decks, blades forward, handles behind the metal deck support stanchions and a bit of marlin to lash them in.
I also stow oars and spars as bowsprits, and over the stern as boomkins, but I do like having sectional oars that have a permanent place in the boat when it’s in the garage, on the road, or afloat.
I had to partially pare down the lower half of some hardwood doweling to fit the hollow center of some bird’s mouth oars to create oar handles for them much like Chris did to fit the ferrule. I pretty much used the same table-saw technique shown here to reduce the diameter of the portion to be inserted, but with a regular crosscut sled. The sled and the runners that track in the channels in the table kept everything square and I think I would feel safer with a sled than I would have using the jig shown here if i had to choose between the two, but we can’t see how its fastened down. With longer pieces like oars, I would think one would have to be extra careful about twisting the jig or the piece itself on the blade and creating a potential kickback.
I got a bit smarter on the second set of handles i did that way, i.e., I cut a 20″ piece of dowel, pared down the middle 8″ to roughly the diameter I wanted, then cut the piece in half to create the two 10″ handles I needed. That meant I could hold the piece securely in the sled on both sides of the blade and my both my hands were always well away from the blade compared when I started with a 10″ piece.
I also quickly cut a lot of parallel grooves around the dowel the second time around…. and then broke out most of the material between them with a chisel back at the bench versus dragging the piece back and forth across the table-saw blade and constantly adjusting the blade height.
I’m not sure what the safest way to use a table saw in this way is.
The 2×4 I used to cradle the oar sections was clamped to the wing of the table saw. That pressed-steel extension of the saw’s cast table was awkward to clamp to until I screwed a 2×6 to the bottom side to fill the space and provide a solid footing for clamps. I used two 6″ cast-iron C-clamps to hold the 2×4 in place and tightened them as hard as I could. I checked for play in the 2×4 before I raised the saw blade into it. I was confident that it wasn’t going to bind, but Mike is right, the arrangement could be risky if not set up rock solid.
I needed to remove only about 1/16″ of material, so sliding the soft spruce of the loom sideways across the carbide-toothed blade went quite smoothly. I’ve used the sideways approach to the saw blade for making crown molding and marimba keys and the technique is not something to rush. Taking a little bit of wood with each pass is the way to go. If you’re flexing the blade sideways you’re taking too much wood too fast. Push sticks can keep your hands at a safe distance, and don’t stand downrange of the blade. One of my marimba keys has a little groove on the bottom to remind me of how fast a piece of wood can fly off a table saw.
Great article for the state of Virginia where oar power is the only mode left for free use of your boat. If I put the electric outboard on, due to a law passed the same year I got the boat, it needs to be registered and hull numbers displayed. Until then electric power was encouraged and registration free.