I prefer to anchor out when we are camp-cruising, but with Alaska’s 20′ tide range that isn’t always an option in some of the shallower coves. Boats with flat bottoms wide enough to keep them upright will ground comfortably on a falling tide, but our Caledonia yawl, with its narrow keel, will come to rest heeled over. This is where beaching legs, also known as sheer legs, come in handy. This decidedly low-tech gear is just the thing to keep your boat upright on the beach, allowing the continued use of your boat as a base camp between tides.
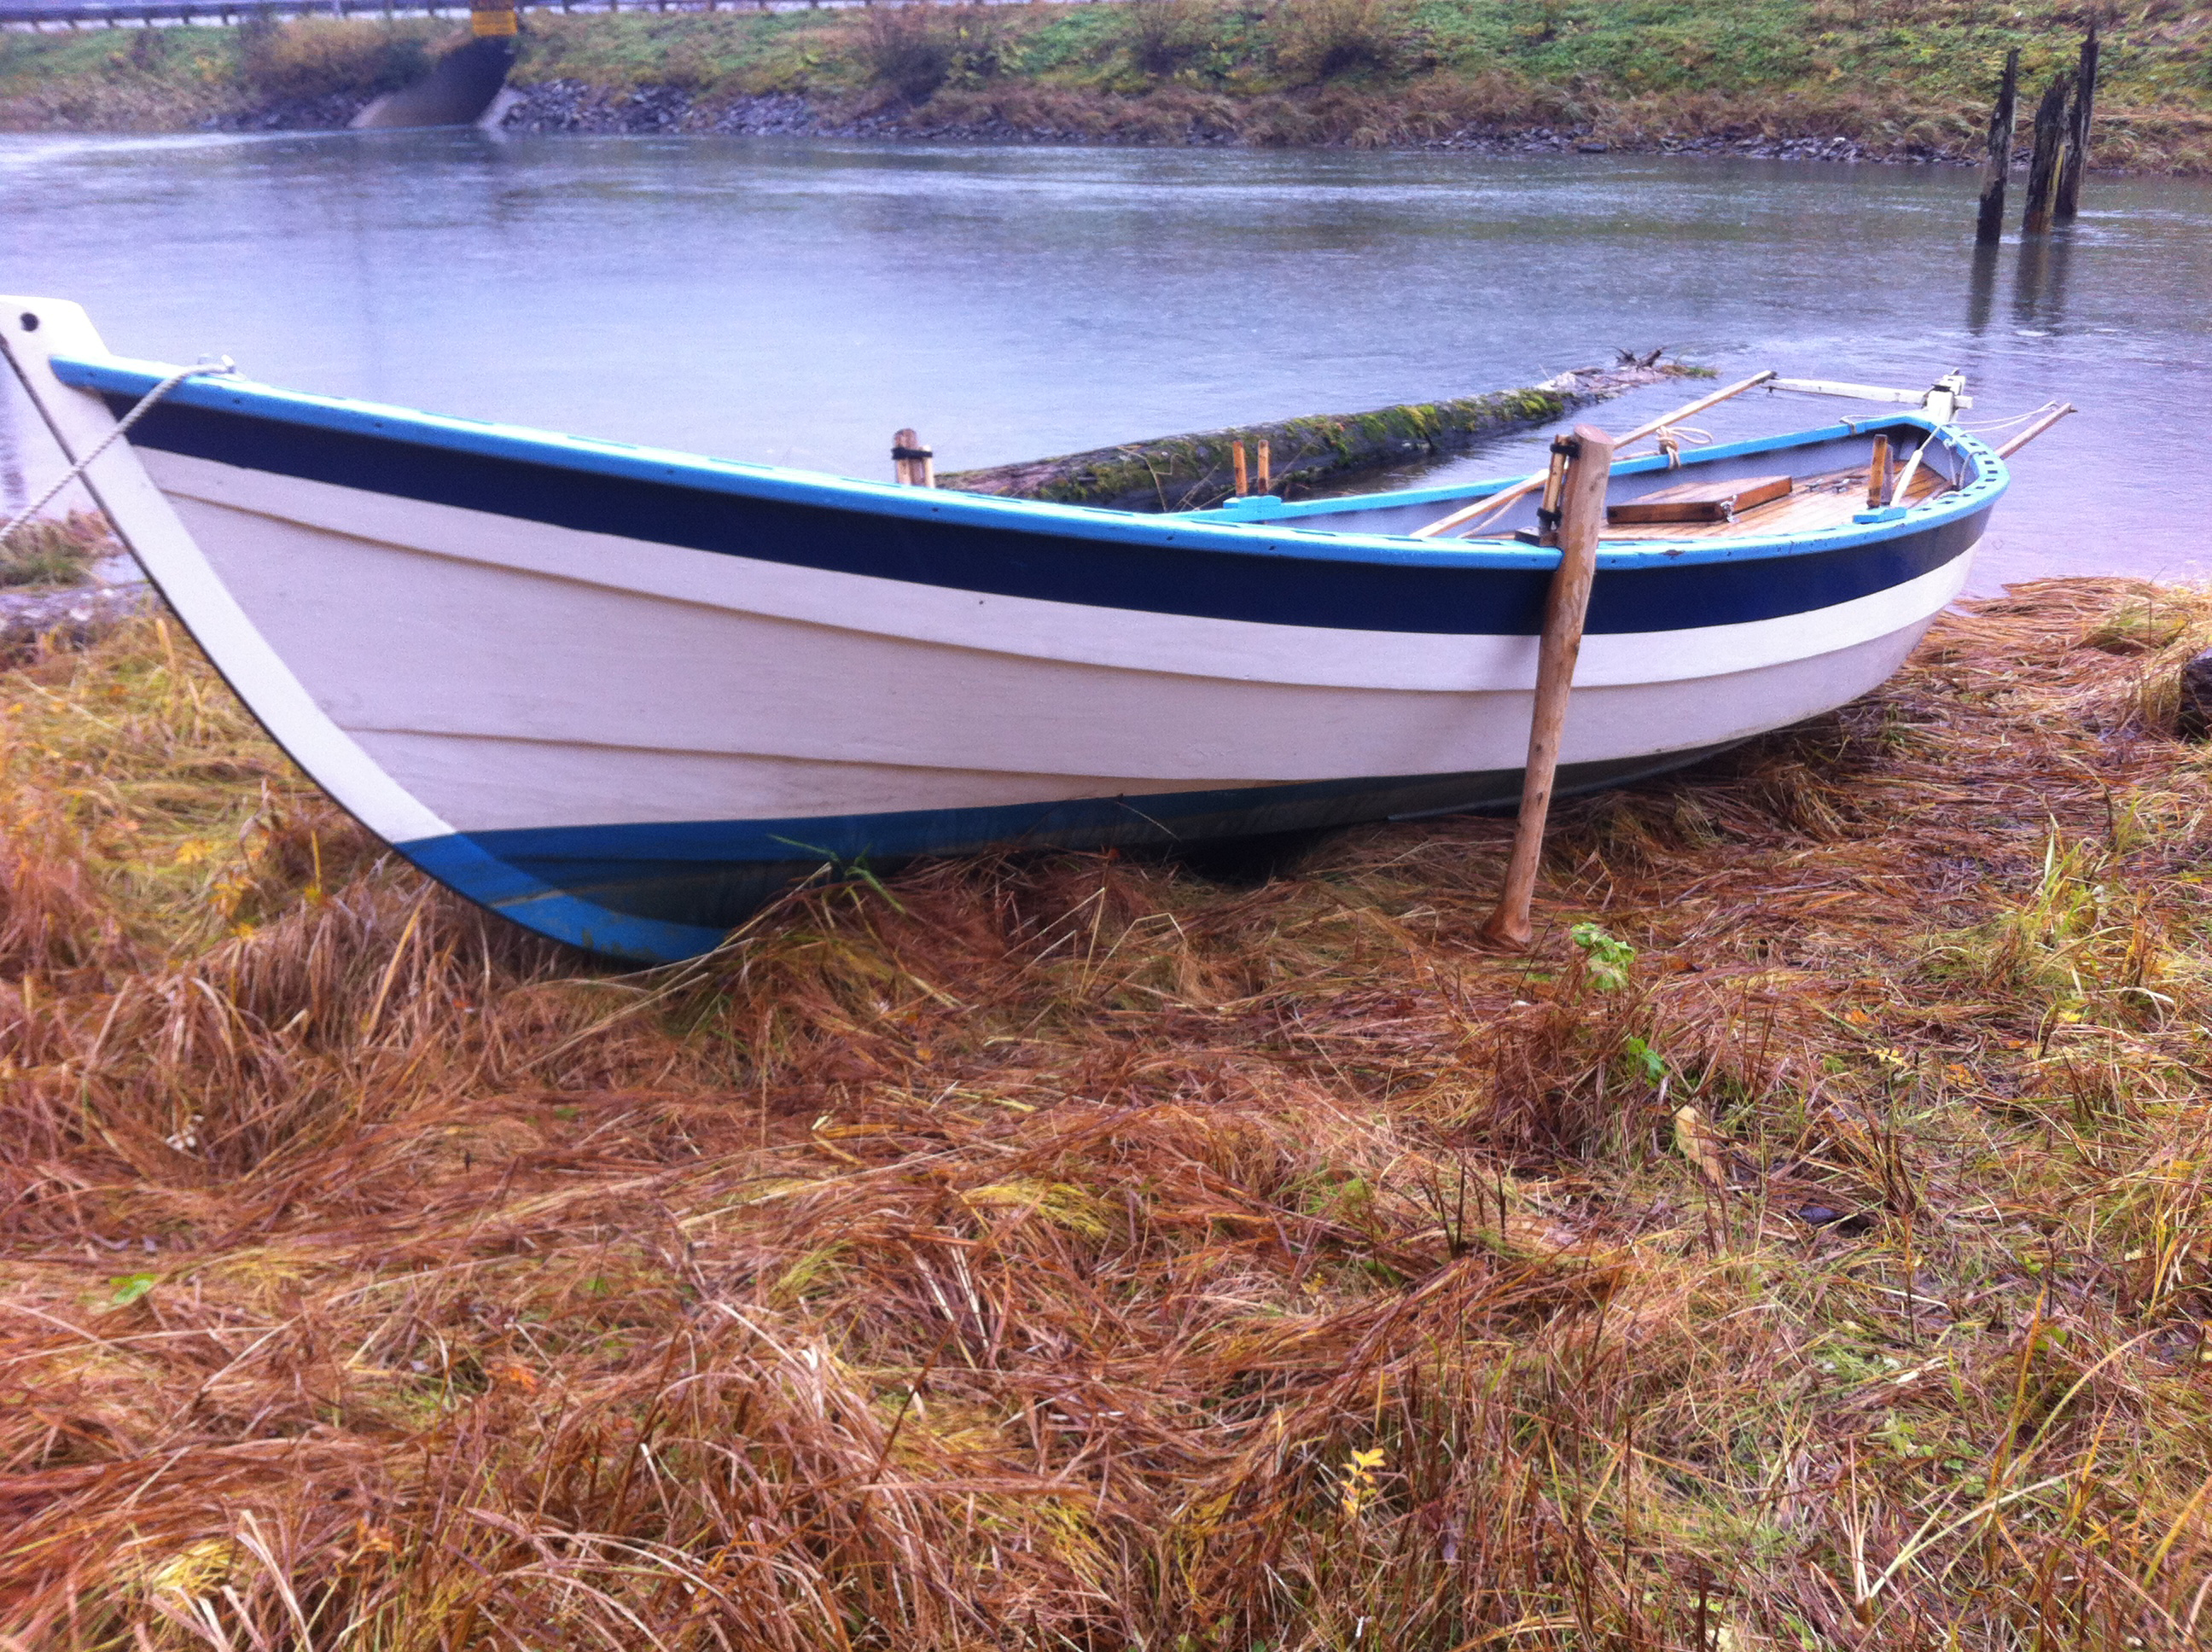
Without her beaching legs, this Caledonia yawl would be resting on her planking and heeled at about 10°, the angle of her deadrise. With the legs she’s level, supported by her keel and gunwales and fit for habitation.
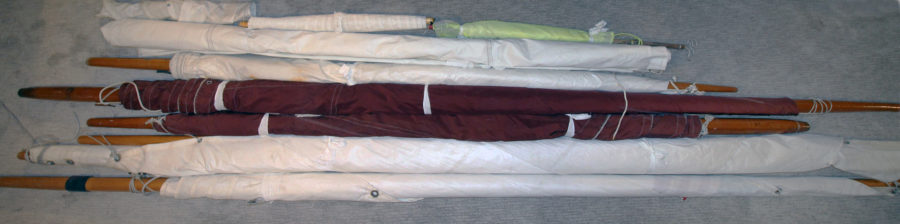
Captain Ahab’s spares? The author’s yellow cedar beaching legs were a driftwood solution to the problem of sleeping aboard on a falling tide that would leave the boat high and dry in the middle of the night.
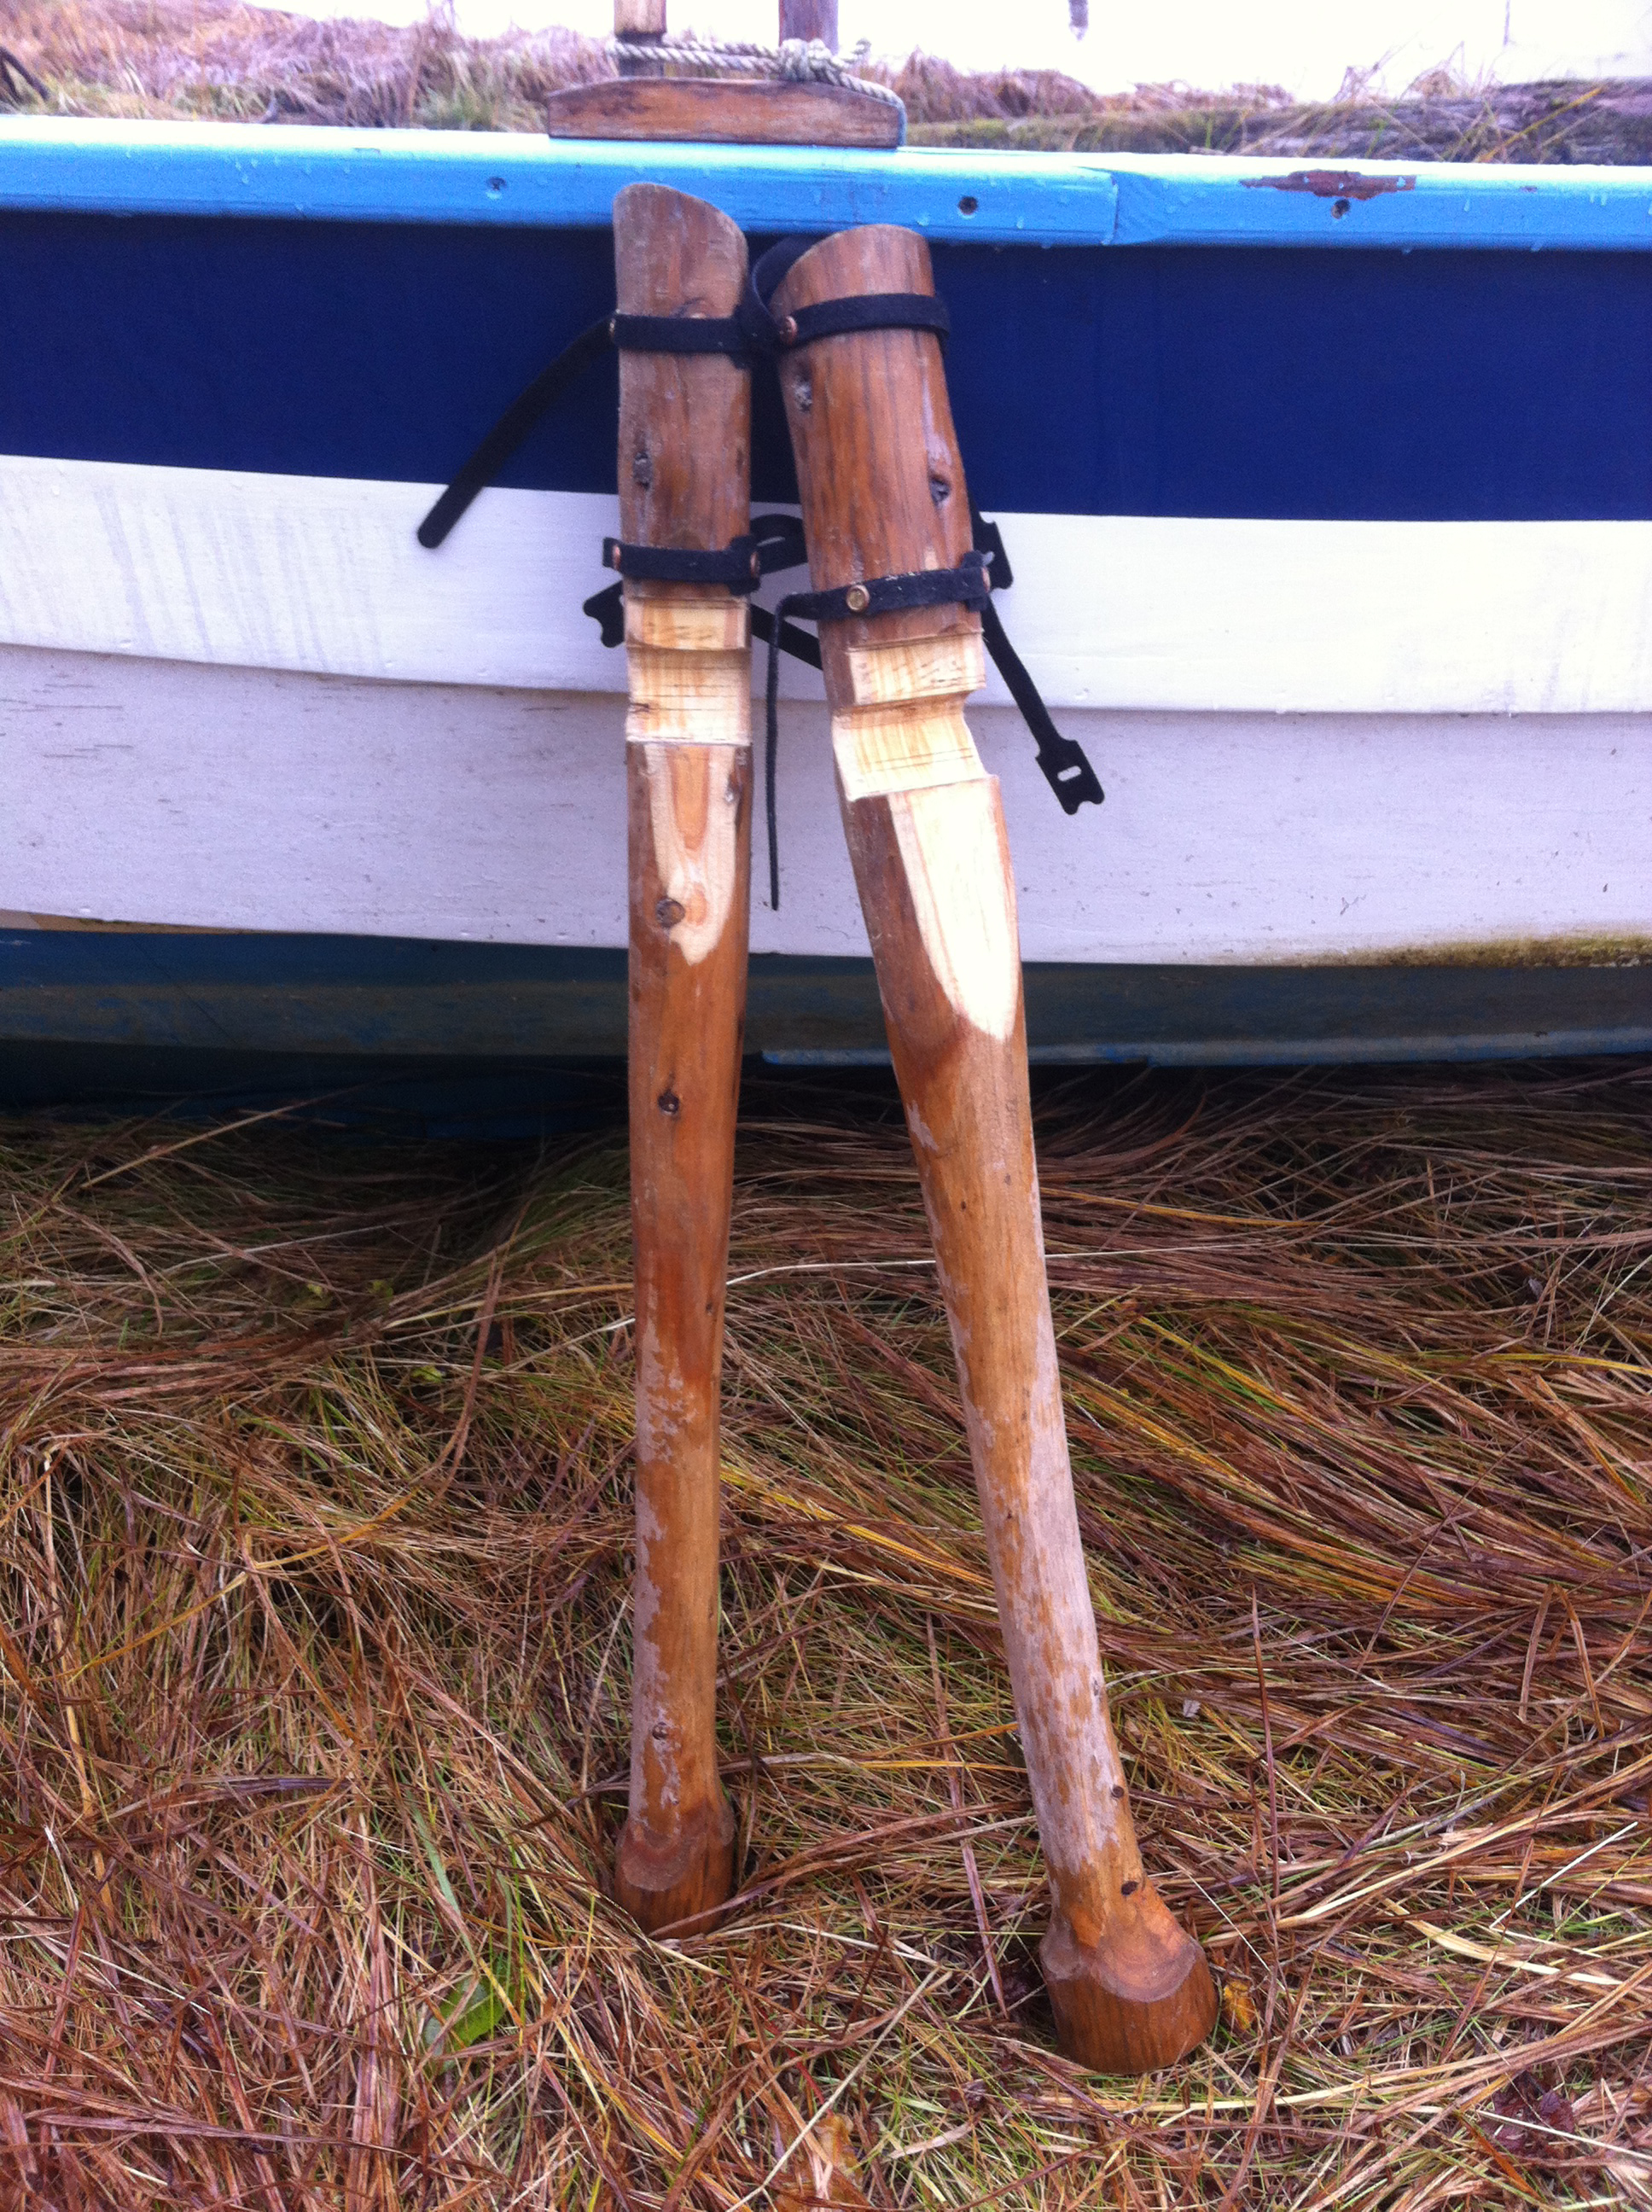
Although it would be tempting to make an adjustable set of legs, the sort used on larger boats, this isn’t necessary. I made a simple set from an Alaskan yellow cedar pole I salvaged from the beach on one of our camping trips when it became obvious that we were going to spend the night high and dry. They worked so well, I brought them home and refined them a bit.
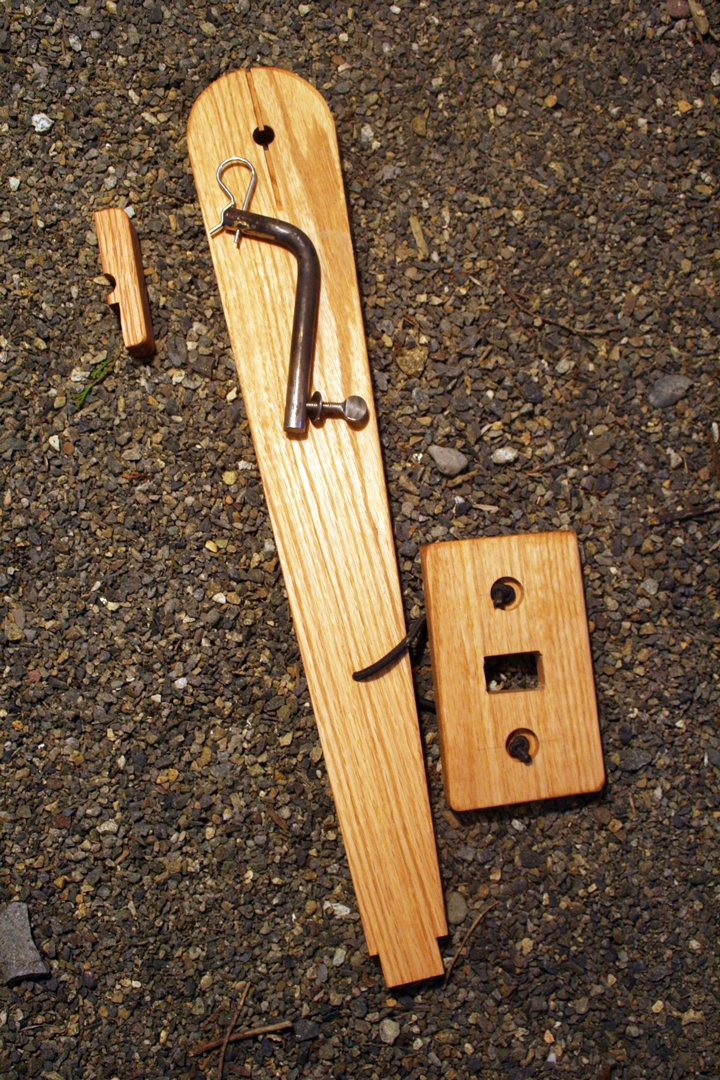
The length of the legs was determined by holding the boat level on a flat beach and measuring from the bottom of the outwale to the ground. To that I added 12″, so there would be enough above the rail to secure the legs to the boat. The legs are notched to tuck under the outwale, providing a good strong contact point with the boat. It is better to err on the short side from foot to notch, since you want the keel taking most of the weight. Mine are then tapered toward the foot, which was also left wide for a nice bearing surface on the ground. If the ground is especially soft, a flat rock or a slab of driftwood will keep the foot from sinking.
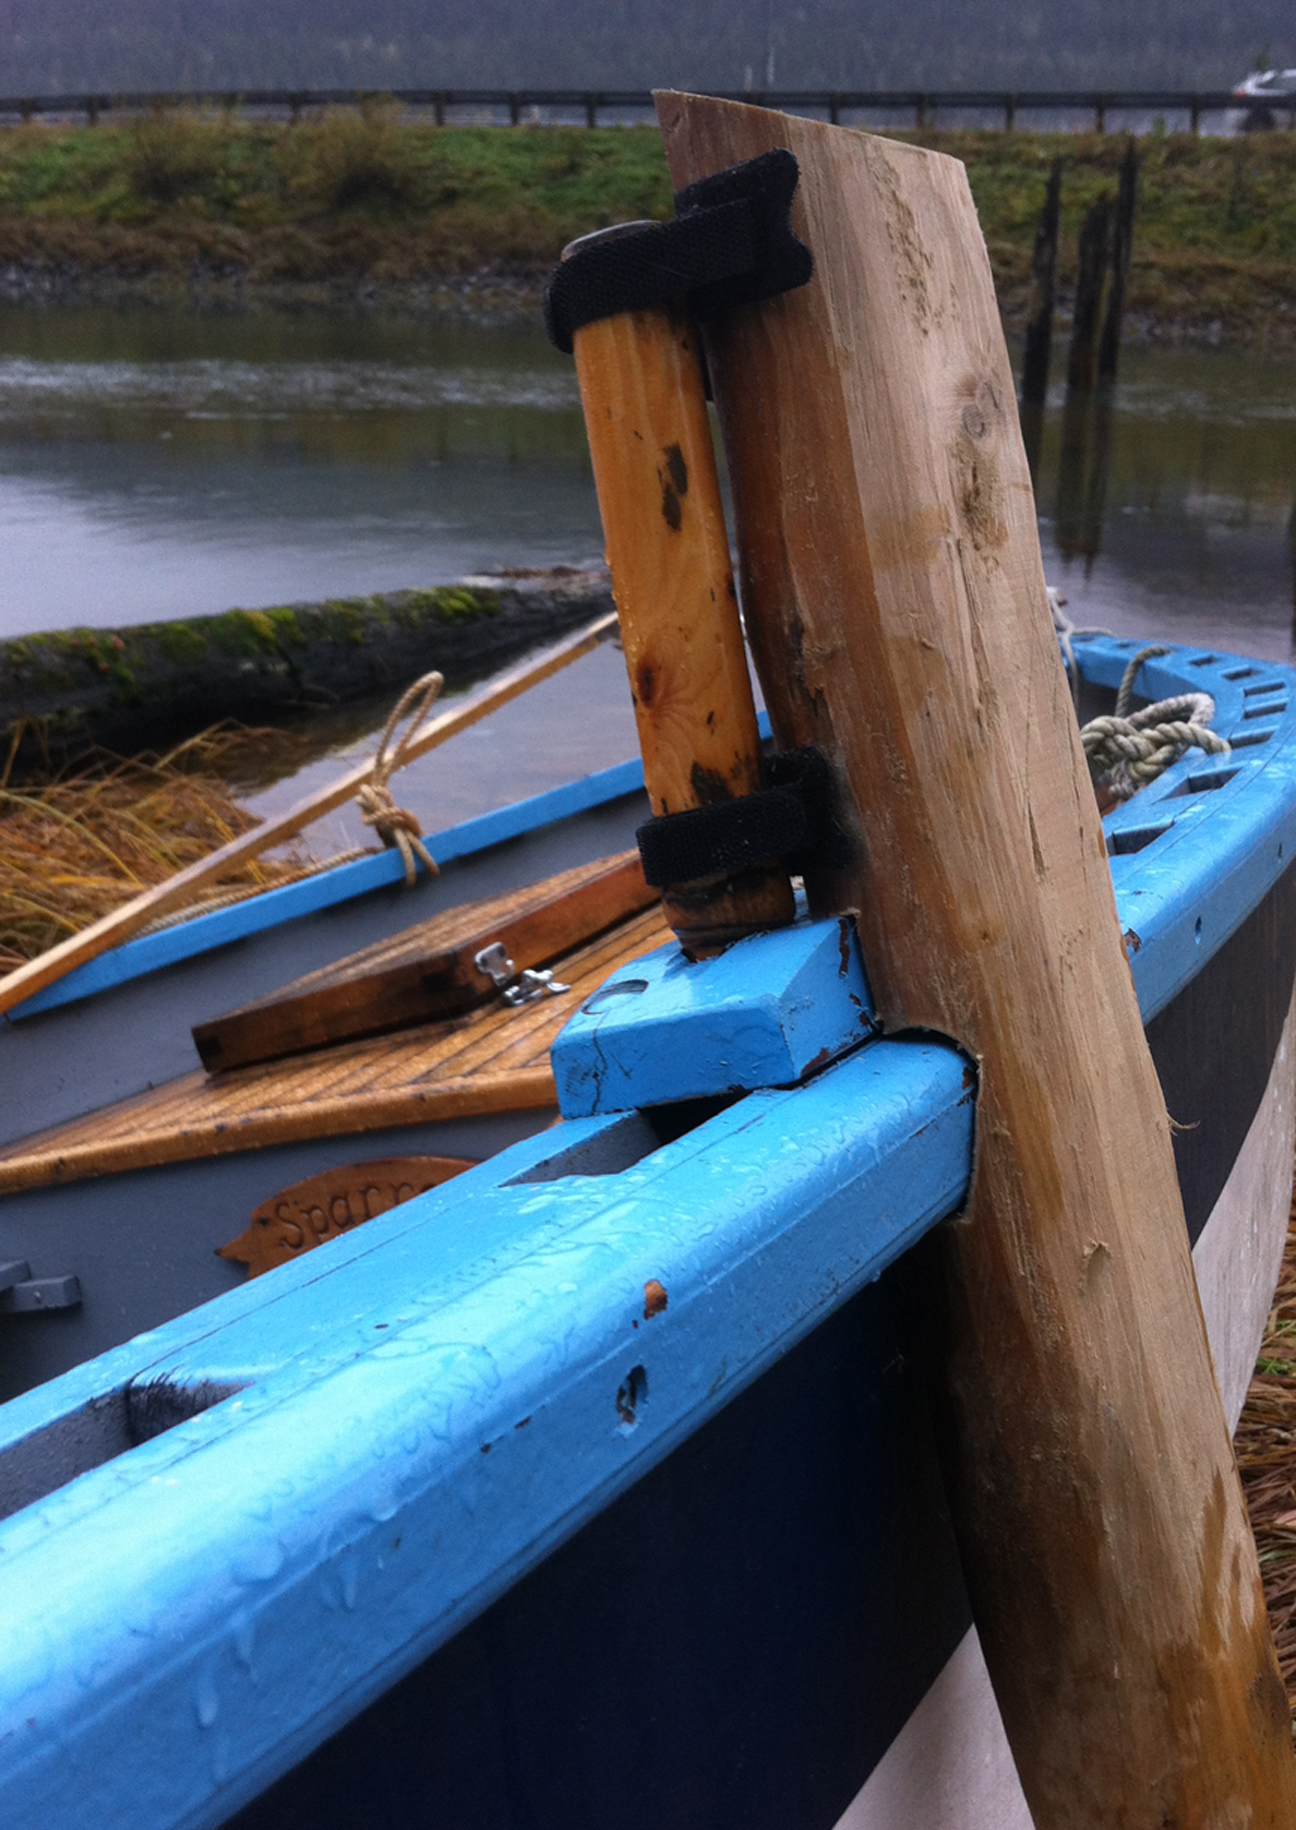
A thole pin serves as the simplest of attachments for a beaching leg. The pin pulls the notched leg in tight so the load can be taken by the outwale
The upper end of each leg has two Velcro straps, secured with screws and finish washers, which are wrapped tight around the tholepins (something that could easily be adapted to a more conventional oar lock). On big boats it was standard practice to through-bolt the legs to the hull and run guy lines fore and aft from the foot of the leg to the rail, but this doesn’t seem to be necessary on a small boat.
When the legs aren’t in use they’re easy to stow. Their simple attachment makes them easy to deploy while still afloat, for times when you’re going to dry out in the middle of the night. Just be sure you know what’s under you; it would be a shame to be surprised by a big rock in the wrong spot.
Beaching legs are simple to make and quite useful for those of us who camp-cruise in tidal waters. Make a pair and see for yourself.![]()
Jim Danner is an IT manager for the state of Alaska. When he’s not working he’s spending time with his family or messing around with small boats. His article about cruising with his family appeared in our September 2014 issue.
Editor’s notes:
After reading Jim’s article I decided that my Whitehall needed a pair of beaching legs. Varnished inside and out, it wasn’t intended for rough handing on shore. While it has a narrow plank keel and will balance upright on its own, a pair of beaching legs would assure that it wouldn’t rest on its bright-finished Port Orford cedar planking.
 Christopher Cunningham
The detachable foot of the beach leg keeps it from sinking into soft ground.
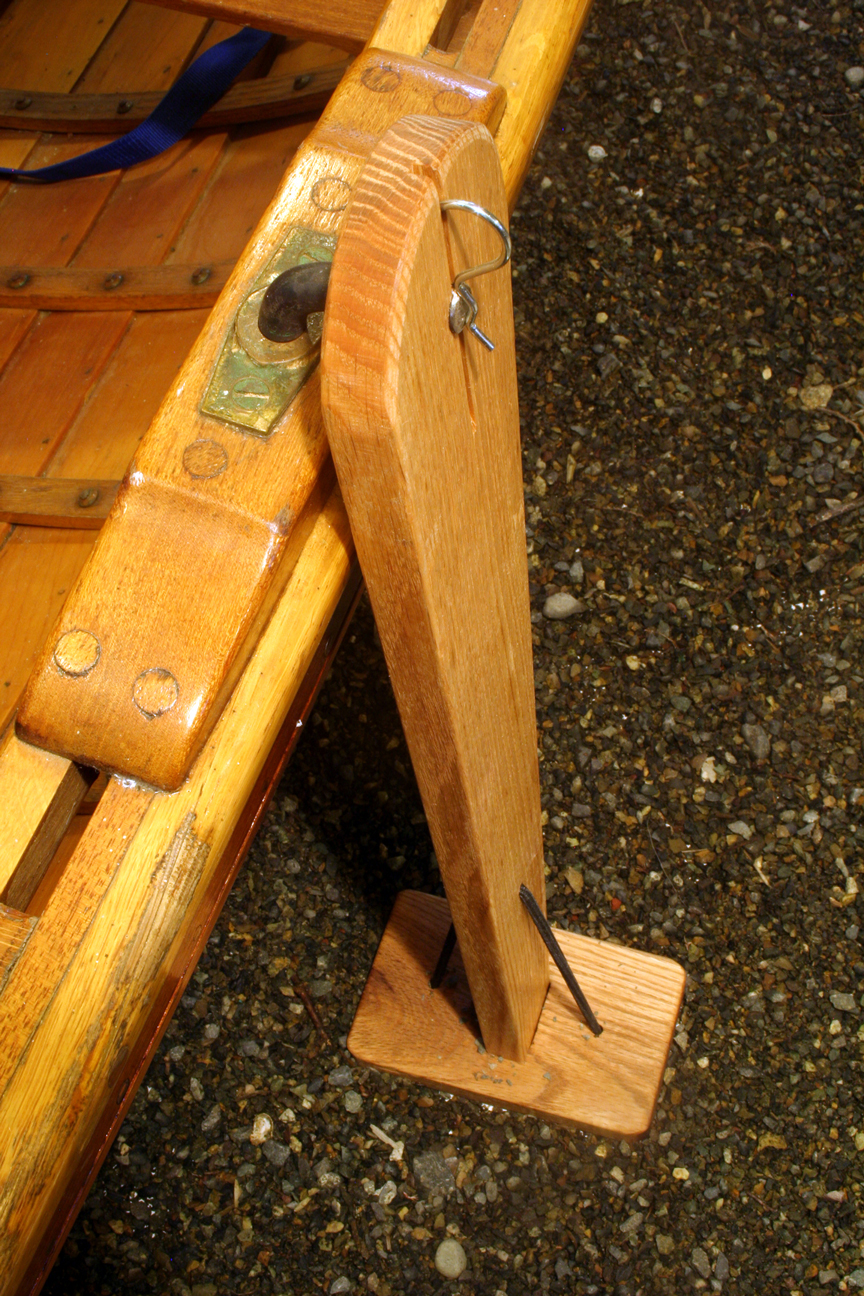
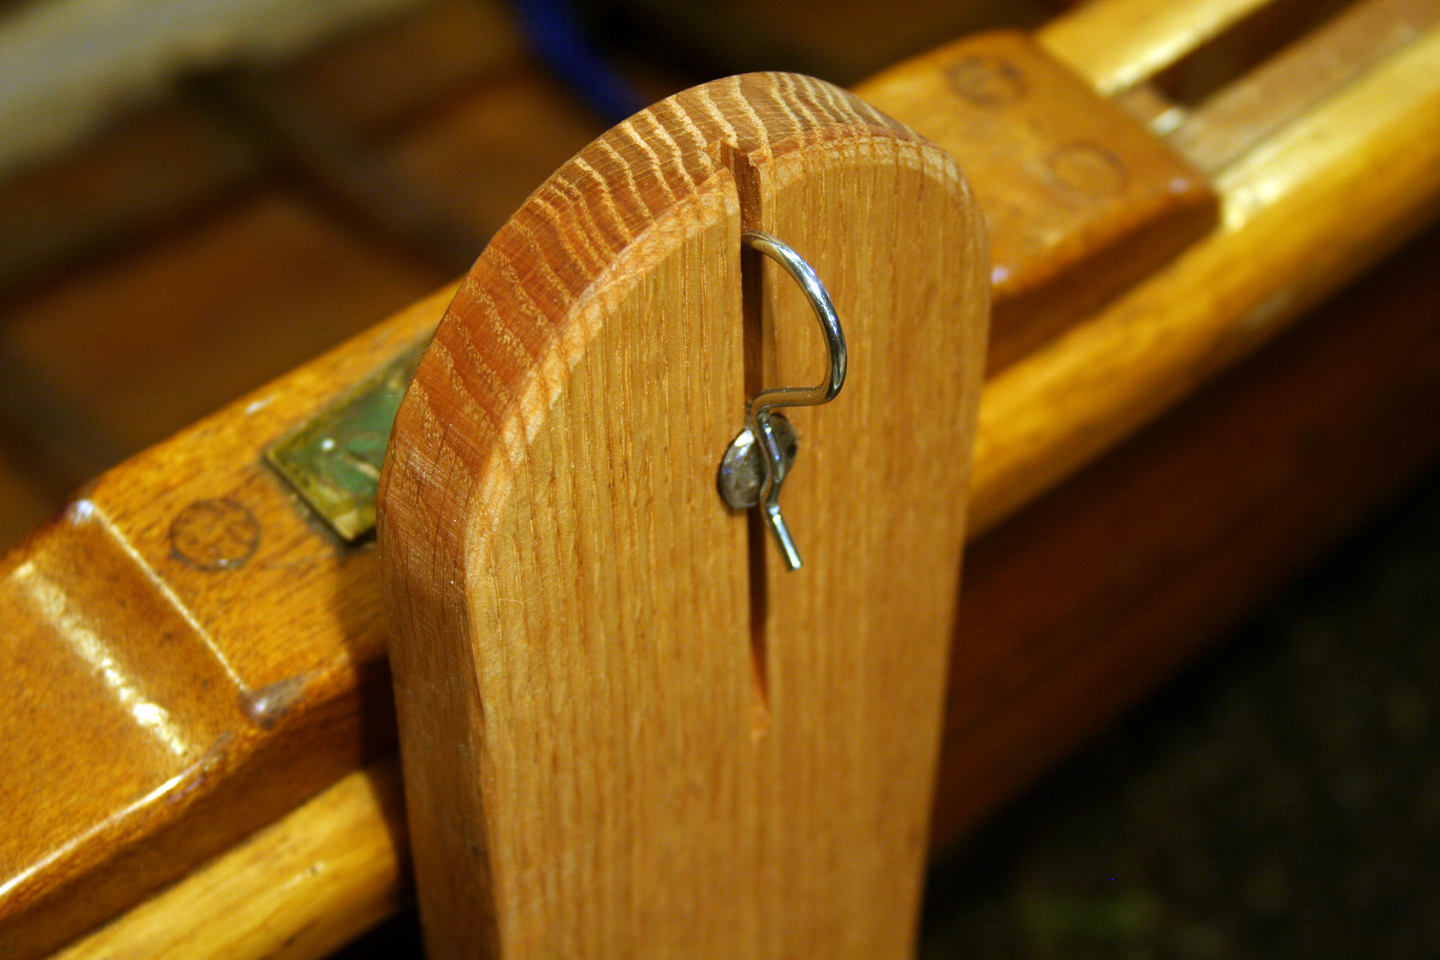
The Whitehall has oarlocks instead of thole pins so I followed up on Jim’s suggestion to fabricate a way of connecting the legs to the rowlocks. A ½″ rod fits perfectly into the rowlocks socket. I bought a 2′ length of mild steel rod at the hardware store for a few bucks. Brass or stainless steel might have been a better choice but not so easy to find nor as inexpensive. Aluminum would have worked well too but I am not familiar with heating and bending it.
The rod required a bend of about 80° to go from the nearly vertical hole in the rowlock to the horizontal hole through the beach leg. I made the bends before cutting the rod to length—the extra length gave me a lever cool to the touch. I heated the rod with an ordinary propane torch. It took about 4 or 5 minutes to get the steel to glow red. I kept the flame aimed at a single spot to focus the heat, and thus the bend, in a small section of the rod. Only an inch or so was glowing brightly when I turned off the torch and went to the vice to make the bend. After cooling the rod in water I cut the ends to length with a hacksaw. With a new blade the cuts don’t take long.
 Christopher Cunningham
The block attached to the bottom of the steel rod transfers the load taken my the beaching leg to the inwale, a strong structural element.
For the rod to keep the beaching leg in place it has to be kept from sliding up. There was no easy way to use a cotter pin, so I made an oak block to attach to the rod. To make a groove to fit the side of the rod I clamped the two blocks together and drilled down the center with a ½” Forstner bit. Each top of each block would press against the bottom face of the inwale, keeping the rod in place and transferring any strain to a structural part of the boat. I drilled a 17/64″ hole in the block and drilled and tapped the rod for a ¼″ x 20 thumbscrew.
 Christopher Cunningham
The straight side of a hairpin cotter pin rests in a kerf, keeping the beaching leg vertical.
The beach legs are ¾″ oak. A ½″ hole fits over the rod. On the tablesaw I cut a kerf through the hole to make a passageway for a hairpin cotterpin. The pin holds the beach leg against the outwale and the slot captures the pin to keep the leg pointed down.
At the bottom of each leg I cut a shouldered tenon and made a foot with a loose-fitting mortise. A bungee cord laced through the foot and leg keeps the foot in place. The loose fit adapts to uneven terrain and makes it easy to remove the foot when the beaching legs are stowed.
 Christopher Cunningham
The parts of the beaching legs fit in a small fabric bag that’s easily stowed.
For about $20, and a mostly pleasant afternoon in the shop, I was in business. I did have one moment of despair: One of the holes I drilled for the cotter pin angled well away from the center of the rod. There was no way to drill a new hole and I thought I’d have to start over and make a new piece. Fortunately the hole was just the right size to drive a 16-penny nail through. I cut the ends flush, dabbed on a bit of flux, and hit it with the torch and a bit of silver solder. That saved the day. The new hole went in straight and true.


I made a set of legs for my Sam Devlin Eider, a 16′ sprits’l cutter with a keel that draws 2′. They worked great. When the boat was beached the deck was at waist height and I could easily climb aboard.