The C-clamps I’ve been using for a few decades now have seen more than their fair share of epoxy, either dripping out of the joints or dabbed on by the gloves I wear for gluing up. The accumulation of cured epoxy has coated the screws and the handles, limiting their range of motion if not seizing them up altogether. I’ve used a heat gun to soften up epoxy for removal, but that method creates a lot of unhealthy fumes and handling clamps individually takes quite a bit of time. Cured epoxy softens at around 200°F, but with a heat gun I have no way of knowing if I’m applying too little heat or too much, and while I’m heating up one spot, the rest of the clamp is cooling off.
 photographs and videos by the author
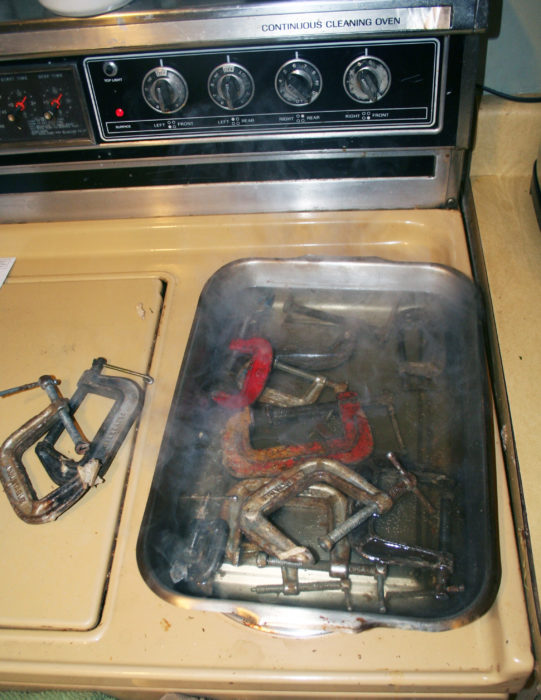
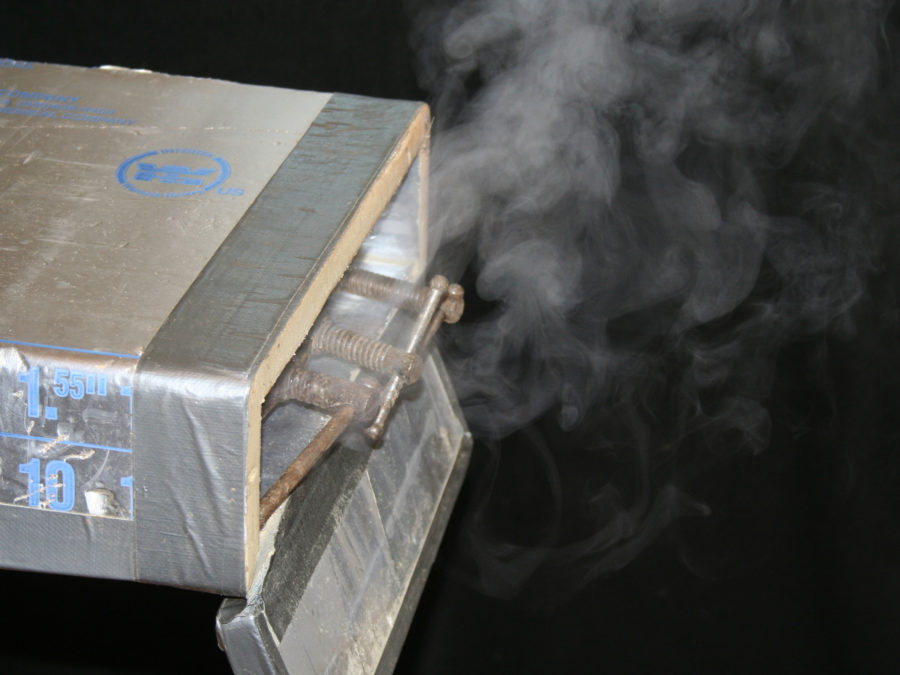
A batch of epoxy-fouled clamps going into my foam steam box will be ready for cleaning in about 10 minutes.
The temperature of steam and boiling water is 212°F, just on the high side of the temperature required to soften epoxy, so I’ve boiled my clamps in a rectangular stainless-steel cake pan on the stovetop and heated them up in my steambox.
Poached clamps: A cake pan full of water will heat several clamps quickly and uniformly. When the water comes to a vigorous boil, the epoxy is hot enough for removal.
Both methods work equally well, and neither produces the strong smell of epoxy that a heat gun does. After a few minutes steaming or boiling, the entire clamp comes up to a uniform 212° and holds that heat long enough to remove a lot of gunk.
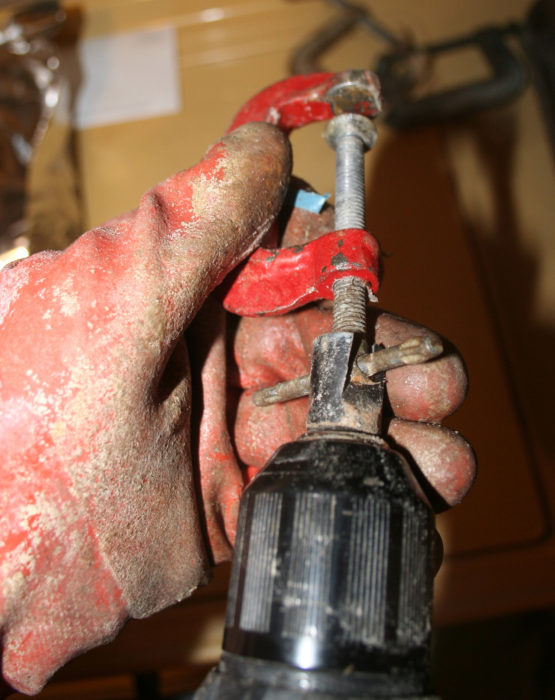
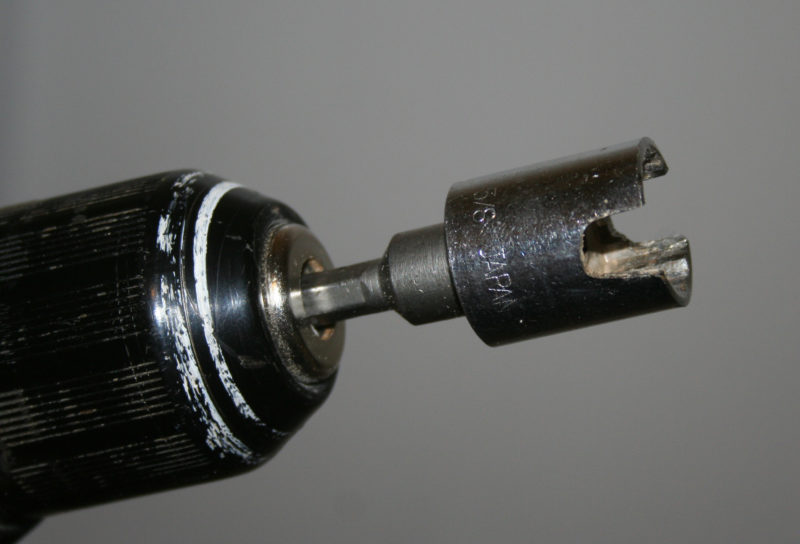
A cheap plug cutter and a cordless drill make it easy to spin the screw to strip the epoxy from the threads.
I don’t bother much with cleaning the body of the clamp. The moving parts—the screw and the sliding handle—are the only pieces that need to be free of glue to operate properly. I wear a rubber glove on my left hand to hold the clamp and with the other hand tap the handle back and forth with a mallet or hammer, and the glue strips away. The threads clean themselves when the screw is run back and forth a few times. Turning the screws by hand gets tedious, and the epoxy requires occasional reheating as the clamp cools.
A cheap plug cutter chucked in my cordless drill fits over the head of the screws on smaller clamps and straddles the handles, allowing me to spin the screw back and forth quickly. On larger clamps, the plug cutter doesn’t fit over the head of the screw, but it can straddle the handle; I can spin the screw easily, albeit with a manageable amount of wobbling. With the clamp reheated, a wire brush takes care of any remaining epoxy.
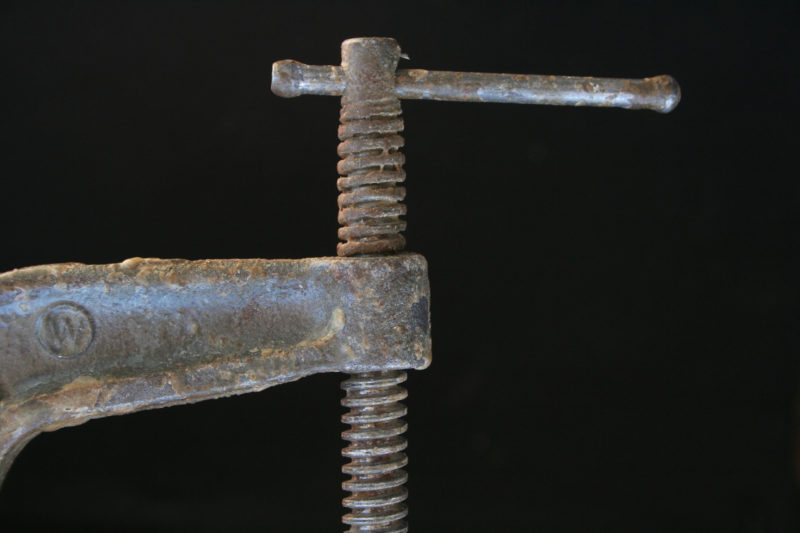
Before cleaning, this clamp had lost its full range and its smooth action.
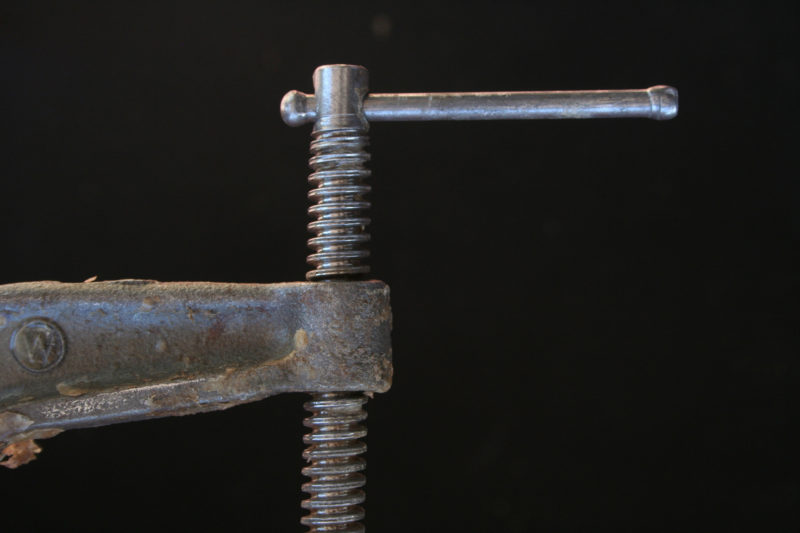
After cleaning, the clamp is fully functional.
After cleaning, the clamps hold enough heat to dry themselves. Shifting the screw takes care of the water trapped inside the clamp’s threads, and a squirt of a spray lubricant finishes the job. Any other tools that you use when gluing up can be cleaned up quickly as long as they can tolerate the moisture and the heat. The next time you’re steaming wood for bending, throw some of your gummed-up clamps into the steambox and get them back in working order.
Speed clamping
With my clamps working smoothly I can use my cordless drill to spin clamps onto work I’m gluing up. To spin the bigger clamps smoothly I made a device that fits over the screws of all but my two largest clamps.
A 5/8″ socket with grooves cut in it will fit over most clamp screws and engage the handle.
I took an angle grinder to a 5/8″ wrench socket and cut slots to engage the clamp handles. A hex-drive bit with a ½″ socket driver connects the modified socket to my cordless drill. I can adjust the clutch on the drill to take the clamps uniformly up to the right pressure.
Manufacturers of architectural laminated wood beams use pneumatic drivers to spin clamping screws and the screws have square ends for that purpose; with a modified socket it’s possible to apply power to common C clamps too for speedier work.![]()
Christopher Cunningham is the editor of Small Boats Monthly.
You can share your tricks of the trade with other Small Boats Monthly readers by sending us an email.


Thank you for a really useful tip. All of my beam clamps have way too much epoxy on them, so I hope to use this method to get them moving freely and usable again
Good idea. Thank you.